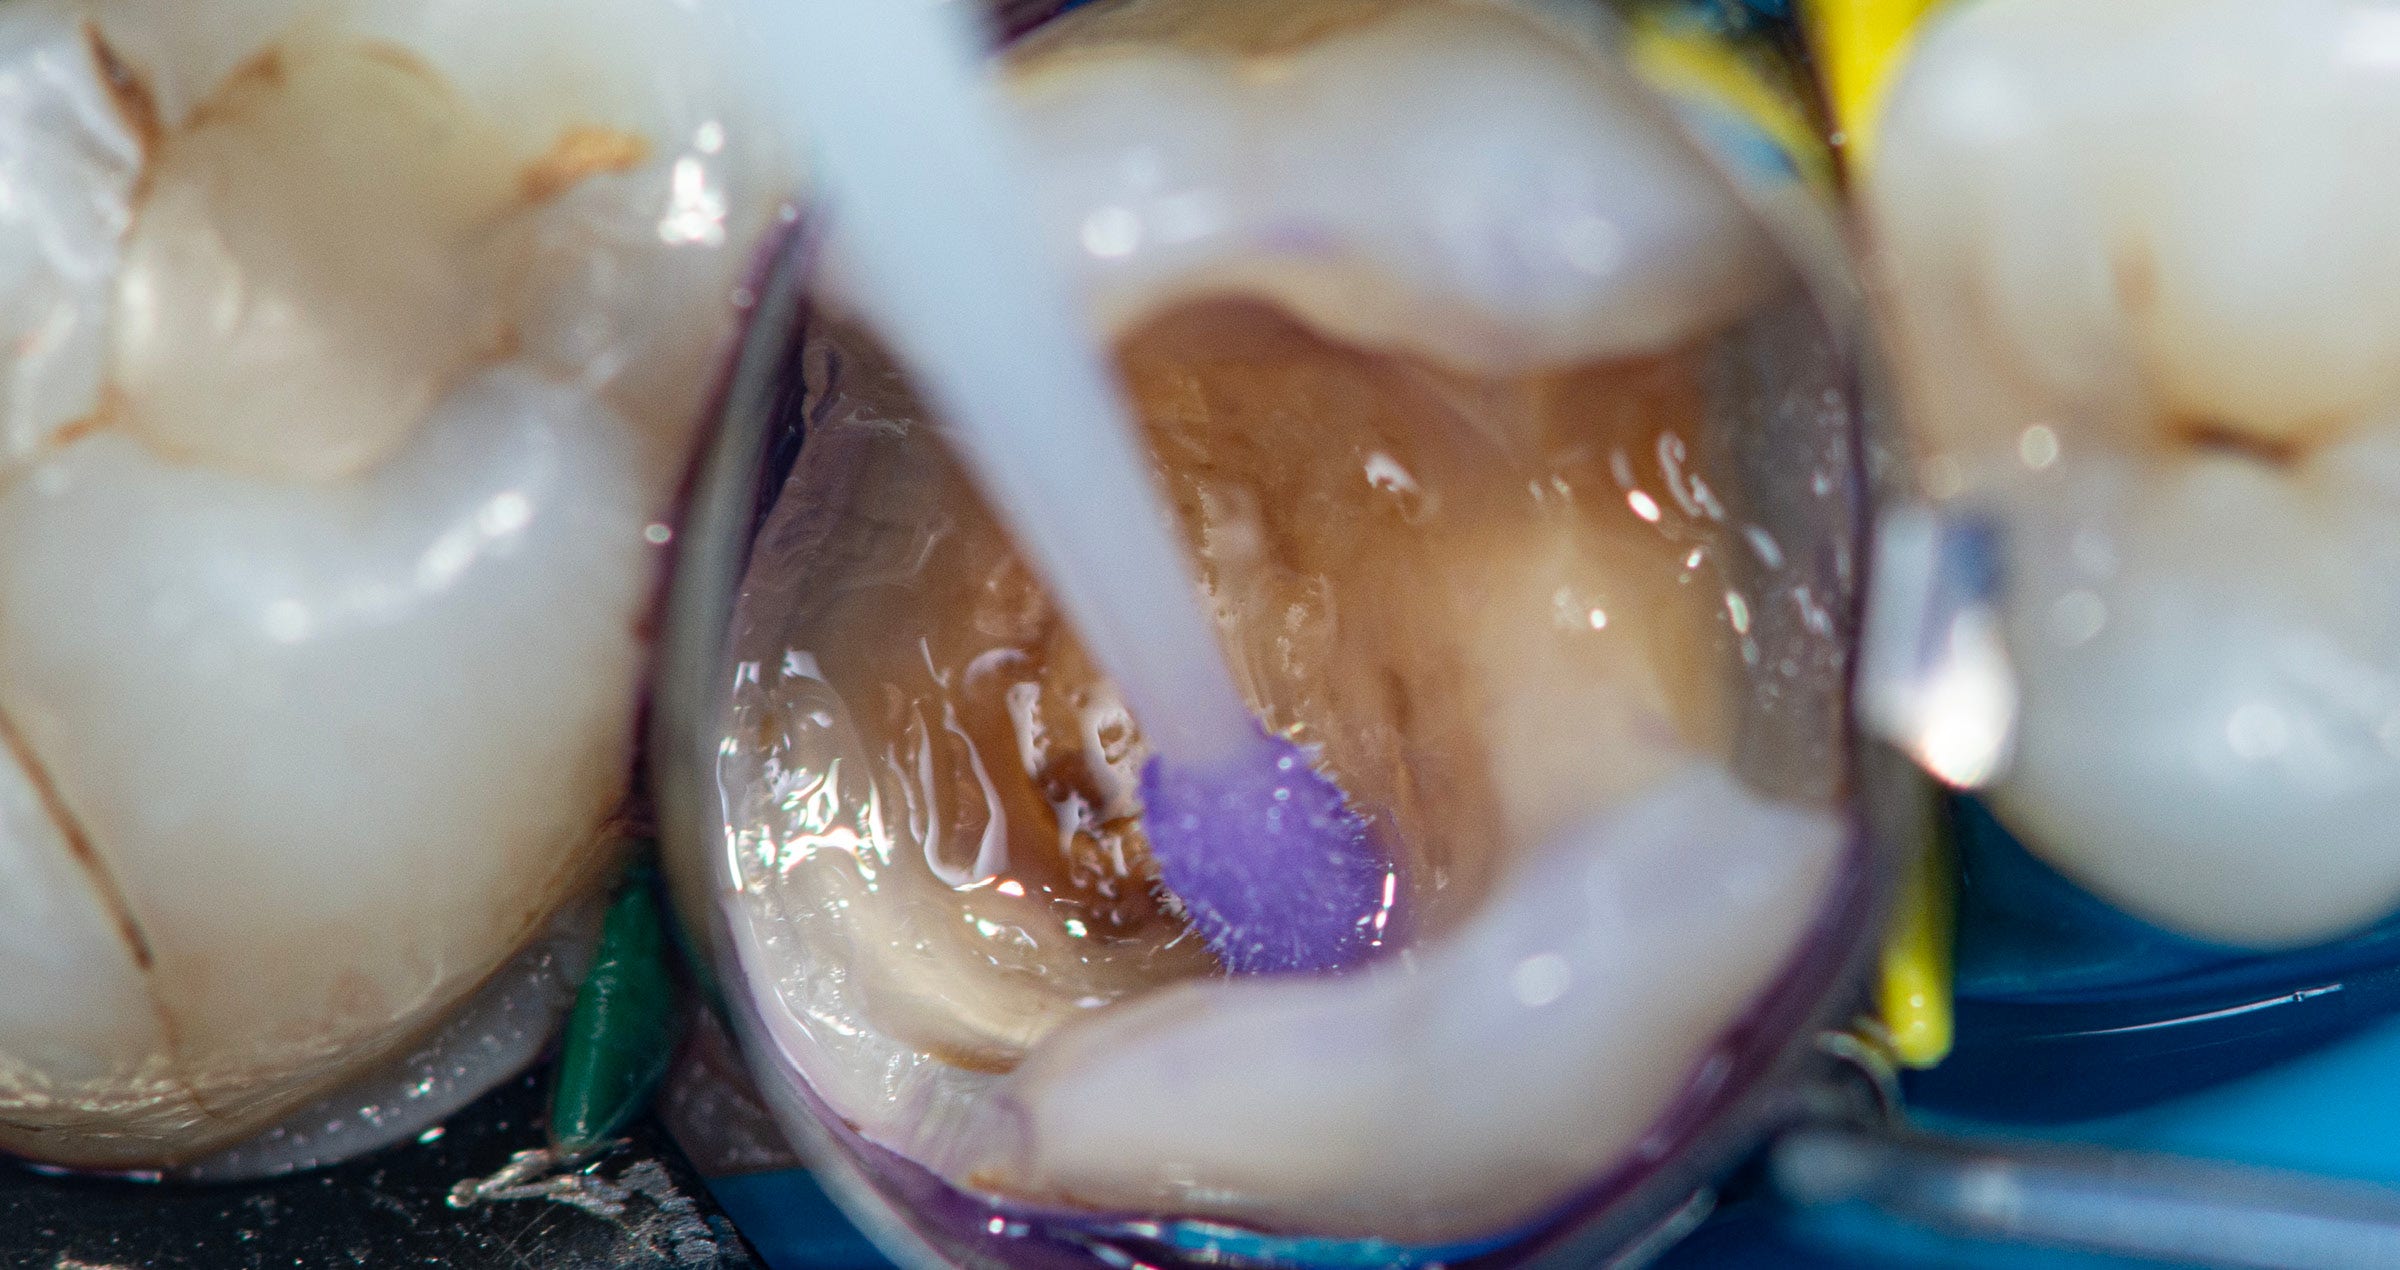
Clinical Cases, Chairside Treatment of a fractured and secondary carious permanent molar tooth 11 mars 2026 Case report by Dr Mediha Isikver Tooth fractures and secondary caries are frequently observed in posterior teeth, often resulting from occlusal stress, restoration failure, or secondary bacterial infiltration. These conditions compromise tooth integrity, function, and aesthetics. With advancements in adhesive dentistry, minimally invasive and durable restorative solutions have become achievable. Material selection plays a critical role in the success of composite restorations, influencing marginal adaptation, wear resistance, and patient satisfaction. This case report describes the step-by-step clinical management of a fractured and secondary carious permanent molar restored using materials from Kuraray Noritake Dental Inc. CASE PRESENTATION A 32-year-old female patient presented to the clinic with sensitivity and discomfort in the upper left posterior region. Clinical examination revealed a distal wall fracture on tooth #26 (maxillary left first molar) with a secondary carious lesion extending subgingivally. Radiographic evaluation confirmed the absence of periapical pathology. Adjacent teeth (#25 and #27) showed early carious activity, but the patient opted for the restoration of tooth #26 only. The tooth was asymptomatic to percussion and showed normal vitality on pulp testing. Fig. 1. Initial clinical view of tooth #26 under rubber dam isolation. TREATMENT PROTOCOL Isolation and caries removal: The tooth was isolated with rubber dam. The existing defective restoration and carious tissue were carefully removed using tungsten carbide burs and a slow-speed handpiece. Surface cleaning: After preparation, KATANA™ Cleaner was applied to remove contaminants and optimize bonding surface quality. Bonding procedure: A single-step, self-etch adhesive, CLEARFIL™ Universal Bond Quick 2, was applied to both enamel and dentin following the protocol recommended by the manufacturer. Restorative phase: The deep and undercut areas were resin coated with CLEARFIL MAJESTY™ ES Flow Universal Low (U shade), ensuring adaptation and stress relief in undercut regions. The remaining cavity was restored incrementally using CLEARFIL MAJESTY™ ES-2 Universal (U shade) paste-type composite, with each 2 mm layer light-cured for 20 seconds. Fig. 2. Clinical view of tooth #26 after removal of the defective restoration and carious tissue. Fig. 3. Application of KATANA™ Cleaner to remove contaminants and optimize bonding surface quality after preparation. Fig. 4. Selective enamel etching performed on tooth #26. Fig. 5. CLEARFIL™ Universal Bond Quick 2 applied to both enamel and dentin following the manufacturer’s recommended protocol. Fig. 6. Resin coating with CLEARFIL MAJESTY™ ES Flow Universal Low (U shade). Fig. 7. Reconstruction of the mesial and distal walls with CLEARFIL MAJESTY™ ES-2 Universal (U shade) composite. Fig. 8. Incremental build-up of cusps and occlusal anatomy using CLEARFIL MAJESTY™ ES-2 Universal composite, refined with a brush for contour adjustment. Fig. 9. Initial finishing of the composite restoration performed with darkcoloured TWIST™ DIA for Composite (medium) rubber points to refine surface texture and anatomy. Fig. 10. Final polishing performed with light-coloured TWIST™ DIA for Composite (fine) rubber points to achieve a highgloss, smooth surface. FINAL SITUATION Fig. 11. Final view of the restoration after occlusal adjustment and polishing. CONCLUSION This case demonstrates that adhesive and restorative systems from Kuraray Noritake Dental Inc. offer a reliable, efficient and effective approach for treating fractured and secondary carious posterior teeth. The integration of self-etch adhesives and high performance composites contributes to durable and aesthetically pleasing restorations. Continuous follow-up is essential to evaluate the long-term clinical behaviour of these materials.
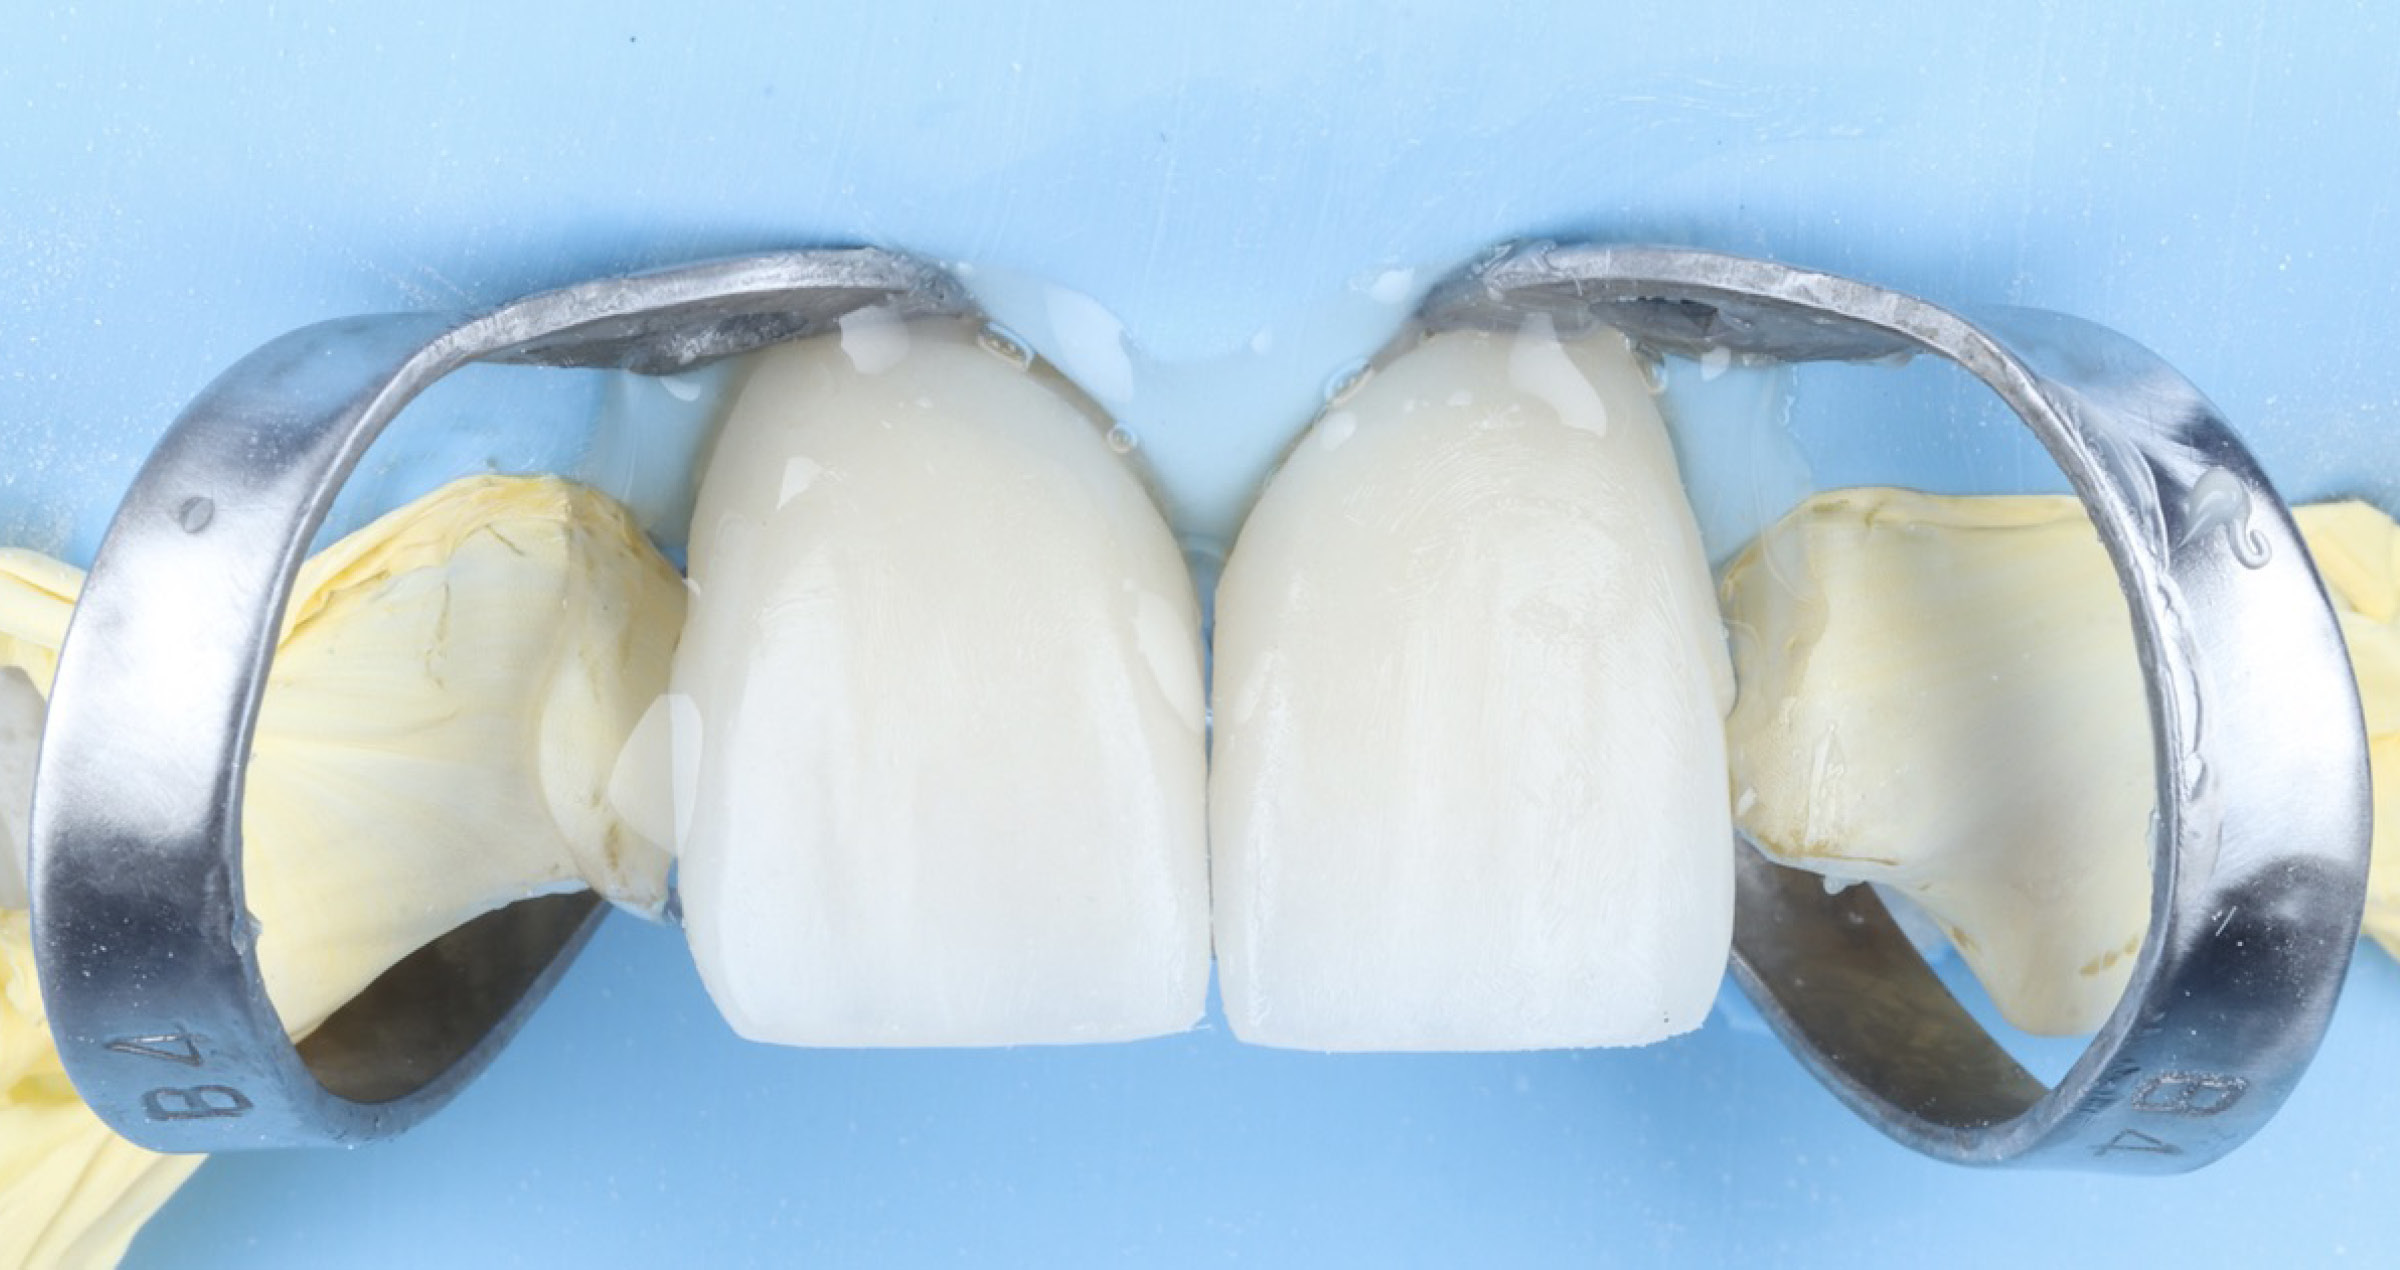
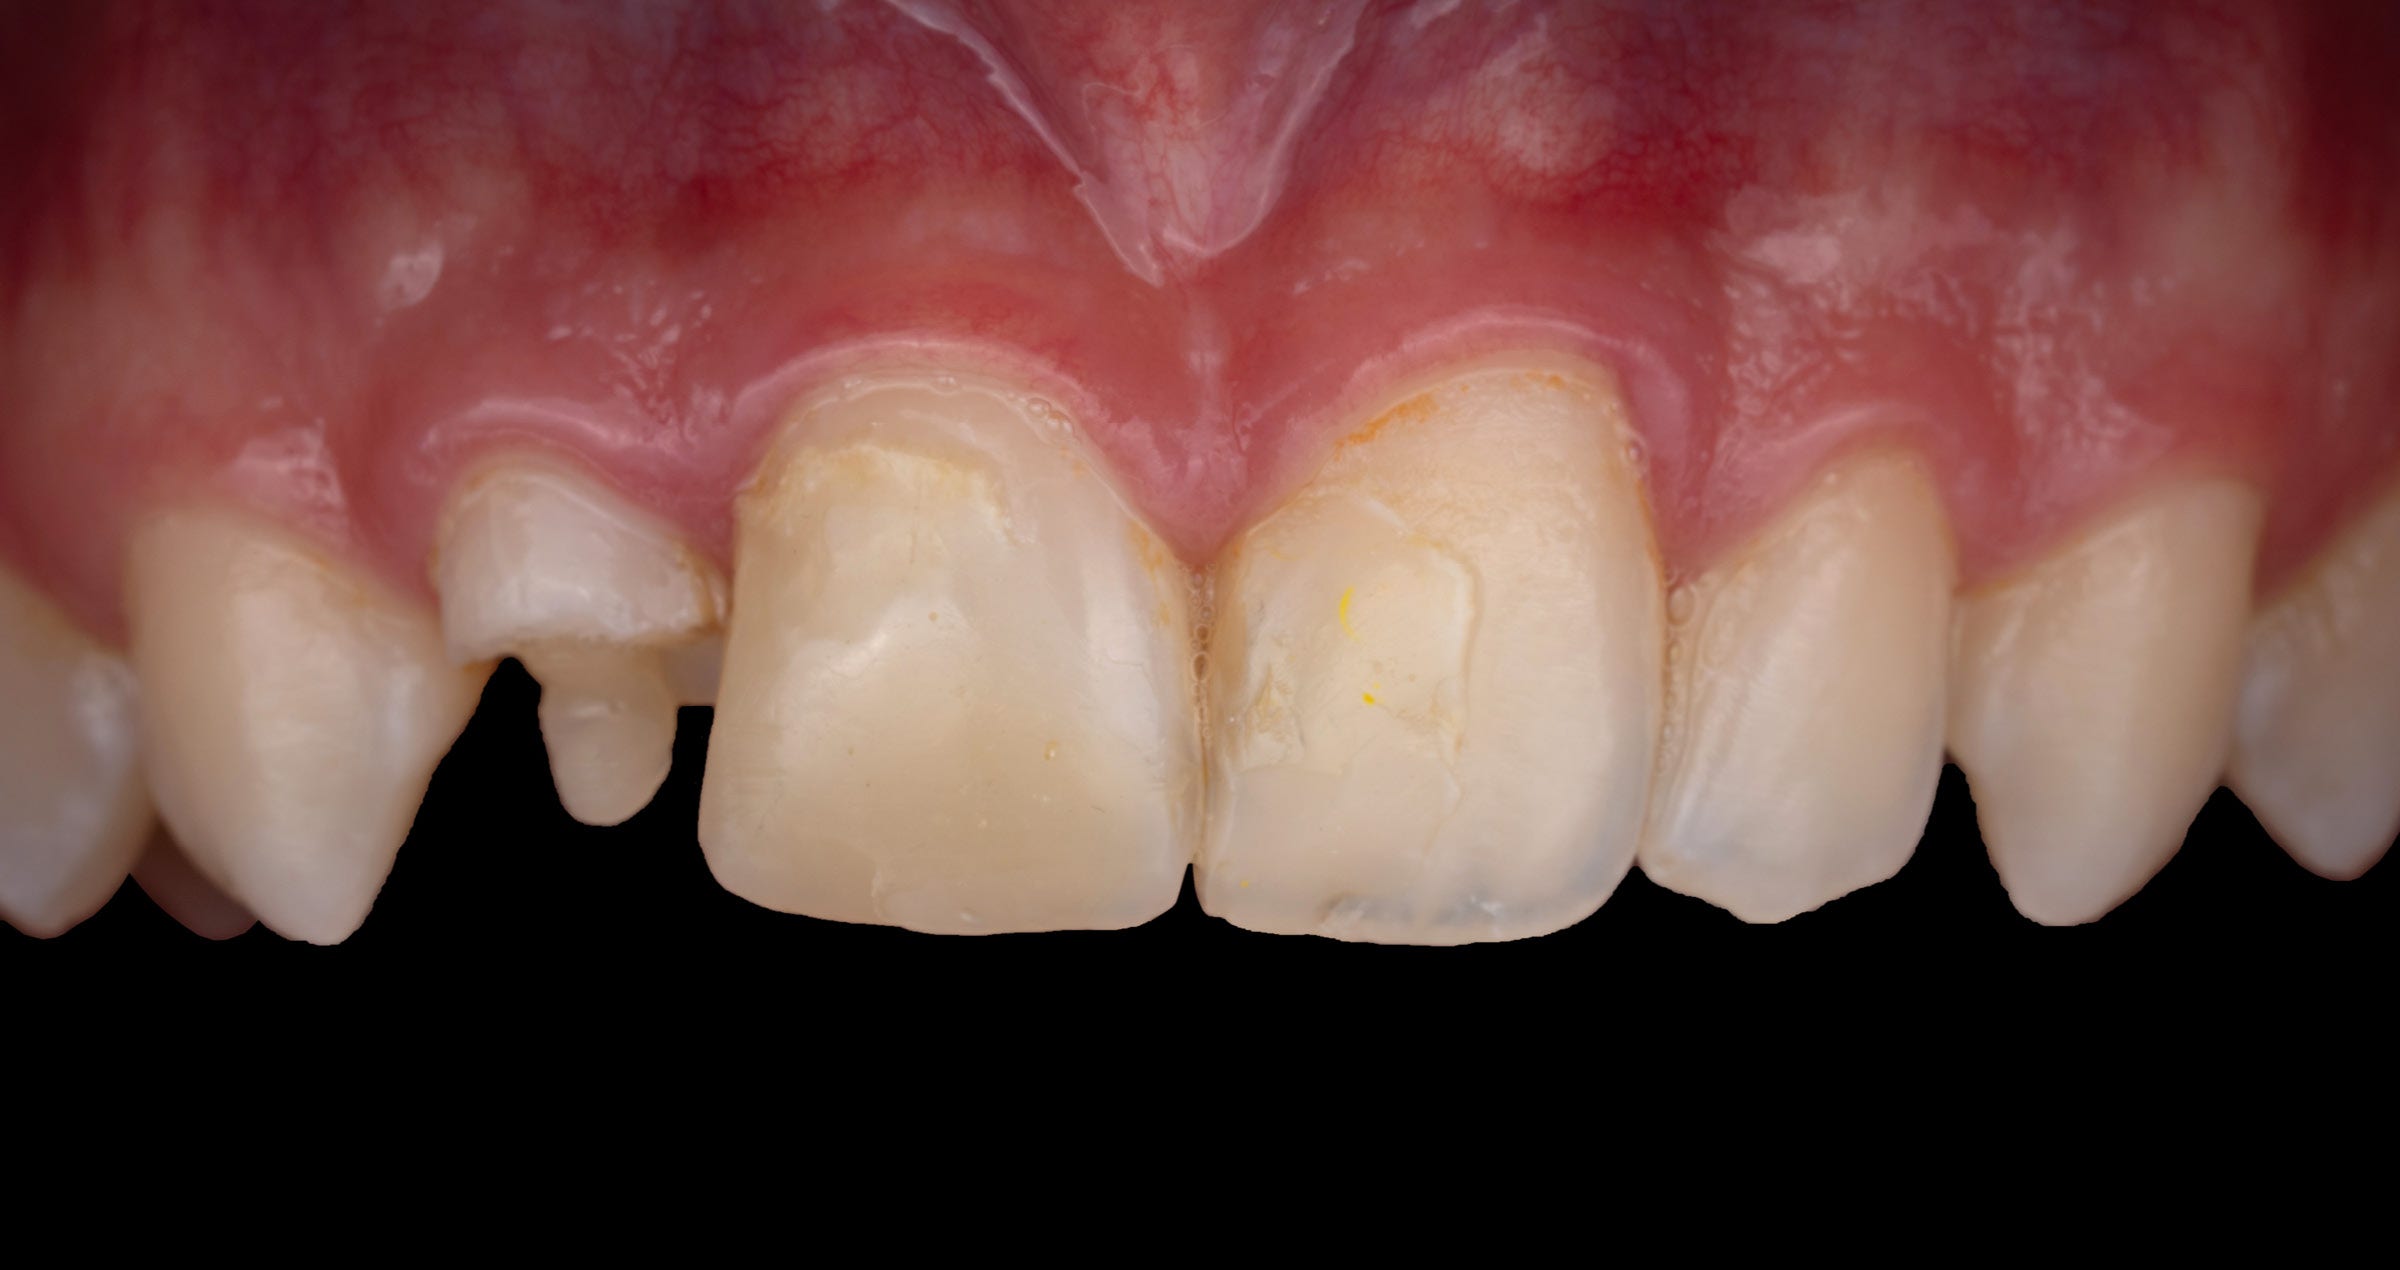
Clinical Cases, Chairside Restoring a young patient’s smile with composite 6 mars 2026 Case by Dr. Onur Alp Yünük COMBINING HIGH-PERFORMANCE TOOLS AND MATERIALS FOR A PREDICTABLE OUTCOME Direct composite restorations are a high-quality treatment option even when large amounts of tooth structure need to be replaced. This is due to recent advancements in resin composite materials and adhesive technology. By selecting appropriate materials and layering techniques combined with modern digital tools for colour difference evaluation, it is possible to predictably produce highly aesthetic outcomes, as demonstrated in the following case example. The challenge A young male patient presented to our clinic requesting the replacement of his existing composite restorations on his maxillary incisors (teeth #12 and #11 according to the FDI notation). Clinical examination revealed extensive restoration loss on the lateral incisor. Furthermore, anatomical irregularities, discolouration, and loss of surface gloss were observed on tooth #11. The adjacent central incisor exhibited similar issues regarding colour and surface polish. In consultation with the patient, it was decided to replace the existing restorations using a modern composite material specifically developed for dual-shade layering – CLEARFIL MAJESTY™ ES-2 Premium (Kuraray Noritake Dental Inc.). For an exact shade analysis, photographs were taken with and without a cross-polarized filter (Figs. 1 to 4). Fig. 1: Frontal view of the teeth with extensive restoration loss on the maxillary left lateral incisor. Fig. 2: Cross-polarized photograph of the teeth allowing for a detailed analysis of the shade irregularities. Fig. 3: Lateral view of the teeth. Fig. 4: Lateral view – cross-polarized photograph. The solution Following removal of the existing restorations, rubber dam was placed for working field isolation. A self-etching adhesive (CLEARFIL™ SE Bond 2, Kuraray Noritake Dental Inc.) was applied in the selective enamel etching mode before establishing the palatal shell using CLEARFIL MAJESTY™ ES-2 Premium in the shade A1E (Figs. 5 and 6). The mamelon structures were reconstructed with CLEARFIL MAJESTY™ ES-2 Premium in the shade A1D, while the translucent shade Blue was applied to the opalescent zone. Finally, yellow and white tints were used for characterization. Fig. 7 illustrates the appearance before, Fig. 8 after finishing and polishing. Fig. 5: Palatal shell established with the enamel shade A1E of the selected composite. Fig. 6: Lateral view of the teeth during the restoration procedure. Fig. 7: Restoration before finishing and polishing. Fig. 8: Appearance of the restorations after finishing and polishing. The outcome To evaluate the final colour integration, another photograph was taken with a cross-polarized filter, holding a grey reference card in place for calibration (Figs. 9 and 10). The lateral view of the restored teeth (Fig. 11) reveals that not only the right colour combination, but also a natural surface texture is required for a highly aesthetic outcome. Fig. 9: Frontal view of the restored teeth taken with a cross-polarized filter. Fig. 10: Gray reference card calibration and the resulting L*a*b* coordinates of the restoration. Fig. 11: Lateral view of the restored teeth stressing the importance of surface texture. DISCUSSION AND CONCLUSION Observation, supported by modern tools for photography and image analysis (like polarized filters and L*a*b* coordinates), is an important skill needed for the lifelike reconstruction of teeth with direct composite materials. By combining this skill with a highperformance composite system that offers fixed shade combinations and innovative light diffusion technology for a nice blend-in with the surrounding tooth structure, creating beautiful restorations becomes a predictable business. In the case presented, the patient was very satisfied with the outcome in terms of aesthetics and function. At regular recalls, the quality of the restorations is checked – they still offer a very nice functional and aesthetic integration.
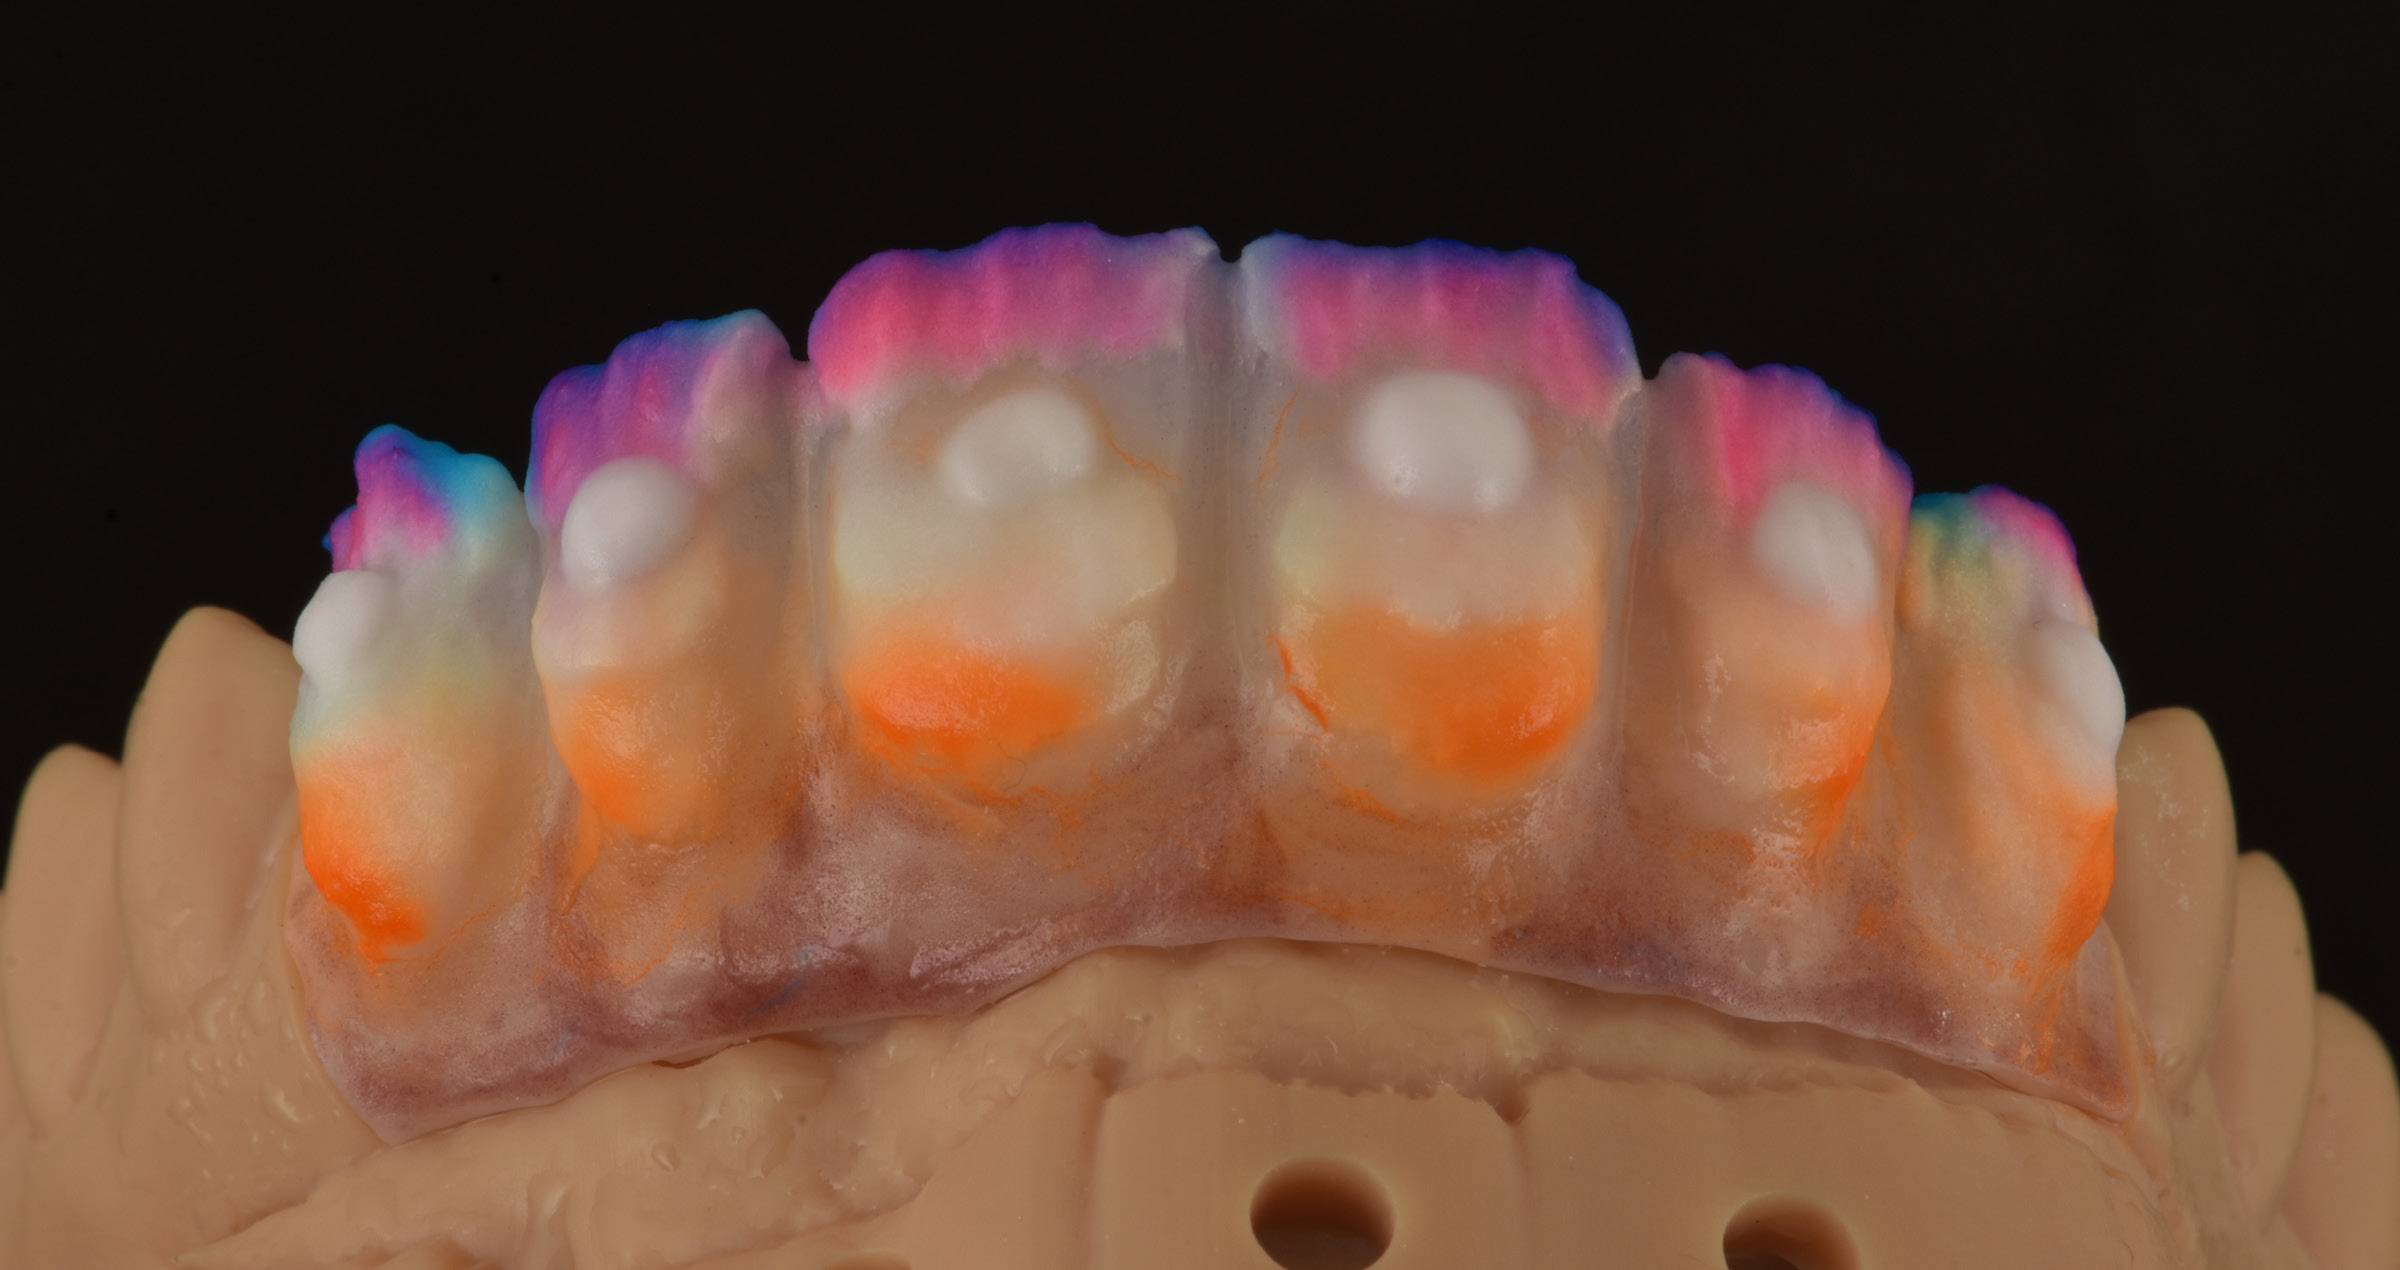
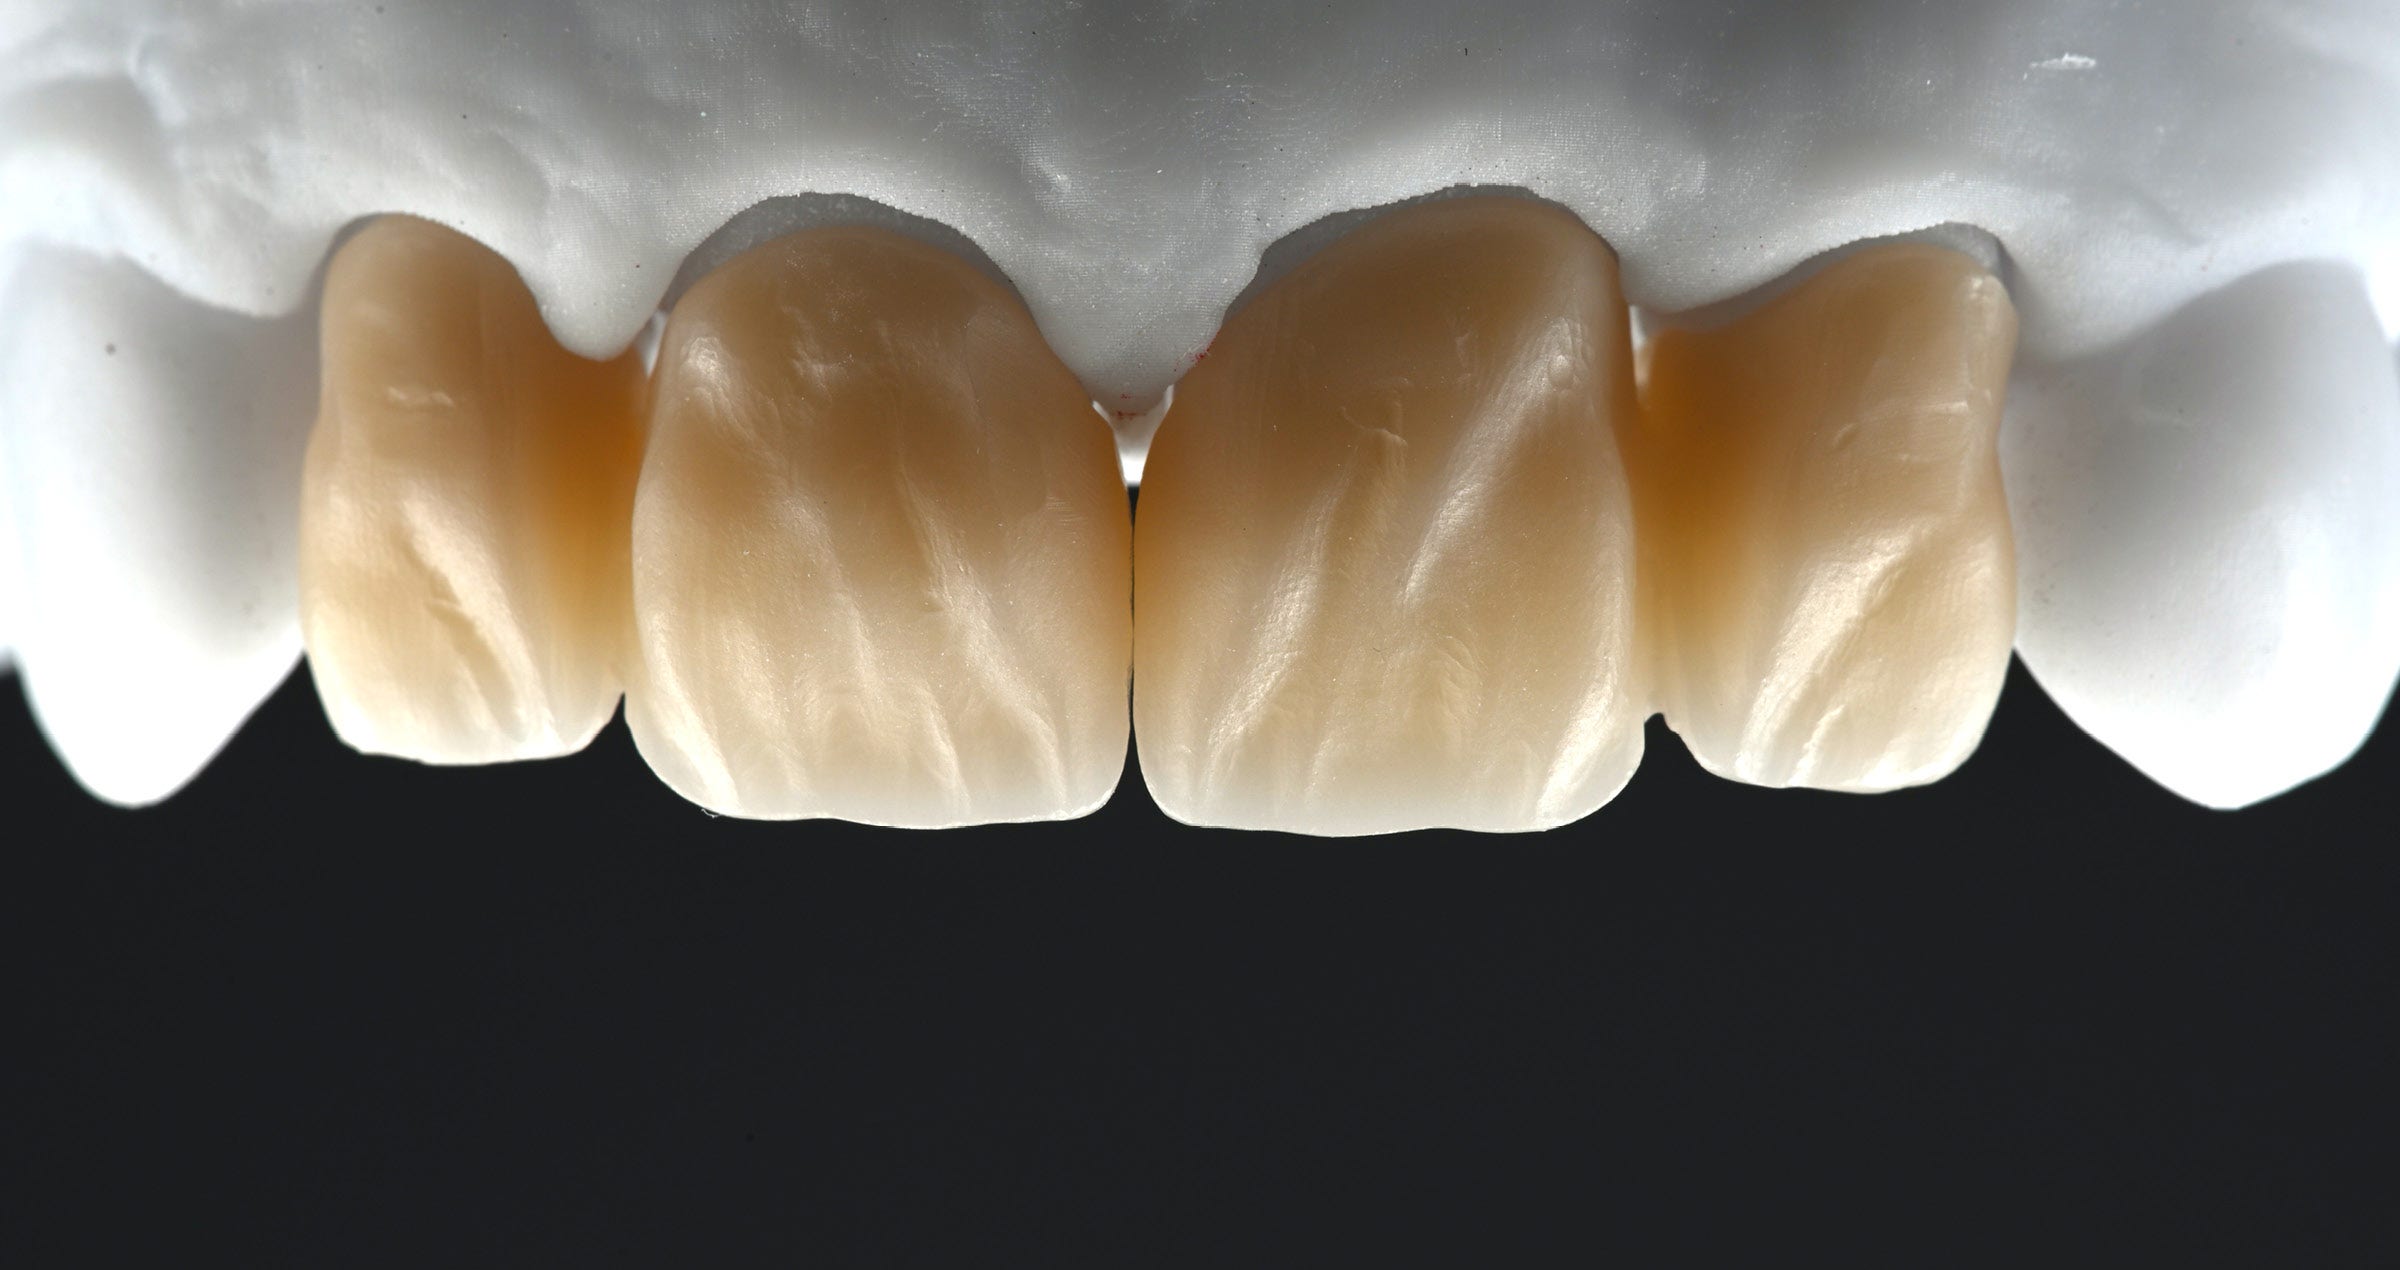
Clinical Cases, Chairside, Labside A smooth path towards beautiful smiles 18 feb. 2026 Case by DT Vasilis Vasiliou MICRO-LAYERING WITH CERABIEN MiLai No matter whether young or old, male or female: Our patients deserve a beautiful smile that matches their adjacent teeth, their face, their character and their individual needs. To be able to produce beautiful restorations that change their life for the better, we (as dental technicians) have to observe closely – and to listen attentively to the stories they tell. ‘We have to observe closely – and to listen attentively to the stories our patients tell us.’– Vasilis Vasiliou – Mr Andreas is a perfect example. He presented in the dental office in need of a full-mouth rehabilitation and the wish to improve the aesthetics of his smile. He asked for an age-appropriate, natural restoration design. After careful observation and listening, I decided that the best way to restore his maxillary incisors would be with zirconia restorations. The plan was to mill the frameworks using low-value KATANA™ Zirconia YML, shade D3 (Kuraray Noritake Dental Inc.). To facilitate the integration of some natural characteristic effects, a framework design with a primarily vestibular cutback was selected. The finishing technique of choice was micro-layering with CERABIEN™ MiLai (Kuraray Noritake Dental Inc.), a porcelain designed specifically for this approach. Important steps in the finishing procedure were: Characterization of the milled zirconia with colouring liquids Pre-treatment of the sandblasted zirconia surfaces with SS Fluoro and Margin porcelain Internal staining with CERABIEN™ MiLai internal stains Application of CERABIEN™ MiLai luster porcelains LABORATORY WORKFLOW Zirconia splinted crowns were designed in full contour with the aid of the Leahu Library featuring tailored tooth designs (part of the Truedental Library available for exocad DentalCAD design software; Fig. 1), cut back merely in the vestibular area using the ‘calma’ reduction option (Fig. 2), and then milled and characterized with colouring liquids to optimize the chroma. Figure 3 shows the sintered frameworks on the model, Figure 4 the try-in in the patient’s mouth. As the fit and shape of the restorations turned out to be excellent, it was time to plan the internal staining and micro-layering procedure (Figs. 5 and 6), always trying to imitate nature as closely as possible. The tricky part is to use the available space wisely – the reason why a detailed layering sketch is useful even when in the context of micro-layering. Once the planned layering procedure had been put to practice (Figs. 7 to 10), the surface texture was finalized and the restorations were tried in again for an aesthetic evaluation. Finally, they were cemented with the adhesive resin cement PANAVIA™ V5 (Kuraray Noritake Dental Inc.). The beautiful treatment outcome is shown in Figure 11. Fig. 1. Computer-aided design of the zirconia frameworks: Splinted crows displayed in a transparent mode to show the abutment teeth. Fig. 2. Computer-aided design of the zirconia frameworks: Outer contour of the splinted crowns with a strongly elaborated surface texture and sufficient room for micro-layering. Fig. 3. Restorations after characterization with colouring liquids and sintering on the model. Fig. 4. Try-in of the restorations. Fig. 5. Layering sketch for the restorations: Internal staining. Fig. 6. Layering sketch for the restorations: Luster porcelain application. Fig. 7. Internal staining – specific characteristics elaborated for a natural depth effect. Fig. 8. Layering in the cervical and body areas. Fig. 9. Final layering with luster porcelains to complete the morphology. Fig. 10. Final restorations after surface finishing and polishing as well as glazing on the model. Fig. 11. Treatment outcome. CONCLUSION The patient was thoroughly satisfied with the treatment outcome and confident that his investment was well worth it. By tailoring my approach to his unique needs, carefully observing his teeth, smile, and facial expressions, and utilizing my extensive knowledge of materials, I was able to achieve this goal successfully. Nonetheless, I remain committed to continuous improvement by critically evaluating each restoration and seeking areas for enhancement. My dedication to growth, supported by exceptional mentors who share innovative techniques and insights, supports me in staying at the forefront of my field, striving at consistently delivering the best possible care. I am deeply grateful to Dr. Zinonas Evagorou for invaluable partnership and clinical expertise, which were instrumental in achieving this result.
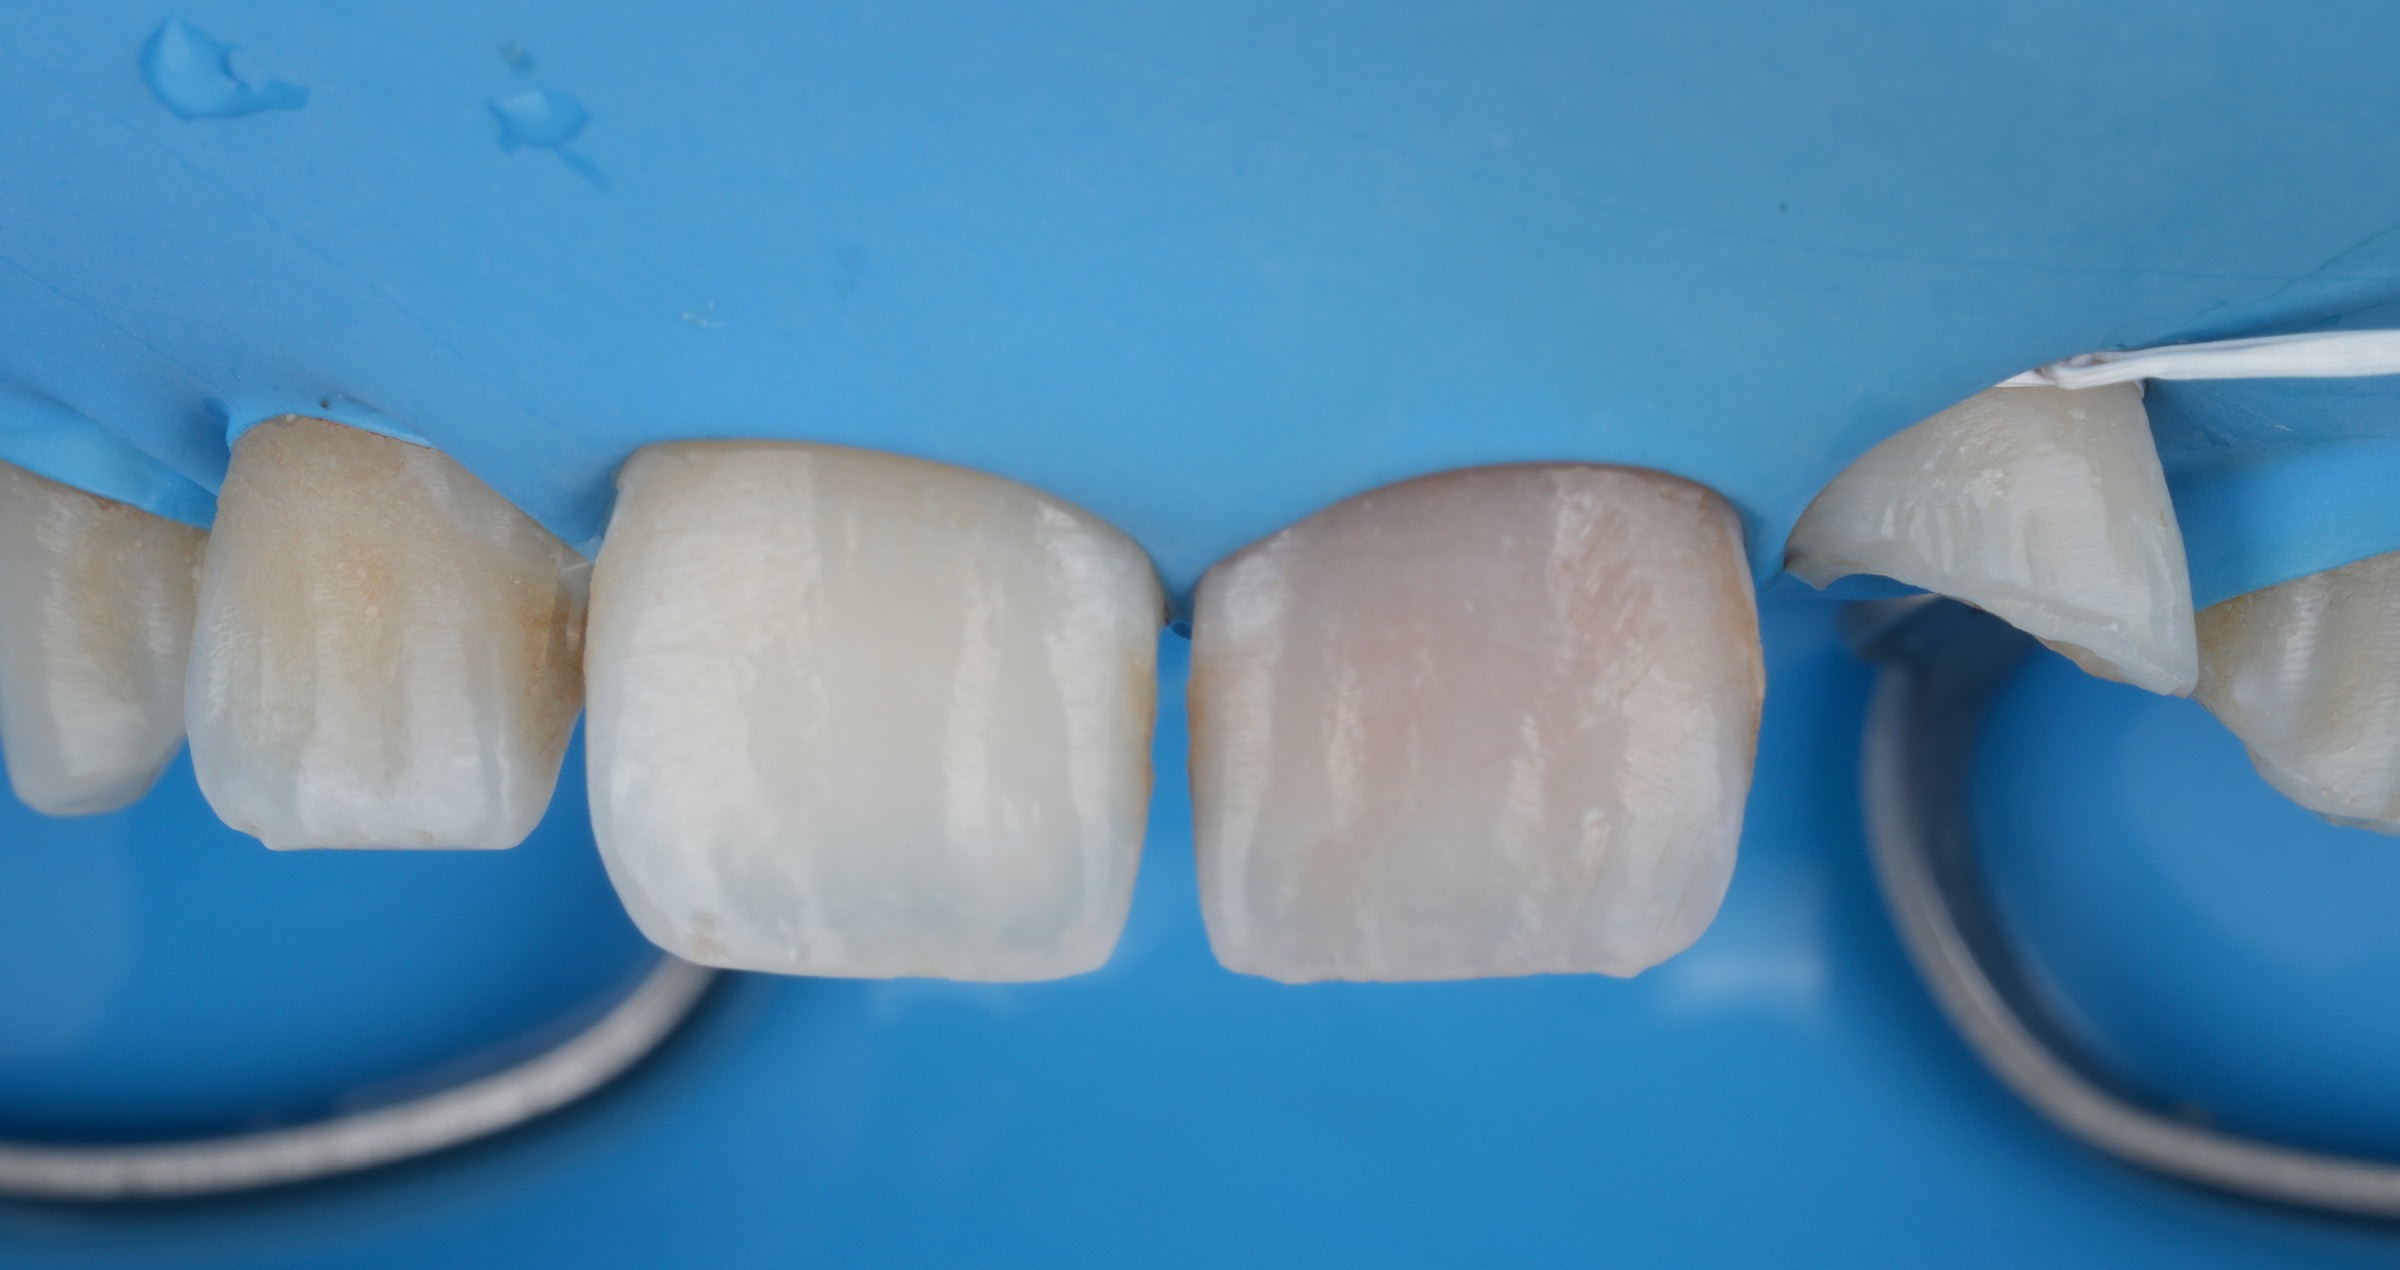
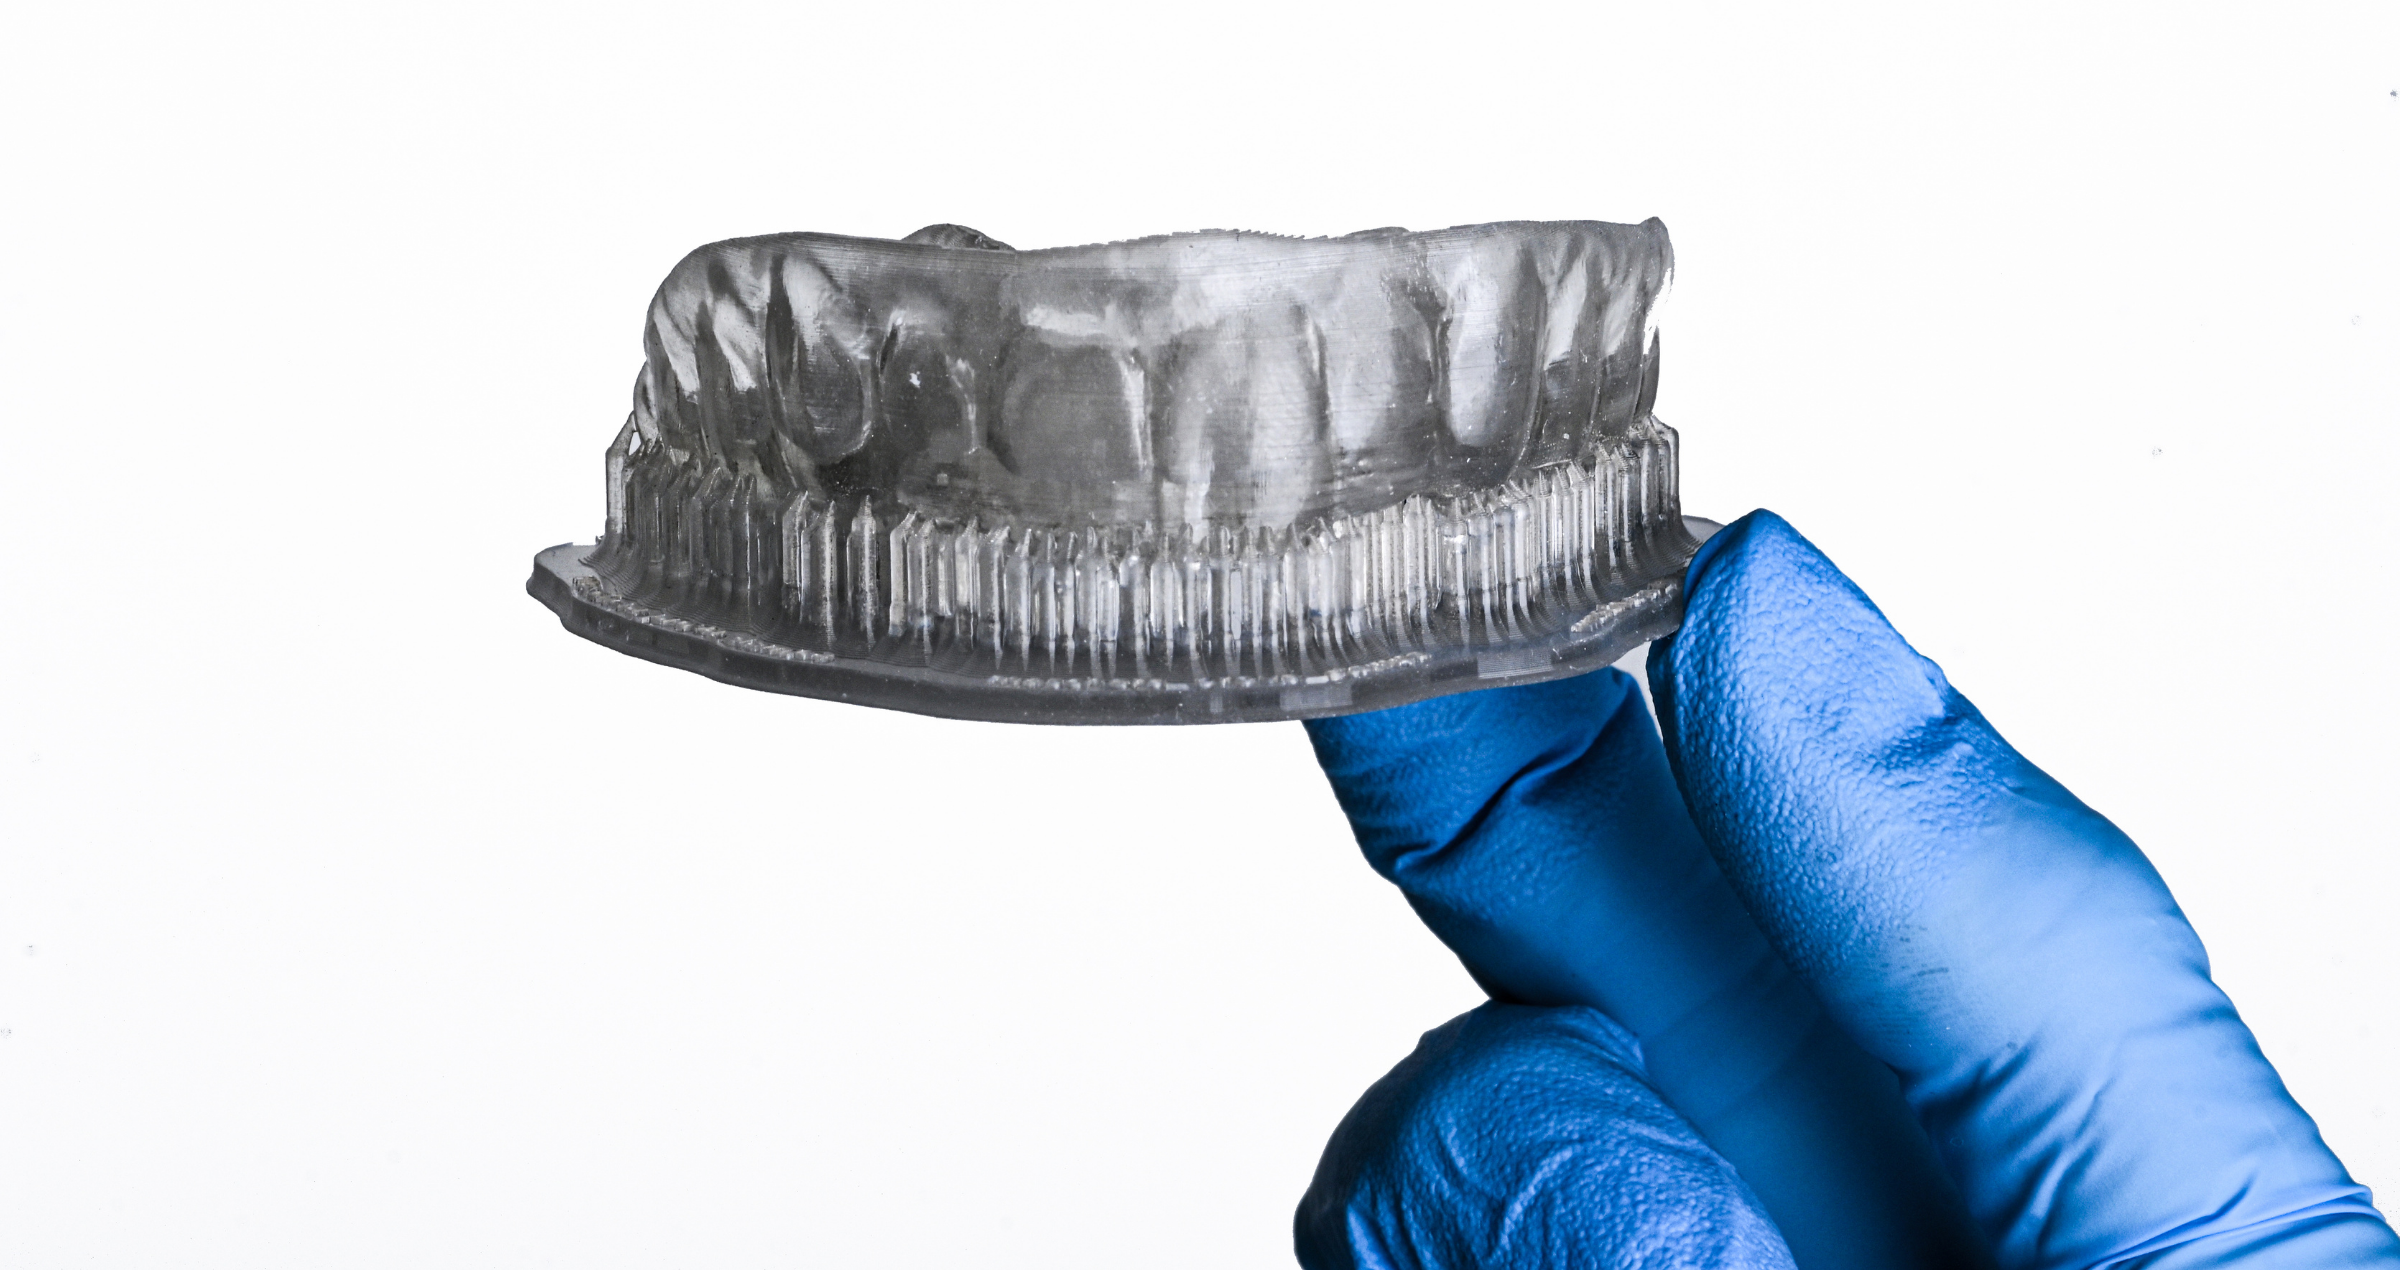
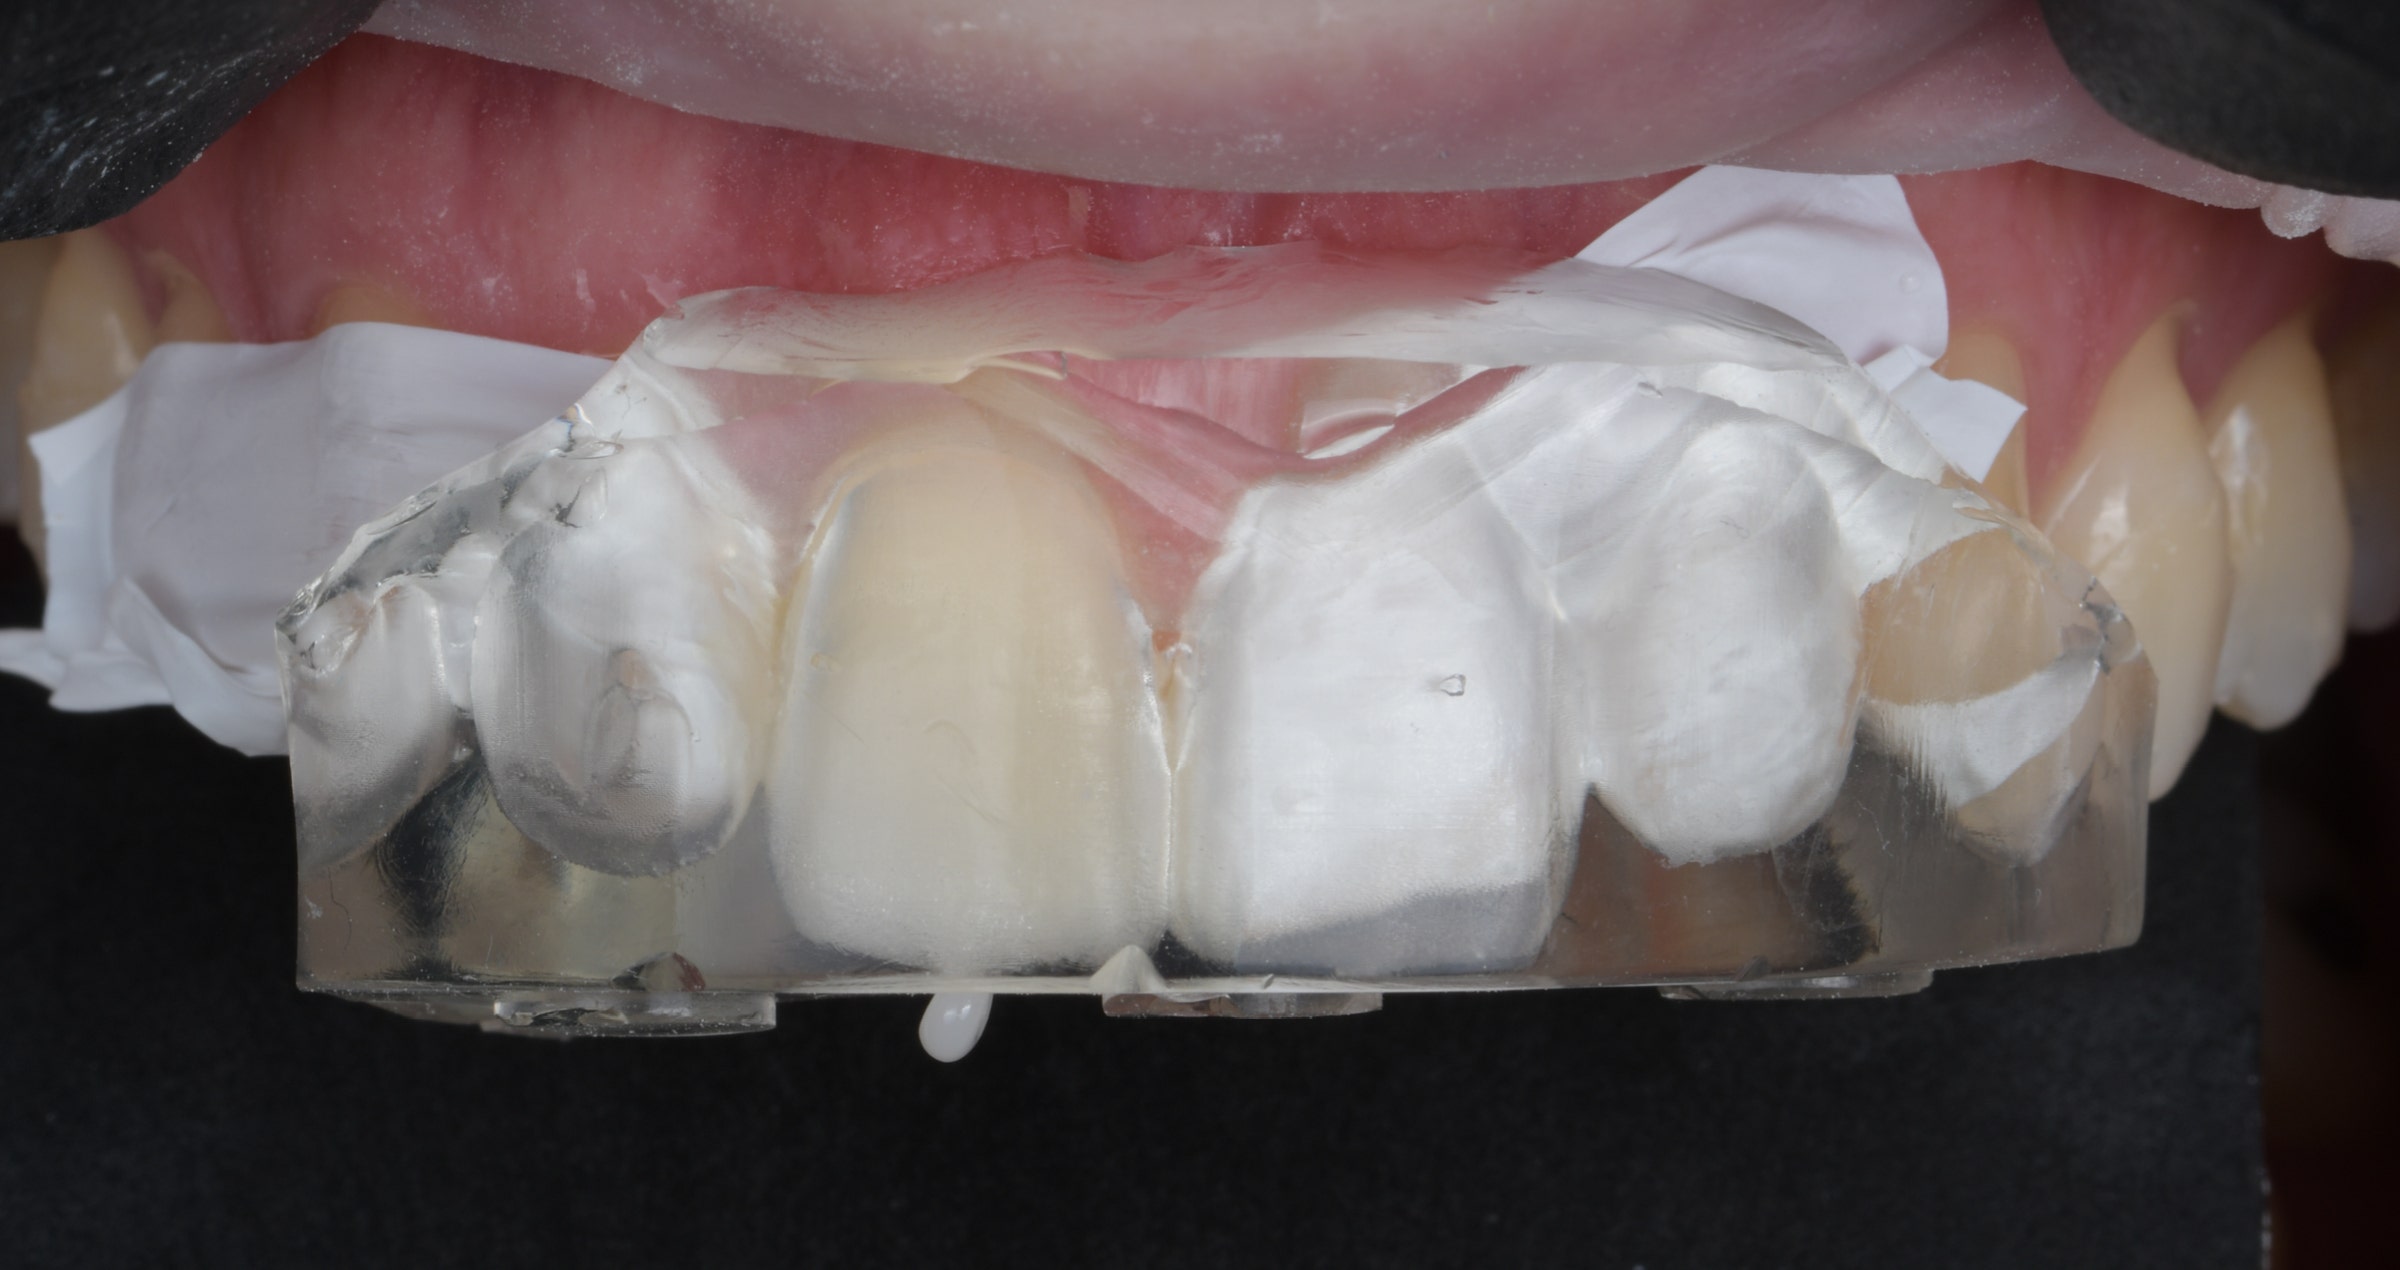
Clinical Cases, Chairside Use of the new CLEARFIL MAJESTY ES Flow Universal 4 feb. 2026 Case by Dr. Michał Jaczewski FLOWABLE INJECTION TECHNIQUE What are the most important properties of a flowable composite used for the flowable injection technique? Personal experience shows that balanced optical properties are essential, with an appropriate translucency, blend-in ability and surface gloss leading the way. However, the mechanical properties are also important, not least because the restorative material will be in direct contact with the antagonist teeth. And finally, handling properties are essential: The right level of flowability is needed for proper injection, while a void-free application is required for an intact, stain-resistant surface. For the last seven years, CLEARFIL MAJESTY™ ES Flow Low (Kuraray Noritake Dental Inc.) has been my go-to flowable composite for the flowable injection technique. Its level of flowability is ideal for the technique in the anterior and posterior region. Whenever a lower flowability is needed, it is possible to switch to the Super Low variant. Moreover, I like the shade offering, which – together with the superior polishability of the material – leads to natural aesthetics. Finally, its mechanical properties are so good that the product is approved for a wide indication range without load limitations. When the company announced the introduction of CLEARFIL MAJESTY™ ES Flow Universal, which comes in just two universal shades and two different levels of flowability (Low and Super Low), I immediately decided to give it a try: The prospect of balanced properties I am already familiar with, combined with a simplified shade selection sounded very promising. So far, the new product comes up to my expectations: The following case example reveals the simplicity of the procedure and the beauty of the results. The patient presented during orthodontic (aligner) treatment for a shape correction in the anterior region due to wear of the incisal edge. Fig. 1. Initial clinical situation: Patient in need of a shape correction in the maxillary incisor region. Fig. 2. Application of CLEARFIL™ Universal Bond Quick 2 (Kuraray Noritake Dental Inc.) to the enamel of a central incisor, which has been merely roughened by air abrasion with aluminium oxide (50 μm at low pressure) followed by etching with a phosphoric acid etchant. Fig. 3. Transparent silicon index placed in the mouth and CLEARFIL MAJESTY ES Flow Universal Low (U shade) already injected in the position of the maxillary right central incisor. Fig. 4. Shape correction on the maxillary right central incisor completed. Fig. 5. Situation after finishing and polishing of the incisor restorations. Fig. 6. Nice shade match leading to a smooth blend-in with the surrounding natural tooth structure. Fig. 7. Immediate treatment outcome supporting an improvement of the smile aesthetics and hence, the patient‘s quality of life during aligner therapy. RESULTS THAT SPEAK FOR THEMSELVES Like its related product CLEARFIL MAJESTY ES Flow, the universal-shade version CLEARFIL MAJESTY ES Flow Universal offers properties which are – from a personal perspective – ideal for the flowable injection technique. The shade-matching properties are astonishing; the translucency is quite high when placed in thin layers (so that enamel is very well imitated), and the polishability is as good as that of CLEARFIL MAJESTY ES Flow. For virtually effortless, bubble-free injection, the product comes in a nicely designed syringe. And last but not least, the product’s mechanical properties provide peace of mind even in the posterior region. Dentist: MICHAŁ JACZEWSKI Michał Jaczewski graduated from Wroclaw Medical University in 2006 and today runs his private practice in the city of Legnica, Poland. He specializes in minimally invasive dentistry and digital dentistry and is the founder of the Biofunctional School of Occlusion. Here he lectures and runs workshops with focus on full comprehensive patient treatments.
Clinical Cases, Chairside Att ersätta amalgam med flytande komposit 26 sep. 2025 Case by Dr. Julien Molia JA, DET FUNKAR! Bland många tandläkare har det blivit en etablerad uppfattning att flytande kompositer är bra som underlagsmaterial under starkare packbara kompositer och indirekta restaurationer eller som provisoriskt material. Många utgår ifrån att användningen av flytande kompositer begränsas av de dåliga mekaniska egenskaperna. EN NY GENERATION FLYTANDE KOMPOSITER Lyckligtvis är detta inte längre sant: Många moderna flytande kompositer - som CLEARFIL MAJESTY™ ES Flow och CLEARFIL MAJESTY™ ES Flow Universal (båda från Kuraray Noritake Dental Inc.) - är behäftade med mekaniska egenskaper som är fullt jämförbara med de hos många kompositer av pastatyp. På så sätt har användningsområdet breddats. CLEARFIL MAJESTY™ ES Flow Universal har , enligt tillverkaren, en fyllnadgrad på 75 till 78 %vikt, böjhållfasthet på mer än 150MPa och tryckhållfasthet som är högre än 370 MPa. Tack vare hållfastheten är den en pålitlig och permanent lösning som fungerar även i områden med stora påfrestningar, d.v.s ocklusalytor i det posteriora området. Den här flytbara kompositen har dock mer att erbjuda: Den finns tillgänglig i två flytbarheter - LOW och SUPER LOW - för att möta personliga preferenser och individspecifika behov. Vidare finns den i endast två nyanser som ger fördelen av intuitiv färgmatchning - till och med i det anteriora området. Detta möjliggörs av en blandning av färgmatchande teknologier, inkluderat optimerad ljusspridning och emaljliknande translucens. Följande exempelfall visar hur CLEARFIL MAJESTY™ ES Flow Universal förenklar mitt liv när det kommer till posteriora fyllningar. EXEMPELFALL Denna patient sökte för att få två amalgamfyllningar i underkäken (tand 46 och 47 enligt FDI) utbytta (Fig.1). Eftersom det skulle underlätta fyllningen och ge bra anslutning till kavitetens väggar föll valet på CLEARFIL MAJESTY™ ES Flow Universal som det enda restorativa materialet. Positionen på de tänder som skulle bahandlas gjorde färgvalet enkelt: Shade U (universal) är gjord för att fungera perfekt för alla posteriora ersättningar. Amalgamfyllningarna avlägsnades och karies exkaverades och så mycket av den friska tandvävnaden som möjligt bevarades (Fig.2 och 3). Tanden etsades selektivt och behandlades därefter med universaladhesiv (CLEARFIL™ Universal Bond Quick 2, Kuraray Noritake Dental Inc.) Därefter applicerades CLEARFIL MAJESTY™ ES Flow Universal, med flytbarhet LOW och nyans U i kaviteterna (Fig. 4). Tack vare den innovativa sprutdesignen är den applicerade kompositen så gott som helt fri från blåsor. I enlighet med instruktionerna för produkten och för att garantera fullständig härdning var inget skikt tjockare än 2 mm. (Fig. 5 och 6). Härdningen är helt avgörande för ersättningens hållbarhet över tid. Varje skikt ska härdas fullständigt under 10 till 20 sekunder (beroende på vilken härdningslampa som används) innan nästa skikt appliceras. Som framgår av Figur 7 tillåter den låga graden av flytbarhet hos det valda materialet en viss modellering av den ocklusala morfologin. När fler anatomiska detaljer ska återskapas är den stadigare varianten SUPER LOW ett alternativ. Det tog bara några sekunder att putsa ersättningen till högglans (Fig.8). Fig. 1: Två amalgamfyllningar som ska bytas ut. Fig. 2: Amalgamfyllningarna är avlägsnade. Fig. 3: Typiska missfärgningar av amalgam är synliga i botten på den större kaviteten. Fig. 4: Fyllning: Applicering av den första skiktet f lytande komposit. Fig. 5: Den andra molaren är komplett fylld, den första molaren behöver ytterligare ett skikt flytande komposit. Fig. 6: Fyllningarna är färdiga. Fig. 7: Fin morfologi och färgmatchning. Fig. 8: Behandlingsresultat efter att kofferdam avlägsnats. Ersättningarna smälter in fint bland granntänderna - med både färg och ytglans. ETT LÄTTANVÄNT ALTERNATIV TILL PASTAKOMPOSITER Användningen av flytande komposit med väl avvägda mekaniska egenskaper kan vara ett bra alternativ till pastakompositer - särskilt i de områden i munnen som är svåråtkomliga. Avancerade möjligheter till färgmatchning, praktiskt taget blåsfri applicering, enkel anpassning och modellering och snabb polering förenklar verkligen livet för tandläkaren. Dentist: JULIEN MOLIA Dr. Julien Molla tog sin examen 2008 med en uppsats om datorassisterad implantologi. Han startade en allmänpraktik i Saint-Jean-de-Luz, där han sedan har fokuserat på implantatkirurgi och käkrekonstruktion. 2017 tog han ännu en examen i implantologi i syfte att uppdatera och fördjupa sim expertis. Han har också fortbildat sig inom digital tandvård, ortodontiska miniskruvar och mukogingival kirurgi. Då han är hängiven vävnadsbevarande tandvård har han fått privat undervisning av Drs. Gil Tirlet och Jean-Pierre Attal i Paris. Dr. Molla är en av grundarna till The French Southwest Bio Team, en samarbetsgrupp hängivna klinisk forskning och innovation.
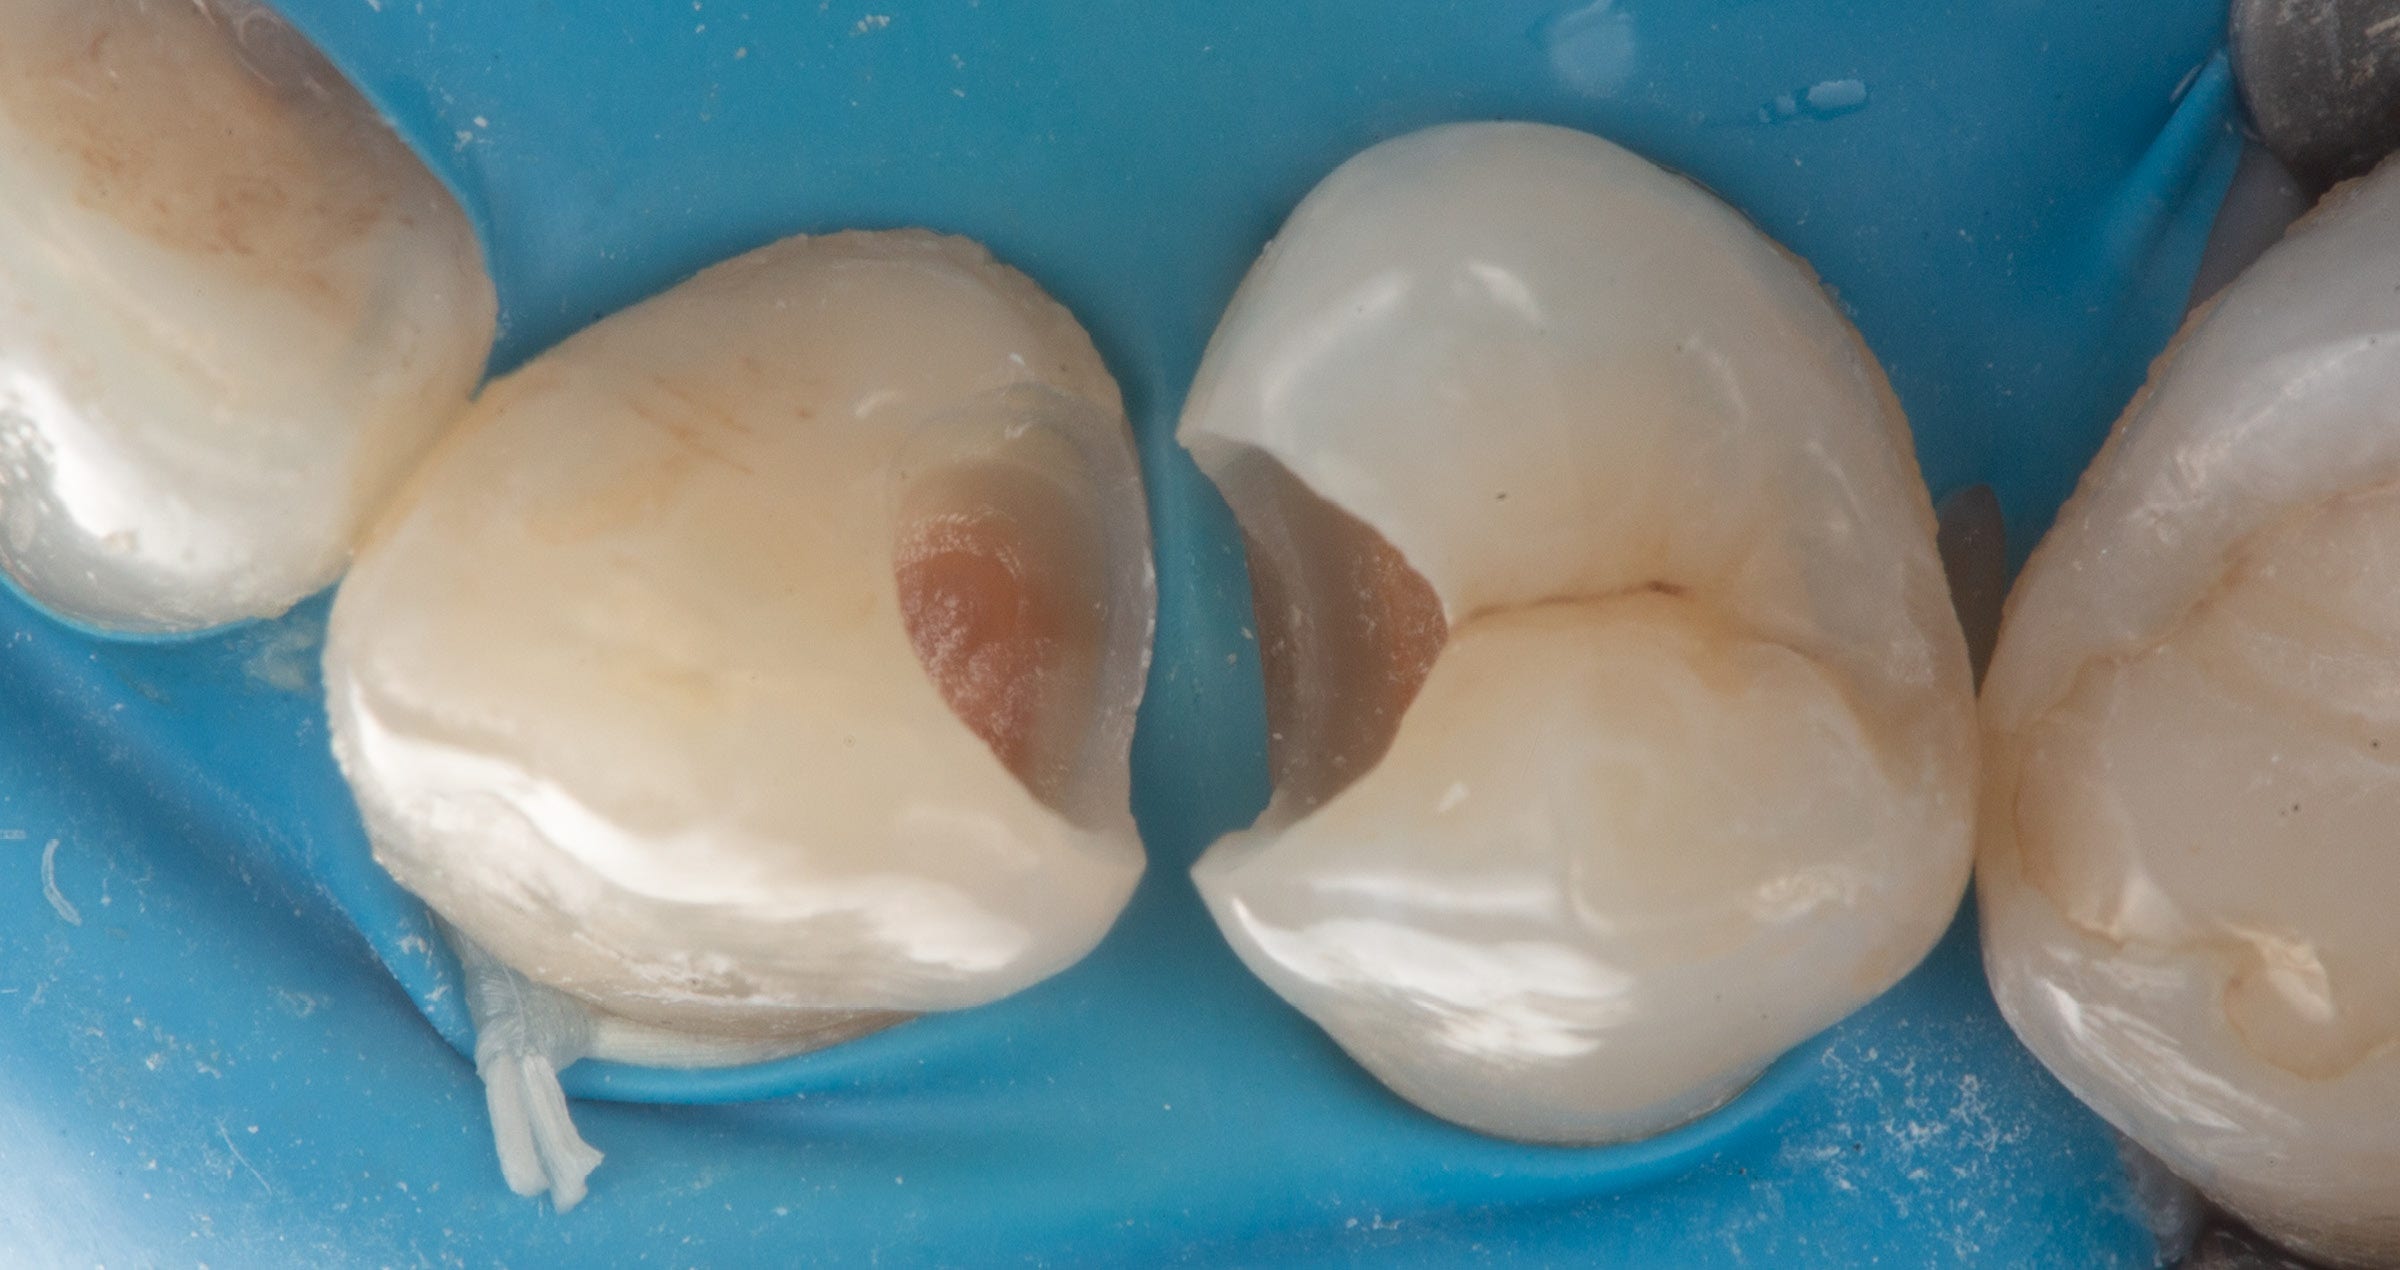
Clinical Cases, Chairside Amalgam replacement with flowable composite 19 aug. 2025 Case by Dr. Julien Molia YES, IT WORKS! In the minds of many dental practitioners, it has become firmly established that flowable composites are nice liner or base materials below stronger packable composites and indirect restorations or as a temporization material. Many of them assume, however, that their use is limited due to their poor mechanical properties. A NEW GENERATION OF FLOWABLES Luckily, this is no longer true: Several flowable composites of the latest generation – like CLEARFIL MAJESTY™ ES Flow and CLEARFIL MAJESTY™ ES Flow Universal (both Kuraray Noritake Dental Inc.) – are equipped with mechanical properties, which are on par with those of many packable alternatives. Consequently, the range of indications is extended. For example, CLEARFIL MAJESTY™ ES Flow Universal, has a high filler loading of 75 to 78 wt/%, a flexural strength of more than 150 MPa and a compressive strength exceeding 370 MPa according to the manufacturer. Thanks to its high strength, it serves as a reliable and permanent solution, even suitable for stress-bearing areas such as the occlusal surfaces of posterior teeth. However, this flowable composite has even more to offer: It is available in two levels of flowability – LOW and SUPER LOW – to serve a wider range of personal preferences and individual indication-specific needs and in just two shades (universal and universal dark). The latter offers the benefit of intuitive shade selection even in the anterior area and is enabled by a mixture of shade matching technologies, including optimized light diffusion technology and an enamel-like translucency. The following case example reveals how CLEARFIL MAJESTY™ ES Flow Universal makes my life easier in posterior restoration procedures. CASE EXAMPLE This patient presented for the replacement of two amalgam restorations in the mandibular right molars (teeth # 46 and 47 according to the FDI notation) (Fig. 1). As it would facilitate filling and provide for great adaptation to the cavity walls, it was decided to use CLEARFIL MAJESTY™ ES Flow Universal LOW as the only restorative material. The position of the teeth to be restored made shade selection easy: Shade U (universal) is designed to work perfectly for all posterior restorations. The amalgam restorations were removed and caries was excavated, while saving as much of the healthy tooth structure as possible (Figs. 2 and 3). A selective enamel etching technique was chosen, followed by the application of a universal adhesive (CLEARFIL™ Universal Bond Quick 2, Kuraray Noritake Dental Inc.). Subsequently, CLEARFIL MAJESTY™ ES Flow Universal in the LOW version and the selected shade U was applied into the cavities (Fig. 4). Thanks to the innovative syringe design, the applied flowable composite is virtually free of voids. In line with the instructions for use of the product, the thickness of each layer did not exceed 2 millimetres to provide for a complete cure (Figs. 5 and 6), which has a decisive impact on the long-term performance of the final restorations. Each layer should be thoroughly cured for 10 to 20 seconds (depending on the curing light) before the next layer is applied. As shown in Figure 7, the low flowability of the selected material allows for some modelling of the occlusal surface morphology. When more anatomical details need to be restored, the steadier SUPER LOW variant may be an option. It took just a few seconds to polish the restorations to high gloss (Fig. 8). Fig. 1. Two amalgam restorations to be replaced. Fig. 2. Situation after removal of the existing amalgam restorations. Fig. 3. Typical amalgam staining is visible at the bottom of the larger cavity. Fig. 4. Filling procedure: Application of the first layer of flowable composite. Fig. 5. Second molar already filled, first molar in need of another layer of flowable composite. Fig. 6. Filling completed. Fig. 7. Nice surface morphology and shade blend-in. Fig. 8. Treatment outcome after rubber dam removal. The restorations blend in nicely with the surrounding dentition – qua shade and surface gloss. EASY-TO-USE ALTERNATIVE TO PACKABLE COMPOSITES Especially in difficult-to-reach areas in the mouth, the use of a flowable composite with well-balanced mechanical properties can be a nice alternative to packable ones. Advanced shade-matching abilities, virtually void-free application, easy adaptation and modelling, and quick polishing truly simplify the life of the dental practitioner. However, many assume their use is limited due to poor mechanical properties. Dentist: JULIEN MOLIA Dr. Julien Molia graduated in 2008 with a thesis on computer-assisted implantology. He established a general dental practice in Saint-Jean-de-Luz, where he has since focused on implant surgery and jawbone reconstruction. In 2017, he completed a second university degree in implantology to update and deepen his expertise. He has also pursued advanced training in digital dentistry, orthodontic miniscrews, and mucogingival surgery. Committed to tissue preservation, he trained privately with Drs. Gil Tirlet and Jean-Pierre Attal in Paris. Dr. Molia is a founding member of the French Southwest BioTeam, a collaborative group dedicated to clinical research and innovation.
Clinical Cases, Chairside Restoring confidence after trauma: a biomimetic approach 22 juli 2025 Case by Dt. Koray Kendir, DDS, Turkey (İzmir) INTRODUCTION Trauma-related fractures of anterior teeth require a precise balance between aesthetics and function, often under emotional pressure from the patient. This clinical case demonstrates the restorative rehabilitation of a previously mismanaged central incisor using CLEARFIL MAJESTY™ ES-2 Premium and PANAVIA™ V5 (both Kuraray Noritake Dental Inc.). The team followed a biomimetic approach to re-establish biological, functional, and aesthetic harmony. CASE SUMMARY A 23-year-old female patient presented one month after a traumatic injury involving tooth #11 (FDI notation). Immediate root canal treatment and a direct composite build-up had been performed elsewhere in a single visit. The existing restoration showed poor aesthetics and marginal adaptation (Fig. 1). Fig. 1. Initial clinical situation. CLINICAL PROCEDURE STEP 1: ISOLATION AND REMOVAL OF OLD RESTORATION For the planned rehabilitation, the tooth was isolated with rubber dam (Figs. 2 and 3) and the existing composite restoration was removed. Gutta-percha from the previous endodontic treatment was found to be severely coronally trimmed (Fig. 4). This poses a risk of future discolouration. Consequently, the gutta-percha was condensed apically to a more biologically appropriate level using a downpack device (Figs. 5 to 9). Fig. 2. Isolation of the working field with rubber dam: Labial view. Fig. 3. Isolation of the working field with rubber dam: Occlusal view. Fig. 4. Gutta-percha from the previous treatment. Fig. 5. Gutta-percha removed, … Fig. 6. … placed back into the root canal … Fig. 7. … and condensed … Fig. 8. … with a downpack device. Fig. 9. Result of the procedure: Occlusal view. STEP 2: CORE BUILD-UP Subsequently, a fiber-reinforced composite was used to provide root-anchored support for the core structure. Then, the bonding surface was treated with phosphoric acid etchant, CLEARFIL™ Universal Bond Quick (Kuraray Noritake Dental Inc.) was applied as a universal adhesive and the core build-up was performed with CLEARFIL MAJESTY™ ES-2 Premium A1D (Figs. 10 to 13). Fig. 10. Etching with phosphoric acid etchant. Fig. 11. Application of the universal adhesive. Fig. 12. Core build-up after thorough light curing. Fig. 13. Intra-oral periapical radiograph or the treated tooth. STEP 3: PREPARATION AND DIGITAL IMPRESSION For definitive restoration, a 3/4 crown preparation was performed and an intraoral scan was taken. Moreover, a temporary crown was fabricated (Fig. 14) and shade photos were taken to finalize the session. Fig. 14. Temporary restoration in place. STEP 4: FINAL CEMENTATION Once the lithium disilicate restoration was received from the laboratory, the temporary crown was removed and the abutment tooth was evaluated (Figs. 15 and 16). Try-in was performed using PANAVIA™ V5 Try-in Paste White to check shade and fit (Fig. 17). No modifications were required; the selected try-in paste contributed to a lifelike appearance of the restoration. For definitive placement, the intaglio surface of the crown was etched with hydrofluoric acid (Fig. 18). Figure 19 shows the appearance of the intaglio after this measure. To provide for optimal bonding conditions, the tooth surface was then cleaned with KATANA™ Cleaner (Kuraray Noritake Dental Inc.), which should be applied with a rubbing motion to the contaminated prepared tooth for more than ten seconds (Figs. 20 to 22). It may also be used to clean the intaglio of a restoration, which is contaminated with blood and saliva e.g. after try-in. Fig. 15. Situation after removal of the temporary crown: Labial view. Fig. 16. Situation after removal of the temporary crown: Occlusal view. Fig. 17. Try-in of the lithium disilicate crown. Fig. 18. Etching of the crown’s intaglio surface with hydrofluoric acid. Fig. 19. Appearance of the etched surface. Fig. 20. Cleaning of the abutment tooth … Fig. 21. … surface covered with the cleaning agent. Fig. 22. Thorough rinsing, which should be followed by drying with air. Adhesive cementation itself was accomplished with the three-component PANAVIA™ V5 (Figs. 23 to 28): The prepared tooth structure and build-up was treated with PANAVIA™ V5 Tooth Primer, the intaglio surface of the crown with CLEARFIL™ CERAMIC PRIMER PLUS. Finally, PANAVIA™ V5 Universal (White) was extruded into the crown and the crown placed. Excess cement is best removed in the gel phase – i.e. after brief polymerization for 3 to 5 seconds before final light curing is performed. Alternatively, it may be removed immediately after seating the restoration with a brush or similar instrument. In this case the first option was chosen. The treatment outcome after rubber dam removal and final clinical and aesthetic evaluation is displayed in Figure 29. Fig. 23. Priming of the tooth structure. Fig. 24. Selected resin cement. Fig. 25. Tooth structure ready for crown placement. Fig. 26. Restoration in place. Fig. 27. Lateral view of the restoration. Fig. 28. Final light curing of the crown. Fig. 29. Treatment outcome immediately after rubber dam removal. CONCLUSION This case highlights a comprehensive restorative approach to preserving a traumatized anterior tooth at risk of loss, while restoring both function and aesthetics. The strong core foundation provided by CLEARFIL MAJESTY™ ES-2 Premium and the reliable adhesive performance of PANAVIA™ V5 played a pivotal role in the successful procedure and outcome. Dentist: KORAY KENDIR Dt. Koray Kendir is a graduate of Hacettepe University Faculty of Dentistry and the co-founder of a private dental clinic in İzmir. He specializes in digital dentistry, smile design, and computer-aided restorative treatments. Known for his innovative approach, Dr. Kendir is a frequent speaker at national dental congresses and serves as an advisor to several dental companies.
Clinical Cases, Chairside Performance and practicality 14 jan. 2025 Case by A/Prof Alan Yap, BDS (Syd), MDSc Hons (Pros)(Syd), FAANZP Since 1983 PANAVIA™ by Kuraray Noritake Dental Inc. has been the gold standard for dental cements throughout the world. Their latest cement, PANAVIA™ Veneer LC, sets a new standard for porcelain veneer cements through incredible performance and ease of use. The following clinical case demonstrates the use of PANAVIA™ Veneer LC. A 31-year-old female (Fig. 1) was referred for porcelain veneers to replace lost tooth structure and to improve aesthetics. The patient exhibited moderate attrition of her anterior and bicuspid teeth (Fig. 2), the result of nocturnal bruxism and a tendency to an edge-to-edge occlusion. She had a Class I malocclusion on a Skeletal Class I tending III base with the right maxillary canine in cross-bite. The treatment plan included orthodontic treatment, porcelain veneers, and an occlusal splint. Fig. 1 Fig. 2 Orthodontic treatment (by Dr Nour Tarraf) included full-fixed appliances with TADs and IPR of mandibular anteriors, and arch retractions to reduce protrusion (Fig. 3, post-orthodontic treatment). A preliminary digital design (Fig. 4) was performed to guide the diagnostic wax-up and a digital mock-up (Fig. 5) was utilised to verify the diagnostic wax-up prior to carrying out the intra-oral mock-up. The patient was unable to afford the restoration of the maxillary bicuspids until a later stage so the reconstruction was limited to the maxillary anterior teeth. Fig. 3 Fig. 4 Fig. 5 Using the diagnostic wax-up, silicone keys were fabricated to guide tooth preparations. Orthodontic treatment allowed prosthetic treatment to be additive in design which meant that tooth preparations could be conservative. Labial reductions were limited to 0.3 mm and incisal reductions were performed only where needed to create an incisal butt joint for the veneer (Fig. 6). Minimal preparations allowed the veneers to be bonded almost entirely to enamel, which is important for the long-term survival of porcelain veneers (Ref 1). There was no need to significantly mask the colour of the cervical region of the tooth and non-carious cervical lesions were absent, so fine chamfer margins were prepared at equi-gingival level. Fig. 6 Splinted provisional veneers (Fig. 7) were fabricated using bisacryl ensuring sufficient interdental space to allow hygiene access for small interdental brushes. The labial surface of the provisional veneers were glazed with a unfilled resin and cemented using the spot-etch technique, ensuring all excess flowable composite was removed prior to curing (Fig. 8). Twice daily interdental cleaning of the provisional veneers and thorough brushing of labial margins during the provisional phase maintained soft tissue health, important for the try-in and cementation of the definitive veneers. Fig. 7 Fig. 8 A dry try-in of the definitive veneers was performed to check the fit of the veneers and a wet try-in was performed using try-in paste to assess aesthetics. The PANAVIA™ Try-in pastes accurately mimic the cement shades. Four useful shades are available (Fig. 9). The White and Brown shades are useful to correct small discrepancies in shade requiring subtle increases or decreases in shade value respectively. Conveniently the try-in pastes are the same as the PANAVIA™ V5 range of try-in pastes (excluding opaque). Following the try-in procedure the teeth were isolated using rubber dam and the floss ligature technique. KATANA™ Cleaner (Fig. 10) was used to clean the veneers prior to silanating with CLEARFIL™ CERAMIC PRIMER PLUS (Fig. 11). Fig. 9 Fig. 10 Fig. 11 Veneers that have not been pre-etched should be etched with hydrofluoric acid prior to silanization. The use of the ProsMate™ Baton allows the cleaning, etching and silanization of all veneers simultaneously (Fig. 12). The veneers are arranged systematically on the ProsMate™ Tray ready for the cementation procedure (Fig. 13). Tooth surfaces were pre-treated with phosphoric acid (K-ETCHANT Syringe) and PANAVIA™ V5 Tooth Primer (Fig. 14). Fig. 12 Fig. 13 Fig. 14 The newly designed cement applicator tip reduces air bubbles and the wide 16-gauge tip (Fig. 15) allows light and easy control of cement extrusion while also providing efficient wide coverage during application. PANAVIA™ Veneer LC has excellent handling because of its ideal paste consistency. It is non-sticky and its viscosity prevents the cement from flowing beyond the veneer margins until the veneer is seated. It is not runny or stringy. Furthermore its thixotropic properties results in lower film thickness during seating of the veneer. These excellent handling properties are due to the development of new filler technology which consists of spherical silica and nano cluster fillers (Fig. 16). The “touch-cure” mechanism of PANAVIA™ V5 Tooth Primer importantly seals the bonding interface while the extended working time and stability of the cement under ambient light allows the simultaneous cementation of multiple veneers. In this case all six lithium disilicate veneers (technical work by Yugo Hatai) were cemented simultaneously with PANAVIA™ Veneer LC Paste (Clear). Fig. 15 Fig. 16 Tack-curing each veneer for one second allowed smooth and easy bulk removal of excess cement with an explorer (Fig. 17). Remaining excess of uncured paste was removed with brushes. Final curing was performed by light curing lingual and labial surfaces. Fig. 17 The optical characteristics of PANAVIA™ Veneer LC, use of fine chamfer margins, and well-fitting translucent restorations produces a gradual and smooth transition of colour from tooth to veneer where margins disappear and soft tissues respond in a healthy way (Fig. 18). The color stability, excellent abrasion resistance and high gloss durability of PANAVIA™ Veneer LC preserves integrity and aesthetics at the margins over the long term. The extraordinary bond strength of PANAVIA™ products, so familiar to our profession over the last 20 years, is still second to none (Fig. 19). Fig. 18 Fig. 19 “KATANA” is a registered trademark or trademark of NORITAKE CO., LIMITED - “PANAVIA” and “CLEARFIL” are registered trademarks or trademarks of KURARAY CO., LTD. References 1. Layton DM, Walton TR. The up to 21-year clinical outcome and survival of feldspathic porcelain veneers: accounting for clustering. Int J Prosthodont. 2012 Nov-Dec; 25(6):604-12. PMID: 23101040.
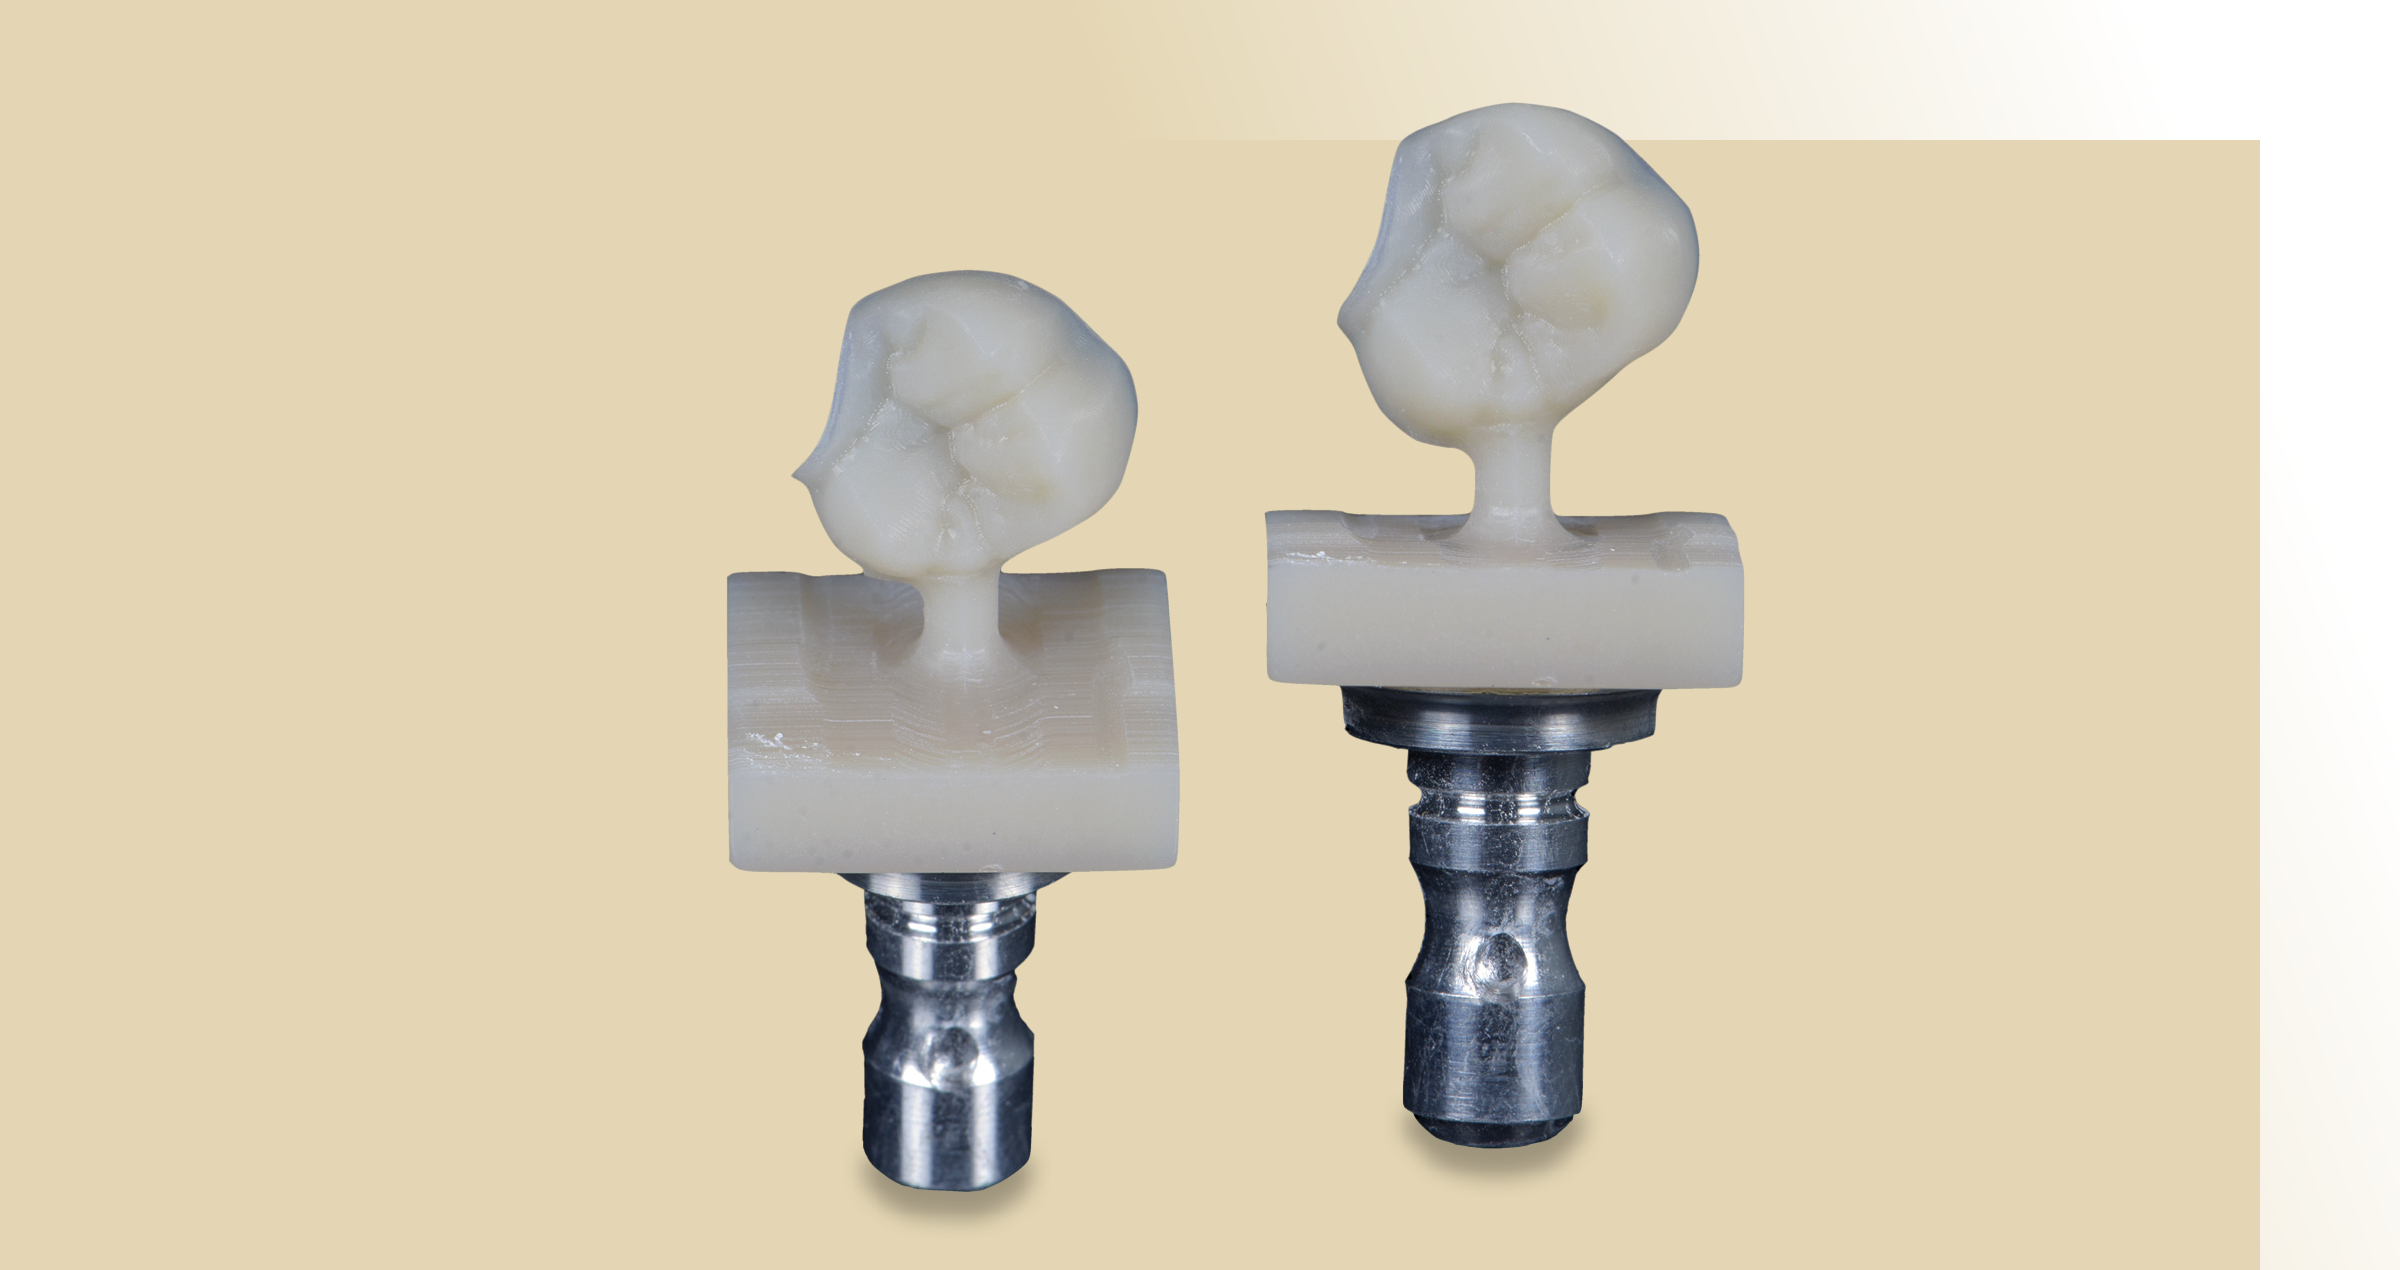
Clinical Cases, Chairside Amalgam replacement: Why and when hybrid ceramics are a great option 26 nov. 2024 Case by Dr. Enzo Attanasio The selection of the restorative material is a crucial step in prosthodontics. Hybrid ceramics offer a range of properties well-suited for various therapeutic situations, both in the presence of vital teeth and of endodontically treated teeth. Using the example of a clinical case, this article will explore the advantages associated with the use of hybrid ceramics in a cracked tooth syndrome scenario. INITIAL SITUATION The affected tooth in this case was a mandibular right second premolar (45 according to the FDI notation) with an old amalgam restoration (Figs. 1 and 2). The patient experienced pain upon chewing (specifically upon release). Clinically, there were visible horizontal and vertical crack lines. The tooth was vital and showed no signs of pulpal pathology. It was decided to replace the amalgam restoration and restore the tooth with an overlay made of the hybrid ceramic KATANA™ AVENCIA™ Block. There were two main reasons for this decision. First, whenever root canal treatment would be necessary in the future, the hybrid ceramic material would facilitate endodontic access cavity preparation (compared to any other ceramic material) and subsequent restoration with composite filling material. Second, hybrid ceramics offer greater resistance and improved mechanical properties compared to composite filling materials applied in an incremental layering technique. Fig. 1. Initial situation: Occlusal view. Fig. 2. Initial situation: Buccal view. PREPARATION AND IMMEDIATE DENTIN SEALING To remove the amalgam restoration and weakened surrounding tooth structure, the occlusal surface of the tooth was reduced by approximately 2 mm. For a smooth colour transition between the tooth and the restoration, the preparation outline was created at the level of interproximal boxes with a vestibular inclined plane (Fig. 3). Subsequently, Immediate Dentinal Sealing (IDS) was carried out (Figs. 4 to 10). This technique involves the use of a universal adhesive like CLEARFIL™ Universal Bond Quick, which is applied to the preparation without prior etching of the peripheral enamel. In the second step, a highly filled flowable composite is applied. In the present case, the material of choice was CLEARFIL MAJESTY™ ES Flow Super Low, applied in a thickness of just 0.5 mm. The preparation was refined using ultrasonic instrumentation: Sonic tips SFM7 and SFD7 (Komet Dental) for refining the boxes; SFD1F and SFM1F (Komet Dental) for margins and steps. Sharp edges were rounded with abrasive discs and then polished with fine polishers. It is crucial that the residual occlusal thickness (prosthetic space) is 1.5 mm, as required by the selected material. Fig. 3. Prepared tooth structure prior to immediate dentin sealing. Fig. 4. IDS: Application of the universal adhesive. Fig. 5. IDS: Light curing of the adhesive layer. Fig. 6. Thin layer of flowable composite applied to the preparation. Fig. 7. Contouring, … Fig. 8. … rounding off sharp edges … Fig. 9. … and polishing of the sealed surface with dedicated instruments. Fig. 10. Sealed tooth preparation ready for impression taking. FROM SCANNING TO TRY-IN Following digital scanning with the intraoral scanner Primescan™ (Dentsply Sirona), MDT Daniele Rondoni produced the restoration (Figs. 11 and 12). The cementation process involves an initial try in phase to assess the marginal fit of the overlay and the contact areas. Testing occlusion at this stage could be risky as it may lead to fracture of the restoration in case of excessive premature contacts. After try-in (when carried out without rubber dam), the restoration may be contaminated by blood, saliva, or glycerin gel used for the evaluation of fit and aesthetics. Therefore, it is necessary to clean the restoration before proceeding with adhesive phases. The use of a cotton pellet soaked in alcohol is an option, a cleaning agent like KATANA™ Cleaner may be even better as it chemically cleans the restoration and eliminates the contaminants. Fig. 11. Hybrid ceramic overlay on the printed model. Fig. 12. Separate overlay. CONDITIONING OF THE TOOTH AND THE RESTORATION Afterwards, the restoration was sandblasted (as recommended for most hybrid ceramics) with 50 μm aluminum oxide using AquaCare (Akura Medical) (Fig. 13), and then immersed in distilled water in an ultrasonic bath for 5 minutes. Meanwhile, rubber dam was placed over the entire sextant, the build-up was sandblasted like the intaglio of the overlay and a phosphoric acid etchant (Ultra Etch, Ultradent) was applied to the enamel, rinsed off and the area dried (Figs. 14 to 17). The clean restoration was subsequently conditioned with a silane containing 10-MDP (CLEARFIL™ Ceramic Primer Plus, Kuraray Noritake Dental Inc.) according to the manufacturer’s instructions (Fig. 18). What followed was the application of the universal adhesive (CLEARFIL™ Universal Bond Quick) to the intaglio of the overlay and to the preparation and light curing on both sites (Figs. 19 and 20). One of the advantages of universal adhesives compared to three-step adhesive systems is their minimal film thickness, which does not compromise the fit of the restoration. It is important to protect adjacent teeth with metal matrix strips during adhesive phases to provide for proper fitting. These elements do not create operational difficulties, but serve their purpose: After restoration placement, the composite or cement used for placement will be easily removable from the mesial and distal surfaces of the adjacent teeth, as they are free of adhesive. Fig. 13. Sandblasting of the overlay … Fig. 14. … and the tooth structure. Fig. 15. Selective etching of the enamel, … Fig. 16. … followed by thorough rinsing. Adjacent teeth are protected by a metal matrix strip. Fig. 17. Tooth structure after selective etching, rinsing and drying. Fig. 18. Silane application. Fig. 19. Application of the universal adhesive into the overlay. Fig. 20. Treatment of the tooth structure with the universal adhesive. DEFINITIVE PLACEMENT In the present case, a heated composite paste (heated to a temperature of 55 °C) was extruded into the restoration, which was then placed by applying slow, gradual, and strong pressure (Figs. 21 and 22). Excess composite was removed with a scaler in the buccal and lingual areas and floss (e.g. SuperFloss®, Oral-B) in the interproximal areas. Several pressurization phases were performed until no more composite was observed at the tooth-restoration interface. Fig. 21. Heated composite paste used for definitive placement. Fig. 22. Restoration placed under rubber dam isolation. Then, the composite was polymerized for 30 seconds from the buccal and lingual sides with two curing lights, before applying glycerin gel to the margins and polymerizing from occlusal for another minute (Fig. 23). If thorough attention is given to removing excess composite during placement phases, subsequent finishing steps will be quick and easy (Figs. 24 to 27). Finishing and polishing of the interproximal areas was accomplished with an EVA handpiece and 3M™ Sof-Lex™ Finishing Strips (3M). For finishing of the buccal and lingual areas, a medium-grit, flame-shaped diamond bur (diameter 14/16) was used. Finally, the margins should be polished using composite polishers like TWIST™ DIA for Composite (Kuraray Noritake Dental Inc.). After the local anesthesia wears off, one should observe the cessation of pain symptoms, as seen in the present case. The treatment outcome is displayed in Figures 28 and 29. Fig. 23. Light curing through a layer of glycerin gel blocking the oxygen. Fig. 24. Finishing of the buccal and lingual margin with a medium-grid, flame-shaped diamond bur. Fig. 25. Finishing of the interproximal areas with EVA handpiece (fine grain). Fig. 26. Checking the occlusal contacts. Fig. 27. Occlusal polishing. FINAL SITUATION Fig. 28. Treatment outcome – buccal view. Fig. 29. Treatment outcome – occlusal view. CONCLUSION For posterior teeth restored with amalgam and a significant level of destruction, restoration replacement with hybrid ceramic overlays can be a great option. Mechanical material properties are usually superior to those of layered composites, processing is possible chairside or labside and comparatively quick (no firing required), while the clinical placement procedure is similar to that involved in placing glass ceramics – with the major difference of sandblasting instead of etching the intaglio of the restoration. One of the most important benefits of hybrid ceramics over glass ceramics, however, is the ability to modify the restoration whenever desired. Endodontic access cavities are easily prepared and closed with composite, contact points are quickly adjusted and the surface is polished or re-polished in next to no time. Moreover, the wear properties are similar to those of tooth structure and patients are happy about a natural touch and feel. The aesthetic properties are quite impressive, too. Dentist:ENZO ATTANASIO Enzo Attanasio graduated in 2008 in Dentistry and Dental Prosthetics from the Magna Graecia University of Catanzaro. In 2009, he went on to specialize in the use of laser and new technologies in the treatment of oral and perioral tissues at the University of Florence. That year he also attended Prof. Arnaldo Castellucci’s course in Clinical Endodontics at the Teaching Center of Microendodontics in Florence where, in 2012, he went on to complete his training in Surgical Microendodontics. In 2017 he attended a course on Direct and indirect Adhesive Restorations at Prof. Riccardo Becciani’s Think Adhesive training center in Florence where he later become a tutor. Today, as a member of the Italian AIC and based in Lamezia Terme, Italy, Dr Attanasio has a special interest in Endodontics and Aesthetic Conservative.
Clinical Cases, Chairside Cementering av litiumdisilikatkronor 20 nov. 2024 Enkel arbetsgång, pålitligt resultat: det är vad de flesta tandläkare eftersträvar när de cementerar en indirekt ersättning. Följande kliniska fall visar på ett enkelt, men mycket framgångsrikt protokoll för cementering av litiumdisilikatkrona. Fig 1. Litiumdisilikatkrona efter inprovning och fluorvätesyraetsning av innerytan. Fig 2a. KATANA™ Cleaner appliceras inuti kronan för komplett avlägsanande av föroreningar; proteiner från blod och saliv, som kan kompromettera kvaliteten hos alla resincement. ELLER Fig 2b. Alternativt kan KATANA™ Cleaner appliceras på en blandningsbricka. Fig 3. KATANA™ Cleaner appliceras sedan på kronans inneryta. Fig 4. KATANA™ Cleaner appliceras på den preparerade tanden på samma sätt (gnugga under 10 sekunder, skölj sedan rent och torka). Fig 5. Applicering av PANAVIA™ SA Cement Universal i den rengjorda kronan. Fig 6. Cementet innehåller ett unikt silankopplingsmedel - LCSi-monomeren - för en stark och pålitlig bindning till litiumdisilikater och andra restorativa material, som glaskeramer och hybridkeramer. I blandningspetsen aktiveras silanet av Original MDP I blandningspetsen aktiveras silanet av Original MDP. Fig. 7. Cementöverskottet är enkelt att avlägsna efter två till fem sekunders punkthärdning. Fig 8. Cementöverskottet, som är i gelstadiet, avlägsnas med hjälp av en sond. SLUTRESULTAT Fig 9. Behandlingsresultat direkt efter cementering. Dentist: RICHARD YOUNG DDS KLINISKT FALL OCH BILDER MED TILLSTÅND AV RICHARD YOUNG DDS, SAN BERNADINO, CA