
Minimally invasive dentistry and digital workflow: Clinical application of the Flowable Injection Technique

Clinical case by Dr. Claudia Mazzitelli and Dr. Edoardo Mancuso


INTRODUCTION

Dental aesthetics are gaining increasing importance and require predictable, rapid, and affordable treatments. Minimally invasive dentistry favours direct restorations, which are now simplified by the evolution of flowable composites. Recent variants of flowable composites offer optical and mechanical characteristics equal or superior to those of paste-type composites. The evolution of flowable resins has led to widespread application using the flowable injection technique (FIT). In addition, the possibility of 3D printing an index for injection reduces operator-dependent variability, providing for high-level aesthetics.


CLINICAL CASE

A 24-year-old patient complained of an unattractive smile. After clinical and radiographic examinations, an aesthetic restoration using FIT was planned. A digital wax-up, created on the basis of intraoral scans (Trios 5, 3Shape), allowed for the design of a customised index or template, which was printed using transparent resin (IBT Flex Resin, Formlabs). After preparation and isolation, the teeth were sandblasted, etched, and a universal adhesive (CLEARFIL™ Universal Bond Quick 2) was applied and light-cured. Flowable composite (CLEARFIL MAJESTY™ ES Flow Low) was injected through the injection holes in the index, followed by thorough curing, finishing and polishing (TWIST™ DIA for Composite, all Kuraray Noritake Dental Inc.).


RESULTS

The treatment, completed in two hours, led to immediate and stable aesthetic improvement, confirmed during check-ups after one week and six months, with excellent gum health and restoration maintenance.


DISCUSSION

FIT offers predictable aesthetic results, a digital workflow option, and reduced clinical time compared to indirect restorations, while maintaining the possibility of future prosthetic treatments. The evolution of flowable composites and 3D-printed indexes has improved the accuracy of clinical transfer and reproducibility, allowing for rapid, conservative aesthetic solutions.


CLINICAL CASE

A 24-year-old male patient presented at our practice dissatisfied with the aesthetics of his smile, with an impact on his spontaneity and social life. After taking his medical and dental history, an interview was conducted to understand his aesthetic and functional expectations as well as financial possibilities.


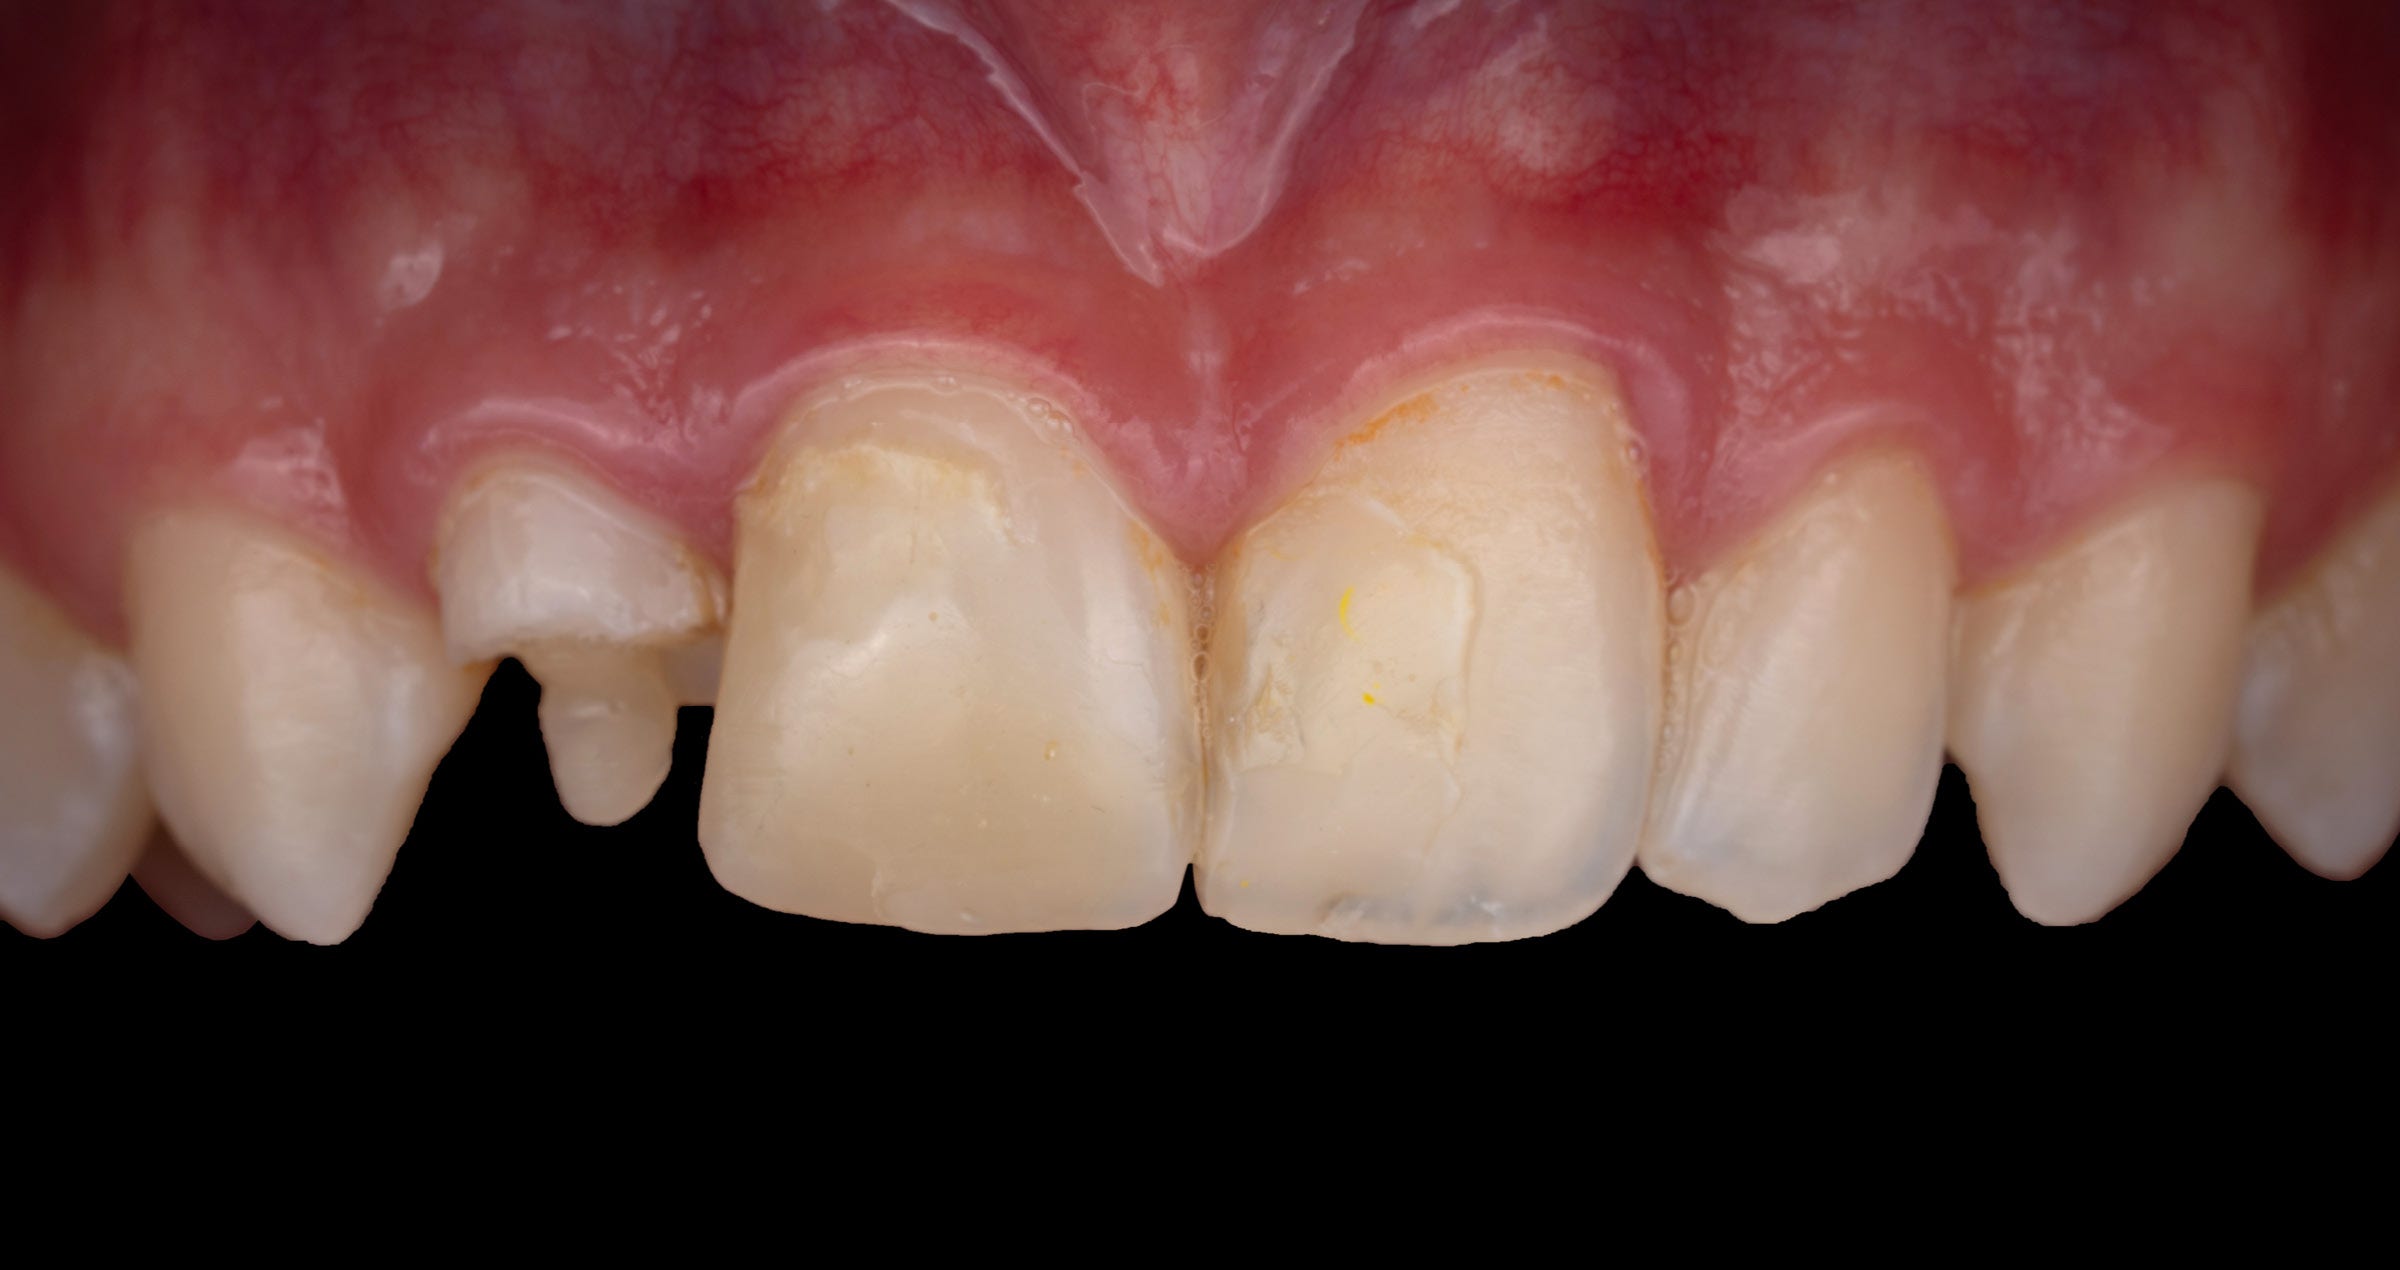
The clinical visual examination, accompanied by photographs, static and dynamic videos, periodontal analysis, and radiographs, revealed incongruous Class IV restorations on teeth 11 and 21 (FDI notation), with asymmetry of the anterior maxillary region  (Fig. 1). Aesthetic rehabilitation using the Flowable Injection Technique (FIT) extended to the six maxillary anterior teeth was therefore proposed.


Fig. 1. Initial clinical situation.


TREATMENT PLANNING

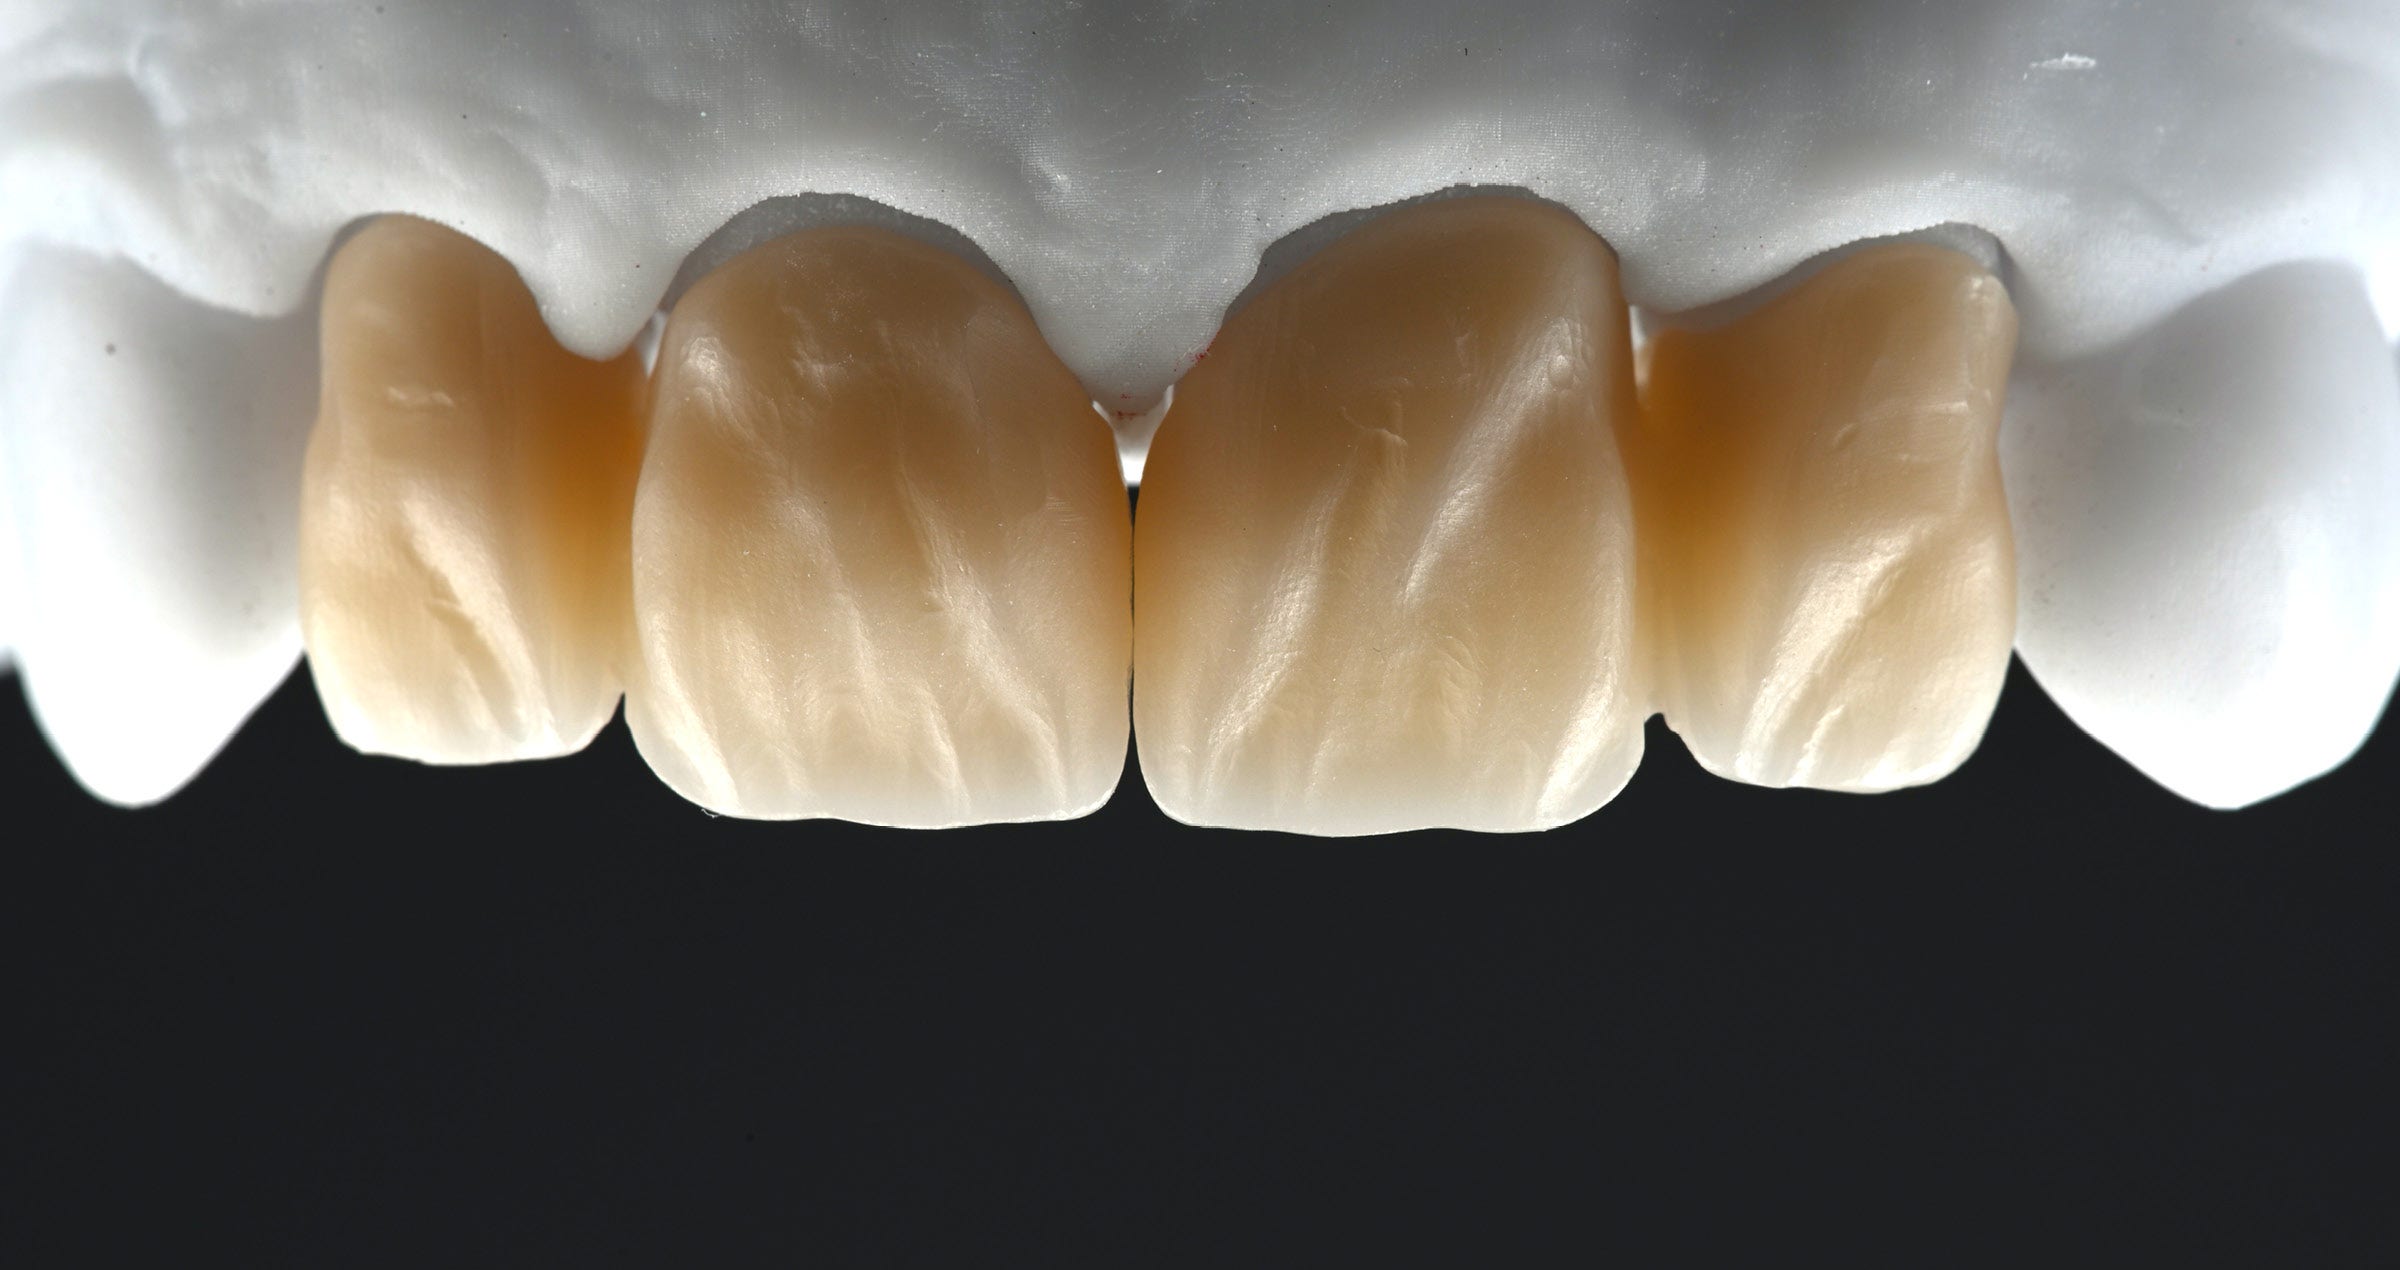
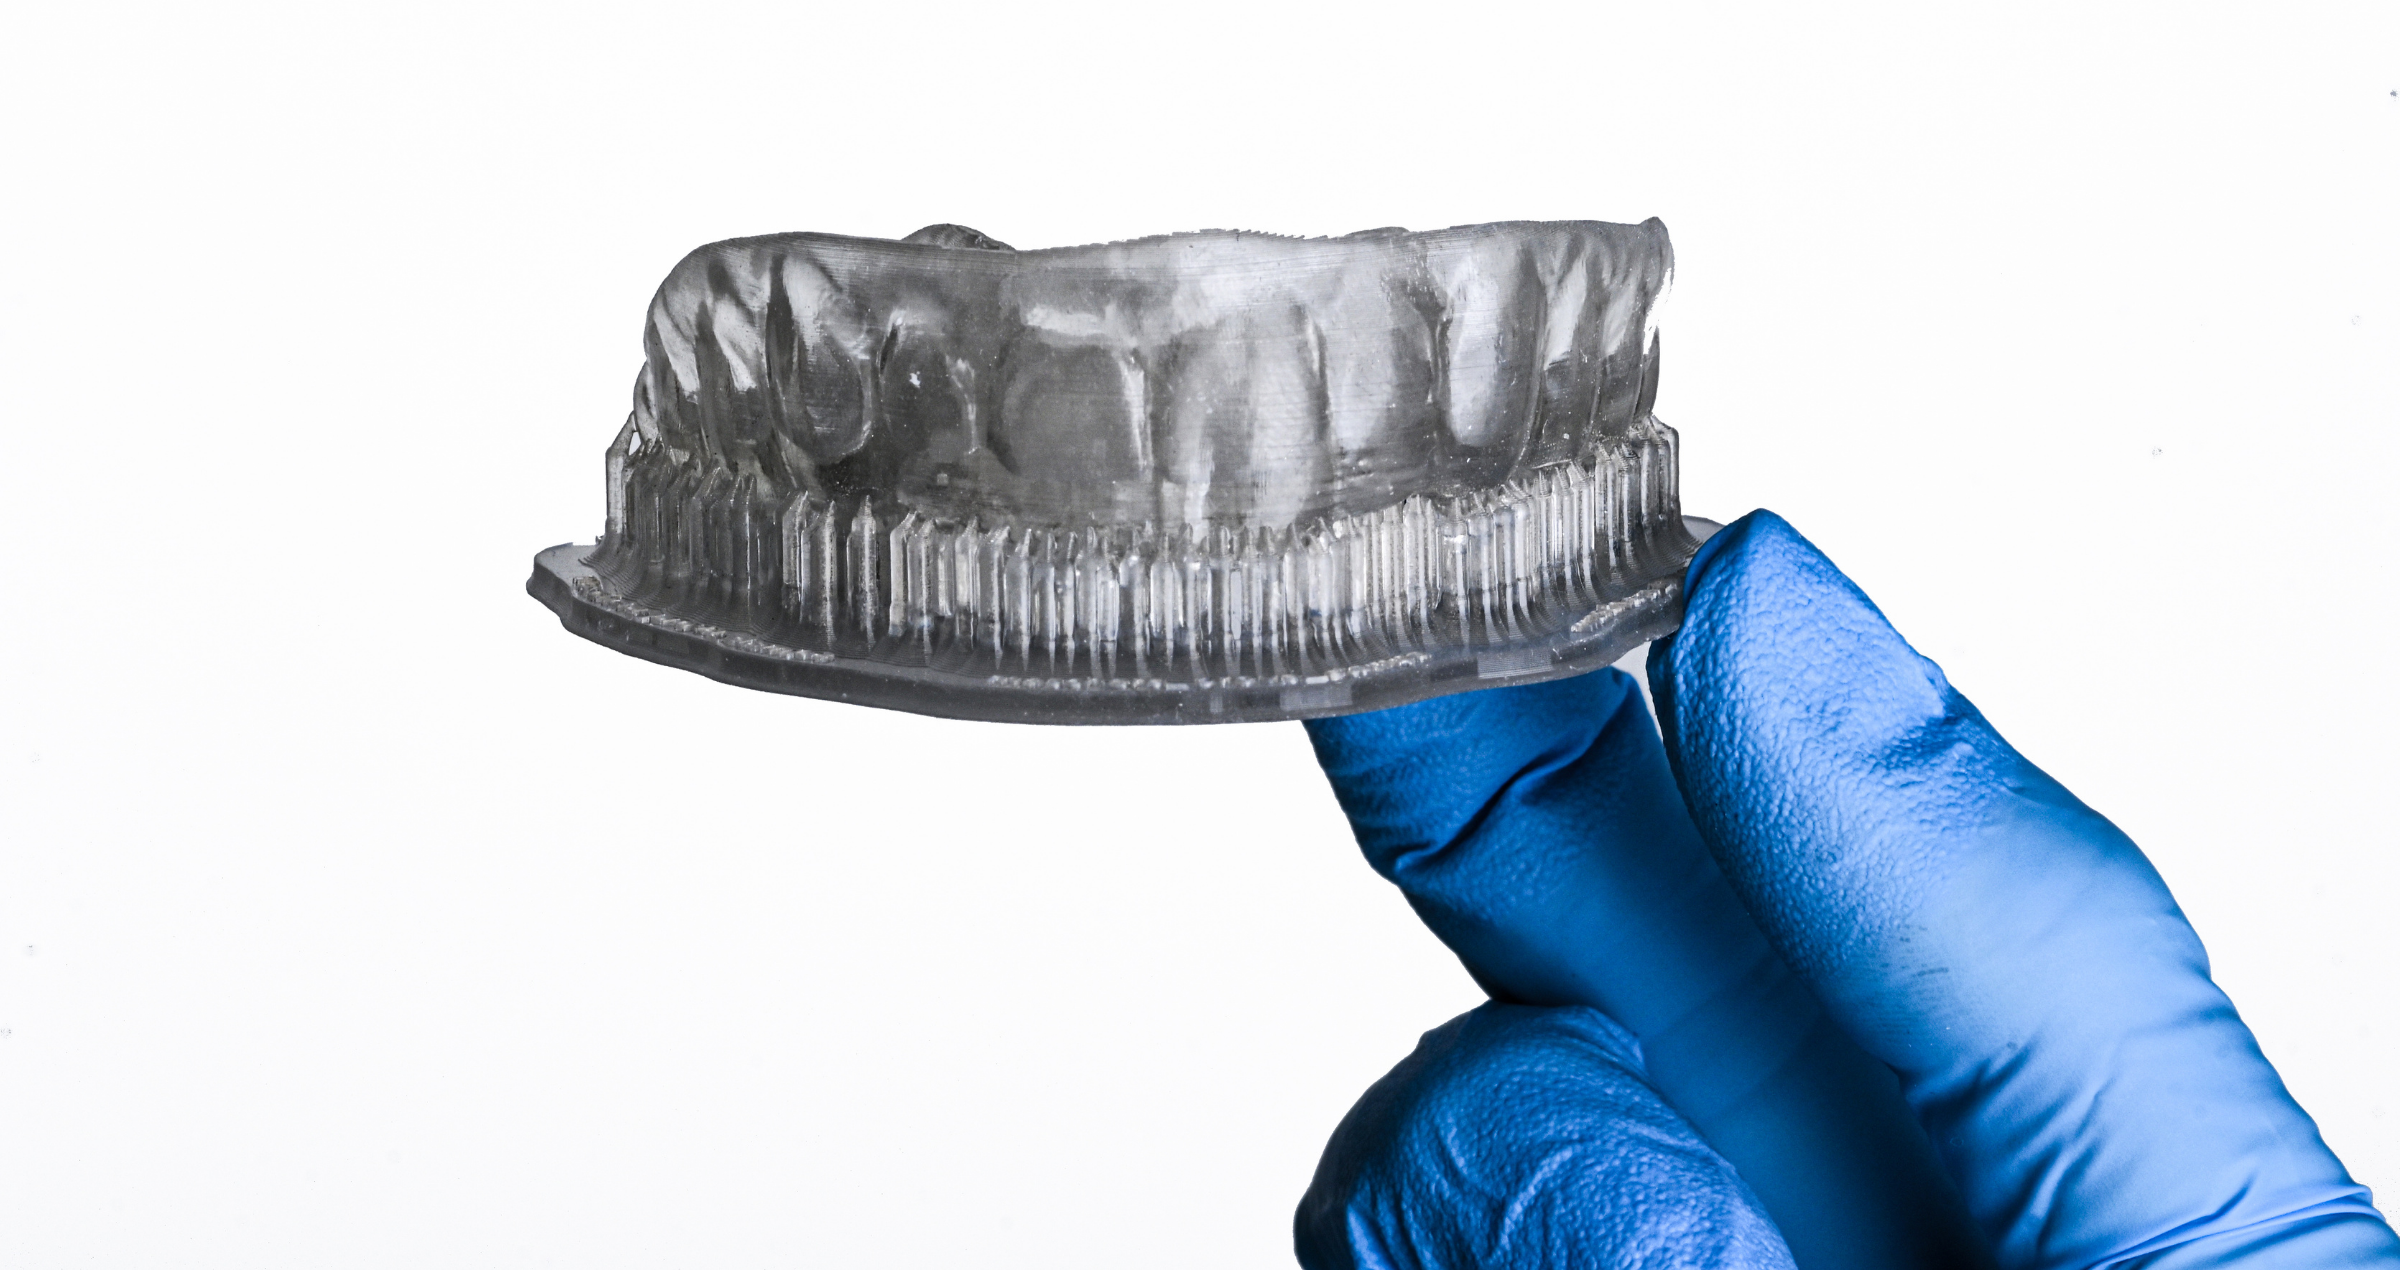
An intraoral scanner (Trios 5, 3Shape) was used for impression taking. The resulting digital model was used to create a digital wax-up, which then served as the basis for digitally designing an index for the injection of the flowable composite (Fig. 2). The index was printed in transparent resin (IBT Flex Resin, Formlabs) (Fig. 3). Once post-processing was complete, calibrated injection holes were integrated. They allow for insertion of the syringe tip and precise injection of the flowable composite (Fig. 4).


Fig. 2. Computer-aided index design.


Fig. 3. 3D-printed transparent index for composite injection.


Fig. 4. Injection holes integrated in the incisal areas of the index.


OPERATIVE PROCEDURE

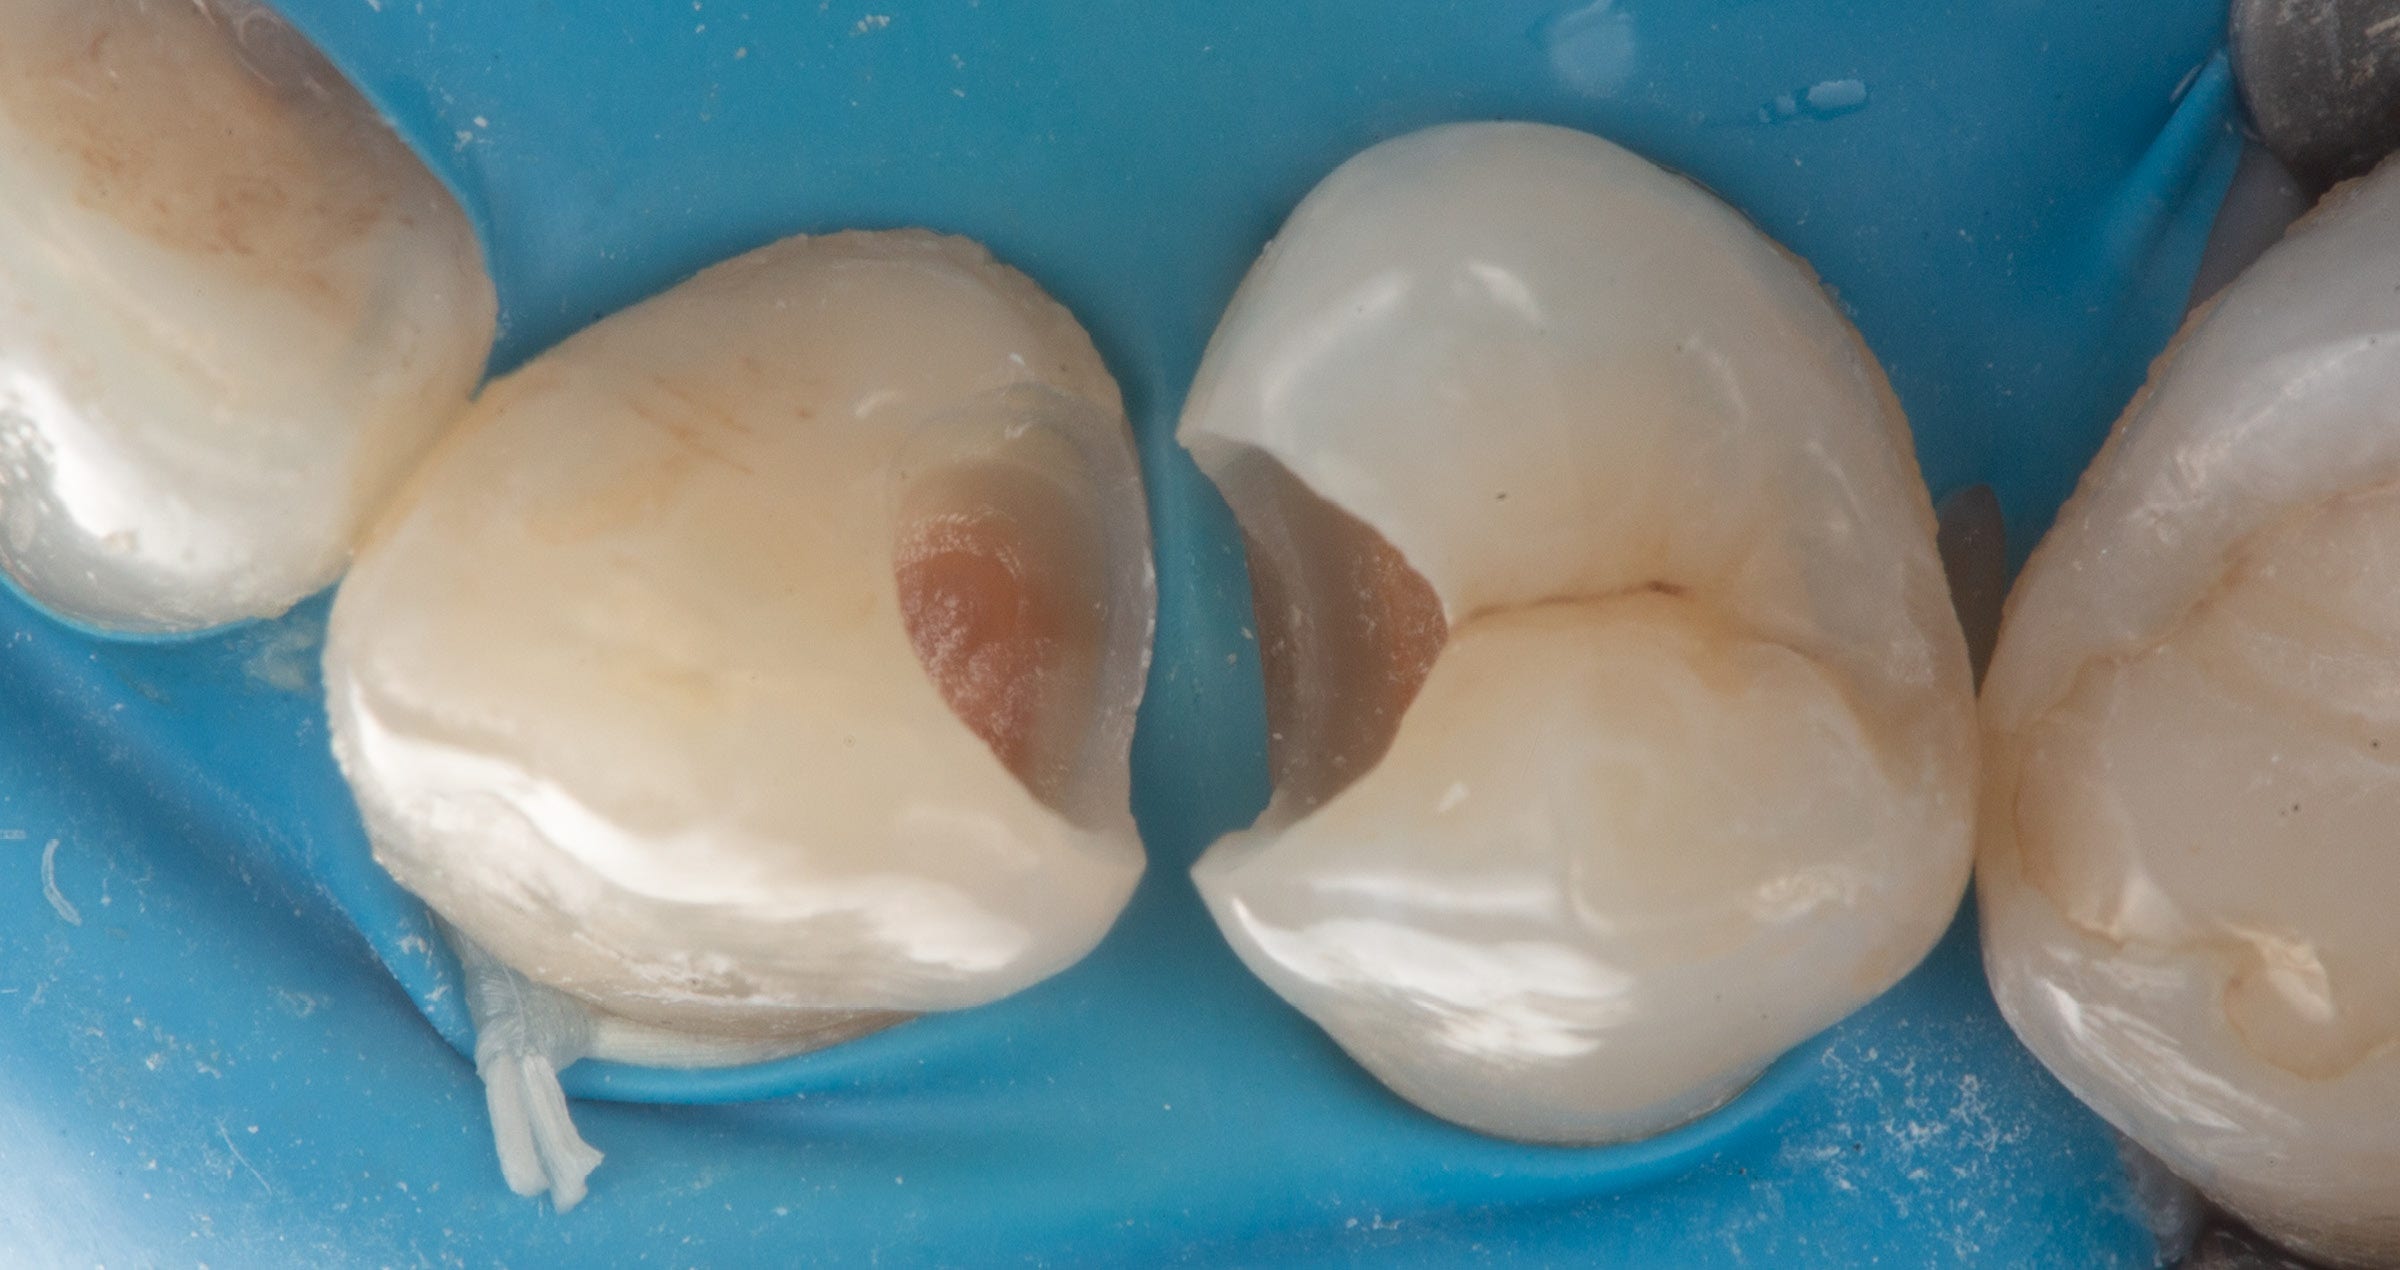
After obtaining informed consent from the patient, the old restorations on the maxillary central incisors were removed with diamond burs under irrigation. The margins were finished and bevelled (Fig. 5). The index was positioned on the upper arch and evaluated for stability and retention. To produce the restorations alternately, PTFE tape (0.076 mm) was applied to isolate the adjacent teeth. The surfaces of the teeth to be restored were sandblasted with aluminium oxide (50 µm), etched with 37 % orthophosphoric acid etchant for 15 seconds, rinsed, and dried (Fig. 6).


Fig. 5. Maxillary central incisors after restoration removal and bevelling of the margins.


Fig. 6. Etching of the tooth surfaces with orthophosphoric acid etchant.


A universal adhesive (CLEARFIL™ Universal Bond Quick 2, Kuraray Noritake Dental Inc.) was then applied (Fig. 7) and polymerized with an LED curing light (SmartLite® Pro, Dentsply Sirona) for 10 seconds per tooth (Fig. 8).


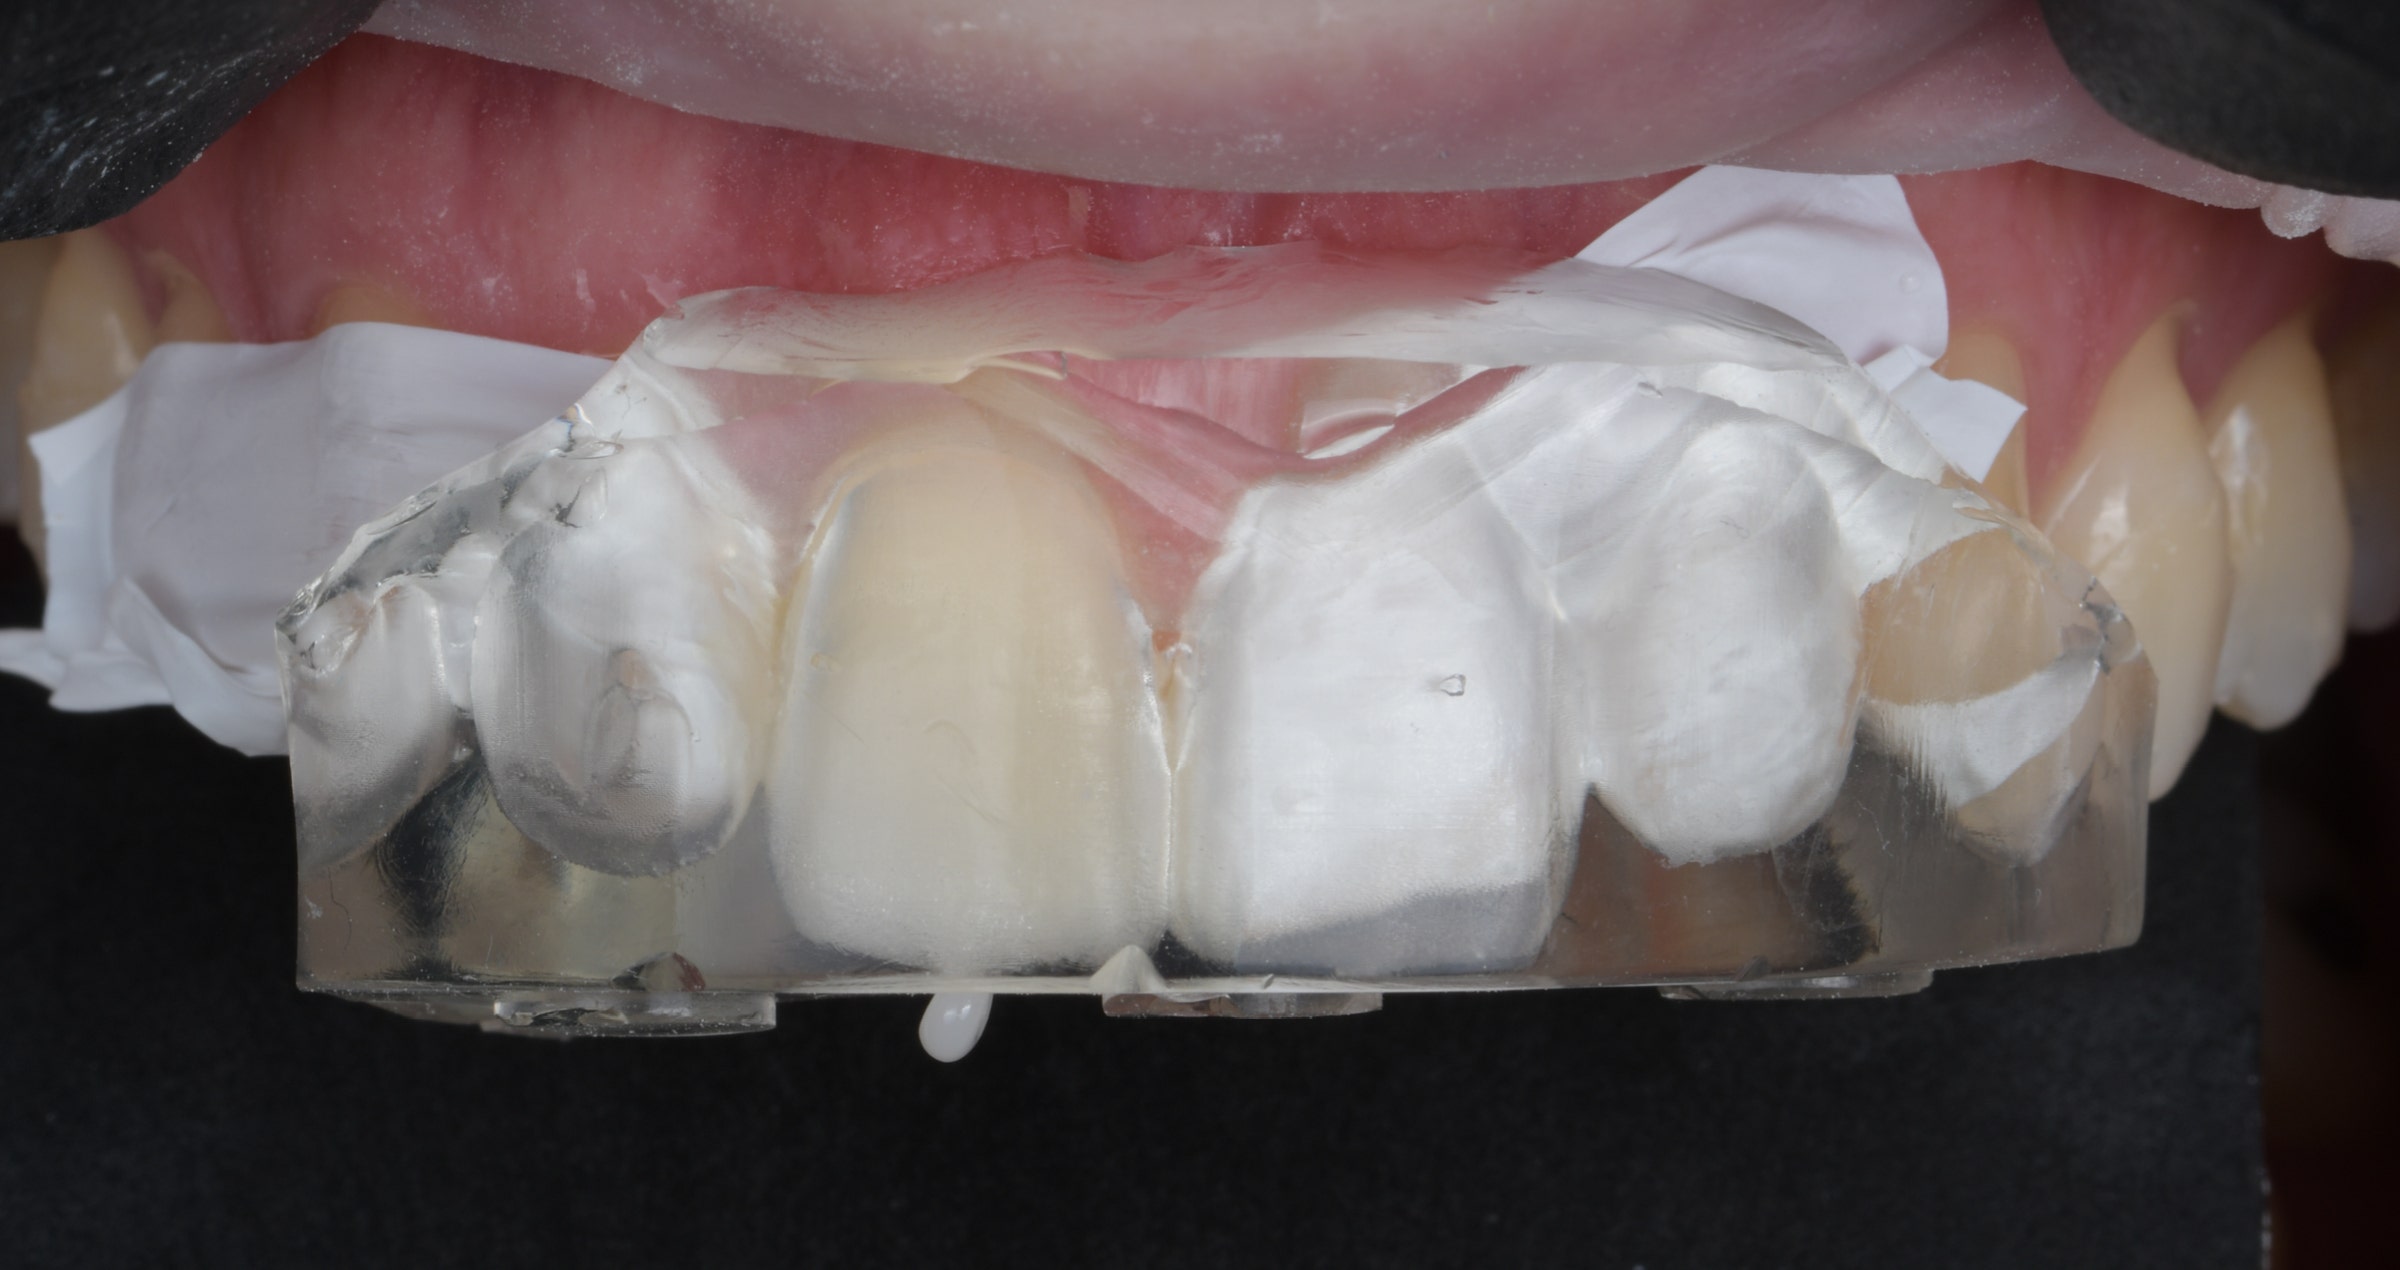
A flowable composite (CLEARFIL MAJESTY™ ES Flow Low, colour W, Kuraray Noritake Dental Inc.) was injected through the holes until the index of the first prepared tooth was filled (Fig. 9). After light-curing for 40 seconds per tooth through the transparent index, the template was removed and the restoration was light-cured for a second time. Excess composite was then removed with a scaler.


Fig. 7. Application of a universal adhesive.


Fig. 8. Light-curing of the adhesive layer.


Fig. 9. Flowable composite injection.


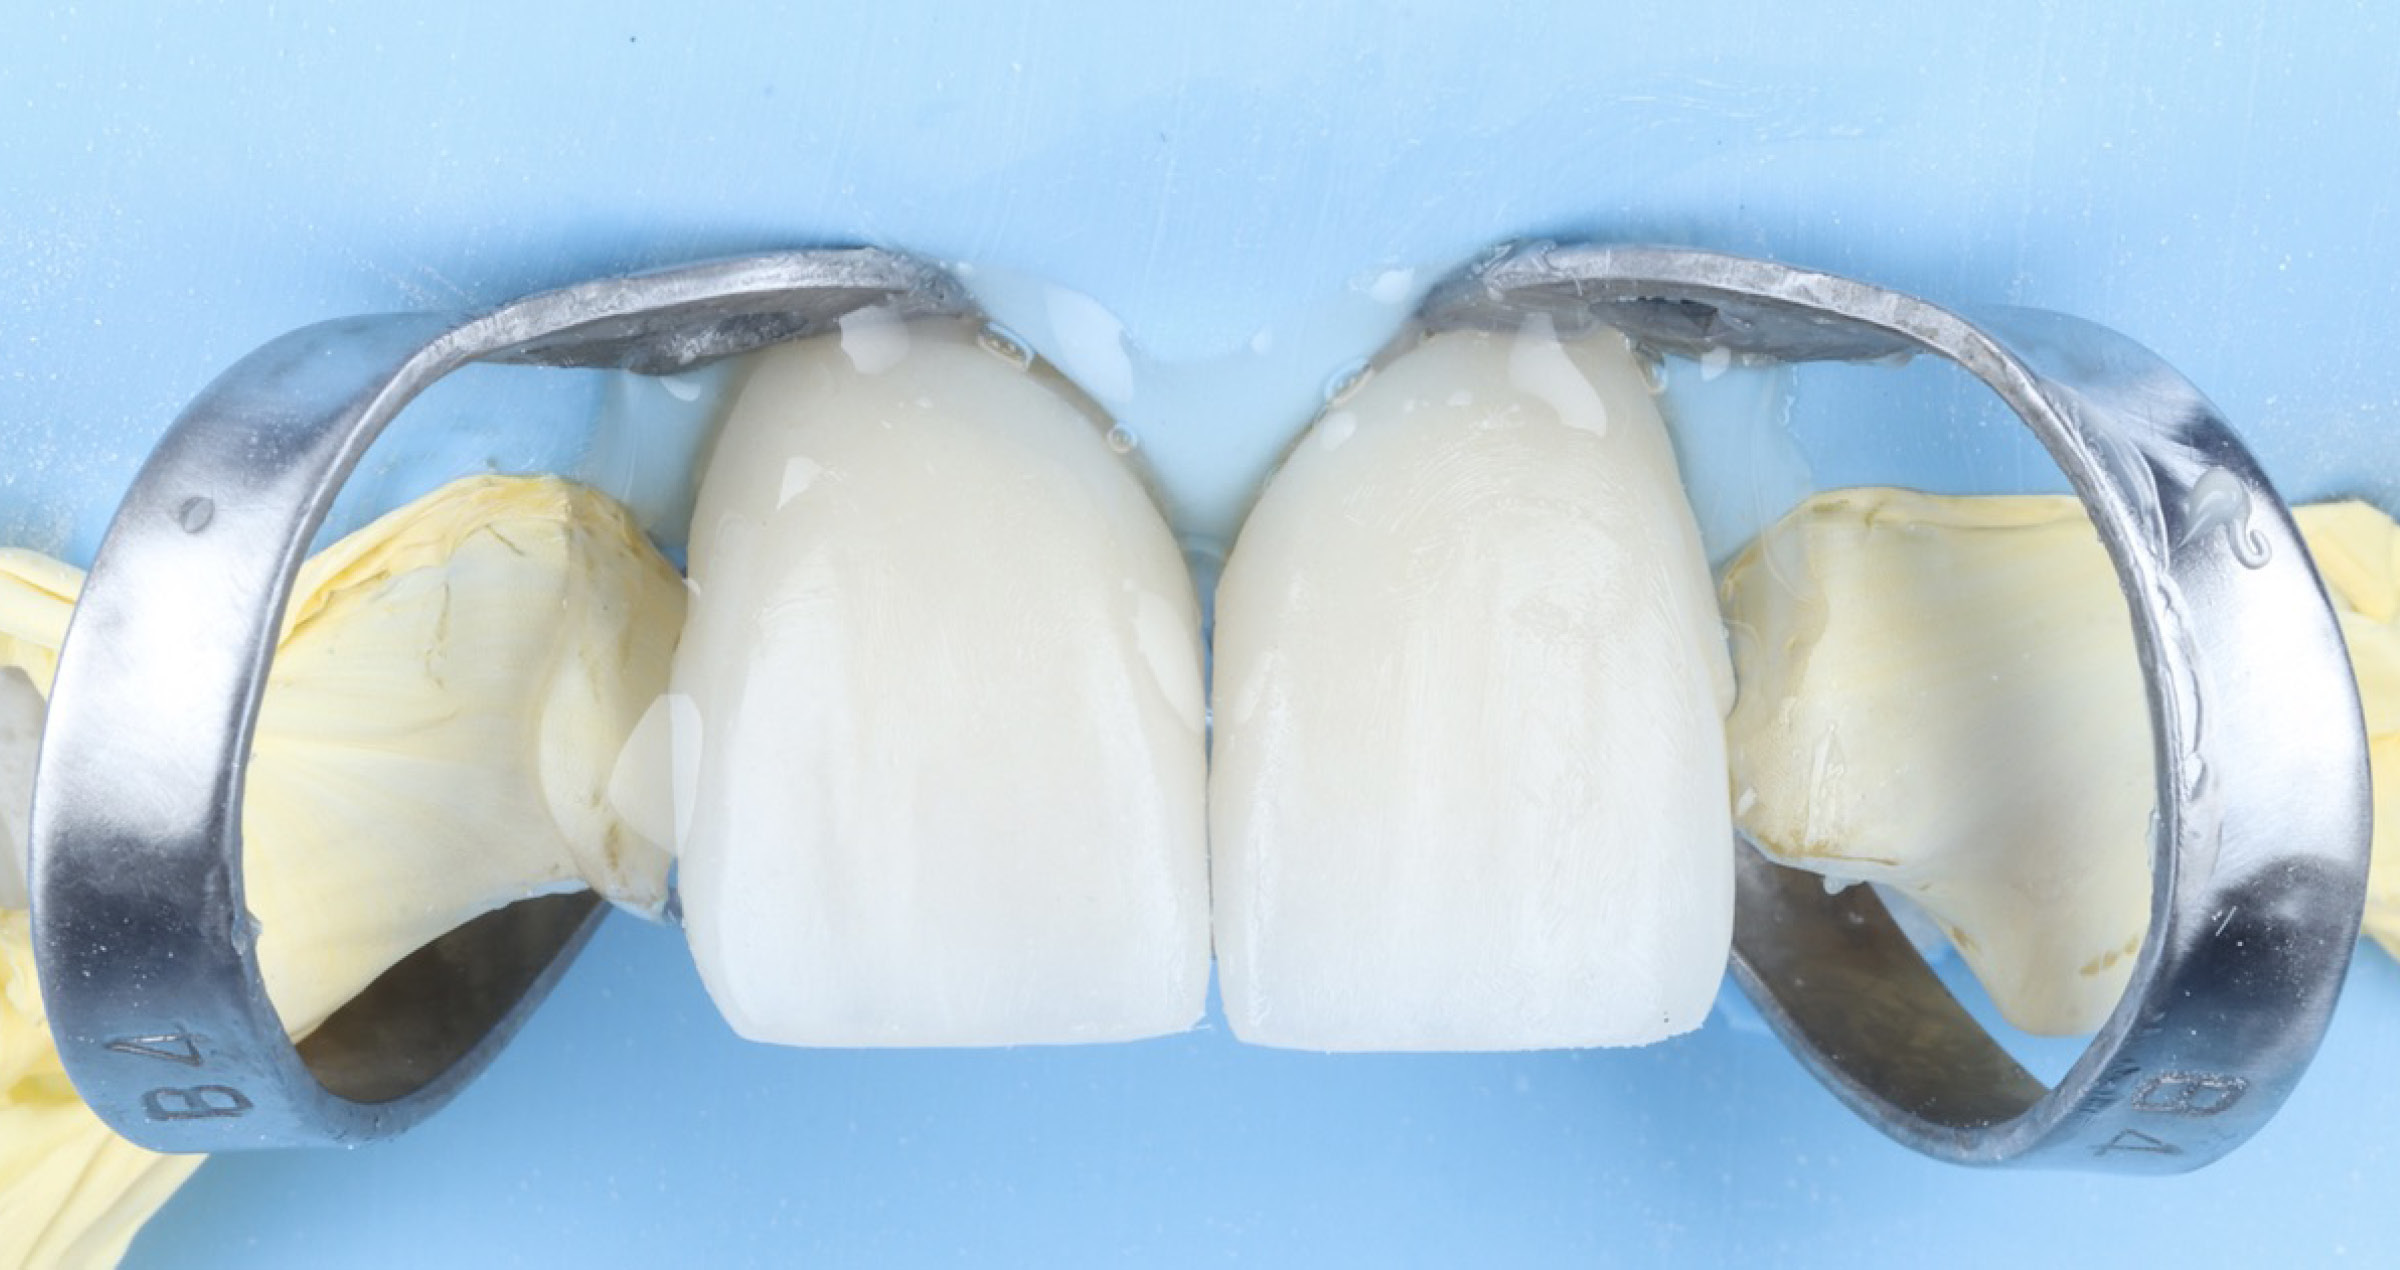
The same procedure was subsequently repeated for the other teeth to be treated, isolating those already restored using PTFE tape (Figs. 10 to 15).


Fig. 10. Restored teeth isolated with PTFE tape.


Fig. 11. Etching of the tooth structure with 37 % orthophosphoric acid etchant.


Fig. 12. Application of the universal adhesive.


Fig. 13. Light-curing of the adhesive layer.


Fig. 14. Injection of the flowable composite into the index.


Fig. 15. Light-curing of the flowable composite through the transparent index.


Once the index was removed and excess material was eliminated. Then, the teeth were isolated with rubber dam using the split dam technique to improve patient comfort and visibility, and the restorations were finished with fine-grained diamond burs. Finally, progressive polishing was performed with polishing discs  (TWIST™ DIA for Composite, Kuraray Noritake Dental Inc.) (Figs. 16 and 17).


Fig. 16. Polishing of the restorations with the pre-polisher.


Fig. 17. Final polishing with the high-gloss polisher.


CLINICAL RESULTS

Once the restorations were completed (Figs. 18 and 19) and the occlusal and dynamic contacts were checked, the patient expressed immediate satisfaction. This was confirmed at the one-week follow-up (Fig. 20). The rehabilitation took a total of two hours, including photographic documentation. This represents a rapid, minimally invasive and cost-effective treatment compared to indirect restorations.


Fig. 18. Treatment outcome.


Fig. 19. Detailed view of the freshly restored teeth.


Fig. 20. Post-operative photograph taken after one week.


The six-month check-up (Figs. 21 and 22) not only confirmed the survival of the restorations but also showed excellent gingival health, demonstrating the correctness of the emergence profile and the high polishability of the cervical margins obtained with this restorative technique.


Fig. 21. Restorations at the six-month recall.


Fig. 22. Optical integration of the new restorations into the overall picture.


DISCUSSION

The Flowable Injection Technique is now a valid alternative in the field of direct restoration, as it combines operational simplicity with predictable aesthetic results. The main advantage lies in the reduction of variability linked to the operator's manual skills, thanks to the guiding role of the index, which allows the digital design or initial wax-up to be transferred with high accuracy. The aesthetic outcome is therefore highly controllable, while the clinical approach complies with the principles of minimally invasive dentistry. Added to this is the efficiency of the method, which allows for shorter operating times and lower costs compared to rehabilitation with indirect restorations. At the same time, it maintains the possibility of a subsequent transition to more complex prosthetic solutions.


A key enabler of this approach is the evolution of flowable composites. The latest generation has overcome the historical limitations of fragility and wear, offering mechanical and optical characteristics comparable to, if not superior to, paste-type composite materials. This progress has made it possible to use flowable materials not only as a complementary support, but as the real protagonist of a restorative technique that aims to simplify clinical work and improve the predictability of results.


Furthermore, the development of 3D printing applied to the production of transparent indexes has introduced a further leap in quality. The digital workflow makes it possible to reduce manufacturing times, standardize procedures, achieve high reproducibility, and design customized templates based on intraoral scans. The accuracy of clinical transfer is thus significantly increased, with a positive impact on the quality and stability of the final restoration.


The synergy between high-performance flowable resins and 3D-printed digital index therefore offers clinicians the option of offering patients aesthetic solutions that are rapid, accessible, and at the same time adhere to the principles of modern conservative dentistry.


CONCLUSION

The Flowable Injection Technique, supported by the latest generation of flowable composites and the potential of 3D printing, represents a modern and effective restorative strategy. The clinical case presented highlights how it is possible to offer patients a satisfactory, rapid, and conservative aesthetic treatment, while keeping open the option of a future transition to indirect restorations.


By combining innovative materials and digital technologies, this technique marks a step forward towards increasingly predictable, accessible, and patient-centred cosmetic dentistry.


Powers JM. A predictable resin composite injection technique, Part I. Dent Today. 2014 Apr;33(4):96, 98-101.

Checchi V, Generali L, Corciolani L, Breschi L, Mazzitelli C, Maravic T. Wear and roughness analysis of two highly filled flowable composites. Odontology. 2025 Apr;113(2):724-733. doi: 10.1007/s10266-024-01013-0.

Liaropoulou YM, Jiménez AK, Chierico F, Blatz MB. The Multilayer Flowable Injection Technique for Highly Esthetic Restorations. J Esthet Restor Dent. 2025 Jun 27. doi: 10.1111/jerd.13500.

Watanabe K, Tanaka E, Kamoi K, Tichy A, Shiba T, Yonerakura K, Nakajima M, Han R, Hosaka K. A dual composite resin injection molding technique with 3D-printed flexible indices for biomimetic replacement of a missing mandibular lateral incisor. J Prosthodont Res. 2024 Oct 16;68(4):667-671. doi: 10.2186/jpr.JPR_D_23_00239.

Shui Y, Wu J, Luo T, Sun M, Yu H. Three dimensionally printed template with an interproximal isolation design guide consecutive closure of multiple diastema with injectable resin composite. J Esthet Restor Dent. 2024 Oct;36(10):1381-1387. doi: 10.1111/jerd.13268.

Hulac S, Kois JC. Managing the transition to a complex full mouth rehabilitation utilizing injectable composite. J Esthet Restor Dent. 2023 Jul;35(5):796-802. doi: 10.1111/jerd.13065.

Lawson NC, Greene Z, Machado N, Tadros D, Robles A, Rocha M. Resin Composite Depth of Cure Through Transparent Matrix Materials Used for Injection Molding. Oper Dent. 2025 Mar 1;50(2):185-193. doi: 10.2341/24-100-L.
 

”Universal excellence” -tuotteilla tehty takahampaiden suora yhdistelmämuovirestauraatio

Case by Dt. Koray Kendir, DDS, Turkey (İzmir)


TIIVISTELMÄ

Tässä kliinisessä tapausraportissa esitellään suoralla tekniikalla toteutettuja takahampaiden yhdistelmämuovirestauraatioita, joissa on hyödynnetty Kuraray Noritake Dental Inc. -yhtiön yleiskäyttöisiä “Universal Excellence” -tuotteita. Yleiskäyttöinen sidosaine (CLEARFIL™ Universal Bond Quick 2)  ja runsaasti täyteainetta sisältävä, yleiskäyttöistä sävyä oleva juokseva yhdistelmämuovi (CLEARFIL MAJESTY™ ES Flow Universal)  valittiin niiden helppokäyttöisyyden ja lopputuloksen ennakoitavuuden vuoksi. Artikkelissa kuvataan vaiheittainen kliininen prosessi, joka kattaa hampaiden eristyksen, kaviteetin preparoinnin, syvän marginaalisen reunan korotuksen, sidostusprotokollan sekä viimeistellyn restauraation.


TAPAUKSEN KUVAUS

38-vuotias naispotilas hakeutui vastaanotolle hampaidenvälisen ienverenvuodon sekä vasemman yläkulmahampaan ja ensimmäisen premolaarin (hampaat 23 ja 24) kylmänherkkyyden vuoksi. Kliinisessä tutkimuksessa todettiin hampaassa 23 sijaitsevan restauraation avoin marginaalisauma ja sekundaarikaries ienrajassa. Kofferdameristyksen jälkeen hoitotoimenpiteet toteutettiin vaiheittain seuraavasti:


KLIININEN TOIMENPIDE

Vaihe 1. Hampaassa 23 oli avoin marginaalisauma ja kariesvaurio (kuva 1).

Vaihe 2. Kariesleesiot poistettiin ienrajaan saakka kiilteen poistamisen jälkeen. Hampaan 24 leesion todettiin ulottuvan subgingivaalisesti eli ienrajan alapuolelle (kuva 2).

Vaihe 3. Karieksen täydellisen poiston ja kaviteetin viimeistelyn jälkeen varmistui, että hampaalle 24 oli suoritettava syvän marginaalireunan korotus (DME, deep margin elevation) (kuva 3).

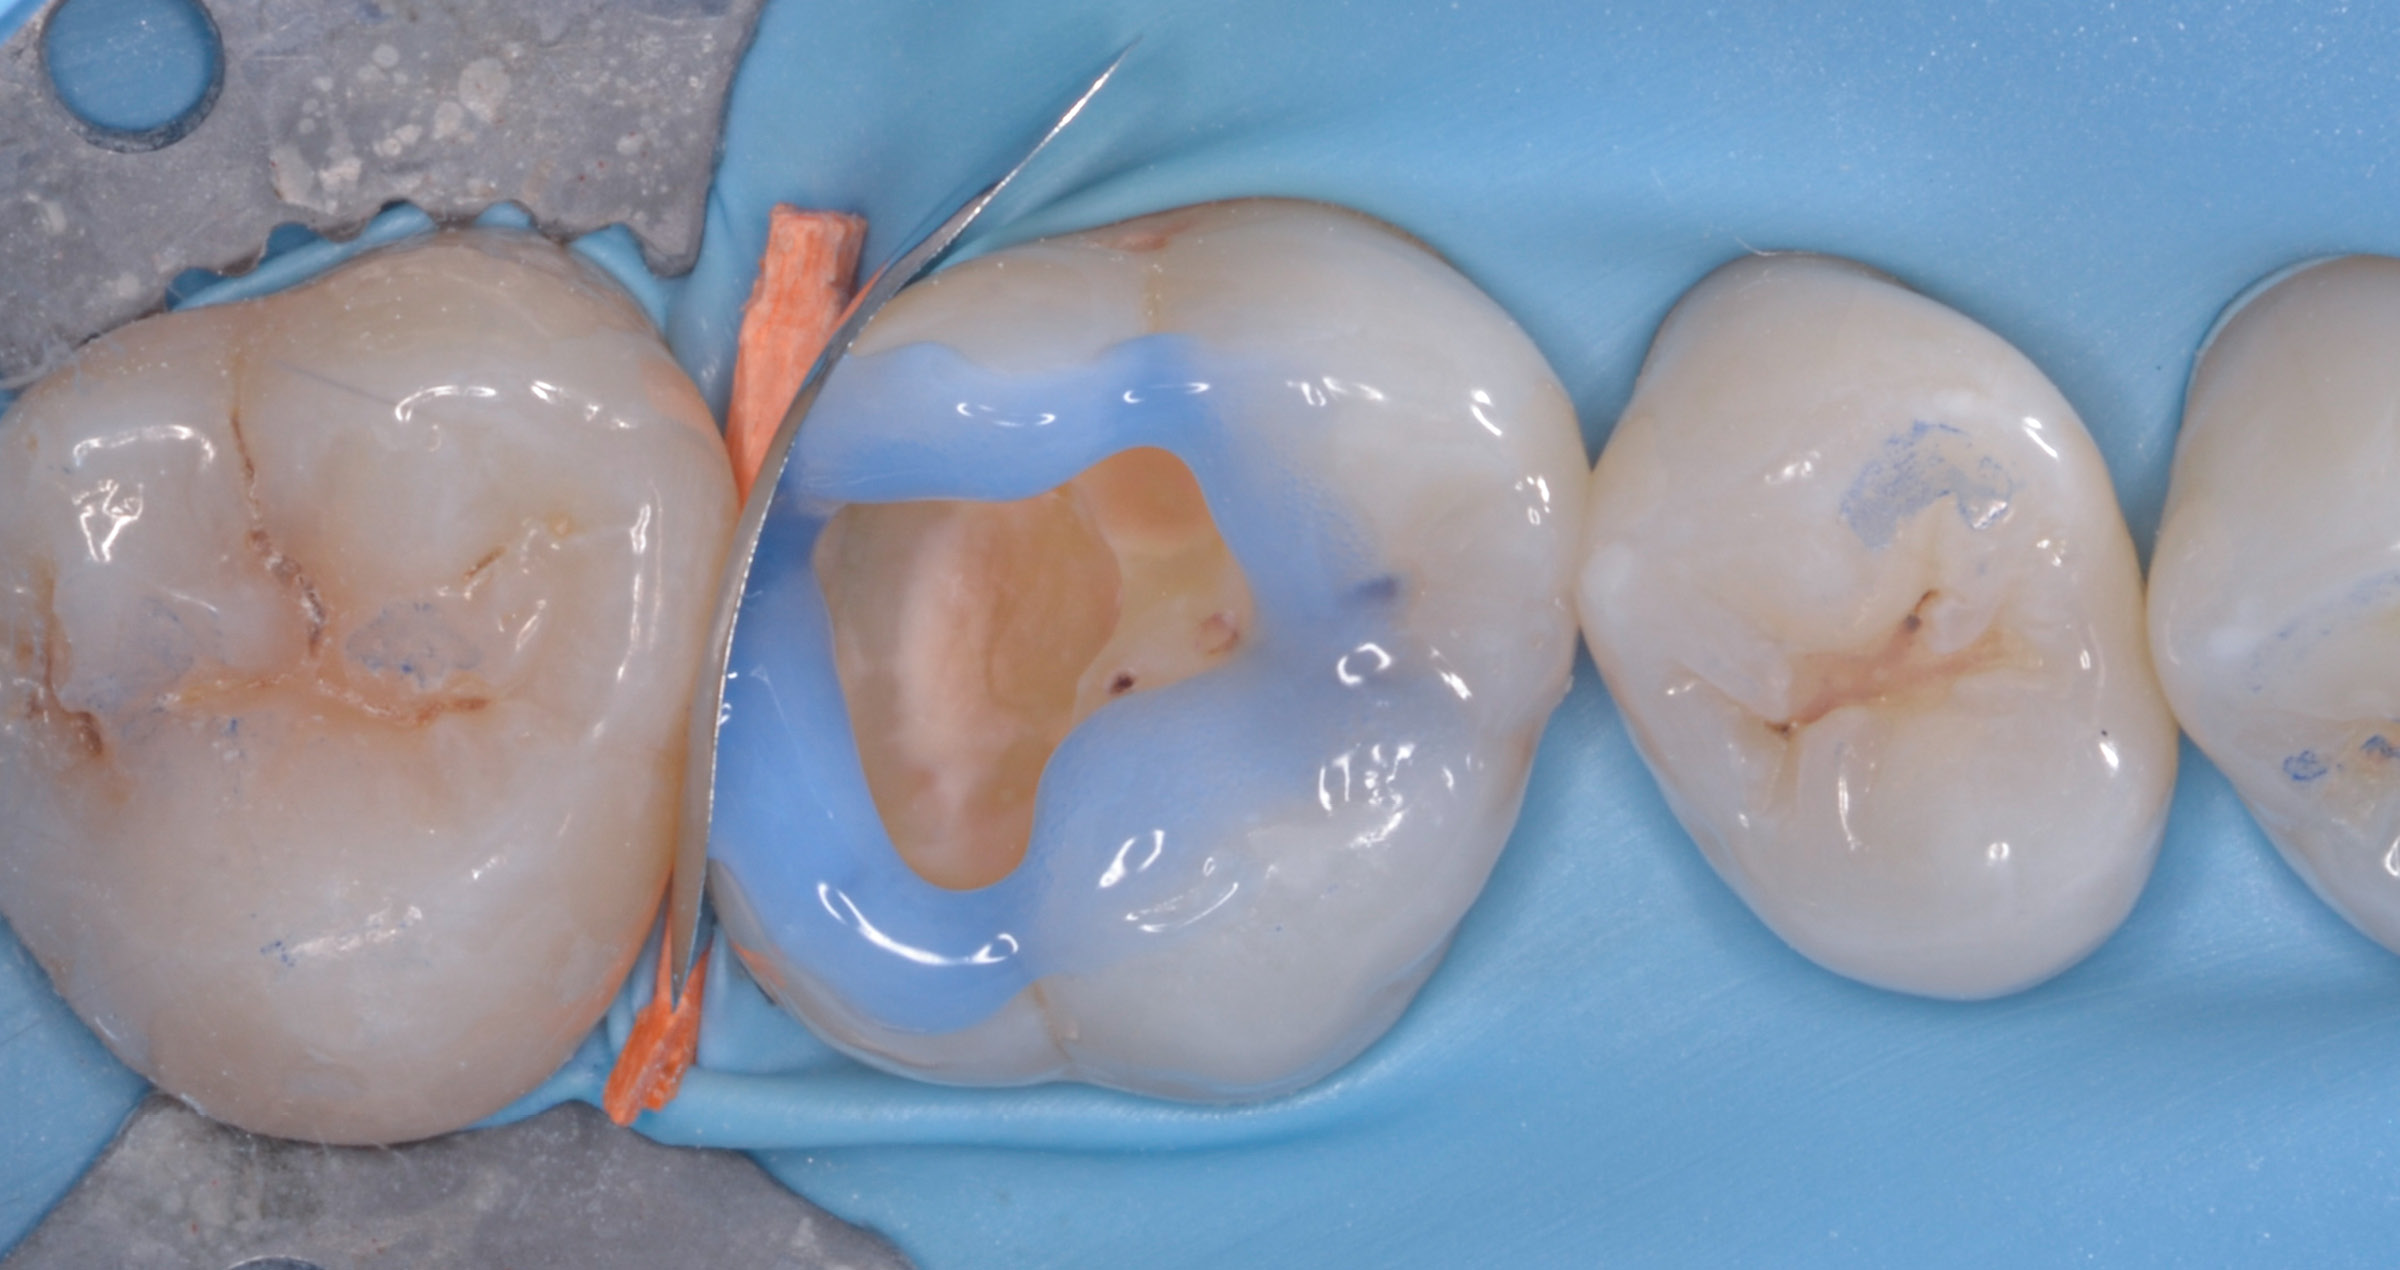
Vaihe 4. Hampaalle 24 tehtiin syvän marginaalisen rajan korotus tapausta varten tehdyn sektorikiilan avulla. Ensin pintaa etsattiin selektiivisesti, minkä jälkeen siihen levitettiin CLEARFIL™ Universal Bond Quick 2 -sidosainetta ja sitten CLEARFIL MAJESTY™ ES Flow Universal (Super Low)  -yhdistelmämuovia (kuvat 4–6).

Vaihe 5. Marginaalireunan korotuksen jälkeen hampaisiin asetettiin asianmukaiset matriisit, minkä jälkeen hampaiden 23 ja 24 suorat restauraatiot toteutettiin CLEARFIL MAJESTY™ ES Flow Universal (Super Low) -materiaalilla (kuvat 7–9). Materiaalin erinomaisen käsiteltävyyden, hampaaseen mukautuvan sävyn ja hyvän kiillotettavuuden ansiosta haastava syvän marginaalireunan korotus ja restauraation viimeistely oli helppo toteuttaa.

Hoitotulos näytetään kuvissa 10–11.


Kuva 1: Kuva toimenpidettä edeltävästä tilanteesta kofferdamkumieristyksen jälkeen


Kuva 2: Kliininen tilanne karieksen poiston jälkeen


Kuva 3: Viimeistellyt kaviteetit ja syvä marginaali välihampaassa


Kuva 4: Tapausta varten tehty kiila, joka valmistettiin marginaalireunan korottamista varten


Kuva 5: Bukkaalipuolelta kuvatut hampaat yleiskäyttöisillä tuotteilla tehdyn syvän marginaalireunan korotuksen jälkeen


Kuva 6: Hampaiden purupintanäkymä yleiskäyttöisillä tuotteilla tehdyn syvän marginaalireunan korotuksen jälkeen


Kuva 7: Sektorimatriisin asettaminen


Kuva 8: Bukkaalipuolelta kuvatut hampaat, joiden restauraatioissa on käytetty yleiskäyttöistä sävyä olevaa juoksevaa yhdistelmämuovia (erittäin alhainen juoksevuus)


Kuva 9: Purupintanäkymä hampaista, joiden restauraatioissa on käytetty yleiskäyttöistä sävyä olevaa juoksevaa yhdistelmämuovia


Kuva 10: Purupintanäkymä hampaiden 23 ja 24 valmiista restauraatioista, joista käy ilmi sävyn mukautuvuus, hampaiden anatomiset piirteet ja pintakiilto


Kuva 11: Bukkaalipuolen näkymä hampaiden 23 ja 24 valmiista restauraatioista, joista käy ilmi sävyn mukautuvuus, hampaiden anatomiset piirteet ja pintakiilto


POHDINTA

Universaalit sidosaineet ja nykyaikaiset juoksevat yhdistelmämuovit ovat vähemmän tekniikkaherkkiä, mikä sujuvoittaa taka-alueen suorien restauraatioiden toteuttamista kestävyydestä tinkimättä. Tässä tapauksessa CLEARFIL™ Universal Bond Quick 2 mahdollisti vahvan sidoslujuuden saavuttamisen erittäin lyhyellä applikointiajalla. Universaali yhdistelmämuovi osoittautui erinomaisesti mukautuvaksi ja kestäväksi materiaaliksi, jolla on poikkeuksellisen hyvät kiillotusominaisuudet. Huolimatta subgingivaalisesta marginaalista ja DME-toimenpiteen asettamista haasteista, kliininen prosessi oli suoraviivainen ja lopputulos laadukas.


JOHTOPÄÄTÖS

CLEARFIL™ Universal Bond Quick 2 yhdessä CLEARFIL MAJESTY™ ES Flow Universal -materiaalin kanssa auttaa hammaslääkäreitä tekemään ennakoitavampia taka-alueen restauraatioita entistä tehokkaammin. Universaalit ja helposti käsiteltävät materiaalit ovat ”Universal Excellence” -konseptin mukaisia, jonka tarkoituksena on auttaa hammaslääkäreitä luomaan laadukkaita restauraatioita helpommin.


Etiikka ja eturistiriidat

Kaikki toimenpiteet suoritettiin yleisten hammaslääketieteen käytäntöjen mukaisesti. Potilas on antanut tietoon perustuvan suostumuksensa hoitoa ja anonymisoitujen kliinisten kuvien julkaisua varten. Kirjoittaja tekee yhteistyötä Kuraray Noritake Dental Inc. -yhtiön kanssa neuvonantajan ominaisuudessa. Sisältö perustuu kliiniseen kokemukseen.


Dentist:

KORAY KENDIR


Koray Kendir on valmistunut Hacettepen yliopiston hammaslääketieteen tiedekunnasta. Kendir on yksi İzmirissä sijaitsevan yksityisen hammasklinikan perustajajäsenistä. Hän on erikoistunut digitaaliseen hammashoitoon, hymyn suunnitteluun ja tietokoneavusteisiin restauraatiohoitoihin. Innovatiivisesta lähestymistavastaan tunnettu Kendir eluennoi säännöllisesti kansallisissa hammaslääketieteen kongresseissa ja toimii useiden hammasalan yritysten neuvonantajana.

Biomimetics versus patient demands - finding the perfect balance

INTRODUCTION

Patient demands and expectations have never been as concrete as in this day and age: Influenced by role models on social media and new aesthetic standards, our patients ask for brighter smiles or for restorations with specific tooth forms rather than demanding a perfect copy of nature. For us dental technicians, the challenge lies in finding a perfect balance between fulfilling these demands and respecting established biomimetics-inspired principles of aesthetics and function.


To accomplish this task, we need to know which principles need to be respected and where there is room for creativity. At the same time, it is essential to be well-informed about the latest technological advancements and developments in dental materials to be able to select the most appropriate restorative approaches. Only by understanding the selected materials and technological tools very well, will we be able to exploit their potential and deliver the best possible restorative solution. To sum up, we need to keep one foot in the boat of science and the other in the boat of art. Only by balancing both can we navigate the rapid advancements in the field effectively - ensuring they serve patients’ best interests while avoiding practices that lack purpose or meaning.


The challenge lies in finding a perfect balance between fulfilling the patient‘s demands and respecting established biomimetics-inspired principles of aesthetics and function.


MATERIAL CHOICES

Our favored framework materials for the production of aesthetic anterior restorations include KATANA™ Zirconia UTML, KATANA™ Zirconia STML discs (both Kuraray Noritake Dental Inc.) and lithium disilicate-based press ingots Amber® Press (HASS). These high-strength ceramics are ideal for fulfilling the aesthetic and functional demands of anterior restorations. Their balanced optical properties allow for the creation of lifelike restorations. Their physical and mechanical properties, on the other hand, are responsible for stability during all clinical steps from try-in to permanent placement, proven bonding ability and a certain error tolerance: Minor adjustments or modifications are possible without the risk of inducing cracks or dimensional changes when firing repeatedly. Finally, both materials are digital workflow compatible, which means that procedures are quick, mock-up, temporary restoration and definitive restoration easily aligned, and remakes facilitated.


The restorations are usually designed in full contour; a labial cutback of 0.3 to 0.5 mm creates sufficient space for the veneering porcelain. The preferred layering approach is micro-layering combined with the internal live stain technique, which offers the benefits of a controlled procedure and predictable, highly aesthetic outcomes with brilliant depth effects in short time. A layering material that precisely meets our needs regarding the preferred approach and is perfectly compatible with both, lithium disilicate and zirconia, is CERABIEN™ MiLai (Kuraray Noritake Dental Inc.).


The following two case reports are used to illustrate how this material combines with the different framework materials, revealing further benefits of the selected ceramics and techniques.


CASE #01


LITHIUM DISILICATE VENEERS

This 36-year-old female patient wanted to replace her bonded composite veneers. She expressed the demand for a brighter smile with a bleached color (NW 0.5) selected for her six maxillary anterior teeth and first premolars. However, she wanted the tooth preparation for this treatment to be as minimally invasive as possible.


In addition, she specifically requested that the teeth be square in form, with the lateral incisors the same length as the central incisors and the incisal edges straight, without rounded corners – clearly influenced by modern aesthetic standards. We explained our concerns regarding potential aesthetic and functional issues that might necessitate further intervention or adjustments, but she remained firm in her choices.


FROM DESIGN TO PRESSED FRAMEWORK


In line with the patient’s demands, it was planned to restore her maxillary teeth from first premolar to first premolar with lithium disilicate veneers (Amber® Press HT in the shade W2), which would allow for the desired minimally invasive preparations and bright appearance. Following tooth preparation, an analog impression was taken and sent to our laboratory. After the production of the model, the case was digitalized for the virtual designing of the veneers. In order to create space for the porcelain, the labial surfaces of the full-contour restorations were reduced by 0.3 mm with the software (exocad® DentalCAD, Figs. 1 and 2).


The frameworks were then milled in wax and pressed in Amber® Press HT W2 (Figs. 3 and 4). Sprues were cut and the surfaces of the veneer frameworks processed with a Diagen-Turbo-Grinder Ø 3,5 x 11 mm Cone and Wheel.


Would you like to continue reading as a PDF? Please leave your email address below.


Glass Ceramic Veneer Cementation

By Dr Wiktor Pietraszewski BSC(HONS) DMD


INTRODUCTION

According to personal experience, the cementation of glass ceramic veneers is one of the most stressful and technique-sensitive procedures in restorative dentistry. This is not only due to the minimal margin for error, but also the high aesthetic standards that must be met to deliver a result satisfying both clinician and patient. Modern protocols emphasize conservative preparation, ideally remaining entirely within enamel, or at the very least, minimising extension into dentin. It is essential to understand that both preparation design and extent should not be planned in isolation. Instead, they must be carefully co-planned through thorough communication and collaboration between clinician and technician, ensuring the final result is both biologically respectful and aesthetically predictable.


THE CASE

The case to be discussed today is rather unique in that it arose unexpectedly, without the luxury of typical pretreatment planning steps such as a diagnostic wax-up or mock-up. These were omitted due to time and budget constraints on the patient’s part — a reality many clinicians can relate to. The rationale behind this approach will become clearer as we progress through the case. The patient is a 70-year-old retiree, whom I have been managing for several years. Treatment thus far has focused on stabilising and gradually improving her posterior restorations, with the longer-term aim of addressing the anterior dentition to enhance both function and aesthetics.


Nowadays, financial considerations often pose a significant barrier to patients accepting comprehensive treatment plans from the outset. As such, effective communication and phased treatment planning become essential tools in fostering patient trust and long-term commitment. This particular visit was an emergency appointment, with the patient presenting with a fractured porcelain veneer on her maxillary left central incisor — tooth 21 according to the FDI notation (Fig. 1). Fortunately, because of the existing phased approach to her care, we were well-positioned to transition into an aesthetic restorative phase with minimal resistance or hesitation from the patient.


Fig. 1. Pre-operative view - emergency: Chipped existing ceramic veneer.


Fig. 2. The plan - Digital Smile Design - 4 x porcelain veneers - 4 x direct composite restorations.


THE PLAN

After careful discussion, it was decided to remove and replace the four existing porcelain veneers and to replace four existing Class V stained composite restorations with fresh new direct composite (Fig. 2). Everyone involved was happy with the plan, sure it would adequately fulfil the patient’s aesthetic expectations and even surpass them. At the emergency appointment, time was so limited that only the temporary restoration of the chip with direct composite was feasible. Time was an important factor going forward: the patient wanted to proceed and have the case completed as soon as possible.


Main features of the Digital Smile Design (DSD) plan

1. Lengthening - central incisors – incisal edges to reflect the length of the canine tips
2. Equal gingival zeniths
3. Masking of the cervical defects


PREPARATION, SCAN & TEMPORISATION

The first step involved building up the teeth using a flowable composite to create a rough direct mock-up (Fig. 3), guided by the DSD plan (Fig. 2). This mock-up provided a visual and functional prototype, of which an impression was taken to aid in the fabrication of interim temporary restorations for the provisional phase of treatment.


Preparations were carried out using OptraGate isolation. The existing veneers were first removed using high-grit diamond burs at high speed. Once the bulk of the old material was cleared, gingival retraction was achieved using retraction cord, allowing for improved visibility and access. The preparations were then refined with lower-grit diamond burs at a reduced speed to ensure precision and tissue safety. The primary objectives of the preparation phase were to establish harmonious gingival zeniths and to adequately cover the cervical defects that were evident in the previous restorations (Figs. 4 and 5).


Fig. 3. Mock-up made of flowable composite.


Fig. 4. Class V composite restorations replaced on teeth 13, 23, 24 and 25.


Fig. 5. Situation after preparation of the maxillary incisors.


Would you like to continue reading as a PDF? Please leave your email address below.


Treatment of a fractured and secondary carious permanent molar tooth

Case report by Dr Mediha Isikver


Tooth fractures and secondary caries are frequently observed in posterior teeth, often resulting from occlusal stress, restoration failure, or secondary bacterial infiltration. These conditions compromise tooth integrity, function, and aesthetics. With advancements in adhesive dentistry, minimally invasive and durable restorative solutions have become achievable. Material selection plays a critical role in the success of composite restorations, influencing marginal adaptation, wear resistance, and patient satisfaction. This case report describes the step-by-step clinical management of a fractured and secondary carious permanent molar restored using materials from Kuraray Noritake Dental Inc.


CASE PRESENTATION

A 32-year-old female patient presented to the clinic with sensitivity and discomfort in the upper left posterior region. Clinical examination revealed a distal wall fracture on tooth #26 (maxillary left first molar) with a secondary carious lesion extending subgingivally. Radiographic evaluation confirmed the absence of periapical pathology. Adjacent teeth (#25 and #27) showed early carious activity, but the patient opted for the restoration of tooth #26 only. The tooth was asymptomatic to percussion and showed normal vitality on pulp testing.


Fig. 1. Initial clinical view of tooth #26 under rubber dam isolation.


TREATMENT PROTOCOL

  1. Isolation and caries removal: The tooth was isolated with rubber dam. The existing defective restoration and carious tissue were carefully removed using tungsten carbide burs and a slow-speed handpiece.
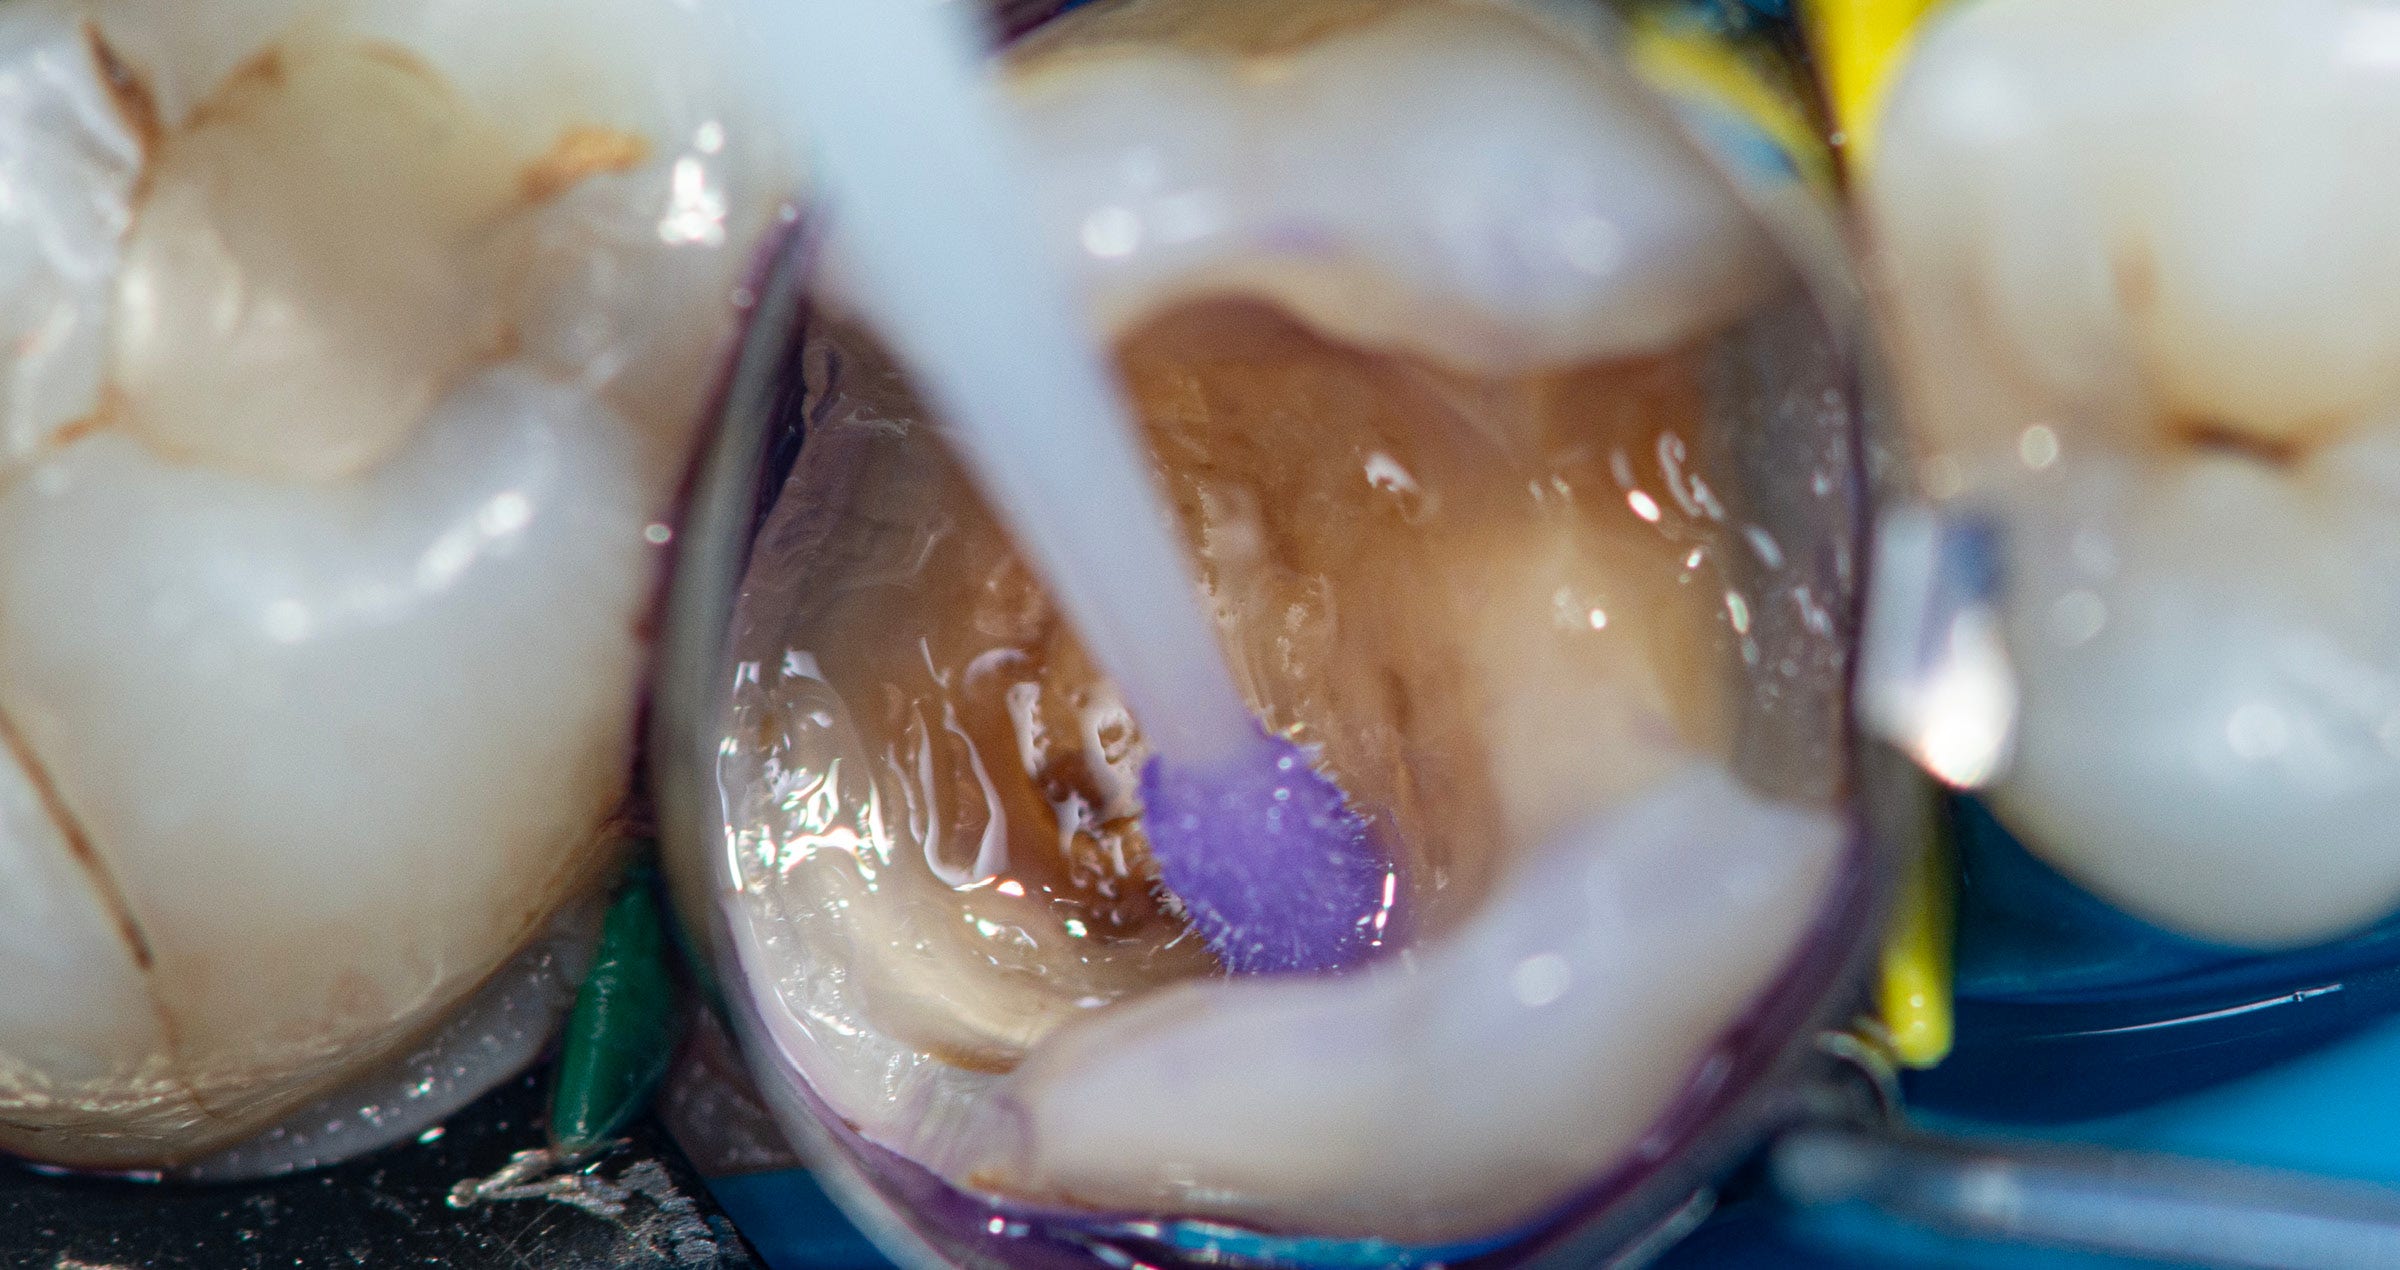
  2. Surface cleaning: After preparation, KATANA™ Cleaner was applied to remove contaminants and optimize bonding surface quality.
  3. Bonding procedure: A single-step, self-etch adhesive, CLEARFIL™ Universal Bond Quick 2, was applied to both enamel and dentin following the protocol recommended by the manufacturer.
  4. Restorative phase: The deep and undercut areas were resin coated with CLEARFIL MAJESTY™ ES Flow Universal Low (U shade), ensuring adaptation and stress relief in undercut regions. The remaining cavity was restored incrementally using CLEARFIL MAJESTY™ ES-2 Universal (U shade) paste-type composite, with each 2 mm layer light-cured for 20 seconds.


Fig. 2. Clinical view of tooth #26 after removal of the defective restoration and carious tissue.


Fig. 3. Application of KATANA™ Cleaner to remove contaminants and optimize bonding surface quality after preparation.


Fig. 4. Selective enamel etching performed on tooth #26.


Fig. 5. CLEARFIL™ Universal Bond Quick 2 applied to both enamel and dentin following the manufacturer’s recommended protocol.


Fig. 6. Resin coating with CLEARFIL MAJESTY™ ES Flow Universal Low (U shade).


Fig. 7. Reconstruction of the mesial and distal walls with CLEARFIL MAJESTY™ ES-2 Universal (U shade) composite.


Fig. 8. Incremental build-up of cusps and occlusal anatomy using CLEARFIL MAJESTY™ ES-2 Universal composite, refined with a brush for contour adjustment.


Fig. 9. Initial finishing of the composite restoration performed with darkcoloured TWIST™ DIA for Composite (medium) rubber points to refine surface texture and anatomy.


Fig. 10. Final polishing performed with light-coloured TWIST™ DIA for Composite (fine) rubber points to achieve a highgloss, smooth surface.


FINAL SITUATION


Fig. 11. Final view of the restoration after occlusal adjustment and polishing.


CONCLUSION

This case demonstrates that adhesive and restorative systems from Kuraray Noritake Dental Inc. offer a reliable, efficient and effective approach for treating fractured and secondary carious posterior teeth. The integration of self-etch adhesives and high performance composites contributes to durable and aesthetically pleasing restorations. Continuous follow-up is essential to evaluate the long-term clinical behaviour of these materials.


Restoring a young patient’s smile with composite

Case by Dr. Onur Alp Yünük 


COMBINING HIGH-PERFORMANCE TOOLS AND MATERIALS FOR A PREDICTABLE OUTCOME

Direct composite restorations are a high-quality treatment option even when large amounts of tooth structure need to be replaced. This is due to recent advancements in resin composite materials and adhesive technology. By selecting appropriate materials and layering techniques combined with modern digital tools for colour difference evaluation, it is possible to predictably produce highly aesthetic outcomes, as demonstrated in the following case example.


The challenge

A young male patient presented to our clinic requesting the replacement of his existing composite restorations on his maxillary incisors (teeth #12 and #11 according to the FDI notation). Clinical examination revealed extensive restoration loss on the lateral incisor. Furthermore, anatomical irregularities, discolouration, and loss of surface gloss were observed on tooth #11. The adjacent central incisor exhibited similar issues regarding colour and surface polish.


In consultation with the patient, it was decided to replace the existing restorations using a modern composite material specifically developed for dual-shade layering – CLEARFIL MAJESTY™ ES-2 Premium (Kuraray Noritake Dental Inc.). For an exact shade analysis, photographs were taken with and without a cross-polarized filter (Figs. 1 to 4).


Fig. 1: Frontal view of the teeth  with extensive restoration loss on the maxillary left lateral incisor.


Fig. 2: Cross-polarized photograph of the teeth allowing for a detailed analysis of the shade irregularities.


Fig. 3: Lateral view of the teeth.


Fig. 4: Lateral view – cross-polarized photograph.


The solution

Following removal of the existing restorations, rubber dam was placed for working field isolation. A self-etching adhesive (CLEARFIL™ SE Bond 2, Kuraray Noritake Dental Inc.) was applied in the selective enamel etching mode before establishing the palatal shell using CLEARFIL MAJESTY™ ES-2 Premium in the shade A1E (Figs. 5 and 6). The mamelon structures were reconstructed with CLEARFIL MAJESTY™ ES-2 Premium in the shade A1D, while the translucent shade Blue was applied  to the opalescent zone. Finally, yellow and white tints were used for characterization. Fig. 7 illustrates the appearance before,  Fig. 8 after finishing and polishing.


Fig. 5: Palatal shell established with the enamel shade A1E of the selected composite.


Fig. 6: Lateral view of the teeth during the restoration procedure.


Fig. 7: Restoration before finishing and polishing.


Fig. 8: Appearance of the restorations after finishing and polishing.


The outcome

To evaluate the final colour integration, another photograph was taken with a cross-polarized filter, holding a grey reference card in place for calibration (Figs. 9 and 10). The lateral view of the restored teeth (Fig. 11) reveals that not only the right colour combination, but also a natural surface texture is required for a highly aesthetic outcome.


Fig. 9: Frontal view of the restored teeth taken with a cross-polarized filter.


Fig. 10: Gray reference card calibration and the resulting L*a*b* coordinates of the restoration.


Fig. 11: Lateral view of the restored teeth stressing the importance of surface texture.


DISCUSSION AND CONCLUSION

Observation, supported by modern tools for photography and image analysis (like polarized filters and L*a*b* coordinates), is  an important skill needed for the lifelike reconstruction of teeth with direct composite materials. By combining this skill with a highperformance composite system that offers fixed shade combinations and innovative light diffusion technology for a nice blend-in  with the surrounding tooth structure, creating beautiful restorations becomes a predictable business.

In the case presented, the patient was very satisfied with the outcome in terms of aesthetics and function. At regular recalls, the quality of the restorations is checked – they still offer a very nice functional and aesthetic integration.


Recreating nature’s beauty

Case report by Vasilis Vasiliou


AESTHETIC RESTORATION OF MAXILLARY INCISORS

Falling in love, applying for a first job, attending a best friend’s wedding: There are so many occasions for young people when looking gorgeous is important. That is why restoring a young patient’s smile to its natural beauty is a special task that demands a lot from us. We need to listen to their touching stories, understand their specific needs and desires – and finally find a way to exceed their expectations. Whenever our plan works and is performed correctly, the outcome will be rewarded with extreme gratitude by those affected. After all, it is not only the smile we restore, but also the patients’ self-confidence and quality of life.


SINGLE BAKE, NATURAL RESULT

The good news: Even highly aesthetic all-ceramic restorations can be produced with a minimal number of bakes. Modern framework materials and porcelain systems allow us to imitate a natural play of colours and translucencies, a virtually unlimited number of individual effects and a vivid surface texture in a predictable way. A possible procedure is illustrated below. The materials utilized in this case were KATANA™ Zirconia STML and CERABIEN™ ZR (Kuraray Noritake Dental Inc.) and the restoration was completed using the One-Bake technique developed by MDT Nondas Vlachopoulos.


Fig. 1. Frameworks made of KATANA Zirconia STML in the shade A1.


Fig. 2. Single-bake layering procedure: Application of CERABIEN ZR Opacious Body in the cervical …


Fig. 3. … and mamelon areas.


Fig. 4. CERABIEN ZR Body porcelain applied in the body area.


Fig. 5. CERABIEN ZR Transitional Dentine used to increase the translucency in the incisal part.


Fig. 6. CERABIEN ZR Opacious Body added in specific areas to create more reflaction.


Fig. 7. Incisal cut-back and creation of the mamelon structure as well as adding of T Blue to give depth.


Fig. 8. … in the body and distal incisal areas.


Fig. 9. Application of Aqua Blue 1 and T Blue on the incisal edges to produce a youthful translucency.


Fig. 10. Creation … effect


Fig. 11. … of mamelons.


Fig. 12. Application of Luster porcelains: LTx, …


Fig. 13. … ELT1 …


Fig. 14. … and LT1.


Fig. 15. Cutback of the dentin for the creation of a halo effect.


Fig. 16. Final shape: Halo effect created with Body.


Fig. 17. Treatment outcome after a first bake followed by minor adjustments, surface texturing and glazing with CERABIEN™ ZR FC Paste Stain Clear Glaze.


Fig. 18. Restorations adhesively cemented in the patient’s mouth.


CONCLUSION

Restoring a young patient’s smile is a particularly challenging task, as the quality of the outcome has a huge effect on the self-confidence and quality of life of the affected person. By listening closely to our patients’ stories, understanding their needs and knowing our materials well, we are able to deliver exactly what they need. It is their positive feedback and happiness that drives me to never stop learning and practicing with my ceramics and porcelains for continued improvement and even better outcomes.


I would like to express my gratitude to Dr. Loukia Pedoulou for the professional partnership and clinical support in achieving this result.


A smooth path towards beautiful smiles

Case by DT Vasilis Vasiliou


MICRO-LAYERING WITH CERABIEN MiLai

No matter whether young or old, male or female: Our patients deserve a beautiful smile that matches their adjacent teeth, their face, their character and their individual needs. To be able to produce beautiful restorations that change their life for the better, we (as dental technicians) have to observe closely – and to listen attentively to the stories they tell.


‘We have to observe closely – and to listen attentively to the stories our patients tell us.’
– Vasilis Vasiliou –


Mr Andreas is a perfect example. He presented in the dental office in need of a full-mouth rehabilitation and the wish to improve the aesthetics of his smile. He asked for an age-appropriate, natural restoration design.


After careful observation and listening, I decided that the best way to restore his maxillary incisors would be with zirconia restorations. The plan was to mill the frameworks using low-value KATANA™ Zirconia YML, shade D3 (Kuraray Noritake Dental Inc.). To facilitate the integration of some natural characteristic effects, a framework design with a primarily vestibular cutback was selected. The finishing technique of choice was micro-layering with CERABIEN™ MiLai (Kuraray Noritake Dental Inc.), a porcelain designed specifically for this approach.


Important steps in the finishing procedure were:

  • Characterization of the milled zirconia with colouring liquids
  • Pre-treatment of the sandblasted zirconia surfaces with SS Fluoro and Margin porcelain
  • Internal staining with CERABIEN™ MiLai internal stains
  • Application of CERABIEN™ MiLai luster porcelains


LABORATORY WORKFLOW

Zirconia splinted crowns were designed in full contour with the aid of the Leahu Library featuring tailored tooth designs (part of the Truedental Library available for exocad DentalCAD design software; Fig. 1), cut back merely in the vestibular area using the ‘calma’ reduction option (Fig. 2), and then milled and characterized with colouring liquids to optimize the chroma.


Figure 3 shows the sintered frameworks on the model, Figure 4 the try-in in the patient’s mouth. As the fit and shape of the restorations turned out to be excellent, it was time to plan the internal staining and micro-layering procedure (Figs. 5 and 6), always trying to imitate nature as closely as possible.


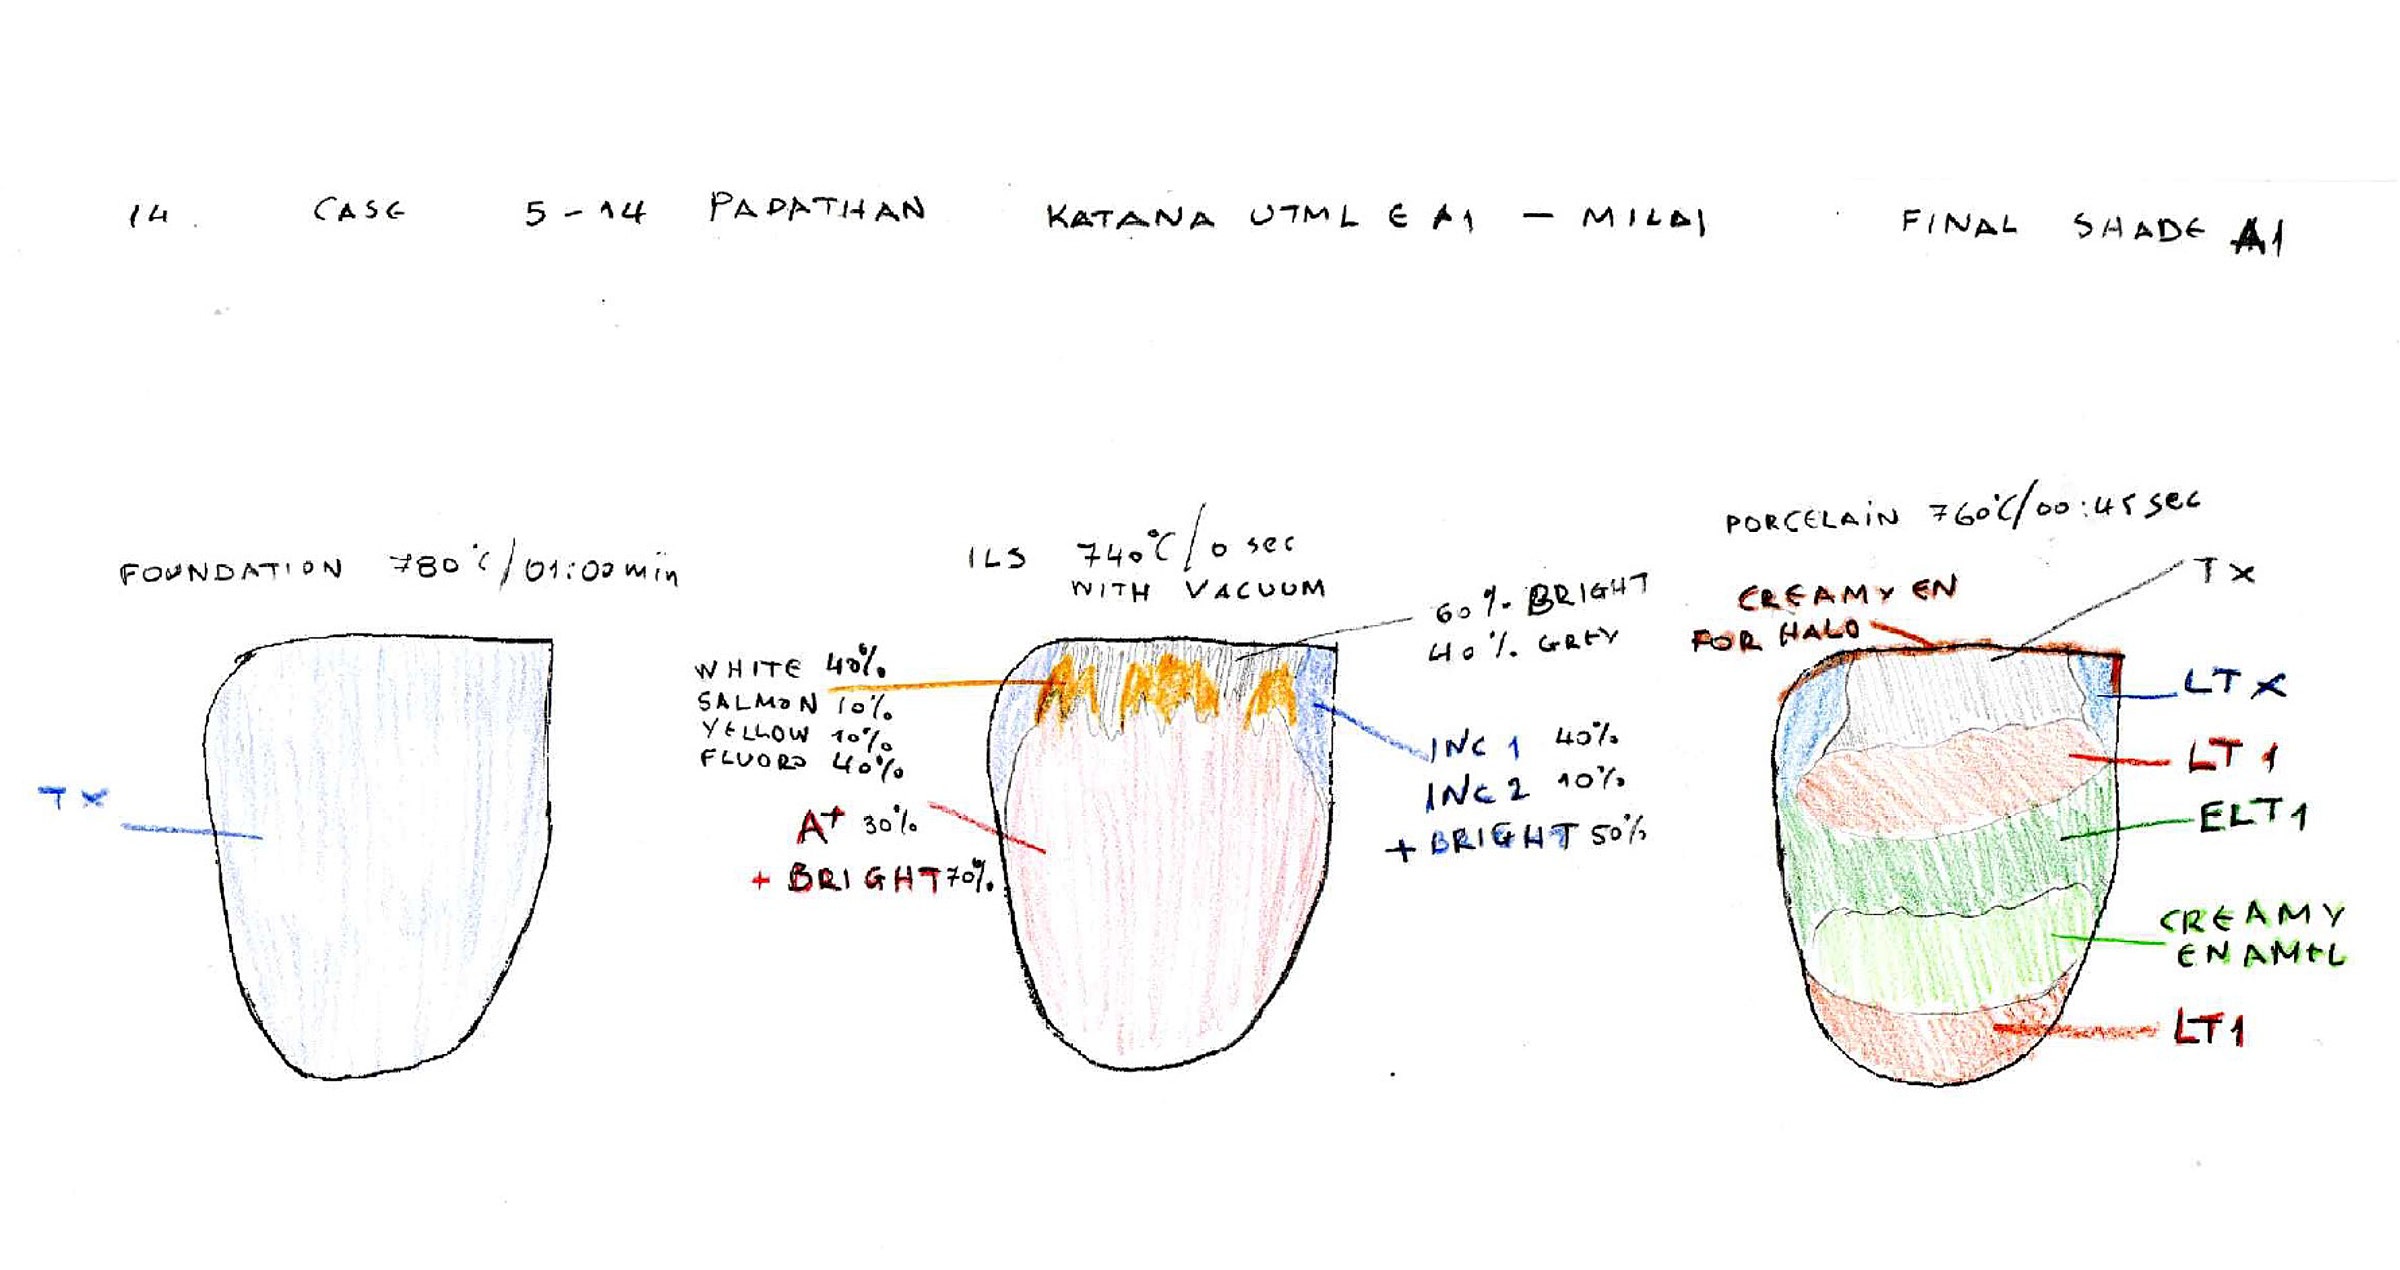
The tricky part is to use the available space wisely – the reason why a detailed layering sketch is useful even when in the context of micro-layering. Once the planned layering procedure had been put to practice (Figs. 7 to 10), the surface texture was finalized and the restorations were tried in again for an aesthetic evaluation. Finally, they were cemented with the adhesive resin cement PANAVIA™ V5 (Kuraray Noritake Dental Inc.).


The beautiful treatment outcome is shown in Figure 11.


Fig. 1. Computer-aided design of the zirconia frameworks: Splinted crows displayed in a transparent mode to show the abutment teeth.


Fig. 2. Computer-aided design of the zirconia frameworks: Outer contour of the splinted crowns with a strongly elaborated surface texture and sufficient room for micro-layering.


Fig. 3. Restorations after characterization with colouring liquids and sintering on the model.


Fig. 4. Try-in of the restorations.


Fig. 5. Layering sketch for the restorations: Internal staining. Fig. 6. Layering sketch for the restorations: Luster porcelain application.


Fig. 7. Internal staining – specific characteristics elaborated for a natural depth effect.


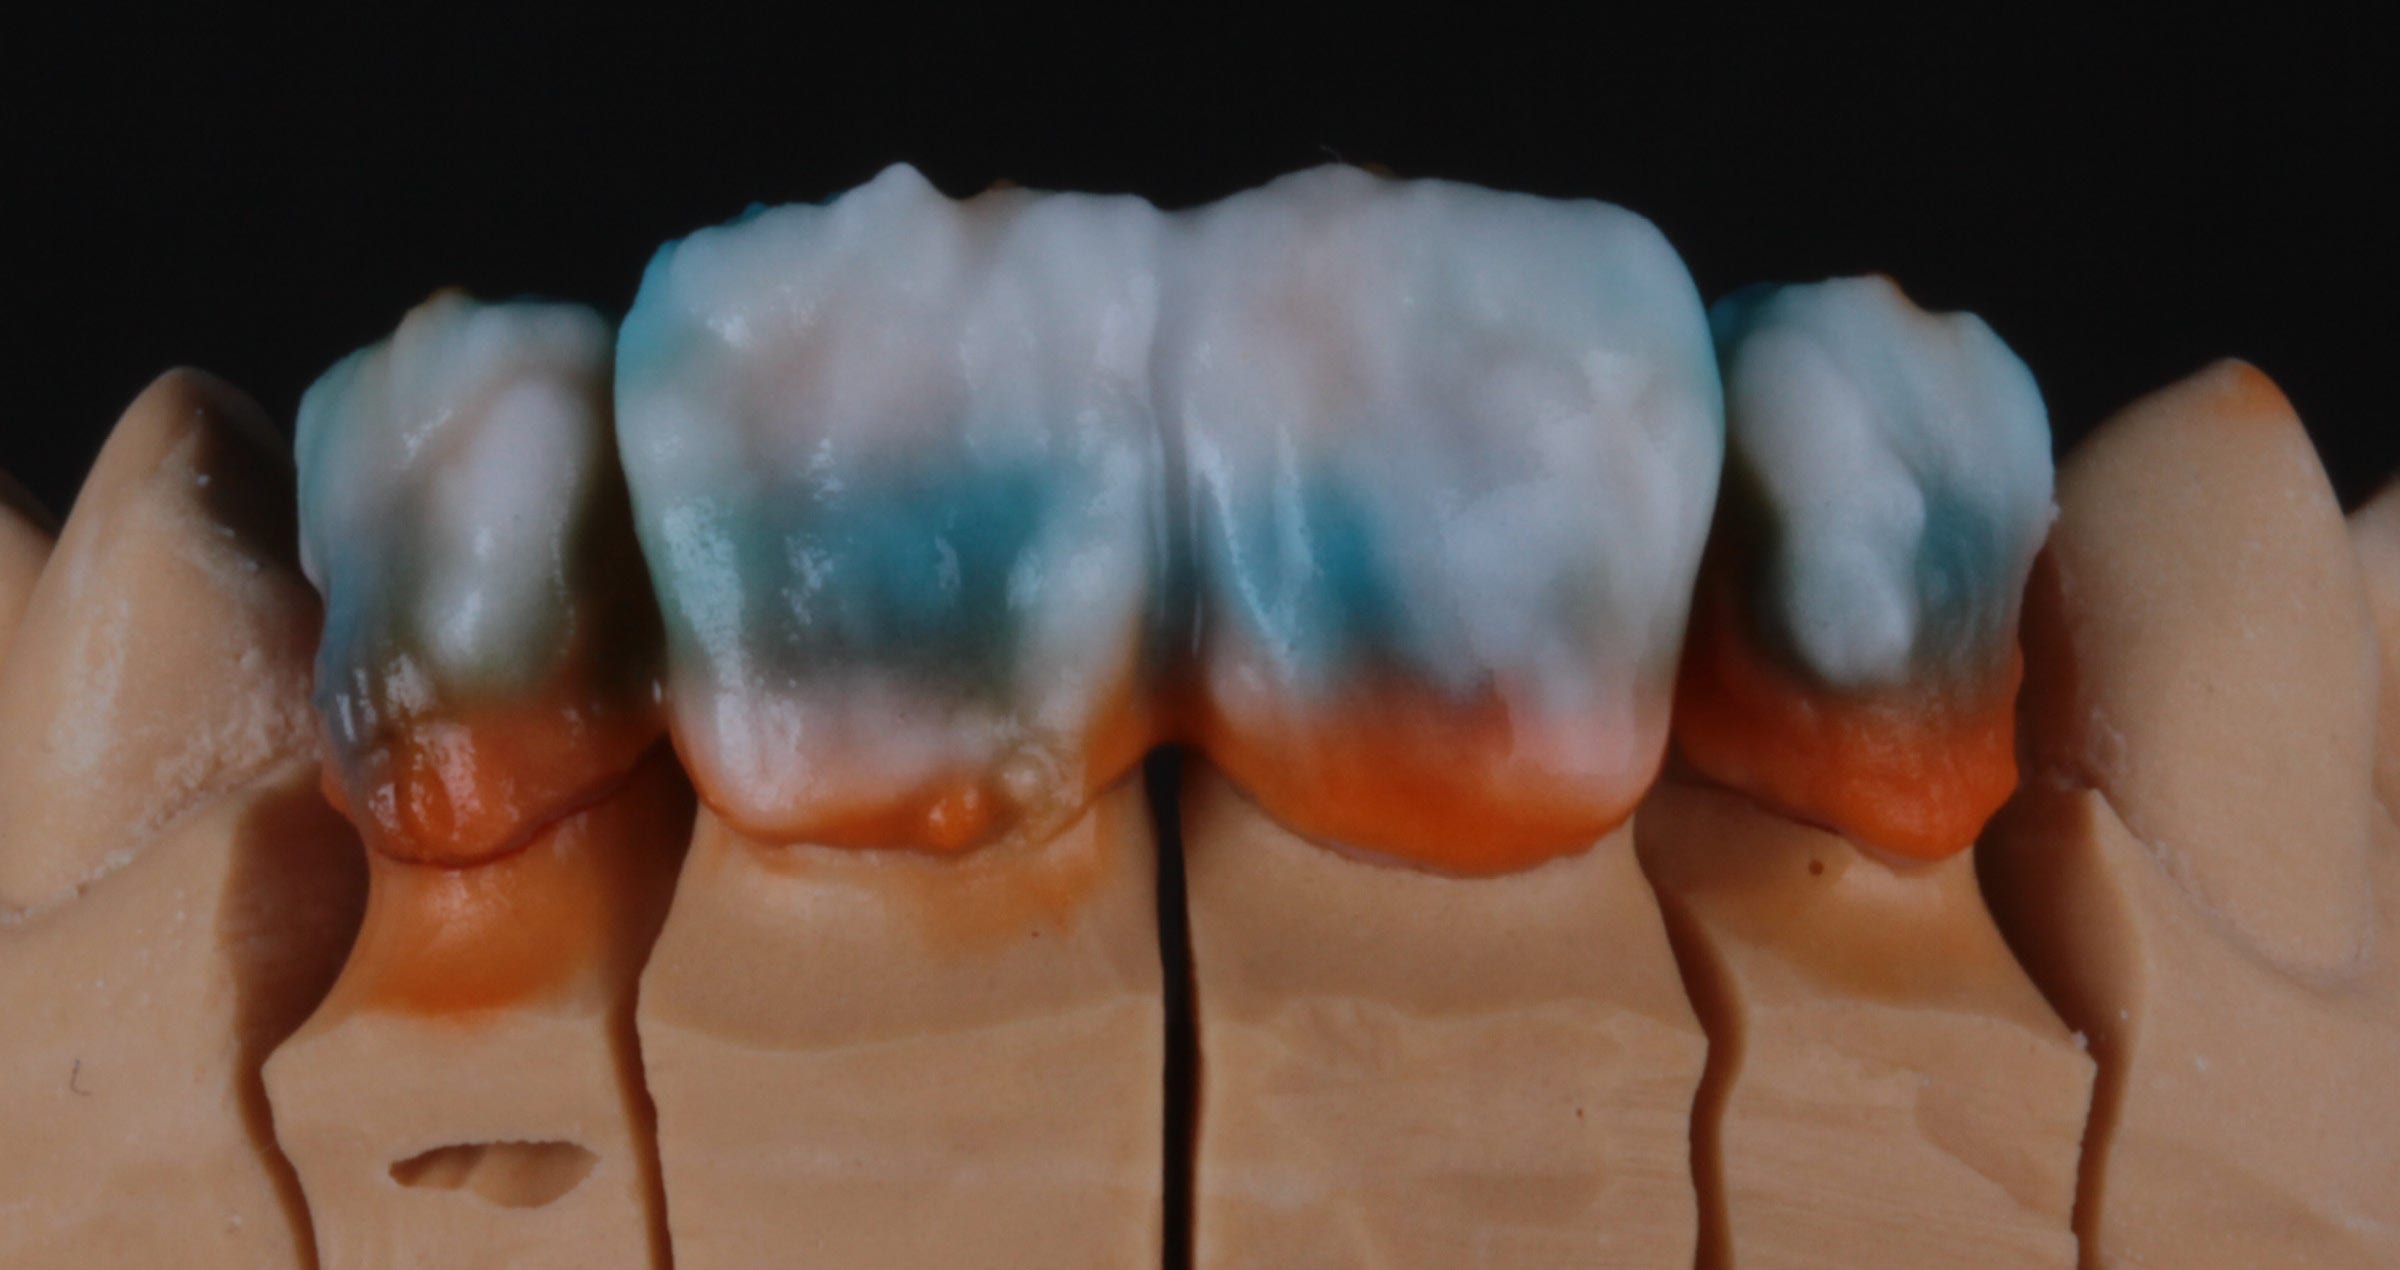
Fig. 8. Layering in the cervical and body areas.


Fig. 9. Final layering with luster porcelains to complete the morphology.


Fig. 10. Final restorations after surface finishing and polishing as well as glazing on the model.


Fig. 11. Treatment outcome.


CONCLUSION

The patient was thoroughly satisfied with the treatment outcome and confident that his investment was well worth it. By tailoring my approach to his unique needs, carefully observing his teeth, smile, and facial expressions, and utilizing my extensive knowledge of materials, I was able to achieve this goal successfully.


Nonetheless, I remain committed to continuous improvement by critically evaluating each restoration and seeking areas for enhancement. My dedication to growth, supported by exceptional mentors who share innovative techniques and insights, supports me in staying at the forefront of my field, striving at consistently delivering the best possible care.


I am deeply grateful to Dr. Zinonas Evagorou for invaluable partnership and clinical expertise, which were instrumental in achieving this result.


Use of the new CLEARFIL MAJESTY ES Flow Universal

Case by Dr. Michał Jaczewski


FLOWABLE INJECTION TECHNIQUE

What are the most important properties of a flowable composite used for the flowable injection technique? Personal experience shows that balanced optical properties are essential, with an appropriate translucency, blend-in ability and surface gloss leading the way. However, the mechanical properties are also important, not least because the restorative material will be in direct contact with the antagonist teeth. And finally, handling properties are essential: The right level of flowability is needed for proper injection, while a void-free application is required for an intact, stain-resistant surface.


For the last seven years, CLEARFIL MAJESTY™ ES Flow Low (Kuraray Noritake Dental Inc.) has been my go-to flowable composite for the flowable injection technique. Its level of flowability is ideal for the technique in the anterior and posterior region. Whenever a lower flowability is needed, it is possible to switch to the Super Low variant. Moreover, I like the shade offering, which – together with the superior polishability of the material – leads to natural aesthetics. Finally, its mechanical properties are so good that the product is approved for a wide indication range without load limitations.


When the company announced the introduction of CLEARFIL MAJESTY™ ES Flow Universal, which comes in just two universal shades and two different levels of flowability (Low and Super Low), I immediately decided to give it a try: The prospect of balanced properties I am already familiar with, combined with a simplified shade selection sounded very promising. So far, the new product comes up to my expectations: The following case example reveals the simplicity of the procedure and the beauty of the results. The patient presented during orthodontic (aligner) treatment for a shape correction in the anterior region due to wear of the incisal edge.


Fig. 1. Initial clinical situation: Patient in need of a shape correction in the maxillary incisor region.


Fig. 2. Application of CLEARFIL™ Universal Bond Quick 2 (Kuraray Noritake Dental Inc.) to the enamel of a central incisor, which has been merely roughened by air abrasion with aluminium oxide (50 μm at low pressure) followed by etching with a phosphoric acid etchant.


Fig. 3. Transparent silicon index placed in the mouth and CLEARFIL MAJESTY ES Flow Universal Low (U shade) already injected in the position of the maxillary right central incisor.


Fig. 4. Shape correction on the maxillary right central incisor completed.


Fig. 5. Situation after finishing and polishing of the incisor restorations.


Fig. 6. Nice shade match leading to a smooth blend-in with the surrounding natural tooth structure.


Fig. 7. Immediate treatment outcome supporting an improvement of the smile aesthetics and hence, the patient‘s quality of life during aligner therapy.


RESULTS THAT SPEAK FOR THEMSELVES

Like its related product CLEARFIL MAJESTY ES Flow, the universal-shade version CLEARFIL MAJESTY ES Flow Universal offers properties which are – from a personal perspective – ideal for the flowable injection technique. The shade-matching properties are astonishing; the translucency is quite high when placed in thin layers (so that enamel is very well imitated), and the polishability is as good as that of CLEARFIL MAJESTY ES Flow. For virtually effortless, bubble-free injection, the product comes in a nicely designed syringe. And last but not least, the product’s mechanical properties provide peace of mind even in the posterior region.


Dentist:

MICHAŁ JACZEWSKI


Michał Jaczewski graduated from Wroclaw Medical University in 2006 and today runs his private practice in the city of Legnica, Poland. He specializes in minimally invasive dentistry and digital dentistry and is the founder of the Biofunctional School of Occlusion. Here he lectures and runs workshops with focus on full comprehensive patient treatments.


Micro-layering: a great concept for zirconia-based screw-retained implant-supported prostheses

Case by Andreas Chatzimpatzakis


For zirconia-based screw-retained implant-supported prostheses, diverse finishing concepts are available. Most of them are quite complex and time-consuming. A streamlined approach that brings efficiency into the finishing procedure without compromising aesthetics and function is micro-layering with CERABIEN™ MiLai (Kuraray Noritake Dental Inc.) on a zirconia superstructure with just a slight vestibular cutback. A possible technical procedure is demonstrated using the following case example. The patient was treated by prosthodontist Dr. Georgios Siavikis from Ioannina, Greece.


Fig. 1. Occlusal view of an implant-supported overdenture made of KATANA™ Zirconia HTML PLUS (Kuraray Noritake Dental Inc.) for a male patient with an edentulous maxilla and a removable partial denture in the mandible.


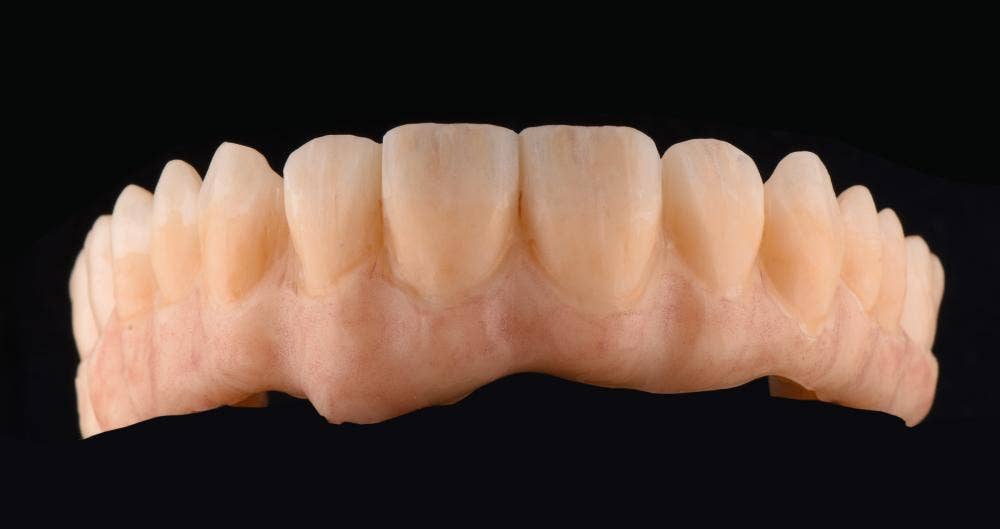
Fig. 2. Frontal view of the milled and sintered screw-retained implant-supported prosthesis.


Fig. 3. Appearance after the application of CERABIEN™ MiLai SS Fluoro and internal stains to enhance the natural shading of the restoration in the tooth and gum areas.


Fig. 4. Result of micro-layering with CERABIEN™ MiLai porcelains LT1 for the cervical as well as E2 and TX for the middle and incisal sections for a seamless gradient in translucency. For an optimal gingival harmony and match with the surrounding tissue, the tissue shades 1, 5 and 6 were applied.


Fig. 5. The restoration after finishing.


Fig. 6. The gingiva and tooth areas have a natural appearance …


Fig. 7. … due to a natural colour, translucency and surface texture.


Fig. 8. Intraoral harmony.


PREDICTABLE OUTCOMES

In this case, the use of an aesthetic, high-strength multi-layered zirconia was a true enabler of a streamlined finishing technique. As a convinced and frequent user of CERABIEN™ ZR, micro-layering with CERABIEN™ MiLai appeared to work flawlessly right from the start. The systems are perfectly aligned to each other, and as they are both based on synthetic feldspathic technology, they offer consistent material properties. These provide precise control over the layering and shading, thus supporting a highly aesthetic and well-integrated implant restoration.


A new porcelain system for micro-layering

Case by MDT Andreas Chatzimpatzakis and DDS Manousos Pissadakis


ONE SOLUTION, MULTIPLE NEEDS COVERED

The treatment of young patients with a dental condition that affects the appearance of multiple teeth – like enamel hypomineralisation or hyperplasia – is particularly challenging for the restorative team. Dental practitioners and technicians need to be aware of the fact that the condition often involves a life-long disease burden, which typically goes hand in hand with an immense treatment need and increasingly invasive measures required with advancing age. It is their task to make the situation as bearable as possible for patients by delivering treatment that is very well aligned to their specific aesthetic, functional and financial needs, both in the short and long term.


Whenever all-ceramic restorations seem most appropriate, material and technique selection are particularly important: Protection of the affected teeth from extrinsic influences, the saving of sound tooth structure and the safeguarding of the long-term stability of the restorations are key to success. Depending on the aesthetic expectations of the patient, veneers made of zirconia or lithium disilicate, produced with a minimal vestibular cutback and finished using the micro-layering technique, are a great option. A prime example of an innovative porcelain system specifically developed for this technique is CERABIEN™ MiLai (Kuraray Noritake Dental Inc.). It includes a collection of internal stains and porcelains that fire at just 740 °C. With this low firing temperature and a coefficient of thermal expansion between 9.5~11.0×10⁻⁶/K (50 °C – 500 °C), this product is ideal for use with lithium disilicate and zirconia. In addition, it offers impressive aesthetic capabilities: Depending on the specific needs of each case, users can adjust the level of complexity and number of bakes.


CASE EXAMPLE

In the present case of a young female patient with hypomineralisation, it was decided to follow a straightforward approach to restore the maxillary teeth for the time being. For this purpose, we produced a wax-up and transferred it into the patient’s mouth in the form of a mock-up. Following guided tooth structure removal trough this mock-up, an impression was taken. The restorations were designed in full contour, pressed using lithium disilicate-based press ingots (Amber® Press LTW3, HASS Corp.) and cut back slightly in the vestibular area (reduction: 0.3 mm). The selected micro-layering system was applied according to the internal stain technique. The following CERABIEN™ MiLai Internal Stains were used: A little Red in the cervical, and Mamelon 2, Incisal Blue 1 and White in the incisal third. What followed was build-up with CERABIEN™ MiLai Porcelains Tx incisally and LTx proximally; some whitish lines were created with Value Liner 1. Then, I applied a mixture of E2 and ELT1 in the middle and LT1 in the cervical area. After the bake, the restorations were treated with green stones, sandpaper and rubber wheels to pre polish the surface. After glazing with CERABIEN™ ZR FC Paste Stain Clear Glaze, final polishing was carried out.


The whole treatment procedure including tooth preparation, shade determination, veneer production and adhesive cementation is illustrated below.


Fig. 1. Portrait of the patient prior to treatment.


Fig. 2. Enamel defects in the maxilla and mandible.


Fig. 3. Initial clinical situation in the maxilla with whitish-brown discolouration and composite restorations in need of replacement.


Fig. 4. Mock-up in the patient’s mouth.


Fig. 5. Labial reduction through the mock-up: The depth of tooth preparation is controlled by using a depth guide and by marking the created depth grooves with a colour marker.


Fig. 6. Silicon index used to check the space created for the veneers.


Fig. 7. Prepared teeth ready for impression taking and temporization.


Fig. 8. Shade determination for the veneers.


Fig. 9. Pressed lithium-disilicate restorations on the model.


Fig. 10. Appearance of the restorations after internal staining.


Fig. 11. Appearance of the teeth after build-up with CERABIEN™ MiLai Porcelain.


Fig. 12. Final restorations on the model.


Fig. 13. Adhesive cementation procedure carried out for two teeth at once: Isolated teeth and a perfectly dry working field.


Fig. 14. Etching of the tooth structure with phosphoric etchant (K-ETCHANT Syringe, Kuraray Noritake Dental Inc.).


Fig. 15. PANAVIA™ V5 Tooth Primer (Kuraray Noritake Dental Inc.) applied to the etched tooth surfaces.


Fig. 16. Veneers – pre-treated with hydrofluoric acid and CLEARFIL™ Ceramic Primer Plus – filled with PANAVIA™ V5 Paste (Both from Kuraray Noritake Dental Inc.) and placed in the patient’s mouth.


Fig. 17. Restorations after excess removal.


Fig. 18. All eight restorations in place.


Fig. 19. Treatment outcome after two weeks.


Fig. 20. Portrait of the patient taken two weeks after treatment.


CONCLUSION

Repeated dental treatment, increasing invasiveness of the measures, often resulting in early tooth loss: To break the vicious cycle in young patients with enamel defects, it is important to carefully evaluate the treatment need and select the appropriate solutions. As dental technicians, we can contribute to long-term treatment success by using high quality materials and production techniques that allow us to create restorations that last.


The presented material combination and the micro-layering technique are very well suited as they offer the required mechanical and optical properties for high aesthetics and durability. Plus, the risk of complications is low due to the high biocompatibility and the layer of porcelain limited to non-load-bearing areas.


Keeping it smart and simple: Micro-layering of implant supported reconstructions

Case by Andreas Chatzimpatzakis


Many modern, tooth-coloured dental materials enable us to achieve more with less. By using high-strength ceramics with a multi-layered colour structure and natural translucency, for example, the path to the desired outcomes involves fewer components, smaller layers and a reduced number of bakes. A possible streamlined procedure is illustrated below. The main materials used were KATANA™ Zirconia HTML PLUS for the screw-retained implant-supported superstructure and CERABIEN™ MiLai (both Kuraray Noritake Dental Inc.) for vestibular micro-layering.


Fig. 1. Zirconia-based screw-retained implant-supported prosthesis after milling and carving to obtain a natural surface texture.


Fig. 2. Restoration after sintering. To intensify the colour characteristic of the multi-layered blanks, the surface was treated with Esthetic Colorant (mainly in the incisal area and the gum parts).


Fig. 3. Appearance after the application of CERABIEN™ MiLai SS Fluoro.


Fig. 4. Restoration after the application of CERABIEN™ MiLai internal stains. They add some natural shading effects to the tooth and gum areas.


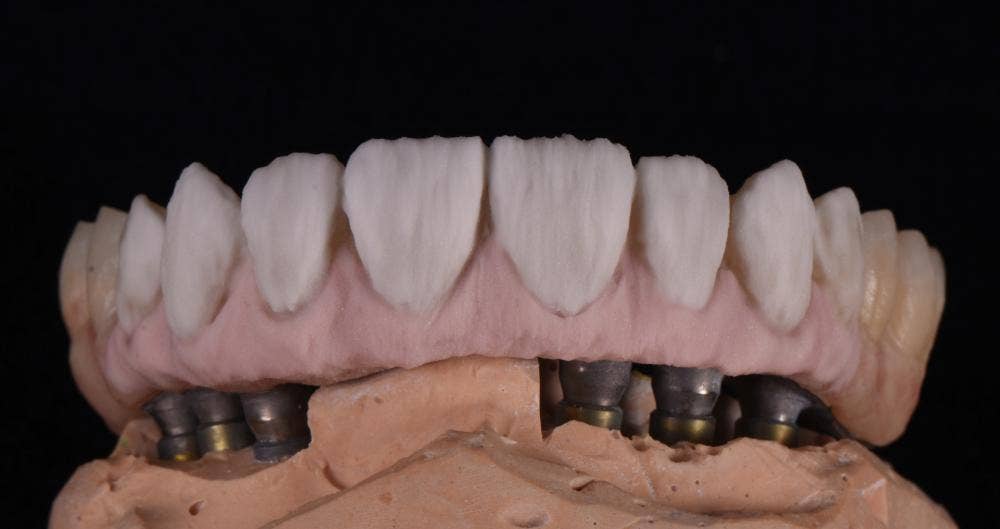
Fig. 5. Restoration on the model after micro-layering. In the cervical area, CERABIEN™ MiLai LT1 was mainly used, while the middle and incisal areas were individualized with E2 and Tx, the latter adding a seamless gradient in translucency. For the gingiva, the choice fell on the tissue porcelains 1, 5 and 6.


Fig. 6. Finished restoration on the model.


Fig. 7. The micro-layer of porcelain has a brilliant effect.


Fig. 8. The lifelike appearance is due to a smart combination of surface texturing …


Fig. 9. … and micro-layering with a comprehensive set of internal stains plus porcelains.


CONFIDENCE AND CONTROL

Full ceramic layering can produce beautiful results, but can be quite complex and time-consuming. In times with limited availability of skilled personnel and high-performance materials being offered, it may be a valuable strategy to opt for micro-layering with CERABIEN™ MiLai whenever appropriate. The system provides precise control over the layering and shading procedure, so that highly aesthetic and functional outcomes are easily and confidently obtained.