Blog

Composite veneering: adjustments easily accomplished

Case by Dr. Onur Alp Yünük


Beautiful teeth, a bright, flawless smile: Meeting the aesthetic demands of patients asking for veneer treatment can be challenging. While some patients share concrete ideas on how their new teeth should look, it is more difficult for others to express their expectations. In this case, it is important to select a treatment approach that allows for modifications – be it in the form of an extended planning phase including digital smile design or by placing composite restorations that can be easily modified intraorally.


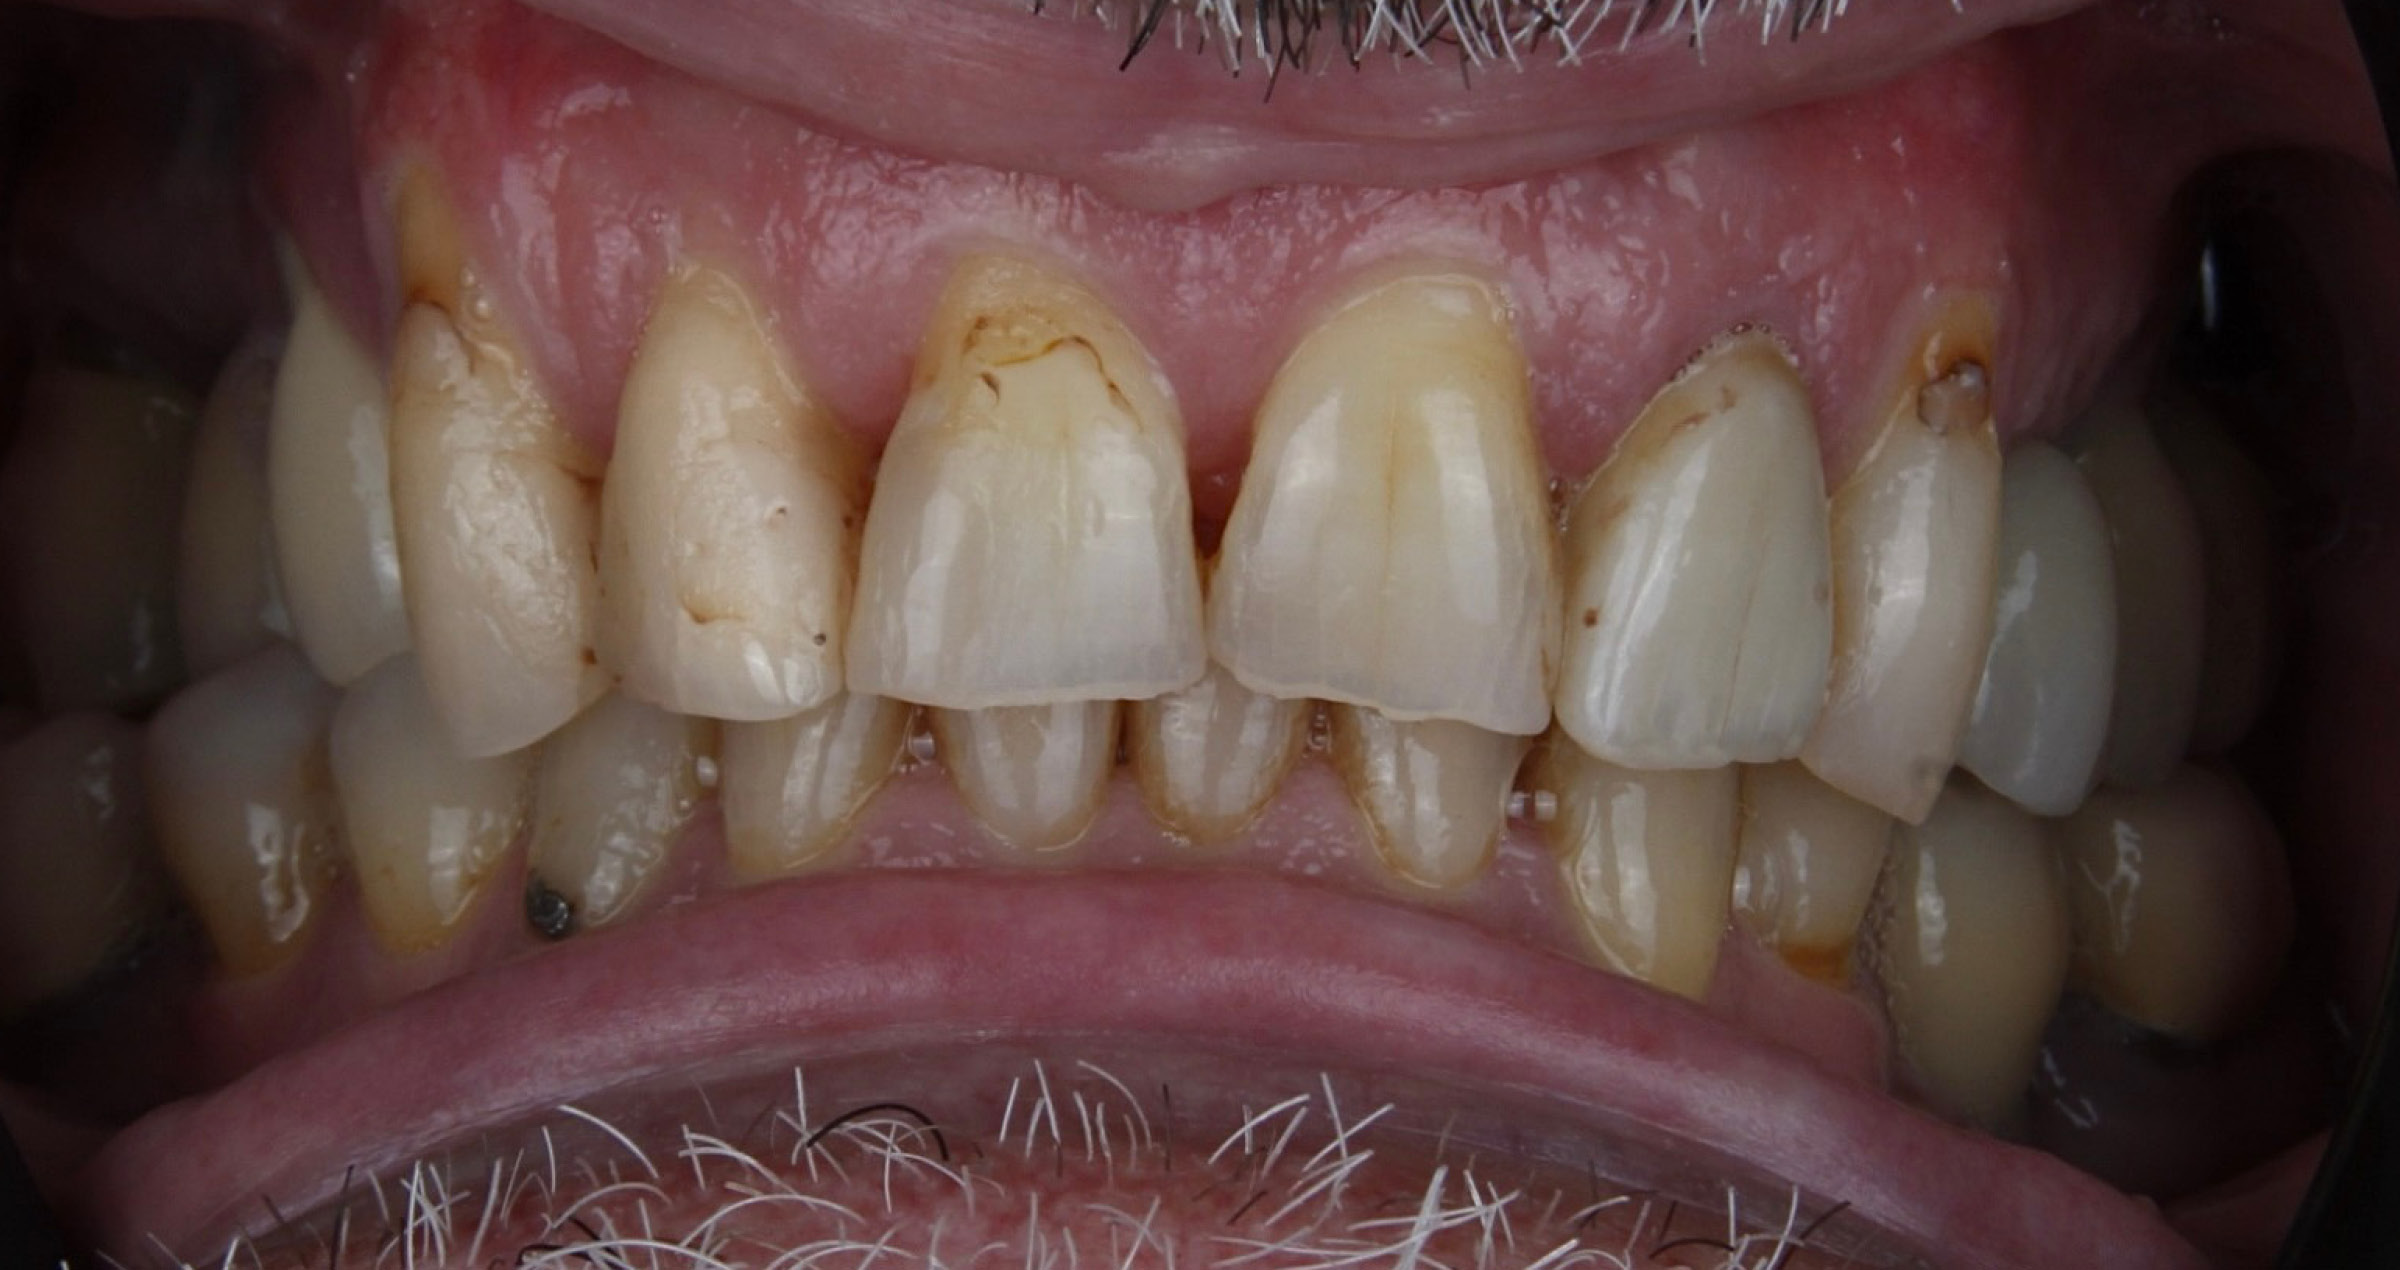
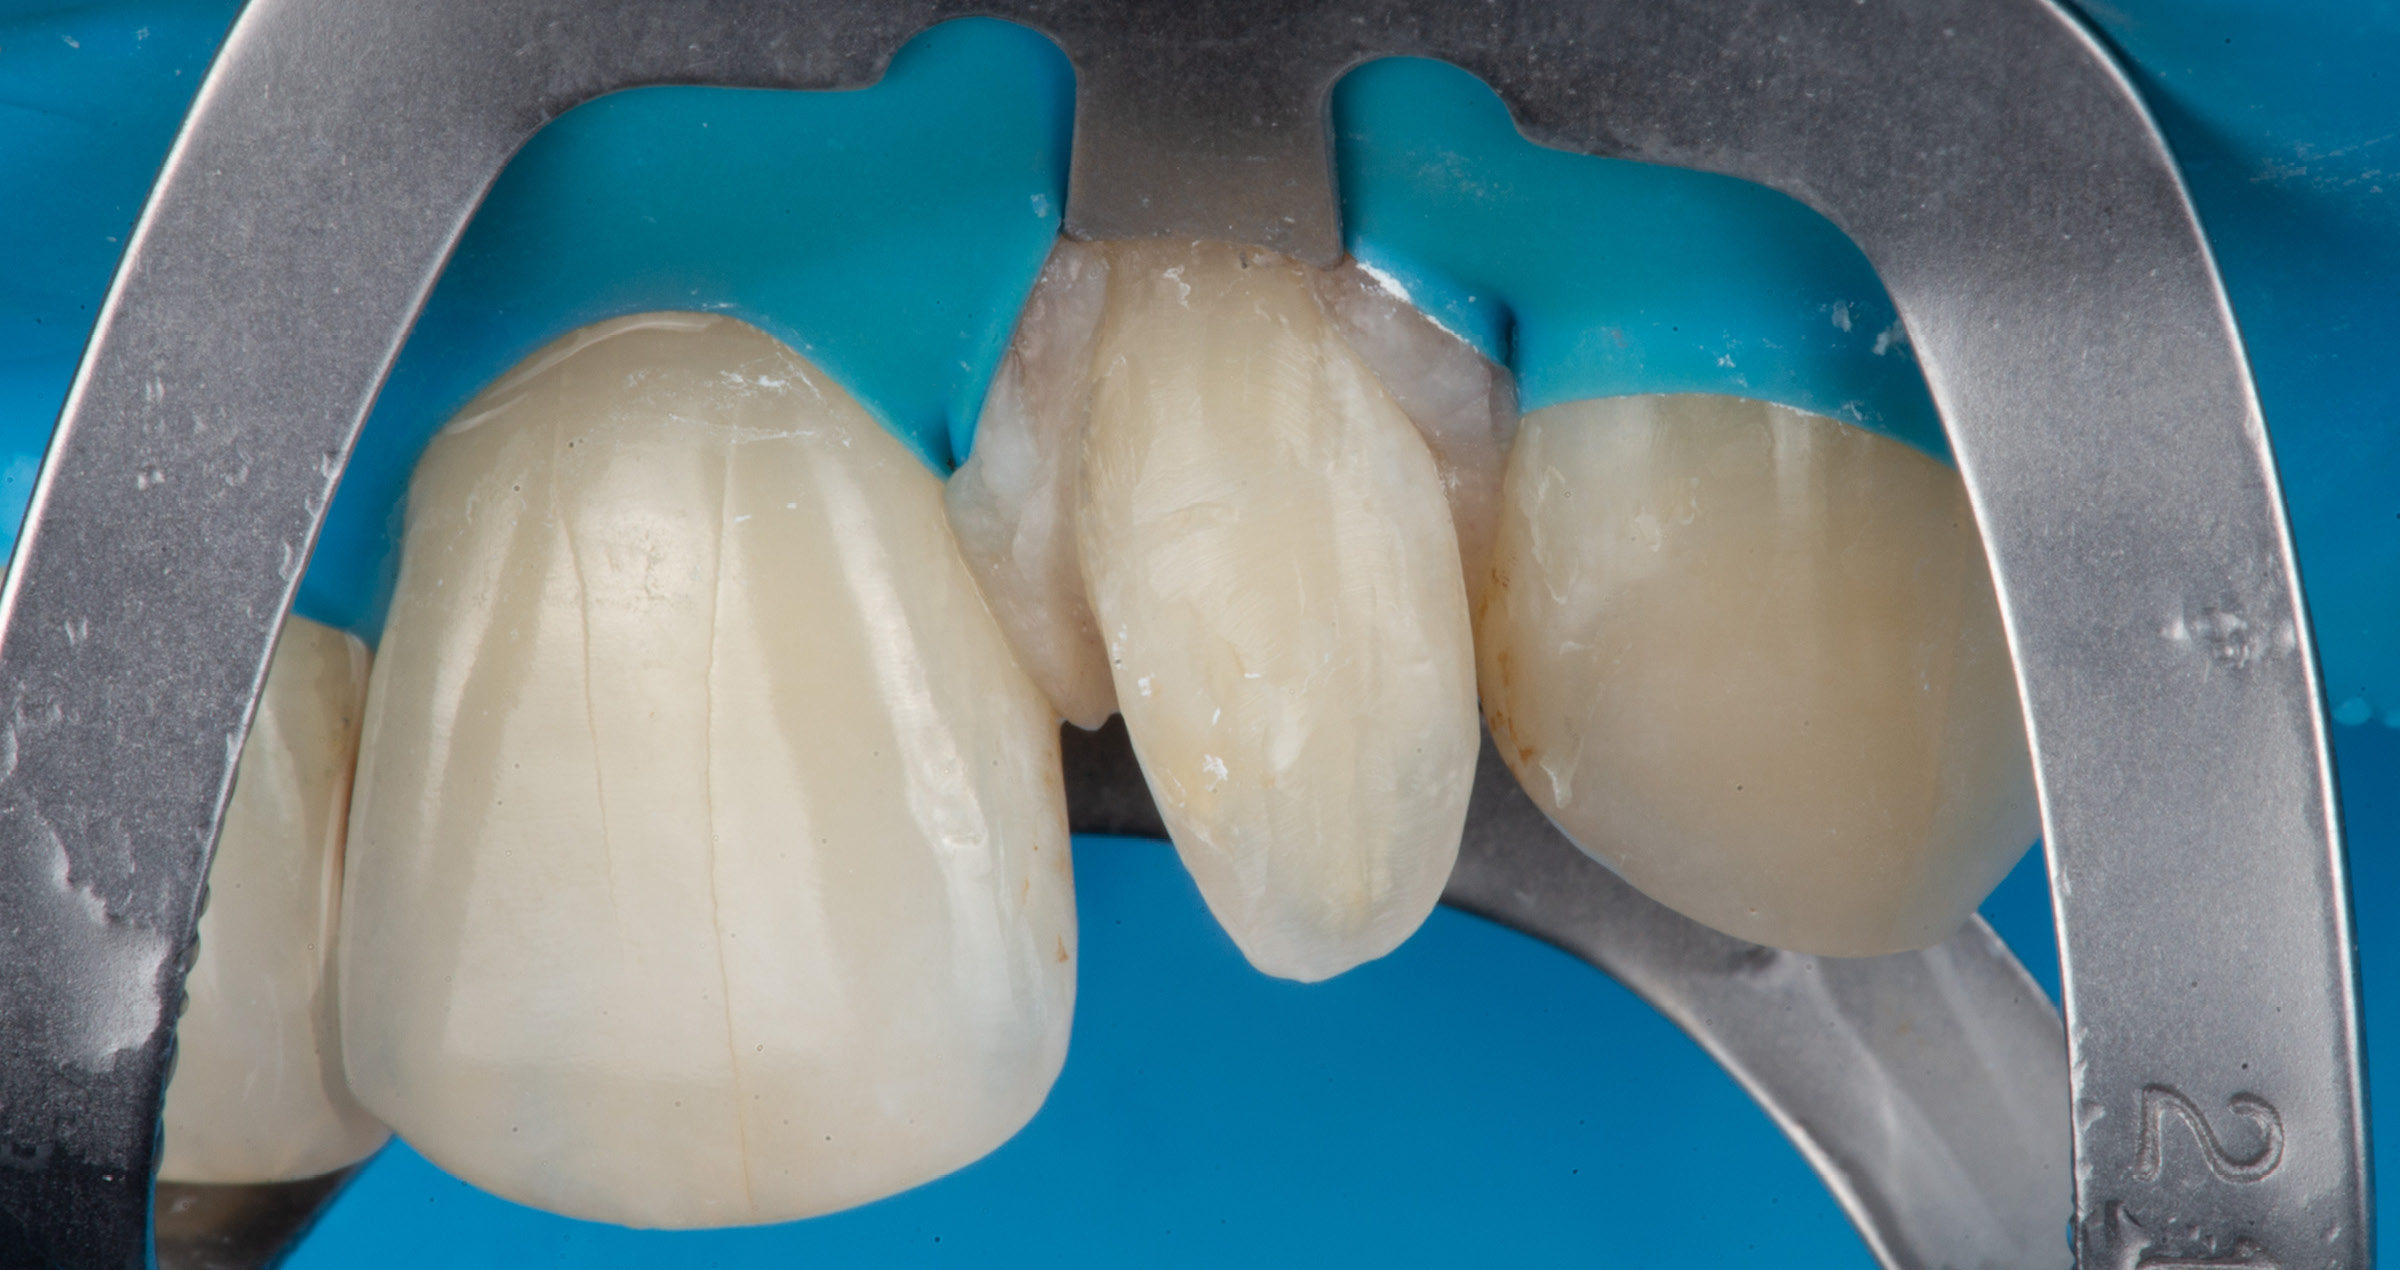
The latter approach was selected for a young female patient who presented to our clinic as she was dissatisfied with her composite veneers that had been placed on the upper incisors (Figs. 1 to 4). During intraoral examination, it became evident that the existing restorations on her maxillary incisors and canines had irregular, rough surfaces, discoloured margins and compromised structural integrity of the composite material. In accordance with these findings, removing the existing restorations at the maxillary anterior teeth and re-establishing optimal aesthetic and functional integrity with new direct composite restorations were planned (teeth between #13 - #23 according to the FDI notation). The patient stated that she would like us to add more individuality and character to her teeth and have a brighter smile than with her existing restorations.


Fig. 1. Composite veneers on the maxillary incisors showing aesthetic and functional integrity issues.


Fig. 2. Occlusal view of the maxillary anterior teeth with visible defects in the composite veneers.


Fig. 3. Lateral view from the right revealing surface irregularities.


Fig. 4. Lateral view from the left revealing a large debonded and chipped area.


REPLACEMENT OF THE COMPOSITE VENEERS

To reproduce the translucency characteristics of the patient’s natural teeth and fulfil her aesthetic demands, the use of a polychromatic layering system and a dual-layer technique was planned. This would allow for a nice play of translucencies in the anterior area.


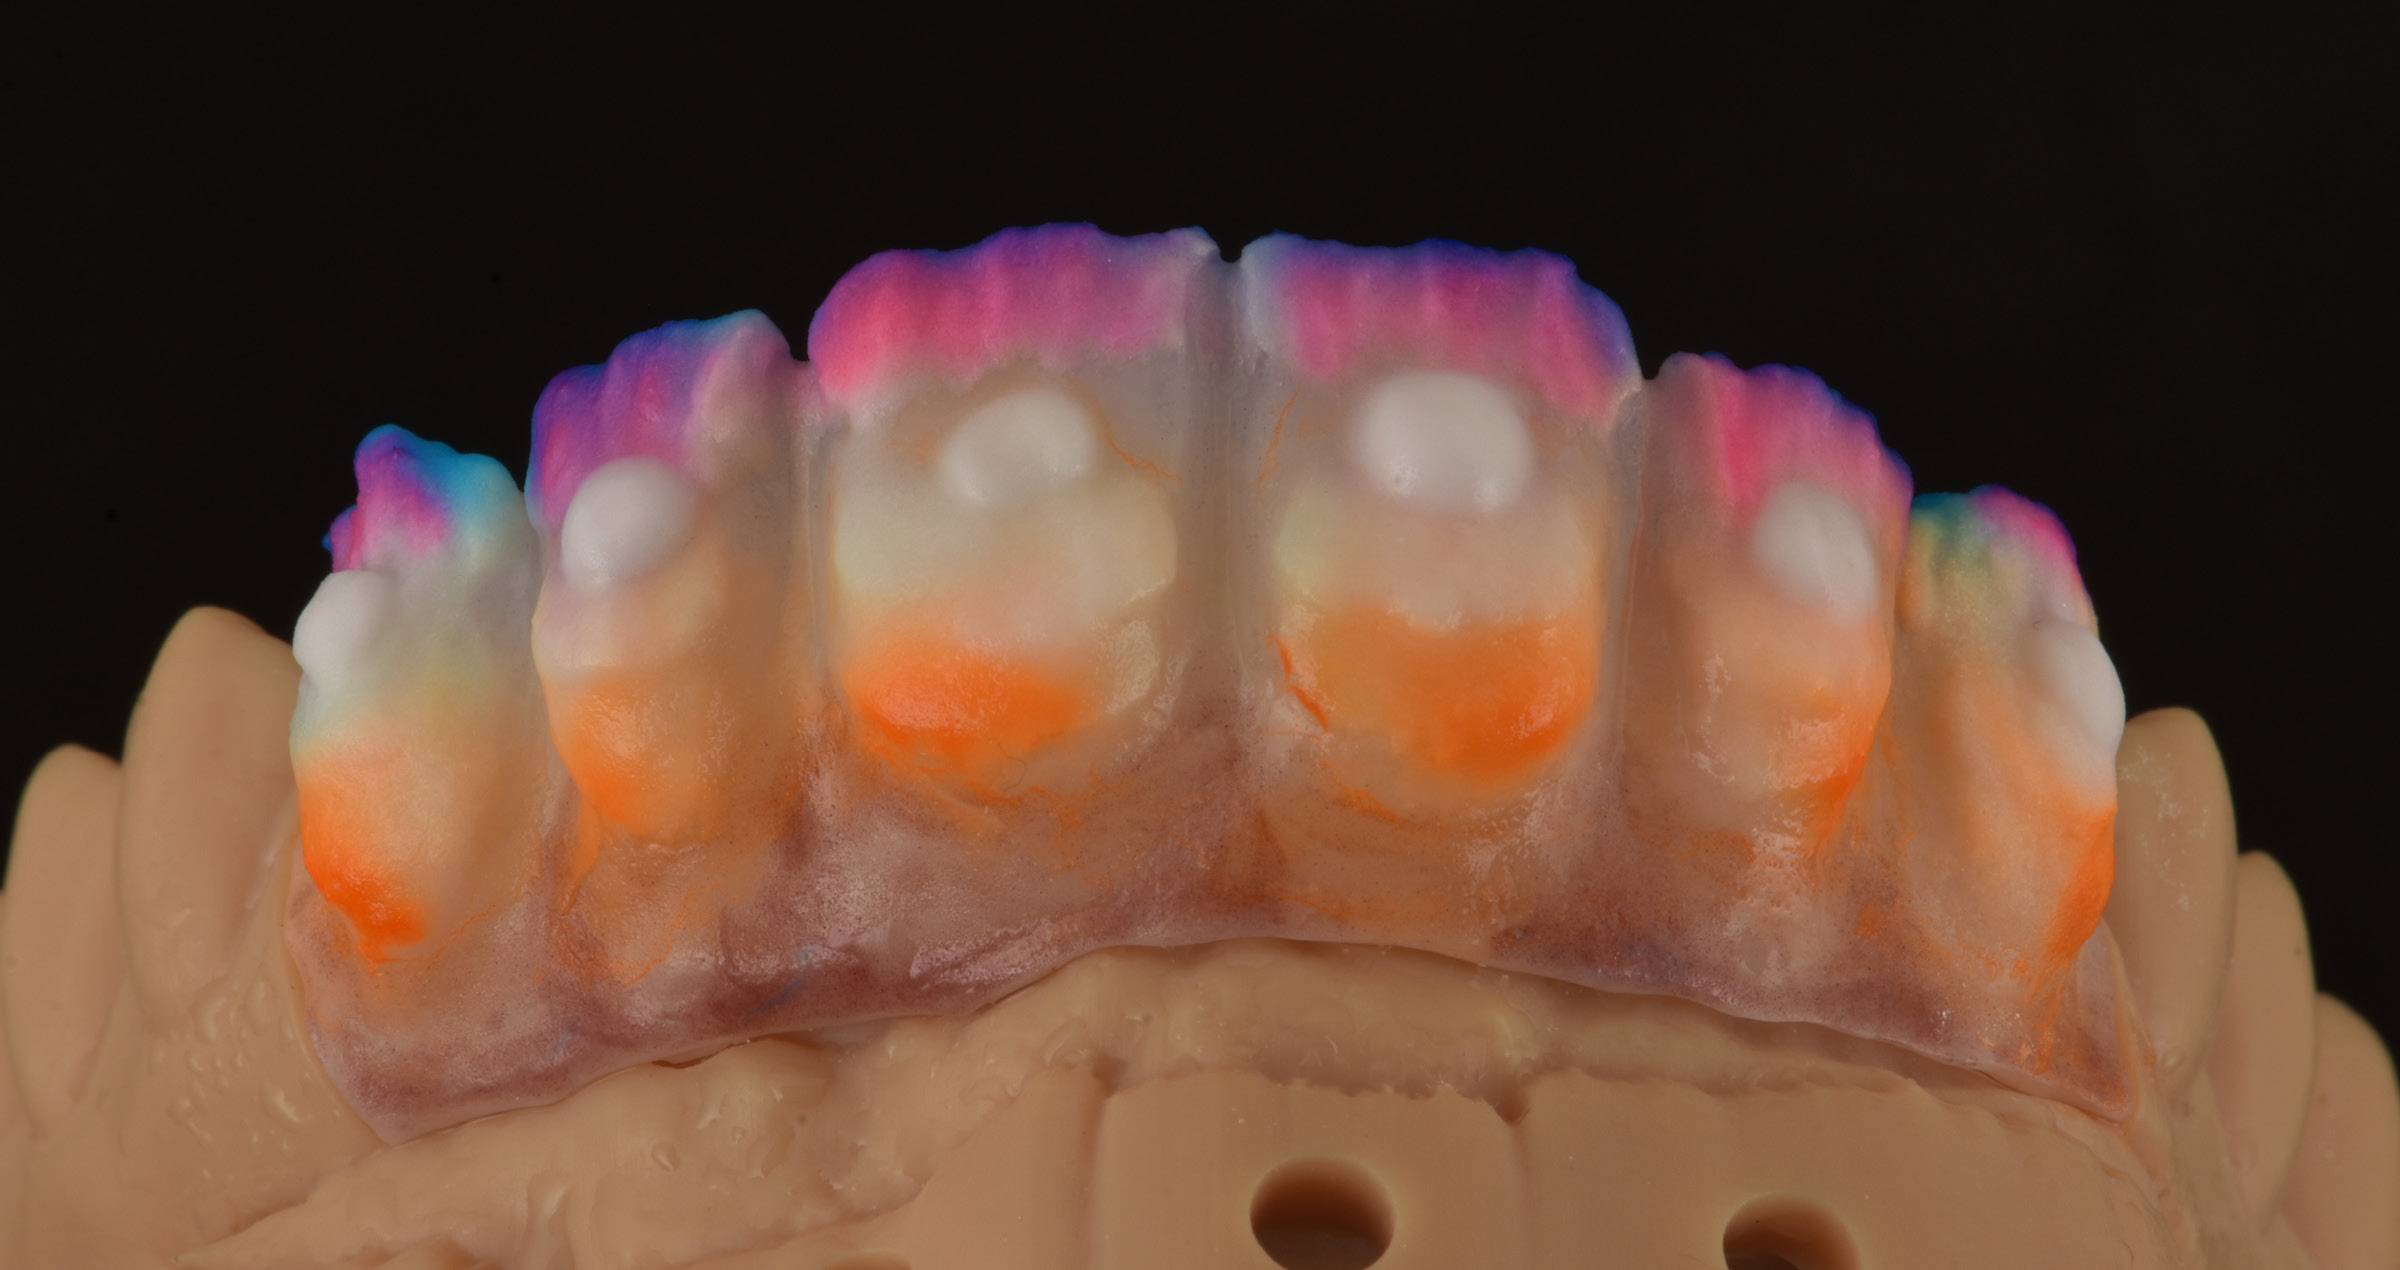
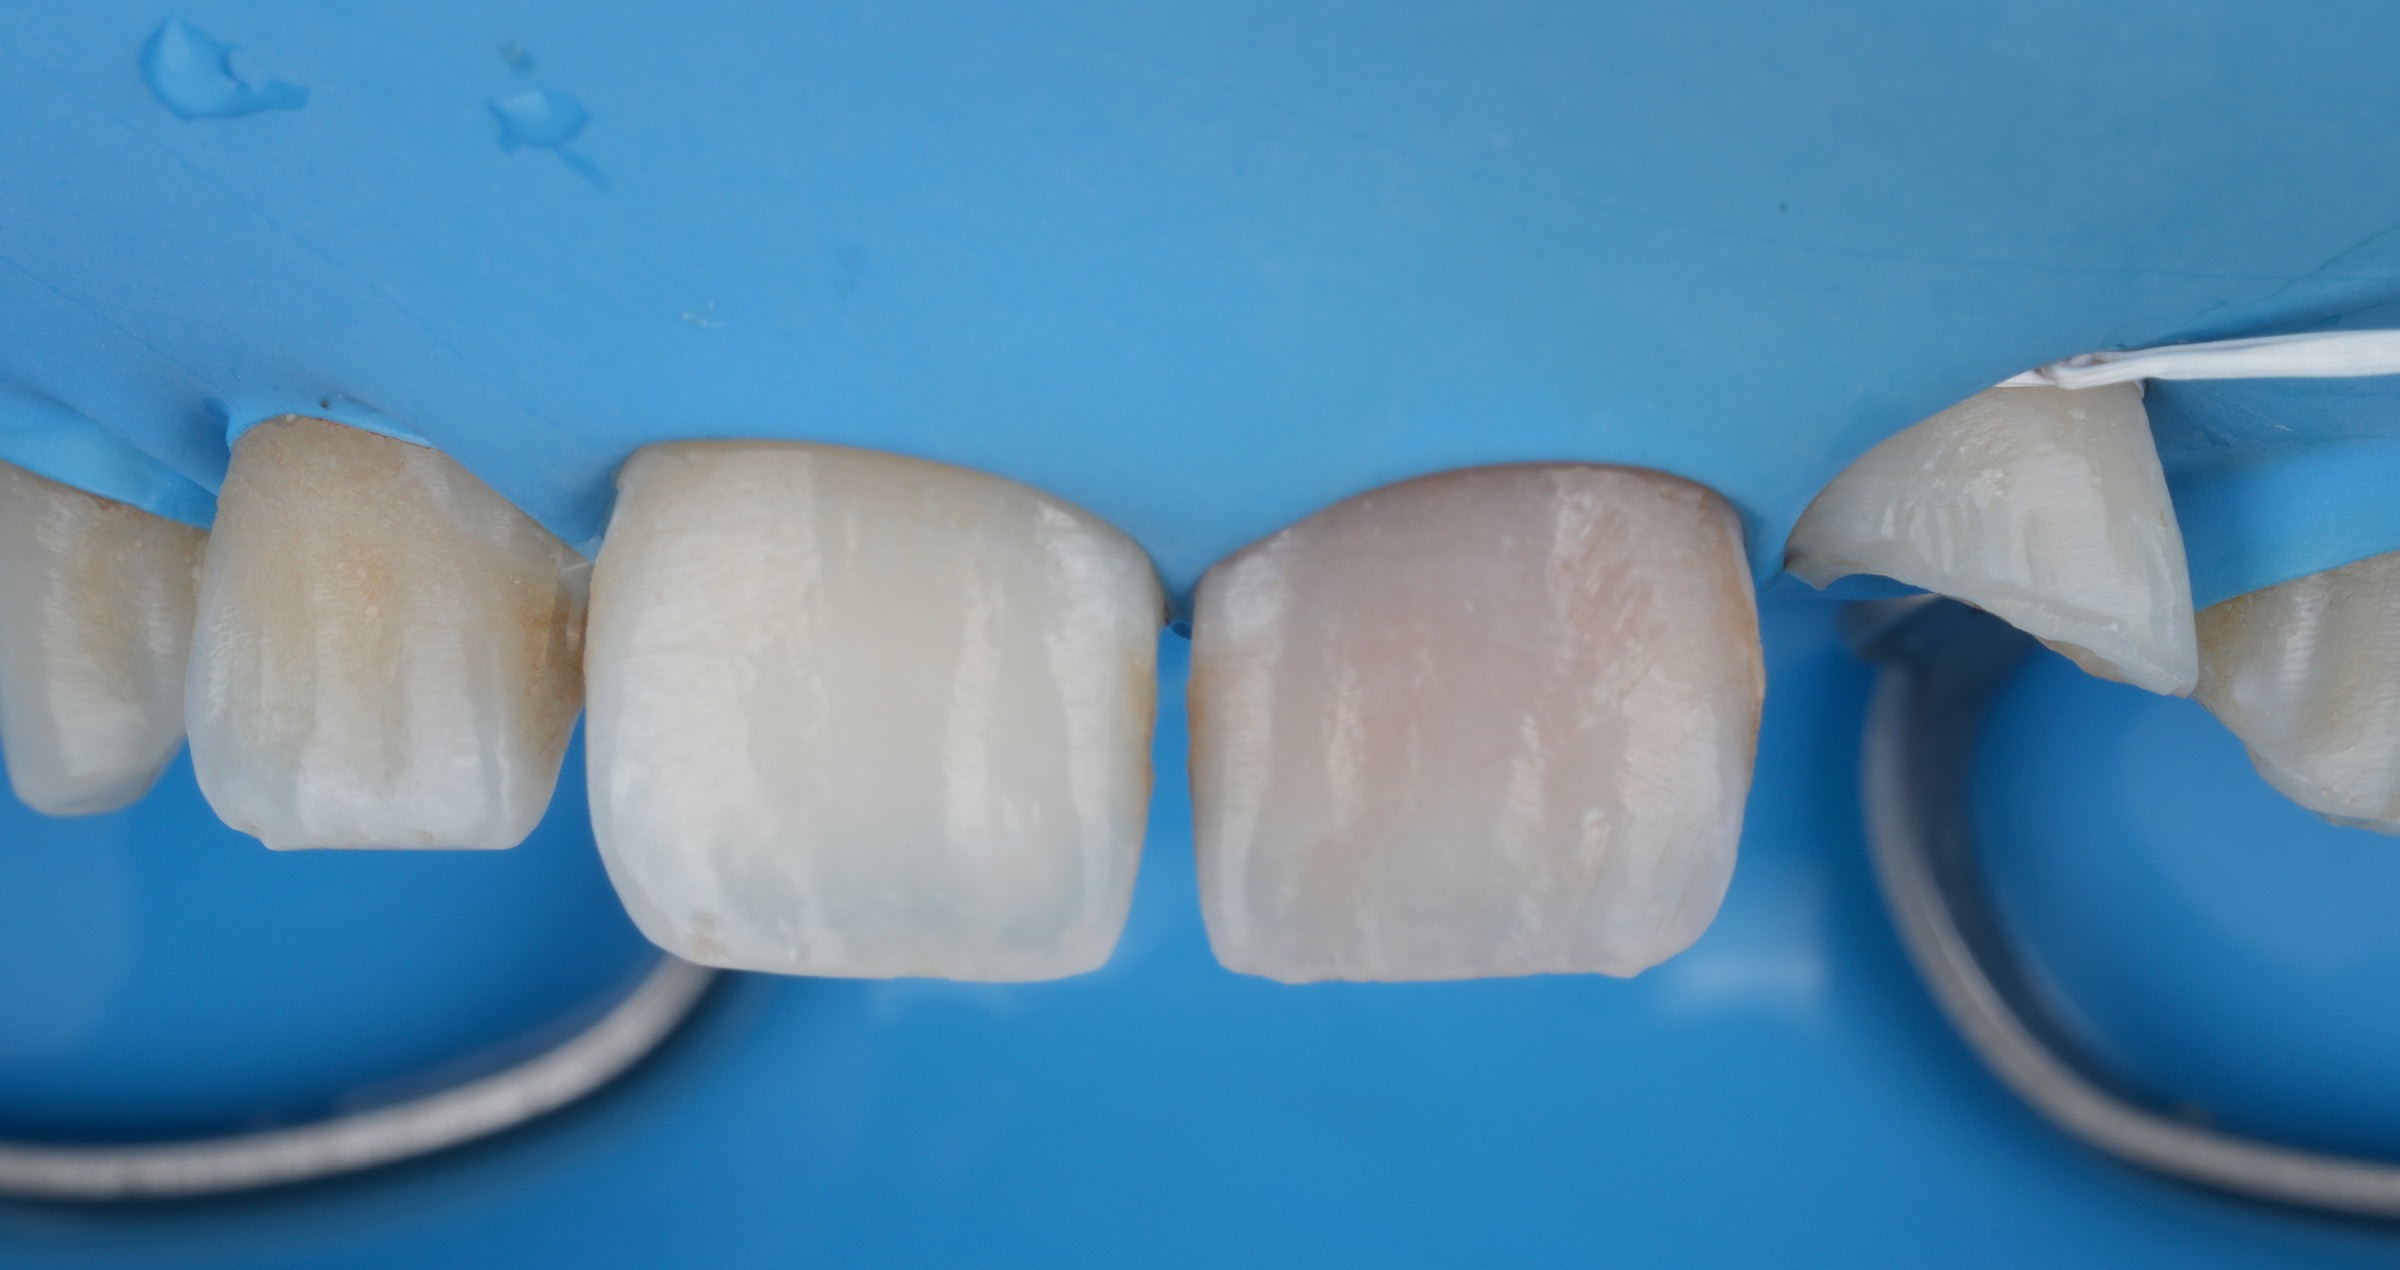
During the shade selection phase, the Bilaminar Shade Assessment Technique (BSAT) was employed, which is based on the color combination of dentin and enamel composites. In this technique, the intended enamel shade was stratified over the target dentin chroma to evaluate the resultant shade created by the two composite color layers. The materials were polymerized on the tooth surface without bonding agents; thus, the cumulative color perception resulting from stratification, rather than the individual shades of the materials, was verified for harmony with the natural tooth structure at the onset of treatment. Photos were taken with a camera equipped with a cross-polarized filter (Fig. 5). Subsequently, the fixed retainer was removed, as were the existing composite veneers. To save as much of the underlying healthy tooth structure as possible, the procedure was performed under magnification and blue-light illumination. The selected instruments were red- and yellow-band diamond burs as well as tungsten carbide burs. Figure 6 shows the result of the procedure.


Fig. 5. Shade determination – image taken with the aid of a cross-polarizing filter that eliminates reflections.


Fig. 6. Teeth after the removal of the deficient composite veneers.


The teeth were isolated using rubber dam, which was secured with floss in the cervical area. Then, restoration procedures were initiated on the teeth. After etching of the enamel and application of a self-etching bonding agent (CLEARFIL™ SE Bond 2, Kuraray Noritake Dental Inc.), CLEARFIL MAJESTY™ ES-2 Premium (Kuraray Noritake Dental Inc.) was applied: The dentin core with its pronounced mamelons was modelled using the shade A1D. The incisal edges and mamelons were highlighted with spots of white tint. To create an opalescent effect, a thin layer of the translucent shade Blue was placed on top, while the enamel parts were built up with the enamel shade WE. Since the retainer had been removed, a clear aligner was fabricated and delivered to the patient at the end of the session for use until the subsequent appointment.


Fig. 7. Isolation with rubber dam for restoration of the lateral incisors and canines.


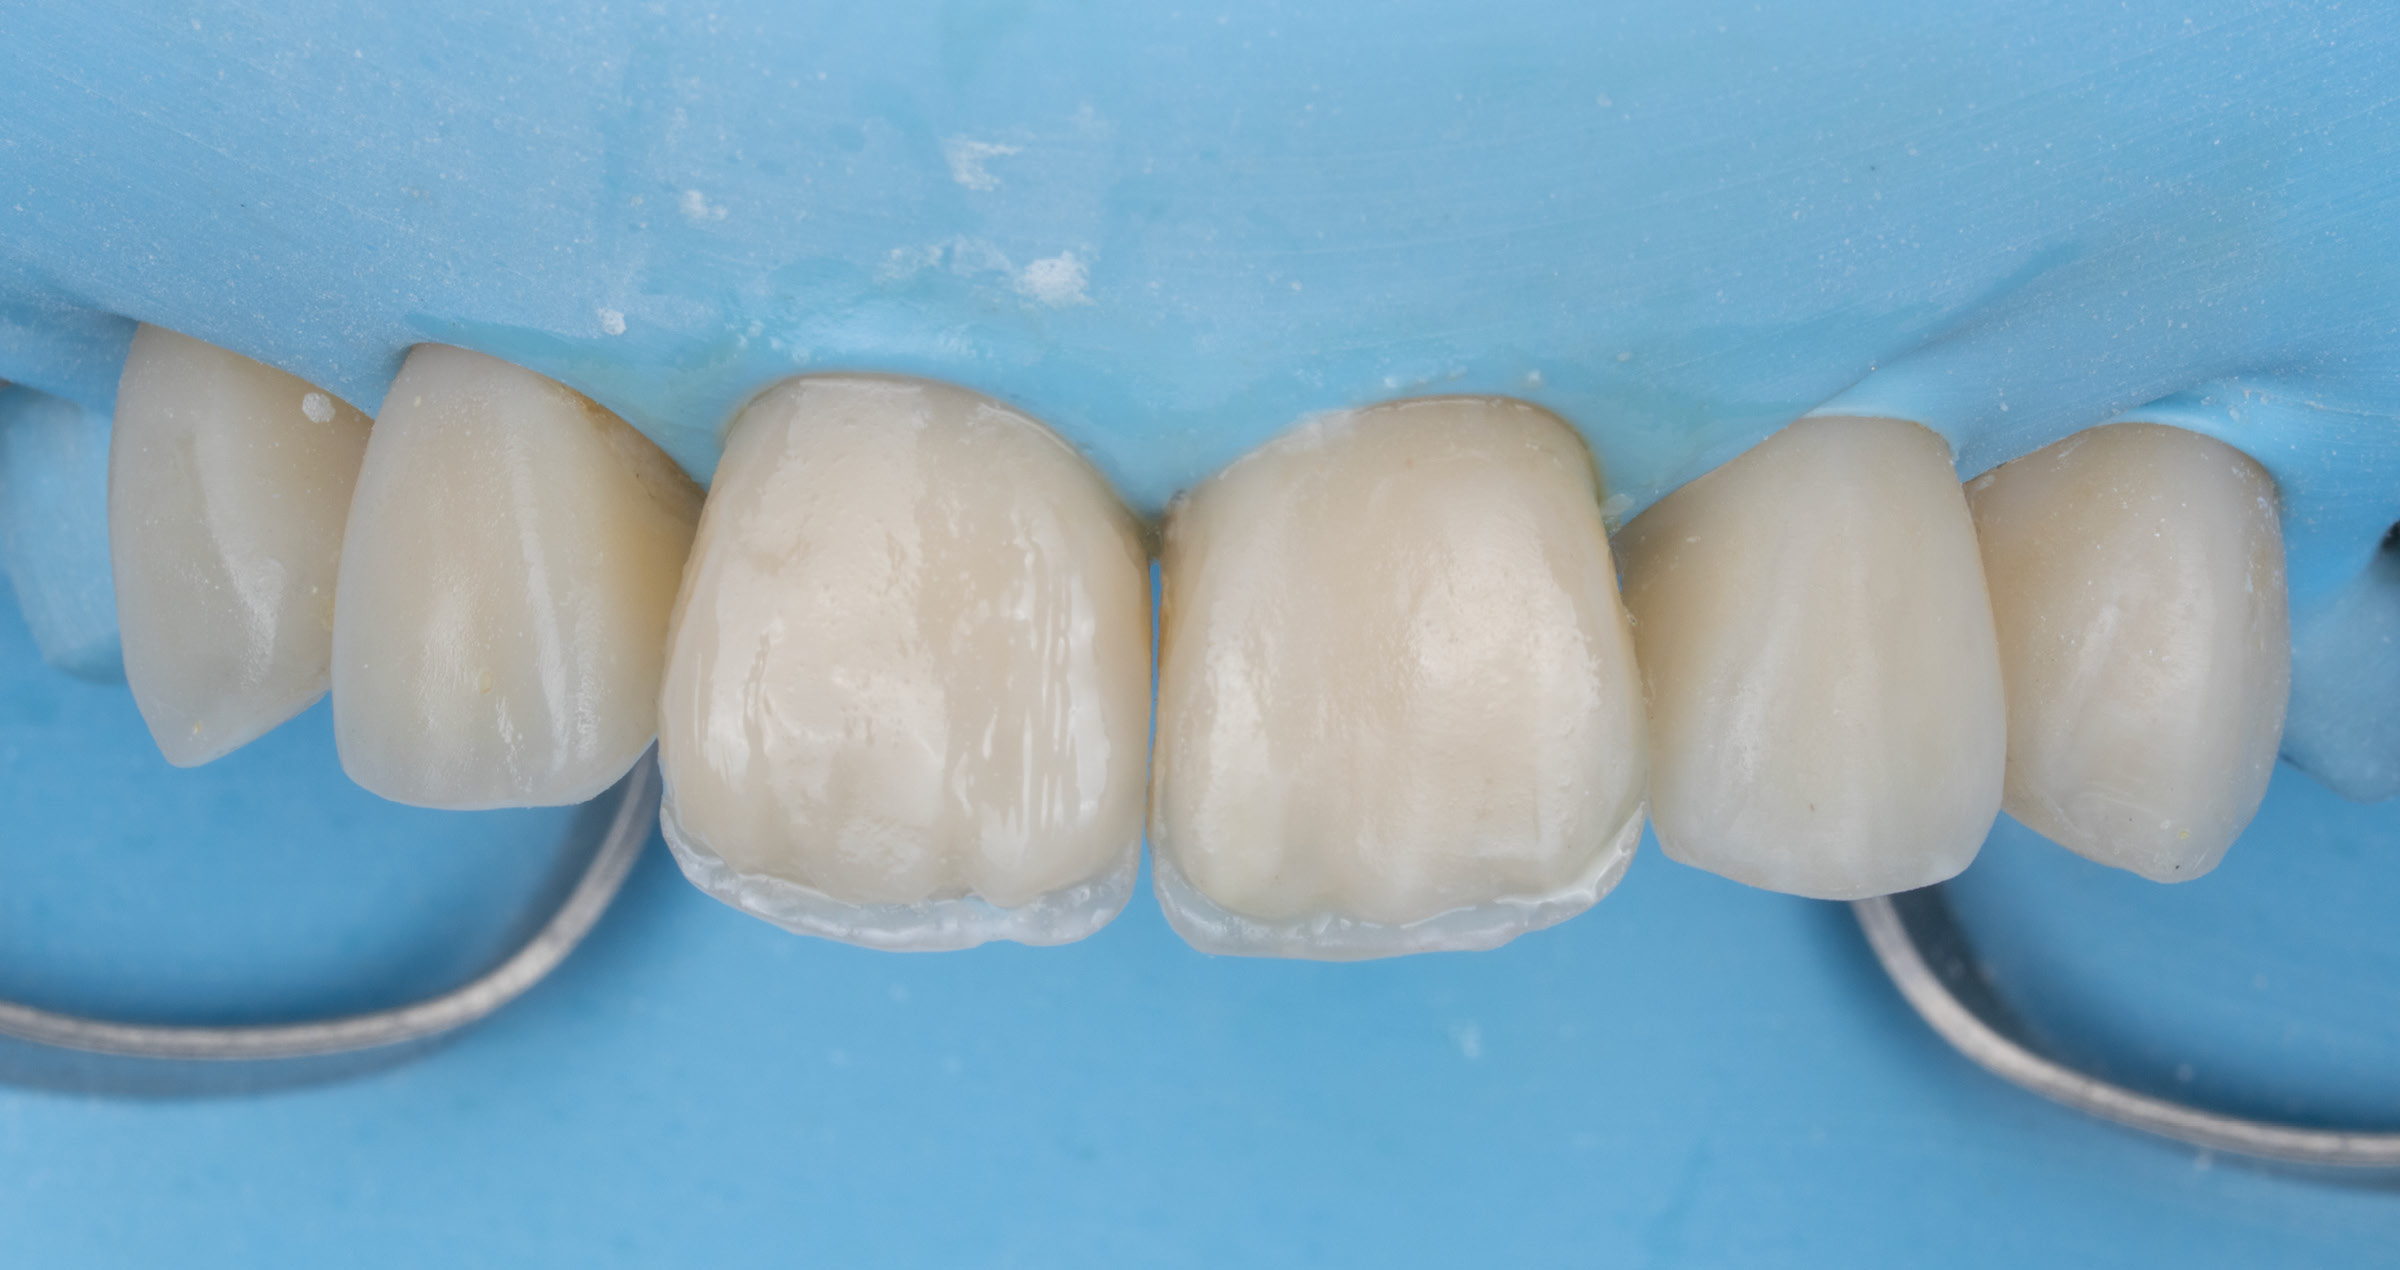
Fig. 8. Vestibular enamel layer applied to the teeth.


Fig. 9. Shape and shade of the restorations created according to the patient’s expectations.


After finishing and polishing with Twist DIA for composite, the patient was sent home and a new appointment was made for re-evaluation and final adjustments.


In the control appointment, the patient asked us to slightly reduce the incisal translucencies and brightness in her maxillary incisors and alter the shape of all restored teeth: She requested longer maxillary central incisors with softer, more rounded line angles and a smoother incisal contour. Rubber dam was placed again. Then, the vestibular surfaces of the composite restorations on the maxillary incisors were reduced slightly using red- and yellow-band diamond burs. To roughen the surface and enhance the topography for optimal micromechanical interlocking, the composite surface was sandblasted with 50-μm aluminium oxide particles. Phosphoric acid etchant, silane and CLEARFIL™ SE Bond 2 were applied sequentially as part of the adhesive protocol. The restorations were then modified by lengthening, shade correction using CLEARFIL MAJESTY™ ES-2 Premium in the shades A1D and A1E and refining of the anatomical contours (Figs. 10 and 11).


Fig. 10. Modification of the central incisor restorations.


Fig. 11. Modified smile with more regular tooth forms and contours as well as a more natural tooth shade.


During this final appointment, the patient expressed that she was very happy with her new smile. The restoration surfaces were re-polished, a new retainer was bonded and final photographs were taken (Figs. 12 to 16).


Fig. 12. Final treatment outcome – frontal view.


Fig. 13. Final treatment outcome – occlusal view.


Fig. 14. Final treatment outcome – lateral view.


Fig. 15. Final treatment outcome – the patient’s smile.


Fig. 16. Detailed view of the inner colour structure – made visible with the aid of a polarized filter.


CONCLUSION

Talking to patients about every detail of the treatment and listening attentively to their ideas, expectations and demands does not always protect us from adjustments – simply because they need to see what they get to be able to judge if they like it. Luckily, selecting appropriate materials and techniques enables dental practitioners to create new smiles that can be modified without harming healthy tooth structure, so that making even the most demanding patients happy is no longer a challenge.


Digital workflow optimised for the Flowable Injection Technique with CLEARFIL MAJESTY ES Flow Universal

Clinical case by Dr. Giuseppe Iacona


The Flowable Injection Technique represents an innovative and predictable approach for the direct aesthetic restoration of one or more teeth in a single appointment (Fig. 1). This methodology, resulting from close collaboration between clinician and technician, allows reproducible results from the very first intervention, offering patient comfort and long-term durability.


In the case presented, the patient wished to close a diastema between the mandibular central incisors (teeth #31 and 41 according to the FDI notation; Fig. 1). Following clinical, radiographic and periodontal assessment, the injection technique was selected, ruling out orthodontic treatment and veneer solutions.


Fig. 1. Extraoral photographs of the patient: initial situation.


Fig. 2. Digital mock-up creation.


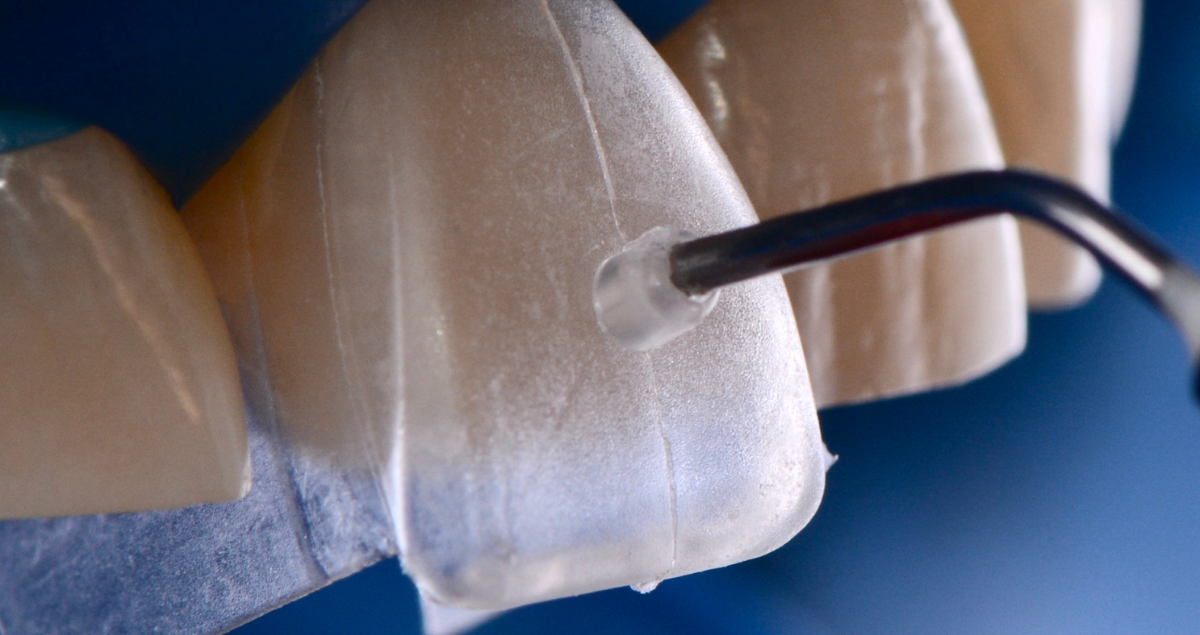
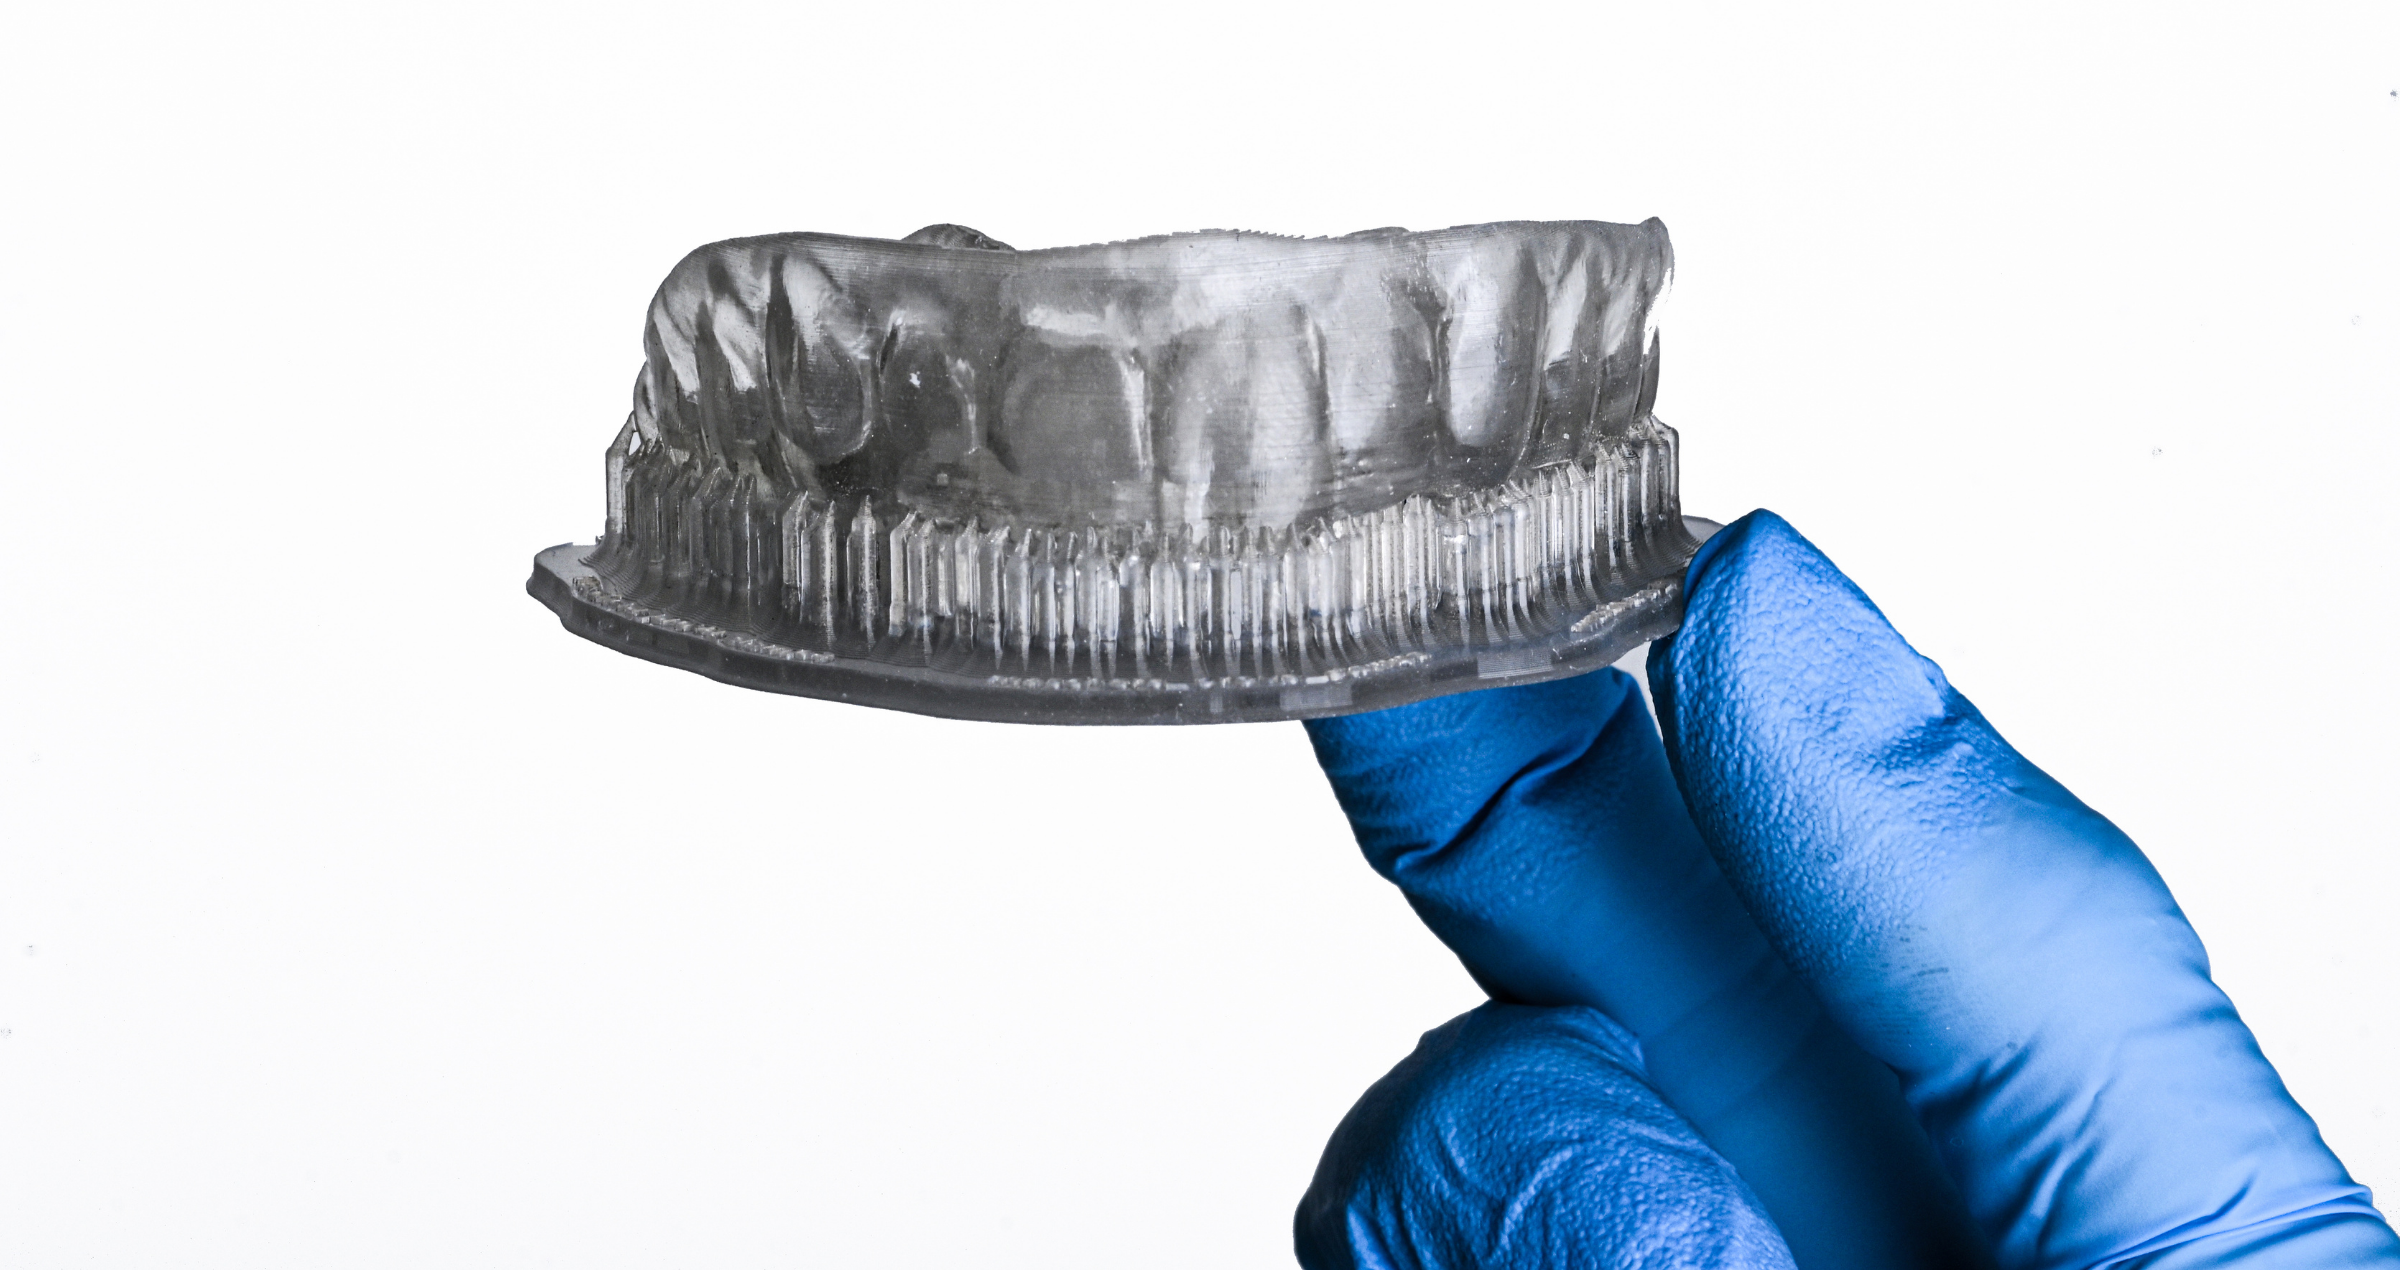
The technique involves the injection of flowable composite through a transparent index (made of silicone or 3D-printed resin), produced from a digital or conventional mock-up (Figs. 1 to 2). It represents a viable treatment option thanks to the combination of advanced composite materials and digital technology.


Intraoral and facial scans were taken to create digital models of the patient’s maxilla and mandible (Fig. 2). Matching the scans made it possible to virtually simulate the initial situation. Based on this dataset, a wax-up was generated and converted into a 3D-printed model and a putty index for wax-up transfer into an intra-oral mock-up.


Transferred into the patient’s mouth through injection of the material into the index, the mock-up (Fig. 3) allowed aesthetic and functional evaluation by providing a preview of the final outcome.


Fig. 3. Mock-up in the patient’s mouth.


Subsequently, the two direct veneers were fabricated using the Flowable Injection Technique in a single appointment (Fig. 4). After placing gingival retraction cords with astringent gel (Fig. 5), isolation with PTFE tape was performed and the surfaces were etched (Figs. 6 and 7), followed by application of the adhesive CLEARFIL™ Universal Bond Quick 2 (Kuraray Noritake Dental Inc., Fig. 8).


Fig. 4. Baseline.


Fig. 5. Application of retraction cords soaked in astringent gel.


Fig. 6. Isolation of adjacent teeth with dental PTFE tape.


Fig. 7. Etching with phosphoric acid etchant.


Fig. 8. Application of CLEARFIL™ Universal Bond Quick 2.


Fig. 9. Injection indices.


Fig. 10. Placement of the injection index.


Fig. 11. Final treatment outcome.


FINAL CONSIDERATIONS

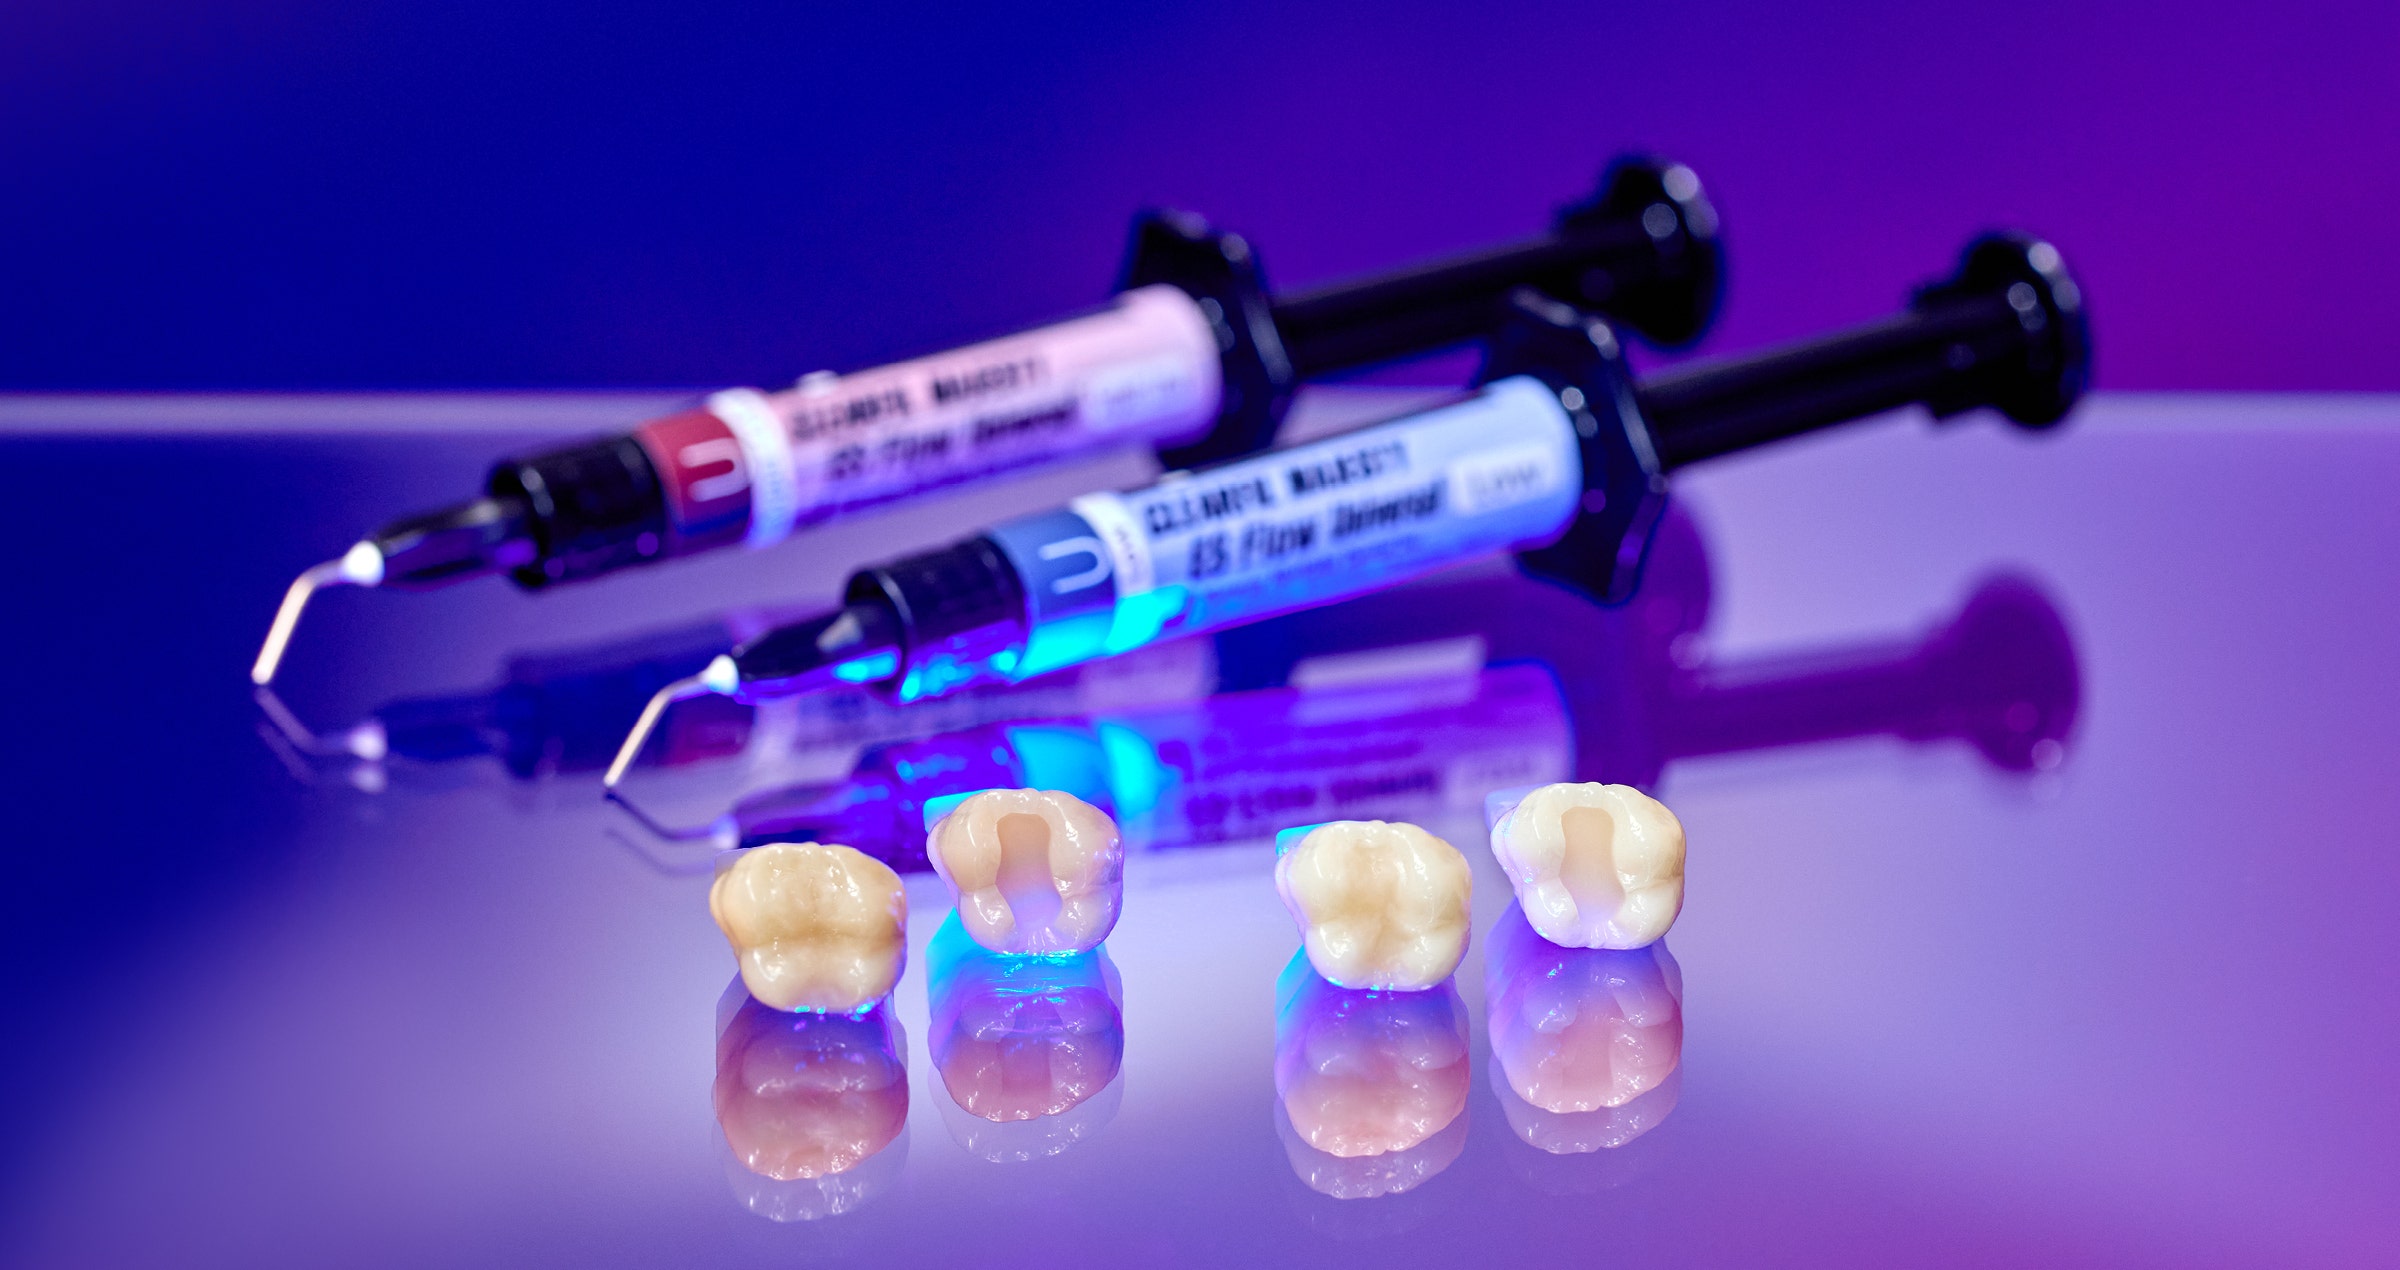
CLEARFIL MAJESTY™ ES Flow Universal (Kuraray Noritake Dental Inc.) stands out for its excellent aesthetic properties, high compressive and flexural strength, and outstanding blend-in ability. Its translucency characteristics, which vary according to thickness, allow for a polychromatic effect using a single material, particularly in the universal variant. The material’s chameleon effect supports seamless colour integration with adjacent teeth, making the restoration indistinguishable from natural tooth structure. This provides for long-term durability, a low incidence of fractures and highly satisfactory results, making it ideal for addressing a wide range of aesthetic and functional requirements.


A biomimetic approach to post-endodontic restorative treatment

Case by Jotautas Kaktys, DDS


Post-endodontic restorative treatments can be quite challenging, mainly because so many decisions need to be made. It is up to the clinician to evaluate the structural condition of the tooth to decide whether a direct or indirect restoration should be selected, which cusps to overlay and which ones to keep, and whether a post or fiber placement is required. Depending on the amount and condition of remaining tooth structure, a direct or indirect restorative approach may be more adequate; while selecting the indirect approach means they have the choice between lots of different restorative materials and restoration designs.


A CASE AS AN EXAMPLE

At our &SMILE clinic in Kaunas, Lithuania, the main goal is always to preserve as much natural tooth structure as possible without compromising the longevity of the restoration. Consequently, we opt for the least invasive approach reasonable, thereby using materials that mimic the mechanical and optical properties of the natural dentition. In this context, hybrid ceramics such as KATANA™ AVENCIA™ Block 2 are often a valuable choice.


The following case is used as an example to demonstrate the biomimetic approach in a situation that required an endodontic revision followed by an indirect restoration of the tooth that had previously been restored with composite.


STRUCTURALLY COMPROMISED MOLAR RESTORATION

The patient came in for a regular routine checkup. A massive composite restoration on her maxillary right first molar (FDI notation: tooth #16) attracted our attention as it appeared to be structurally compromised: Clinical examination revealed some occlusal porosities along the restoration margin, as well as cracked and chipped areas (Fig. 1). The buccal margin was stained and leaky (Fig. 2), while on the palatal surface, some micro-cracks were visible in the surrounding tooth structure (Fig. 3).


Fig. 1. Initial clinical situation with a large composite restoration that shows porosities at the margin.


Fig. 2. Buccal surface of the first molar with a stained, leaky margin.


Fig. 3. Palatal surface with micro-cracked tooth structure.


As the tooth had been endodontically treated elsewhere several years ago, a radiograph was taken (Fig. 4). This radiograph revealed that the canals were not filled to the apices of the roots. However, as the patient showed no symptoms, the decision was made to go for an indirect restoration without any endodontic retreatment: Reasons to opt for an indirect restoration included the large size of the existing composite restoration and the compromised condition of the surrounding tooth structure. Cementing indirect restorations offers additional benefits of virtually no polymerization shrinkage as well as minimal stress to the remaining and already compromised tooth structure and results in better mechanical properties. The tooth shade was determined immediately: The adjacent premolar had a tooth shade resembling A3 in the middle third, while the occlusal third showed some whitish spots and appeared brighter, similar to A2 (Fig. 5). This information was recorded for the dental laboratory.


Would you like to continue reading as a PDF? Please leave your email address below.


Minimally invasive dentistry and digital workflow: Clinical application of the Flowable Injection Technique

Clinical case by Dr. Claudia Mazzitelli and Dr. Edoardo Mancuso


INTRODUCTION

Dental aesthetics are gaining increasing importance and require predictable, rapid, and affordable treatments. Minimally invasive dentistry favours direct restorations, which are now simplified by the evolution of flowable composites. Recent variants of flowable composites offer optical and mechanical characteristics equal or superior to those of paste-type composites. The evolution of flowable resins has led to widespread application using the flowable injection technique (FIT). In addition, the possibility of 3D printing an index for injection reduces operator-dependent variability, providing for high-level aesthetics.


CLINICAL CASE

A 24-year-old patient complained of an unattractive smile. After clinical and radiographic examinations, an aesthetic restoration using FIT was planned. A digital wax-up, created on the basis of intraoral scans (Trios 5, 3Shape), allowed for the design of a customised index or template, which was printed using transparent resin (IBT Flex Resin, Formlabs). After preparation and isolation, the teeth were sandblasted, etched, and a universal adhesive (CLEARFIL™ Universal Bond Quick 2) was applied and light-cured. Flowable composite (CLEARFIL MAJESTY™ ES Flow Low) was injected through the injection holes in the index, followed by thorough curing, finishing and polishing (TWIST™ DIA for Composite, all Kuraray Noritake Dental Inc.).


RESULTS

The treatment, completed in two hours, led to immediate and stable aesthetic improvement, confirmed during check-ups after one week and six months, with excellent gum health and restoration maintenance.


DISCUSSION

FIT offers predictable aesthetic results, a digital workflow option, and reduced clinical time compared to indirect restorations, while maintaining the possibility of future prosthetic treatments. The evolution of flowable composites and 3D-printed indexes has improved the accuracy of clinical transfer and reproducibility, allowing for rapid, conservative aesthetic solutions.


CLINICAL CASE

A 24-year-old male patient presented at our practice dissatisfied with the aesthetics of his smile, with an impact on his spontaneity and social life. After taking his medical and dental history, an interview was conducted to understand his aesthetic and functional expectations as well as financial possibilities.


The clinical visual examination, accompanied by photographs, static and dynamic videos, periodontal analysis, and radiographs, revealed incongruous Class IV restorations on teeth 11 and 21 (FDI notation), with asymmetry of the anterior maxillary region  (Fig. 1). Aesthetic rehabilitation using the Flowable Injection Technique (FIT) extended to the six maxillary anterior teeth was therefore proposed.


Fig. 1. Initial clinical situation.


TREATMENT PLANNING

An intraoral scanner (Trios 5, 3Shape) was used for impression taking. The resulting digital model was used to create a digital wax-up, which then served as the basis for digitally designing an index for the injection of the flowable composite (Fig. 2). The index was printed in transparent resin (IBT Flex Resin, Formlabs) (Fig. 3). Once post-processing was complete, calibrated injection holes were integrated. They allow for insertion of the syringe tip and precise injection of the flowable composite (Fig. 4).


Fig. 2. Computer-aided index design.


Fig. 3. 3D-printed transparent index for composite injection.


Fig. 4. Injection holes integrated in the incisal areas of the index.


OPERATIVE PROCEDURE

After obtaining informed consent from the patient, the old restorations on the maxillary central incisors were removed with diamond burs under irrigation. The margins were finished and bevelled (Fig. 5). The index was positioned on the upper arch and evaluated for stability and retention. To produce the restorations alternately, PTFE tape (0.076 mm) was applied to isolate the adjacent teeth. The surfaces of the teeth to be restored were sandblasted with aluminium oxide (50 µm), etched with 37 % orthophosphoric acid etchant for 15 seconds, rinsed, and dried (Fig. 6).


Fig. 5. Maxillary central incisors after restoration removal and bevelling of the margins.


Fig. 6. Etching of the tooth surfaces with orthophosphoric acid etchant.


A universal adhesive (CLEARFIL™ Universal Bond Quick 2, Kuraray Noritake Dental Inc.) was then applied (Fig. 7) and polymerized with an LED curing light (SmartLite® Pro, Dentsply Sirona) for 10 seconds per tooth (Fig. 8).


A flowable composite (CLEARFIL MAJESTY™ ES Flow Low, colour W, Kuraray Noritake Dental Inc.) was injected through the holes until the index of the first prepared tooth was filled (Fig. 9). After light-curing for 40 seconds per tooth through the transparent index, the template was removed and the restoration was light-cured for a second time. Excess composite was then removed with a scaler.


Fig. 7. Application of a universal adhesive.


Fig. 8. Light-curing of the adhesive layer.


Fig. 9. Flowable composite injection.


The same procedure was subsequently repeated for the other teeth to be treated, isolating those already restored using PTFE tape (Figs. 10 to 15).


Fig. 10. Restored teeth isolated with PTFE tape.


Fig. 11. Etching of the tooth structure with 37 % orthophosphoric acid etchant.


Fig. 12. Application of the universal adhesive.


Fig. 13. Light-curing of the adhesive layer.


Fig. 14. Injection of the flowable composite into the index.


Fig. 15. Light-curing of the flowable composite through the transparent index.


Once the index was removed and excess material was eliminated. Then, the teeth were isolated with rubber dam using the split dam technique to improve patient comfort and visibility, and the restorations were finished with fine-grained diamond burs. Finally, progressive polishing was performed with polishing discs  (TWIST™ DIA for Composite, Kuraray Noritake Dental Inc.) (Figs. 16 and 17).


Fig. 16. Polishing of the restorations with the pre-polisher.


Fig. 17. Final polishing with the high-gloss polisher.


CLINICAL RESULTS

Once the restorations were completed (Figs. 18 and 19) and the occlusal and dynamic contacts were checked, the patient expressed immediate satisfaction. This was confirmed at the one-week follow-up (Fig. 20). The rehabilitation took a total of two hours, including photographic documentation. This represents a rapid, minimally invasive and cost-effective treatment compared to indirect restorations.


Fig. 18. Treatment outcome.


Fig. 19. Detailed view of the freshly restored teeth.


Fig. 20. Post-operative photograph taken after one week.


The six-month check-up (Figs. 21 and 22) not only confirmed the survival of the restorations but also showed excellent gingival health, demonstrating the correctness of the emergence profile and the high polishability of the cervical margins obtained with this restorative technique.


Fig. 21. Restorations at the six-month recall.


Fig. 22. Optical integration of the new restorations into the overall picture.


DISCUSSION

The Flowable Injection Technique is now a valid alternative in the field of direct restoration, as it combines operational simplicity with predictable aesthetic results. The main advantage lies in the reduction of variability linked to the operator's manual skills, thanks to the guiding role of the index, which allows the digital design or initial wax-up to be transferred with high accuracy. The aesthetic outcome is therefore highly controllable, while the clinical approach complies with the principles of minimally invasive dentistry. Added to this is the efficiency of the method, which allows for shorter operating times and lower costs compared to rehabilitation with indirect restorations. At the same time, it maintains the possibility of a subsequent transition to more complex prosthetic solutions.


A key enabler of this approach is the evolution of flowable composites. The latest generation has overcome the historical limitations of fragility and wear, offering mechanical and optical characteristics comparable to, if not superior to, paste-type composite materials. This progress has made it possible to use flowable materials not only as a complementary support, but as the real protagonist of a restorative technique that aims to simplify clinical work and improve the predictability of results.


Furthermore, the development of 3D printing applied to the production of transparent indexes has introduced a further leap in quality. The digital workflow makes it possible to reduce manufacturing times, standardize procedures, achieve high reproducibility, and design customized templates based on intraoral scans. The accuracy of clinical transfer is thus significantly increased, with a positive impact on the quality and stability of the final restoration.


The synergy between high-performance flowable resins and 3D-printed digital index therefore offers clinicians the option of offering patients aesthetic solutions that are rapid, accessible, and at the same time adhere to the principles of modern conservative dentistry.


CONCLUSION

The Flowable Injection Technique, supported by the latest generation of flowable composites and the potential of 3D printing, represents a modern and effective restorative strategy. The clinical case presented highlights how it is possible to offer patients a satisfactory, rapid, and conservative aesthetic treatment, while keeping open the option of a future transition to indirect restorations.


By combining innovative materials and digital technologies, this technique marks a step forward towards increasingly predictable, accessible, and patient-centred cosmetic dentistry.


Powers JM. A predictable resin composite injection technique, Part I. Dent Today. 2014 Apr;33(4):96, 98-101.

Checchi V, Generali L, Corciolani L, Breschi L, Mazzitelli C, Maravic T. Wear and roughness analysis of two highly filled flowable composites. Odontology. 2025 Apr;113(2):724-733. doi: 10.1007/s10266-024-01013-0.

Liaropoulou YM, Jiménez AK, Chierico F, Blatz MB. The Multilayer Flowable Injection Technique for Highly Esthetic Restorations. J Esthet Restor Dent. 2025 Jun 27. doi: 10.1111/jerd.13500.

Watanabe K, Tanaka E, Kamoi K, Tichy A, Shiba T, Yonerakura K, Nakajima M, Han R, Hosaka K. A dual composite resin injection molding technique with 3D-printed flexible indices for biomimetic replacement of a missing mandibular lateral incisor. J Prosthodont Res. 2024 Oct 16;68(4):667-671. doi: 10.2186/jpr.JPR_D_23_00239.

Shui Y, Wu J, Luo T, Sun M, Yu H. Three dimensionally printed template with an interproximal isolation design guide consecutive closure of multiple diastema with injectable resin composite. J Esthet Restor Dent. 2024 Oct;36(10):1381-1387. doi: 10.1111/jerd.13268.

Hulac S, Kois JC. Managing the transition to a complex full mouth rehabilitation utilizing injectable composite. J Esthet Restor Dent. 2023 Jul;35(5):796-802. doi: 10.1111/jerd.13065.

Lawson NC, Greene Z, Machado N, Tadros D, Robles A, Rocha M. Resin Composite Depth of Cure Through Transparent Matrix Materials Used for Injection Molding. Oper Dent. 2025 Mar 1;50(2):185-193. doi: 10.2341/24-100-L.


 

Restauration composite postérieure directe dans le cadre du concept « universal excellence »

Case by Dt. Koray Kendir, DDS, Turkey (İzmir)


RÉSUMÉ

Ce rapport de cas clinique présente une restauration composite postérieure directe réalisée à l‘aide du concept de produit « Universal Excellence » de Kuraray Noritake Dental Inc. Un adhésif universel (CLEARFIL™ Universal Bond Quick 2) et un composite fluide à teinte universelle et haute charge (CLEARFIL MAJESTY™ ES Flow Universal) ont été utilisés avec la simplicité et la prévisibilité pour objectif. La documentation étape par étape montre l‘isolation, la préparation de cavité, la remontée de marge profonde, le protocole d‘adhésion et la restauration finale.


DESCRIPTION DU CAS

Une patiente de 38 ans s‘est présentée pour des saignements interdentaires et une sensibilité au froid entre la canine maxillaire gauche et la première prémolaire (dents #23 et #24, notation FDI). L‘examen clinique a révélé une marge ouverte et une carie secondaire sur le plancher gingival de la restauration existante sur la dent #23. Après isolation par digue en caoutchouc, la procédure de traitement a été entamée en étapes.


PROCÉDURE CLINIQUE

Étape 1. La dent #23 présentait une marge gingivale ouverte et une carie (Ill. 1).

Étape 2. Après retrait de l‘émail, la carie a été excavée jusqu‘au niveau gingival. La lésion de la dent #24 a été observée pour extension sous-gingivale (Ill. 2).

Étape 3. Après excavation complète de carie et peaufinage de cavité, il est apparu évident que la dent #24 avait besoin d‘une remontée de marge profonde (DME) (Ill. 3).

Étape 4. La remontée de marge profonde (DME) a été réalisée sur la dent #24 à l‘aide d‘une cale transversale d‘usage. Après application d‘un mordançage sélectif et de CLEARFIL™ Universal Bond Quick 2, il a été procédé à la pose de CLEARFIL MAJESTY™ ES Flow Universal (Super Low) (Ill. 4 à 6).

Étape 5. Une fois la DME (remontée de marge profonde) terminée, des bandes de matrice adaptées ont été positionnées, puis les dents #23 et #24 ont fait l‘objet d‘une restauration directe avec CLEARFIL MAJESTY™ ES Flow Universal (Super Low) (Ill. 7 à 9). Grâce à la manipulation aisée du matériau, à l‘adaptation de teinte et à l‘excellente polissabilité, ce cas de DME délicat a été géré avec efficacité et réalisé avec succès. 

Les illustrations 10 et 11 montrent le résultat du traitement.


Ill. 1 : Vue pré-opérative sous isolation par digue en caoutchouc 


Ill. 2 : Situation clinique après excavation de carie


Ill. 3 : Cavités peaufinées avec marge profonde sur la prémolaire 


Ill. 4 : Cale d‘usage placée pour remonter la marge 


Ill. 5 : Vue buccale de la dent après remontée de la marge profonde avec des produits universels


Ill. 6 : Vue occlusale de la dent après remontée de la marge profonde avec des produits universels


Ill. 7 : Pose d‘une matrice transversale 


Ill. 8 : Vue buccale de la dent restaurée avec un composite fluide à teinte universelle et fluidité super low 


Ill. 9 : Vue occlusale de la dent restaurée avec un composite fluide à teinte universelle 


Ill. 10 : Vue occlusale de la restauration finale des dents #23 et #24, montrant le fondu des teintes, la forme anatomique et le brillant de surface


Ill. 11 : Vue buccale de la restauration f inale des dents #23 et #24, montrant le fondu des teintes, la forme anatomique et le brillant de surface


DISCUSSION

Les adhésifs universels et composites fluides modernes simplifient les restaurations postérieures directes en réduisant la sensibilité technique tout en apportant des résultats durables. Dans le cas présent, CLEARFIL™ Universal Bond Quick 2 a fourni une solide adhésion pour un temps d‘application minimal. Le composite fluide universel a démontré un niveau excellent en termes d‘adaptabilité, de polissabilité et de durabilité. Même avec une marge sous-gingivale exigeant une DME, une approche rationalisée a mise en œuvre sans compromis à la qualité. 


CONCLUSION

La combinaison de CLEARFIL™ Universal Bond Quick 2 et CLEARFIL MAJESTY™ ES Flow Universal permet aux cliniciens de réaliser des restaurations postérieures prévisibles et efficaces. Leur applicabilité universelle et leurs propriétés de manipulation s‘inscrivent dans le cadre du concept « Universal Excellence » pour une pratique quotidienne simplifiée, mais fiable.


Éthique et divulgation

Toutes les procédures ont été réalisées conformément aux normes d‘usage dans les cabinets dentaires. La patiente a donné son consentement éclairé pour le traitement et la publication d‘images cliniques anonymisées. L‘auteur collabore avec Kuraray Noritake Dental Inc. en tant que consultant, le contenu reflète l‘expérience clinique.


Dentist:

KORAY KENDIR


Diplômé de la faculté dentaire de l‘université Hacettepe, le Dr Koray Kendir a co-fondé une clinique dentaire privée à Izmir. Il est spécialisé dans la dentisterie numérique, la conception du sourire et les traitements restauratifs assistés par ordinateur. Réputé pour son approche novatrice, le Dr Kendir intervient fréquemment dans le cadre de congrès dentaires nationaux et est consultant pour plusieurs entreprises dentaires.

Biomimetics versus patient demands - finding the perfect balance

INTRODUCTION

Patient demands and expectations have never been as concrete as in this day and age: Influenced by role models on social media and new aesthetic standards, our patients ask for brighter smiles or for restorations with specific tooth forms rather than demanding a perfect copy of nature. For us dental technicians, the challenge lies in finding a perfect balance between fulfilling these demands and respecting established biomimetics-inspired principles of aesthetics and function.


To accomplish this task, we need to know which principles need to be respected and where there is room for creativity. At the same time, it is essential to be well-informed about the latest technological advancements and developments in dental materials to be able to select the most appropriate restorative approaches. Only by understanding the selected materials and technological tools very well, will we be able to exploit their potential and deliver the best possible restorative solution. To sum up, we need to keep one foot in the boat of science and the other in the boat of art. Only by balancing both can we navigate the rapid advancements in the field effectively - ensuring they serve patients’ best interests while avoiding practices that lack purpose or meaning.


The challenge lies in finding a perfect balance between fulfilling the patient‘s demands and respecting established biomimetics-inspired principles of aesthetics and function.


MATERIAL CHOICES

Our favored framework materials for the production of aesthetic anterior restorations include KATANA™ Zirconia UTML, KATANA™ Zirconia STML discs (both Kuraray Noritake Dental Inc.) and lithium disilicate-based press ingots Amber® Press (HASS). These high-strength ceramics are ideal for fulfilling the aesthetic and functional demands of anterior restorations. Their balanced optical properties allow for the creation of lifelike restorations. Their physical and mechanical properties, on the other hand, are responsible for stability during all clinical steps from try-in to permanent placement, proven bonding ability and a certain error tolerance: Minor adjustments or modifications are possible without the risk of inducing cracks or dimensional changes when firing repeatedly. Finally, both materials are digital workflow compatible, which means that procedures are quick, mock-up, temporary restoration and definitive restoration easily aligned, and remakes facilitated.


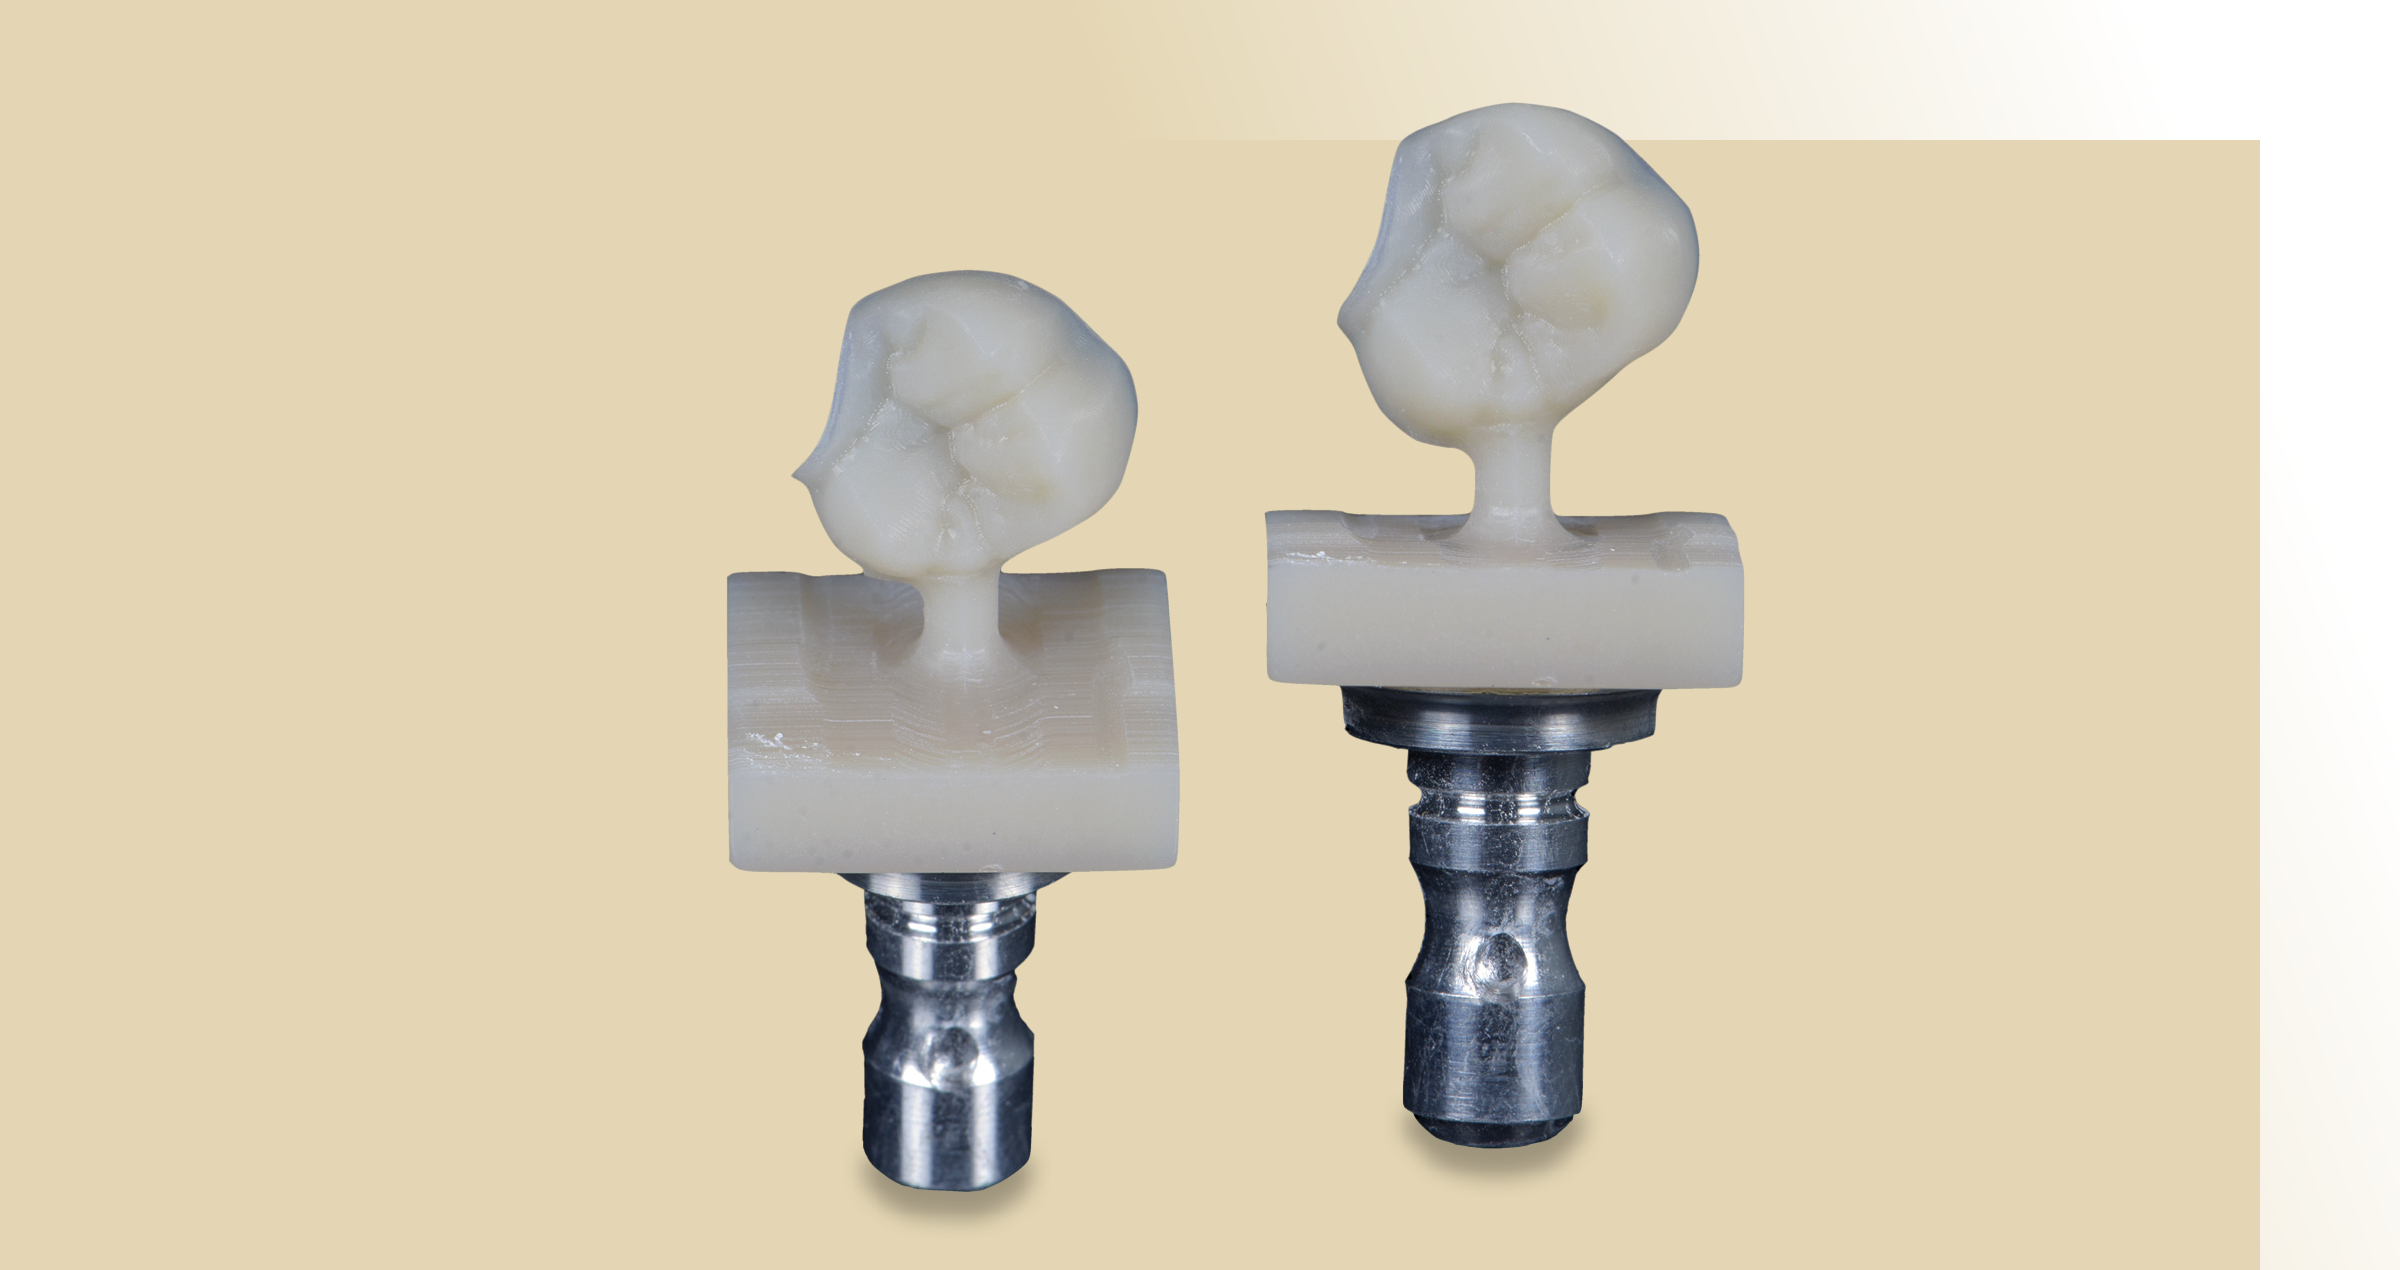
The restorations are usually designed in full contour; a labial cutback of 0.3 to 0.5 mm creates sufficient space for the veneering porcelain. The preferred layering approach is micro-layering combined with the internal live stain technique, which offers the benefits of a controlled procedure and predictable, highly aesthetic outcomes with brilliant depth effects in short time. A layering material that precisely meets our needs regarding the preferred approach and is perfectly compatible with both, lithium disilicate and zirconia, is CERABIEN™ MiLai (Kuraray Noritake Dental Inc.).


The following two case reports are used to illustrate how this material combines with the different framework materials, revealing further benefits of the selected ceramics and techniques.


CASE #01


LITHIUM DISILICATE VENEERS

This 36-year-old female patient wanted to replace her bonded composite veneers. She expressed the demand for a brighter smile with a bleached color (NW 0.5) selected for her six maxillary anterior teeth and first premolars. However, she wanted the tooth preparation for this treatment to be as minimally invasive as possible.


In addition, she specifically requested that the teeth be square in form, with the lateral incisors the same length as the central incisors and the incisal edges straight, without rounded corners – clearly influenced by modern aesthetic standards. We explained our concerns regarding potential aesthetic and functional issues that might necessitate further intervention or adjustments, but she remained firm in her choices.


FROM DESIGN TO PRESSED FRAMEWORK


In line with the patient’s demands, it was planned to restore her maxillary teeth from first premolar to first premolar with lithium disilicate veneers (Amber® Press HT in the shade W2), which would allow for the desired minimally invasive preparations and bright appearance. Following tooth preparation, an analog impression was taken and sent to our laboratory. After the production of the model, the case was digitalized for the virtual designing of the veneers. In order to create space for the porcelain, the labial surfaces of the full-contour restorations were reduced by 0.3 mm with the software (exocad® DentalCAD, Figs. 1 and 2).


The frameworks were then milled in wax and pressed in Amber® Press HT W2 (Figs. 3 and 4). Sprues were cut and the surfaces of the veneer frameworks processed with a Diagen-Turbo-Grinder Ø 3,5 x 11 mm Cone and Wheel.


Would you like to continue reading as a PDF? Please leave your email address below.


Advancements in adhesive technology: CLEARFIL Universal Bond Quick 2 well-equipped for success

INTRODUCTION

Adhesive dentistry has seen significant advancements over the past decades. Initially, dental adhesives evolved from no-etch systems to etch-and-rinse systems, which consisted of multiple components. From then on, manufacturers shifted focus toward simplifying the procedure. Different generations of self-etch adhesives and, finally multi-mode or universal adhesives were the result. The latter category, introduced in the early 2010s, nowadays comprises numerous products offered by many different manufacturers.


In general, universal adhesives offer more procedural freedom and simplicity than multi-step, multi-bottle systems as well as good adhesion. According to a recent review1, adhesive properties have improved and manufacturers have also succeeded in reducing the technique sensitivity of the adhesive systems. However, hybrid layer degradation still seems to be a relevant issue for many modern products available on the market. Moreover, feedback from clinicians reveals that there are several areas of concern where bonding systems in general can be improved. These include the risk of contamination due to a lengthy procedure or the need for rubbing, pooling of the adhesive in corners and accumulation along margins. Moreover, some adhesives are challenging to introduce into narrow cavities, while their curability may be limited.


That is why Kuraray Noritake Dental Inc. decided to develop a new-generation universal adhesive that addresses these areas of concern: CLEARFIL™ Universal Bond Quick 2. This latest evolution in dental bonding technology is based on decades of knowledge in the development of clinically successful dental adhesives at Kuraray Noritake Dental Inc. It retains all the benefits of its predecessor – the current extensively tested and clinically proven CLEARFIL™ Universal Bond Quick – adding higher strength and improved handling.2-5


THE ESSENTIAL BENEFITS OF CLEARFIL Universal Bond Quick 2

CLEARFIL Universal Bond Quick 2 offers the following essential benefits:

  • Quick and straightforward application procedure
  • High-strength bonding layer
  • Consistently durable bond
  • Ease of application
  • Minimised risk of pooling
  • Procedural freedom
  • Immediate availability for clinical use


For all those who wonder how the improvements were implemented, which technologies are responsible for them and whether there is scientific proof, the following paragraphs are worth reading. They summarize essential general knowledge about adhesive formulations, explain potential issues and their causes, and address every benefit featured by CLEARFIL Universal Bond Quick 2, explaining all the important details around it.


KEY COMPONENTS OF UNIVERSAL ADHESIVES

Universal adhesives are based on highly complex formulations with many different constituents and technologies combined in a single bottle. The most essential parts found in virtually every universal adhesive are:


RESIN COMPONENTS

Just like composite restorative materials, dental adhesives are resin-based materials. This means that different kinds of cross-linking and functional monomers are the beating heart of the formulation. Functional monomers are initially hydrophilic and form linear polymers upon curing, while cross linking polymers are hydrophobic and form stronger, highly cross-linked polymer networks.6 They are added to adhesive formulations to fulfil different tasks: some monomers are used to promote adhesion to tooth structure or composite resin, while others are used as etching or demineralizing agents, wetting enablers, and agents promoting penetration into the tooth structure. Hence, they have an impact on application properties, bond strength to various substrates including enamel and dentin, strength, hydrolytic stability and overall durability of the bonding layer, and more.


Would you like to continue reading as a PDF? Please leave your email address below.


References

1. Breschi L, Maravic T, Mazzitelli C, Josic U, Mancuso E, Cadenaro M, Pfeifer CS, Mazzoni A. The evolution of adhesive dentistry: From etch-and-rinse to universal bonding systems. Dent Mater. 2025 Feb;41(2):141-158.
2. Jaggi M, Karlin S, Zitzmann NU, Rohr N. Shear bond strength of universal adhesives to human enamel and dentin. J Esthet Restor Dent. 2024 May;36(5):804-812.
3. Peumans M, Vandormael S, De Coster I, De Munck J, Van Meerbeek B. Three-year Clinical Performance of a Universal Adhesive in Non Carious Cervical Lesions. J Adhes Dent. 2023 Jun 8;25(1):133-146. doi: 10.3290/j.jad.b4186751. PMID: 37387551.
4. de Almeida RAM, Lima SNL, Nassif MV, Mattos NHR, de Matos TP, de Jesus Tavarez RR, Cardenas AFM, Bandeca MC, Loguercio AD. Eighteen-month clinical evaluation of a new universal adhesive applied in the “no-waiting” technique: a randomized clinical trial. Clin Oral Investig. 2023 Jan;27(1):151-163. doi: 10.1007/s00784-022-04703-7. Epub 2022 Sep 6. PMID: 36068369; PMCID: PMC9447982.
5. De Almeida R, Siqueira F, Verde T, Naupari-Villasante R, Reis A, Loguercio AD, Cardenas A. Prolonged application time effects on universal adhesives in non-carious cervical lesions: An 18-month split mouth randomized clinical trial. J Dent. 2024 Jan;140:104800. doi: 10.1016/j.jdent.2023.104800. Epub 2023 Dec 4. PMID: 38056759.
6. Van Landuyt KL, Snauwaert J, De Munck J, Peumans M, Yoshida Y, Poitevin A, Coutinho E, Suzuki K, Lambrechts P, Van Meerbeek B. Systematic review of the chemical composition of contemporary dental adhesives. Biomaterials 2007; 28(26):3757-85.


Glass Ceramic Veneer Cementation

By Dr Wiktor Pietraszewski BSC(HONS) DMD


INTRODUCTION

According to personal experience, the cementation of glass ceramic veneers is one of the most stressful and technique-sensitive procedures in restorative dentistry. This is not only due to the minimal margin for error, but also the high aesthetic standards that must be met to deliver a result satisfying both clinician and patient. Modern protocols emphasize conservative preparation, ideally remaining entirely within enamel, or at the very least, minimising extension into dentin. It is essential to understand that both preparation design and extent should not be planned in isolation. Instead, they must be carefully co-planned through thorough communication and collaboration between clinician and technician, ensuring the final result is both biologically respectful and aesthetically predictable.


THE CASE

The case to be discussed today is rather unique in that it arose unexpectedly, without the luxury of typical pretreatment planning steps such as a diagnostic wax-up or mock-up. These were omitted due to time and budget constraints on the patient’s part — a reality many clinicians can relate to. The rationale behind this approach will become clearer as we progress through the case. The patient is a 70-year-old retiree, whom I have been managing for several years. Treatment thus far has focused on stabilising and gradually improving her posterior restorations, with the longer-term aim of addressing the anterior dentition to enhance both function and aesthetics.


Nowadays, financial considerations often pose a significant barrier to patients accepting comprehensive treatment plans from the outset. As such, effective communication and phased treatment planning become essential tools in fostering patient trust and long-term commitment. This particular visit was an emergency appointment, with the patient presenting with a fractured porcelain veneer on her maxillary left central incisor — tooth 21 according to the FDI notation (Fig. 1). Fortunately, because of the existing phased approach to her care, we were well-positioned to transition into an aesthetic restorative phase with minimal resistance or hesitation from the patient.


Fig. 1. Pre-operative view - emergency: Chipped existing ceramic veneer.


Fig. 2. The plan - Digital Smile Design - 4 x porcelain veneers - 4 x direct composite restorations.


THE PLAN

After careful discussion, it was decided to remove and replace the four existing porcelain veneers and to replace four existing Class V stained composite restorations with fresh new direct composite (Fig. 2). Everyone involved was happy with the plan, sure it would adequately fulfil the patient’s aesthetic expectations and even surpass them. At the emergency appointment, time was so limited that only the temporary restoration of the chip with direct composite was feasible. Time was an important factor going forward: the patient wanted to proceed and have the case completed as soon as possible.


Main features of the Digital Smile Design (DSD) plan

1. Lengthening - central incisors – incisal edges to reflect the length of the canine tips
2. Equal gingival zeniths
3. Masking of the cervical defects


PREPARATION, SCAN & TEMPORISATION

The first step involved building up the teeth using a flowable composite to create a rough direct mock-up (Fig. 3), guided by the DSD plan (Fig. 2). This mock-up provided a visual and functional prototype, of which an impression was taken to aid in the fabrication of interim temporary restorations for the provisional phase of treatment.


Preparations were carried out using OptraGate isolation. The existing veneers were first removed using high-grit diamond burs at high speed. Once the bulk of the old material was cleared, gingival retraction was achieved using retraction cord, allowing for improved visibility and access. The preparations were then refined with lower-grit diamond burs at a reduced speed to ensure precision and tissue safety. The primary objectives of the preparation phase were to establish harmonious gingival zeniths and to adequately cover the cervical defects that were evident in the previous restorations (Figs. 4 and 5).


Fig. 3. Mock-up made of flowable composite.


Fig. 4. Class V composite restorations replaced on teeth 13, 23, 24 and 25.


Fig. 5. Situation after preparation of the maxillary incisors.


Would you like to continue reading as a PDF? Please leave your email address below.


Treatment of a fractured and secondary carious permanent molar tooth

Case report by Dr Mediha Isikver


Tooth fractures and secondary caries are frequently observed in posterior teeth, often resulting from occlusal stress, restoration failure, or secondary bacterial infiltration. These conditions compromise tooth integrity, function, and aesthetics. With advancements in adhesive dentistry, minimally invasive and durable restorative solutions have become achievable. Material selection plays a critical role in the success of composite restorations, influencing marginal adaptation, wear resistance, and patient satisfaction. This case report describes the step-by-step clinical management of a fractured and secondary carious permanent molar restored using materials from Kuraray Noritake Dental Inc.


CASE PRESENTATION

A 32-year-old female patient presented to the clinic with sensitivity and discomfort in the upper left posterior region. Clinical examination revealed a distal wall fracture on tooth #26 (maxillary left first molar) with a secondary carious lesion extending subgingivally. Radiographic evaluation confirmed the absence of periapical pathology. Adjacent teeth (#25 and #27) showed early carious activity, but the patient opted for the restoration of tooth #26 only. The tooth was asymptomatic to percussion and showed normal vitality on pulp testing.


Fig. 1. Initial clinical view of tooth #26 under rubber dam isolation.


TREATMENT PROTOCOL

  1. Isolation and caries removal: The tooth was isolated with rubber dam. The existing defective restoration and carious tissue were carefully removed using tungsten carbide burs and a slow-speed handpiece.
  2. Surface cleaning: After preparation, KATANA™ Cleaner was applied to remove contaminants and optimize bonding surface quality.
  3. Bonding procedure: A single-step, self-etch adhesive, CLEARFIL™ Universal Bond Quick 2, was applied to both enamel and dentin following the protocol recommended by the manufacturer.
  4. Restorative phase: The deep and undercut areas were resin coated with CLEARFIL MAJESTY™ ES Flow Universal Low (U shade), ensuring adaptation and stress relief in undercut regions. The remaining cavity was restored incrementally using CLEARFIL MAJESTY™ ES-2 Universal (U shade) paste-type composite, with each 2 mm layer light-cured for 20 seconds.


Fig. 2. Clinical view of tooth #26 after removal of the defective restoration and carious tissue.


Fig. 3. Application of KATANA™ Cleaner to remove contaminants and optimize bonding surface quality after preparation.


Fig. 4. Selective enamel etching performed on tooth #26.


Fig. 5. CLEARFIL™ Universal Bond Quick 2 applied to both enamel and dentin following the manufacturer’s recommended protocol.


Fig. 6. Resin coating with CLEARFIL MAJESTY™ ES Flow Universal Low (U shade).


Fig. 7. Reconstruction of the mesial and distal walls with CLEARFIL MAJESTY™ ES-2 Universal (U shade) composite.


Fig. 8. Incremental build-up of cusps and occlusal anatomy using CLEARFIL MAJESTY™ ES-2 Universal composite, refined with a brush for contour adjustment.


Fig. 9. Initial finishing of the composite restoration performed with darkcoloured TWIST™ DIA for Composite (medium) rubber points to refine surface texture and anatomy.


Fig. 10. Final polishing performed with light-coloured TWIST™ DIA for Composite (fine) rubber points to achieve a highgloss, smooth surface.


FINAL SITUATION


Fig. 11. Final view of the restoration after occlusal adjustment and polishing.


CONCLUSION

This case demonstrates that adhesive and restorative systems from Kuraray Noritake Dental Inc. offer a reliable, efficient and effective approach for treating fractured and secondary carious posterior teeth. The integration of self-etch adhesives and high performance composites contributes to durable and aesthetically pleasing restorations. Continuous follow-up is essential to evaluate the long-term clinical behaviour of these materials.


Restoring a young patient’s smile with composite

Case by Dr. Onur Alp Yünük 


COMBINING HIGH-PERFORMANCE TOOLS AND MATERIALS FOR A PREDICTABLE OUTCOME

Direct composite restorations are a high-quality treatment option even when large amounts of tooth structure need to be replaced. This is due to recent advancements in resin composite materials and adhesive technology. By selecting appropriate materials and layering techniques combined with modern digital tools for colour difference evaluation, it is possible to predictably produce highly aesthetic outcomes, as demonstrated in the following case example.


The challenge

A young male patient presented to our clinic requesting the replacement of his existing composite restorations on his maxillary incisors (teeth #12 and #11 according to the FDI notation). Clinical examination revealed extensive restoration loss on the lateral incisor. Furthermore, anatomical irregularities, discolouration, and loss of surface gloss were observed on tooth #11. The adjacent central incisor exhibited similar issues regarding colour and surface polish.


In consultation with the patient, it was decided to replace the existing restorations using a modern composite material specifically developed for dual-shade layering – CLEARFIL MAJESTY™ ES-2 Premium (Kuraray Noritake Dental Inc.). For an exact shade analysis, photographs were taken with and without a cross-polarized filter (Figs. 1 to 4).


Fig. 1: Frontal view of the teeth  with extensive restoration loss on the maxillary left lateral incisor.


Fig. 2: Cross-polarized photograph of the teeth allowing for a detailed analysis of the shade irregularities.


Fig. 3: Lateral view of the teeth.


Fig. 4: Lateral view – cross-polarized photograph.


The solution

Following removal of the existing restorations, rubber dam was placed for working field isolation. A self-etching adhesive (CLEARFIL™ SE Bond 2, Kuraray Noritake Dental Inc.) was applied in the selective enamel etching mode before establishing the palatal shell using CLEARFIL MAJESTY™ ES-2 Premium in the shade A1E (Figs. 5 and 6). The mamelon structures were reconstructed with CLEARFIL MAJESTY™ ES-2 Premium in the shade A1D, while the translucent shade Blue was applied  to the opalescent zone. Finally, yellow and white tints were used for characterization. Fig. 7 illustrates the appearance before,  Fig. 8 after finishing and polishing.


Fig. 5: Palatal shell established with the enamel shade A1E of the selected composite.


Fig. 6: Lateral view of the teeth during the restoration procedure.


Fig. 7: Restoration before finishing and polishing.


Fig. 8: Appearance of the restorations after finishing and polishing.


The outcome

To evaluate the final colour integration, another photograph was taken with a cross-polarized filter, holding a grey reference card in place for calibration (Figs. 9 and 10). The lateral view of the restored teeth (Fig. 11) reveals that not only the right colour combination, but also a natural surface texture is required for a highly aesthetic outcome.


Fig. 9: Frontal view of the restored teeth taken with a cross-polarized filter.


Fig. 10: Gray reference card calibration and the resulting L*a*b* coordinates of the restoration.


Fig. 11: Lateral view of the restored teeth stressing the importance of surface texture.


DISCUSSION AND CONCLUSION

Observation, supported by modern tools for photography and image analysis (like polarized filters and L*a*b* coordinates), is  an important skill needed for the lifelike reconstruction of teeth with direct composite materials. By combining this skill with a highperformance composite system that offers fixed shade combinations and innovative light diffusion technology for a nice blend-in  with the surrounding tooth structure, creating beautiful restorations becomes a predictable business.

In the case presented, the patient was very satisfied with the outcome in terms of aesthetics and function. At regular recalls, the quality of the restorations is checked – they still offer a very nice functional and aesthetic integration.


Recreating nature’s beauty

Case report by Vasilis Vasiliou


AESTHETIC RESTORATION OF MAXILLARY INCISORS

Falling in love, applying for a first job, attending a best friend’s wedding: There are so many occasions for young people when looking gorgeous is important. That is why restoring a young patient’s smile to its natural beauty is a special task that demands a lot from us. We need to listen to their touching stories, understand their specific needs and desires – and finally find a way to exceed their expectations. Whenever our plan works and is performed correctly, the outcome will be rewarded with extreme gratitude by those affected. After all, it is not only the smile we restore, but also the patients’ self-confidence and quality of life.


SINGLE BAKE, NATURAL RESULT

The good news: Even highly aesthetic all-ceramic restorations can be produced with a minimal number of bakes. Modern framework materials and porcelain systems allow us to imitate a natural play of colours and translucencies, a virtually unlimited number of individual effects and a vivid surface texture in a predictable way. A possible procedure is illustrated below. The materials utilized in this case were KATANA™ Zirconia STML and CERABIEN™ ZR (Kuraray Noritake Dental Inc.) and the restoration was completed using the One-Bake technique developed by MDT Nondas Vlachopoulos.


Fig. 1. Frameworks made of KATANA Zirconia STML in the shade A1.


Fig. 2. Single-bake layering procedure: Application of CERABIEN ZR Opacious Body in the cervical …


Fig. 3. … and mamelon areas.


Fig. 4. CERABIEN ZR Body porcelain applied in the body area.


Fig. 5. CERABIEN ZR Transitional Dentine used to increase the translucency in the incisal part.


Fig. 6. CERABIEN ZR Opacious Body added in specific areas to create more reflaction.


Fig. 7. Incisal cut-back and creation of the mamelon structure as well as adding of T Blue to give depth.


Fig. 8. … in the body and distal incisal areas.


Fig. 9. Application of Aqua Blue 1 and T Blue on the incisal edges to produce a youthful translucency.


Fig. 10. Creation … effect


Fig. 11. … of mamelons.


Fig. 12. Application of Luster porcelains: LTx, …


Fig. 13. … ELT1 …


Fig. 14. … and LT1.


Fig. 15. Cutback of the dentin for the creation of a halo effect.


Fig. 16. Final shape: Halo effect created with Body.


Fig. 17. Treatment outcome after a first bake followed by minor adjustments, surface texturing and glazing with CERABIEN™ ZR FC Paste Stain Clear Glaze.


Fig. 18. Restorations adhesively cemented in the patient’s mouth.


CONCLUSION

Restoring a young patient’s smile is a particularly challenging task, as the quality of the outcome has a huge effect on the self-confidence and quality of life of the affected person. By listening closely to our patients’ stories, understanding their needs and knowing our materials well, we are able to deliver exactly what they need. It is their positive feedback and happiness that drives me to never stop learning and practicing with my ceramics and porcelains for continued improvement and even better outcomes.


I would like to express my gratitude to Dr. Loukia Pedoulou for the professional partnership and clinical support in achieving this result.


No limits: A truly universal adhesive

REDEFINING WHAT “UNIVERSAL”  MEANS

When discussing the universal properties of a dental adhesive, most of us probably think of its compatibility with various etching techniques (from self-etch to total-etch) and a wide indication range. After all, universal adhesives are typically used as bonding agents for direct restorations made of light-curing composite, for immediate dentin sealing, for repair procedures and also in the context of indirect restoration placement.


However, in our opinion, there is more to it:


This means it should be compatible with any resin-based composite and self-adhesive resin cement, regardless of the manufacturer.


BREAKING FREE FROM SYSTEM BOUNDARIES

This is not self-evident: For a long time, “staying within the manufacturer’s own system ” has been a key prerequisite for the successful use of dual-cure core build-up materials and self-adhesive resin cements. Manufacturers worldwide have strongly recommended combining components from the same manufacturer and system to provide for chemical compatibility, optimal alignment, and the best possible outcomes. 


CLEARFIL™ Universal Bond Quick 2: FREEDOM AND FLEXIBILITY

With the new CLEARFIL™ Universal Bond Quick 2, this is no longer necessary: The R&D team of Kuraray Noritake Dental Inc. in Japan has developed an adhesive that works well not only with the company’s self-adhesive resin cement PANAVIA™ SA Cement Universal, but also with other manufacturers’ products. The same applies to core build-up materials: Compatibility is no longer limited to CLEARFIL™ DC CORE PLUS, but extends to solutions offered by other companies. Thorough testing has confirmed that it works well – provided each product’s official instructions for use are followed.


ONE ADHESIVE FOR EVERY CHALLENGE

This makes CLEARFIL Universal Bond Quick 2 a truly universal adhesive and, in fact, the only one needed in your dental practice. Interested? Learn more about the product and its innovative features, including its effortless application with no waiting time. 


SMART. STREAMLINED. UNIVERSAL.

At Kuraray Noritake Dental Inc., we understand the demands of modern dental practices. Balancing complex procedures, tight schedules, and patient needs is no easy task. That is why we have been on a relentless journey to streamline, enhance, and refine every step of your work for decades. Our vision is clear: a world where your materials and tools work seamlessly in your hands, where complexity is minimized, and where you are given enough time to focus on what matters most: the individual desires and needs of every single patient. This is the future of dentistry, and together, we’re making it happen.


We invite you to explore our comprehensive Universal Excellence portfolio —  from bonding agent to composites and resin cement. For Smart Streamlined Solutions in your practice.