Clinical case - PFM incisor crowns using Noritake Super Porcelain EX-3

By Daniele Rondoni, RDT


Preoperative view


1 PFM. 3 Laminates on refractory


Postoperative view


NORITAKE SUPER PORCELAIN EX-3 CHROMATIC MAP


Dentist:

DANIELE RONDONI, RDT


Born in Savona in 1961 where he lives and has worked in his own laboratory since 1982 with his collaborators. Graduated from the dental technician school IPSIA “P. Gaslini” in Genoa in 1979. He continued his education by attending relevant workshops for the “Italian dental school“ and broadened his professional experience in Switzerland, Germany and Japan. Since 2011 Kuraray Noritake Dental International Instructor.


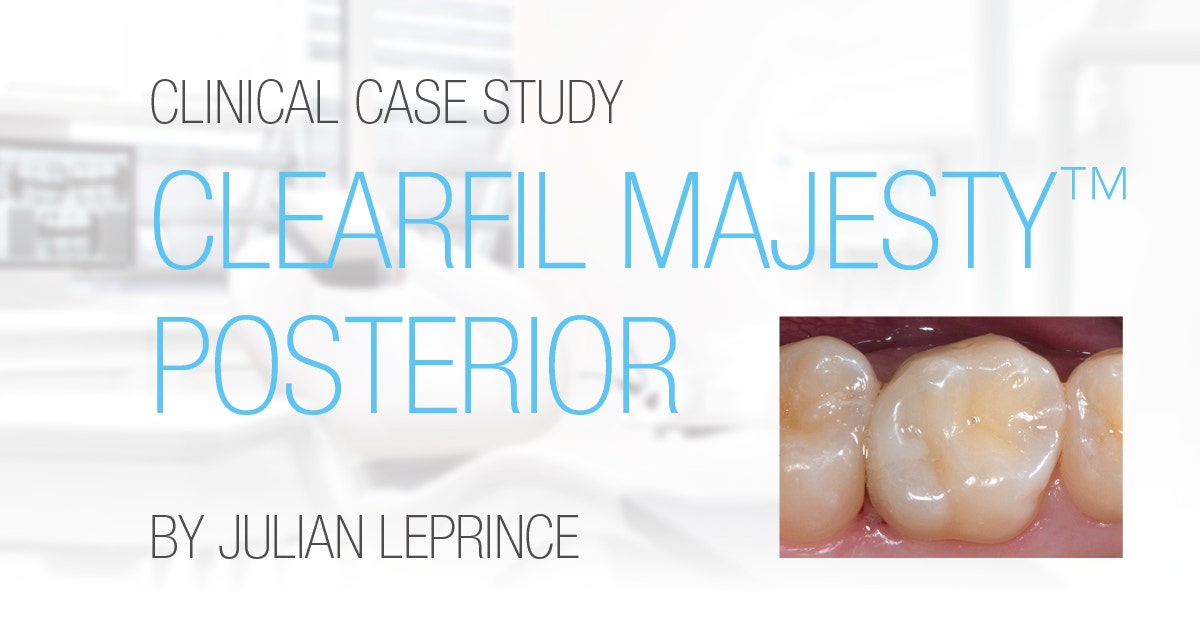
Clinical case with CLEARFIL MAJESTY™ Posterior

By Julian Leprince, UCLouvain


PROXIMAL RESTORATION
POSTERIOR // 26 DEEP DISTAL


  • Patient stated they experienced occasional sensitivity to heat/cold.
  • Preoperative bite-wing X-ray. Carious lesions in 26 M and D.
  • Decided to monitor 26 M (caries limited to the outer dentin zone > just 35% of these lesions were cavitated; per Hintze et al., Caries Res 1998).
  • Decided to treat 26 D; treatment classified as difficult due to the limited juxtaosseous space.


  • Clinical preoperative situation.
  • Rubber dam positioned (clamp on 27, ligatures at elements 25-26-27), limited connection at the height of 27 palatally. Deemed acceptable due to the absence of blood and saliva.
  • A gray discoloration can be observed at the height of the mesial marginal ridge (limited) and distally (extensive). An old composite restoration is visible in the distal fossa.


  • Positioning a protective system – a combination of a plastic wedge and a straight small metal plate – to prevent damage to the neighboring element during the mounting process.


  • Drilling through the enamel to access the softened dentin, which can be excavated with a hand tool.


  • First phase of removing the proximal enamel.


  • Removing the unsupported proximal enamel.
  • Excavating the softened dentin. The difference in texture in the dentin is visible.
  • Note the damage to the protective system, which appears to justify its use.


  • Cleaned cavity after removing the protection system.
  • The current recommendations from the ORCA (European Organisation for Caries research) state that where caries is deep, partial excavation is required but restricted to the softened dentin. With regard to the pulp, work must be carried out to ensure that it is not exposed (Carvalho et al., Caries Res 2016). The successes achieved with this approach outweigh those achieved with complete excavation. In contrast, the cavity edges (enamel and dentin; as per JAD) are treated so that only hard and healthy tissue is present, which is more favorable for marginal contact.


  • Positioning a matrix band with box.
  • A wooden wedge is used to position the matrix band against the element on the palatal side, while Teflon is used on the vestibular side.


  • Contact between the matrix band and the bottom of the proximal cavity.
  • The matrix band runs precisely until beyond the edge of the cavity.
  • The cavity is deep enough so that the concavity between the root is visible distovestibularly and palatally.
  • The connection of the matrix band is incomplete due to the concavity, but the seal that is achieved by the matrix and improved by using Teflon is thereby deemed to be adequate, including as no contamination is observed. The bonding procedure is then begun.


  • Selective etching of the enamel with 37% phosphoric acid (K-Etchant Syringe) for 20 seconds, followed by thorough flushing with the multifunction spray.


  • After drying, the etched enamel has a chalky appearance.
  • In this case study, the preferred choice was the type of selfetching adhesive system used here (CLEARFIL™ SE BOND). This is because the technology used appears to have a favorable outcome when used on eroded dentin, thanks to the ability of MDP to bond chemically to calcium in the partially demineralized dentin (Perdigao, Dent Mater 2010).
  • This procedure was chosen to create an optimum bond.


  • It is clearly visible at the height of the cavity edge that the excavation extends to the hard dentin. In the axial section, excavation is limited to as far as the soft dentin to reduce the risk of exposing pulp.


  • Applying the self-etching primer to the dentin for 20 seconds, followed by drying.
  • Applying the bonding (B), followed by light curing for 10 seconds.
  • Applying a small amount of flowable composite (F) (e.g. CLEARFIL MAJESTY™ ES Flow), restricted to the interradicular concavity.
  • Note the change in the appearance of the dentin, from matt to glossy.


  • Positioning a horizontal layer of composite (max. 2 mm) to raise the proximal margin.
  • Light curing of each layer with an output of 1,000 mW/cm2 for 20 seconds (Leprince et al., Oper Dent 2010).


  • Positioning a sectional matrix, in conjunction with a separating ring and a wooden wedge, to achieve an accurate anatomy of the proximal restoration.
  • The composite is positioned by adding successive 2-mm layers (the number of bonded surfaces must be minimized).


  • After removing the matrix band, defects can be observed in the shape (slight oversize); this should be corrected carefully with a curved scalpel and/or the drill.
  • A paro curette is used, in conjunction with floss wire and a fine abrasive strip, to remove any excess adhesive, for example.

FINAL SITUATION


  • Correcting the anatomy is followed by adjustment of the occlusion and polishing.
  • The composite chosen for the restoration (CLEARFIL MAJESTY™ Posterior) has a high filler loading (weight percentage of inorganic filler >80%), which produces an elasticity modulus of >16 GPa; this is comparable to the elasticity modulus values reported for dentin (Randolph et al., Dent Mater 2016).


Dentist:

JULIAN LEPRINCE
UCLouvain


Julian Leprince studied dentistry at UCLouvain, and is now head of the division of Conservative Dentistry & Endodontics at Cliniques universitaires Saint-Luc (Brussels, Belgium), associate professor at UCLouvain and head of the DRIM research group (www.drim-ucl.be).


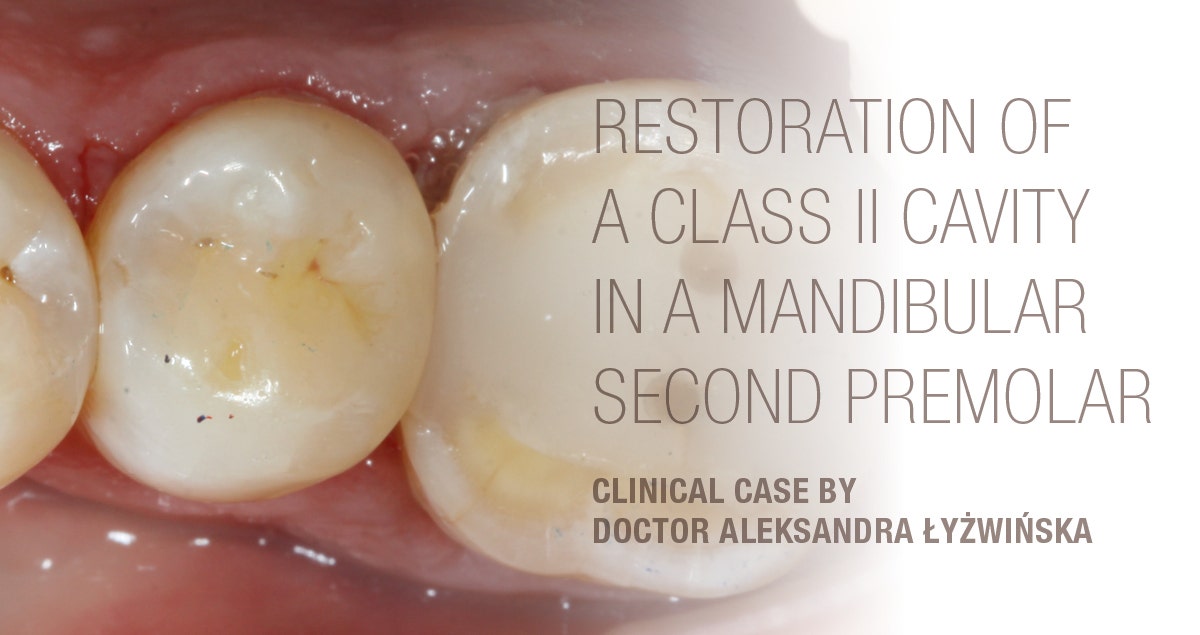
Clinical case - Restoration of a class II cavity in a mandibular second premolar

By Aleksandra Łyżwińska, DMD


This patient required the replacement of an insufficient composite restoration of the mandibular right second premolar. It was planned to restore the tooth using a combination of CLEARFIL MAJESTY™ ES Flow – Super Low A3 and CLEARFIL MAJESTY™ ES-2 Classic A3 with some tints. CLEARFIL™ SE BOND 2 was the adhesive of choice. It produces a reliable chemical adhesion to dentin and enamel as it contains 10-MDP. The best results are obtained after selective enamel etching.


Fig. 1 Initial clinical situation.


Fig. 2 Removal of the existing restoration reveals carious tissue underneath.


Fig. 3 Appearance of the cavity after caries excavation and preparation.


Fig. 4 Dried tooth structure after selective enamel etching with a sectional matrix in place.


Fig. 5 Build-up of the interproximal wall with CLEARFIL MAJESTY™ ES-2 Classic (shade A3) after the use of CLEARFIL™ SE BOND 2.


Fig. 6 Successful transformation of a Class II cavity to Class I.


Fig. 7 Cavity filled with CLEARFIL MAJESTY™ ES Flow (Super Low A3).


Fig. 8 Appearance of the tooth after the application of a final layer of CLEARFIL MAJESTY™ ES-2 Classic (shade A3) and some tints.


Fig. 9 Polished restoration on the mandibular right second premolar.


FINAL SITUATION

Fig. 10 Treatment result ...


Fig. 11 ... after rubber dam removal.


Dentist:

ALEKSANDRA ŁYŻWIŃSKA
Warsaw, Poland


Aleksandra Łyżwińska, DMD, is a passionate aesthetic and adhesive dentist. Driven by Evidence Based Dentistry, her goal includes using modern composite materials and bonding agents in her clinical practise. In addition to her primary job, she worked as a lecturer and an assistant professor at the Department of Conservative Dentistry and Endodontics of Medical University of Warsaw, her alma mater.


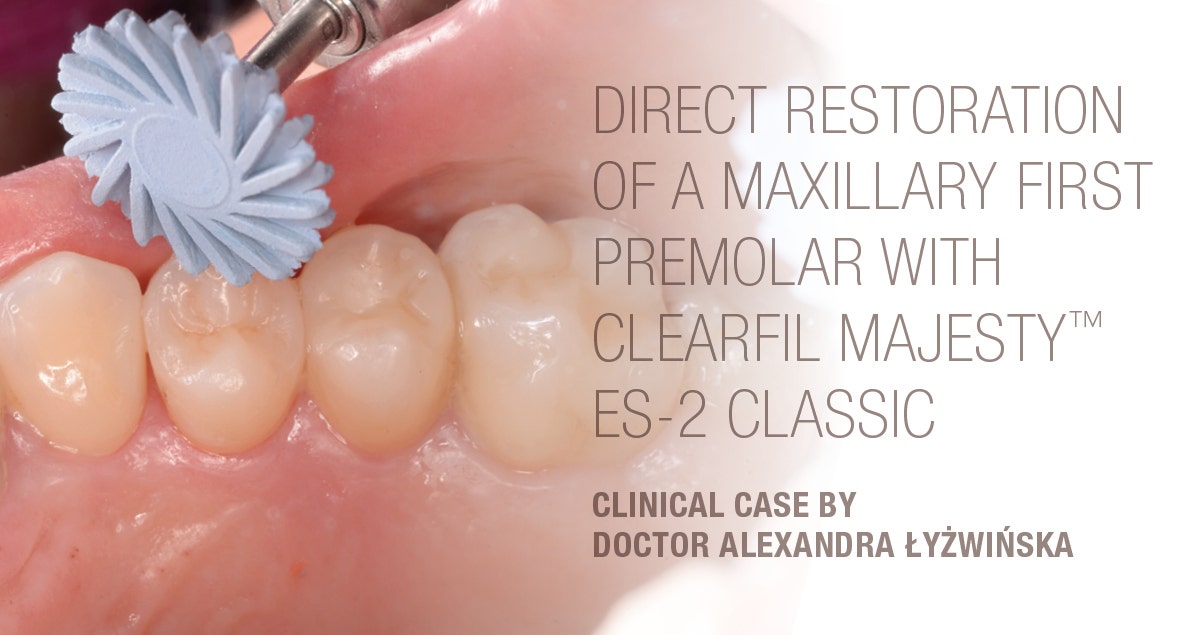
Clinical case with direct restoration of a maxillary first premolar

By Aleksandra Łyżwińska, DMD


INITIAL SITUATION

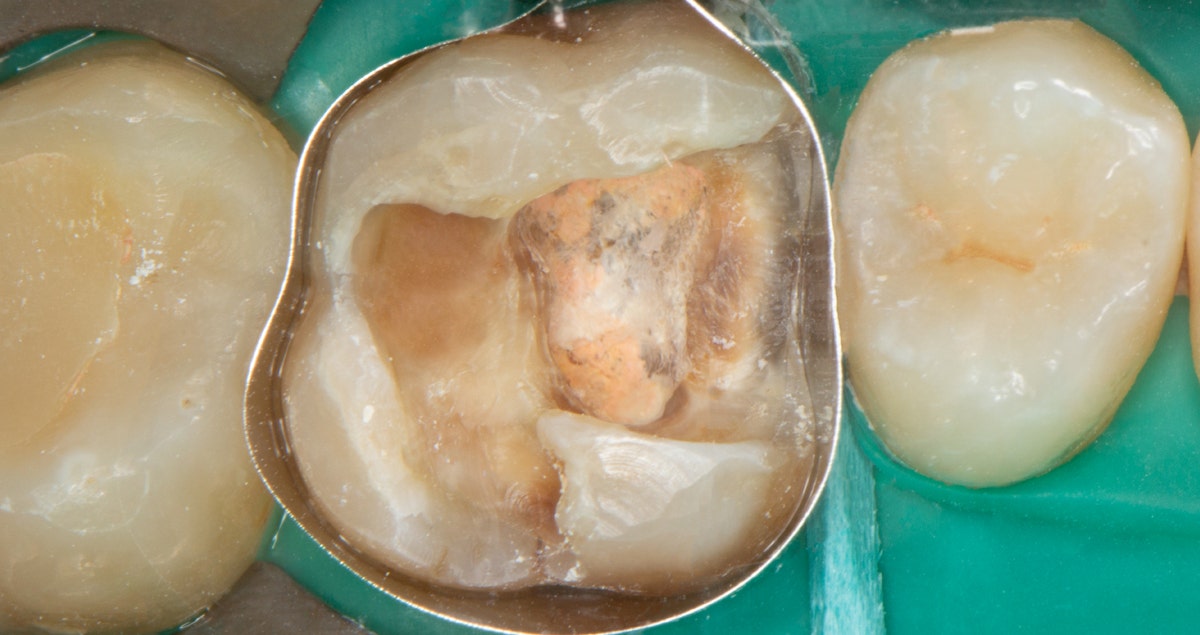
Fig. 1 MOD filling with marginal leakage, secondary caries, and significant mechanical weakening.


Fig. 2 Cavity preparation extending over the buccal and palatal cusps.


Fig. 3 Direct restoration created with CLEARFIL MAJESTY™ ES-2 Classic, shade A2, and stains.


Fig. 4 Appearance of the restoration after polishing with CLEARFIL™ TWIST DIA.


FINAL SITUATION

Fig. 5 Repolishing during check-up one week later. The restoration shows an excellent color integration and natural gloss.


Dentist:

ALEKSANDRA ŁYŻWIŃSKA
Warsaw, Poland


Aleksandra Łyżwińska, DMD, is a passionate aesthetic and adhesive dentist. Driven by Evidence Based Dentistry, her goal includes using modern composite materials and bonding agents in her clinical practise. In addition to her primary job, she worked as a lecturer and an assistant professor at the Department of Conservative Dentistry and Endodontics of Medical University of Warsaw, her alma mater.


Clinical case - KATANA™ HTML and CERABIEN™ ZR (CZR) - Screw-retained implant bridge

By D.T. Pier Francesco Golfarelli


Digital workflow and CAD/CAM shaping have now become a daily practice that helps to manage most cases, including the most extensive re-adaptations (rehabilitations).


KATANA™ HTML zirconia was selected, in consultation with the specialist, for the case presented here. It was principally chosen for its aesthetic and mechanical properties. One of our selection criteria was the advantageous lower abrasiveness level of zirconia. Because of its density, this material is less abrasive than the more traditional ceramics in combination with adequate mechanical polishing. Based on the initial situation, once the assembly in the articulator was completed, we designed a structure with anterior cutbacks for maximum aesthetics, while for the posterior teeth a monolithic solution was chosen for maximum strength and quality of the functional surfaces.


With the CORE & SHELL technique developed by the Noritake Italian Study Club, I can now fully exploit the optical properties of KATANA™ zirconia by integrating it, in the anterior area, with Noritake CERABIEN™ ZR ceramics. In the images here you can see the aesthetic results of the anterior and side areas, the mechanically polished monolithic surfaces and the special Noritake glaze.


Fig. 1 CAD Shaping - 3Shape Dental Designer


Fig. 2 Structure design with cutbacks


Fig. 3 KATANA™ HTML structure


Fig. 4 Occlusal surface – details


Fig. 5 Shade stain


Fig. 6 Shade Stain (SS)


Fig. 7 Core


Fig. 8 Internal Live Stain (ILS)


Fig. 9 Shell


Fig. 10 Shell Tissue


FINAL SITUATION

Fig. 11 Layering Details


Dentist:

D.T. Pier Francesco Golfarelli
Noritake Italian Study Club Teacher, Forlì


Clinical case - Cavity Design Optimisation & Cervical margin Relocation

By Dr Adham Elsayed


This video illustrates the Treatment Concepts for minimal-invasive Composit-Overlay.


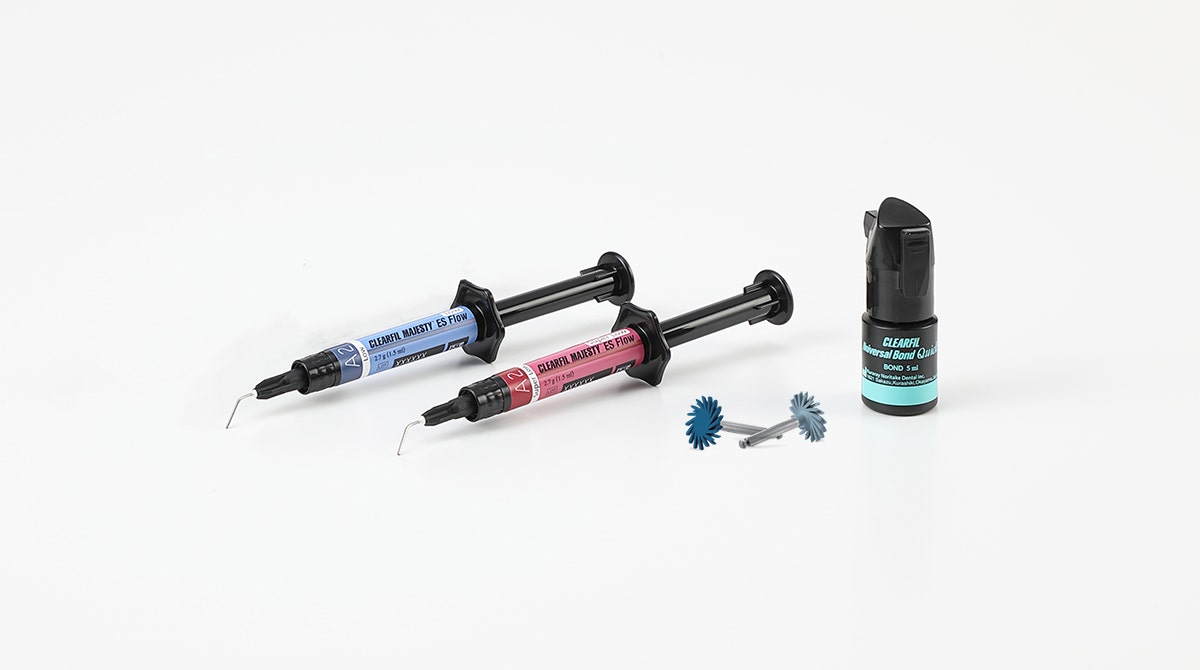
Dr. Elsayed uses KATANA AVENCIA, PANAVIA SA Cement Universal, CLEARFIL MAJESTY™ ES Flow, CLEARFIL Universal Bond Quick, K-ETCHANT, KATANA Cleaner and CLEARFIL Twist DIA and shows how to use different flowable composites for techniques like cervical margin relocation and cavity design optimization. Then an overlay was milled from KATANA AVENCIA and luted with PANAVIA SA Cement Universal, after cleaning with KATANA Cleaner.


Clinical case - Composite restoration in less than 10 minutes

By Dr Adham Elsayed


This video explains the concept of doing class I restorations in less than 10 minutes.


Dr. Elsayed uses Clearfil Majesty ES Flow, Clearfil Universal Bond Quick and Clearfil Twist Dia and shows one of the advantages of flows over conventional composites. Using stamp technique (optional), fast and easy restorations can be done using Clearfil Universal Bond Quick (no waiting time) and different viscosities of flows. This is very practical for composite restorations in the molar area.


Clinical case: Full-mouth rehabilitation using multiple types of Zirconia

This case was conducted by Dr Davide Cortellini, owner of Studio Cortellini in Riccione in Italy, and dental technician Angelo Canale, owner of Canale dental laboratory in Rimini in Italy.


This patient came to the clinic to improve her chewing ability and aesthetic level. The physical examination revealed the presence of several endogenous erosive lesions that made chewing difficult, in addition to partly affecting the esthetics due to decrease in enamel thickness and the presence of dyschromic composite restorations. The possibility of using the new types of both tetragonal and cubic multilayer zirconia made it possible for us to plan the complete covering of all the elements with extremely conservative crowns with thicknesses between 0.5 and 1 mm in the axial and occlusal areas and up to 0.2 mm at the margin.


VERTICAL PREPARATIONS

Very conservative vertical preparations were carried out in the enamel without anesthesia. In the upper arch, the front group was prepared for full-veneer crowns, while the lower front group was treated with conventional lithium disilicate veneers without interproximal separation. In this case too, vertical preparations were carried out without finishing line. The impression was made using a 3Shape TRIOS intraoral scanner. The technician modeled the zirconia restorations that were then completed by the ceramist.


Knife Edge Preparation

No finishing line


SCANNING SEQUENCE

1. Temporary 2. Lower arch
3. Upper arch 4. Bite

Digital DV models of temporary teeth


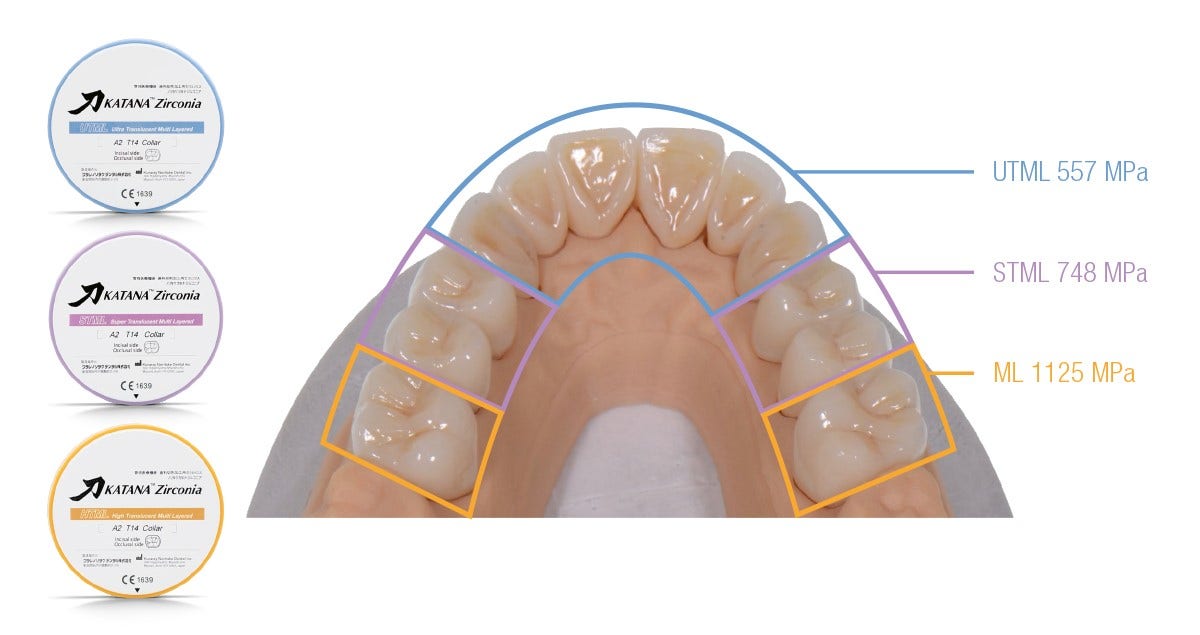
The three different materials were selected on the basis of the specific positions inside the mouth:

  • UTML for the anterior teeth
  • STML for the premolars
  • HTML for the molars


The final result shows excellent integration between the 3 different types of zirconia and a good natural feeling.

Bucco-lingual thickness: 0.6 mm Interproximal thickness: 0.5 mm


MINIMAL PREP KATANA™ (KATANA™ MICRO LAYER)


HARMONIC OPTICAL INTEGRATION

The full-mouth rehabilitation procedure using three different types of zirconia led to a functional and beautiful treatment outcome. The optical integration between the materials is excellent and the high translucency especially in the anterior region creates a true-to-life appearance.

Initial situation Final situation


APPROACH WITH MINIMAL INVASIVE PREPARATIONS - REPORT ON THE SELECTION OF MULTI-LAYERED ZIRCONIA

Dental zirconia is no longer just the opaque framework material introduced two decades ago. Nowadays, it offers the high strength needed for long-span bridges, dentin-like translucency and strength perfect for thin-walled posterior crowns, or enamel-like optical properties for beautiful anterior restorations - depending on its composition and structure. Kuraray Noritake offers three types of dental zirconia - three with a multilayered structure created using patented powder coloring technology. They differ with regard to their optical and mechanical properties, which makes it possible to choose an ideal material for every clinical situation.


Dentists:


DR. DAVIDE CORTELLINI

Dr. Cortellini graduated with honours in Dentistry and Dental Prosthetics from the University of Siena in 1992. He won the scholarship of the Italian Society of Periodontology for the year 1994-95. He then received the opportunity to attend the Department of Periodontology and Fixed Prosthetics of Prof. NP. Lang at the University of Bern in Switzerland, carrying out clinical and research activities. He obtained the title of „Doctor Medicinae Dentium“ (D.M.D.) at the same university in 2000. Dr. Cortellini is the author of scientific publications in international journals of aesthetic dentistry. He is an active member and advisor to the Italian Academy of Prosthetic Dentistry, and a member of the International Academy for Digital Dental Medicine. He holds conferences in Italy and abroad and is dedicated to clinical activity in his own practice in Riccione, where he primarily focuses on aesthetic and digital prosthetics and complex prosthetic rehabilitation.


CDT. ANGELO CANALE

Mr. Canale is a dental technician graduated high school in 1981. He’s the owner of a dental laboratory in Rimini since 1986. He is specialized in fixed prosthesis on natural teeth and on implants with a metal free approach using different kind of materials. He is always interested about digital technique using CAD-CAM systems (in his laboratory the 80% of the work comes from digital impressions). He is co-author of international publications on PPAD, QDT, EJED and THE JOURNAL OF ADHESIVE DENTISTRY concerning the use of metal free in prosthesis. He is a speaker in national and international congress.


Clinical case - Single crown on 11

By Dr Alessandro Devigus


Close up of insufficient crown on tooth 11.


After removal of old crown – discolored stump (endo treatment).


Try-in of the crown after sintering – no intrinsic fluorescence.


Try-in of the crown after glazing.


Try-in of the crown after glazing under cross polarized light to check the shade match.


Try-in of the crown after staining under cross polarized light to check the shade match.


Retraction cord in situ for adhesive cementation with PANAVIA™ V5.


Adhesive cementation using PANAVIA™ V5 opaque to mask dark stump.


Control after 1 week.


Control after 1 week – cross polarized light to check shade.


Control after 1 week – fluorescence check.


FINAL SITUATION


Dentist:


Dr Alessandro Devigus received his degree from Zurich University, Switzerland, in 1987. Since 1990 his working in his own private practice with a focus on CAD CAM and Digital Dentistry. He is also CEREC Instructor at the Zurich Dental School.


Dr Alessandro Devigus is an active member of the European Academy of Esthetic Dentistry (EAED), founder of the Swiss Society of Computerized Dentistry, Neue Gruppe member, ITI fellow and speaker.


Dr Devigus is editor-in-chief of the International Journal of Esthetic Dentistry, author of various publications and an international lecturer.


Clinical case with KATANA™ ZIRCONIA STML in combination with CZR FC Paste Stain

By Dr Salvatore Scolavino and DT Francesco Napolitano 


The dental laboratory is confronted with the greatest aesthetic challenge whenever it comes to the restoration of a single incisor with natural adjacent teeth. In the following case, a young patient had undergone endodontic treatment of her tooth 21 (fig. 1) while all other teeth showed their natural appearance. Tooth 21 was due for replacement now (fig. 2).


Fig. 1:  X-Ray after endodontic treatment (with new crown on tooth 21 in place).


Fig. 2: The former restoration with which the patient showed up in the dentist’s practice.


To keep the natural identity, together with preserving the gingiva outline, the decision was taken in favour of a monolithic zirconia restoration, with a layered block for a full-contour crown. KATANA™ Zirconia STML (Kuraray Noritake Dental) provides for four gradational layers from „Body/Dentine“ (cervical area) to „Enamel“ (incisal aera), varying in chroma and translucency. Using this kind of milling block, it is possible to imitate the natural progression from yellowish to whitish-blue, and this in an easy manner. At the same time this way, the endodontic post wouldn’t shine through and make any aesthetic difference. On the other hand, the zirconia irradiates into the gingiva and results in a natural looking shade allover the anterior area. Furthermore for a lively and most natural-identical appeal, it was intended to individualize the crown by surface stains. With the product CZR™ FC Paste Stain by Kuraray Noritake Dental, 27 shades are available, together with fluorescence. What is essential in the front, too, is this well proven experience: All zirconia material enhances the close gingival attachment and provides for stable results of the pink-and-white aesthetics.


The dentist built up the stump 21, prepared it according to the specifications for zirconia and took the impression (fig. 3). The plaster model followed (fig. 4) and was scanned to start then the digital process. After designing, the crown was milled and tried-in at the next session with the patient (fig. 5).


Fig. 3: Impression taking after preparing tooth 21.


Fig. 4: Plaster model - the prothetic baseline of the case.


Fig. 5: Try-in of the zirconia crown in the patient’s mouth with rubber dam.


SHAPE AND COLOUR

Right when starting the case, the teeth of both jaws had been scrutinized: first for shape. Special attention was payed to the interproximale space between 11 and 21 because this area had worn out in the meantime (see again fig. 2). It was also necessary to move closer to each other the approximale margins 21/22 resp. 11/12 in their cervical-middle parts. When giving the zirconia crown its final shape, this resulted in a widely swinging outer line distally 21. For harmony reasons, tooth 11 was extended distally, too. Here, the clinician used the direct filling composite CLEARFIL MAJESTY™ Classic, shade A2 (fig. 6, 7 and 8). This nano-hybrid composite by Kuraray Noritake Dental is easy-sculpting and integrated fully with the milled crown.


It was most important for crown 21 and tooth 11 too, to create a 3D effect of the tooth structure and an age-appropriate vestibular surface texture. For this, the characteristics of the adjacent teeth and allover both jaws were examined meticulously in general and in detail. Surface burs, discs, stones, and similar instruments sophisticatedly engraved pericymatia and a groove here and there, thus accomplishing the perfect natural look.


Fig. 6: Tooth 11 before recontouring the shape distally.


Fig. 7: Finished crown 21 on the plaster model. Notice: In order to match the shape of crown 21 and close-up the margins 11/12, composite has been added in the interproximal space.


Fig. 8: Finishing the new distal outline of tooth 11.


The final colour touch was given to both teeth by surface staining: with a thin layer of FC Paste Stain measuring only 50-70 micrometers in depth, different shades were applicated. The entire range was used from yellow/orange to blue and white (fig. 9a-d) in order to provoke the effect of mamelons and other structures in all thirds of the restorations.


Fig. 9a: Definitive fitting of the restoration.


Fig. 9b: Directly after the fitting.


FINAL SITUATION

Fig. 9c: View of the lips with the restoration in place.


Fig. 9d: Natural look of the upper and lower jaws.