

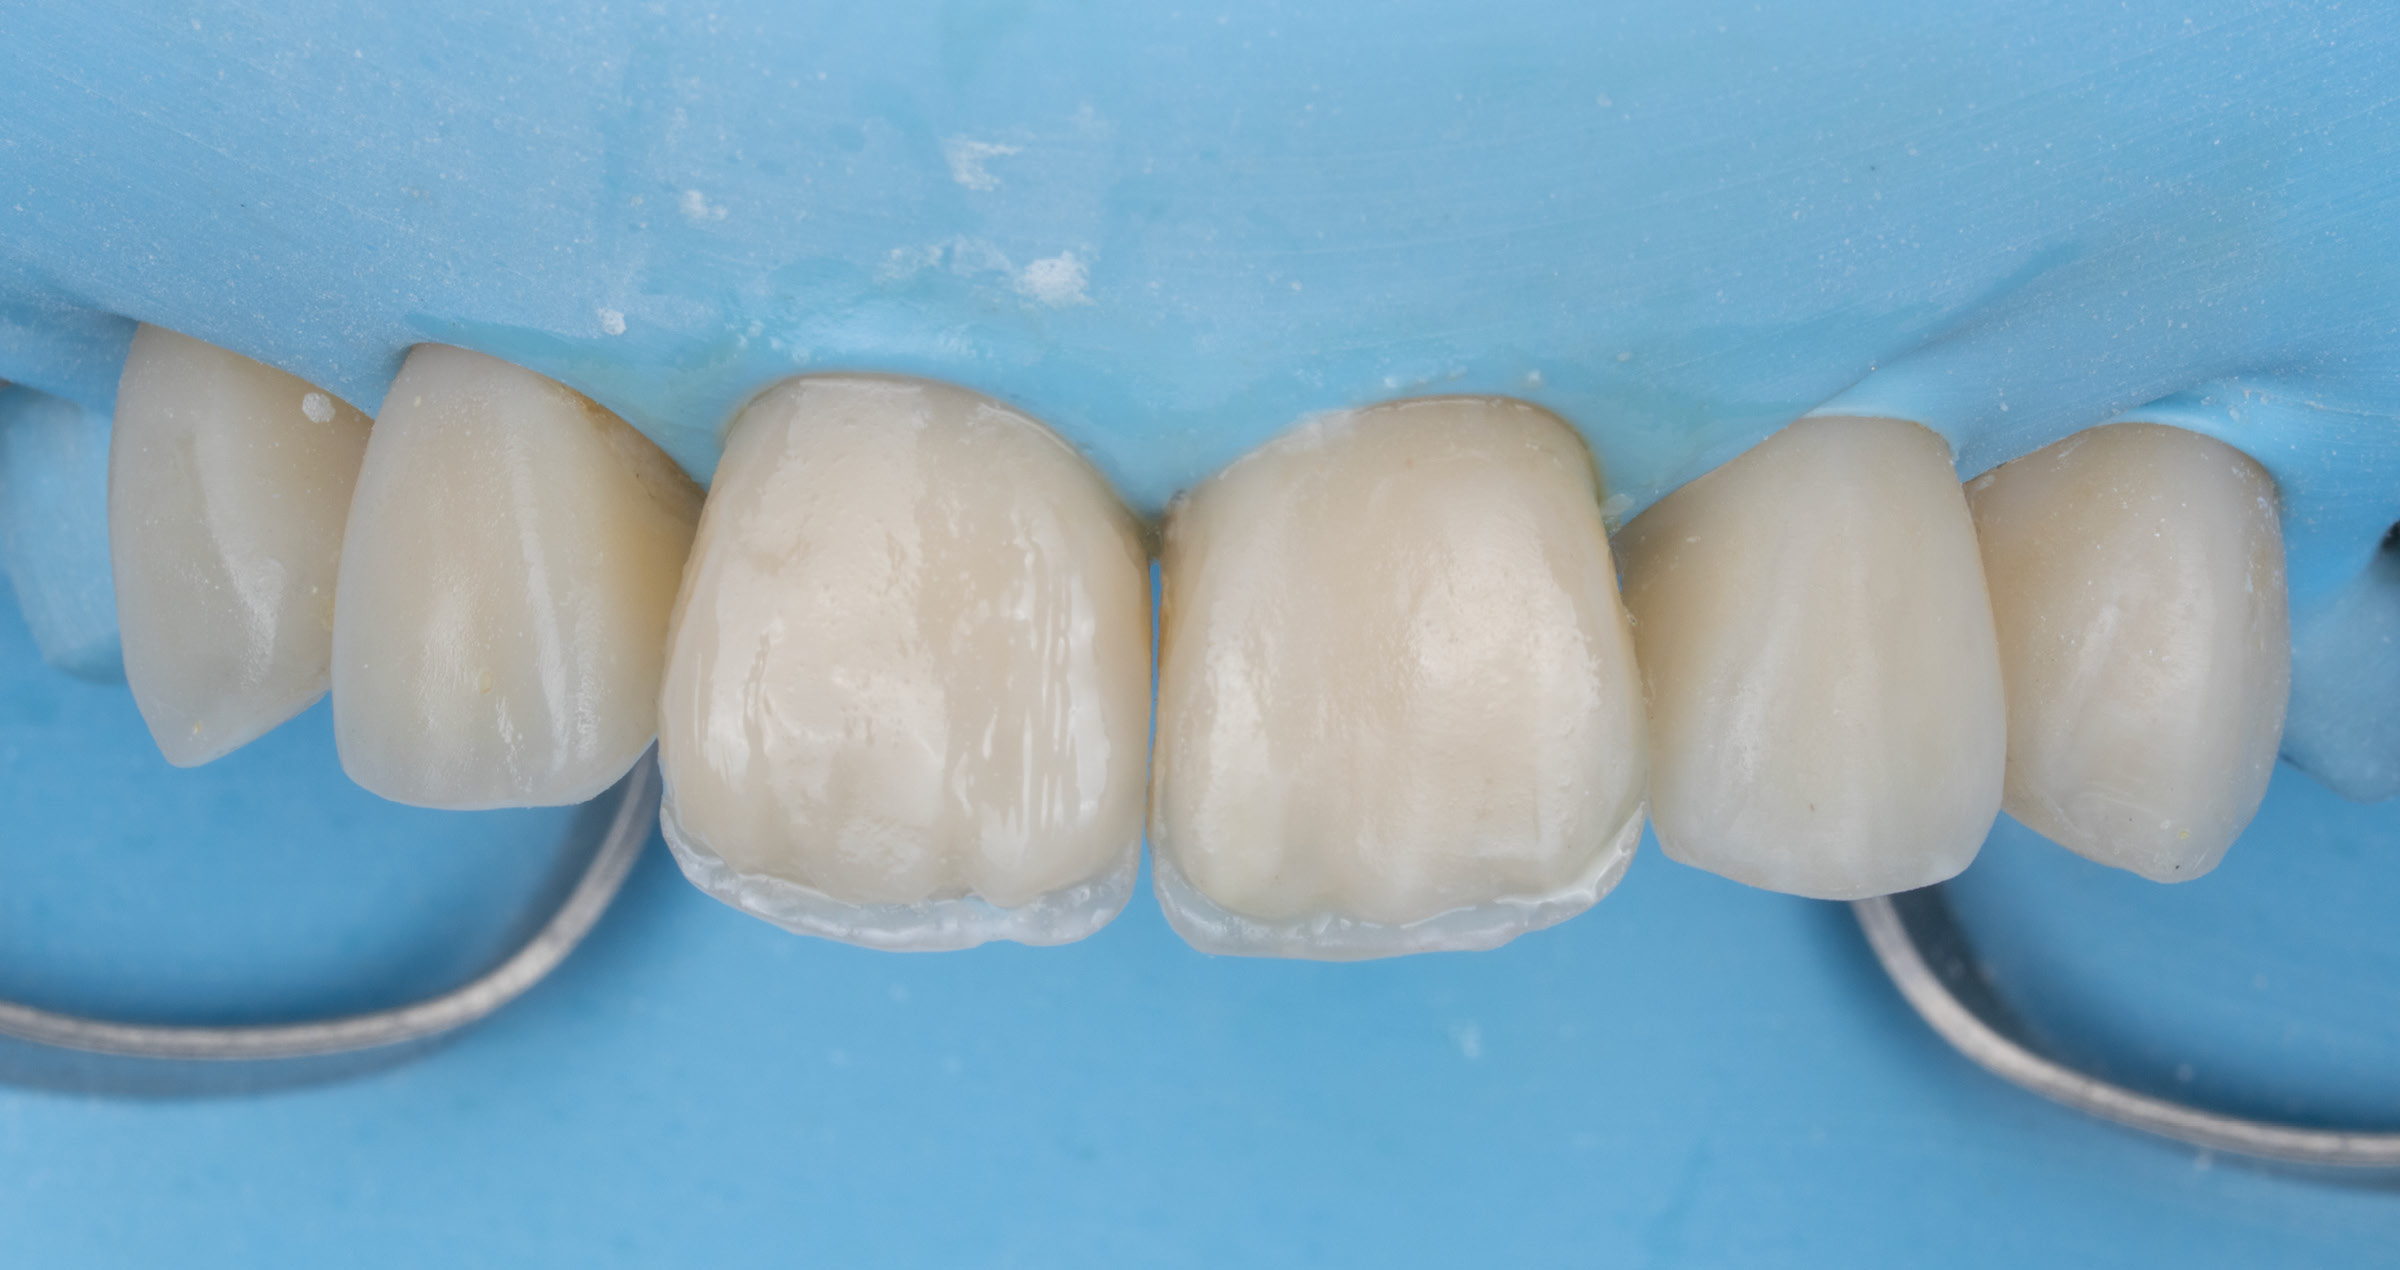
Clinical Cases, Chairside Laminatės ir kompozitai. koregavimas lengvai 2026-07-16 Dr. Onur Alp Yünük atvejis Gražūs dantys, spindinti, nepriekaištinga šypsena... Patenkinti laminačių (venyrų) norinčių pacientų estetinius poreikius gali būti nelengva. Kai kurie pacientai aiškiai išsako savo lūkesčius dėl naujų dantų, o kai kuriems tai gali būti sudėtinga. Šiuo atveju svarbu pasirinkti tokį darbo metodą, kad būtų galima atlikti pakeitimus, nesvarbu, ar vykdomas išplėstinis planavimo etapas, apimantis skaitmeninį šypsenos dizainą, ar ketinama įdėti kompozitines restauracijas, kurias būtų galima lengvai modifikuoti burnos ertmėje. Jaunai pacientei, kuri kreipėsi į mūsų kliniką, nes buvo nepatenkinta ant viršutinių kandžių uždėtomis kompozitinėmis laminatėmis (venyrais) (1–4 pav.), buvo parinktas būtent pastarasis metodas. Atliekant burnos ertmės apžiūrą paaiškėjo, kad esamų viršutinio žandikaulio kandžių ir ilčių restauracijų paviršius nelygus ir šiurkštus, pakitusi kraštų spalva ir pablogėjęs kompozitinės medžiagos struktūrinis vientisumas. Remiantis šiais duomenimis, buvo ketinama pašalinti esamas viršutinio žandikaulio priekinių dantų restauracijas ir atkurti optimalų estetinį ir funkcinį vientisumą naudojant naujas tiesiogines kompozitines restauracijas (dantų Nr. 13–23 pagal FDI žymėjimą). Pacientė teigė norinti, kad jos dantims suteiktume daugiau individualumo ir išskirtinumo, o šypsena būtų ryškesnė nei su esamomis restauracijomis. 1 pav. Kompozitinės laminatės (venyrai) ant viršutinio žandikaulio kandžių, kuriose matyti estetiniai ir funkcinio vientisumo trūkumai 2 pav. Viršutinio žandikaulio priekinių dantų okliuzinis vaizdas su matomais kompozitinių laminačių (venyrų) defektais 3 pav. Vaizdas iš dešinės pusės, kuriame matyti paviršiaus nelygumai 4 pav. Vaizdas iš kairės pusės, kuriame matyti didelis atšokęs ir nuskilęs plotas KOMPOZITINIŲ LAMINAČIŲ KEITIMAS Siekiant atkurti pacientės natūralių dantų skaidrumą ir patenkinti jos estetinius poreikius, buvo suplanuota naudoti polichrominę sluoksniavimo sistemą ir taikyti dvisluoksnį metodą. Tai leido sukurti skaidrumo efektą priekinėje dalyje. Atspalvio pasirinkimo etape taikyta dvisluoksnė atspalvio nustatymo metodika (BSAT), grindžiama dentino ir emalio kompozitų deriniu. Taikant šią metodiką norimas emalio atspalvis buvo sluoksniuojamas ant dentino pagal tikslinį sodrumą, siekiant įvertinti dviejų kompozito spalvų sluoksnių sukurtą atspalvį. Medžiagos buvo polimerizuojamos ant danties paviršiaus nenaudojant surišamųjų medžiagų. Taigi pradedant gydymą buvo vertinami ne atskirų medžiagų atspalviai, o sluoksniuojant pasiektas bendras vizualinis spalvos efektas ir jo dermė su natūralia danties struktūra. Padarytos nuotraukos naudojant kamerą su kryžminės poliarizuotos šviesos filtru (5 pav.). Vėliau pašalintas fiksuotas retencinis aparatas ir esamos kompozitinės laminatės (venyrai). Siekiant išsaugoti kuo daugiau sveikos danties struktūros, procedūra atlikta naudojant didinimo objektyvą ir mėlynos šviesos apšvietimą. Pasirinkti instrumentai buvo deimantiniai grąžtai su raudona ir geltona juostelėmis, taip pat volframo karbido grąžtai. 6 paveiksle pavaizduotas šios procedūros rezultatas. 5 pav. Atspalvio nustatymas – vaizdas, užfiksuotas naudojant kryžminės poliarizuotos šviesos filtrą, kuris pašalina atspindžius 6 pav. Dantys pašalinus trūkumų turinčias kompozitines laminates Dantys buvo izoliuoti koferdamu, šis cervikalinėje srityje užfiksuotas dantų siūlu. Tada pradėtos dantų restauravimo procedūros. Nuėsdinus emalį ir aplikavus savaiminio ėsdinimo surišiklio („CLEARFIL™ SE Bond 2“, Kuraray Noritake Dental Inc.), buvo aplikuojamas „CLEARFIL MAJESTY™ ES-2 Premium“ (Kuraray Noritake Dental Inc.). Dentino šerdis su aiškiai matomais emalio iškilimais (mamelonais) sumodeliuota naudojant A1D atspalvį. Kandžių kraštai ir emalio iškilimai (mamelonai) paryškinti balto atspalvio dėmėmis. Siekiant sukurti opalinį efektą, ant viršaus uždėtas plonas sluoksnis permatomo atspalvio „Blue“ (mėlynas), o emalio dalys padengtos WE emalio atspalviu. Pašalinus retencinį aparatą, sukurta ir baigus seansą pacientei įteikta permatoma kapa, kurią ji turėjo mūvėti iki kito vizito. 7 pav. Šoninių kandžių ir iltinių dantų izoliavimas naudojant koferdamą restauravimo tikslais 8 pav. Aplikuotas dantų vestibulinis emalio sluoksnis 9 pav. Restauracijų forma ir atspalvis, sukurti pagal pacientės lūkesčius Baigus apdailą ir poliravimą kompozitui skirtu „Twist DIA“, pacientė buvo išleista namo ir paskirtas naujas vizitas pakartotiniam įvertinimui ir galutiniam koregavimui atlikti. Per kontrolinį vizitą pacientė paprašė šiek tiek sumažinti viršutinio žandikaulio kandžių skaidrumą, ryškumą ir pakeisti visų restauruotų dantų formą: jo norėjo, kad centriniai kandžiai būtų ilgesni, kampai švelnesni ir labiau suapvalinti, o kandamojo krašto kontūras lygesnis. Vėl uždėta koferdamo. Tada viršutinio žandikaulio kandžių kompozitinių restauracijų vestibuliniai paviršiai šiek tiek sumažinti naudojant deimantinius grąžtus su raudona ir geltona juostelėmis. Siekiant pašiurkštinti paviršių ir pagerinti topografiją, kad mikrocheminis sujungimas būtų optimalus, kompozito paviršius apdorotas 50 μm aliuminio oksido dalelėmis naudojant smėliasrovę. Tuomet, laikantis adhezyvo naudojimo protokolo, paeiliui aplikuota fosforo rūgšties ėsdiklio, silano ir „CLEARFIL™ SE Bond 2“. Paskui restauracijos modifikuotos jas pailginant, pakoreguojant atspalvį „CLEARFIL MAJESTY™ ES-2 Premium“ A1D ir A1E atspalviais ir patikslinant anatominius kontūrus (10 ir 11 pav.). 10 pav. Centrinių kandžių restauracijų modifikavimas 11 pav. Modifikuota šypsena – taisyklingesnės dantų formos ir kontūrai, taip pat natūralesnis dantų atspalvis. Per šį paskutinį vizitą pacientė pareiškė, kad yra labai patenkinta savo naująja šypsena. Restauracijos paviršiai buvo perpoliruoti, pritvirtintas naujas retencinis aparatas ir padarytos galutinės nuotraukos (12–16 pav.). 12 pav. Galutinis gydymo rezultatas, vaizdas iš priekio 13 pav. Galutinis gydymo rezultatas, okliuzinio paviršiaus vaizdas 14 pav. Galutinis gydymo rezultatas, vaizdas iš šono 15 pav. Galutinis gydymo rezultatas, pacientės šypsena 16 pav. Detalus vidinės spalvų struktūros vaizdas, padarytas naudojant poliarizuotos šviesos filtrą IŠVADA Net ir detaliai aptarus visą gydymą su pacientu ir įdėmiai išklausius visas jo idėjas, lūkesčius ir poreikius, dar nereiškia, kad nereikės daryti jokių korekcijų, nes pacientui tiesiog reikia pamatyti rezultatą, kad jis galėtų spręsti, ar jam patinka. Laimei, pasirinkdami tinkamas medžiagas ir metodus odontologai gali kurti naujas šypsenas, kurias vėliau galima modifikuoti nepakenkiant sveikai dantų struktūrai, taigi net ir reikliausių pacientų poreikių tenkinimas nebėra toks didelis iššūkis.
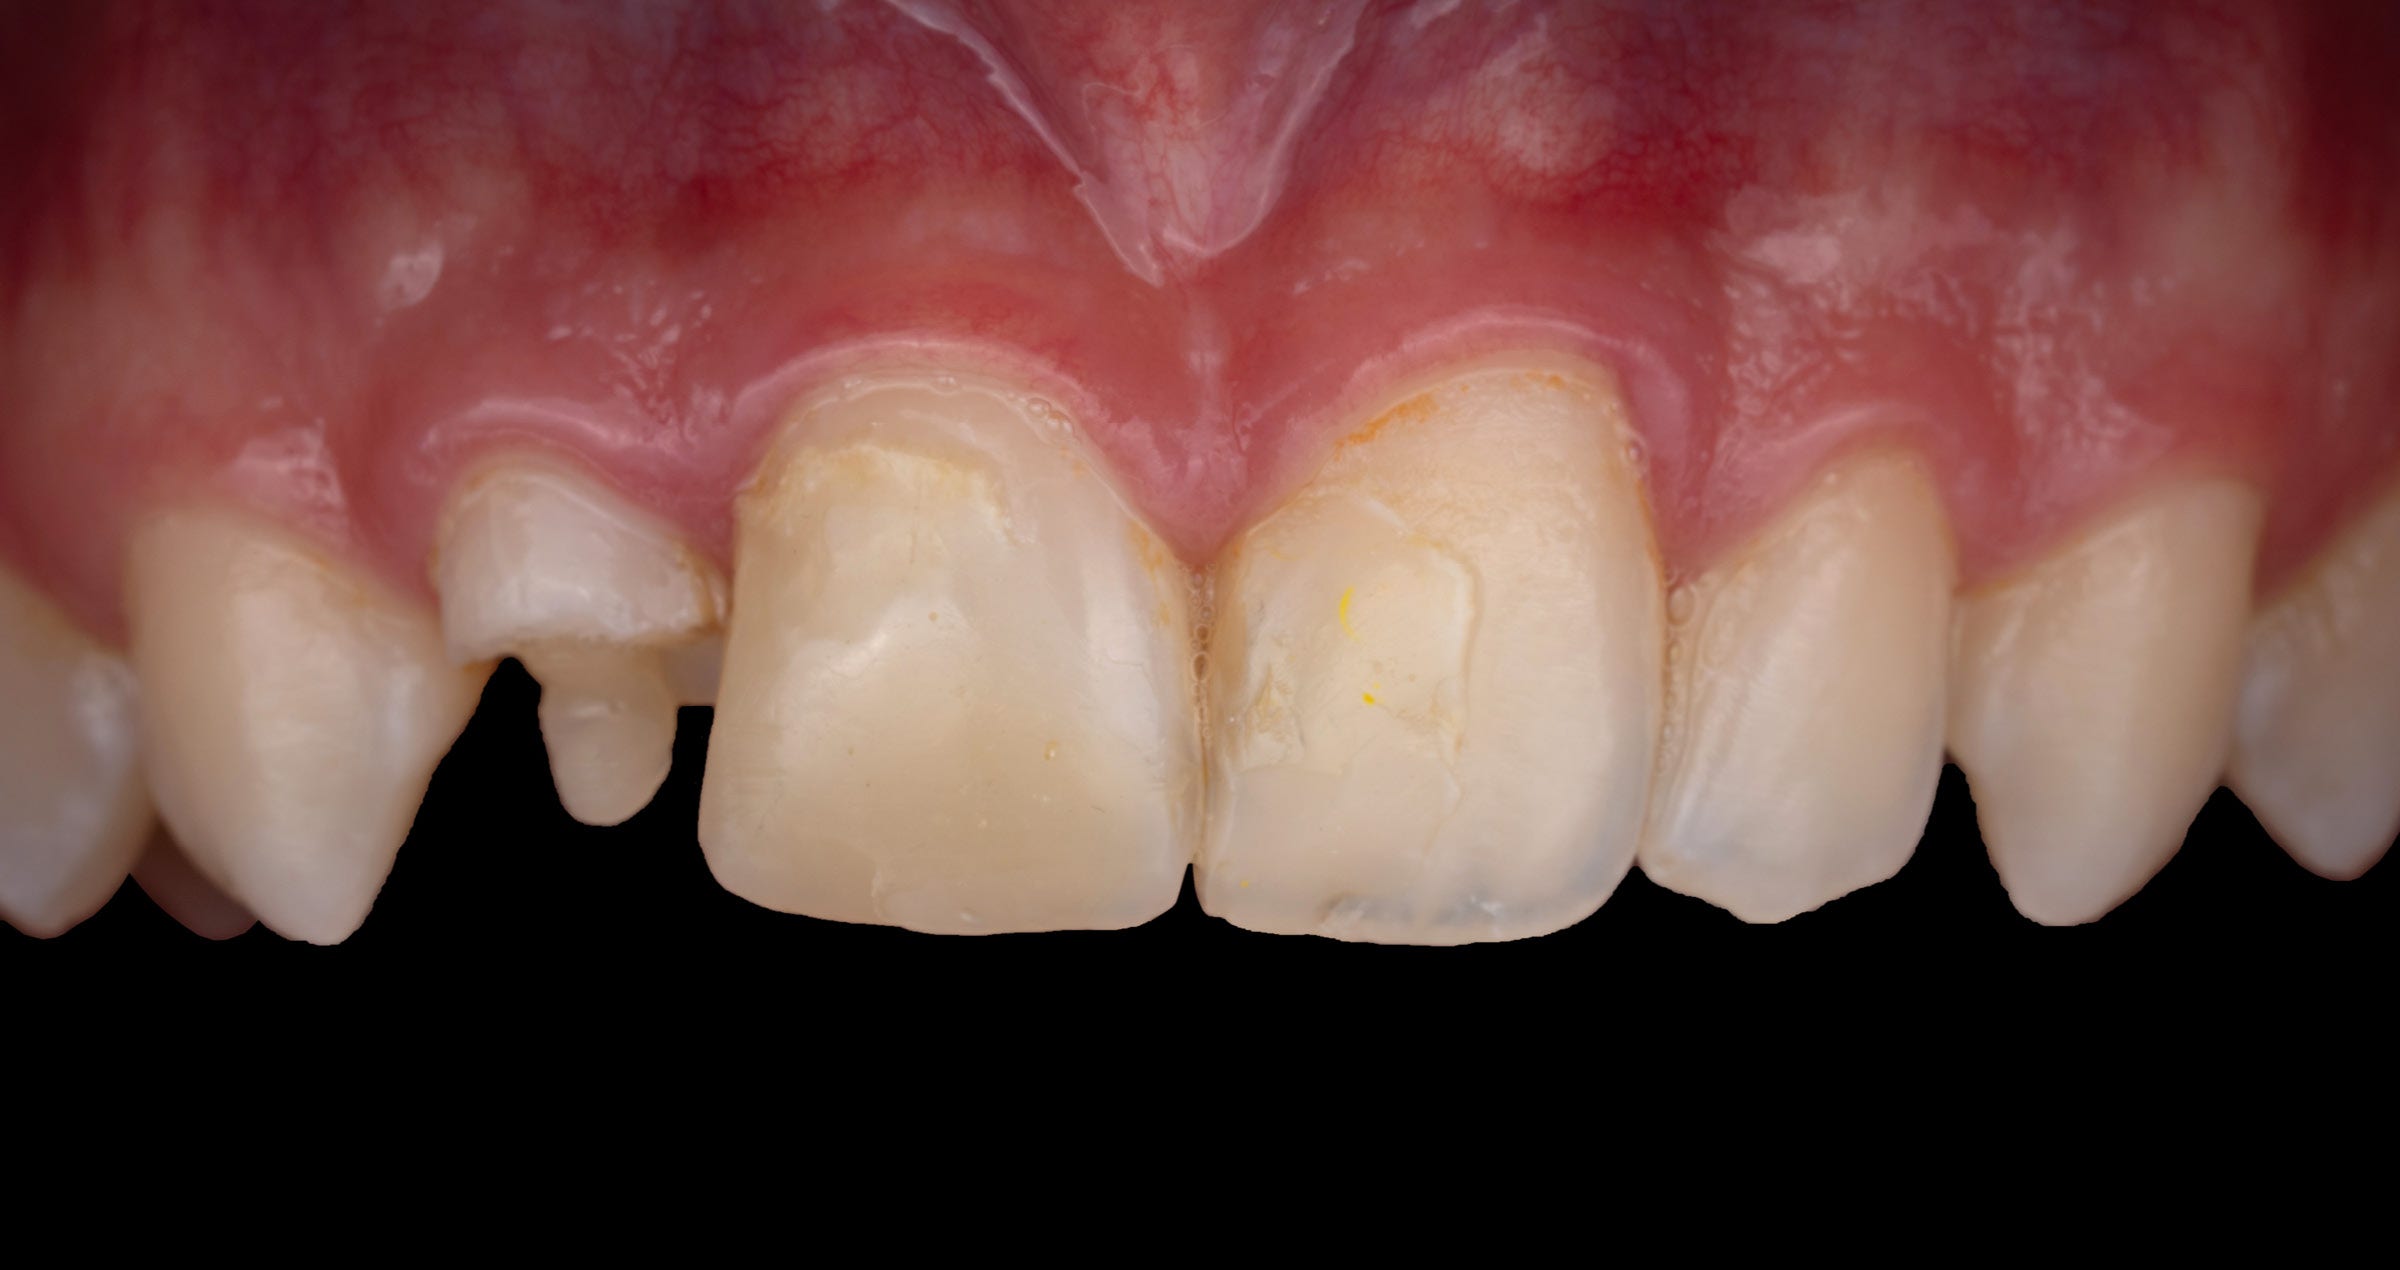
Clinical Cases, Chairside Composite veneering: adjustments easily accomplished 2026-05-06 Case by Dr. Onur Alp Yünük Beautiful teeth, a bright, flawless smile: Meeting the aesthetic demands of patients asking for veneer treatment can be challenging. While some patients share concrete ideas on how their new teeth should look, it is more difficult for others to express their expectations. In this case, it is important to select a treatment approach that allows for modifications – be it in the form of an extended planning phase including digital smile design or by placing composite restorations that can be easily modified intraorally. The latter approach was selected for a young female patient who presented to our clinic as she was dissatisfied with her composite veneers that had been placed on the upper incisors (Figs. 1 to 4). During intraoral examination, it became evident that the existing restorations on her maxillary incisors and canines had irregular, rough surfaces, discoloured margins and compromised structural integrity of the composite material. In accordance with these findings, removing the existing restorations at the maxillary anterior teeth and re-establishing optimal aesthetic and functional integrity with new direct composite restorations were planned (teeth between #13 - #23 according to the FDI notation). The patient stated that she would like us to add more individuality and character to her teeth and have a brighter smile than with her existing restorations. Fig. 1. Composite veneers on the maxillary incisors showing aesthetic and functional integrity issues. Fig. 2. Occlusal view of the maxillary anterior teeth with visible defects in the composite veneers. Fig. 3. Lateral view from the right revealing surface irregularities. Fig. 4. Lateral view from the left revealing a large debonded and chipped area. REPLACEMENT OF THE COMPOSITE VENEERS To reproduce the translucency characteristics of the patient’s natural teeth and fulfil her aesthetic demands, the use of a polychromatic layering system and a dual-layer technique was planned. This would allow for a nice play of translucencies in the anterior area. During the shade selection phase, the Bilaminar Shade Assessment Technique (BSAT) was employed, which is based on the color combination of dentin and enamel composites. In this technique, the intended enamel shade was stratified over the target dentin chroma to evaluate the resultant shade created by the two composite color layers. The materials were polymerized on the tooth surface without bonding agents; thus, the cumulative color perception resulting from stratification, rather than the individual shades of the materials, was verified for harmony with the natural tooth structure at the onset of treatment. Photos were taken with a camera equipped with a cross-polarized filter (Fig. 5). Subsequently, the fixed retainer was removed, as were the existing composite veneers. To save as much of the underlying healthy tooth structure as possible, the procedure was performed under magnification and blue-light illumination. The selected instruments were red- and yellow-band diamond burs as well as tungsten carbide burs. Figure 6 shows the result of the procedure. Fig. 5. Shade determination – image taken with the aid of a cross-polarizing filter that eliminates reflections. Fig. 6. Teeth after the removal of the deficient composite veneers. The teeth were isolated using rubber dam, which was secured with floss in the cervical area. Then, restoration procedures were initiated on the teeth. After etching of the enamel and application of a self-etching bonding agent (CLEARFIL™ SE Bond 2, Kuraray Noritake Dental Inc.), CLEARFIL MAJESTY™ ES-2 Premium (Kuraray Noritake Dental Inc.) was applied: The dentin core with its pronounced mamelons was modelled using the shade A1D. The incisal edges and mamelons were highlighted with spots of white tint. To create an opalescent effect, a thin layer of the translucent shade Blue was placed on top, while the enamel parts were built up with the enamel shade WE. Since the retainer had been removed, a clear aligner was fabricated and delivered to the patient at the end of the session for use until the subsequent appointment. Fig. 7. Isolation with rubber dam for restoration of the lateral incisors and canines. Fig. 8. Vestibular enamel layer applied to the teeth. Fig. 9. Shape and shade of the restorations created according to the patient’s expectations. After finishing and polishing with Twist DIA for composite, the patient was sent home and a new appointment was made for re-evaluation and final adjustments. In the control appointment, the patient asked us to slightly reduce the incisal translucencies and brightness in her maxillary incisors and alter the shape of all restored teeth: She requested longer maxillary central incisors with softer, more rounded line angles and a smoother incisal contour. Rubber dam was placed again. Then, the vestibular surfaces of the composite restorations on the maxillary incisors were reduced slightly using red- and yellow-band diamond burs. To roughen the surface and enhance the topography for optimal micromechanical interlocking, the composite surface was sandblasted with 50-μm aluminium oxide particles. Phosphoric acid etchant, silane and CLEARFIL™ SE Bond 2 were applied sequentially as part of the adhesive protocol. The restorations were then modified by lengthening, shade correction using CLEARFIL MAJESTY™ ES-2 Premium in the shades A1D and A1E and refining of the anatomical contours (Figs. 10 and 11). Fig. 10. Modification of the central incisor restorations. Fig. 11. Modified smile with more regular tooth forms and contours as well as a more natural tooth shade. During this final appointment, the patient expressed that she was very happy with her new smile. The restoration surfaces were re-polished, a new retainer was bonded and final photographs were taken (Figs. 12 to 16). Fig. 12. Final treatment outcome – frontal view. Fig. 13. Final treatment outcome – occlusal view. Fig. 14. Final treatment outcome – lateral view. Fig. 15. Final treatment outcome – the patient’s smile. Fig. 16. Detailed view of the inner colour structure – made visible with the aid of a polarized filter. CONCLUSION Talking to patients about every detail of the treatment and listening attentively to their ideas, expectations and demands does not always protect us from adjustments – simply because they need to see what they get to be able to judge if they like it. Luckily, selecting appropriate materials and techniques enables dental practitioners to create new smiles that can be modified without harming healthy tooth structure, so that making even the most demanding patients happy is no longer a challenge.
Clinical Cases, Chairside Restoring a young patient’s smile with composite 2026-03-06 Case by Dr. Onur Alp Yünük COMBINING HIGH-PERFORMANCE TOOLS AND MATERIALS FOR A PREDICTABLE OUTCOME Direct composite restorations are a high-quality treatment option even when large amounts of tooth structure need to be replaced. This is due to recent advancements in resin composite materials and adhesive technology. By selecting appropriate materials and layering techniques combined with modern digital tools for colour difference evaluation, it is possible to predictably produce highly aesthetic outcomes, as demonstrated in the following case example. The challenge A young male patient presented to our clinic requesting the replacement of his existing composite restorations on his maxillary incisors (teeth #12 and #11 according to the FDI notation). Clinical examination revealed extensive restoration loss on the lateral incisor. Furthermore, anatomical irregularities, discolouration, and loss of surface gloss were observed on tooth #11. The adjacent central incisor exhibited similar issues regarding colour and surface polish. In consultation with the patient, it was decided to replace the existing restorations using a modern composite material specifically developed for dual-shade layering – CLEARFIL MAJESTY™ ES-2 Premium (Kuraray Noritake Dental Inc.). For an exact shade analysis, photographs were taken with and without a cross-polarized filter (Figs. 1 to 4). Fig. 1: Frontal view of the teeth with extensive restoration loss on the maxillary left lateral incisor. Fig. 2: Cross-polarized photograph of the teeth allowing for a detailed analysis of the shade irregularities. Fig. 3: Lateral view of the teeth. Fig. 4: Lateral view – cross-polarized photograph. The solution Following removal of the existing restorations, rubber dam was placed for working field isolation. A self-etching adhesive (CLEARFIL™ SE Bond 2, Kuraray Noritake Dental Inc.) was applied in the selective enamel etching mode before establishing the palatal shell using CLEARFIL MAJESTY™ ES-2 Premium in the shade A1E (Figs. 5 and 6). The mamelon structures were reconstructed with CLEARFIL MAJESTY™ ES-2 Premium in the shade A1D, while the translucent shade Blue was applied to the opalescent zone. Finally, yellow and white tints were used for characterization. Fig. 7 illustrates the appearance before, Fig. 8 after finishing and polishing. Fig. 5: Palatal shell established with the enamel shade A1E of the selected composite. Fig. 6: Lateral view of the teeth during the restoration procedure. Fig. 7: Restoration before finishing and polishing. Fig. 8: Appearance of the restorations after finishing and polishing. The outcome To evaluate the final colour integration, another photograph was taken with a cross-polarized filter, holding a grey reference card in place for calibration (Figs. 9 and 10). The lateral view of the restored teeth (Fig. 11) reveals that not only the right colour combination, but also a natural surface texture is required for a highly aesthetic outcome. Fig. 9: Frontal view of the restored teeth taken with a cross-polarized filter. Fig. 10: Gray reference card calibration and the resulting L*a*b* coordinates of the restoration. Fig. 11: Lateral view of the restored teeth stressing the importance of surface texture. DISCUSSION AND CONCLUSION Observation, supported by modern tools for photography and image analysis (like polarized filters and L*a*b* coordinates), is an important skill needed for the lifelike reconstruction of teeth with direct composite materials. By combining this skill with a highperformance composite system that offers fixed shade combinations and innovative light diffusion technology for a nice blend-in with the surrounding tooth structure, creating beautiful restorations becomes a predictable business. In the case presented, the patient was very satisfied with the outcome in terms of aesthetics and function. At regular recalls, the quality of the restorations is checked – they still offer a very nice functional and aesthetic integration.