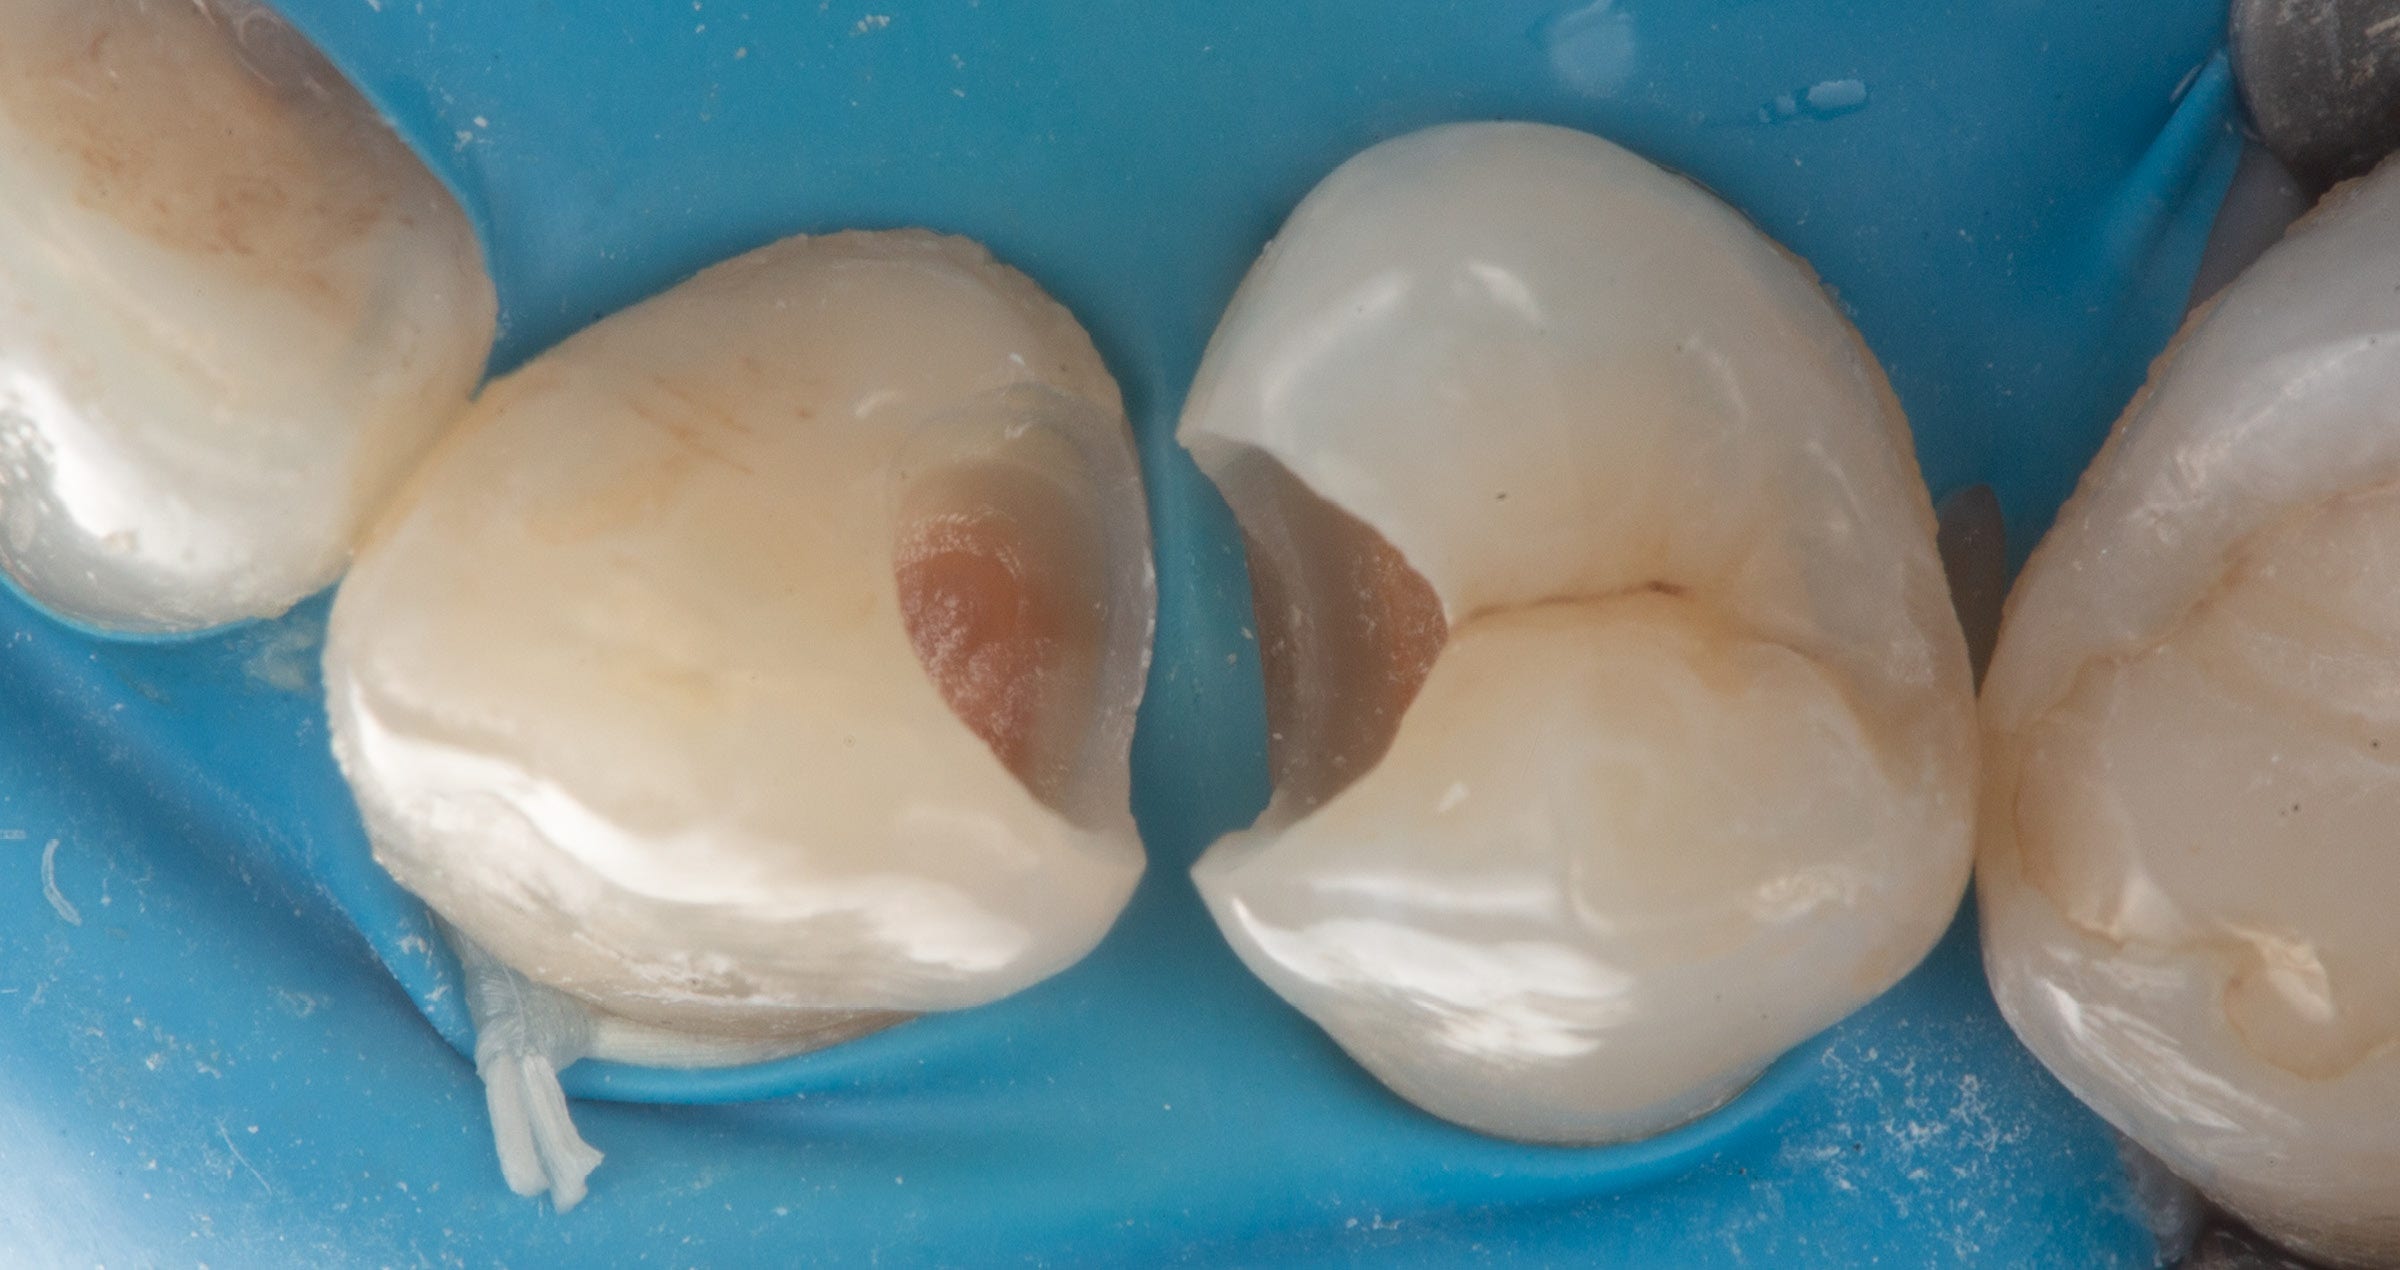
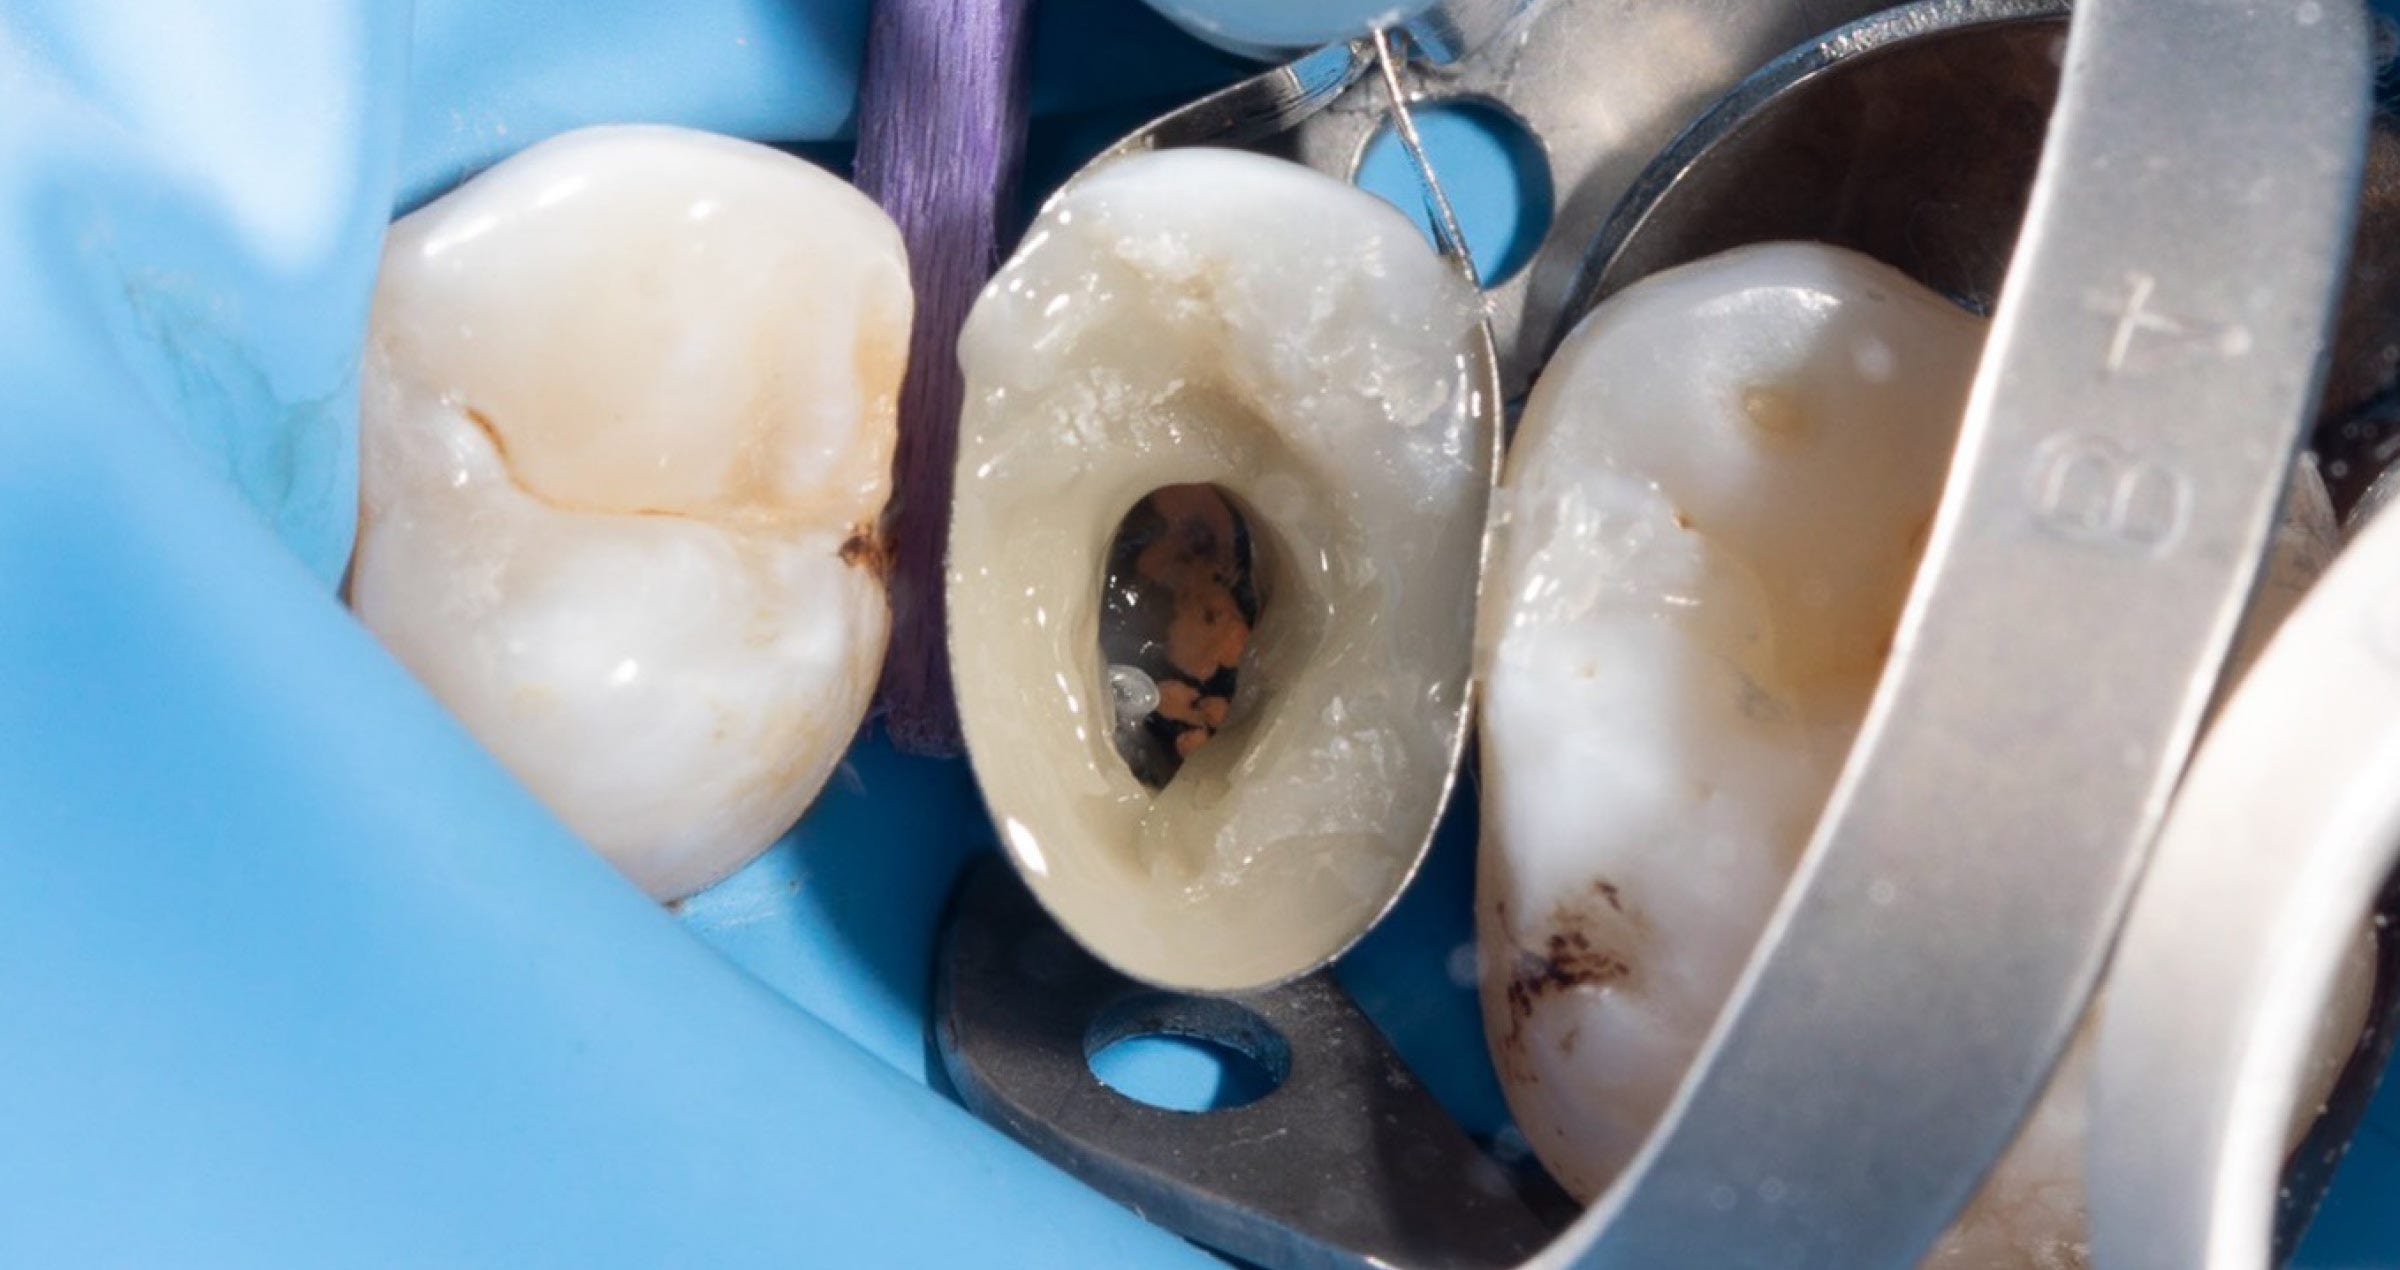
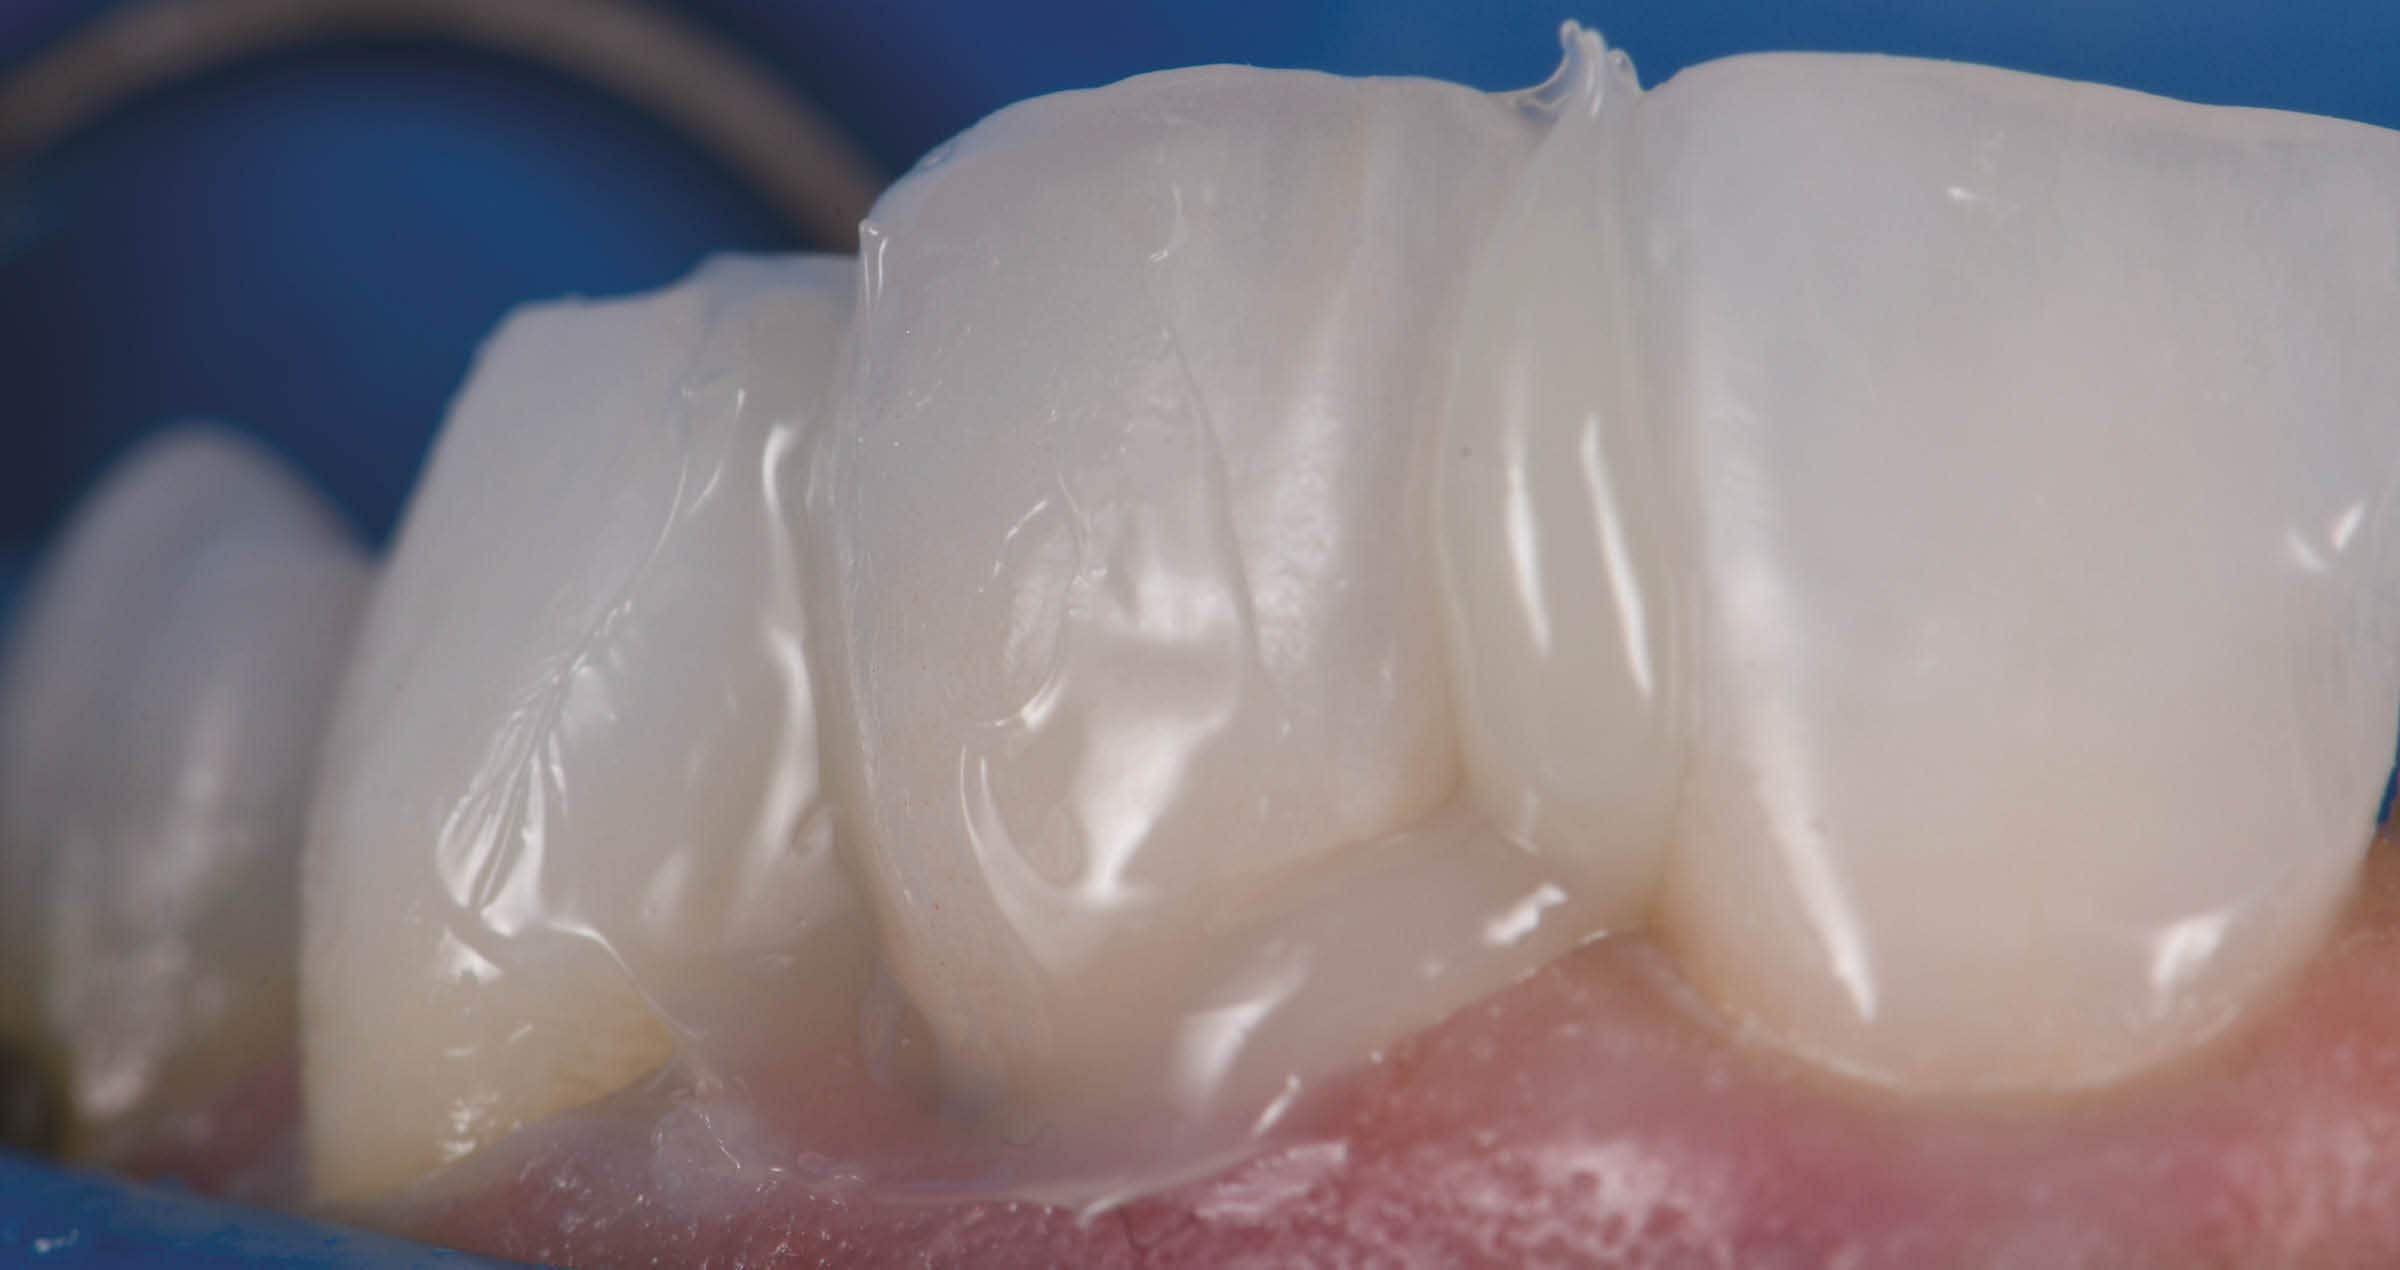
Clinical Cases, Chairside Large cavity restoration with resin composite: which materials to choose? Aug 27, 2024 Case by Vasiliki Tsertsidou What kind of resin composite is recommended for core build-up procedures? While there are specific dual-cure core build-up resin composites available on the market, it is not mandatory to use them. Light curing is advisable to be applied even for materials with dual-cure polymerization. Some conventional resin composites demonstrate more favourable properties for a core build-up compared to specific core build-up resin composites itself.1 Hence, it is possible to utilize a composite generally used in the dental office, provided it is indicated to and it is not applied deep within the root canal, where proper light curing would be impossible. The critical material properties for core build-ups are high filler load, sufficient flexural modulus and flexural strength. CLEARFIL MAJESTY™ ES-2 composite series (Kuraray Noritake Dental Inc.) are suitable option for this case. With a filler load weight percentage of 78 and a flexural strength of 118 MPa (according to manufacturer), CLEARFIL MAJESTY™ ES-2 Classic corresponds to core build-up prerequisites*. The following case is illustrating the clinical procedure. *The indication range of CLEARFIL MAJESTY™ ES-2 composite does not cover core build-up. In the specific case it is used for creating a large Class II filling where all conditions from the IFU, such as curing depth, are met. Fig. 1. Endodontically treated tooth with a vertical fracture of palatal wall on maxillary right second premolar. Fig. 2. Buccal view of the tooth. Fig. 3. Clinical image, directly after removal of fragment. Fig. 4. Fragment of the maxillary right second premolar. Fig. 5. Circumferential matrix band for build-up to assist endodontic retreatment. Fig. 6. Build-up of the missing walls (margin relocation) with CLEARFIL MAJESTY™ ES-2 Classic (A3). Fig. 7. Temporary filling of the cavity. Fig. 8. Replacement of the temporary filling material with CLEARFIL MAJESTY™ ES-2 Classic. Fig. 9. Crown preparation. Fig. 10. Proximal carious lesion present on the adjacent fist premolar. Fig. 11. Situation after rubber dam placement and caries removal. Fig. 12. Cavity restored with CLEARFIL MAJESTY™ ES-2 Classic. Fig. 13. Prepared crown. Fig. 14. Crown after sandblasting of the intaglio. Fig. 15. Mechanically cleaned abutment tooth ready for pre-treatment. Fig. 16. Intaglio of the crown treated with CLEARFIL™ CERAMIC PRIMER PLUS. Fig. 17. Etching of the composite surface with phosphoric acid gel. Fig. 18. Air-drying of PANAVIA™ V5 Tooth Primer on the abutment tooth. Fig. 19. Crown in place after cementation with PANAVIA™ V5 Paste and excess removal. A GOOD CHOICE Dual-cure core build-up resin composites are two-component materials that need to be mixed homogeneously, which obstracts composition from containing high filler load. However, to prevent deformation of the core, a highly filled composite is advisable. This better simulates the flexural modulus of natural tissues compared to materials with low filler load. Consequently, a light-curing material like CLEARFIL MAJESTY™ ES-2 might be a better option. Applied in 2-mm increments in the core area (and not in the root canal), it performs well and provides the desired outcomes. Additionaly, the option of utilising the same material as for any other type of direct restorations is simplifying the stock management and supporting dental practitioners striving for a simplification of clinical procedures. References 1. Spinhayer L, Bui ATB, Leprince JG, Hardy CMF. Core build-up resin composites: an in-vitro comparative study. Biomater Investig Dent. 2020 Nov 3;7(1):159-166. doi: 10.1080/26415275.2020.1838283. PMID: 33210097; PMCID: PMC7646551. Dentist: VASILIKI TSERTSIDOU
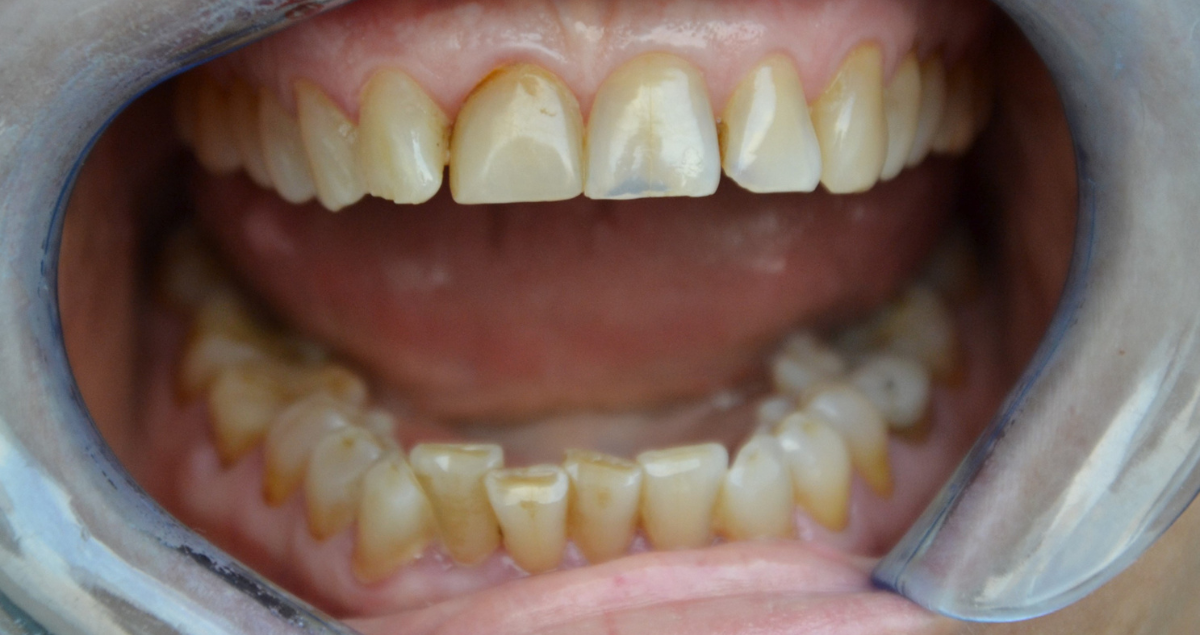
Clinical Cases, Chairside Universal Dark: For natural results in darker teeth Aug 13, 2024 Abrasion and shape correction was also the major reason for this 58-year-old female patient to ask for cosmetic dental treatment. She was unhappy with the appearance of the anterior teeth in the maxilla, which showed signs of tooth wear and discolouration. The selected treatment approach was composite veneering with CLEARFIL MAJESTY™ ES-2 Universal in the shade UD. The shade was selected based on the indication and the somewhat darker shade of the patient’s natural teeth. Fig. 1. Initial clinical situation. Fig. 2. Treatment outcome. Reasons for selecting universal dark: - For older patients (tooth shades A3 and darker) - Situations in which light easily passes through the composite (e.g., Class III, Class IV) Universal dark properties: - High light scattering effect - Well-balanced translucency Dentist: JUSUF LUKARCANIN Dr. Jusuf Lukarcanin is a Certified Dental Technician (DCT) and a Doctor of Dental Science (DDS). He studied dentistry at the Ege University Dental Faculty in Izmir, Turkey, where he obtained a Master‘s degree in 2011. In 2017, he received a Ph.D. degree from the Department of Restorative Dentistry of the same university. Between 2012 and 2019, Dr. Lukarcanin was the head doctor and general manager at a private clinic in Izmir. Between 2019 and 2020, he worked at Tinaztepe GALEN Hospital as a Restorative Dentistry specialist, between 2020-2022 he worked at MEDICANA International Hospital Izmir as a Restorative Dentistry specialist. Currently he is an owner of a private clinic for aesthetics and cosmetics in Izmir.
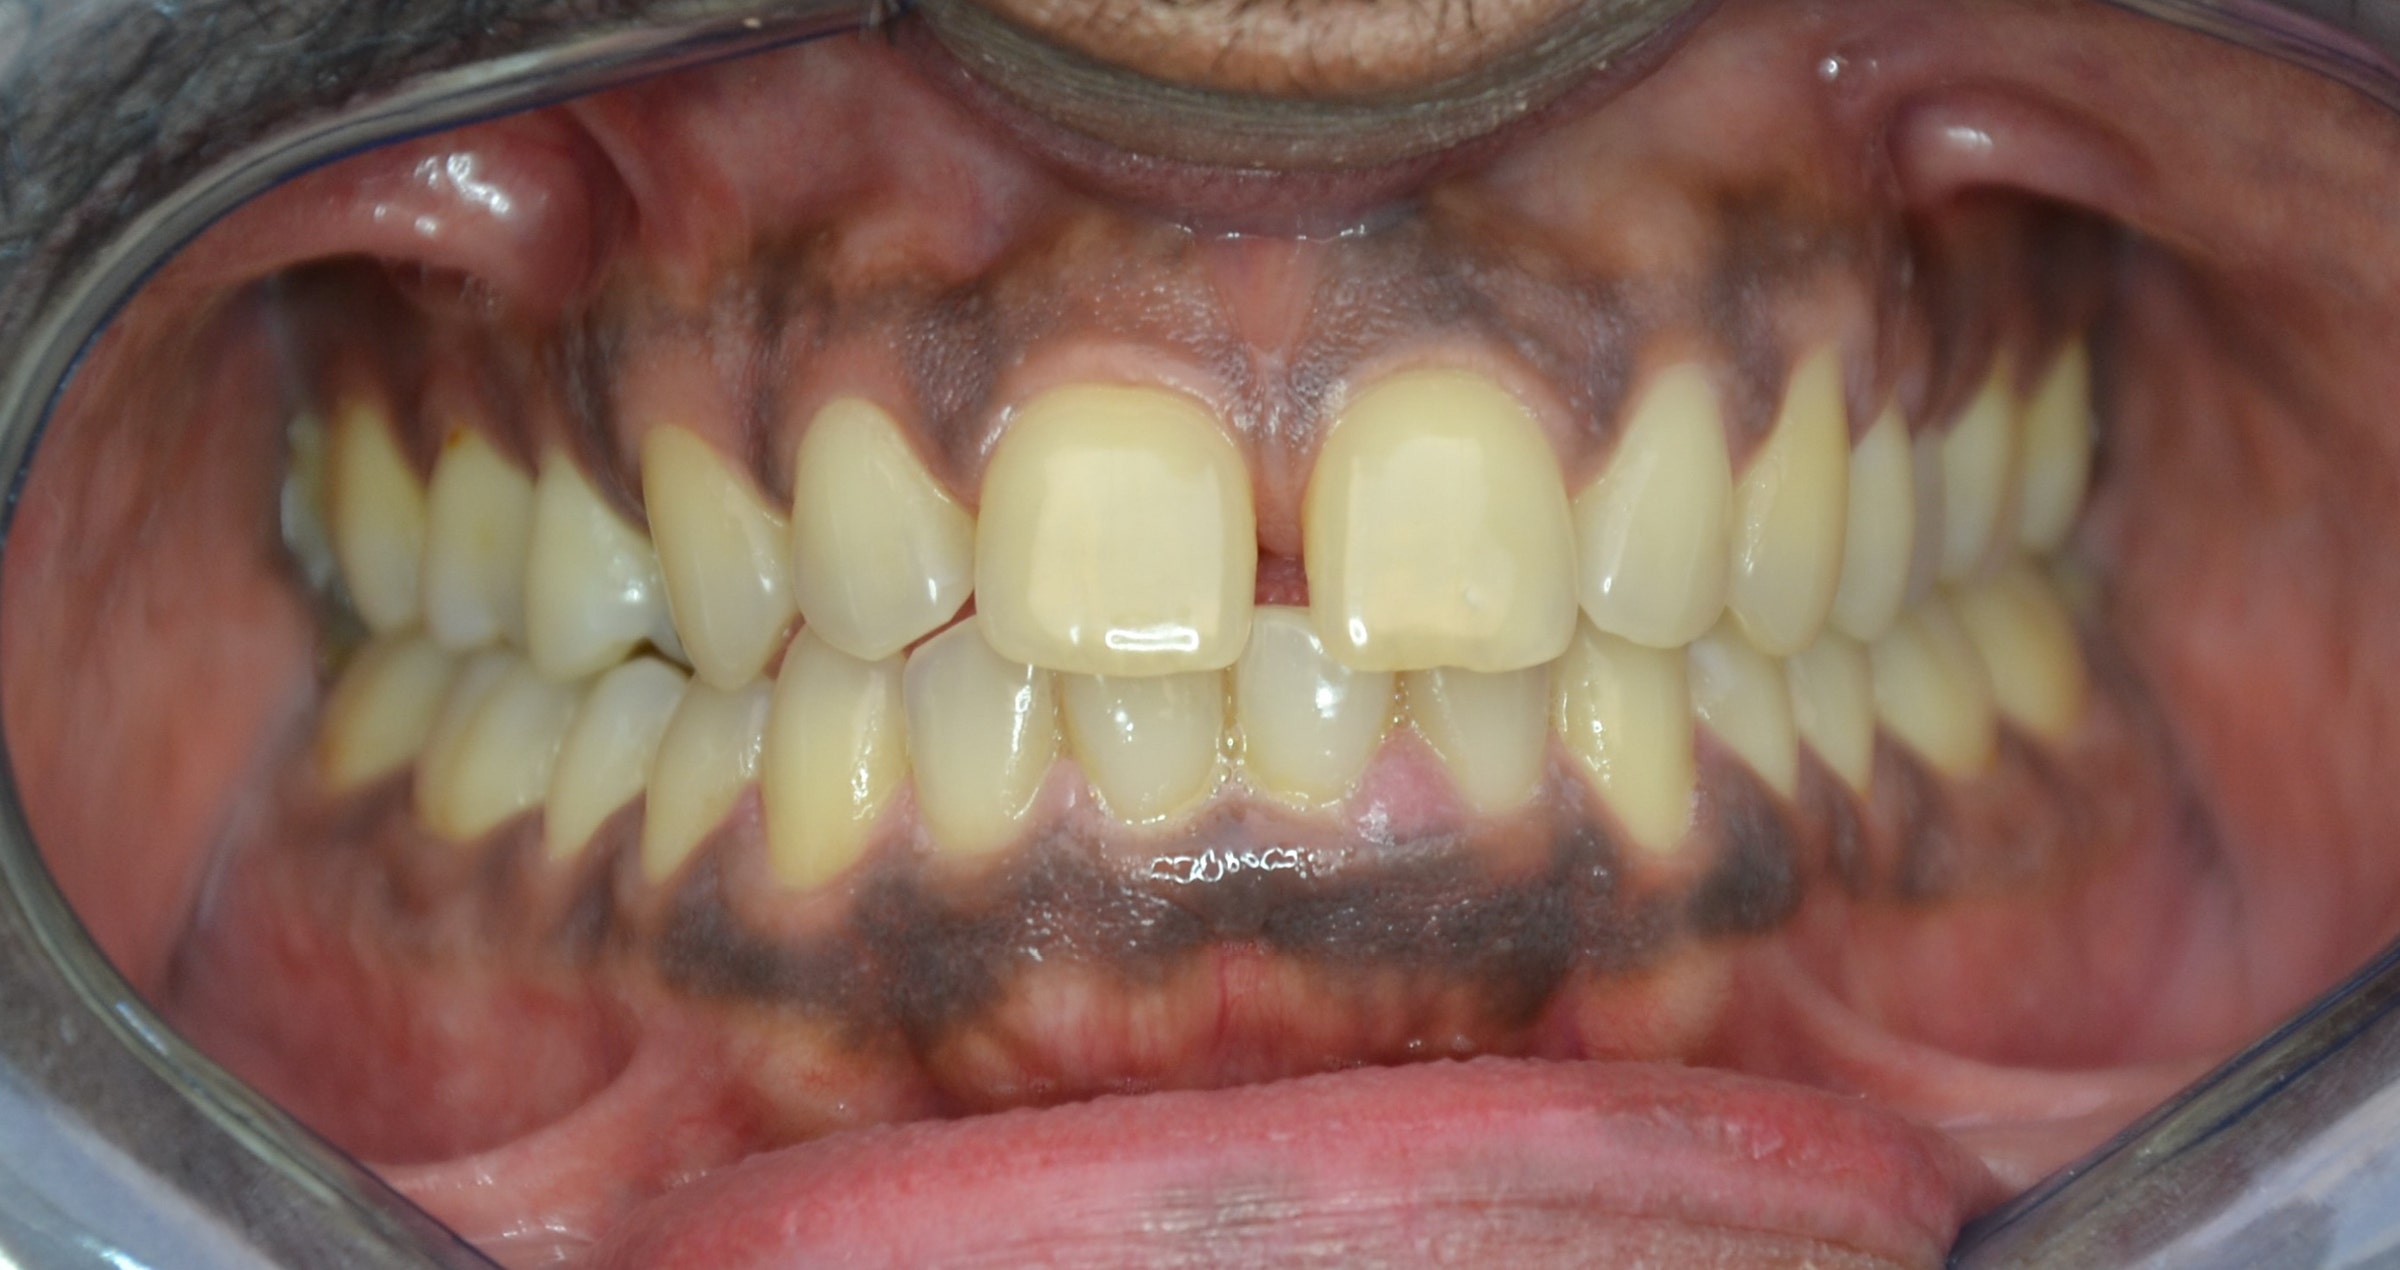
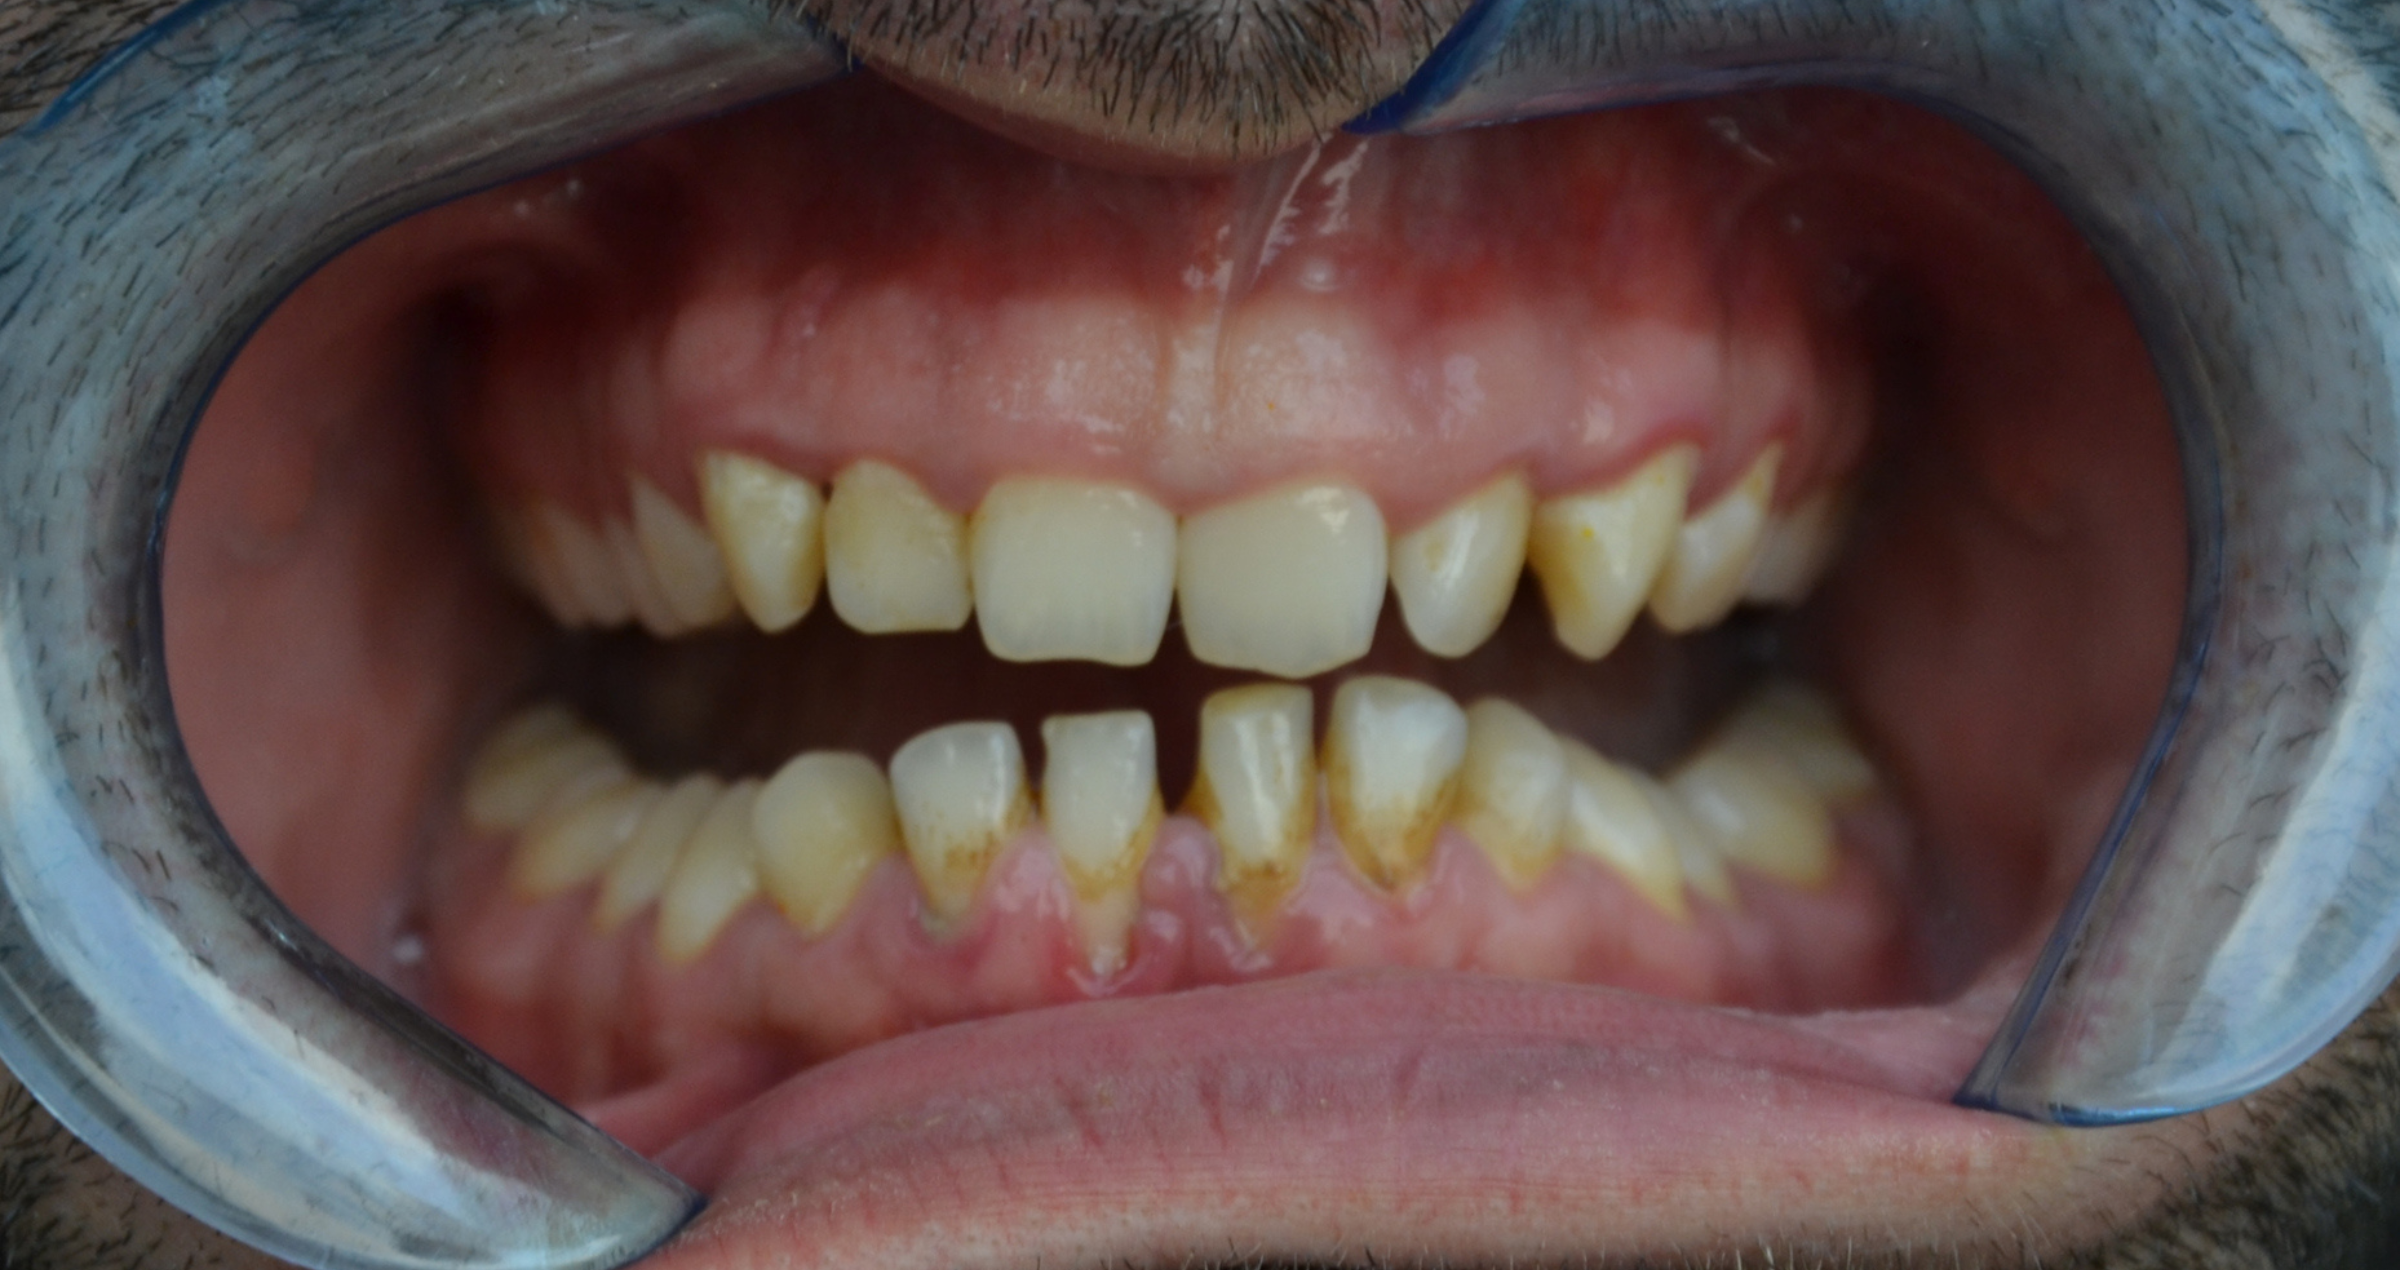
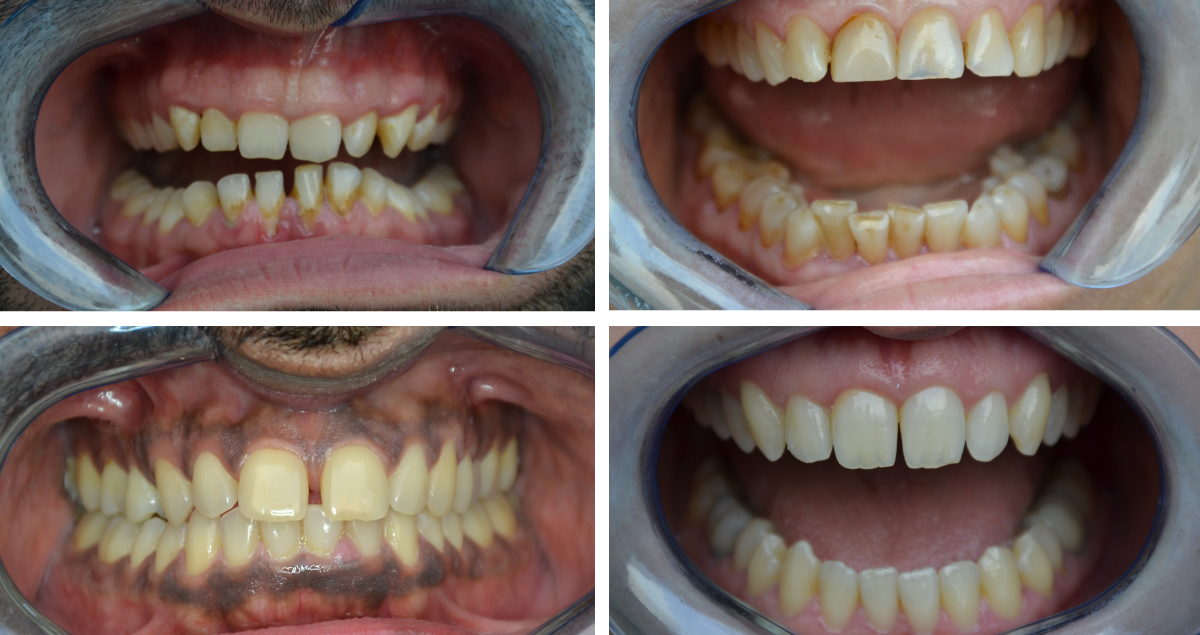
Clinical Cases, Chairside Universal Light: For natural results in brighter teeth Jul 23, 2024 Case by Dr. Jusuf Lukarcanin This young patient aged 35 with microdontia presented in the dental office with the desire to have more beautifully shaped teeth. His teeth were almost free of dental caries, but with deficiencies in oral hygiene and signs of gingival inflammation. A deep bite was also evident. After professional tooth cleaning and oral hygiene advice, the teeth were restored with CLEARFIL MAJESTY™ ES-2 Universal in the shade UL. Fig. 1. Initial situation. Fig. 2. Initial situation: Deep bite. Fig. 3. Teeth restored with composite in the single-shade technique. Fig. 4. Immediate treatment outcome. Reasons for selecting universal light: - For younger patients (tooth shades A2 and lighter) - Situations in which light easily passes through the composite (e.g., Class III, Class IV) Universal light properties: - High light scattering effect - Well-balanced translucency Dentist: JUSUF LUKARCANIN Dr. Jusuf Lukarcanin is a Certified Dental Technician (DCT) and a Doctor of Dental Science (DDS). He studied dentistry at the Ege University Dental Faculty in Izmir, Turkey, where he obtained a Master‘s degree in 2011. In 2017, he received a Ph.D. degree from the Department of Restorative Dentistry of the same university. Between 2012 and 2019, Dr. Lukarcanin was the head doctor and general manager at a private clinic in Izmir. Between 2019 and 2020, he worked at Tinaztepe GALEN Hospital as a Restorative Dentistry specialist, between 2020-2022 he worked at MEDICANA International Hospital Izmir as a Restorative Dentistry specialist. Currently he is an owner of a private clinic for aesthetics and cosmetics in Izmir.
Clinical Cases, Chairside Considerations on the use of a universal composite in the anterior region Jul 9, 2024 4 Clinical cases by Dr. Jusuf Lukarcanin Composites with a universal shade concept, a reduced number of shades that may be selected without any shade guide are a clear trend in restorative dentistry. With specific blend-in properties, these materials can help streamline restorative procedures and reduce chair time, take some pressure off the dental practitioner and contribute to potentially good outcomes. Some users, however, are skeptical about a wide-scale use of the materials, particularly when it comes to restoring teeth in the anterior region. The reasons may be a comparatively high translucency requiring the separate application of a blocker (or opacious shade) in certain situations, or a too limited shade offering. Personal experience shows that CLEARFIL MAJESTY™ ES-2 Universal is perfectly suitable for a wide range of single-shade restorations in anterior teeth. It offers great polishability and long-term gloss retention and is available in just four shades: One universal shade (U) originally designed for posterior restorations, universal light (UL) and universal dark (UD) as the two major options for anterior teeth and, finally, universal white (UW) for the imitation of any bleached shade. In general, all four options may be used in the anterior and posterior region. As the blend-in ability is due to proprietary light-diffusion technology and not managed via an increased translucency, the application of a blocker is usually not necessary and even larger areas can be restored quite inconspicuously. For those asking themselves when to select which shade in the anterior region, the following clinical case examples and comments may provide some useful guidance. The recommendations and practical tips are based on personal experience. All patients were in treatment for diastema closure or shape correction, but the selection criteria are the same for other types of anterior restorations, too. UNIVERSAL LIGHT: FOR NATURAL RESULTS IN BRIGHTER TEETH This young patient aged 35 with microdontia presented in the dental office with the desire to have more beautifully shaped teeth. His teeth were almost free of dental caries, but with deficiencies in oral hygiene and signs of gingival inflammation. A deep bite was also evident. After professional tooth cleaning and oral hygiene advice, the teeth were restored with CLEARFIL MAJESTY™ ES-2 Universal in the shade UL. Fig. 1. Initial situation. Fig. 2. Initial situation: Deep bite. Fig. 3. Teeth restored with composite in the single-shade technique. Fig. 4. Immediate treatment outcome. Reasons for selecting universal light: - For younger patients (tooth shades A2 and lighter) - Situations in which light easily passes through the composite (e.g., Class III, Class IV) Universal light properties: - High light scattering effect - Well-balanced translucency UNIVERSAL DARK: FOR NATURAL RESULTS IN DARKER TEETH Abrasion and shape correction was also the major reason for this 58-year-old female patient to ask for cosmetic dental treatment. She was unhappy with the appearance of the anterior teeth in the maxilla, which showed signs of tooth wear and discolouration. The selected treatment approach was composite veneering with CLEARFIL MAJESTY™ ES-2 Universal in the shade UD. The shade was selected based on the indication and the somewhat darker shade of the patient’s natural teeth. Fig. 1. Initial clinical situation. Fig. 2. Treatment outcome. Reasons for selecting universal dark: - For older patients (tooth shades A3 and darker) - Situations in which light easily passes through the composite (e.g., Class III, Class IV) Universal dark properties: - High light scattering effect - Well-balanced translucency UNIVERSAL: WHENEVER A HIGH TRANSLUCENCY IS DESIRED In teeth in which the areas to be restored are surrounded by a lot of non-discoloured tooth structure - as may be the case in Class I, II and Class V cavities - the use of CLEARFIL MAJESTY™ ES-2 Universal in the shade U may be an option. The 28-year-old patient, who presented for diastema closure, had teeth with a comparatively low translucency and different shades due to smoking and excessive coffee consumption. As the composite was applied in enamel areas only, the relatively high translucency of the universal shade seemed beneficial in this case. Fig. 1. Initial clinical situation. Fig. 2. New smile of the patient. Reasons for selecting universal: - Large amounts of underlying or surrounding tooth structure present - Medium light-scattering desired Universal properties: - High translucency - Medium light-scattering effect UNIVERSAL WHITE: FOR ALL PATIENTS ASKING FOR A BLEACHED EFFECT For all cases that require a particularly bright tooth shade – e.g. children or patients with bleached teeth / asking for a bleached effect in their restorations – CLEARFIL MAJESTY™ ES-2 Universal in the shade UW is likely to be the first choice. The young patient aged 28 shown below asked for diastema closure including shape and shade correction: She wanted to have a brighter, more beautiful smile. Fig. 1. Initial clinical situation. Fig. 2. Shape and shade correction were desired in this case. Fig. 3. Treatment outcome … Fig. 4. … leading to the beautiful smile the patient desired. Reasons for selecting universal white: - Cases requiring a particularly high brightness or value - Restorations in deciduous teeth - Restorations in bleached teeth Universal white properties: - Well-balanced translucency - High light-scattering effect CONCLUSION One universal composite, four shades: In the case of CLEARFIL MAJESTY™ ES-2 Universal, this portfolio is absolutely sufficient for single-shade restorations even in the aesthetically demanding anterior region. Properties such as a nice blend-in effect, a great polishability and gloss retention over time support dental practitioners in creating beautiful restorations. As shade determination may be based on very few criteria instead of a complex shade guide, the whole restoration procedure becomes less stressful and more efficient. Furthermore, with only four shades to stock and usually no blocker needed, the number of materials on stock is reduced, leading to facilitations in stock management as well. Dentist: JUSUF LUKARCANIN Dr. Jusuf Lukarcanin is a Certified Dental Technician (DCT) and a Doctor of Dental Science (DDS). He studied dentistry at the Ege University Dental Faculty in Izmir, Turkey, where he obtained a Master‘s degree in 2011. In 2017, he received a Ph.D. degree from the Department of Restorative Dentistry of the same university. Between 2012 and 2019, Dr. Lukarcanin was the head doctor and general manager at a private clinic in Izmir. Between 2019 and 2020, he worked at Tinaztepe GALEN Hospital as a Restorative Dentistry specialist, between 2020-2022 he worked at MEDICANA International Hospital Izmir as a Restorative Dentistry specialist. Currently he is an owner of a private clinic for aesthetics and cosmetics in Izmir.
Clinical Cases, Chairside Different direct restoration techniques in one patient case Mar 26, 2024 Case by Dr. Ioannis Memis Single-shade or two-shade approach? Using modern resin composites, it is possible to treat virtually every patient in need of a direct restoration in an aesthetic way using one of those two techniques. If the defect is rather small, a single shade of composite restorative in a body opacity may be sufficient – especially when the tooth to be restored is in the posterior region. Larger defects and those located in the aesthetic zone may require a combination of two different shades – one as a dentin replacement and one as translucent as enamel – to closely imitate the optical characteristics of the natural tooth. With CLEARFIL MAJESTY™ ES-2, Kuraray Noritake Dental Inc. offers a complete composite system designed to simplify procedures in bot, the single-shade and the two-shade approach. CLEARFIL MAJESTY™ ES-2 Classic is a typical composite for the single-shade technique consisting of 18 shades offered in a single universal opacity. Shade determination is brightness-based, meaning that the brightness is selected first and the hue and colour saturation in a second step (using the VITA Classical A1 – D4 shade guide). For those who want to skip shade determination completely, CLEARFIL MAJESTY™ ES-2 Universal has been introduced. It consists of only two shades for the anterior and one shade for the posterior region, selectable without using shade tabs. For the two-shade technique, CLEARFIL MAJESTY™ ES-2 Premium is the solution: It allows users to copy natural enamel and dentin layers with a total of seven enamel, seven dentin and four translucent shades. Its exceptional feature: pre-defined colour combinations with one Premium shade combination covering three VITA Classical shades. A natural blending into the environment is achieved with the Light Diffusion Technology in the formulation. All three versions of CLEARFIL MAJESTY™ ES-2 are compatible with each other and offer the same favourable handling properties. The use of different techniques, shades and opacities is demonstrated using the following patient case. YOUNG PATIENT WITH MULTIPLE CARIOUS LESIONS A 24-year-old female patient was referred from undergraduate clinic of Operative Dentistry of the Aristotle’s University of Thessaloniki - School of Dentistry (Greece). Patient presented multiple interproximal carious lesions in need of restorative treatment. In the clinical and radiographic examination, the following defects were identified: Quadrant 1 (maxillary right): - Distal lesion on the lateral incisor (Class III) - Mesial and distal lesions on the first premolar (Class II) - Mesial and distal lesions on the second premolar (Class II) - Mesial lesion on the first molar (Class II) Quadrant 2 (maxillary left): - Distal lesion on the lateral incisor (Class III) - Mesial lesion on the first premolar (Class II) - Mesial and distal lesions on the second premolar (both Class II) - Mesial lesion on the first molar (Class II) Quadrant 3 (mandibular left): - Distal lesion on the first molar (Class II) - Mesial lesion on the second molar (Class II) In a stepwise procedure, the teeth were restored with CLEARFIL MAJESTY™ ES-2 either in a single-shade or in a two-shade approach depending on the size of the lesions. INITIAL SITUATION Fig. 1. Initial situation: Frontal view. Fig. 2. Occlusal view of the maxilla. Fig. 3. Occlusal view of the mandible. RESTORING THE TEETH IN QUADRANT 1 The six carious lesions in this quadrant were restored in three steps. At first, the focus was on the first molar and second premolar. Opening the larger cavity mesially of the first molar provided access to the smaller lesion on the premolar’s distal surface. After caries excavation and cavity preparation, rubber dam was placed and fixed with a clamp on the second molar. The enamel in the cavities was treated with phosphoric acid etchant for 15 seconds before CLEARFIL™ Universal Bond Quick (Kuraray Noritake Dental Inc.) was applied according to the manufacturer’s instructions. For a morphologically correct designing of the proximal contact point and area, the use of a sectional matrix system with rings was utilized. Both cavities were restored with CLEARFIL MAJESTY™ ES-2 Premium in the shades A3D and A2E. Finishing and polishing of the occlusal surface accomplished with silicon cups and Twist Dia disks on a slow speed handpiece. In the second step, the distal lesion on the first and mesial lesion on the second premolar were restored in an identical procedure with CLEARFIL MAJESTY™ ES-2 Premium in the shade A3D and CLEARFIL MAJESTY™ ES-2 Classic in the shade A3. A different approach was selected in step 3 for the lesions on the distal part of the lateral incisor and the mesial part of the first premolar. Due to the small size and the all-but-prominent position of the lesions, a single-shade technique using CLEARFIL MAJESTY™ ES-2 Classic in the shade A3 was selected. Between the lateral incisor and canine, a posterior sectional matrix was placed in an upright position and fixed with a wedge to support a proper restoration of the contact point, while both elements were used in the usual way between the canine and first premolar. Fig. 4. Simultaneous restoration of the mesial lesion on the first molar and the distal lesion on the second premolar with CLEARFIL MAJESTY™ ES-2 Premium. Fig. 5. Restoration of the distal lesion on the lateral incisor and the mesial lesion on the first premolar with CLEARFIL MAJESTY™ ES-2 Classic. RESTORING THE TEETH IN QUADRANT 2 For the small disto-palatal lesion on the maxillary left lateral incisor, a single-shade technique with CLEARFIL MAJESTY™ ES-2 Classic in the shade A3 also produced aesthetic outcomes. The four lesions at the posterior region of the quadrant were restored in two steps – one for each pair of proximal lesions – with a combination of CLEARFIL MAJESTY™ ES-2 Premium in the shade A3D and CLEARFIL MAJESTY™ ES-2 Classic in the shade A1. Fig. 6. A single-shade technique is sufficient to aesthetically restore this small lesion on the left lateral incisor. Fig. 7. Simultaneous restoration of the mesial lesion on the second premolar and the distal lesion on the first premolar. Fig. 8. Simultaneous restoration of the mesial lesion on the first molar and distal lesion on the second premolar. RESTORING THE TEETH IN QUADRANT 3 In this quadrant, only a single pair of proximal lesions needed treatment. A simultaneous restoration procedure was selected once again due to the favourable space conditions. Although the size of the lesion was like those in the posterior region of the maxilla, a single-shade restoration was selected with the use of CLEARFIL MAJESTY™ ES-2 Classic (shade A3). Fig. 9. Treatment of the lesions in quadrant 3. CONCLUSION In the present patient case, several different shades, opacities, and combinations of CLEARFIL MAJESTY™ ES-2 were utilized either in a single- or in a two-shade approach. All combinations and techniques produced good outcomes. As shown in Figure 4, the enamel opacity of CLEARFIL MAJESTY™ ES-2 Premium is visibly more translucent than the universal opacity of CLEARFIL MAJESTY™ ES-2 Classic. Experience shows that enamel shades translucency is highly valuable for aesthetic anterior restorations, while in posterior restorations, the universal shade approach is aesthetically adequate, particularly for medium-sized restorations, as shown in Figure 9. This is clearly an evidence of Light Diffusion Technology which is blending hue and colour saturation to the surrounding tooth structure. Handling of all selected composite pastes is comfortable: non-sticky, adaptable to cavity walls and allowing precise occlusal sculpting. Polishing with Silicone Cups and TWIST DIA for Composite is easy, quick and leaves a natural gloss on the surface.Dentist: DR. IOANNIS MEMIS Postgraduate Student, Operative Dentistry Dept., School of DentistryAristotle University of Thessaloniki, Greece
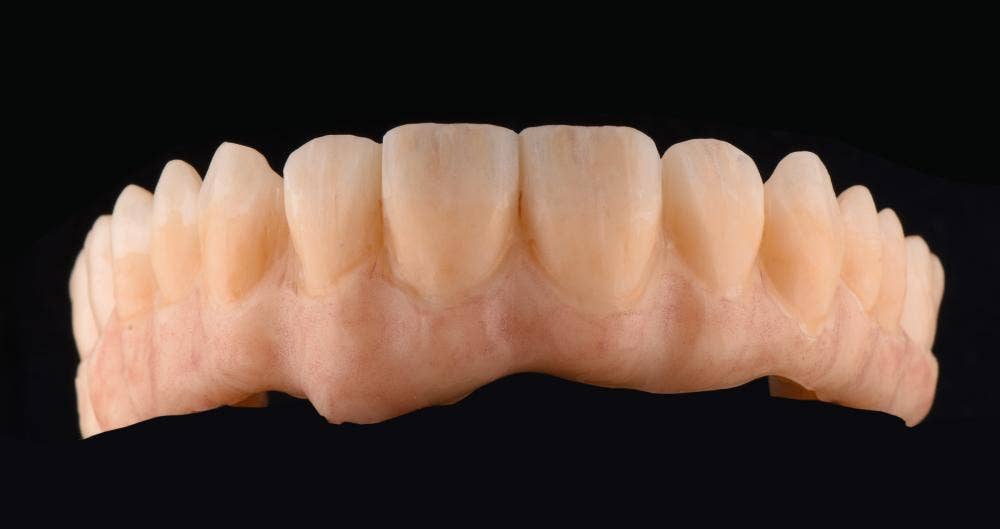
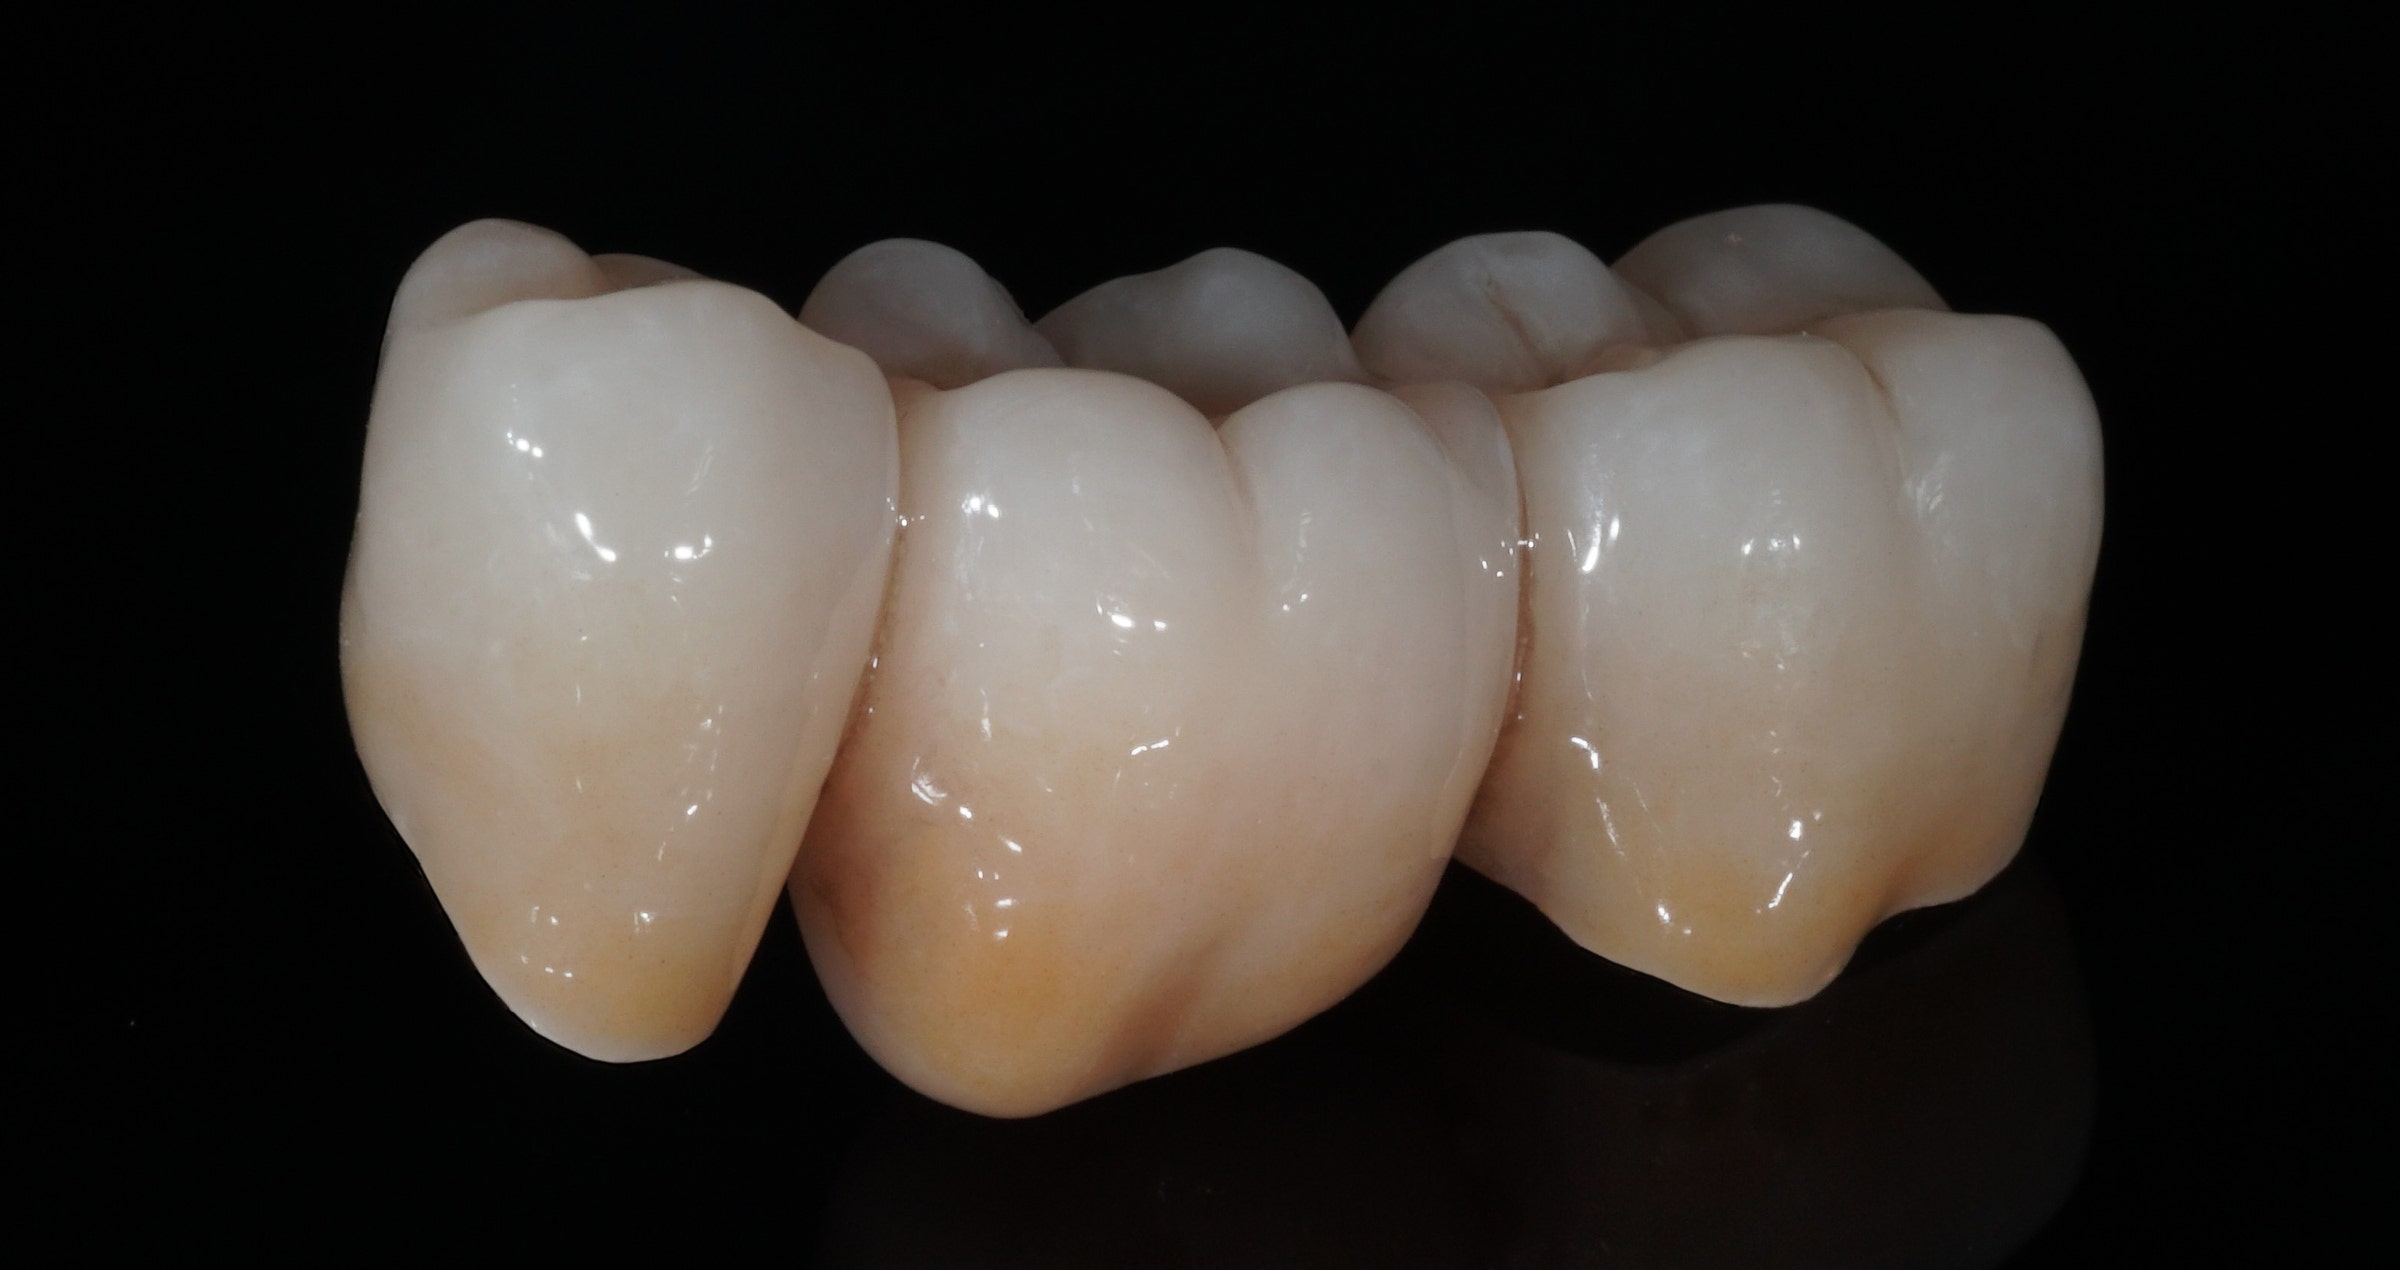
Clinical Cases, Chairside Unilateral bite elevation with a zirconia bridge and a lithium disilicate onlay Oct 31, 2023 Clinical case by Dr. Florian Zwiener The 85-year-old female patient presented after osteosynthesis of a multiple mandibular fracture she had sustained after a fall. During fixation, a massive nonocclusion had occurred in the left posterior region of the mandible (teeth 34 to 37; FDI notation). The patient desired to be able to chew properly again in this area. After endodontic treatment of the two avulsed central incisors, which had been replanted in the hospital, and periodontal therapy, a bite elevation was planned on the left side. The idea was to restore the teeth and elevate the bite with three onlays and a crown made of lithium disilicate (IPS e.max CAD, Ivoclar Vivadent). During tooth preparation, however, a longitudinal root fracture was detected on the first molar. Therefore, only the first premolar was restored in this session. For this purpose, an onlay was produced chairside (with the CEREC system, Dentsply Sirona) and adhesively luted with PANAVIA™ V5 (Kuraray Noritake Dental Inc.). The first molar was extracted. One week later, the extraction socket, which was still healing, was modelled for the ovoid pontic using an electrotome loop. The second premolar and molar were prepared as abutment teeth for a bridge. The bridge was then milled from KATANA™ Zirconia Block for Bridge in the shade A3.5 and individualized with CERABIEN™ ZR FC Paste Stain (both Kuraray Noritake Dental inc.). After another week, the bridge was luted with the self-adhesive resin cement PANAVIA™ SA Cement Universal (Kuraray Noritake Dental Inc.) following sandblasting. Fig. 1. Situation after multiple mandibular fracture on the left side. Fig. 2. Clinical situation at the initial appointment in the dental practice. Fig. 3. Open bite in the mandibular left posterior region. Fig. 4. Bridge design … Fig. 5. … using the CEREC Software. Fig. 6. Due to the bright shade of the teeth in the cusp area, the restoration was positioned high in the KATANA™ Zirconia Multi-Layered Block. Fig. 7. Surface texturing in the pre-sintered state (prior to the final sintering procedure). Fig. 8. Bridge after a seven-hour sintering cycle. Fig. 9. Appearance of the bridge after individualization with CERABIEN™ ZR FC Paste Stain … Fig. 10. … and two glaze firings. Fig. 11. Clinical situation after restoring the teeth with a lithium disilicate onlay and a zirconia bridge. FINAL SITUATION Fig. 12. Onlay and bridge in place (after adhesive luting with PANAVIA™ V5 and self-adhesive luting with PANAVIA™ SA Cement Universal). Fig. 13. Final X-ray used to check for excess cement around the bridge. Dentist: DR. FLORIAN ZWIENER Dr. Florian Zwiener is a distinguished dental professional known for his expertise in Endodontics, Prosthodontics, and CAD/CAM technology. Born in Cologne, Germany, he developed a passion for dentistry and pursued his education at the University of Cologne, where he obtained his degree in Dentistry. Currently, Dr. Florian Zwiener practices at the Dr. Frank Döring Dental Clinic in Hilden, Germany. Here, he continues to apply his specialized knowledge and skills, ensuring that his patients receive the highest quality of care. Follow Dr. Zwiener on Instagram: @dr.florian_zwiener.
Clinical Cases, Chairside Universal adhesives: rationalizing clinical procedures Oct 24, 2023 Case report with Dr. José Ignacio Zorzin Rationalizing clinical workflows: This is the main reason for the use of universal products in adhesive dentistry. They are suitable for a wide range of indications and different application techniques, fulfil their tasks with fewer components than conventional systems and often involve fewer steps in the clinical procedure. Universal adhesives are a prominent example. How do universal adhesives contribute to a streamlining of workflows? When restoring teeth with resin composite, the restorative material will undergo volumetric shrinkage upon curing. By bonding the restorative to the tooth structure with an adhesive, the negative consequences of this shrinkage – marginal gap formation, marginal leakage and staining, hypersensitivity issues and the development of secondary caries – are prevented. The first bonding systems available on the dental market were etch-and-rinse adhesives, which typically consisted of three components: an acid etchant, a primer and a separate adhesive. Later generations combined the primer and the adhesive in one bottle, or were two or one-bottle self-etch adhesives. Universal adhesives (also referred to as multi-mode adhesives) may be used with or without a separate phosphoric acid etchant. Fig. 1. Volumetric shrinkage of resin composite restoratives and its clinical consequences. Which technique to choose depends on the indication and the clinical situation. In most cases, the best outcomes are obtained after selective etching of the enamel1. Bonding to enamel is generally found more effective when the enamel is etched with phosphoric acid, while the application of phosphoric acid on large areas of dentin involves the risk of etching deeper than the adhesive is able to hybridize. When the cavity is small, however, selective application of the phosphoric acid etchant to the enamel surface may not be possible, so that a total-etch approach is most appropriate. Finally, in the context of repair, the self-etch approach may be the first choice, as phosphoric acid might impair the bond strength of certain restorative materials by blocking the binding sites. By using a universal adhesive, all these cases may be treated appropriately, as the best suitable etching technique can be selected in every situation. Apart from the differences related to the use or non-use of phosphoric acid etchant on the enamel or enamel-and-dentin bonding surface, the clinical procedure is always similar with the same universal adhesive. The following clinical case is used to illustrate how to proceed with CLEARFIL™ Universal Bond Quick (Kuraray Noritake Dental Inc.) in the selective enamel etch mode, and it includes some details about the underlying mechanism of adhesion. How to proceed with selective enamel etching? A clinical example. This patient presented with a fractured maxillary lateral incisor, luckily bringing the fragment with him. Hence, it was decided to adhesively lute the fragment to the tooth with an aesthetic flowable resin composite. Fig. 2. Patient with a fractured maxillary lateral incisor. Fig. 3. Close-up of the fractured tooth. Fig. 4. Working field isolated with rubber dam. As proper isolation of the working field makes the dental practitioner’s life easier, a rubber dam was placed using the split-dam technique. It works well in the anterior region of the maxilla, as the risk of contamination with saliva from the palate is minimal. Once the rubber dam was placed, the bonding surfaces needed to be slightly roughened to refresh the dentin. As the surfaces were also slightly contaminated with blood and it is important to have a completely clean surface for bonding, KATANA™ Cleaner was subsequently applied to the tooth structure, rubbed into the surfaces for ten seconds and then rinsed off. The cleaning agent contains MDP salt with surface-active characteristics that remove all the organic substances from the substrate. The fragment was fixed on a ball-shaped plugger with (polymerised) composite and also cleaned with KATANA™ Cleaner. Fig. 5. Cleaning of the tooth … Fig. 6. … and the fragment with KATANA™ Cleaner. What followed was selective etching of the enamel on the tooth and the fragment for 15 seconds. Whenever selective enamel etching is the aim, it is essential to select an etchant with a stable (non runny) consistency – a property that is offered by K-ETCHANT Syringe (Kuraray Noritake Dental Inc.). Both surfaces were thoroughly rinsed and lightly dried before applying CLEARFIL™ Universal Bond Quick with a rubbing motion. This adhesive is really quick: Study results show that the bond established immediately after application is as strong and durable as after extensive rubbing into the tooth structure for 20 seconds.2,3 The adhesive layer was carefully air-dried to a very thin layer and finally polymerized on the tooth and on the fragment. Fig. 7. Selective etching of the enamel of the tooth … Fig. 8. … and the fragment with phosphoric acid etchant. Fig. 9. Application … Fig. 10. … of the universal bonding agent. Fig. 11. Polymerization of the ultra-thin adhesive layer on the tooth … Fig. 12. … and the fragment. What happens to dentin in the selective enamel etch (or self-etch) mode? After surface preparation or roughening, there is a smear layer on the dentin surface that occludes the dentinal tubules, forms smear plugs that protect the pulp and prevents liquor from affecting the bond. When self-etching the dentin with a universal adhesive, this smear layer is infiltrated and partially dissolved by the mild self-etch formulation (pH > 2) of the universal adhesive. At the same time, the adhesive infiltrates and demineralizes the peritubular dentin. The acid attacks the hydroxyapatite at the collagen fibrils, dissolves calcium and phosphate and hence enlarges the surface. Then, the 10-MDP contained in the formulation reacts with the positively loaded calcium (and phosphate) ions. This ionic interaction is responsible for linking the dentin with the methacrylate and thus for the formation of the hybrid layer.4,5 In the total-etch mode, the phosphoric acid is responsible for dissolving the smear layer and demineralising the hydroxyapatite. This leads to a collapsing of the collagen fibrils, which need to be rehydrated by the universal adhesive that is applied in the next step. Whenever the acid penetrates deeper into the structures than the adhesive, the collagen fibrils will remain collapsed. This will most likely result in clinical issues including post-operative sensitivity6. When applying the adhesive system, a dental practitioner rarely thinks about what is happening at the interface7. However, every user of a universal adhesive should be aware of the fact that a lot is happening there. This is why it is so important to use a high-performance material with well-balanced properties and strictly adhere to the recommended protocols. Fig. 13. Schematic representation of dentin after tooth preparation: The smear layer on top with its smear plugs occluding the dentinal tubules protects the pulp and prevents liquor from being released into the cavity. Fig. 14. Schematic representation of dentin after the application of a universal adhesive containing 10-MDP: The mild self-etch formulation partially dissolves and infiltrates the smear layer, while at the same time demineralizing and infiltrating the peritubular dentin5. In the present case, the tooth and the fragment now needed to be reconnected. For this purpose, CLEARFIL MAJESTY™ ES-Flow (A2 Low) was applied to the tooth structure. The fragment was then repositioned with a silicone index, held in the right position with a plier and light cured. To obtain a smooth margin and glossy surface, the restoration was merely polished. The patient presented after 1.5 years for a recall and the restoration was still in a perfect condition. Fig. 15. Reconnecting the fragment with the tooth structure. Fig. 16. Treatment outcome. Why is it important to adhere to the product-specific protocols? Universal adhesives contain lots of different technologies in a single bottle. While this fact indeed allows users to rationalize their clinical procedures, it also requires some special attention. As every highly developed material, universal adhesives need to be used according to the protocols recommended by the manufacturer. In general, materials may only be expected to work well on absolutely clean surfaces, while contamination with blood and saliva is likely to decrease the bond strength significantly. Depending on the type of universal adhesive, active application is similarly important, as is proper air-drying and polymerization of the adhesive layer. In addition, care must be taken to use the material in its original state, which means that it needs to be applied directly from the bottle to avoid premature solvent evaporation or chemical reactions. When adhering to these rules, universal adhesives offer several benefits from streamlined procedures to simplified order management and increased sustainability, as fewer bottles are needed and likely to expire before use. Dentist: DR. JOSÉ IGNACIO ZORZIN Dr. José Ignacio Zorzin graduated as dentist at the Friedrich-Alexander University of Erlangen-Nürnberg, Germany, in 2009. He obtained his Doctorate (Dr. med. dent.) in 2011 and 2019 his Habilitation and venia legendi in conservative dentistry, periodontology and pediatric dentistry (“Materials and Techniques in Modern Restorative Dentistry”). Dr. Zorzin works since 2009 at the Dental Clinic 1 for Operative Dentistry and Periodontology, University Hospital Erlangen. He lectures at the Friedrich-Alexander University of Erlangen-Nürnberg in the field of operative dentistry where he leads clinical and pre-clinical courses. His main fields of research are self-adhesive resin luting composites, dentin adhesives, resin composites and ceramics, publishing in international peer-reviewed journals. References 1. Van Meerbeek, B.; Yoshihara, K.; Van Landuyt, K.; Yoshida, Y.; Peumans, M. From Buonocore‘s Pioneering Acid-Etch Technique to Self-Adhering Restoratives. A Status Perspective of Rapidly Advancing Dental Adhesive Technology. J Adhes Dent 2020, 22, 7-34.2. Kuno Y, Hosaka K, Nakajima M, Ikeda M, Klein Junior CA, Foxton RM, Tagami J. Incorporation of a hydrophilic amide monomer into a one-step self-etch adhesive to increase dentin bond strength: Effect of application time. Dent Mater J. 2019 Dec 1;38(6):892-899.3. Nagura Y, Tsujimoto A, Fischer NG, Baruth AG, Barkmeier WW, Takamizawa T, Latta MA, Miyazaki M. Effect of Reduced Universal Adhesive Application Time on Enamel Bond Fatigue and Surface Morphology. Oper Dent. 2019 Jan/Feb;44(1):42-53.4. Fehrenbach, J., C.P. Isolan, and E.A. Münchow, Is the presence of 10-MDP associated to higher bonding performance for self-etching adhesive systems? A meta-analysis of in vitro studies. Dental Materials, 2021. 37(10): 1463-1485.5. Van Meerbeek, B., et al., State of the art of self-etch adhesives. Dental Materials, 2011. 27(1): 17-28.6. Pashley, D.H., et al., State of the art etchand-rinse adhesives. Dent Mater, 2011. 27(1): 1-16.7. Vermelho, P.M., et al., Adhesion of multimode adhesives to enamel and dentin after one year of water storage. Clinical Oral Investigations, 21(5): 1707-1715.
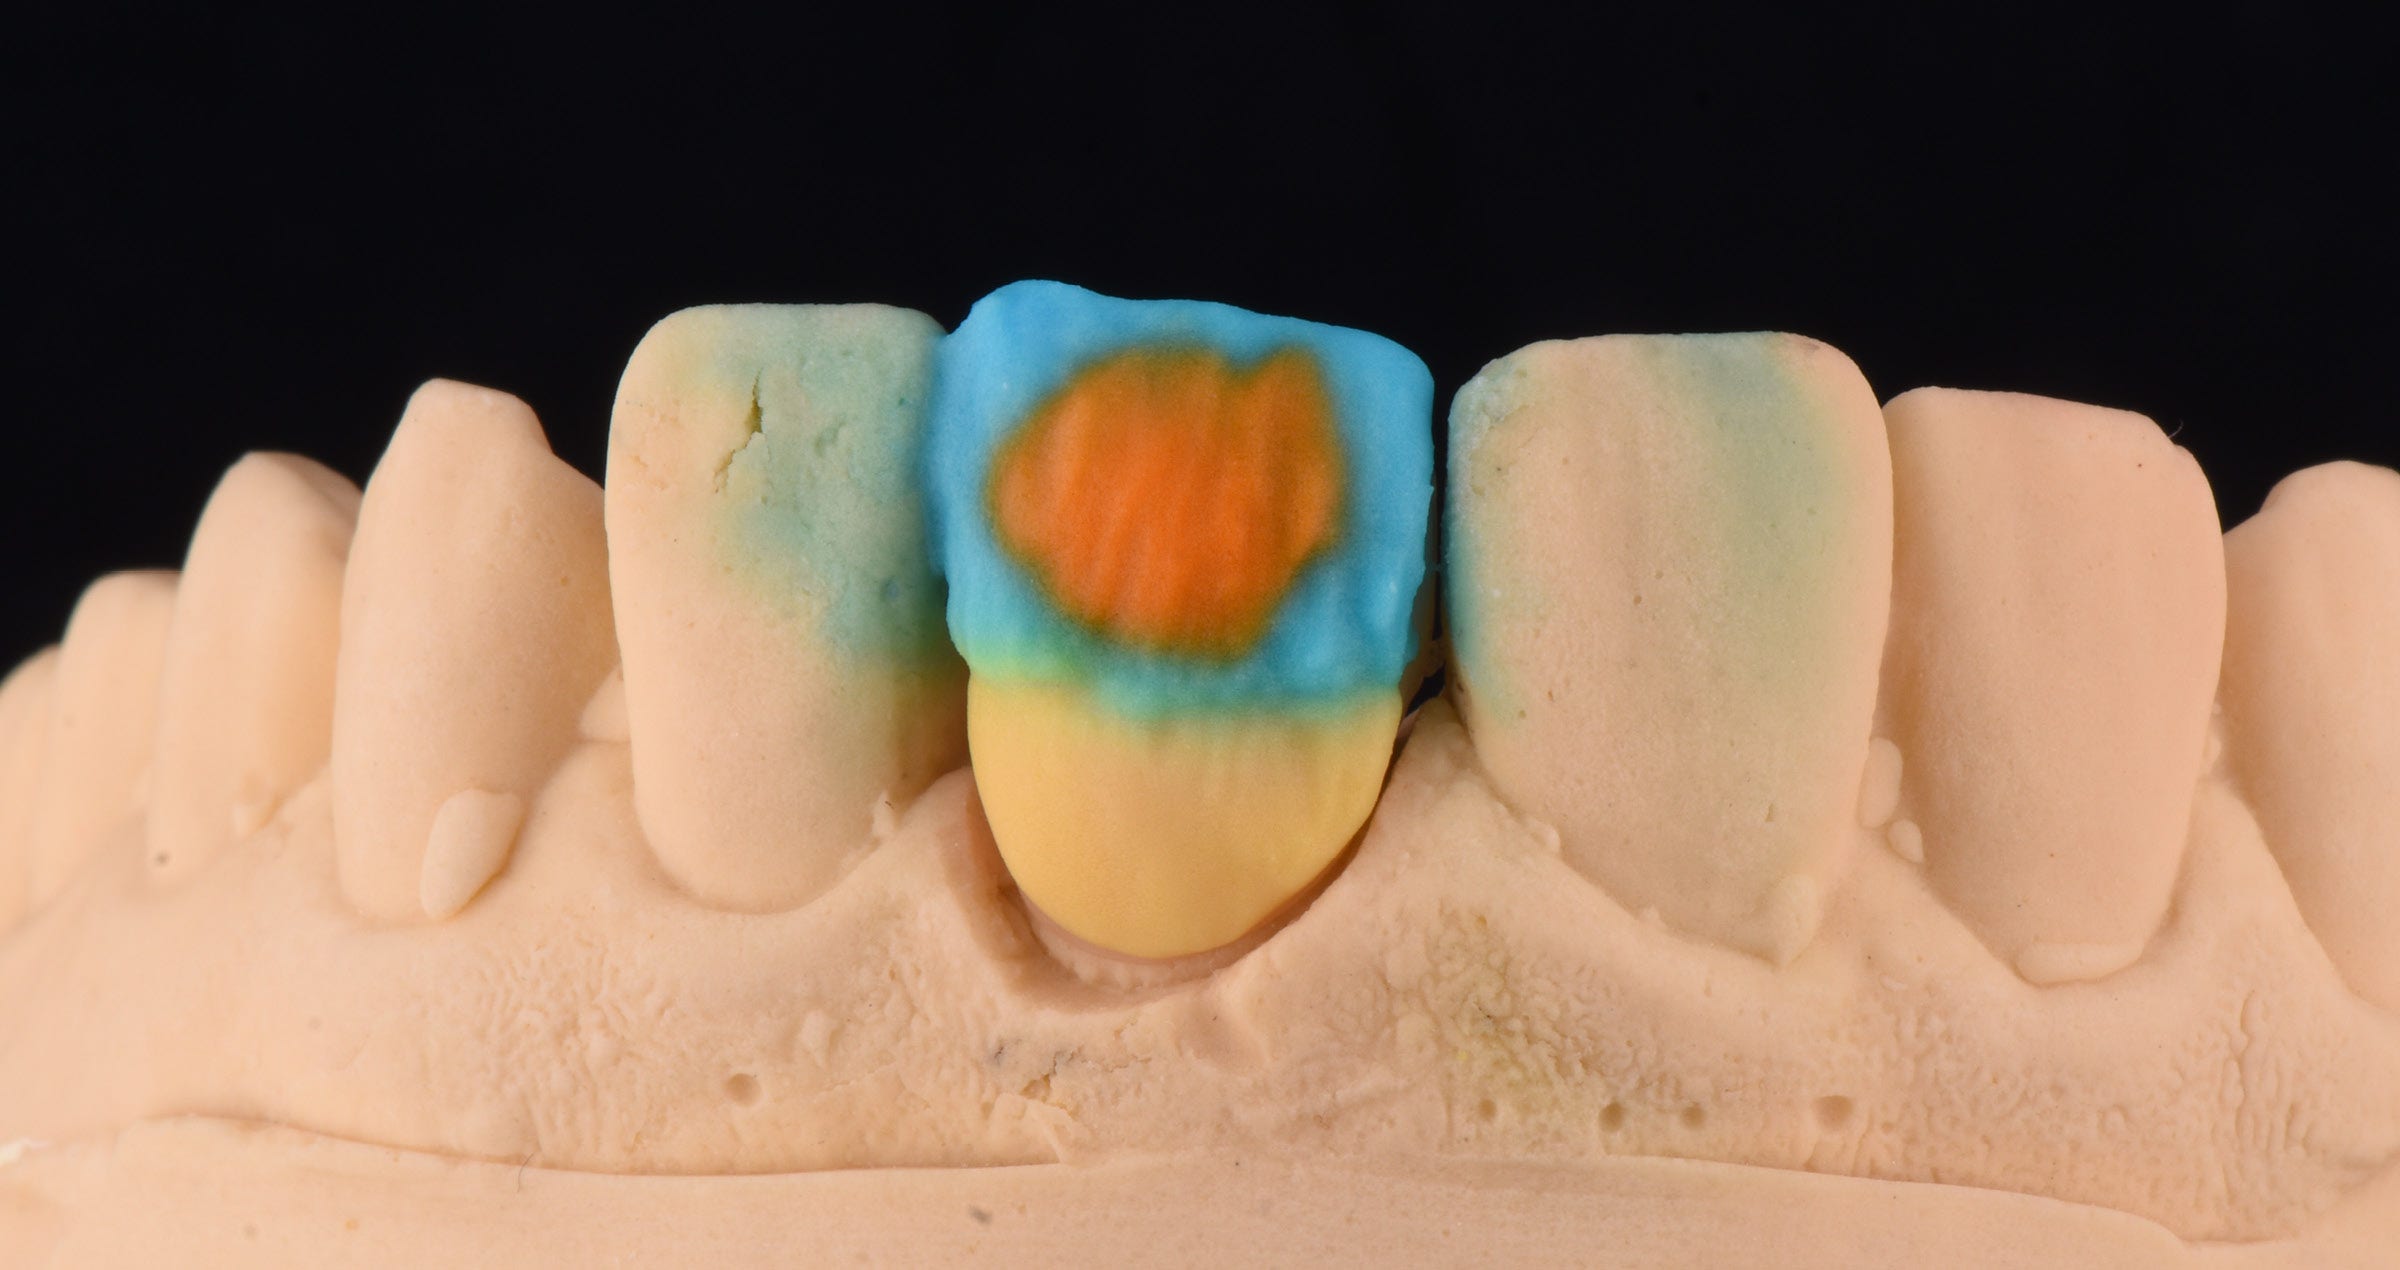
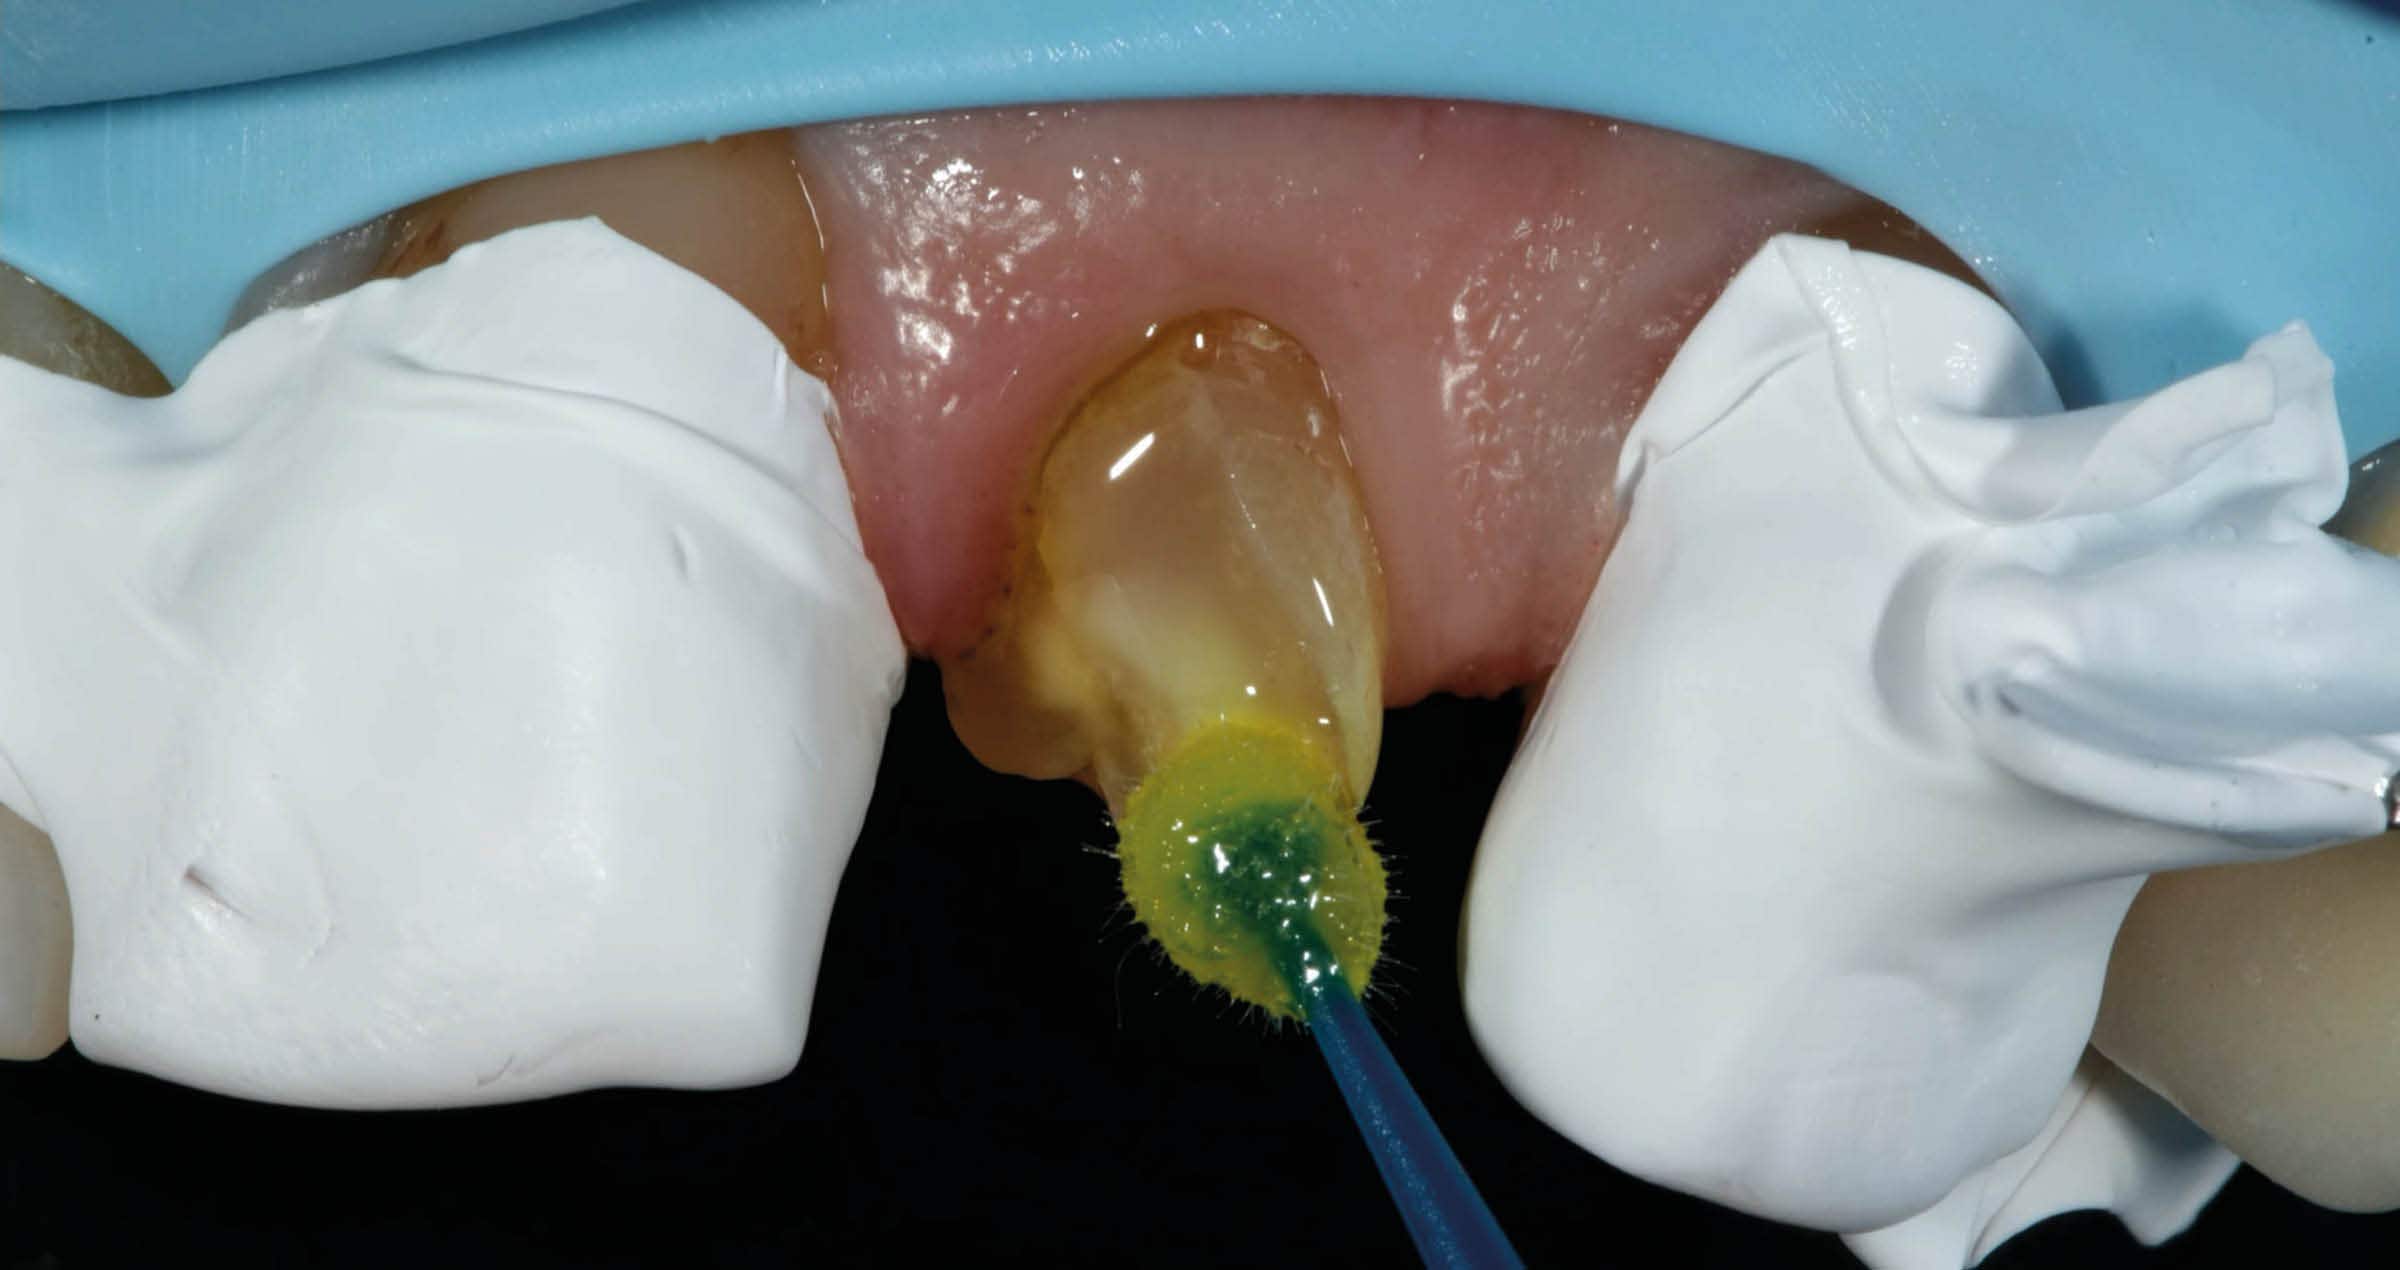
Clinical Cases, Chairside Optimizing functional and esthetic parameters in veneer cementation Aug 29, 2023 By Dr. Clarence Tam, HBSC, DDS, AAACD, FIADFE The use of both porcelain veneers to improve and restore the shape, shade and visual position of anterior teeth is a common technique in esthetic dentistry. The biomimetic aim in the restoration of teeth is not only the cosmetic domain, but also functional considerations. It is critical to note that the intact enamel shell of the palatal and facial walls with respect to anterior teeth are responsible for its innate flexural resistance. When dental structure has been violated by endodontic access, caries and/or trauma, every effort must be made to preserve the residual structure and strive to restore or exceed the baseline performance levels of a virgin tooth. BACKGROUND A 55 year old ASA II female with a medical history significant only for controlled hypertension presented to the practice for teeth whitening. It was foreseen that dental bleaching would not have an effect on the shade of a pre-existing porcelain veneer on tooth 1.2, and that this would need to be retreated following the procedure especially if the shade value changes were significant. The patient started with a baseline shade of VITA* 1M1:2M1; 50:50 ratio in the upper anterior region and 1M1 in the lower anterior region. Following a nightguard bleaching protocol with 10% carbamide peroxide worn overnight for 3-4 weeks, the patient succeeded in achieving a VITA* 0M3 shade in both upper and lower arches. As a result, there was a significant value discrepancy between the veneered tooth 1.2 and the adjacent teeth, and also increased chroma noted on the contralateral tooth 2.2 due to a facially-involved Class III composite restoration. This latter tooth also did not match the contralateral tooth in dimension and thus the decision was made to treat both lateral incisors with bonded lithium disilicate laminate veneers. The canine adjacent (2.3) featured localized mild to moderate cusp tip attrition, but the patient did not want to address this until following the currently-discussed veneers were placed. The goal of smile design at this stage is to ultimately establish bilateral harmony with the view to place an additional indirect restoration restoring the facial volume and cusp tip deficiency of tooth 2.3 in the near future. PROCEDURE A digital smile design protocol was not required for the initial intention, which was individual treatment of the lateral incisors, as slight variation is permitted in this tooth type, being a personality and gender marker of the smile. Prior to anesthesia, the target shade was selected using retracted photos featuring both polarized and unpolarized selections. The photographs were prepared for digital shade calibration by taking reference views with an 18% neutral gray white balance card (Fig. 1). Fig. 1. Reference photograph taken with a 18% neutral gray card. The basic body shade was VITA* 0M2 with an ingot shade of BL2. The patient was anesthetized using 1.5 carpules of a 2% Lignocaine solution with 1:100,000 epinephrine before affixing a rubber dam in a split dam orientation. The veneer on tooth 1.2 was sectioned and removed from tooth 1.2 and a minimally-invasive veneer preparation completed on tooth 2.2 (Fig. 2). Partial replacement of the old composite resin restoration was completed on the mesioincisobuccopalatal aspect of tooth 12 with the intact segment maintained. Adhesion to old composite was achieved using both micro particle abrasion and a silane coupling agent (CLEARFIL™ CERAMIC PRIMER PLUS, Kuraray Noritake Dental Inc.). Margins were refined and retraction cords soaked in an aluminum chloride solution and packed. Preparation stump shades were recorded. Final impressions were taken using both light and heavy body polyvinylsiloxane in a metal tray. The patient was provisionalized and sent away with instructions to verify the shade at the laboratory at the bisque bake stage. The models prepared by the laboratory verify the minimally-invasive nature of the case. Fig. 2. Veneer preparation tooth 1.2, 2.2. On receipt of the case, the patient was anesthetized and the provisionals removed. The preparations were debrided and prepared for bonding by abrading the surfaces using a 27 micron aluminum oxide powder at 30-40 psi. The veneers were assessed using a clear glycerin try-in paste (PANAVIA™ V5 Try-in Paste Clear, Kuraray Noritake Dental Inc.). Retraction cords were packed and the intaglio surface of the restorations treated using a 5% hydrofluoric acid for 20 seconds prior to application of a 10-MDP-containing silane coupling agent (CLEARFIL™ CERAMIC PRIMER PLUS, Kuraray Noritake Dental Inc.) (Fig. 3). The tooth surface was etched using 33% orthophosphoric acid for 20 seconds and rinsed. A 10-MDP-containing primer was applied to the tooth (PANAVIA™ V5 Tooth Primer, Kuraray Noritake Dental Inc.) (Fig. 4) and air dried as per manufacturer’s instructions. Veneer cement was loaded (PANAVIA™ Veneer LC Paste Clear, Kuraray Noritake Dental Inc.) (Fig. 5) and the veneer seated. The excess cement featured a non-slumpy character and maintained the veneer well in place during all margin verification exercises prior to a 1 second tack cure (Fig. 6). Fig. 3. CLEARFIL™ CERAMIC PRIMER PLUS applied to intaglio surfaces of veneers. Fig. 4. PANAVIA™ V5 Tooth Primer application to etched tooth surfaces. Fig. 5. PANAVIA™ Veneer LC Paste Clear shade loaded onto prepared intaglio surfaces of veneers. Fig. 6. PANAVIA™ Veneer LC Paste immediately after seating. Note the viscous, non-slumpy nature of the cement, which allows for ease of removal under both wet and gel-phase options. The cement was rendered into a gel state, which facilitated “clump” or en masse removal of cement with minimal cleanup required (Fig. 7). The margins were coated using a clear glycerin gel prior to final curing to eliminate the oxygen inhibition layer (Fig. 8). Fig. 7. Excess cement removal after tack curing for 1 second. Fig. 8. Final curing of veneers from both palatal and facial aspects simultaneously. The margins were finished and polished to high shine and the occlusion of the restorations verified as conformative. The post-operative views show excellent esthetic marginal integration (Fig. 9). Fig. 9. Post-operative esthetic integration of veneers on 1.2 and 2.2. On polarized photograph reassessment, the restorations are well-integrated into the new smile esthetically and functionally (Fig. 10), now awaiting esthetic augmentation of tooth 2.3 to match the contralateral canine. FINAL SITUATION Fig. 10. Final result with polarized photography on reassessment. RATIONALE FOR MATERIAL SELECTION Porcelain is often the chosen material for prosthetic dental veneers due to its innate stiffness in thin cross section, ability to modify and transmit light for optimal internal refraction and its bondability by way of adhesive protocols to composite resin. This trifecta allows for a maximal preservation of residual tooth structure whilst bolstering its physical function relative to flexural performance1. The elastic modulus of a tooth can be restored to 96% of its control virgin value if the facial enamel is replaced with a bonded porcelain laminate veneer2. The elastic modulus of lithium disilicate is 94 GPa whereas that of intact enamel is 84 GPa. The elastic modulus of dentin has been found to range from 10-25 GPa, whereas that of the hybrid layer can vary widely, indeed from 7.5 GPa to 13.5 GPa in a study by Pongprueska et al3. This low flexural resistance range reflects that of deep dentin and not that of superficial dentin, which does not reflect an ideal situation where a laminate veneer is bonded in as much enamel as possible, or in the worst case to superficial dentin. Maximal flexural strength of the hybrid layer is invaluable from a biomimetic standpoint. PANAVIA™ V5 Tooth Primer (Kuraray Noritake Dental Inc.) incorporates the use of the original 10-methacryloyloxydecyl dihydrogen phosphate (10-MDP) monomer, which elicits a pattern of stable calcium-phosphate nanolayering known as Superdentin, an acid-base resistant zone that is about 600x more insoluble than the monomer 4-MET, which is found in many other adhesives. Indeed, PANAVIA™ V5 Tooth Primer is used solely in conjunction with Kuraray Noritake Dental Inc. PANAVIA™ V5 cement and PANAVIA™ Veneer LC which both allow the primer to act as a bond without the need to cure the layer prior to cementation of the indirect restoration due to its dual cure potential when married together. If a bonding agent would be preferred, CLEARFIL™ Universal Bond Quick (Kuraray Noritake Dental Inc.), a multi-modal adhesive that also contains the essential amide monomer and 10-MDP components created by Kuraray Noritake Dental Inc., can be used. Of note, CLEARFIL™ Universal Bond Quick features exceptional flexural strength due to the accentuated cross-linking during polymerization afforded by the amide monomers, on the order of 120 MPa by itself4. PANAVIA™ Veneer LC is a cement system that features cutting edge technology that provides excellent esthetics and adhesive stability of your indirect restorations, whilst allowing a stress free workflow. It is a cement system that is a game changer; one that allows you to restore confidence in the patient, strength in the tooth-restoration interface, and bolsters your clinical confidence in the delivery of biomimetic excellence. Dentist: CLARENCE TAM References 1. Magne P, Douglas WH. Rationalization of esthetic restorative dentistry based on biomimetics. J Esthet Dent. 1999;11(1):5-15. doi: 10.1111/j.1708-8240.1999.tb00371.x. PMID: 10337285.2. Magne P, Douglas WH. Porcelain veneers: dentin bonding optimization and biomimetic recovery of the crown. Int J Prosthodont. 1999 Mar-Apr;12(2):111-21. PMID: 10371912.3. Pongprueksa P, Kuphasuk W, Senawongse P. The elastic moduli across various types of resin/dentin interfaces. Dent Mater. 2008 Aug;24(8):1102-6. doi: 10.1016/j.dental.2007.12.008. Epub 2008 Mar 4. PMID: 18304626.4. Source: Kuraray Noritake Dental Inc. Samples (beam shape; 25 x 2 x 2 mm): The solvents of each material were removed by blowing mild air prior to the test.
Clinical Cases, Chairside Flowable injection technique, a flowable composite revolution May 16, 2023 Case by Michal Jaczewski This patient came to the clinic to improve the aesthetics of her smile. After an aesthetic and functional analysis, it was decided to align and restore the teeth using a minimally invasive protocol with flowable composite. INITIAL SITUATION Fig. 1. The patient had worn teeth, visible abrasion, erosion and crowding in the lower arch. Fig. 2. Situation after orthodontic treatment, full arch ready to restore. Fig. 3. A silicon mould is used for the Flowable Injection Technique to restore the teeth with flowable composite. The silicone injection mould had injection channels prepared and was placed to check for proper fit. Fig. 4. For this case it was decided to use CLEARFIL MAJESTY™ ES Flow Low in shade XW. Fig. 5. Teflon tape was used, in order to separate the teeth. Fig. 6. The restoration is completely additive; the teeth are not prepared at all. Total etching of the enamel is the best pre-treatment in this situation. K-Etchant Syringe (35% phosphoric acid) was applied for 10 seconds. Fig. 7. A surgical suction tip was used in order to carefully remove the phosphoric acid gel and protect the isolations on the teeth. Followed by rinsing off completely with water in the usual manner. Fig. 8. Each tooth was gently air dried for 10 seconds. CLEARFIL™ Universal Bond Quick was applied with a rubbing motion without additional waiting time. Followed by drying of the entire bonding treated surfaces by blowing mild air for more than 5 seconds until the bonding no longer moves. Fig. 9. Light curing of each bonded tooth for 10 sec. Fig. 10. The silicon mould is used to inject CLEARFIL MAJESTY™ ES Flow Low (optimal flowability, and properties for a case like this). Fig. 11. Using the protocol „Treat one, skip one” several teeth are restored simultaneously. Fig. 12. Situation directly after first round of injections. Fig. 13. Situation after restoring all teeth, before polishing. Fig. 14. To create a natural gloss the following polishing protocol was used: 1.) Sof-Lex™* discs, 2.) CLEARFIL™ Twist DIA for Composite polishing wheels, 3.) diamond paste and finally zinc oxide paste. *Not a brand name of Kuraray Noritake Dental. Fig. 15. High-shine results after polishing. FINAL SITUATION Fig. 16. Final restoration, immediately after treatment. Fig. 17. Final restoration after 2 days. Dentist: MICHAL JACZEWSKI Michał Jaczewski graduated from Wroclaw Medical University in 2006 and today runs his private practice in the city of Legnica, Poland. He specializes in minimally invasive dentistry and digital dentistry and is the founder of the Biofunctional School of Occlusion. Here he lectures and runs workshops with focus on full comprehensive patient treatments.
Clinical Cases, Chairside Class II cavities restored with composite raising the margin and re-establishing the contact point Apr 4, 2023 Case by Kokla Thalia, Postgraduate student in Restorative Dentistry program, Faculty of Dentistry, National and Kapodistrian University of Athens, Greece Restoring Class II cavities can be challenging due to limited access to the posterior area, where the interproximal contact needs to re-established in a proper way. Inadequate contacts tend to result in increased plaque accumulation, food impaction and, as a consequence, the development of caries and irritation of the interproximal gingiva. Therefore, it is essential that the interproximal contact is restored based on the model of nature. A suitable matrix system and a proper clinical protocol can help us succeed in this context. The following clinical case is used to illustrate a possible strategy. Fig. 1. Initial clinical situation. 23-year-old female patient with caries on the mandibular left second premolar. Fig. 2. Situation after cavity preparation, isolation of the working field with rubber dam and the placement of a sectional matrix fixed with a ring. It is essential that the matrix imitates the natural shape of the contact area, which is usually rather flat or concave cervically and convex in the middle and occlusal parts. Fig. 3. Etching of the tooth structure with phosphoric acid etchant. Afterwards, the adhesive needs to be applied (in this case, Universal Bond Quick was used according to the manufacturer’s instructions). Fig. 4. CLEARFIL MAJESTY™ ES-2 Premium in the shade A3E is applied in the distal box to build up the wall first. In this way, the available space is used to model the most critical part of the restoration before simply filling the cavity in increments with the dentin shade A3D. FINAL SITUATION Fig. 5. Final restoration after finishing and polishing. In accordance with the concept behind CLEARFIL MAJESTY™ ES-2 Premium with its pre-defined shade combinations, the final enamel layer was build-up using the shade A3E. However, the use of a single opacity is also possible in the posterior region depending on the aesthetic demands. CONCLUSION By elevating deep interproximal margins, it is possible to focus on the critical designing of the contact point when there is still sufficient space available to do so. This simplifies the procedure, while all that is left to do can be managed in a straightforward way like a Class I restoration.