429 Too Many Requests

429 Too Many Requests


nginx

Special MAJESTY ES-2 Universal - Clinical Cases Brochure

Compact, time-saving and aesthetic


How many different shades of composite do you need to create appealing restorations in virtually every clinical situation? If you opt for “CLEARFIL MAJESTY™ ES-2” Universal shade concept, a few shades will do the trick.


With wonderful support of our internationally recognized key opinion leaders, we have prepared a Clinical Case brochure of “CLEARFIL MAJESTY™ ES-2” Universal for you. The brochure highlights a variety of clinical cases in the anterior and posterior region to show the all about excellent properties of our latest composite. Let the pictures speak for themselves!


Click here to view. Enjoy!


Start Reading: Special MAJESTY ES-2 Universal - Clinical Cases Brochure


Treatment of a carious lesion with a single posterior shade composite

Case by Dr. Nicola Scotti


When restoring posterior teeth with resin composite, functional aspects such as tight and anatomically correct proximal contacts and a naturally shaped occlusal surface that is wear-resistant and antagonist-friendly are even more important than a perfect optical integration. This is why every dental practitioner should avoid spending a lot of time on shade selection in these cases and focus on the factors that have an impact on the reliability and longevity of the restoration. Great support in accomplishing this task is offered by CLEARFIL MAJESTY™ ES-2 Universal, a resin composite with a single universal shade (U) for the posterior region that eliminates the need for shade taking and selection. At the same time, it offers good marginal adaptation, low shrinkage stress and high wear resistance needed for great long-term results.


Fig. 1. Initial situation with a wide primary carious lesion in the distal aspect of the second premolar.


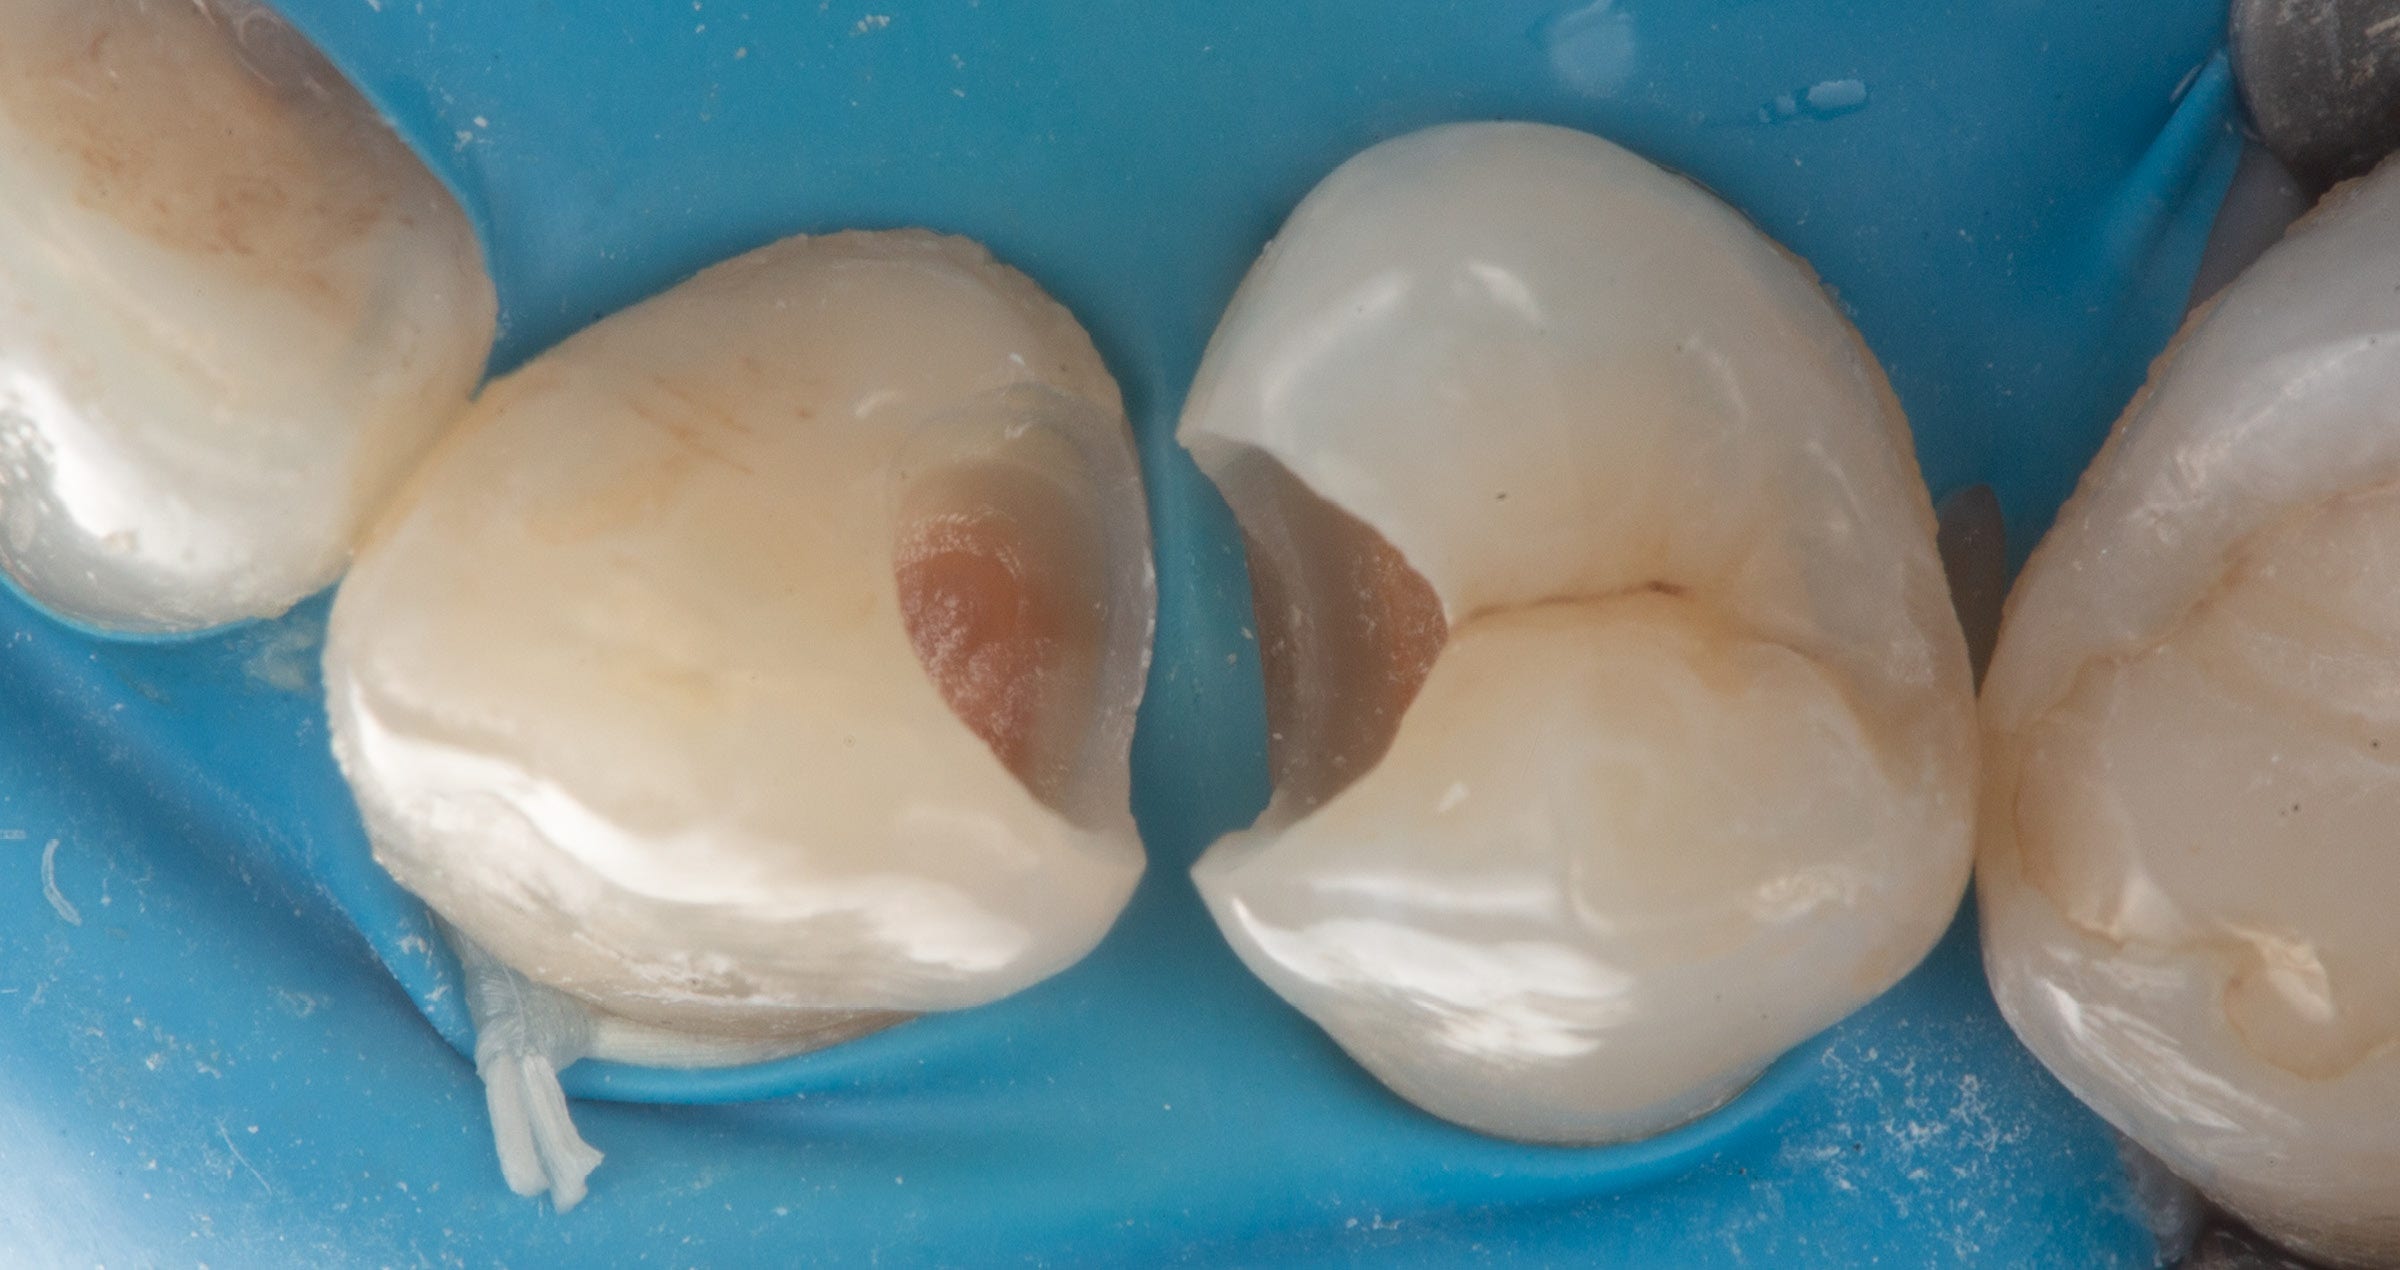
Fig. 2. Premolar after isolation of the working field with rubber dam, caries excavation and cavity preparation.


Fig. 3. Placement of a sectional matrix and a wedge to optimize the fit. Both are held in place with a separation ring, which increases the interproximal space and hence ensures tight, anatomically correct proximal contacts.


Fig. 4. Build-up of the proximal wall with CLEARFIL MAJESTY™ ES-2 Universal (U shade) following selective enamel etching with phosphoric acid (K-ETCHANT Syringe) and bonding with CLEARFIL™ SE Bond.


Fig. 5. A thin layer of flowable composite (CLEARFIL MAJESTY™ ES FLOW High) applied to the cavity floor to act as a resin coat.


Fig. 6. Restoration completed with CLEARFIL MAJESTY™ ES-2 Universal (U shade). While the universal shade composite blends in very well with the surrounding tooth structure, the natural look is completed by adding a tiny bit of brown tint to the fissure.


Fig. 7. Treatment outcome immediately after rubber dam removal. The proximal contact is tight and the occlusal anatomy well-shaped for the patient’s individual masticatory dynamics. The margin of the restoration is virtually invisible, while the buccal cusp appears lighter due to dehydration of the natural tooth structure.


FINAL SITUATION


Fig. 8. Treatment outcome after two months.


Conclusion

The present case demonstrates that the selected composite is well-suited for simplified restoration procedures in the posterior region. The material handles well, offers the same mechanical properties as other materials from the CLEARFIL MAJESTY™ ES-2 series and blends in harmoniously with the surrounding structures without being too translucent. This way, it is possible to waive the shade-taking process without compromising the treatment outcome. The time saved in this context may be spent on functional aspects – or even on another patient.


Dentist:

DR. NICOLA SCOTTI


Simplified direct restoration procedure in the lower anterior region

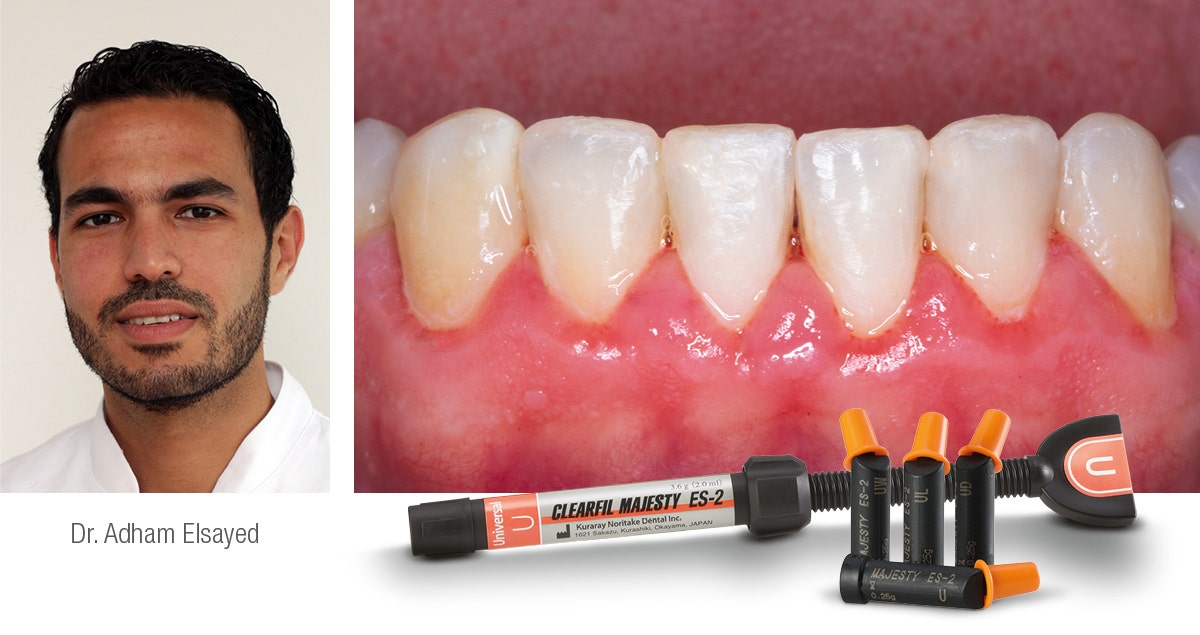
Case by Adham Elsayed


If we ask dental patients what they expect from direct restorative treatments, they will most probably mention a quick procedure – as nobody wants to sit in a dental chair for a long time – and highly aesthetic outcomes. Reducing the treatment time is also something every dental practitioner should strive for, as their own time is the most precious asset they have. Fortunately, saving time becomes easy when appropriate high-quality materials and techniques are selected, as demonstrated using the following patient case.


The patient presented with several small carious lesions in the lower anterior region. In order to save time without compromising the quality of the outcomes, it was decided to opt for a simultaneous direct treatment approach involving the use of a universal adhesive and a universal restorative with a streamlined shade offering. It consists of two shades for the anterior region, which are typically applied in a single-shade approach and have optimized optical properties that allow for a smooth optical integration. The images shown below speak for themselves…


Fig. 1. Initial situation. Several caries lesions are detected on the lower anterior teeth.


Fig. 2. Situation after placement of rubber dam for moisture control.


Fig. 3. Appearance of the teeth following caries removal.


Fig. 4. Application of CLEARFIL™ Universal Bond Quick.


Fig. 5. Labial view of the final restorations produced with CLEARFIL MAJESTY™ ES-2 Universal (UD) before finishing and polishing.


FINAL SITUATION


Fig. 6. Final situations after rubber dam removal.


Dentist:


Dr. Adham Elsayed
Clinical and Scientific manager, Kuraray Europe GmbH, Hattersheim, Germany.


3-Unit anterior maxillary bridge

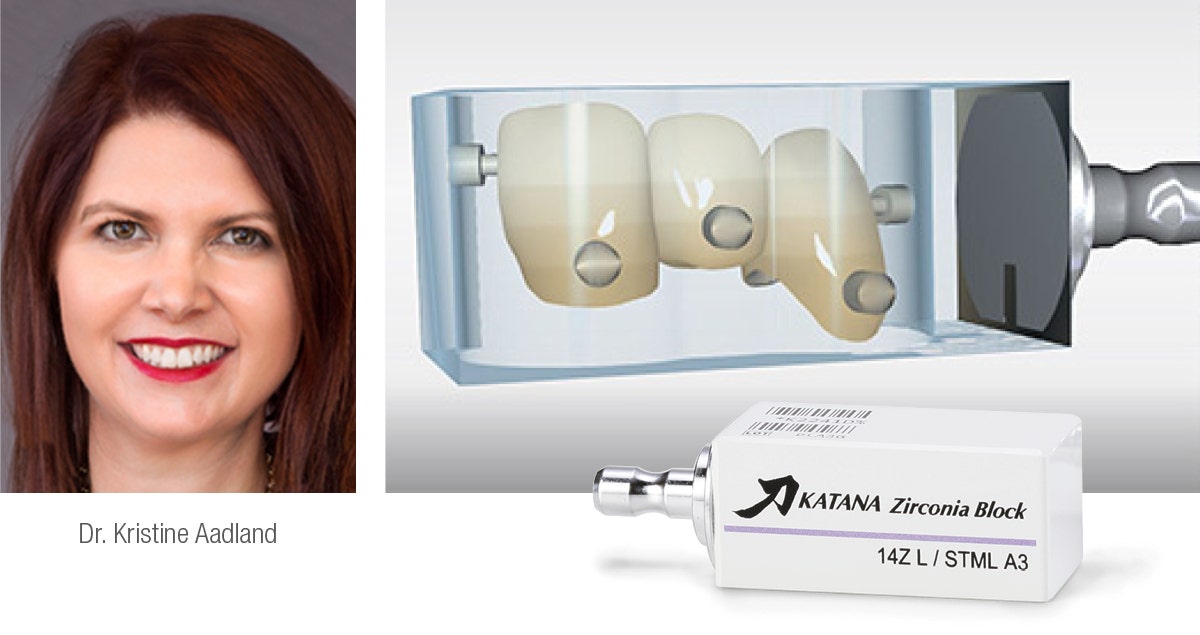
Case by Dr. Kristine Aadland.


Fig. 1. Preparation.


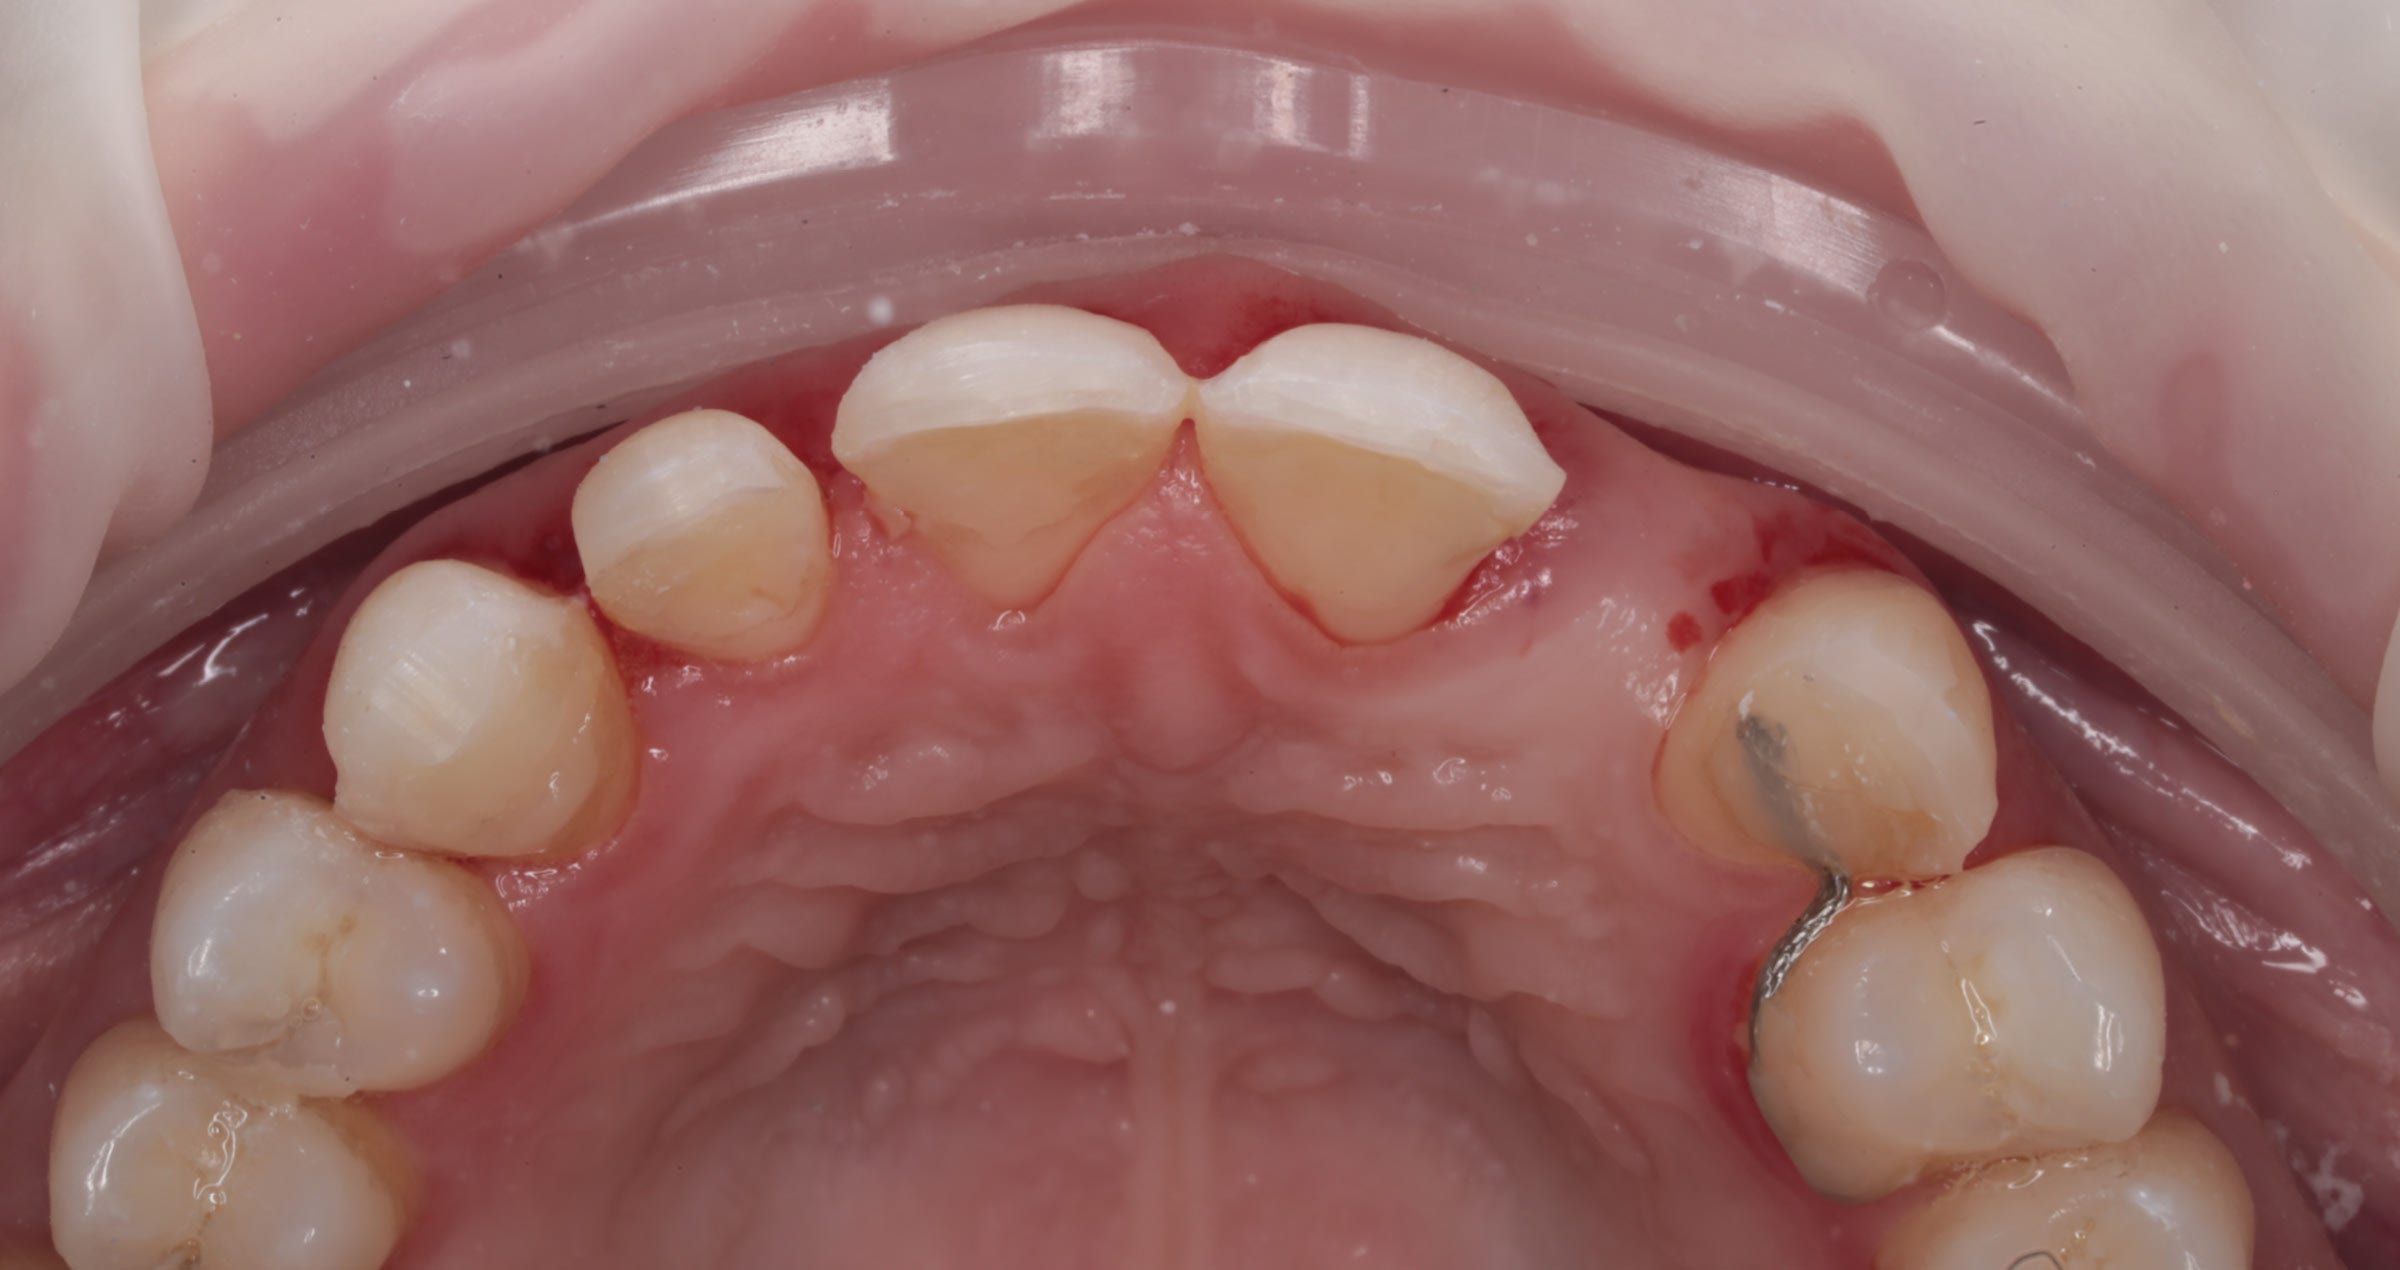
The patient’s old PFM bridge (shown here) was removed, and the existing preps for teeth #6 and #8 were modified with a medium chamfer with smooth and rounded edges to accommodate a 3-unit KATANA™ Zirconia bridge. There was no abutment for tooth #7, as that space serves as the pontic. Tooth #9 was similarly prepared to receive a single-unit KATANA™ crown.


Fig. 2. Define Restorations.


To begin, each restoration type is defined in the CEREC software, as the design mode (Biogeneric Individual), material type (KATANA™ Zirconia Block), and milling device (CEREC MC XL).


Fig. 3. Digital Impression.


A digital impression of the upper arch was performed using CEREC Primescan.


Fig. 4. Restoration Design.


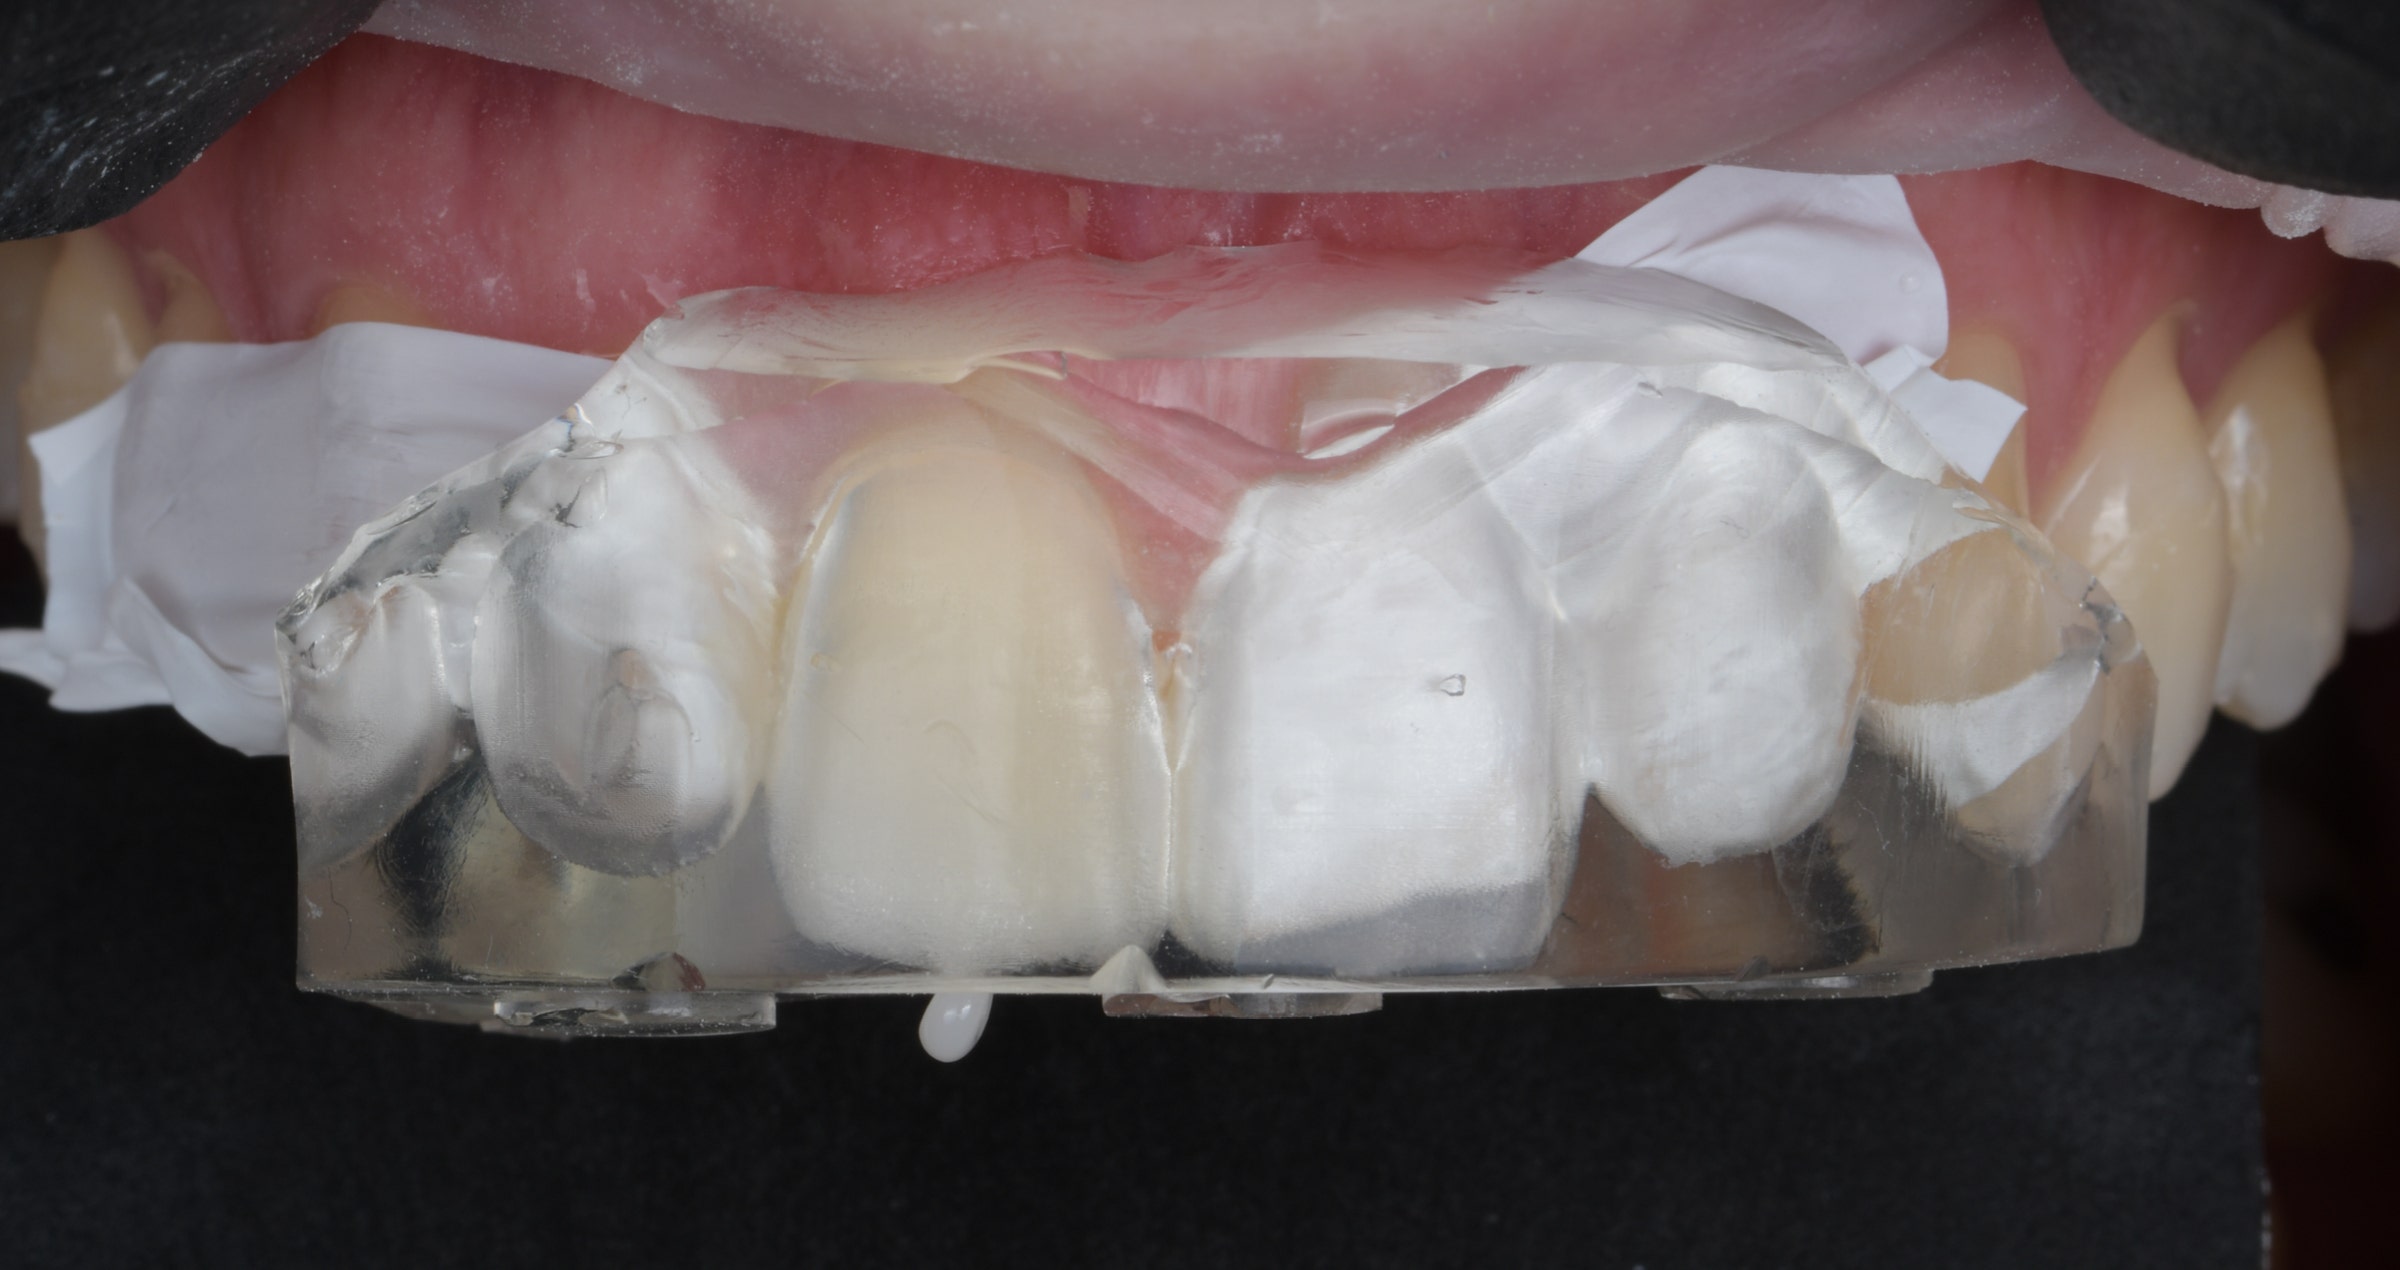
The patient did not like the size of her centrals and wanted them smaller. She also didn’t like that her smile was slanted/canted. While designing, it really helps to use the patient’s old smile as a reference. This is why I used Bioindividual when designing the restorations, and added a BioCopy folder in the acquisition screen. I can ghost over the previous smile and readily see where I am.


Fig. 5. Restoration Design: Occlusal.


The BioCopy design function is also utilized to ensure a correct occlusal profile.


Fig. 6. Milling.


A KATANA™ Zirconia Block for bridge (14Z L) was used for the 3-unit bridge, and a KATANA™ Zirconia 12Z single-unit block was used for the single crown. The bridge block mills out in about 18 minutes, which is the fastest-milled chairside bridge block currently available.


Fig. 7. Characterization & Sintering.


Kuraray Noritake CERABIEN™ ZR FC Paste Stain and Glaze Kit was used for characterizing. The colors are very natural and it is not simply a metal oxide like other stains, but actually adding porcelain, giving the restorations more vitality. The oven cycle is quick at approximately 10 minutes, which means multiple fires are easy to do without excess time.


Fig. 8. Seating & Final Smile.


PANAVIA™ SA Cement Universal and CLEARFIL™ Universal Bond Quick were used for cementation and bonding. I love the ease of use and clean-up with PANAVIA™ SA Cement Universal, and its MDP monomer creates a strong chemical bond to the tooth structure and zirconia. CLEARFIL™ Universal Bond Quick has a quick technique without reducing bond strengths, releases fluoride and has a low film thickness. I simply rub CLEARFIL™ Universal Bond Quick into the tooth for a few seconds and air dry. There is no need to light-cure, since it cures very well with PANAVIA™ SA Cement Universal. The patient was very happy with the results. She loved that she no longer saw metal margins, and her smile was much more uniform and lifelike.


DR. KRISTINE AADLAND


Cementation of lithium disilicate crown

Using KATANA™ Cleaner and PANAVIA™ SA Cement Universal

Case by Dr. Richard Young


Fig. 1. HF etch and try-in complete.


Fig. 2. Dispense KATANA™ Cleaner into mixing well.


Fig. 3. Rub for 10 seconds, then rinse and dry.


Fig. 4. Rub for 10 seconds, then rinse and dry. KATANA™ Cleaner contains MDP based surfactant that breaks down blood and saliva - removing contamination.


Fig. 5. Apply cement directly onto restoration (glass ceramic, zirconia, metal or composite resin).


Fig. 6. PANAVIA™ SA Cement Universal contains MDP and LCSi monomers, providing for durable bonding even to lithium disilicate restorations.


Fig. 7. Tack-cure for 2-5 seconds.


Fig. 8. Tack-curing results in nice gel-like-state and excess is removed with ease.


FINAL SITUATION


Fig. 9. Final situation.


Dentist:

DR. RICHARD YOUNG


Adhesive cementation of a KATANA™ Zirconia HT 3-unit bridge with PANAVIA™ V5

Case by Dr. Shoji Kato of Takanawa Dental Office, Japan


1. After preparing the abutments

An anterior bridge made of crown and bridge resin has become dislodged. The abutments are vital teeth.


2. Prosthesis

A PFZ bridge with a frame fabricated using KATANA™ Zirconia HT12.


3. Application of Try-in Paste

Evaluate the shade of the cement before cementation.


4. Try-in

After checking the cement’s shade, rinse the prosthesis and tooth surface with water to remove Try-in Paste.


5. Pretreatment of the prosthesis (A)

Sandblast the prosthesis (at 0.3 to 0.4 MPa), clean with an ultrasonic cleaner for 2 minutes, then dry.


6. Pretreatment of the prosthesis (B)

Apply CLEARFIL™ CERAMIC PRIMER PLUS and blow dry with air.


7. Pretreatment of the abutments (C)

Apply Tooth Primer, allow it to react for 20 seconds, then blow dry with air.


8. Application of Paste

Use Universal.


9. Placement of the prosthesis

After placement, remove excess cement using a piece of gauze, a small brush, etc.


10. Light-curing

Light-cure the entire surface of the prosthesis, including the margins.


11. Final polymerization

Make sure the prosthesis is left in place, unmoved, for 3 minutes.


Single-shade concept: an adequate option in direct posterior restorations

Case by Dr. Salvatore Scolavino


After decades of developing and improving the matrix chemistry and filler technology contained in resinbased composites, the products available for direct restorative procedures finally seemed technically mature. What remained challenging, however, was the management of the extremely wide range of tooth shades and opacities available for each product: The dentin, body and enamel masses had to be selected and combined in the right way to obtain a perfect colour match and optical integration with the surrounding tooth structure. The difficulties associated with shade selection and calibration of layer thicknesses (particularly the top enamel layer) required to obtain the desired optical (desaturation) effects have now also finally been overcome.


The reason is that further improvements of the composites’ optical properties, mainly achieved through a careful selection and combination of fillers, have enabled the production of materials with optimized light diffusion properties. These properties enable the restorations to blend in smoothly with the adjacent tooth structure, thus paving the way for a single-shade concept (SSC). This concept involves the use of a single mass of composite to restore the function and aesthetics compromised by the loss of dental structure.


This translates into a significant saving of chair time and a high predictability of aesthetic outcome. A composite material supporting a single-shade technique needs to have medium opacity and a technology ensuring that the incoming light is absorbed, reflected and scattered in the right way to merge effortlessly with the surrounding natural dentition and create a biomimetic effect. The following clinical case reveals how the Light Diffusion Technology used in the CLEARFIL MAJESTY™ ES-2 Universal composite system (Kuraray Noritake Dental Inc.) leads to a highly predictable aesthetic integration obtained using the SSC.


Case description


The 30-year-old female patient presented for a check-up, during which it appeared that her composite restorations in the second quadrant (the maxillary left first and second molar) needed to be replaced due to marginal leakage (Fig. 1). Once the rubber dam was in place (Fig. 2), the existing composite restorations were removed using a round multi-blade bur, which allowing for a selective removal of composite and carious tissue. The extension of the cavity was performed with a truncated cone diamond bur (fine). Once the cavity preparation was completed (Fig. 3), the enamel and dentin surfaces were cleaned by sandblasting with aluminium oxide (50 μm). Selective etching of the enamel was performed with K-ETCHANT Syringe (Kuraray Noritake Dental; Fig. 4), followed by thorough rinsing and drying of the tooth (Fig. 5). For the adhesive procedure with CLEARFIL™ SE BOND 2 (Kuraray Noritake Dental), the primer was applied first (Fig. 6), rubbed into the tooth surface for 40 seconds and air-dried. The bond was subsequently applied in the same manner (Fig. 7). After several seconds of air flowing to create homogeneous surface the adhesive was light-cured for 40 seconds (Fig. 8). As the last phase of the adhesive procedure, a 1-mm-thick layer of flowable composite (CLEARFIL MAJESTY™ ES-Flow Super Low A3, Kuraray Noritake Dental) was applied to cover the adhesive on the dentin (Figs. 9 and 10).


Fig. 1. Pre-operative clinical image.


Fig. 2. Isolation with rubber dam.


Fig. 3. First and second molar after cavity preparation.


Fig. 4. Selective etching of the enamel.


Fig. 5. Cavities ready for the adhesive procedure.


Fig. 6. Application of the tooth primer.


Fig. 7. Glossy appearance of the cavities after application of the bond.


Fig. 8. Light-curing of the adhesive layer.


Fig. 9. Application of flowable composite.


Fig. 10. Cusp-by-cusp modelling of the universal composite.


In the modelling phase, the posterior shade U of the composite CLEARFIL MAJESTY™ ES-2 Universal was placed using the cusp-by-cusp technique (Figs. 11 and 12). In order to improve the optical integration of the restorations, some brown stain (CHROMA ZONE™ COLOR STAIN Dark Brown, Kuraray Noritake Dental) was added to the fissures (Fig. 13). For finishing, we used a multi-blade ball-shaped bur and an Arkansas Flame abrasive stone (Fig. 14). Polishing of the restorations was accomplished with the TWIST™ DIA system (EVE; Fig. 15). After rubber dam removal, the occlusal check was performed with articulating paper (Fig. 16), minimal adjustments were made and the surfaces repolished. The integration of the restorations after 30 days fully meets the clinical expectations (Figs. 17 to 20).


Fig. 11. Glossy appearance of the cavities after application of the bond.


Fig. 12. Completed occlusal anatomy.


Fig. 13. Stained fissures.


Fig. 14. Matte surfaces after finishing.


Fig. 15. High-gloss surfaces after polishing.


FINAL SITUATION


Fig. 16. Whole quadrant after rubber dam removal and the occlusal check.


Fig. 17. Whole quadrant at the 1-month-recall.


Fig. 18. Occlusal view of the restorations …


Fig. 19. … after one month.


Conclusion


The innovative composite system CLEARFIL MAJESTY™ ES-2 Universal, which consists of two shades for the anterior and a single shade option for the posterior region, offers the properties needed for a successful implementation of the single shade technique. Used in the posterior region, the material is sufficiently opaque to mask optical irregularities of the underlying tooth structure, while it is translucent enough to provide for an imperceptible optical transition from the tooth structure to the restoration. Irrespective of the tooth shade, the restoration merges smoothly with the surrounding natural dentition, creating a harmonic overall picture.


Dentist:

DR. SALVATORE SCOLAVINO


Dr. Salvatore Scolavino, graduated with honors in Dentistry and Dental Prosthesis from the University of Naples. Dr. Salvatore is a specialist in aesthetics and direct and indirect anterior and posterior adhesive restorations. His focus lies with Conservation, Endodontics and Prosthetics in particular. He is an active member of prestigious academies and scientific societies: AIC -Italian Academy of Conservation, IAED -Italian Academy of Esthetic Dentistry and SIDOC (Italian Society of Conservative Dentistry. Since 2004, he has private practice Nola, Italy.


Dr. Scolavino is a founder of werestoreit.it, an inspiring site that offers abundance and variety of aesthetic clinical cases. Author of the book published by Quintessence Publishing „Direct Restorations in the posterior regions“, author of scientific publications in national and international journals, he is speaker at courses and conferences in Italy and abroad.


Re-establishing a stable occlusion in a tipped second molar

Case by Dr. Salvatore Scolavino


The establishing of a stable occlusal relationship is one of the biggest challenges dental practitioners are facing when restoring posterior teeth with resin composite, but it is a task with a decisive impact on the integrity of the masticatory apparatus. A poor static and dynamic occlusion may have a negative effect on the restored tooth, the periodontal apparatus, and also on the opposing dentition.1 Ideally, the occlusal anatomy of direct restorations is designed in a way that occlusal forces are directed along the long axis of the tooth, which is achieved when each cusp tip in occlusal contact touches a flat surface. Horizontally directed forces, on the other hand, should be avoided, as they tend to cause tipping and increase the risk of cuspal fracture, tooth mobility etc.


In cases concerning improper occlusal relationship involving tipping of restored teeth, it may be possible to stabilize the situation by replacing the restoration and re-establishing a proper occlusion. If carried out correctly and early enough, this restorative approach may be a way around orthodontic treatment. The following clinical case is used to demonstrate how to create a functional occlusal surface right away – without larger adjustments. The whole restorative procedure is simplified by the use of a universal composite with a single posterior shade that eliminates the need for shade determination and shade selection, while it produces lifelike treatment outcomes.


Case description


This patient presented with direct composite restorations in the mandibular left first and second molar that were lacking an elaborated occlusal morphology (Fig. 1). The second molar appeared to be tipped mesially towards the first molar (Figs. 2 and 3), which resulted in improper occlusal relationships and a decreased position of the mesial marginal ridge. In order to verify the clinical and radiographic observation of an improper occlusal relationship, the occlusal contacts were recorded with articulating paper (Fig. 4). As expected, there was an uneven distribution of occlusal contacts, which were exclusively located in the distobuccal area on the second molar, and not matching the tooth-restoration interface on both molars.


Fig. 1. Pre-operative clinical situation: Occlusal view.


Fig. 2. Pre-operative clinical situation: Lateral view revealing the tipping of the second molar.


Fig. 3. Pre-operative bite-wing radiograph confirming the tipping issue.


Fig. 4. Checking of the occlusal contacts.


Planned approach


As orthodontic treatment was not an option, it was decided to replace the composite restorations, thereby treating the Class I cavity of the second molar as if it were a Class II cavity. This would allow us to increase the height of the mesial marginal ridge and establish the proper occlusion.


Preliminary measures


Once the rubber dam was placed (Fig. 5), the existing composite restorations were removed and the cavity slightly extended with a diamond chamfer bur (Fig. 6). The result of this procedure is shown in Figure 7. In order to provide an anatomical build-up of the mesial wall, a sectional matrix was mounted with the aid of a wooden wedge and a separator ring (Fig. 8).


Fig. 5. Isolation with rubber dam, held in place with a clamp and a wedge.


Fig. 6. Tooth preparation with a diamond chamfer bur.


Fig. 7. Appearance of the teeth after preparation.


Fig. 8. Sectional matrix, wedge and separator ring in place.


Adhesive procedure


After selective etching of the enamel (K-ETCHANT GEL, Kuraray Noritake Dental Inc.) (Fig. 9), the enamel bonding surfaces had a chalky-white appearance, which indicates properties that are favourable for bonding (Fig. 10). The adhesive procedure was performed with CLEARFIL™ SE BOND 2 (Kuraray Noritake Dental; Fig. 11). In the first step, the primer of the system was applied and actively rubbed into the surface for 40 seconds, and air-dried. Subsequently, the bond was used in the same manner. After complete evaporation of the solvent, the bonding surface was light-cured for 40 seconds to ensure proper polymerisation. The cavity floor was then covered with a 1 mm thick layer of flowable composite (CLEARFIL MAJESTY™ ES FLOW SUPER LOW A3, Kuraray Noritake Dental).


Fig. 9. Selective etching of the enamel.


Fig. 10. Chalky-white enamel surfaces.


Fig. 11. Glossy appearance of the bonding surfaces after application of the tooth primer and bond.


Restoration procedure


Before starting to elevate the mesial wall of the second molar using the centripetal build-up technique2 (Fig. 12), we analyzed the height of the marginal ridge and anatomical details of the contralateral tooth, while the adjacent molar provided orientation as well. In general, knowledge not only about the tooth’s typical anatomy, but also about the patient-specific anatomical details of the adjacent and contralateral teeth as well as the antagonist is very useful for designing the occlusal anatomy. In addition, remaining anatomical structures should be read and used. In this particular case, the restorations were completed with CLEARFIL MAJESTY™ ES-2 Universal composite (Kuraray Noritake Dental) in the posterior shade U, using the cusp-by-cusp technique (Figs. 13 to 15). In most areas, it was possible to follow the inclination of the remaining cusps and the orientation of the grooves to produce an ideal surface anatomy. For those who would like to speed up the procedure, the simultaneous modeling technique3 may be an option. In this technique, the cusps are built up simultaneously from separate increments, which remain out of contact to each other until light-cured in a single curing cycle.


Fig. 12. Mesial wall built up with composite.


Fig. 13. Application of the first increment for cusp build-up. It is useful to limit the size of the increments for controllability.


Fig. 14. Cusp-by-cusp build-up completed on the second molar.


Fig. 15. Molars with restored occlusal surfaces.


In order to improve the already great optical integration of the restorations, some stain (Dark Brown, CHROMA ZONE™ COLOR STAIN, Kuraray Noritake Dental) was applied to the fissures. A multi-blade ball shaped bur and an Arkansas Flame abrasive stone were used for finishing. Final polishing was accomplished with the TWIST™ DIA system (EVE). The immediate treatment outcome is shown in Figure 16. The patient was released after rubber dam removal, checking the static and dynamic occlusion, and conducting a control radiograph (Fig. 17). The optical integration was even better at the recall after one month due to the rehydration of the surrounding tissues (Fig. 18), while the functional integration was excellent and no occlusal adjustments were required.


Fig. 16. Immediate treatment outcome with a nice optical integration of the restorations providing for a stable occlusal relationship.


Fig. 17. Control radiograph taken after the direct restoration procedure.


FINAL SITUATION


Fig. 18. Treatment outcome at recall after 30 days.


Conclusion


The presented case example reveals how important it is to strive for occlusal stability when restoring posterior teeth with composite. Furthermore, it demonstrates how it is possible to re-establish a stable occlusal relationship, even if some tipping has already occurred. In order to get it right the first time, it is essential to make use of the remaining anatomical structures, which guide the way toward an occlusal surface that ensures a favourable distribution of occlusal forces, and therefore provides optimal conditions for a long life of the freshly restored teeth. The combined use of the presented restorative techniques with innovative materials like CLEARFIL MAJESTY™ ES-2 Universal will make the procedures simpler and even more efficient.


References

1 Sandhu S, Lal J, Singh R, Sandhu R, Sra J. Significance of establishing occlusal anatomy in operative dentistry. Saint Int Dent J 2016;2:7-10.
2 Bichacho N. The centripetal build-up for composite resin posterior restorations. Pract Periodontics Aesthet Dent. 1994 Apr;6(3):17-23.
3 Scolavino S, Paolone G, Orsini G, Devoto W, Putignano A. The Simultaneous Modeling Technique: closing gaps in posteriors. Int J Esthet Dent. 2016 Spring;11(1):58-81.


Dentist:

DR. SALVATORE SCOLAVINO


Dr. Salvatore Scolavino, graduated with honors in Dentistry and Dental Prosthesis from the University of Naples. Dr. Salvatore is a specialist in aesthetics and direct and indirect anterior and posterior adhesive restorations. His focus lies with Conservation, Endodontics and Prosthetics in particular. He is an active member of prestigious academies and scientific societies: AIC -Italian Academy of Conservation, IAED -Italian Academy of Esthetic Dentistry and SIDOC (Italian Society of Conservative Dentistry. Since 2004, he has private practice Nola, Italy.


Dr. Scolavino is a founder of werestoreit.it, an inspiring site that offers abundance and variety of aesthetic clinical cases. Author of the book published by Quintessence Publishing „Direct Restorations in the posterior regions“, author of scientific publications in national and international journals, he is speaker at courses and conferences in Italy and abroad.


Monolithic chairside restorations in the posterior area - effective and efficient

Case by Dr. Hendrik Zellerhoff


Not all zirconia is created equal. This finding presented by Prof. Martin Rosentritt7 back in 2014 has lost none of its actuality and even appears to be increasingly relevant these days. This is because dental practitioners are spoilt for choice between various zirconia blanks, which differ widely in terms of quality, flexural strength, shade appearance, translucency and production complexity. Hence, each material has its own specific processing requirements and range of indications6. Profound knowledge of the available zirconia options is therefore an absolute prerequisite for long-term success of every full contour restoration produced in a time-efficient and economic procedure.


While in the early years of zirconia manufacturing in dentistry, the dental practitioner’s choice was limited to industrially milled zirconia frameworks hand-veneered by the dental technician, a wide range of material variants for chairside CAD/CAM production is nowadays available. Material-specific improvements are one of the reasons for the fact that every single zirconia has its specific indications and its own material parameters6. Zirconia milling blocks for monolithic restorations are in principle very well suited for the chairside production of single crowns for the anterior and specifically the load bearing posterior area. This is due to their stability and the reduced processing effort compared to hand- veneered crowns. However, the material in use needs to fulfil high demands with regard to strength, translucency, and shading – parameters that also need to be balanced against each other2 (Fig. 1 to 4).


Fig. 1. Initial situation with multiple insufficient fillings.


Fig. 2. Crown milled from a KATANA™ Zirconia Block (Kuraray Noritake Dental Inc., Tokyo, Japan).


Fig. 3. Crown glazed after sintering, with fissures characterized using stains.


Fig. 4. Adhesively cemented crown with the appearance of a natural molar.


NOT ALL ZIRCONIA IS CREATED EQUAL


Due to their high flexural strength of more than 1,000 MPa, tetragonal zirconia variants (3Y-TZP) of the first and second generation are perfectly suited as framework materials. However, they lack the translucency required for monolithic use. It is theoretically possible to improve the translucency of 3Y-TZP materials by increasing the sintering temperature, however, this would result in restorations with insufficient strength. This is different for the third and fourth generations of cubic-tetragonal zirconia (5- TZP and 4-TZP). Due to the increased yttria content in the formulation, cubic crystals grow in the crystal microstructure. These cubic crystals have a larger volume, which leads to reduced scattering at the grain boundaries and improved light transmission. In addition, cubic crystal structures are more isotropic than tetragonal structures, so that incoming light is spread more evenly into all directions8. The combination of a high flexural strength and a high translucency in the fourth generation zirconia sets the stage for monolithic use of the material. This, in turn, eliminates the risk of chipping of the veneering porcelain.


PREMISES OF MONOLITHIC CHAIRSIDE RESTORATIONS


In order to ensure the desired long-term stability, intraoral functionality and aesthetics of a monolithic restoration on one hand and a time- and cost-efficient chairside workflow on the other, two factors are crucial. One is a proper functional occlusal adjustment of the restorations, the other is knowledge about the material parameters of the zirconia blocks in use.


Hardness and abrasion

Clinically, monolithic zirconia shows virtually no abrasion and an antagonist-friendly behaviour - provided that the occlusal surface is polished properly, is free of sharp edges and is covered with glaze. In order to leverage this effect and to avoid improper occlusal contacts as factors triggering parafunctions, the dental practitioner should carefully carry out an occlusal and functional analysis. This analysis should include an examination of the vertical dimension and of different jaw movement like protrusion, retrusion, laterotrusion and mediotrusion. Based on the results, a precise dynamic occlusal adjustment is possible. Any retrospective adjustment – even in case of minimal irregularities – is impossible or, more specifically, restricted to the glazing layer. If the surfaces, especially the cusps, are not polished to a high gloss, any wear of the glaze would lead to the exposure of a rough abrasive zirconia surface. Material-specific high-gloss polishing and glazing, however, effectively avoids abrasive wear of the antagonist3,4,5.


Strength, translucency and shade

Under these premises, 5Y-TZP materials like KATANA™ Zirconia UTML (Ultra Translucent Multi Layered) with a flexural strength of 557 MP and a translucency of 43 percent are particularly well suited for the production of highly aesthetic anterior crown or veneer restorations. In the load-bearing posterior area, however, higher flexural strength values are necessary. Using 4Y-TZP materials like KATANA™ Zirconia Block (Super Translucent Multi Layered) with a flexural strength of 763 MPa provides more stability of the restoration, which is required for the posterior region. The product offers a translucency of 38 percent and is suitable for the chairside production of aesthetically and functionally demanding restorations with high stability even in case of a reduced wall thickness. Thanks to the colour gradient, light shines through in the incisal area in an enamel-like way, while in the cervical area, the level of translucency is similar to dentin. The imitation of a colour gradient found in natural teeth, which ensures that the restoration will blend in perfectly with the adjacent teeth, is obtained with a multi-layered, polychromatic structure with a smooth shade transition from the incisal to the cervical part. This feature eliminates the need for a time-consuming manual application of shades prior to sintering. A patient- specific post-sintering characterisation with stains is optional. As shade, form and effects are already visible during application, the dental practitioner gains full control over aesthetics at all times (Fig. 5 to 8).


Fig. 5. Comparison of flexural strength and translucency.


Fig. 6. Smooth shade transition from the enamel to the dentin and cervical area.


Fig. 7. Comparison of the translucency exhibited by different ceramics.


Fig. 8. Range of shades of KATANA™ Zirconia Single Unit Blocks.


KATANA™ ZIRCONIA BLOCK IN THE CEREC WORKFLOW


Reliable material properties are imperative for a smooth production workflow leading to a consistent high quality of the restorations. They are only obtained with industrially produced zirconia blanks, which offer a defect-free, homogeneous grain structure1,10. At Kuraray Noritake Dental, the whole manufacturing process of zirconia products is carried out in-house, including the production of the raw materials. Therefore, it is possible to optimize the material parameters of KATANA™ Zirconia Blocks for chairside production and with high-speed sintering process. Using these components, the dental practitioner can reduce the time needed for the production of a monolithic zirconia restoration including scanning, milling and sintering to less than an hour.


Design

For this purpose, the teeth to be restored are prepared and captured together with the adjacent and antagonist teeth using an intraoral scanner (Omnicam or Primescan, Dentsply Sirona). The digital data set is then imported into the CEREC software. The software extracts the required information from the data and generates a design proposal for the restoration. Usually, this proposal may be accepted without major modifications. Due to the high mechanical properties of KATANA™ Zirconia, a wall thickness of 1.0 mm is sufficient for a posterior crown. This design has two positive effects: it optimizes the translucency of the restoration and supports a minimal preparation, which also facilitates clinical procedures in situations with limited space conditions. The shade and translucency of the restoration is also customizable via virtual positioning of the designed crown in the multi-layer block. This enables the dental practitioner to harmonize the brightness and translucency with the parameters of the adjacent teeth (Fig. 9 to 13).


Fig. 9. Initial situation with insufficient porcelain layer.


Fig. 10. Abutment teeth after preparation prior to digital impression taking.


Fig. 11. Restorations after polishing, occlusal and cervical characterization and glaze firing.


Fig. 12 - 13. Final restorations in place - occlusal and frontal view.


Sintering

The designed crown is milled from the KATANA™ Zirconia Block with the CEREC milling machine. Subsequently, finishing steps are carried out and the sintering process is started using the induction furnace CEREC SpeedFire. This furnace reaches a maximum heating rate of 300° C per minute. Neither pre-heating is required nor holding temperatures needed. As the material properties of KATANA™ Zirconia Block are optimally aligned with the CEREC SpeedFire programme, the user can be sure that the device adheres to all sintering parameters. This, in turn, is important for the growth of the crystals as well as phase transformation and stabilization9, which affect the natural shade results after sintering (Fig. 14 to 18).


Fig. 14 - 15. Labial and palatal view of the initial situation with restorations on the lateral incisor and canine.


Fig. 16. Varying shade and translucency gradient depending on the position of the restoration in the multi-layer block.


Fig. 17. Crowns with a natural colour gradient from the incisal to the cervical area merely glazed after sintering (without any additional adjustment).


Fig. 18. Natural aesthetic appearance of the KATANA™ Zirconia crowns even in the esthetic zone.


Individualisation and characterization

After sintering, dental practitioners may individualize or characterize KATANA™ Zirconia Block restorations if desired. This requires only a few simple work steps. The marginal ridges, mamelons, fissures or enamel cracks are imitated controllably using paste stains (CERABIEN™ ZR FC Paste Stain, Kuraray Noritake Dental), as the shade, shape and effects created are already visible during application. For the final glaze firing process with Glaze or Clear Glaze (Kuraray Noritake Dental), the SpeedFire induction furnace is used again (Fig. 19 to 25).


Fig. 19. Initial situation with secondary caries below the amalgam restoration on the maxillary left second premolar (tooth #25).


Fig. 20. Tooth prepared for a core build-up after caries excavation and proximal modification of the adjacent premolar (tooth #24).


Fig. 21. Crown milled from the block before …


Fig. 22. … and after sintering (at try-in).


Fig. 23. Fissures with age-specific characterization.


Fig. 24. Functional contact point created in consideration of the adjacent teeth.


Fig. 25. Final crown after glazing and adhesive cementation with PANAVIA™ V5 (Kuraray Noritake Dental).


Conditioning and placement of the restoration

Prior to restoration placement, the inner surface of the crown is sandblasted with Al2O3 (grain size: 50 μm, pressure: 1 bar) and treated with CLEARFIL™ Ceramic Primer Plus (Kuraray Noritake Dental), whereas PANAVIA™ V5 Tooth Primer (Kuraray Noritake Dental) is applied to the prepared tooth structure. Finally, PANAVIA™ V5 (Kuraray Noritake Dental) is applied for adhesive luting of the crown. The MDP monomer contained in the primer establishes a stable chemical bond and eliminates the need for additional conditioning. The fact that PANAVIA™ V5 is free of amines ensures long-term colour stability of the restoration.


CONCLUSION


With its combination of a high translucency and a high flexural strength, chairside dentists may use KATANA™ Zirconia Block for monolithic restorations with confidence. Restorations made of KATANA™ Zirconia offer the required long-term stability and fulfil the high aesthetic standards demanded from it to be able to serve as an alternative not only to cast metal and PFM crowns, but also to glass ceramic restorations. Due to the lack of a porcelain layer, the risk of chipping does not exist. Optimally aligned components enable dental practitioners to make use of a simplified and constantly monitored digital workflow that offers a high process reliability. Aesthetic functional restorations for the load-bearing posterior and the anterior area can be produced and placed within a single appointment. This is an important factor, which greatly affects patient satisfaction.


Dentist:


DR. HENDRIK ZELLERHOFF


References

1. Edelhoff D, Beuer F, Schweiger J, Brix O, Stimmelmayr M, Güth JF. CAD/CAM-generated high-density polymer restorations for the pretreatment of complex cases: a case report. Quintessence Int 2012;43:457–467.
2. Güth JF, Magne P. Optische Integration von CAD/CAM-Materialien. Int J Esthet Dent 2016;11:380–395.
3. Preis V, Behr M, Handel G, Schneider-Feyrer S, Hahnel S, Rosentritt M. Wear performance of dental ceramics after grinding and polishing treatments. J Mech Behav Biomed Mater 10 (2012); 13-22.
4. Preis V, Weiser F, Handel G, Rosentritt M. Wear performance of monolithic dental ceramics with different surface treatments. Quintessence Int 44 (2013);393-405.
5. Rosentritt M, Behr M, Strasser T, Preis V. Zirkonoxide als Implantatwerkstoff? Quintessenz 2018; 69 (12): 1420–1430.
6. Rosentritt M, Kieschnick A, Hahnel S, Stawarczyk B. Werkstoffkunde-Kompendium. Zirkonoxid. Berlin: Apple ibook; 2018.
7. Rosentritt M. Studie zum Verschleißverhalten von Zirkonoxid – Zirkonoxid ist nicht gleich Zirkonoxid. ZWR 2014;123(11):570-571.
8. Stawarczyk B, Keul C, Eichberger M, Figge D, Edelhoff D, Lümkemann N. Werkstoffkunde-Update: Zirkonoxid und seine Generationen – von verblendet bis monolithisch. Quintessenz Zahntech 2016;42(6):740–765.
9. Stawarczyk B, Özcan M, Hallmann L et al. The effect of zirconia sintering temperature on flexural strength, grain size, and contrast ratio. Clin Oral Investig 2013; 269–274.
10. Stober T, Bermejo JL, Rammelsberg P, Schmitter M. Enamel wear caused by monolithic zirconia crowns after 6 months of clinical use. J Oral Rehabil 2014;41:314–322.


Streamlined posterior restoration procedure using universal composite

Case by Daniel Vasquez, DDS


The dental practitioner’s time is the most valuable factor in the dental practice. Hence, it should be well spent, and saved wherever possible. In the context of placing direct posterior restorations, the universal composite CLEARFIL MAJESTY™ ES-2 Universal provides valuable support to anyone who would like to achieve this goal - being universally applicable, it allows users to spend less time on material selection. With its universal shade concept consisting of a single posterior shade and two anterior shade options, it eliminates the need for shade determination. This gives users more time to focus on fulfilling their patient’s needs. The following clinical case illustrates the use of the innovative material in the posterior region.


Fig. 1. Pre-operative situation with multiple carious lesions in the second premolar and both molars.


Fig. 2. Isolated working field.


Fig. 3. View of the quadrant after cavity preparation.


Fig. 4. Selective etching of the enamel with phosphoric acid gel.


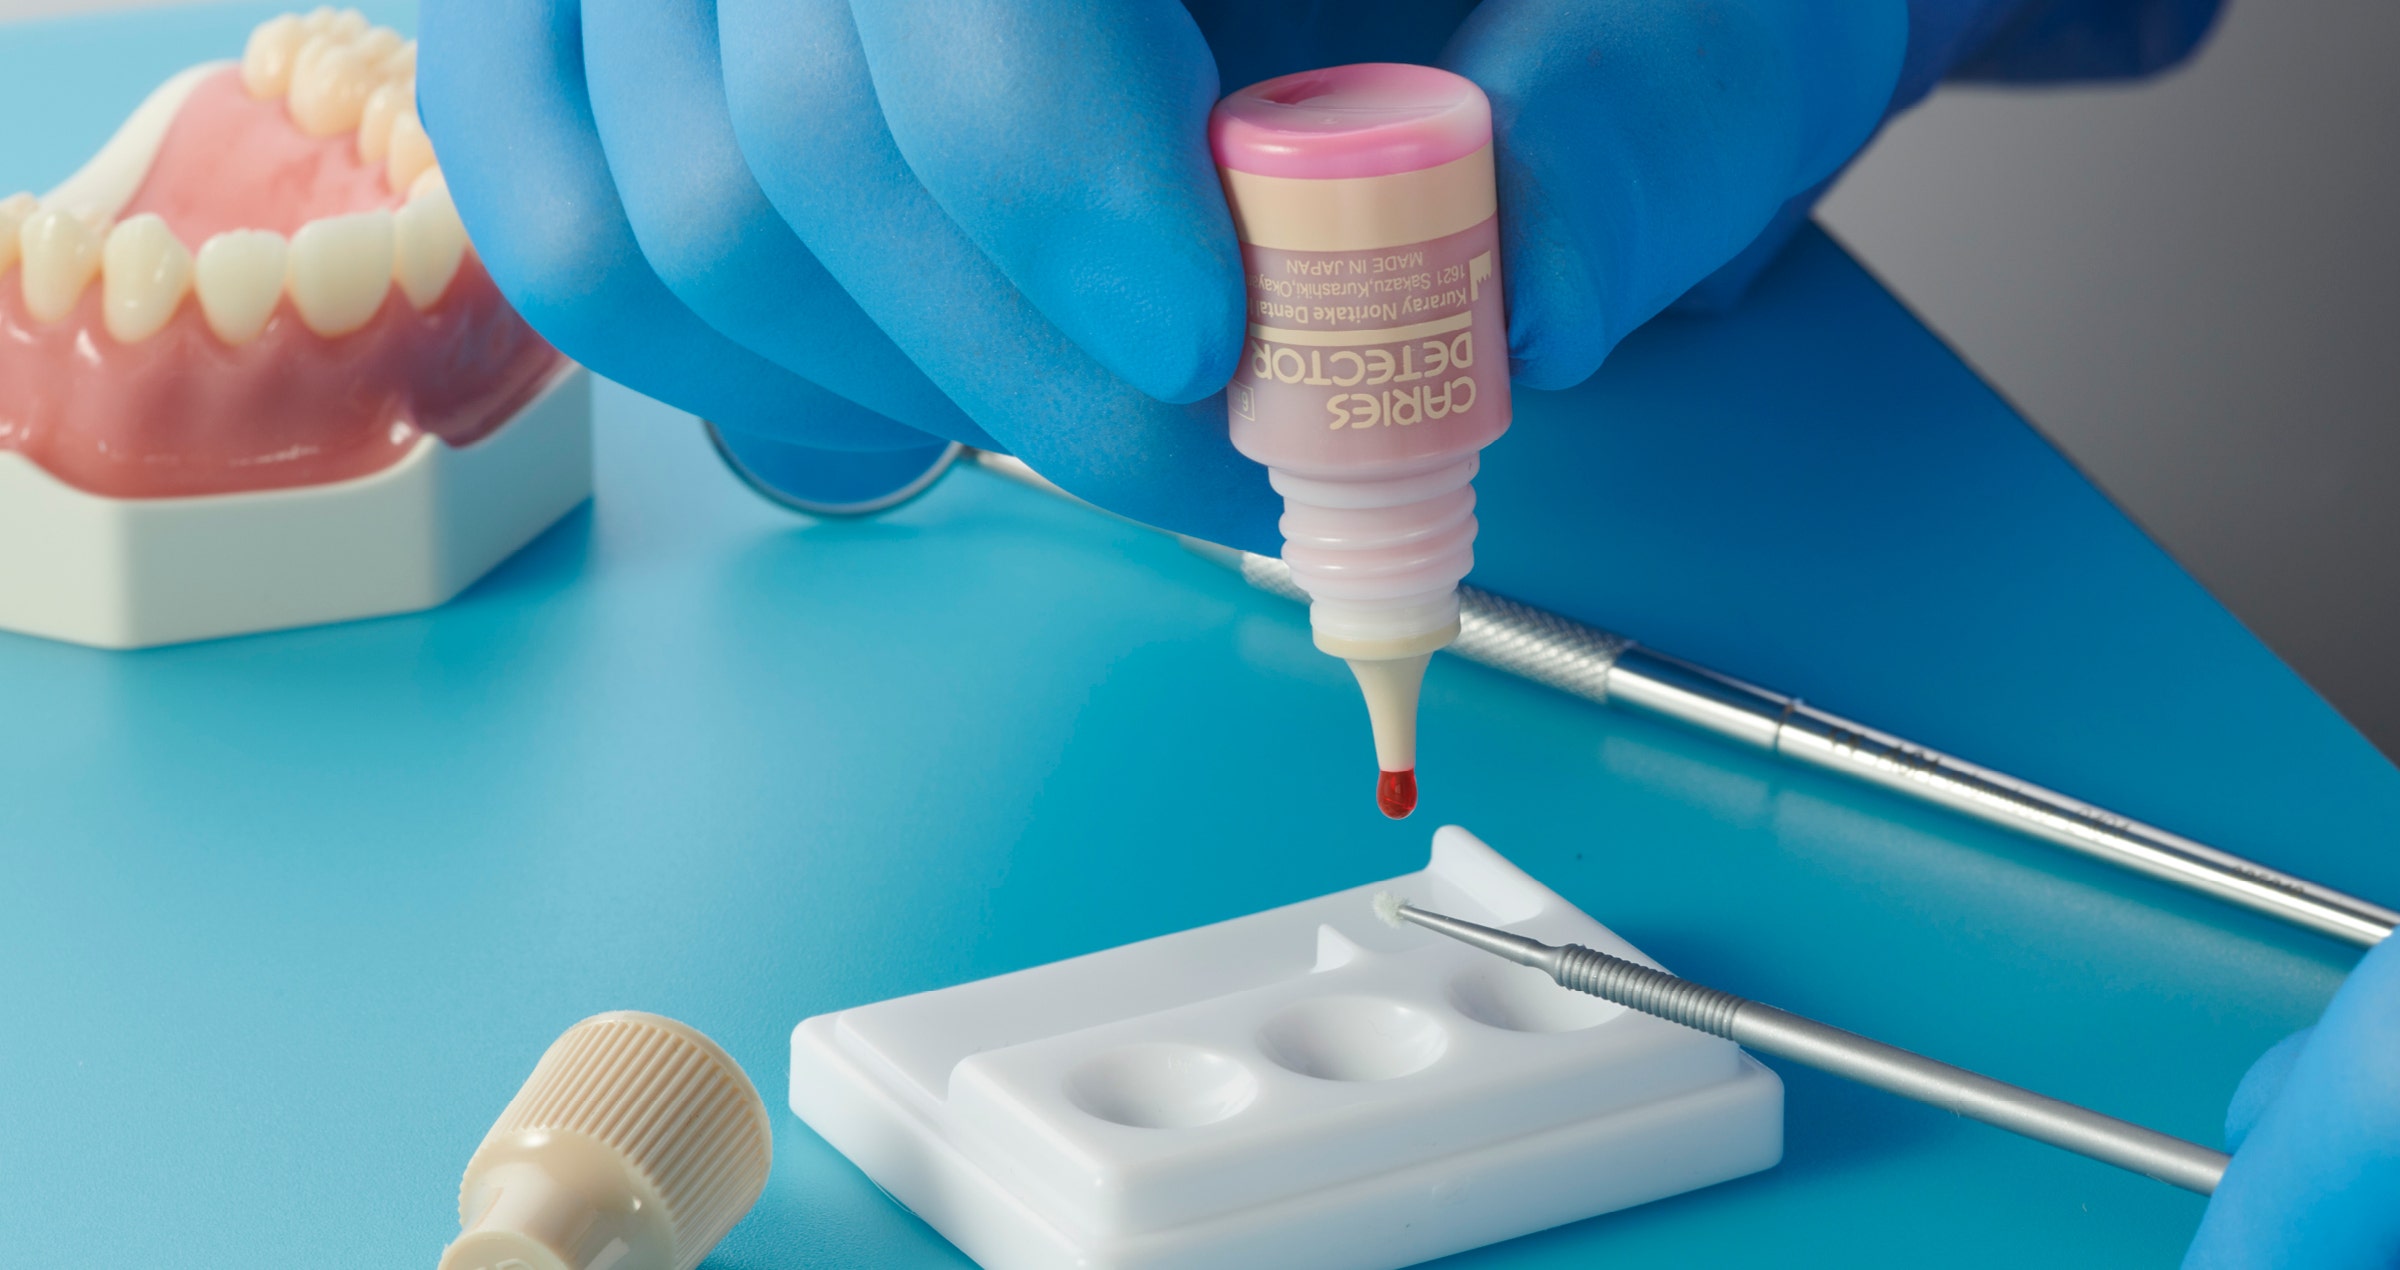
Fig. 5. Dispensing of the universal adhesive CLEARFIL™ Universal Bond Quick into a mixing dish.


Fig. 6. Application of the universal adhesive to the enamel and dentin after etching, rinsing and air-drying.


Fig. 7. Lining up of the cavity floors with of a thin layer of flowable composite (CLEARFIL MAJESTY™ Flow).


Fig. 8. Immediate treatment outcome after the placement of several layers of CLEARFIL MAJESTY™ ES-2 Universal in the shade Universal.


FINAL SITUATION


Fig. 9. Post-operative image taken after rubber dam removal.


Dentist:

DANIEL VASQUEZ, DDS