Amalgam replacement with flowable composite

Case by Dr. Julien Molia


YES, IT WORKS!

In the minds of many dental practitioners, it has become firmly established that flowable composites are nice liner or base materials below stronger packable composites and indirect restorations or as a temporization material. Many of them assume, however, that their use is limited due to their poor mechanical properties.


A NEW GENERATION OF FLOWABLES

Luckily, this is no longer true: Several flowable composites of the latest generation – like CLEARFIL MAJESTY™ ES Flow and CLEARFIL MAJESTY™ ES Flow Universal (both Kuraray Noritake Dental Inc.) – are equipped with mechanical properties, which are on par with those of many packable alternatives. Consequently, the range of indications is extended. For example, CLEARFIL MAJESTY™ ES Flow Universal, has a high filler loading of 75 to 78 wt/%, a flexural strength of more than 150 MPa and a compressive strength exceeding 370 MPa according to the manufacturer. Thanks to its high strength, it serves as a reliable and permanent solution, even suitable for stress-bearing areas such as the occlusal surfaces of posterior teeth.


However, this flowable composite has even more to offer: It is available in two levels of flowability – LOW and SUPER LOW – to serve a wider range of personal preferences and individual indication-specific needs and in just two shades (universal and universal dark). The latter offers the benefit of intuitive shade selection even in the anterior area and is enabled by a mixture of shade matching technologies, including optimized light diffusion technology and an enamel-like translucency.


The following case example reveals how CLEARFIL MAJESTY™ ES Flow Universal makes my life easier in posterior restoration procedures.


CASE EXAMPLE

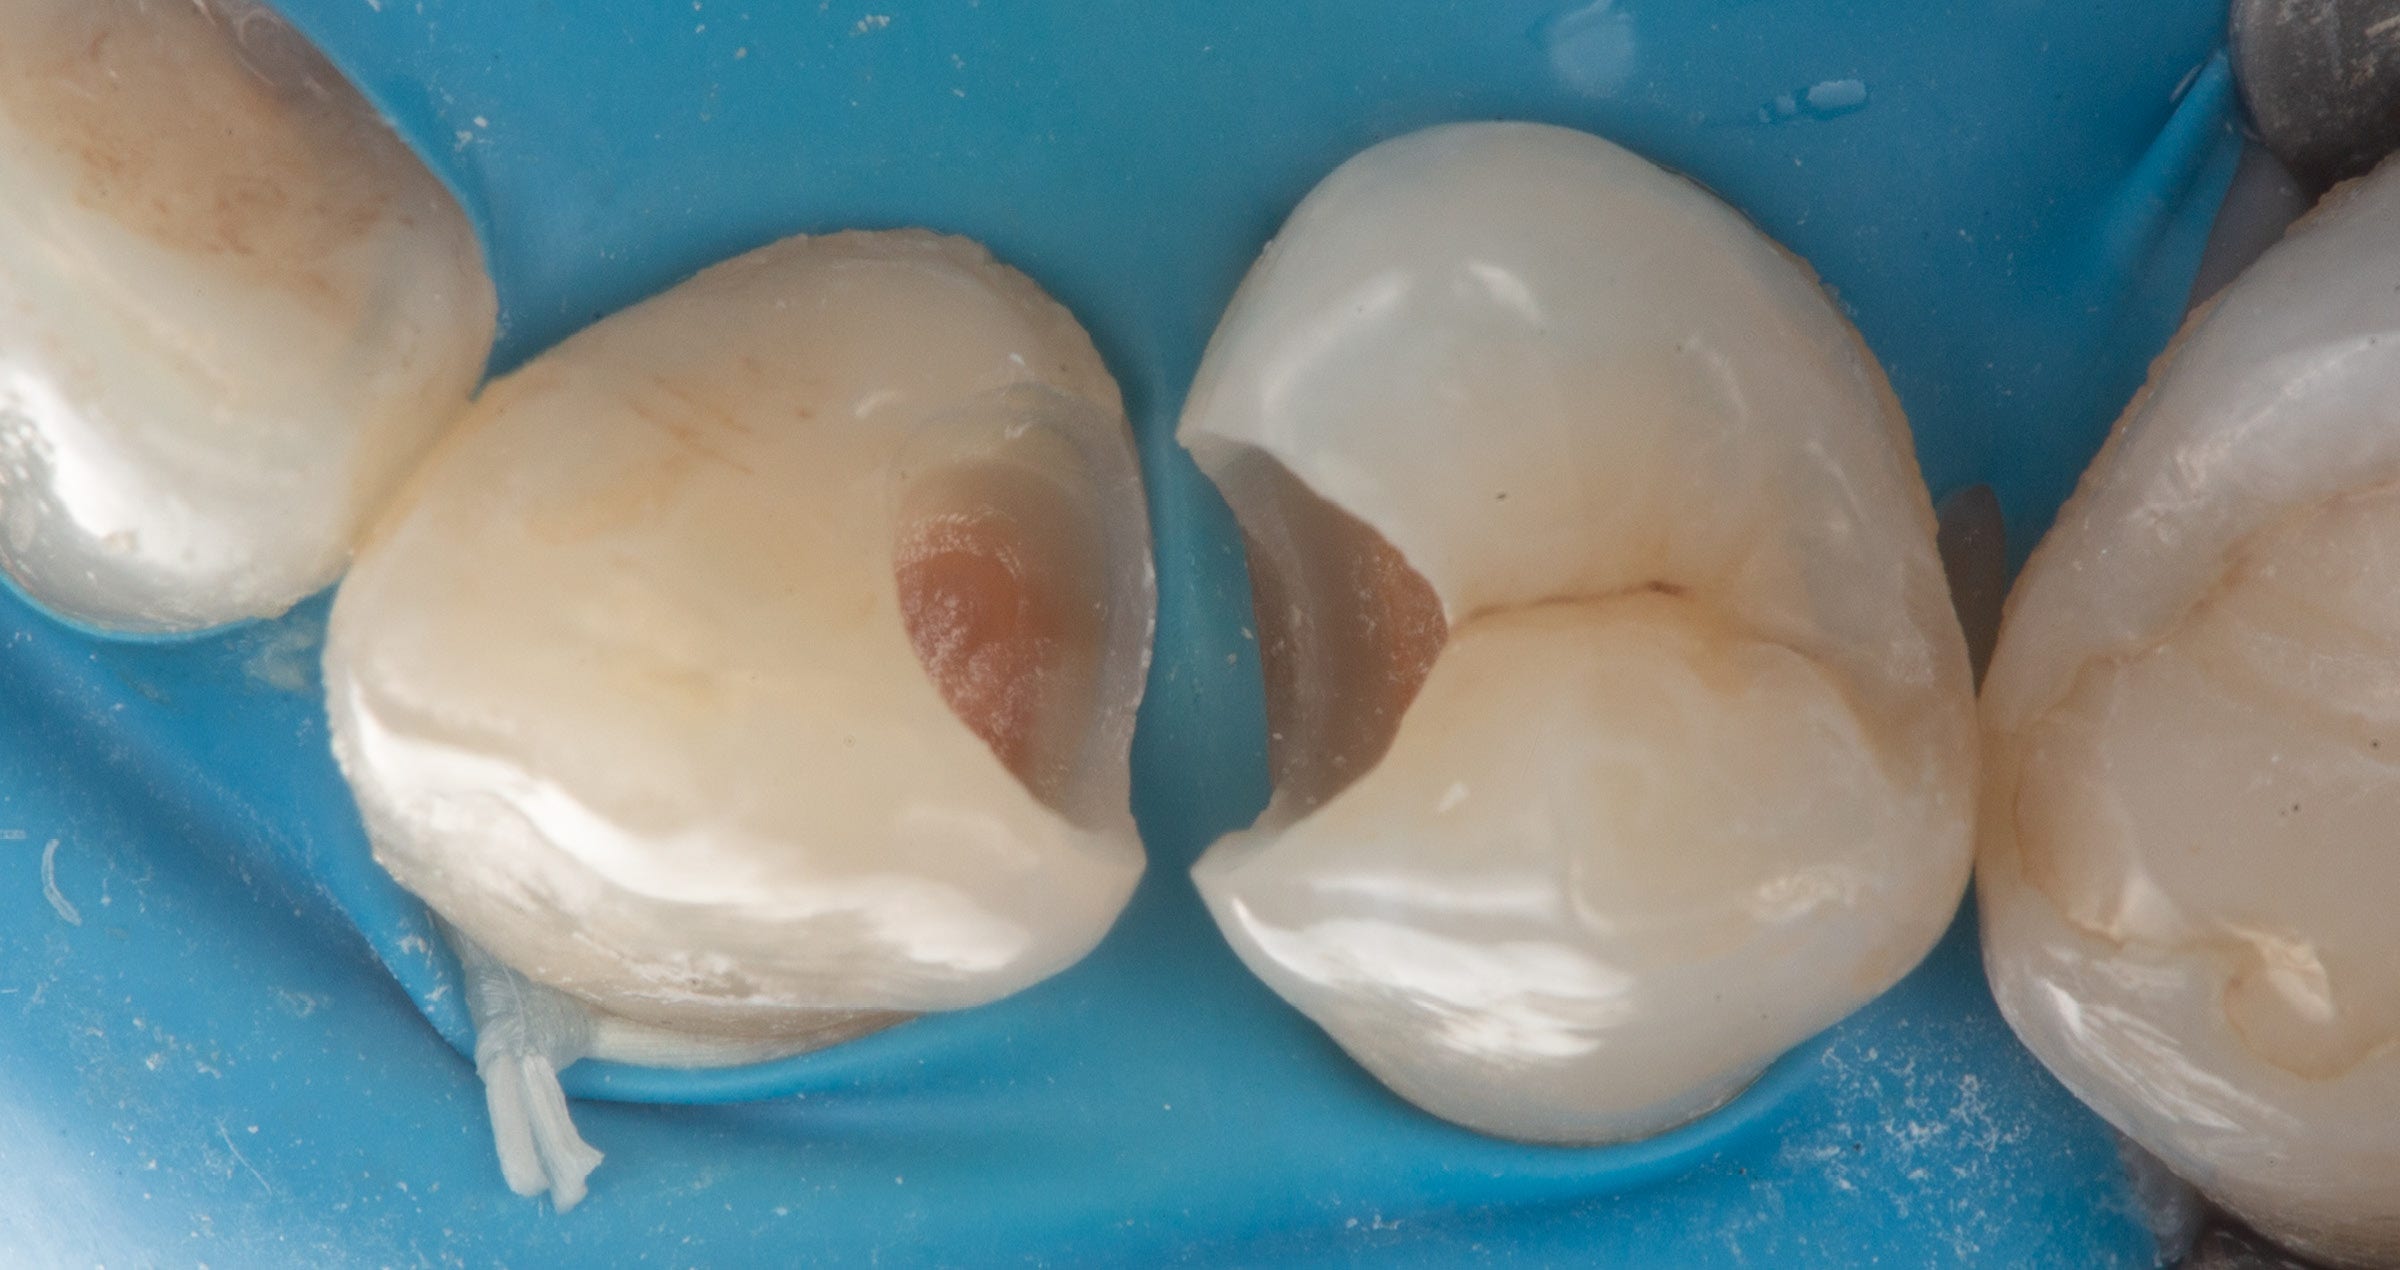
This patient presented for the replacement of two amalgam restorations in the mandibular right molars (teeth # 46 and 47 according to the FDI notation) (Fig. 1). As it would facilitate filling and provide for great adaptation to the cavity walls, it was decided to use CLEARFIL MAJESTY™ ES Flow Universal LOW as the only restorative material. The position of the teeth to be restored made shade selection easy: Shade U (universal) is designed to work perfectly for all posterior restorations.


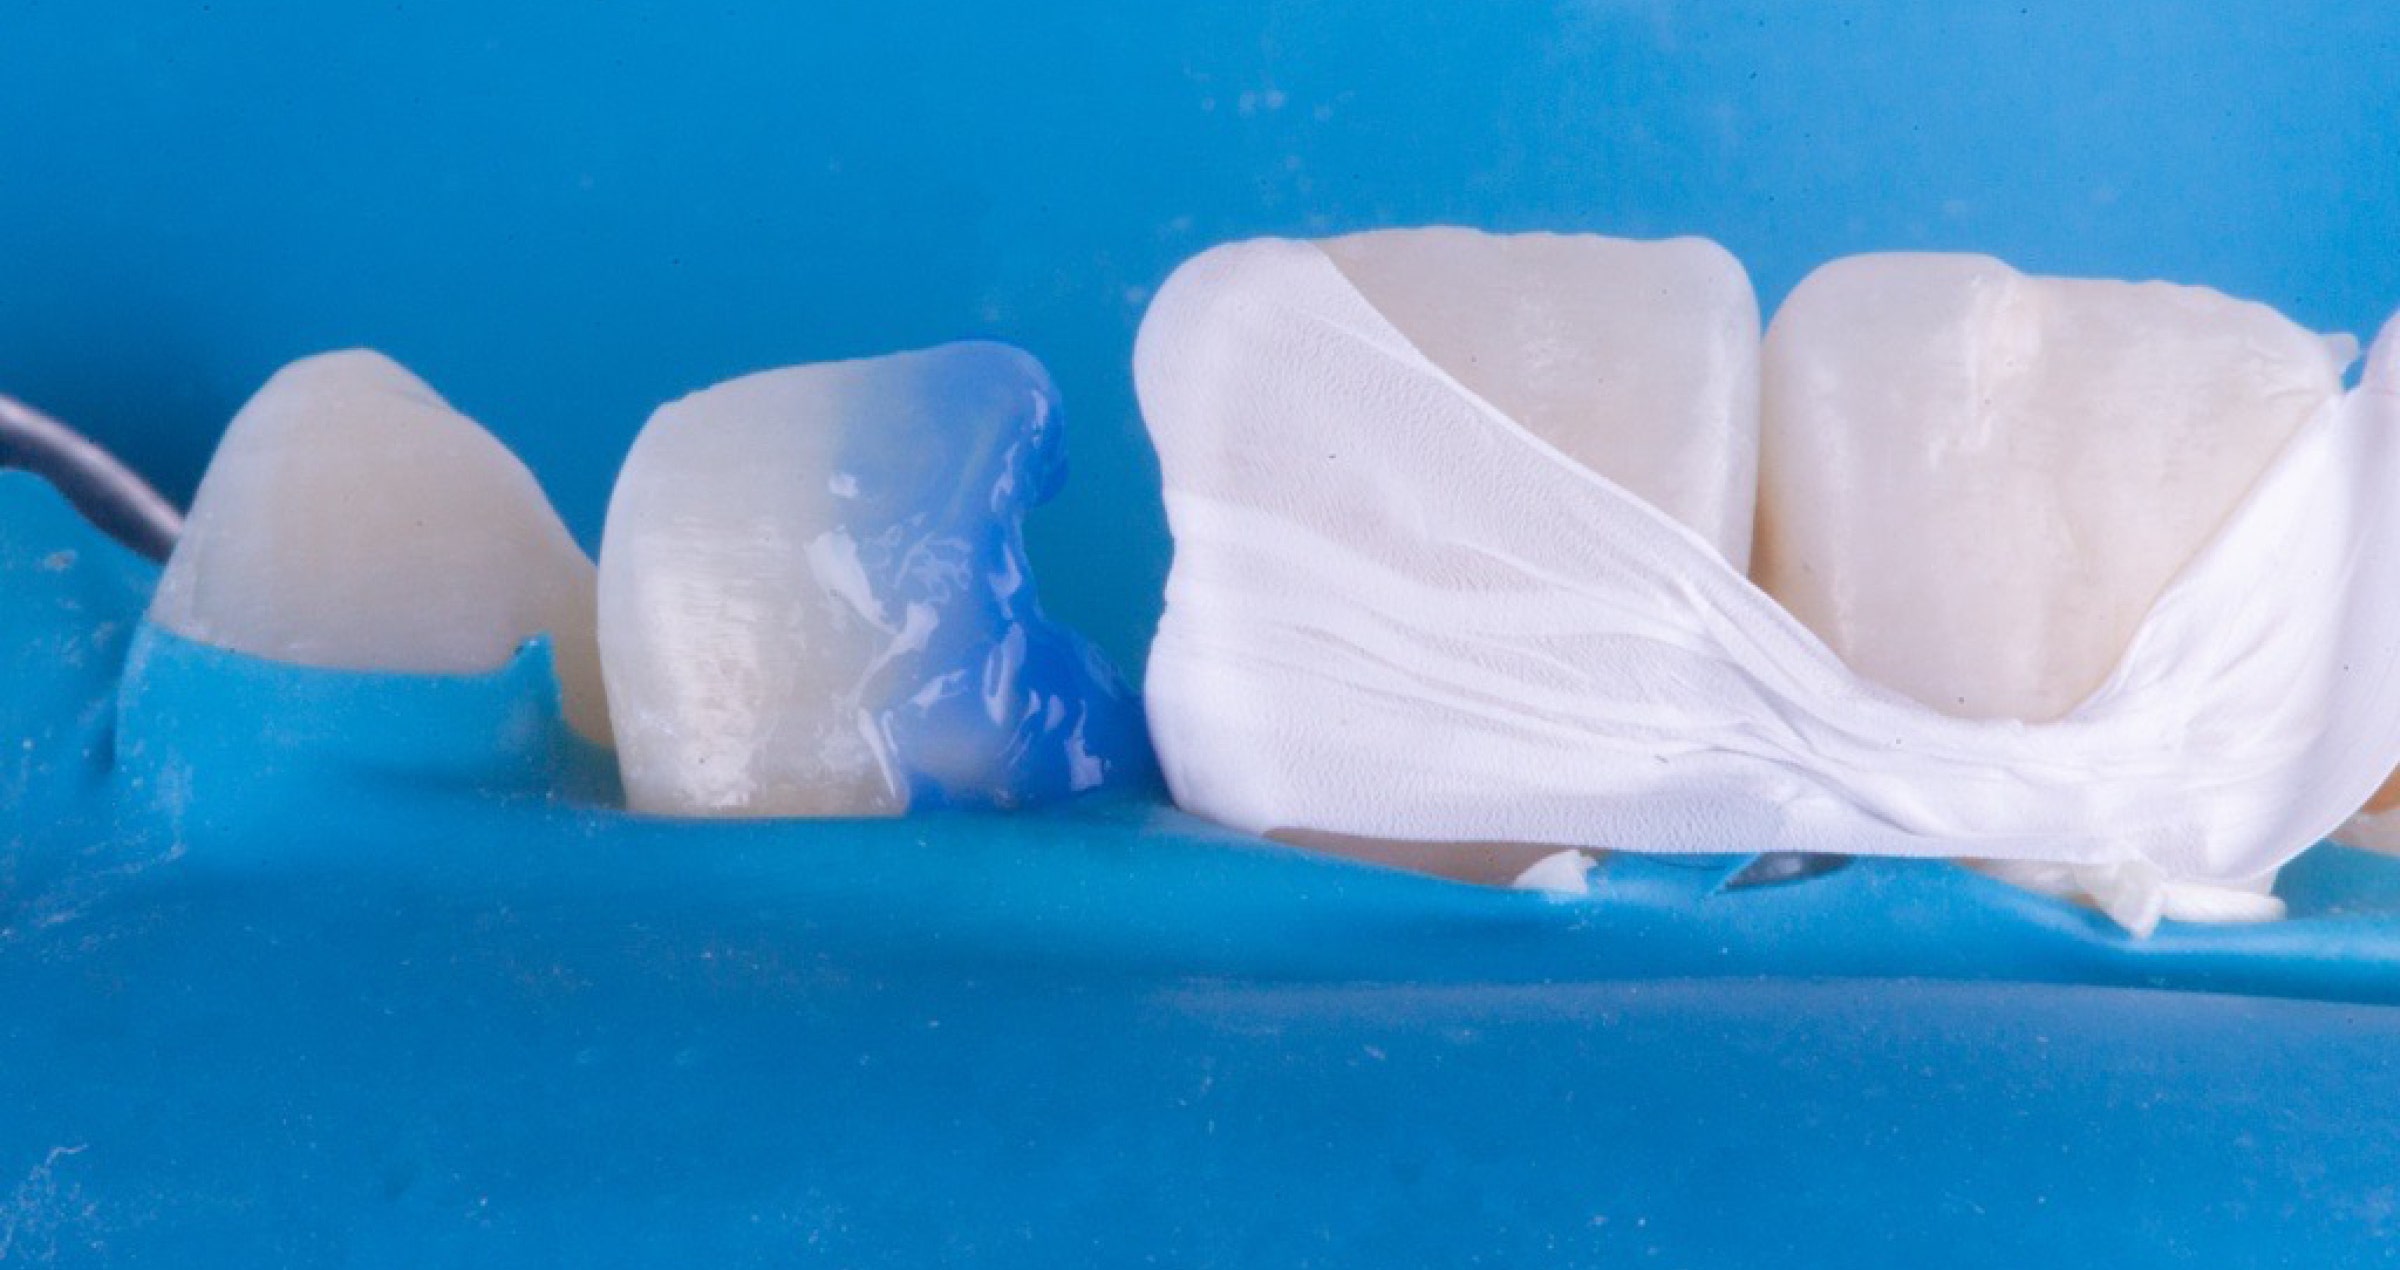
The amalgam restorations were removed and caries was excavated, while saving as much of the healthy tooth structure as possible (Figs. 2 and 3). A selective enamel etching technique was chosen, followed by the application of a universal adhesive (CLEARFIL™ Universal Bond Quick 2, Kuraray Noritake Dental Inc.). Subsequently, CLEARFIL MAJESTY™ ES Flow Universal in the LOW version and the selected shade U was applied into the cavities (Fig. 4). Thanks to the innovative syringe design, the applied flowable composite is virtually free of voids. In line with the instructions for use of the product, the thickness of each layer did not exceed 2 millimetres to provide for a complete cure (Figs. 5 and 6), which has a decisive impact on the long-term performance of the final restorations. Each layer should be thoroughly cured for 10 to 20 seconds (depending on the curing light) before the next layer is applied. As shown in Figure 7, the low flowability of the selected material allows for some modelling of the occlusal surface morphology. When more anatomical details need to be restored, the steadier SUPER LOW variant may be an option. It took just a few seconds to polish the restorations to high gloss (Fig. 8).


Fig. 1. Two amalgam restorations to be replaced.


Fig. 2. Situation after removal of the existing amalgam restorations.


Fig. 3. Typical amalgam staining is visible at the bottom of the larger cavity.


Fig. 4. Filling procedure: Application of the first layer of flowable composite.


Fig. 5. Second molar already filled, first molar in need of another layer of flowable composite.


Fig. 6. Filling completed.


Fig. 7. Nice surface morphology and shade blend-in.


Fig. 8. Treatment outcome after rubber dam removal. The restorations blend in nicely with the surrounding dentition – qua shade and surface gloss.


EASY-TO-USE ALTERNATIVE TO PACKABLE COMPOSITES

Especially in difficult-to-reach areas in the mouth, the use of a flowable composite with well-balanced mechanical properties can be a nice alternative to packable ones. Advanced shade-matching abilities, virtually void-free application, easy adaptation and modelling, and quick polishing truly simplify the life of the dental practitioner. However, many assume their use is limited due to poor mechanical properties.

Dentist:

JULIEN MOLIA


Dr. Julien Molia graduated in 2008 with a thesis on computer-assisted implantology. He established a general dental practice in Saint-Jean-de-Luz, where he has since focused on implant surgery and jawbone reconstruction. In 2017, he completed a second university degree in implantology to update and deepen his expertise. He has also pursued advanced training in digital dentistry, orthodontic miniscrews, and mucogingival surgery. Committed to tissue preservation, he trained privately with Drs. Gil Tirlet and Jean-Pierre Attal in Paris. Dr. Molia is a founding member of the French Southwest BioTeam, a collaborative group dedicated to clinical research and innovation.


Micro-layering: are there benefits of using a dedicated porcelain system?

Case by Andreas Chatzimpatzakis


When dental technicians from all over the world started using the micro-layering technique, they simply combined a reduced number of porcelains and stains from their original porcelain system. After some time, porcelains specifically designed for micro-layering were introduced to the dental market. Consequently, early adopters had to decide whether or not to switch to one of those new systems.


For me as a frequent user of CERABIEN™ ZR (Kuraray Noritake Dental Inc.), a porcelain system based on synthetic feldspathic porcelain developed for porcelain layering on zirconia frameworks, switching to any micro layering porcelain system was not an option. However, when I had the chance to test the brand-new CERABIEN™ MiLai porcelains and internal stains (Kuraray Noritake Dental Inc.), I grabbed it for two reasons. Firstly, the simplicity! I was surprised how easily I could achieve a high aesthetic result without using too many different ceramic powders. Secondly with this system, I have a micro-layering porcelain system at my disposal that works for both, zirconia and lithium disilicate. Farther more, the product is well-aligned to CERABIEN™ ZR – and offers a very similar handling.


CASE EXAMPLE

The following case is a nice example of how it may be used in the anterior region. The male patient had already been treated with monolithic zirconia crowns from another dental laboratory in the posterior region. Now, he desired a maxillary anterior smile makeover due to discoloured composite restorations and signs of tooth wear. The decision was made to produce six veneers with frameworks made of lithium disilicate (Amber Press), individualized with CERABIEN™ MiLai using the micro-layering technique. I would like to thank the prosthodontist Dr Konstantina Aggelara for the excellent collaboration and the intra oral photos.


For layering, I simply applied CERABIEN™ MiLai Value Liner 1. Then, I used CCV2 in the cervical and Tx in the incisal area, as well as Liner 2 for the mamelons. Internal stains were applied after the first bake. Subsequently, the canines were completed with LT1. The lateral and central incisors were built up with LT1 in the cervical area, Creamy Enamel on the marginal ridges and the middle and E2 mixed with Tx in the ratio 70/30 in the incisal area.


Fig. 1. Initial situation: The patient was unhappy with his lip line and facial appearance, …


Fig. 2. … particularly due to discoloured composite restorations and severe wear in the maxillary anterior region.


Fig. 3. Shade determination after tooth preparation.


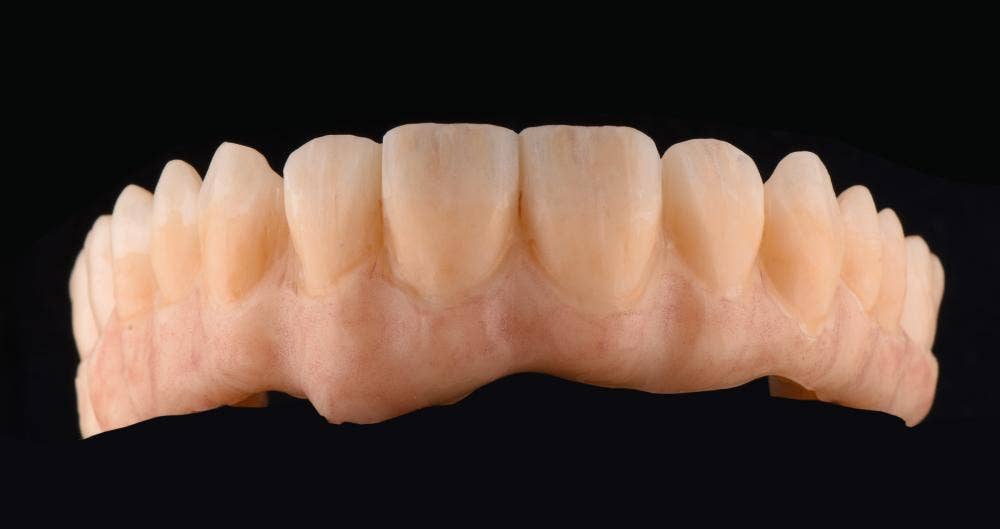
Fig. 4. Restorations produced with Amper Press (Shade LT A2), individualized with CERABIEN™ MiLai.


Fig. 5. Lateral view: The internal play of colours (internal stains) creates a nice effect. Natural shading and surface texture.


FINAL SITUATION


Fig. 6a and 6b. Restorations placed in the patient’s mouth.


THE PERFECT COMPLEMENT TO MY STANDARD PORCELAIN SYSTEM

As hoped, CERABIEN™ MiLai offers similarly great handling properties as CERABIEN™ ZR – probably mainly due to the fact that it is also based on synthetic feldspathic ceramic. It is not only responsible for consistent handling, but also for predictable optical properties, eliminating unwanted shadow effects. As the system is designed for micro-layering, it offers a natural appearance when applied in thin layers. This fact – in addition to the broader compatibility (to high-strength oxide and silicate ceramics) – makes it worthwhile to consider using a specific porcelain system for micro-layering. Experience shows that it works just as well on zirconia as it does on lithium disilicate, so that combining both framework materials in a single patient becomes a lot easier, while the line-up is neat.

Dental technician:

ANDREAS CHATZIMPATZAKIS


Andreas graduated from the Dental Technology Institute (TEI) of Athens in 1999. During his studies he followed a program at the Helsinki Polytechnic Department of Dental Technique, where he trained on implant superstructures and all ceramic prosthetic restorations. As of 2000, he is running the ACH Dental Laboratory in Athens, Greece, specialized on refractory veneers, zirconia and long span implant prosthesis. In 2017 Andreas visited Japan where he trained under the guidance of Hitoshi Aoshima, Naoto Yuasa and Kazunabu Yamanda and become International Trainer for Kuraray Noritake Dental Inc..


Restoring confidence after trauma: a biomimetic approach

Case by Dt. Koray Kendir, DDS, Turkey (İzmir)


INTRODUCTION

Trauma-related fractures of anterior teeth require a precise balance between aesthetics and function, often under emotional pressure from the patient. This clinical case demonstrates the restorative rehabilitation of a previously mismanaged central incisor using CLEARFIL MAJESTY™ ES-2 Premium and PANAVIA™ V5 (both Kuraray Noritake Dental Inc.). The team followed a biomimetic approach to re-establish biological, functional, and aesthetic harmony.


CASE SUMMARY

A 23-year-old female patient presented one month after a traumatic injury involving tooth #11 (FDI notation). Immediate root canal treatment and a direct composite build-up had been performed elsewhere in a single visit. The existing restoration showed poor aesthetics and marginal adaptation (Fig. 1).


Fig. 1. Initial clinical situation.


CLINICAL PROCEDURE

STEP 1: ISOLATION AND REMOVAL OF OLD RESTORATION

For the planned rehabilitation, the tooth was isolated with rubber dam (Figs. 2 and 3) and the existing composite restoration was removed. Gutta-percha from the previous endodontic treatment was found to be severely coronally trimmed (Fig. 4). This poses a risk of future discolouration. Consequently, the gutta-percha was condensed apically to a more biologically appropriate level using a downpack device (Figs. 5 to 9).


Fig. 2. Isolation of the working field with rubber dam: Labial view.


Fig. 3. Isolation of the working field with rubber dam: Occlusal view.


Fig. 4. Gutta-percha from the previous treatment.


Fig. 5. Gutta-percha removed, …


Fig. 6. … placed back into the root canal …


Fig. 7. … and condensed …


Fig. 8. … with a downpack device.


Fig. 9. Result of the procedure: Occlusal view.


STEP 2: CORE BUILD-UP

Subsequently, a fiber-reinforced composite was used to provide root-anchored support for the core structure. Then, the bonding surface was treated with phosphoric acid etchant, CLEARFIL™ Universal Bond Quick (Kuraray Noritake Dental Inc.) was applied as a universal adhesive and the core build-up was performed with CLEARFIL MAJESTY™ ES-2 Premium A1D (Figs. 10 to 13).


Fig. 10. Etching with phosphoric acid etchant.


Fig. 11. Application of the universal adhesive.


Fig. 12. Core build-up after thorough light curing.


Fig. 13. Intra-oral periapical radiograph or the treated tooth.


STEP 3: PREPARATION AND DIGITAL IMPRESSION

For definitive restoration, a 3/4 crown preparation was performed and an intraoral scan was taken. Moreover, a temporary crown was fabricated (Fig. 14) and shade photos were taken to finalize the session.


Fig. 14. Temporary restoration in place.


STEP 4: FINAL CEMENTATION

Once the lithium disilicate restoration was received from the laboratory, the temporary crown was removed and the abutment tooth was evaluated (Figs. 15 and 16). Try-in was performed using PANAVIA™ V5 Try-in Paste White to check shade and fit (Fig. 17). No modifications were required; the selected try-in paste contributed to a lifelike appearance of the restoration. For definitive placement, the intaglio surface of the crown was etched with hydrofluoric acid (Fig. 18). Figure 19 shows the appearance of the intaglio after this measure. To provide for optimal bonding conditions, the tooth surface was then cleaned with KATANA™ Cleaner (Kuraray Noritake Dental Inc.), which should be applied with a rubbing motion to the contaminated prepared tooth for more than ten seconds (Figs. 20 to 22). It may also be used to clean the intaglio of a restoration, which is contaminated with blood and saliva e.g. after try-in.


Fig. 15. Situation after removal of the temporary crown: Labial view.


Fig. 16. Situation after removal of the temporary crown: Occlusal view.


Fig. 17. Try-in of the lithium disilicate crown.


Fig. 18. Etching of the crown’s intaglio surface with hydrofluoric acid.


Fig. 19. Appearance of the etched surface.


Fig. 20. Cleaning of the abutment tooth …


Fig. 21. … surface covered with the cleaning agent.


Fig. 22. Thorough rinsing, which should be followed by drying with air.


Adhesive cementation itself was accomplished with the three-component PANAVIA™ V5 (Figs. 23 to 28): The prepared tooth structure and build-up was treated with PANAVIA™ V5 Tooth Primer, the intaglio surface of the crown with CLEARFIL™ CERAMIC PRIMER PLUS. Finally, PANAVIA™ V5 Universal (White) was extruded into the crown and the crown placed. Excess cement is best removed in the gel phase – i.e. after brief polymerization for 3 to 5 seconds before final light curing is performed. Alternatively, it may be removed immediately after seating the restoration with a brush or similar instrument. In this case the first option was chosen. The treatment outcome after rubber dam removal and final clinical and aesthetic evaluation is displayed in Figure 29.


Fig. 23. Priming of the tooth structure.


Fig. 24. Selected resin cement.


Fig. 25. Tooth structure ready for crown placement.


Fig. 26. Restoration in place.


Fig. 27. Lateral view of the restoration.


Fig. 28. Final light curing of the crown.


Fig. 29. Treatment outcome immediately after rubber dam removal.


CONCLUSION

This case highlights a comprehensive restorative approach to preserving a traumatized anterior tooth at risk of loss, while restoring both function and aesthetics. The strong core foundation provided by CLEARFIL MAJESTY™ ES-2 Premium and the reliable adhesive performance of PANAVIA™ V5 played a pivotal role in the successful procedure and outcome.


Dentist:

KORAY KENDIR


Dt. Koray Kendir is a graduate of Hacettepe University Faculty of Dentistry and the co-founder of a private dental clinic in İzmir. He specializes in digital dentistry, smile design, and computer-aided restorative treatments. Known for his innovative approach, Dr. Kendir is a frequent speaker at national dental congresses and serves as an advisor to several dental companies.


Micro-layering on lithium disilicate

Case by Francesco Ferretti, MDT


Is it possible to produce lifelike porcelain veneers using lithium disilicate and a porcelain system with a reduced number of internal stains and porcelains designed for micro-layering? This is what we wanted to find out when we decided to test the new CERABIEN™ MiLai line-up. As loyal users of the CERABIEN ZR family for porcelain layering on zirconia, we hoped that the new product would offer similar handling and optical properties.


The CERABIEN™ MiLai line-up consists of 15 internal stains and 16 porcelains, which are - like CERABIEN ZR - based on synthetic feldspathic porcelain technology from Kuraray Noritake Dental Inc. With a comparatively low firing temperature of 740 °C (or 1,364 °F), the system may be used on zirconia as well as silicate ceramic restorations, provided that the CTE value of the materials is between 10.2 and 10.5 × 10⁻⁶/K (50 °C – 500 °C). This is true for lithium disilicate, our preferred base material for the production of ceramic veneers. The thickness of the porcelain layer is usually smaller than 0.5 mm, which allows us to exploit the aesthetic potential of the underlaying ceramic, while creating some individual effects for the underlying structure and the enamel. A clinical case predestined for the use of the new system is shown below.


Fig. 1. Young male patient with discoloured composite restorations on his maxillary central incisors.


Fig. 2. The patient was unhappy with his smile aesthetics, so that it was decided to place more durable ceramic veneers.


Fig. 3. Appearance of the central incisors after minimally invasive tooth preparation.


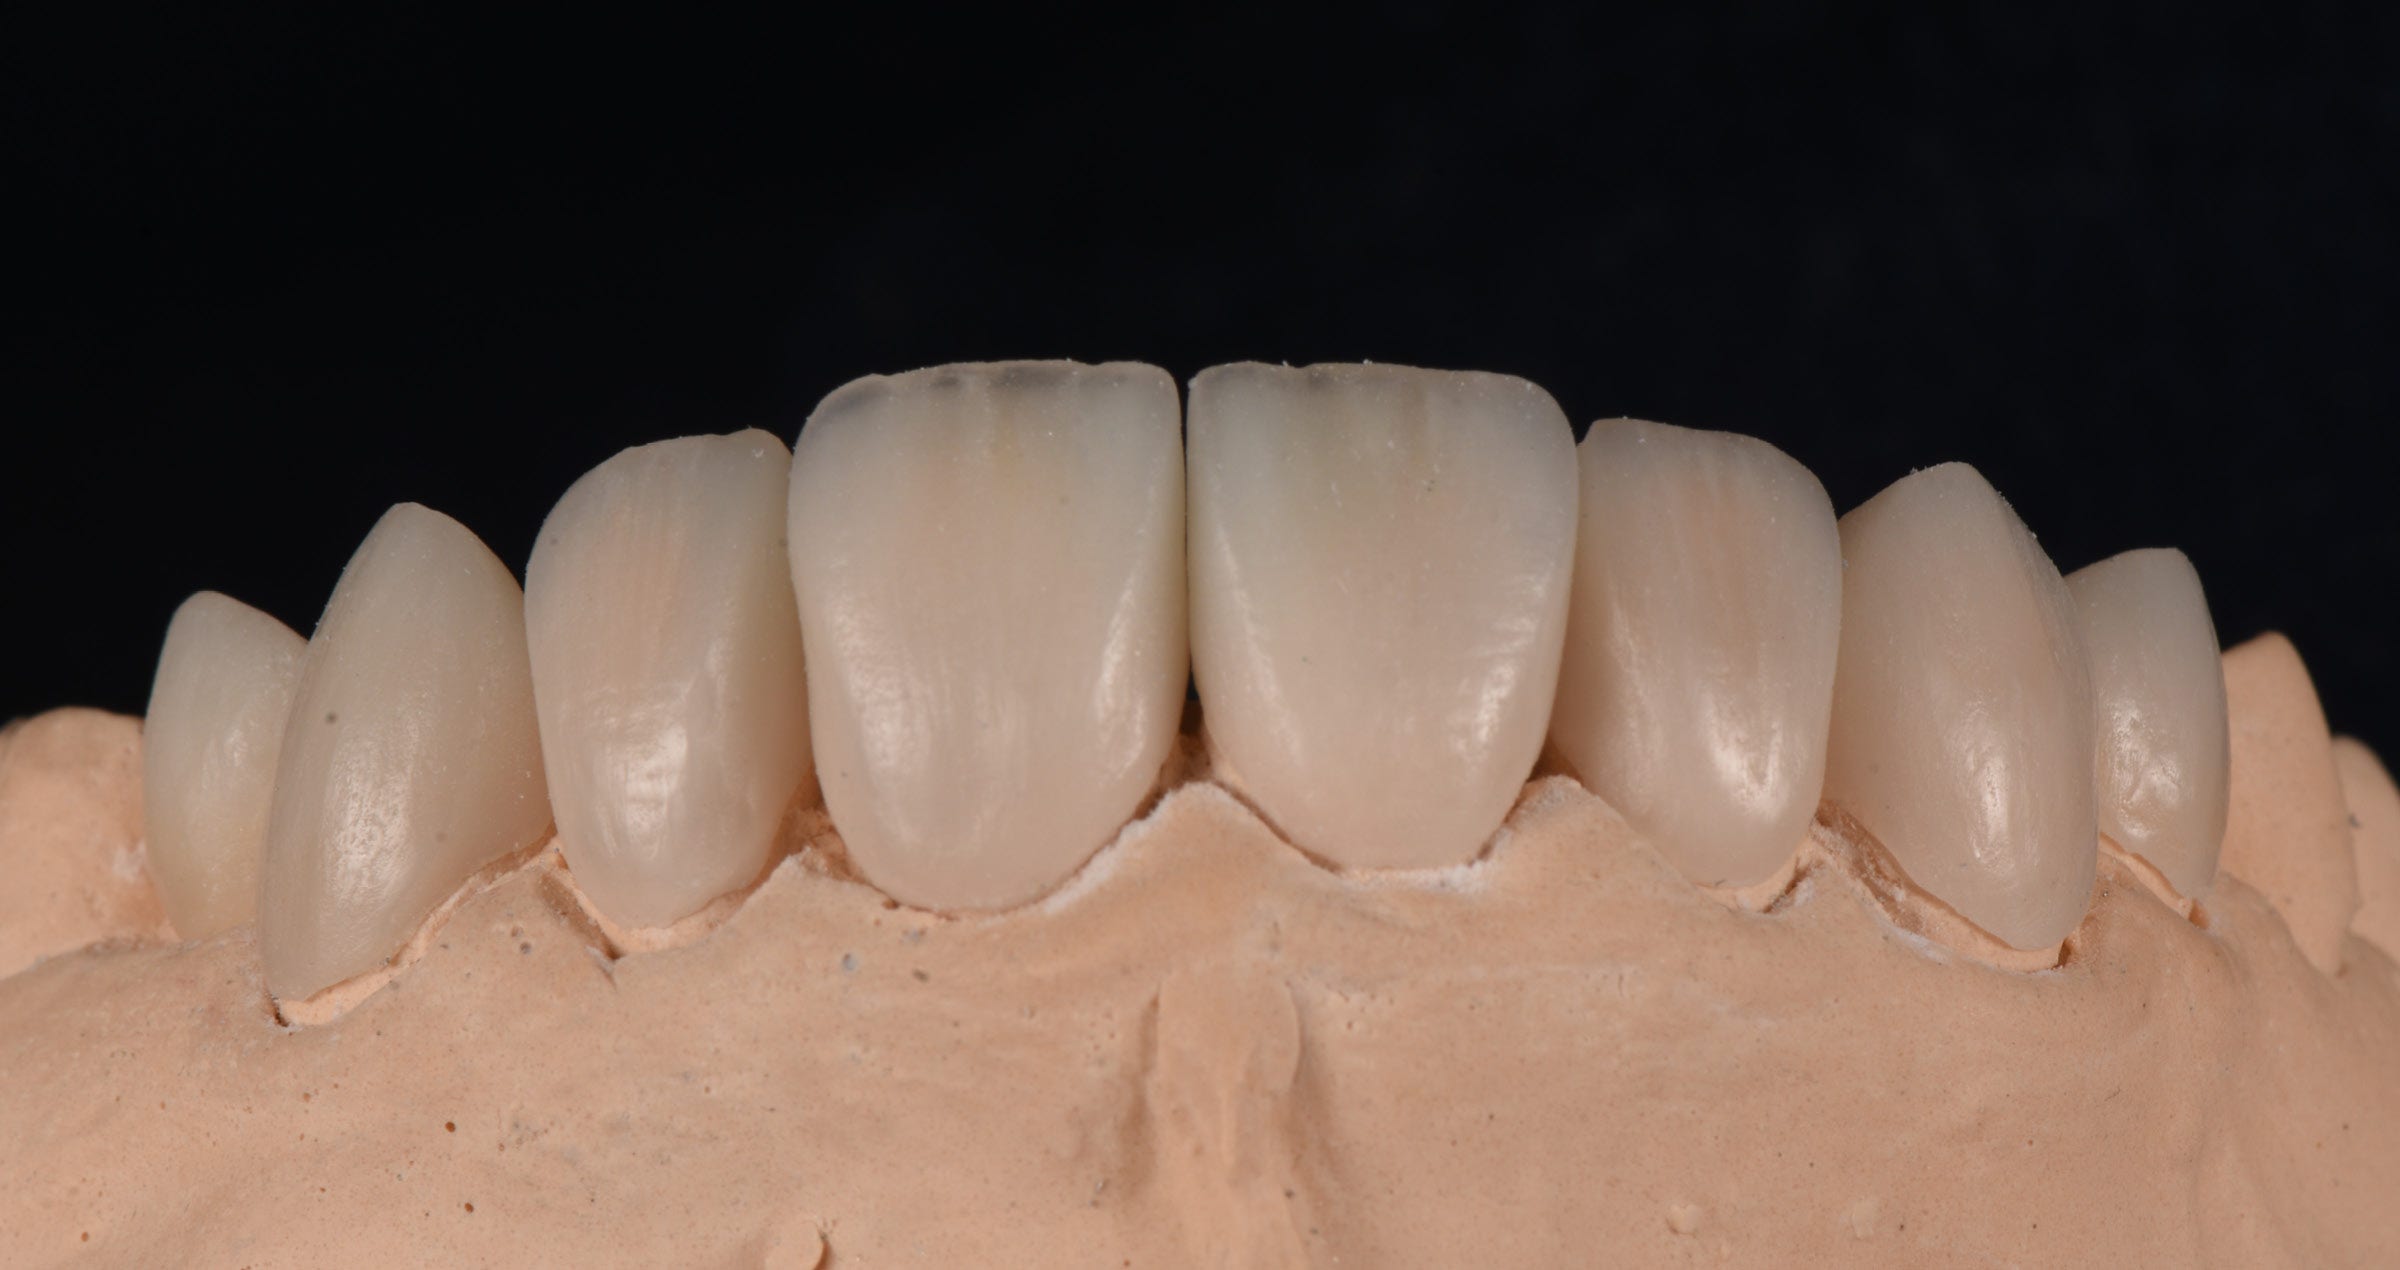
Fig. 4. Veneers made of lithium disilicate individualized with CERABIEN™ MiLai placed on the model.


Fig. 5. Intraoral view of the teeth after adhesive cementation of the veneers.


Fig. 6. Close-up view of the anterior teeth.


Fig. 7. Smooth optical integration of the veneers: They show some individual effects and are virtually indistinguishable from natural tooth structure of the adjacent lateral incisors.


Fig. 8. Black-and-white photograph of the maxillary anterior teeth.


Fig. 9. Smile aesthetics.


Fig. 10. Beautiful treatment outcome.


COMPACT SYSTEM

The compact line-up of CERABIEN™ MiLai with its nicely developed internal stains and porcelains enables us to imitate the patient’s natural teeth very well in the great majority of cases. Shades are easily selected and the favourable consistency of the porcelains facilitates application in thin layers. Due to the reduced thickness of the porcelain layer, it is possible to play with the optical properties of the underlying lithium disilicate, creating a final restoration with a natural appearance despite the simplified procedure.


Dentist:

FRANCESCO FERRETTI, MDT


Born in Rome on March 15, 1957, Francesco Ferretti received his dental technician diploma from the Edmondo de Amicis Institute in Rome and began working independently in 1980. His dental career has been versatile and impressive - working under Prof. Mario Martignoni, being partner at ORAL DESIGN Center in Rome (founded by Mr. Willi Geller and Mr. Francesco Felli) and having his own Estech Dental Studios, are just some of the highlights.


He taught the advanced course in prosthesis at the University of Chieti from 2002 to 2010 and the postgraduate course in prosthesis at the University of Naples Federico II in 2007.


He has been using metal free methods for more than 30 years, specialized in prosthesis and implants, has published articles and research in Italian, American, Russian and Asian magazines and has been a speaker at various international conferences and courses.


Full and Partial Laminate Veneers: An Aesthetic Treatment Option

Case by DT Dumitru Leahu


Aesthetically motivated restorative treatments are steadily gaining popularity. White teeth following the American example, ideal proportions and a natural surface texture is what many patients request when presenting at a cosmetic dental practice. In those cases, the particular challenge is in selecting a treatment that enables the restorative team to meet the patient’s expectations without harming the otherwise healthy tooth structure.


This was exactly what we tried to accomplish in the presented case of a young man who was unhappy with the appearance of his maxillary anterior teeth. The existing veneers on his maxillary central and lateral incisor did not have the desired colour and shape. Hence, the patient expressed the wish to replace the restorations and do what would be needed for a bright, natural and youthful smile.


Fig. 1. Initial clinical situation: Smiling patient.


Fig. 2. Appearance of the maxillary incisors with restorations that do not meet the patient’s aesthetic demands.


TREATMENT OPTIONS AND TREATMENT PLAN

To improve the young patient’s smile aesthetics, a replacement of the existing veneers seemed most appropriate. To provide for a perfect dental and facial harmony, we decided to produce laminate veneers using the refractory die technique for all six maxillary anterior teeth. However, full veneers were only planned for those teeth that had already been prepared for the existing restorations. In the canine region, we opted for an even more conservative approach: Two non-prep feldspathic partial veneers with infinity margins were to be produced.


CLINICAL PROCEDURE

For this purpose, the old restorations were removed and the previously prepared teeth were refined with rotary instruments to develop ideal veneer preparations with smooth surfaces and well-defined finish lines. The margins were located supragingivally instead of subgingivally to increase the simplicity, accuracy and predictability of clinical procedures like impression taking and adhesive cementation. The marginal fit and long-term stability of the restorations are also likely to be improved by placing this measure, which is, on top, less invasive and hence healthier for the patient. The surface of the canines was merely roughened. To get a clear picture of the patient’s aesthetic expectations, the dental practitioner took an impression, which was send to the dental laboratory. Here, we developed a wax-up, which was transferred into the patient’s mouth in the form of a mock-up. This mock-up served as a temporary restoration and allowed us to evaluate the shape, surface texture and shade of the planned restorations in situ. In consultation with the patient, the mock-up was modified slightly, while the information about the approved shape, texture and shade was transferred back into the laboratory via images and a preliminary impression.


Fig. 3. Temporary restoration in the patient’s mouth.


Fig. 4. Situation after tooth preparation with supragingival preparation margins.


TECHNICAL PROCEDURE

Based on the precision impression, a master cast was produced. This cast served as the basis for the production of removable dies and a high-precision alveolar model. Finally, the dies were duplicated using the refractory die material NORI-VEST (Kuraray Noritake Dental Inc.) needed for veneer production with the desired technique. On those dies, the preparation margins were marked with a pencil, while the surface that would come in contact with the porcelain was treated with a plaster separating agent to facilitate removal of the veneers from the model.


Fig. 5. Dyes placed in the impression.


Fig. 6. Stone Super Rock EX type IV for production of the alveolar model.


Fig. 7. High-precision alveolar model with six separate removable dies.


Fig. 8. Model with duplicated refractory dies, marked irregular preparation margins and separator liquid on the surfaces.


Then, the first layer of synthetic feldspathic porcelain (CERABIEN™ ZR Opacious Body White, Kuraray Noritake Dental Inc.) was applied. After the initial bake, a second layer of Opacious Body, which allows a shining through of the original tooth colour, was used to build up the integration structure. Following the second bake and assessment of the available space with the aid of a silicone index, we built up the cervical, body and incisal areas with the respective porcelains (A1B, CCV-1, and Enamel 1), before a final layer of Luster (LTX and ELT3) was applied. Morphological corrections were carried out after the final bake, and the essential anatomical surface details including line angles, cervical portion and incisal grooves were marked with coloured pencils. This served the purpose of integrating the desired natural surface texture into the laminate veneers with rotating instruments (PA and PB rubbers, from SHOFU). When it comes to checking the final surface details, the application of golden (Eyes Texture from MPF) texture powder offers valuable support in order to see the imperfections of surface and to correct it. It clearly reveals all the surface cracks, tiny grooves and other characteristic effects. Final polishing was accomplished with MPF all bright Diamond Paste, followed by self-glazing bake program with CERABIEN™ ZR FC Paste Stains in order to add some effects.

Fig. 9. Second layer of CERABIEN™ ZR Opacious Body applied to create integration and mamelons.


Fig. 10. Evaluation of the available space using a silicone index.


Fig. 11. Building up of the cervical and body areas.


Fig. 12. Surface of the veneers marked with coloured pencils: Vestibular view.


Fig. 13. Surface of the veneers marked with coloured pencils: Occlusal view.


Fig. 14. Evaluation of the created surface details using MPF Eyes texture.


Fig. 15. Palatal view of the veneers with texture powder.


In Figures 16 to 18, the final restorations are shown on the alveolar model. The veneers and partial veneers restore the maxillary anterior teeth to their optimal proportions. While the shade of the restorations is quite bright as desired by the patient, the natural shape and surface texture will make a major contribution to a natural and aesthetic harmony. Looked at separately, the minimal thickness of the veneers and partial veneers is revealed (Fig. 19). The margins are extremely thin, so that even the partial veneers will allow for a smooth optical integration without any visible finish line (infinity margin).


Fig. 16. Finished full and partial veneers on the model.


Fig. 17. Detailed view of the first quadrant.


Fig. 18. Detailed view of the second quadrant.


Fig. 19. Extremely thin veneers and partial veneers.


ADHESIVE CEMENTATION AND FINAL OUTCOME

After successful try-in, the adhesive surfaces of the restorations were treated with a buffered nine percent hydrofluoric acid (Ultradent™ Porcelain Etch) for 90 seconds according to the manufacturer’s instructions. During this step, it is extremely important to observe the recommended protocol, as excessive etching may weaken the ceramic structure. Subsequently, the teeth were cleaned and the veneers then adhesively cemented starting with the two central incisors and proceeding one by one. The selected light-curing adhesive cementation system (Variolink Esthetic LC) includes a universal restoration primer, phosphoric acid and a universal adhesive for the tooth structure. For restorations with limited light penetration, the use of dual-cure resin cement might be beneficial. The treatment outcome is shown in Figures 20 to 24.


Fig. 20. Portrait picture of the patient after treatment.


Fig. 21. Close-up of the patient’s smile.


Fig. 22. Lateral view of the new smile from the right.


Fig. 23. Lateral view of the new smile from the left.


Fig. 24. Overall optical integration of the veneers in the anterior region of the maxilla.


Fig. 25. Close-up of the final treatment outcome confirming a smooth transition from restorations to tooth structure and harmonic pink and white aesthetics.


CONCLUSION

The described conservative treatment approach can be challenging as the produced full and partial veneers are extremely thin. Especially during try-in and adhesive cementation, care must be taken not to break them.


At the same time, however, the full and partial veneers are a great option particularly for young patients asking for cosmetic dental treatment. They allow for minimally to non-invasive tooth preparation, while it is possible to play with the proportions and shade of the teeth. Even the colour of the underlying dentin can be nicely revealed for a more vivid appearance, and a smooth transition from natural tooth structure to restoration can be achieved even if the finish line is in no way hidden by the gums. In the present case, the restorative team succeeded in restoring the young patient’s smile in a bright and natural way – giving him exactly the smile he desired.

Dental Technician:

DUMITRU LEAHU


Dumitru Leahu is the Head of Laboratory at Opal Atelier in Paris, France. A graduate of the Apollonia University (Romania), with a degree in Dental Technology (2021), Dumitru specializes in ceramic dental restorations and veneers on refractory, following the biomimetic concept while working with a variety of high-quality dental materials.


Dedicated to continuous skill development and research, he explores the full potential of modern dental products to create restorations that closely mimic nature. Passionate about sharing knowledge, Dumitru actively conducts international courses, fostering professional exchange and contributing to the global dental community.


With a strong commitment to advancing the field, Dumitru Leahu has authored two articles for Quintessence France Magazine on aesthetic ceramic restorations, as well as one article for DTG Magazine. Grateful for the support of colleagues and mentors, he remains focused on building a lasting legacy in dental aesthetics.


Powder ceramics redesigned for micro-layering

Case by MDT Andreas Chatzimpatzakis


EFFECTIVE FINISHING OF A ZIRCONIA FRAMEWORK WITH CERABIEN™ MiLai


‘Modern concepts are based on the smart combination of different materials.’

The implant-prosthetic restoration of edentulous jaws requires more than functional stability. Modern concepts are based on the smart combination of different materials. In the presented case, a titanium bar provides for a stable connection between the implants, while a zirconia framework offers the necessary strength and fracture resistance. Both materials stand out due to their high biocompatibility, the good soft tissue attachment properties of zirconia being particularly noteworthy. The real challenge in the selected type of restoration, however, begins with aesthetic realization. Micro-layering techniques promise efficiency combined with aesthetics – but this often comes with compromises, e.g. in terms of handling. With CERABIEN™ MiLai (Kuraray Noritake Dental Inc.), a new path is now being taken here.

MDT Andreas Chatzimpatzakis, Athens


The rapid development of all-ceramic framework materials such as zirconia and lithium disilicate calls for new veneering concepts. CERABIEN™ MiLai (Kuraray Noritake Dental inc.) picks up on the strengths of classic powder ceramics and optimizes them for the requirements of micro-layering – the reinterpretation of a classic, so to speak. The basis for this is provided by synthetic feldspathic ceramic technology, in which Kuraray Noritake Dental Inc. has decades of experience. The company developed its first synthetic dental ceramics back in the late 1980s – expertise that is now also used in the low-fusing porcelain system CERABIEN™ MiLai for micro-layering. Unlike natural feldspathic ceramics, the synthetic version provides for consistent properties without the need to adjust the formulation due to altering raw materials. This is reflected in stable coefficients of thermal expansion and a uniform particle distribution; prerequisites for aesthetic results and colour stability. Another decisive advantage is evident during the firing process: the special composition prevents micro-movements in the material during firing, which can lead to inhomogeneities and gray haze effects with conventional ceramics. This property is indispensable for micro-layering, as any irregularity, no matter how small, would be immediately visible in the thin ceramic layers.


INITIAL SITUATION

The presented case illustrates the technical procedure around the restoration of an edentulous maxilla. The prosthetic work was produced after the placement of six implants and their osseointegration. In consultation between the practice team around prosthodontist Dr Georgios Siavikis, laboratory technician and patient, the decision was made to restore the teeth with a bar-supported bridge construction. A CAD/CAM-fabricated titanium bar (Atlantis® BridgeBase, Dentsply Sirona) formed the basis. Due to its high manufacturing precision, it would provide for a passive fit of the reconstruction on the implants. The material of choice for the superstructure was zirconia, which was to be finalized using micro-layering due to the patient’s high aesthetic demands.


Fig. 1. Computer-aided design of the implant bar.


Fig. 2. Computer-aided design of the zirconia framework – transparent view revealing the BridgeBase.


Fig. 3. Computer-aided design of the zirconia superstructure.


WHY CHOOSE MICRO-LAYERING?

The decision to opt for micro-layering is based on tangible benefits: In addition to economic efficiency, the thin layer of porcelain provides a high level of safety and significantly reduces the risk of chipping. In addition, the ultra-thin porcelain layer enables a controlled approach to porcelain layering. However, we must be aware that with micro layering, around 80 to 90 percent of the restoration’s final shape is already created in the framework. Although this leads to maximum control during layering, it also places high demands on the selected framework material. With porcelain layer thicknesses in the micro range, the zirconia needs to be convincing in terms of aesthetics and mechanical strength. For our long-span bridge construction, we chose KATANA™ Zirconia HTML Plus (Kuraray Noritake Dental Inc.), a material that combines high strength with natural translucency. We deliberately opted for a disc in the shade A2 – one shade lighter than the desired target shade A3. This strategic choice enabled us to play with the colours during layering and implementation of the internal stain technique.

Fig. 4. Multi-Layered zirconia with a high strength and translucency used as a framework material.


WHY OPT FOR INTERNAL STAINING?

The internal stain technique is no longer an insider tip, but is one of the supreme all-ceramic disciplines. Kuraray Noritake Dental Inc. has perfected the technique over decades together with dental technicians. We particularly value the technique in our day-to-day laboratory work, as it gives restorations an individual touch that sets them apart from standard work. Unlike superficial stains, the internal staining creates a characterization from inside the restoration with a lively play of colours that unfolds naturally in changing light conditions.


Until now, it has been challenging to combine the advantages of the internal stain technique with those of micro-layering. Although we have put various approaches to a test and detected solutions that do work, we have always come up against technical limitations. The combination of both techniques – micro-layering and internal staining – places special demands on the porcelain system: It needs to allow characterization from the inside and at the same time be able to be processed in ultra-thin layers. CERABIEN™ MiLai closes the previous gap. As a low-fusing porcelain system, it combines the advantages of the internal stain technique with the efficiency of micro-layering. Being a powder-based porcelain system, the product may be used in the familiar way – only much more efficiently. The possibility of adjusting the consistency to individual needs gives us the precise control we need for minimal layer thicknesses. With 16 porcelains and 15 internal stains, the system remains manageable without compromising on design.

Fig. 5. The low-fusing porcelain CERABIEN™ MiLai is designed for micro-layering on zirconia and lithium disilicate.


FRAMEWORK PREPARATION

After milling and sintering, the framework in its cut-back design was processed systematically: The first step was to treat the zirconia surface with a diamond bur – under water cooling to avoid microcracks. In this phase, it is also possible to incorporate fine anatomical details such as mamelon structures or marginal ridges. To provide for a strong bond, the surface of the framework was then sandblasted with 50 μm alumina particles. In this context, it is important to apply a moderate pressure that conditions the surface without weakening the structure. Framework preparation was completed with ultrasonic cleaning for ten minutes. All this created the basis for a reliable bond between the framework and the veneering porcelain.

Fig. 6. Zirconia framework prepared for finishing.


INTERNAL STAINING MEETS MICRO-LAYERING

Next on the list was internal staining. It is often the smallest details that have the biggest effect – be it a prominent marginal ridge or an intensive cervical colouration. Sometimes, however, less is more. It is often a question of the dental technician’s artistic sensitivity and – of course – the individual situation. In this case, Tissue Red was used for a vivid effect of the gingival areas, while a combination of Cervical 2, Incisal Blue 1 and Mamelon 2 was chosen to give the teeth a three-dimensional depth effect. Subsequent micro-layering was carried out selectively: CCV2 in the cervical area, Creamy Enamel for lighter margins and LT1 for the desired standard translucency and opalescence. The gingiva was given its natural depth through a sophisticated interplay of shades and shapes – with a base of Tissue 1 and 5, while the keratinized areas were given their characteristic appearance with a 60/40 mixture of Tissue 1 and TX.

Fig. 7. Internal staining: Targeted application of the stains on the framework as the basis for the three-dimensional colour effect of the restoration.


Fig. 8. Micro-layering: Ultra-thin layering on the characterized framework gives the restoration its final shape and light dynamics.


What followed was the first bake. CERABIEN™ MiLai is a low-fusing porcelain. Its firing temperature of 740 °C is not only the enabler of its compatibility with various framework materials (zirconia, lithium disilicate), but also reduces the risk of distortion or micromovements causing unwanted changes in shape during repeated firings. Minor shape corrections were made after the first bake. In this step, a particular advantage of powder ceramics in micro-layering becomes apparent: they allow for precise modelling of even the finest structures and textures. The surface structure with its lively textures gives the work its natural appearance. The final glaze firing leveraged the self-glazing effect of CERABIEN™ MiLai.

Fig. 9. Occlusal view of the finished restoration.


Fig. 10. Clearly visible internal colour characteristics.

Fig. 11. Lively surface structure with interplay of concave and convex areas both in the area of the teeth and the gingiva.


Fig. 12. Restoration in situ; edentulous maxilla with an implant-based zirconia bridge. The patient’s wishes regarding individual aesthetics are fulfilled thanks to internal staining and micro-layering (CERABIEN™ MiLai) – effectively, economically and safely.


EFFECTIVE AND FLEXIBLE

In the case presented, we combined the internal stain technique with micro-layering to fulfil the patient’s individual aesthetic demands. However, CERABIEN™ MiLai is just as suitable for micro layering without internal staining – fast, straightforward and effective. And this is precisely the advantage of this system: it offers the flexibility to go your own way – tailored to the respective situation and to the framework material (zirconia and lithium disilicate), eliminating the need to store different porcelain systems. Particularly useful: CERABIEN™ MiLai can be combined with the tried-and-tested CERABIEN™ ZR porcelain. Thanks to the low firing temperature, areas that have already been layered remain stable in shape and colour. The high versatility makes CERABIEN™ MiLai our preferred system for effective micro-layering. MiLai YOUR WAY – we have found our way with it and know that we have the right solution for every case.


‘THE HIGH VERSATILITY MAKES CERABIEN™ MILAI OUR PREFERRED SYSTEM FOR EFFECTIVE MICRO-LAYERING.’


Dental technician:

ANDREAS CHATZIMPATZAKIS


Andreas Chatzimpatzakis graduated from the Dental Technology Institute (TEI) of Athens in 1999. During his studies, he followed a program at the Helsinki Polytechnic Department of Dental Technique, where he trained on implant superstructures and all-ceramic prosthetic restorations. Since the year 2000, he has been running the ACH Dental Laboratory in Athens, Greece, specialized on refractory veneers, zirconia and long-span implant prosthesis. In 2017, Andreas travelled to Japan, where he was trained by Hitoshi Aoshima, Naoto Yuasa and Kazunabu Yamanda to become an Official Trainer for Kuraray Noritake Dental Inc.


Made for lithium disilicate

Case by Andreas Chatzimpatzakis


PUTTING CERABIEN™ MiLai TO THE TEST

Nowadays, lithium disilicate and highly translucent variants of zirconia are among the most popular ceramic materials processed in the dental laboratory. Their favourable optical properties allow us to opt for simplified finishing approaches such as micro-layering in a great majority of cases. For dental technicians, this means a reduction of the manual workload without compromising the quality of the outcomes.


Recently, Kuraray Noritake Dental Inc. has launched a new set of porcelains and internal stains specifically developed for micro-layering, which works not only with zirconia but also with lithium disilicate. The CERABIEN™ MiLai line-up consists of 16 porcelains and 15 internal stains, which – the manufacturer claims – are easy to select and manage. As the more universal approach with a single porcelain for silicate ceramics and zirconia enables us to streamline inventory management and to standardize layering procedures, we decided to test the new product in the laboratory setting. The following case is a documentation of the first try of CERABIEN™ MiLai on lithium disilicate (Amber Press, HASS Bio).


Fig. 1. Anatomically reduced crown structures made of lithium disilicate (Amber Press LT, shade A2).


Fig. 2. Crowns after the application of CERABIEN™ MiLai Value Liner 1 generally used to increase the value of lithium disilicate restorations, followed by wash firing.


Fig. 3. Situation after CERABIEN™ MiLai Internal Stains: A+ is applied in the cervical area to enhance the chroma, and Mamelon Orange 2 alternating with Incisal Blue 1 are used to imitate the mamelon structures in the incisal area.


Fig. 4. Crowns after the first and second bake with CERABIEN™ MiLai Porcelain LT1 applied in the cervical area to add translucency and opalescence to the enamel, E2 mixed with ELT (ratio: 60/40) to optimize the body area and LTx to boost the incisal translucency and opalescence.


Fig. 5. Restorations finalized with CERABIEN™ ZR FC Paste Stain Clear Glaze and external stains to add some lines incisally.


Fig. 6. Lateral view of the restorations.


Fig. 7. Natural translucency and internal optical structure revealed in transmitted light.


CONCLUSION

The outcome achieved at the first go with the CERABIEN™ MiLai line-up for micro-layering on lithium disilicate is very satisfying. I feel that we can achieve great results with this system, which is indeed easy to select and manage. The reduced number of shades clearly comes in handy especially for beginners, who will be grateful for the option of creating lifelike restorations with fewer decisions to be made, and less effort involved compared to conventional ceramic line-ups. The possibility of standardizing and streamlining procedures by using a single porcelain system for all micro-layering procedures is likely to improve the life of every dental technician.


Dental technician:

ANDREAS CHATZIMPATZAKIS


Andreas graduated from the Dental Technology Institute (TEI) of Athens in 1999. During his studies he followed a program at the Helsinki Polytechnic Department of Dental Technique, where he trained on implant superstructures and all ceramic prosthetic restorations. As of 2000, he is running the ACH Dental Laboratory in Athens, Greece, specialized on refractory veneers, zirconia and long span implant prosthesis.


In 2017 Andreas visited Japan where he trained under the guidance of Hitoshi Aoshima, Naoto Yuasa and Kazunabu Yamanda and become International Trainer for Kuraray Noritake Dental Inc..


A new bright smile

Clinical case by Kostia Vyshamirski, DT


Digital technologies for computer-aided imaging, planning, design and manufacturing are valuable tools that support dental technicians in their daily work. Combined with traditional approaches, those digital tools allow us to assess, shape, and finally meet or even exceed patient expectations. The case below is a perfect example: We produced 20 natural bleach restorations made of KATANA™ Zirconia YML and CERABIEN™ ZR Porcelains and of Noritake Super Porcelain EX-3 (Kuraray Noritake Dental Inc.), respectively.


INITIAL SITUATION

The aim was to create a new white, still natural smile. It was decided to replace the old crowns in the maxilla and to create a wider and brighter smile by adding laminate veneers in the maxilla and mandible.


Fig. 1. Initial clinical situation.


DIGITAL SMILE DESIGN AND DIAGNOSTIC WAX-UP

Digital smile design and a diagnostic wax-up are great tools for analysing and planning a new smile. Intraoral scans and portrait photographs of the patient served as the basis for the development of the ideal proportions and shapes. Once the virtual designing of the new restorations was completed (software: exocad DentalCAD), the wax-up models were printed. By transferring the wax-up into the patient’s mouth via an index or matrix, it is possible to test and assess the outcome intraorally. In this step, aesthetic and functional analysis should be the priority.


Fig. 2. Digital smile design based on an image.


Fig. 3. Computer-aided waxing up in the maxilla based on the smile design.


Fig. 4. Completed virtual wax-up for the maxilla and mandible.


Fig. 5. Wax-up transferred into the patient’s mouth for functional and aesthetic analysis.


Fig. 6. The planned new bright smile.


ALVEOLAR PRINTED MODEL

Precise and functional models are essential for the production of accurate, aesthetic restorations in the laboratory. The model builder software SHERAeasy-model (SHERA) and a 3D printer (ASIGA MAX UV, Asiga) were used to produce solid models and alveolar models with full gingival information and removable dies.


Fig. 7. Alveolar models printed in gingiva and tooth colours.


Fig. 8. Printed models with articulator holding plates and removed dental elements.


REFRACTORY DIE DUPLICATION AND ARTICULATION

The refractory die technique allows for the production of extremely thin-walled restorations and hence supports minimal tooth structure removal. For this reason, the approach seems best suited for all previously untreated teeth without major defects. The printed dies were duplicated in the refractory die material before mounting the models in the articulator for a transfer of the maxillomandibular relations.


Fig. 9. Process of duplicating printed dies in the refractory material.


Fig. 10. Articulating the models.


PRODUCTION OF THE RESTORATIONS

To achieve the best results, it is essential to select the best material for each specific situation. For the production of the crown frameworks used to restore the six maxillary anterior teeth, KATANA™ Zirconia YML in the shade NW appeared to be the ideal option. Their intaglio surfaces were treated with Esthetic Colorant (Kuraray Noritake Dental Inc.) in the shade OPAQUE to prevent a shining through of the discolourations found on some of the prepared teeth. After sintering of the frameworks in a high-temperature sintering furnace (Nabertherm) at 1,550° C, CERABIEN™ ZR porcelains were applied as illustrated below. For the creation of natural effects inside the restorations – i.e. between the layers of porcelain –, we use the internal stain technique (ILS). This procedure is very predictable and fast. Each step during porcelain build-up and staining was recorded with photos to monitor the entire process and to capture all information on the individual protocol steps. The porcelain veneers (Super Porcelain EX-3, Kuraray Noritake Dental Inc.) were produced on the refractory dies to restore the premolars in the maxilla and central incisors to second premolars in the mandible.


Fig. 11. Refractory dies and zirconia frameworks on the model.


Fig. 12. Wax-up on the model with removable dies.


Fig. 13. KATANA™ Zirconia YML frameworks on the model.


Fig. 14. Opacity control with CERABIEN™ ZR Opacious Body OB White to optimise brightness.


Fig. 15. Application of CERABIEN™ ZR Body NW0.5 to restore the cores of the crowns using a silicon index.


Fig. 16. CERABIEN™ ZR porcelains E1 and LTX applied to create translucency at the incisal edge.


Fig. 17. Prepared surface ready for internal stain application.


Fig. 18. Creation of mamelons and incisal effects with CERABIEN™ ZR internal stains.


Fig. 19. Adaptation of the incisal third with a mamelon mixture of internal stain shades (white, mamelon orange and bright).


Fig. 20. Outcome of the internal staining procedure.


Fig. 21. CERABIEN™ ZR Luster application using the Interchangeable Build-up Technique, application of CCV1 in the cervical area.


Fig. 22. CERABIEN™ ZR porcelains ELT1 used for the core, LTX for the incisal area and ELT3 for the ridges.


Fig. 23. Restorations finished by carving, hand polishing and a self-glaze bake.


Fig. 24. Layering map summarizing the porcelain layering procedure.


FIT ASSESSMENT AND TRY-IN

When the production process was complete, the restorations were placed on the solid models (printed master casts). This step is very important to validate the passive fit and contact points of each crown and veneer. Afterwards, it was time to try-in and check all the restorations intra-orally.


Fig. 25. Final restorations ready for fit assessment.


Fig. 26. Maxillary restorations: Checking of the passive fit and contacts on the model.


Fig. 27. Mandibular restorations: Checking of the passive fit and contacts on the model.


Fig. 28. Intra-oral try-in of the crowns.


DEFINITIVE PLACEMENT AND FINAL OUTCOME

Refractory ceramic veneers were cemented via an adhesive protocol using a resin-based composite. Opaque glass ionomer cement was used to cement the zirconia crowns.


At the recall about one month after restoration placement, we saw amazing gum conditions and a happy, healthy and beautiful smile!


Fig. 29. Image taken right after definitive placement of the crowns.


Fig. 30. Nice pink-and-white aesthetics achieved with the all-ceramic restorations.


Fig. 31. Amazing gum conditions found one month after restoration placement.


Fig. 32. Happy, healthy and beautiful smile.


Fig. 33. The new smile exceeds expectations.


Dentists:

KOSTIA VYSHAMIRSKI

OMAR AZZAWI

Kanstantsin started his dental technician career in 2014. His speciality is aesthetic prosthetic porcelain works. Kanstantsin is an experienced user of KATANA™ Zirconia and Noritake porcelains. He owns his lab in Riga, Latvia.

Dr. Omar Azzawi, Vienna, Austria


The new way of micro-layering

Case by Andreas Chatzimpatzakis


With CERABIEN™ ZR, Kuraray Noritake Dental Inc. offers a whole porcelain portfolio for the finishing of restorations based on zirconia. Originally developed for complex layering techniques, the synthetic feldspathic porcelain powders, liquid ceramics, internal and external stains allow for the creation of beautiful dental artwork. We love to work with the system as it offers consistent handling and mechanical properties, allowing us to produce predictable outcomes.


However, the complexity of the system with its huge number of different shades can pose challenges to less experienced users. This complexity is further increased when different substructure materials are used, as CERABIEN™ ZR works exclusively on zirconia, so that users would need to select and manage a second porcelain system when opting for a lithium disilicate framework, for example.


For dental technicians who would like to keep it smartly simple, the new CERABIEN™ MiLai line-up is certainly a great solution. Specifically developed for micro-layering on pre-shaded, highly translucent substructure materials such as lithium disilicate or a latest-generation zirconia, CERABIEN™ MiLai porcelains and internal stains may be applied in a thin (micro-) layer on restorations with a small (vestibular) cut-back. Just like CERABIEN™ ZR, the new system is based on synthetic feldspathic porcelain delivering consistent properties, but the line-up is reduced to 15 internal stains and 16 porcelains. As the CERABIEN™ MiLai has a firing temperature of 740 °C (1,364 °F), it works on oxide ceramics like zirconia, but also on reinforced silicate ceramics like lithium disilicate*.

*The material should have CTE value within 9.5~11.0×10⁻⁶ /K (50~500 °C)


Consequently, the system may be used as the universal porcelain system for micro-layering on aesthetic ceramics. With its slim portfolio, it fits the philosophy of creating impressive restorations with fewer components, layers and bakes very well, as demonstrated in two different case examples below.


VENEERS BASED ON LITHIUM DISILICATE

Fig. 1. Six anterior veneers made of lithium disilicate (Amber Press LTA2 HASS Bio), designed with a slight cut-back to create the space needed for micro-layering.


Fig. 2. Restorations after the application of CERABIEN™ MiLai Value Liner 1 followed by wash firing and internal staining. This type of porcelain increases the value of lithium disilicate restorations. By staining the core, we control the chroma and add some internal characteristic effects. In this case, we added Cervical 2 to the marginal area and characterized the incisal third with Cervical 2 and Incisal Blue 1 & 2.


Fig. 3. First porcelain layer consisting of CERABIEN™ MiLai LT1 applied to the cervical, ELT1 to the mesial third and TX to the incisal third before …


Fig. 4. … and after the first bake.


Fig. 5. Application of internal stains for special effects like cracks, intense chroma etc.


Fig. 6. Second porcelain layer consisting of CERABIEN™ MiLai LT1 applied to the canines as well as the cervical third of the central and lateral incisors, while the middle and incisal third of the four incisors is individualised with LTx.


Fig. 7. Finished restorations on the master cast.


Fig. 8. Lateral view of the restorations highlighting their natural surface texture.


ANTERIOR BRIDGEWORK BASED ON ZIRCONIA

Fig. 1. KATANA™ Zirconia HTML Plus (A2 shade) structure immediately after milling.


Fig. 2. Appearance of the substructure after sintering.


Fig. 3. High translucency of the zirconia with the applied CERABIEN™ MiLai stains and porcelains on teeth and gingiva.


Fig. 4. Palatal view of the individualized restoration before the firing process.


Fig. 5. Restoration ready for try-in.


CONCLUSION

The two different cases confirm that CERABIEN™ MiLai works very well on lithium disilicate and zirconia. Despite the reduced number of stains and shades, it is possible to imitate most of the shades and individual effects found in natural teeth, which are important for lifelike outcomes. Hence, the new material is worth a try for everyone who prefers standardized and simplified procedures.

Dental technician:

ANDREAS CHATZIMPATZAKIS


Andreas graduated from the Dental Technology Institute (TEI) of Athens in 1999. During his studies he followed a program at the Helsinki Polytechnic Department of Dental Technique, where he trained on implant superstructures and all ceramic prosthetic restorations. As of 2000, he is running the ACH Dental Laboratory in Athens, Greece, specialized on refractory veneers, zirconia and long span implant prosthesis.


In 2017 Andreas visited Japan where he trained under the guidance of Hitoshi Aoshima, Naoto Yuasa and Kazunabu Yamanda and become International Trainer for Kuraray Noritake Dental Inc..


Welcome to the future of ceramic layering

Cases by DT Ioulianos Moustakis and MDT Andreas Chatzimpatzakis


Producing dental restorations that are not recognizable as such – this is probably the ultimate goal of every dental technician. For a long time, pursuing this goal was complicated by core materials whose optical properties were very different from those of natural teeth. The dark metal or opaque zirconia substructures had to be masked by applying multiple layers of intensively coloured ceramic powders, topped by more translucent porcelains imitating the enamel.


The rise of modern, tooth-coloured core materials such as lithium disilicate and zirconia has changed the game. With a core that is highly aesthetic, translucent and close to the final shade, it became much easier to produce a restoration that is virtually indistinguishable from the adjacent teeth. The thickness of the porcelain layer decreased as did the number of shades to be combined and necessary bakes to be conducted. The use of the existing porcelain systems for the new micro-layering techniques posed several new challenges: those systems originally developed for opaque zirconia were indicated for the more translucent zirconia core materials, but usually not for lithium disilicate. Moreover, the complexity of the systems made their use unnecessarily complicated for inexperienced users.


Consequently, Kuraray Noritake Dental Inc. developed a new porcelain system for micro layering on zirconia and lithium disilicate core materials. The portfolio of CERABIEN™ MiLai, which refers to micro-layering and the Japanese word for future (mirai), consists of 15 internal stains (13 tooth colours including Bright to boost the translucent and Fluoro to boost the fluorescent effect, and two tissue colours) and 16 porcelains (12 tooth porcelains and four tissue porcelains). Hence, it enables dental technicians to implement a modernized version of the original Internal Live Stain Technique developed by Hitoshi Aoshima in the early 1990s in a porcelain layer of minimal thickness.


The following demo cases are used to show how to achieve lifelike aesthetic restorations based on aesthetic zirconia and on lithium disilicate. Illustrating each step, the cases allow users to anticipate how much time and effort can be saved compared to traditional layering techniques.


CASE 1

MAXIMALLY SIMPLE APPROACH ON LITHIUM DISILICATE

In this case, the idea was to restore the six maxillary anterior teeth in a simple way. The selected core material for the planned veneers was Amber Press (HASS Bio) LT in the shade B1. The lithium disilicate restorations were pressed with a micro cut-back and their fit was checked on the model, followed by surface texturing, sandblasting and steam cleaning [Fig. 1a]. When the veneers are milled instead of pressed, the procedure is the same. After that, the restorations are ready for the application of the CERABIEN™ MiLai internal stains for characterization of the core. In order to achieve the desired result, it is critical to mix the selected stains with the internal stain Bright responsible for a translucent effect. The chroma map for internal staining is shown in figure 1b, the outcome of the procedure in figure 1c. Subsequently, the veneers were built up to their final anatomy with selected CERABIEN™ MiLai Porcelains [Fig. 1d] to imitate the enamel and create a window effect. In this approach, simple layering and a single bake are sufficient to create the desired restoration. After glazing with Clear Glaze, finishing of the restorations was accomplished with paper-abrasive cones, a rubber polisher and polishing paste. The outcome is shown in figure 1e.


Fig. 1a. Pressed lithium disilicate veneers after surface optimization (grinding), sandblasting and steam cleaning on the model.


Fig. 1b. Chroma map for the application of CERABIEN™ MiLai Internal Stains to the lithium disilicate surface. We selected B+ (red colour) for the cervical area. For the proximal and middle incisal areas, Incisal Blue 1 & 2 (gradient blue colour) were applied and incisally in the middle, we chose Cervical 2 (orange colour). Tip: all internal stains were mixed with Bright and IS Liquid.


Fig. 1c. Appearance of the veneers after the application of CERABIEN™ MiLai Internal Stains.


Fig. 1d. CERABIEN™ MiLai Porcelains applied on top of the internal stains: LT1 is used for the cervical area (red) and a mixture of TX and E2 (30:70 ratio) for the middle and the incisal third.


Fig. 1e. The final restorations after glazing with Clear Glaze and mechanical polishing using paper-abrasive cones, a rubber polisher and Pearl Surface Z (Kuraray Noritake Dental Inc.).

Images courtesy of Andreas Chatzimpatzakis.


CASE 2

ADVANCED APPROACH ON LITHIUM DISILICATE

In order to imitate a more complex inner colour structure with mamelons, different levels of translucency and more individual effects, a slightly more complex micro-layering approach was selected. Again, the core was produced using Amber Press in the LT variant and the shade B1. After pressing and fitting on the model, we reduced the incisal third to create space for the transparent porcelain [Fig. 2a]. Subsequently, an extremely thin layer of CERABIEN™ MiLai Porcelain adding translucency to the enamel surface (TX) was applied in the incisal third of the veneers [Fig. 2b]. In this way, it is possible to create an optimally translucent basis for the application of the internal stains. The first bake was conducted and the surfaces were sandblasted as well as steam cleaned to create the conditions needed for internal staining [Figs. 2c and 2d]. The chroma map for and outcome of the internal stain application are shown in figures 2e and 2f. Afterwards, a final layer of CERABIEN™ MiLai Porcelain was applied [Fig. 2g]. All four incisors received a layer of LTx to add ultimate translucency and opalescence to the enamel, while LT1 was the material of choice in the cervical third of the canines, where LTx completed the layer in the other areas. As LT1 is slightly less translucent and opalescent, a natural effect is obtained in this way. The outcome obtained after glazing and mechanical polishing is shown in Figure 2h.


Fig. 2a. Lithium disilicate veneers reduced for the advanced layering procedure involving more porcelains and bakes.


Fig. 2b. Thin layer of TX applied to the incisal third of the restorations to boost the translucency in this area.


Fig. 2c. Appearance of the veneers after the first bake.


Fig. 2d. Ceramic surfaces after sandblasting and steam cleaning.


Fig. 2e. Chroma map for the application of the internal stains. Cervical 2 was used for the cervical third, Incisal Blue 2 for the proximal regions and Mamelon Orange 2 for the mamelons. As mentioned before, the selected internal stains were mixed with Bright.


Fig. 2f. Appearance of the veneers after the bake of the applied CERABIEN™ MiLai Internal Stains.


Fig. 2g. Final build-up to reach the desired shape of the veneers. LTx is the only material applied to the central and lateral incisors, while the canines are built up with LTx in the incisal and middle and LT1 in the cervical third.


Fig. 2h. Glazed and polished veneers on the model.

Images courtesy of Andreas Chatzimpatzakis.


CASE 3

ADVANCED APPROACH WITH GUM AREAS ON ZIRCONIA

In this case, a highly complex ten-unit bridge with gum parts in the anterior region had to be produced. The selected framework material was KATANA™ Zirconia HTML Plus (Kuraray Noritake Dental Inc.), which offers a multi-layered colour structure, an optimized translucency and the high flexural strength required for long-span bridges. The restoration was milled in an anatomically reduced design and the surface texture was optimized with rotating instruments before sintering [Fig. 3a]. After the final sintering procedure, the restoration had a favourably high translucency in the incisal region and a natural shade structure [Figs. 3b and 3c]. In the first step of the micro-layering procedure, the application of the CERABIEN™ MiLai Internal Stains was planned and carried out [Figs. 3d and 3e]. Subsequently, different layers of CERABIEN™ MiLai Porcelain were applied. The images 3f to 3h reveal which shades were combined and illustrate the procedure, while the outcome before and after the last bake is shown in Figures 3i to 3k. In the next step, the gum areas were completed using the CERABIEN™ MiLai tissue porcelains Tissue 4, 5 and 6 in the order and locations described in Figures 3l to 3o. In the final layer, Tissue 1 was mixed with ELT1 to imitate the labial frenulum and with LTx to create a smooth transition to the natural gingiva [Figs. 3p and 3q]. The final restoration is shown in Figure 3r.


Fig. 3a. Milled restoration after surface texturing.


Fig. 3b. Shade and translucency of the sintered zirconia restoration.


Fig. 3c. Highly translucent bridge on the model.


Fig. 3d. Chroma map for the application of CERABIEN™ MiLai Internal Stains.


Fig. 3e. Applying a mixture of Bright, Salmon Pink and Tissue Pink to the gum area.


Fig. 3f. Application of CERABIEN™ MiLai E2 to add translucency to the structure.


Fig. 3g. Application of Tx and a mixture of Tx and CCV-2 to individualize the cervical and incisal areas while boosting the translucency of the enamel in the middle and incisal third.


Fig. 3h. Adding a final layer of LT1 for additional translucency and opalescence.


Fig. 3i. Appearance of the ten-unit bridge before the bake – labial view.


Fig. 3j. Appearance of the ten-unit bridge before the bake – palatal view.


Fig. 3k. Appearance of the ten-unit bridge after the bake.


Fig. 3l. Application of small amounts of Tissue 5 …


Fig. 3m. … covered with a layer of Tissue 6 alternating with Tissue 5.


Fig. 3n. Following another bake, Tissue 5 is applied in the proximal areas.


Fig. 3o. How to combine Tissue 6 and Tissue 4 in the next layer.


Fig. 3p. How to complete the tissue layer with Tissue 1, locally mixed with ELT1 or LTx.


Fig. 3q. Restoration before the final bake.


Fig. 3r. Final ten-unit bridge ready for placement.

Images courtesy of Ioulianos Moustakis.


ABOUT THE AUTHORS

DT IOULIANOS MOUSTAKIS
Germany


Dental Technician/Photographer
1985 - 1987 Studied at the School of Dental Technology (SBIE) in Athens / Greece
1997 - 1998 Master school in Berlin
2007 - Education as Maxillofacial prosthetic technician (IASPE)
2010 - Advanced education in Functional diagnosis temporomandibular joint
2011 - 2012 Curriculum implant prosthetics for dental technicians (DGZI)
2013 - 2014 Education as a graphic designer at the Media Design Hochschule (MDH) in Berlin
2015 - 2017 Education as a photographer at the Photocentrum of the Gilberto Bosques VHS Friedrichshain-Kreuzberg
2014 - 2016 - 2018 Further training at Noritake/Kuraray in Japan
2019 - International Instructor Noritake/Kuraray
2019 - Certified trainer of Teeth Morphology carving (Osaka Ceramic Training Center)
1998 - Implant Dental Studio - Athens/Greece
2010 - Zirkler & Moustakis Dental Technology - Falkensee/Germany
2020 - Giuliano Dentaldesign - Falkensee/Germany

Publications in Dental Journals
2014 - 5/2014 Dental Dialogue/Germany
2015 - 10/2015 The International Journal of Dental Technology/Japan
2018 - 1/2018 Cosmetic Dentistry/Germany
2018 - 4/2018 Zahntechnik Zeitung/Germany
2018 - 5/2018 Das Dental Labor/Germany
2018 - 5/2018 Dental Dialogue/Italy
2018 - 10/2018 Laborama/Greece
2019 - 1/2019 LabLine/Hungary
2019 - 3-4/2019 Dental Technologies/UK
2020 - 4/2020 LabLine/Hungary
2021 - 1+2 LabLine/Hungary
2021 - 5/2021 + 12/2021 Quintessenz Zahntechnik/Germany
2021 - 4/2021 QDRP France

Competitions
2013 – 6th place at the 8th KunstZahnWerk contest by Candulor
2017 – 5th place at the 10th KunstZahnWerk contest by Candulor
2017 – 1st place at the 10th KunstZahnWerk contest by Candulor as "Best Documentation“
2020 – 1st place at the 4th Panthera Master Cup by Panthera Dental

Memberships
NGSC Noritake Greek Study Club
DGZI German Society of Dental Implantology
IASPE International Association for Surgical Prosthetics and Epithetics
Key Opinion Leader (KOL) at company MPF Brush Company
Key Opinion Leader (KOL) at company Candulor
Key Opinion Leader (KOL) at company Kuraray/Noritake


MDT ANDREAS CHATZIMPATZAKIS
Greece


Andreas graduated from the Dental Technology Institute (TEI) of Athens in 1999. During his studies he followed a program at the Helsinki Polytechnic Department of Dental Technique, where he trained on implant superstructures and all ceramic prosthetic restorations.

From the year 2000, he is running the ACH Dental Laboratory in Athens, Greece, specialized on refractory veneers, zirconia and long span implant prosthesis.

ACH Dental Laboratory is Co-operating lab with the National and Kapodistrian University of Athens for the MSc degree in Dental Laboratory Materials.

From 2016 he is key opinion leader for the MPF Brush.co.

On 2017 he visits Japan where he trained from Hitoshi Aoshima, Naoto Yuasa and Kazunabu Yamanda and becomes International Trainer for Kuraray – Noritake company.

In 2018 he became Editor-in-chief for the dental technician magazine “LABORAMA” published by OMNIPRESS co.

On 2019 he studies carving, morphology and all ceramic restorations at the Osaka Ceramic Training Center by Shigeo Kataoka.

On 2019 he establishes the Dental Technicians’ Coaching Services and coaches dental technicians to improve their work.

Andreas has also conducted several lectures and hands on seminars in Greece and abroad and published articles in Greek and international magazines.

His lecture “An exciting journey … to be a dental technician” is about inspiring dental technicians to improve their work by observing and emulate natural teeth using the internal live stain technique.


Article first published in Labline Magazine Issue 45, Spring 2022 edition.