429 Too Many Requests

429 Too Many Requests


nginx

Custom abutment implant cementation technique

With PANAVIA™ SA Cement Universal and KATANA™ Zirconia


By using PANAVIA™ SA Cement Universal and its proprietary dual-monomer technology, you can now simplify the bonding of restoration to implant abutments without the use of separate primers or silane. Independent research has confirmed this new dual-monomer technology does not sacrifice adhesion or durability on glass-based ceramics or zirconia. The technique, in this case study, is for custom fabricated abutment & KATANA™ Zirconia YML crown, however, the basic technique on the treatment of the abutment and restoration may be used with any implant restoration combination as long as the proper surface treatments for type of material is followed.


INITIAL FIT OF ABUTMENT & RESTORATION

Basic technique on the treatment of the abutment and restoration.


Fig. 1. Check Initial Fit of Abutment & Restoration: abutment & crown margins should be checked to ensure proper fit.


Fig. 2. Protect base of implant with putty or light-cure block-out resin. The base of the implant should be covered so that it is not air abraded accidentally.


Fig. 3. Abrade titanium abutment with 50 μm alumina oxide powder.


Fig. 4. Clean abutment with KATANA™ Cleaner: Apply KATANA™ Cleaner by rubbing each area for 10 seconds.


KATANA™ Cleaner is a universal cleaner that is indicated to clean metal, zirconia & glass-based restorations. It is also an intra oral cleaner that may be used on dentin and enamel.


TREATMENT OF KATANA™ Zirconia RESTORATION WORKFLOW

Bonding to zirconia has been proven to be durable in research going back to the 1990’s with the original MDP adhesive monomer in the PANAVIA™ resin cements. The three requirements to bonding zirconia are:

  1. Air abrade zirconia with 50 μm alumina oxide powder.
  2. Clean zirconia
  3. Apply an MDP-Based Primer or resin cement. PANAVIA™ SA Cement Universal contains the original MDP that was developed & patented in 1981 by Kuraray Dental.


Fig. 1. Air abrade KATANA™ Zirconia at 14-58 psi.


Fig. 2. Dispense & mix PANAVIA™ SA Cement Universal (it is available in automix or handmix formulations).


Fig. 3. Apply PANAVIA™ SA Cement Universal to the abutment or inside the crown.


Fig. 4. Seat restoration on abutment.


Fig. 5. Remove excess resin with a dry micro-applicator or brush.


Fig. 6. You may light-cure the margins after cleaning up all excess resin. If you fully cure excess resin, It can be difficult to remove. If difficult to remove, change curing time or distance with your light.


Fig. 7. Leave restoration on abutment to self-cure fully for approximately 10 minutes at room temperature.


Fig. 8. Final check of custom abutment KATANA™ Zirconia YML crown on model.

Ti-Base implant cementation technique

With PANAVIA™ SA Cement Universal


By using PANAVIA™ SA Cement Universal and its proprietary dual-monomer technology, you can now simplify the bonding of any restoration to implant abutments without the use of separate primers or silane. Independent research has confirmed this new dual-monomer technology does not sacrifice adhesion or durability on glass-based ceramics or zirconia. The technique, in this case study, is for Ti-Base Implants, however, the basic technique on the treatment of the abutment and restoration may be used with any implant restoration combination.


TREATMENT OF TITANIUM ABUTMENT


Fig. 1. After attaching the abutment to the implant analog.


Fig. 2. Protect the base of the abutment with block out resin & light-cure.


Fig. 3. Air abrade the Titanium Abutment with 30-50 μm Alumina Powder @ 32 PSI.


Fig. 4. Clean abutment with KATANA™ Cleaner (10’s Rubbing, Rinse & Dry).


KATANA™ Cleaner is a universal cleaner that is indicated to clean metal, zirconia & glass-based restorations. It is also an intra oral cleaner that may be used on dentin and enamel.


REFERENCE INDEX POINTS TO ENSURE ACCURATE SEATING


Fig. 1. Mark Index position on implant analog.


Fig. 2. Mark index position (notch) on crown.


TREATMENT OF RESTORATION & BONDING TO THE ABUTMENT


Fig. 1. If Lithium Disilicate, HF acid etch Internal Surfaces, with 5% HF etch for 20’seconds then rinse & dry. If Zirconia, air abrade, at 14-58 PSI.


Fig. 2. Inject PANAVIA™ SA Cement Universal (White Shade) onto treated & cleaned abutment.


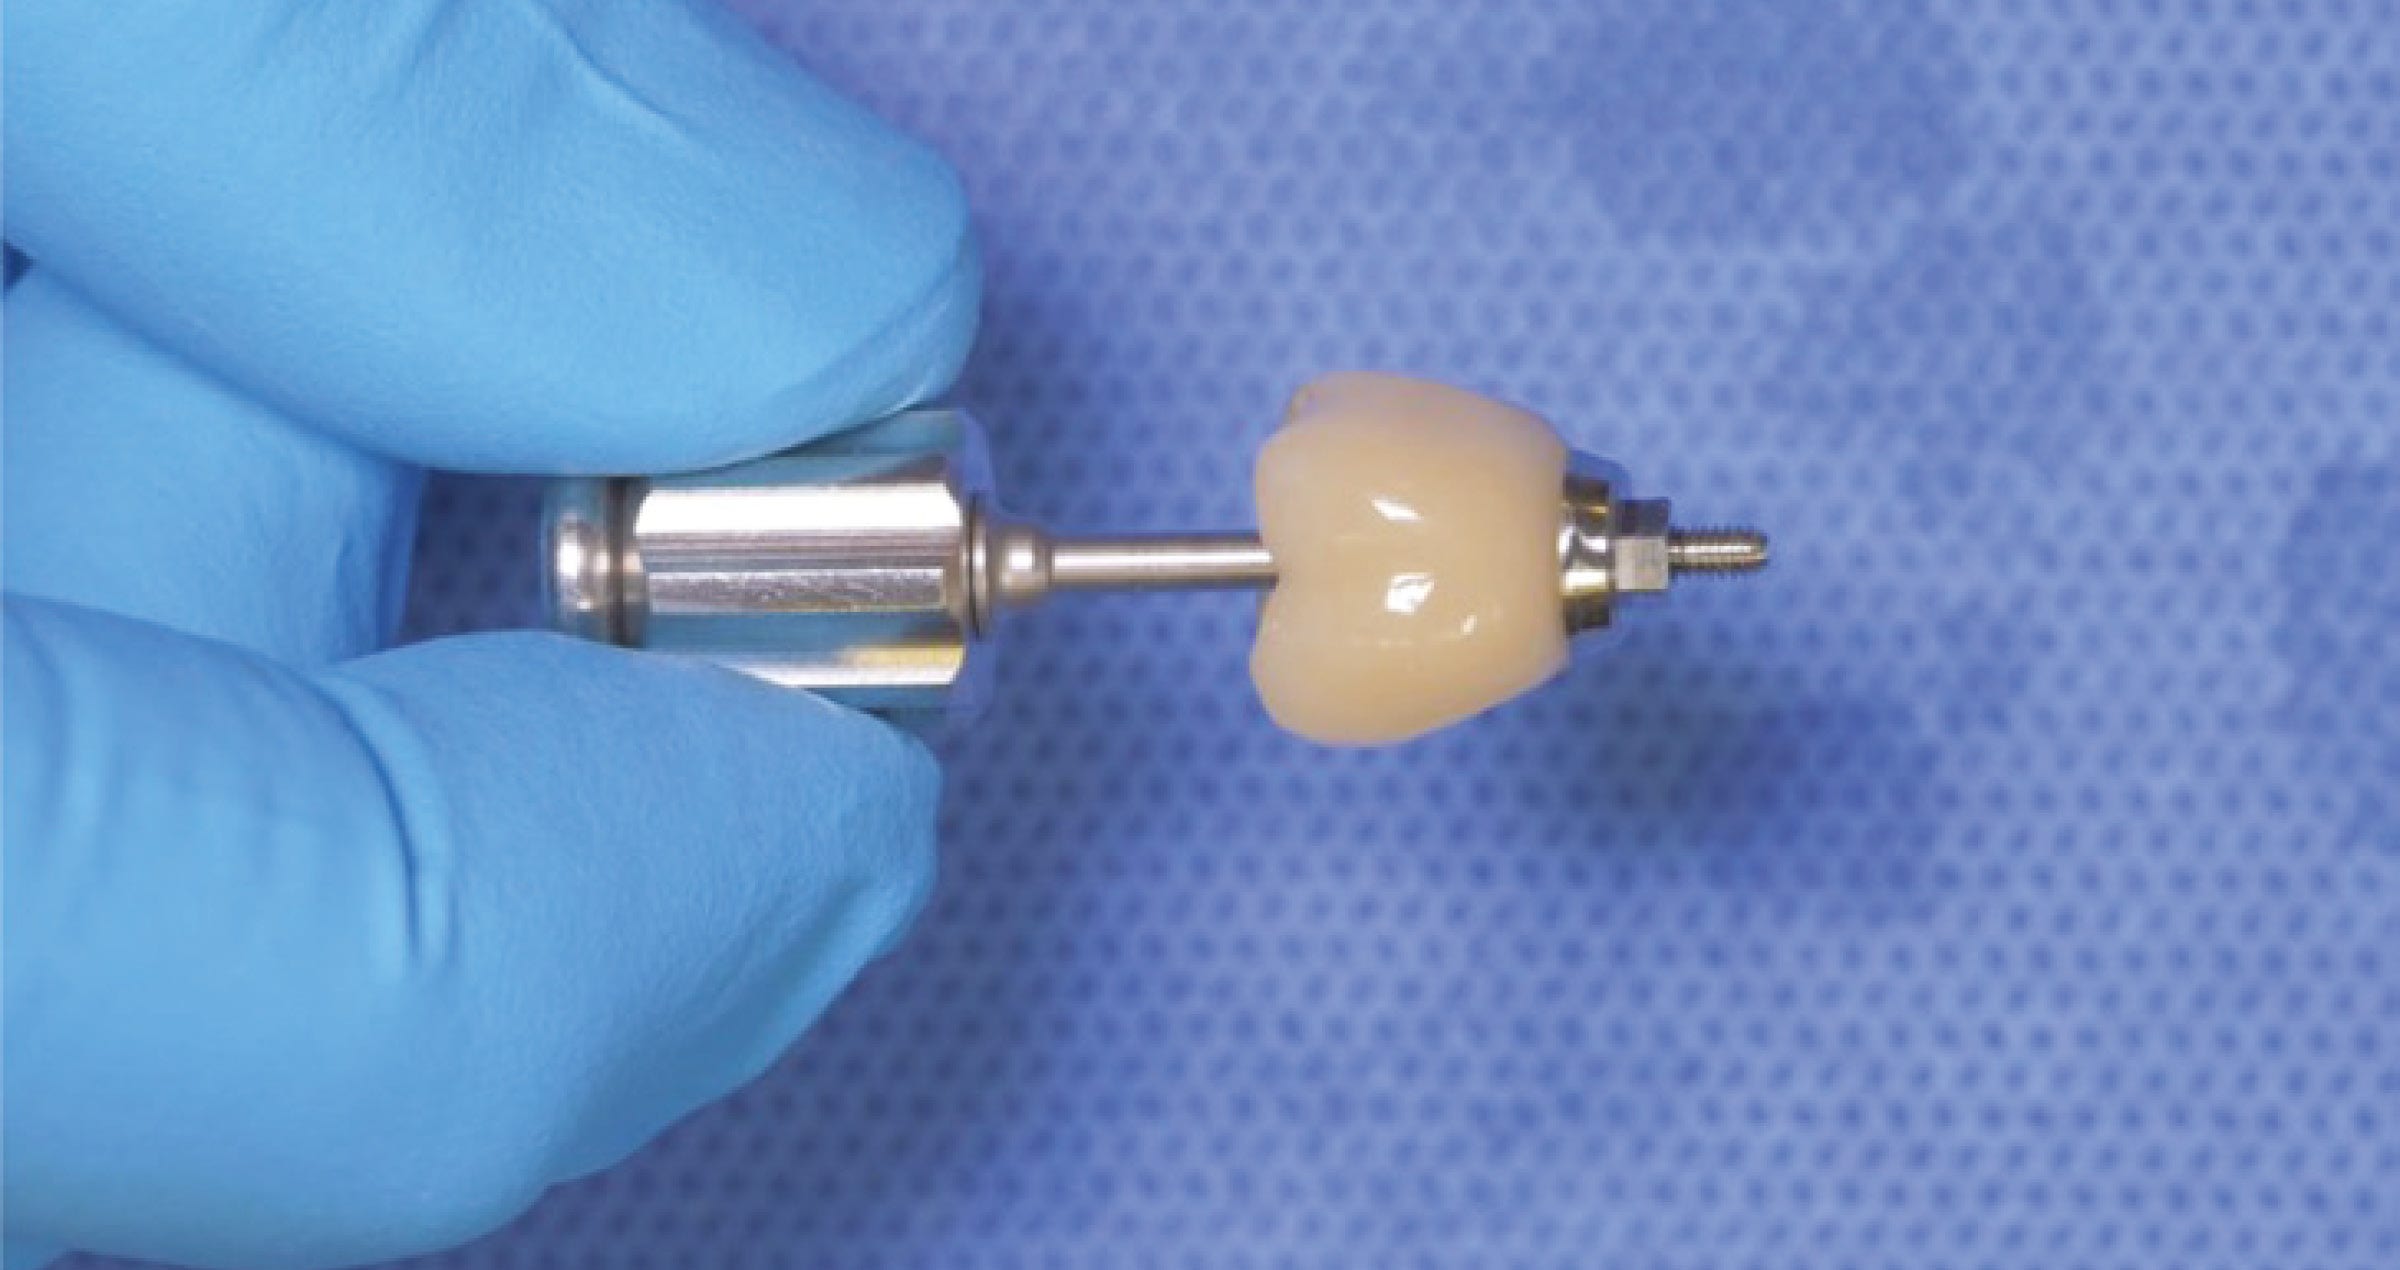
Fig. 3. Align index points & seat crown onto abutment.


Fig. 4. Place crown & implant into clamps & lightly tighten.


Fig. 5. Tack-Cure Clean-Up: Light-Cure excess cement for 2-5 seconds (time depends on light output & distance held).


Fig. 6. Remove excess cement & block-out resin with an explorer. PANAVIA™ SA Cement Universal has extremely easy clean-up.


Fig. 7. Wipe off remaining resin with gauze.


Fig. 8. Remove index mark with alcohol & gauze.


Fig. 9. Clean & polish restoration prior to seating. Surfaces coming in contact with soft-tissue should be polished.

Monolithic multilayer zirconia crowns in the esthetic zone

Case report by Dr. Wissam Dirawi, DDS


During the last decade, zirconia has increasingly established itself as the material of choice in oral prosthodontic rehabilitation. Its great mechanical and inert properties are the main reason for this trend. Since the introduction of multi-layered zirconia blanks more than ten years ago, the optical properties have been improved dramatically. The multi-layered zirconia used nowadays (e.g. KATANA™ Zirconia YML from Kuraray Noritake Dental Inc.) offers well-balanced mechanical properties, translucency and colour. It allows dental technicians from all over the world to produce aesthetic full-contour restorations that are merely stained.


Even in the anterior region, stained monolithic restorations may be an option. Factors such as the age of the patient, the internal colour structure of the adjacent dentition, the number of teeth to be restored (one versus all four or six maxillary anterior teeth), the aesthetic demands of the patient and financial aspects should be taken into account in the material selection process. In the case described below, full-contour zirconia was selected for several reasons.


BACKGROUND

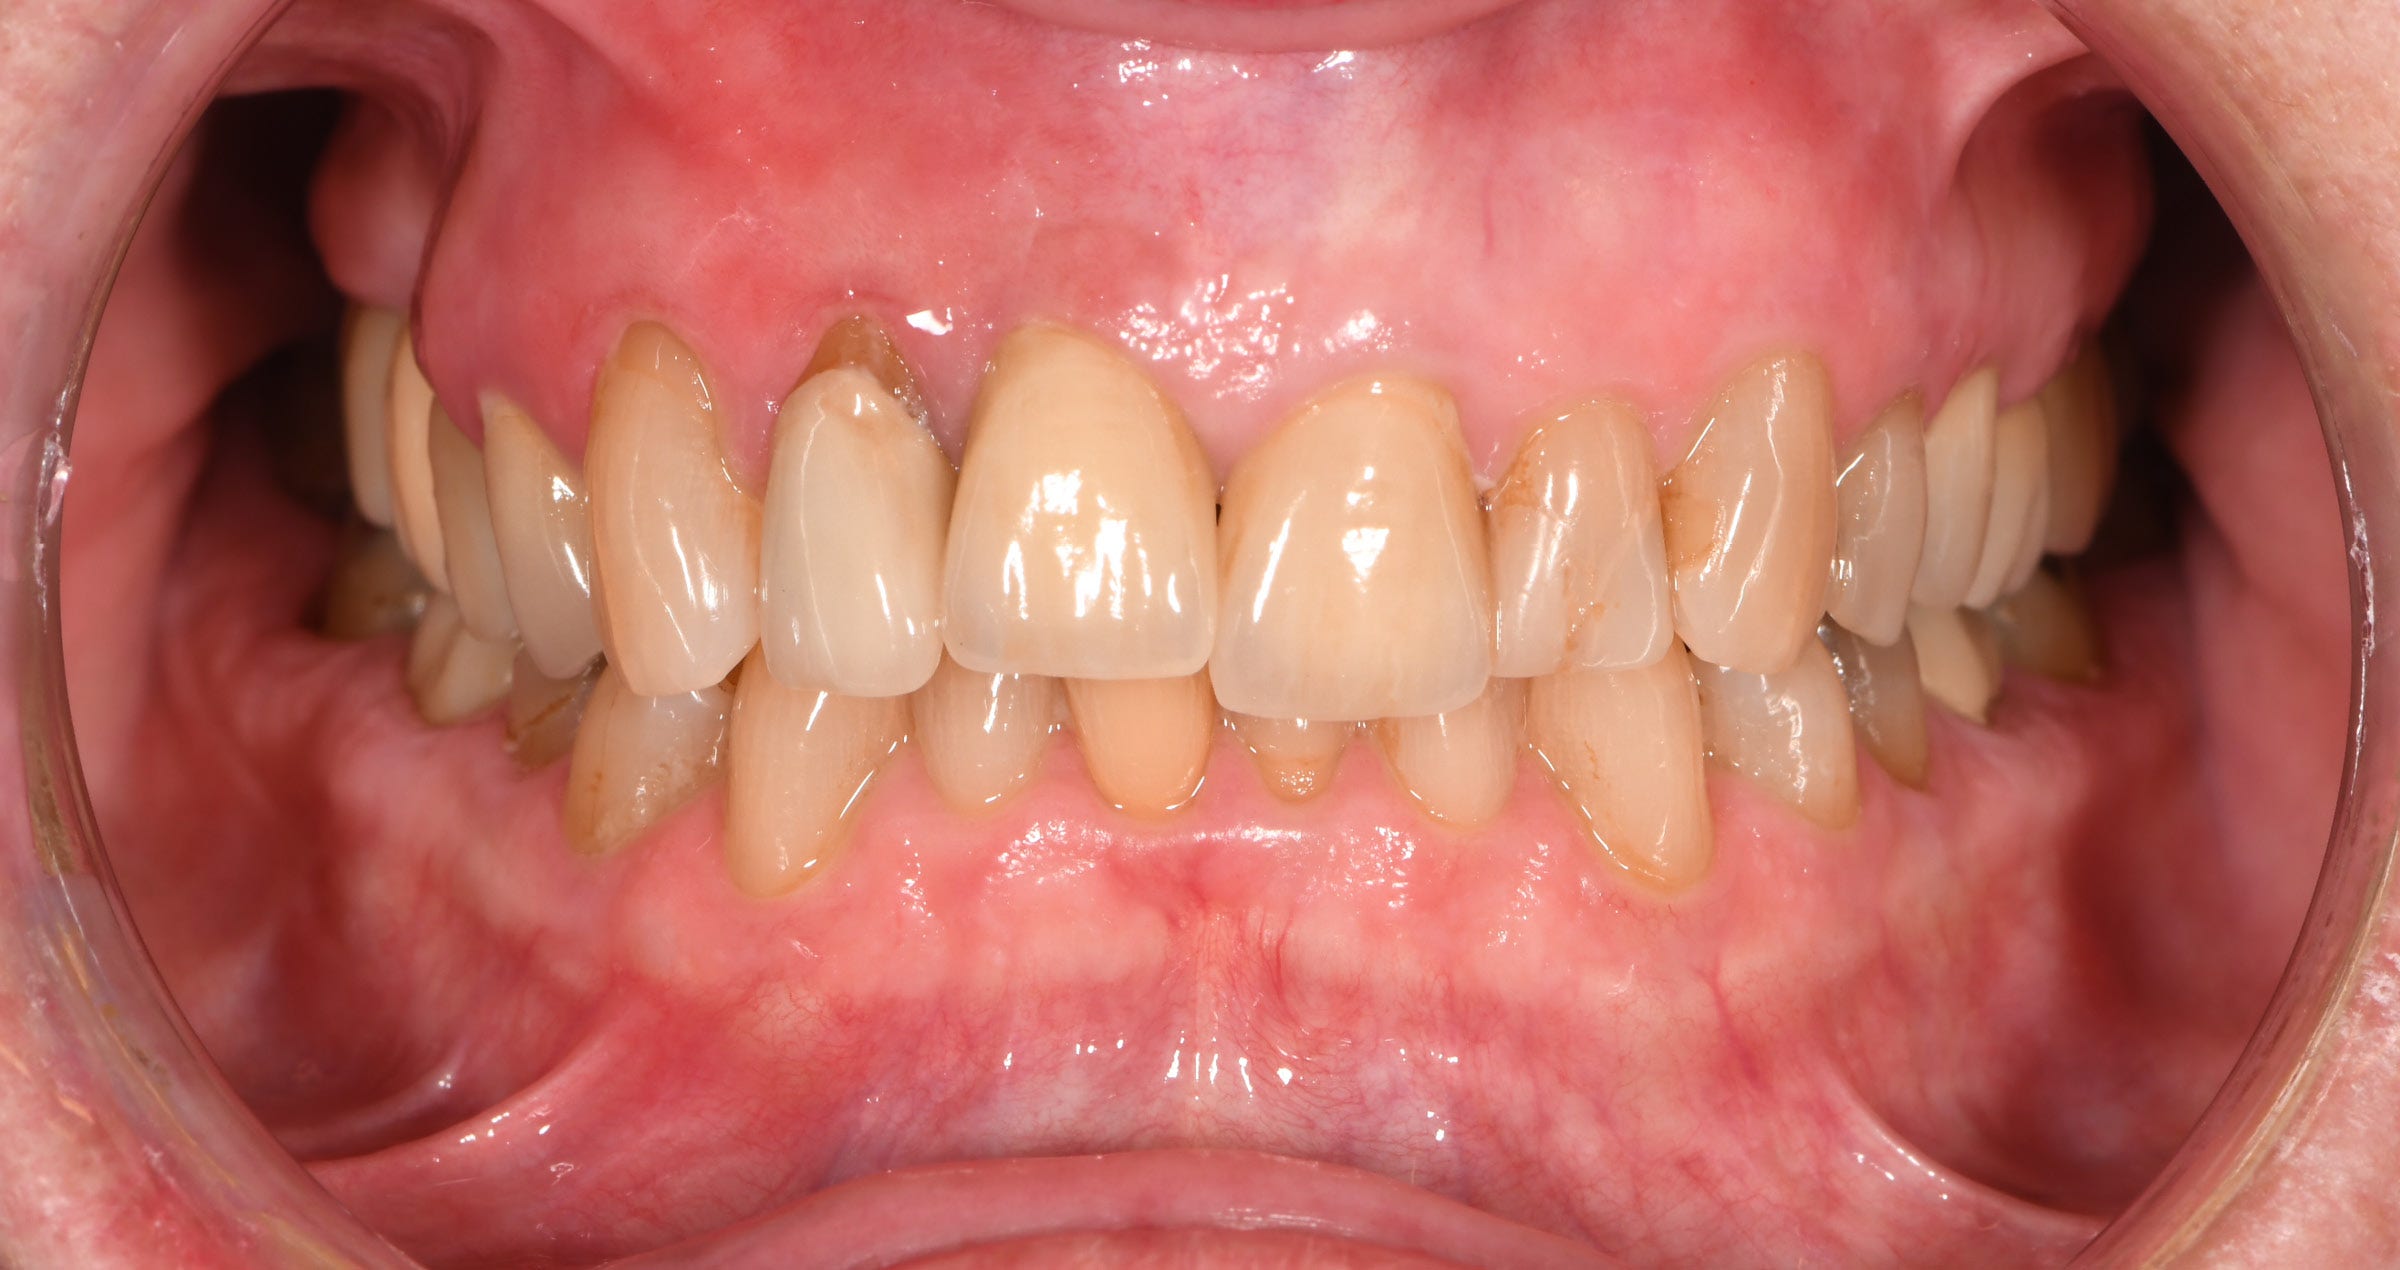
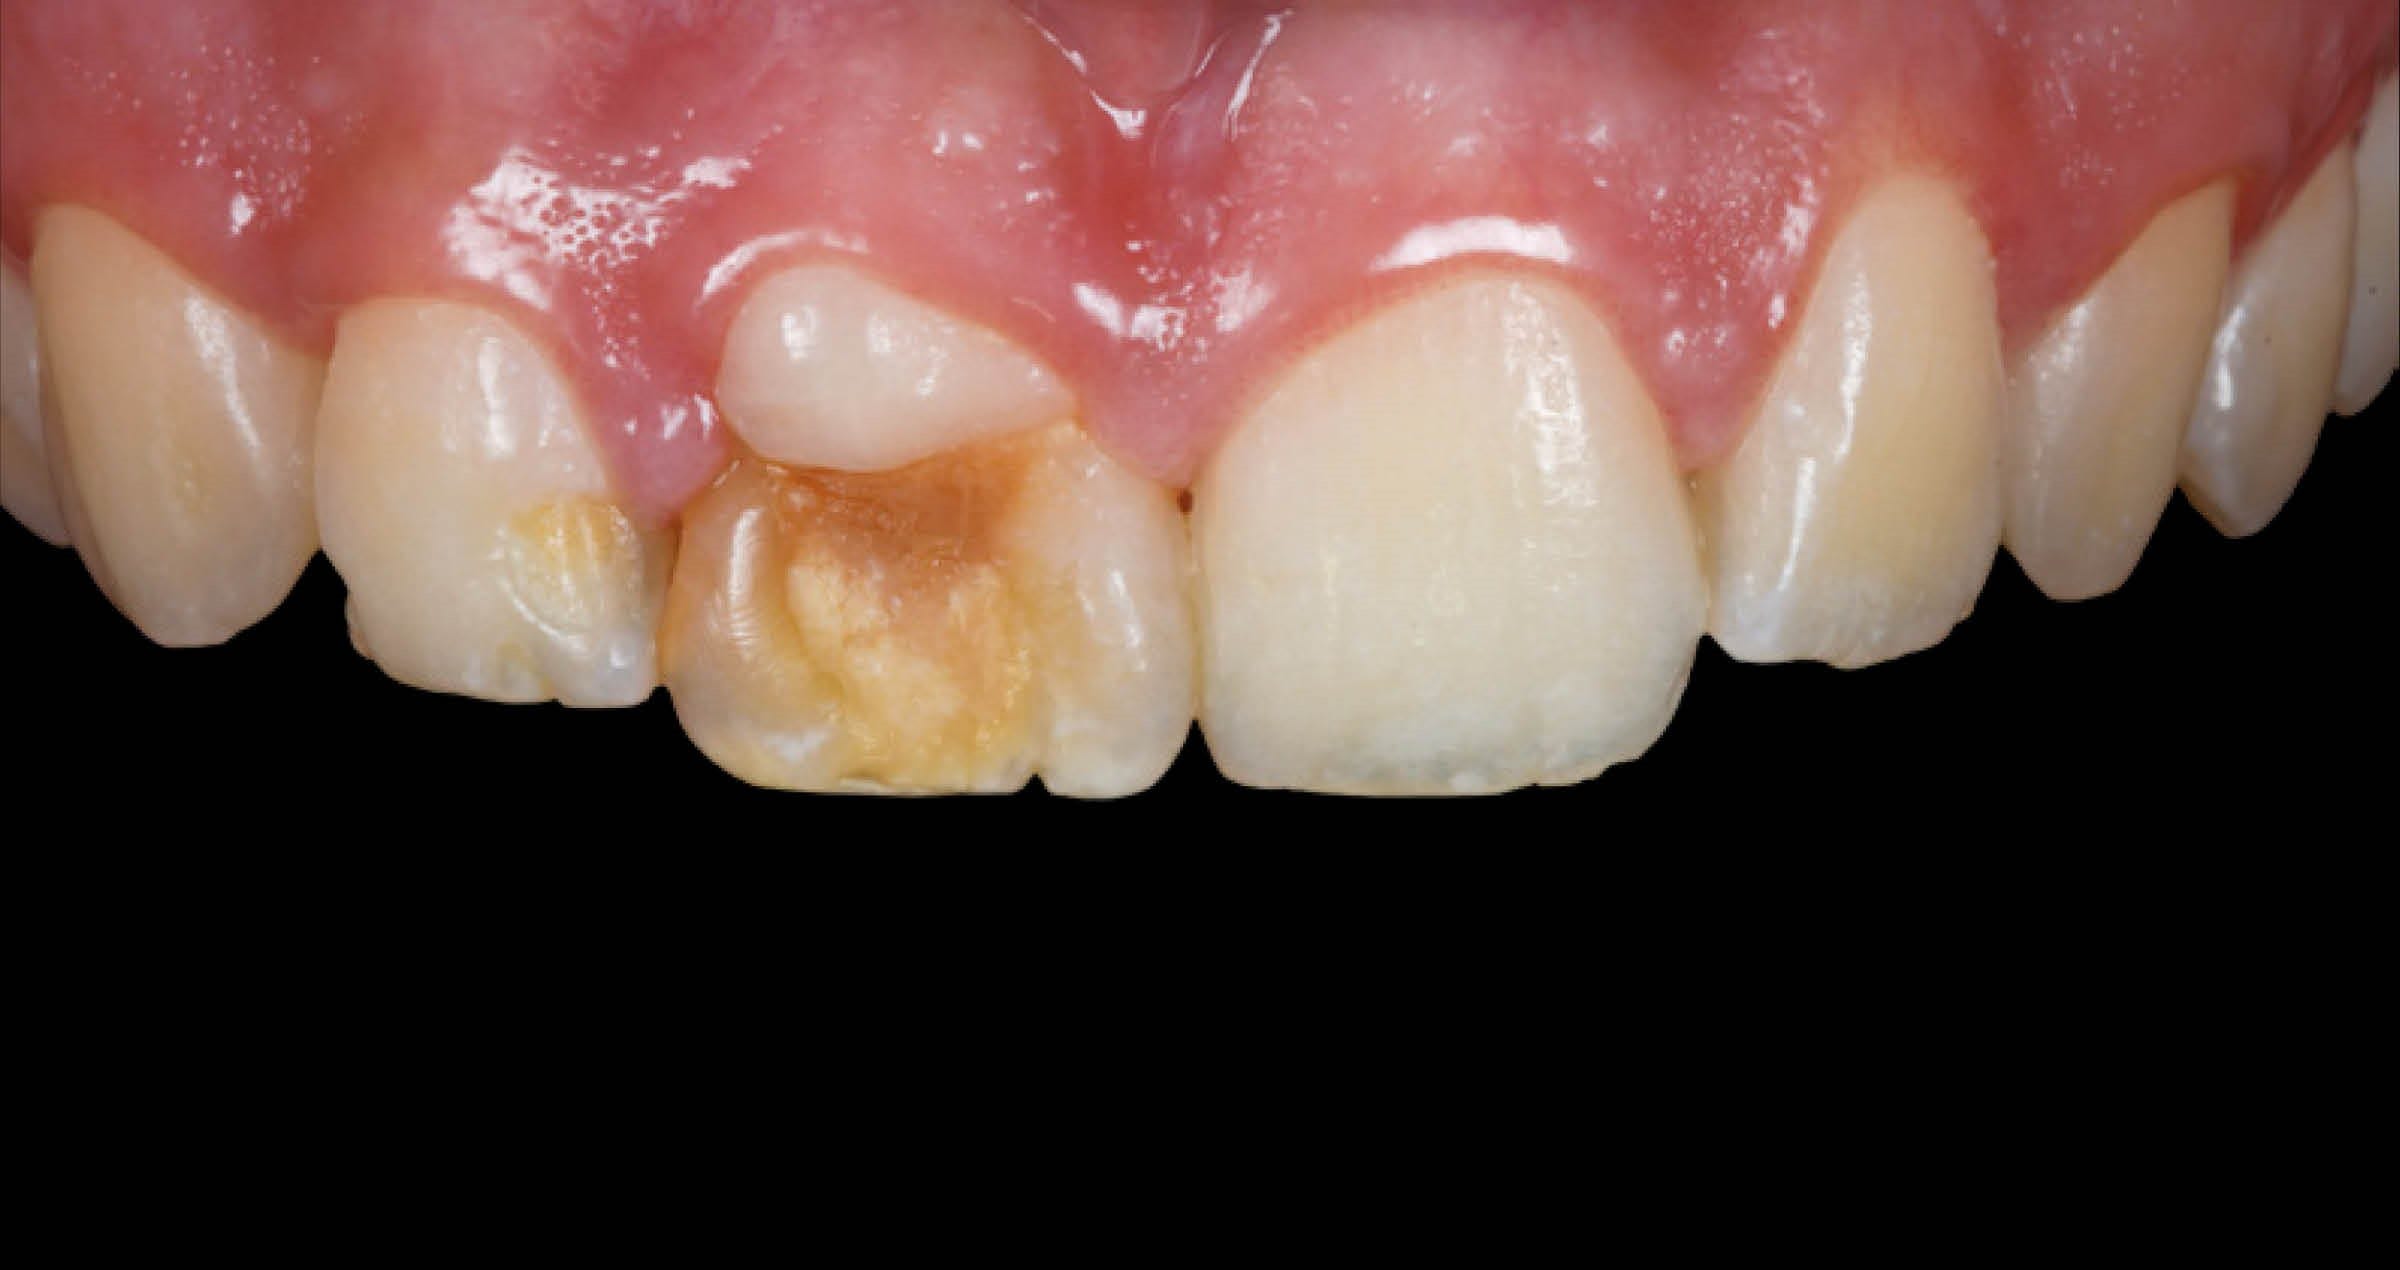
The 71-year-old female presented in the clinical due to aesthetic problems in the maxillary anterior region. Oral hygiene was good and the patient was a non-smoker. Infraposition of the existing implant-based crown (Nobel Biocare Brånemark RP fixture) in the position of the right central incisor (tooth #11 according to the FDI notation) was evident. Moreover, gingival retraction was observed on the maxillary right lateral incisor (tooth #12), while the left lateral incisor (tooth #22) has a major composite filling with discolouration. The patient expressed the desire to adjust the gingival level differences and to restore the four maxillary incisors with all-ceramic crowns for optimal aesthetics.


Fig. 1. Initial situation: Frontal view.


Fig. 2. Initial situation: Facial view.


Fig. 3. Initial situation: Occlusal view of the maxilla.


Fig. 4. Initial situation: Occlusal view of the mandible.


MATERIAL SELECTION

Due to the decision to restore all four anterior incisors, monolithic zirconia was a suitable material option. It would allow the team to obtain the desired results within the financial framework. In order to meet the aesthetic demands of the patient, provide for the required mechanical properties and allow for proper masking of the underlying structures, KATANA™ Zirconia YML was selected. It offers colour, translucency and flexural strength gradation throughout the multi-layered blank.


TREATMENT PROCEDURE: FROM PREP TO TEMPORIZATION

In order to design the indirect restorations, a digital impression was taken with an intraoral scanner and the data was transferred to the dental laboratory Teknodont in Malmoe, Sweden. There, a digital wax-up was created. After patient approval, a matrix was produced and sent to the clinic. Here, the old restorations were removed and the three maxillary incisors (all but the one replaced by an implant) prepared for full coverage restorations. A healing abutment was placed on the implant and a temporary bridge produced chairside using the matrix and Protemp 4 Temporization Material (3M) in the shade A3. Subsequently, a gingivectomy was carried out with a ceramic burr (Ceratip, Kt.314.016 – KOMET) in the buccal aspect of the left central and lateral incisor.


Fig. 5. Chairside-produced temporary in the patient’s mouth.


After the patient’s approval of the aesthetics, phonetics and function of the temporary restoration, the situation was captured with an intraoral scanner again. This allowed the team to duplicate the shape of the construction. Based on the acquired data, a new set of splinted temporary crowns made of PMMA (HUGE Multilayer PMMA) in the shade A3 was milled in laboratory. They were placed to allow the patient to further evaluate the aesthetic appearance and function for a couple of weeks. The patient was happy with the phonetics, function and appearance of the crowns, which were merely slightly too bright in comparison to the adjacent teeth, and approved the shape for the production of the permanent restorations.


Fig. 6. Printed model …


Fig. 7. … with splinted PMMA crowns.


Fig. 8. Lab-made temporary restorations.


Fig. 9. Long-term temporary in place: Lateral view from the right.


Fig. 10. Long-term temporary in place: Frontal view.


Fig. 11. Long-term temporary in place: Lateral view from the left.


FINAL RESTORATIONS: PRODUCTION AND CEMENTATION

Based on the dataset of the temporary restorations, four separate crowns – one implant and three tooth-based – were designed in full contour. Without any anatomical reduction, the restorations were milled from KATANA™ Zirconia YML. Based on the evaluation of the temporary restoration, the shade selected this time was A3.5. CERABIEN™ ZR FC Paste Stain was used for external staining and glazing of the surface. Still in the laboratory, the implant-based crown was cemented to the gold-shaded titanium abutment (Elos Medtech) with PANAVIA™ V5 (Kuraray Noritake Dental Inc.) in the shade opaque for an improved masking effect.


While the abutment crown was screwed onto the implant and the screw hole closed with composite, the three tooth-based crowns were placed using PANAVIA™ SA Cement Universal (Kuraray Noritake Dental Inc.).


Fig. 12. Final restorations on the model.


Fig. 13. Intraoral situation prior to restoration placement.


CONCLUSION

Multilayered zirconia is a suitable material for many clinical situations. Due to the availability of modern types of highly translucent, multi-layered blanks, it is possible to produce aesthetic outcomes even when using the material monolithically – not only in the posterior region, but also in the aesthetic zone in some indications. The present case shows that very good results and patient satisfaction can be obtained. And due to outstanding mechanical properties, these outcomes may be expected to last for a long time.


Fig. 14. Immediate treatment outcome: Facial view.


Fig. 15. Immediate treatment outcome: Frontal view.


Fig. 16. Immediate treatment outcome: Occlusal view.


References

- Alfadhli R, Alshammari Y, Baig MR, Omar R. Clinical outcomes of single crown and 3-unit bi-layered zirconia-based fixed dental prostheses: An up to 6- year retrospective clinical study: Clinical outcomes of zirconia FDPs. J Dent. 2022 Dec;127:104321.
- Le M, Papia E, Larsson C. The clinical success of tooth- and implant-supported zirconia-based fixed dental prostheses. A systematic review. J Oral Rehabil. 2015 Jun;42(6):467-80.
- Alammar A, Blatz MB. The resin bond to high-translucent zirconia-A systematic review. J Esthet Restor Dent. 2022 Jan;34(1):117-135.
- Sadowsky SJ. Has zirconia made a material difference in implant prosthodontics? A review. Dent Mat 2020; 36: 1–8.
- Mazza LC, Lemos CAA, Pesqueira AA, Pellizzer EP. Survival and complications of monolithic ceramic for tooth-supported fixed dental prostheses: A systematic review and meta-analysis. J Prosthet Dent 2022; 128: 566–74.
- Passia N, Mitsias M, Lehmann F, Kern M. Bond strength of a new generation of universal bonding systems to zirconia ceramic. J Mech Behav Biomed Mater. 2016; 62:268–274.
- Sailer I, Makarov NA, Thoma DS, Zwahlen M, Pjetursson BE. All-ceramic or metal-ceramic tooth- supported fixed dental prostheses (FDPs)? A systematic review of the survival and complication rates. Part I: Single crowns (SCs). Dent Mater 2015; 31:603-623.
- Pjetursson BE, Sailer I, Makarov NA, Zwahlen M, Thoma DS. All-ceramic or metal-ceramic tooth- supported fixed dental prostheses (FDPs)? A systematic review of the survival and complication rates. Part II: Multiple-unit FDPs. Dent Mater 2015; 31:624–639.


 

A new smile with only 4 zirconia crowns

Case by Kosti Vyshamirski


A male patient (47 years of age) presented to his dentist with severe damage to his teeth. His main request was to increase aesthetics, to achieve a more pleasing envisaged aesthetic area. A side request was to achieve a ‘whitening but natural look’. This was achieved by using a lighter colour palette of zirconia and porcelain materials.


The final result was achieved through the creation of a wax-up, followed by a mock-up, provisional restoration and finally adhesive bonding of the zirconia crowns.


INITIAL SITUATION


Fig. 1. Initial situation. Male patient (47 years of age).


Fig. 2. Planning the new smile according to patient’s aesthetic and functional parameters.


Fig. 3. Mock-up in place to check the new look in the patient’s mouth.


Fig. 4. KATANA™ Zirconia YML shade A1 crowns with labial cutback after milling.


Fig. 5. Crowns after sintering on the plaster model.


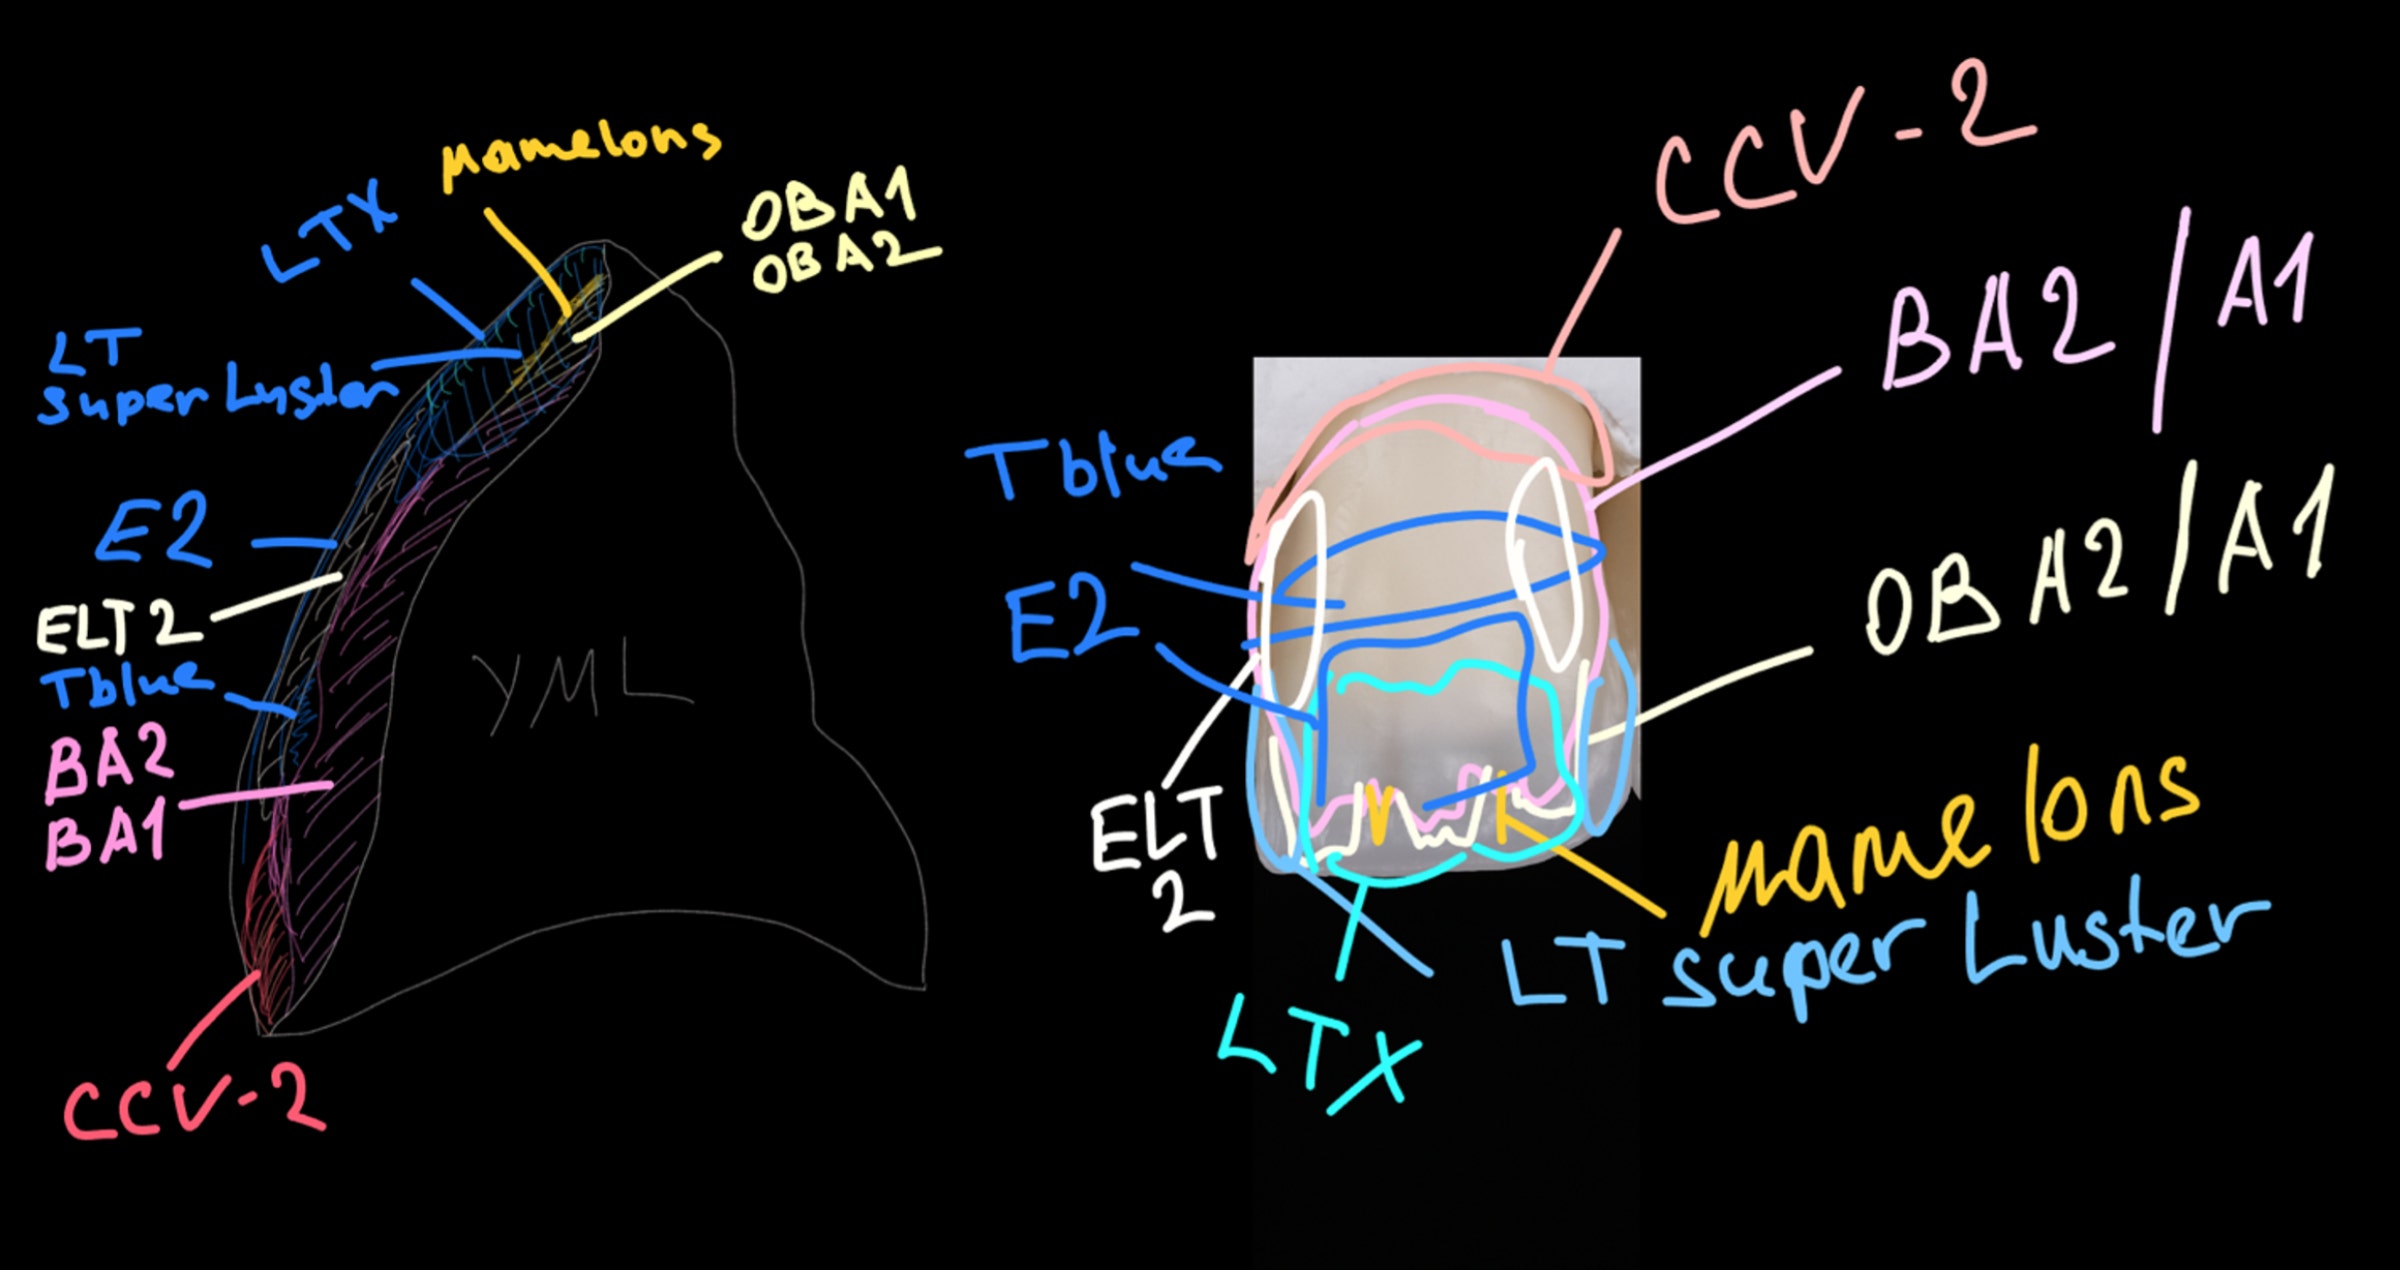
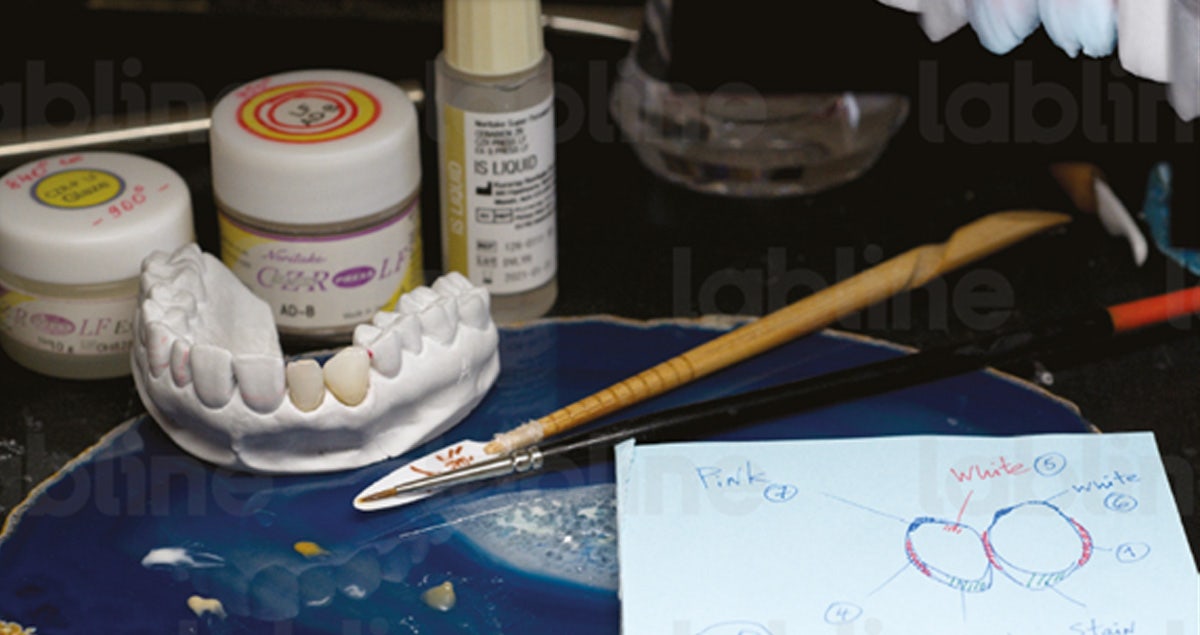
Fig. 6. Noritake CERABIEN™ ZR porcelain layering map.


Fig. 7. Finishing the labial surface using both polishing and selfglaze. On the palatal side of the crowns only CERABIEN™ FC Paste Stain stains and glaze were used for finishing. To aid in optimisation of the soft tissue condition the palato-cervical and near proximal areas were polished.


Fig. 8. Finished crowns on the plaster model.


Fig. 9. Try-in using PANAVIA™ V5 White try-in paste, to confirm the proper appearance. For the final adhesive cementation PANAVIA™ V5 White has been used.


FINAL SITUATION


Fig. 10. Situation after seven months. The result is aesthetically pleasing and the gingival condition excellent.


Fig. 11. Recall after 1.5 years.


Aesthetic case

LabLine magazine is an English language publication catering to the field of lab-side dentistry. It provides comprehensive coverage of the latest techniques and trends in dental laboratory technology and materials, showcasing them via sophisticated, challenging and aesthetic clinical cases done by some of the most known experts in Europe. With its expertly curated content, LabLine serves as an invaluable resource for dental professionals seeking to enhance their knowledge and stay at the forefront of the industry.


In the SPRING edition of LabLine you can find a wonderful AESTHETIC CASE by Mikel Villar Gonzales and DT Pilar Ballesteros Galan. The patient, a 21-year-old female had a hypoplasia defect on her permanent teeth, 1.1 and 1.2., presumably due to trauma on her deciduous anterior teeth. Click the image below and check out how the case was done!


This aesthetic case

Case by Dr. David Garcia Baeza and DT. Pilar Ballesteros Galan


Shade determination in the planning phase, shade evaluation at try-in: How is it possible to accomplish these highly important tasks in the production of lifelike anterior restorations without meeting the patient in person? A computer-based shade documentation and try-in system is a great solution. Download this clinical case example describing the aesthetic restoration of two maxillary anterior teeth to learn more about one such system and its use!


Laminate veneer restoration using KATANA™ Zirconia STML prostheses

Case by Dr. Yohei Sato, DMD, PhD, Department of Removable Prosthodontics, Tsurumi University School of Dental Medicine, JAPAN and Dr. Keisuke Ihara, CDT, i-Dental Lab, JAPAN


Fig. 1. The patient was referred to our hospital by an orthodontist. The chief complaints were improper esthetics of the teeth due to black triangles at the edges of the gaps between the teeth and occlusal wear of the teeth.


Fig. 2. On the basis of the pre-treatment diagnosis using a mockup, the abutments were prepared without anesthesia, keeping in mind that the enamel should be preserved to the extent possible.

Fig. 3. Since a fixation retainer was installed on the palate side, it was difficult to take impressions using silicone. Therefore, an intraoral scanner for impression taking was used.


Fig. 4. A layer of porcelain on each of KATANA™ Zirconia STML substrates was applied to complete the laminate veneer resto-rations. The inner surface of each restoration was sandblasted, being careful to prevent chipping.


Fig. 5. After trial fitting, bonding inhibiting substances as blood and saliva were removed using KATANA™ Cleaner.


Fig. 6. Milling. CLEARFIL™ CERAMIC PRIMER PLUS, which contains the phosphoric ester monomer MDP, was applied and dried using compressed air.


Fig. 7. The surface of each tooth was cleaned and treated with K-ETCHANT Syringe for 10 seconds before washing it away with water and compressed air-dried the area.


Fig. 8. PANAVIA™ V5 Tooth Primer was applied and left it for 20 seconds, then compressed air-dried it.


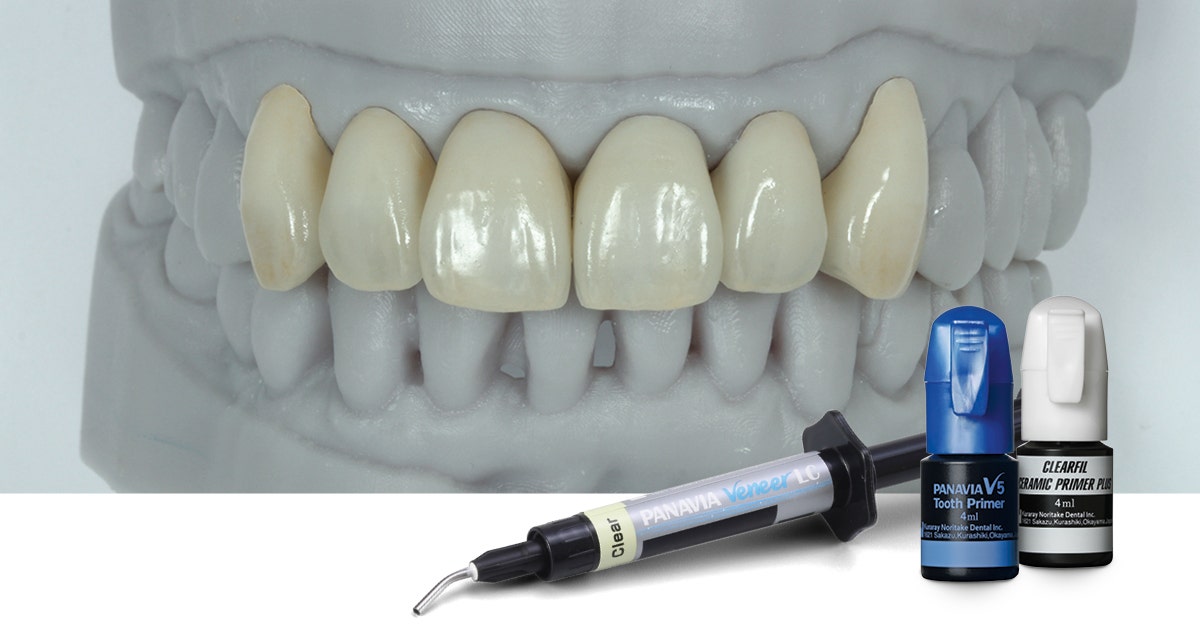
Fig. 9. PANAVIA™ Veneer LC Paste was applied and the laminate veneer was seated. For this case, we treated six teeth during one session.


Fig. 10. The unpolymerized excess paste was removed with a brush. PANAVIA™ Veneer LC Paste is a light-cured type, which was designed to provide sufficient working time.


Fig. 11. This photo shows the results after the final light curing. Since the excess cement was easily removed, there were almost no cement residues.


FINAL SITUATION


Fig. 12. The photo shows the inside of the oral cavity one month after the fitting of the laminate veneer restorations. It can also be noted that the teeth’s marginal gingiva has been improved, thanks to the good fit of the laminate veneer restorations.


What did you miss this summer?

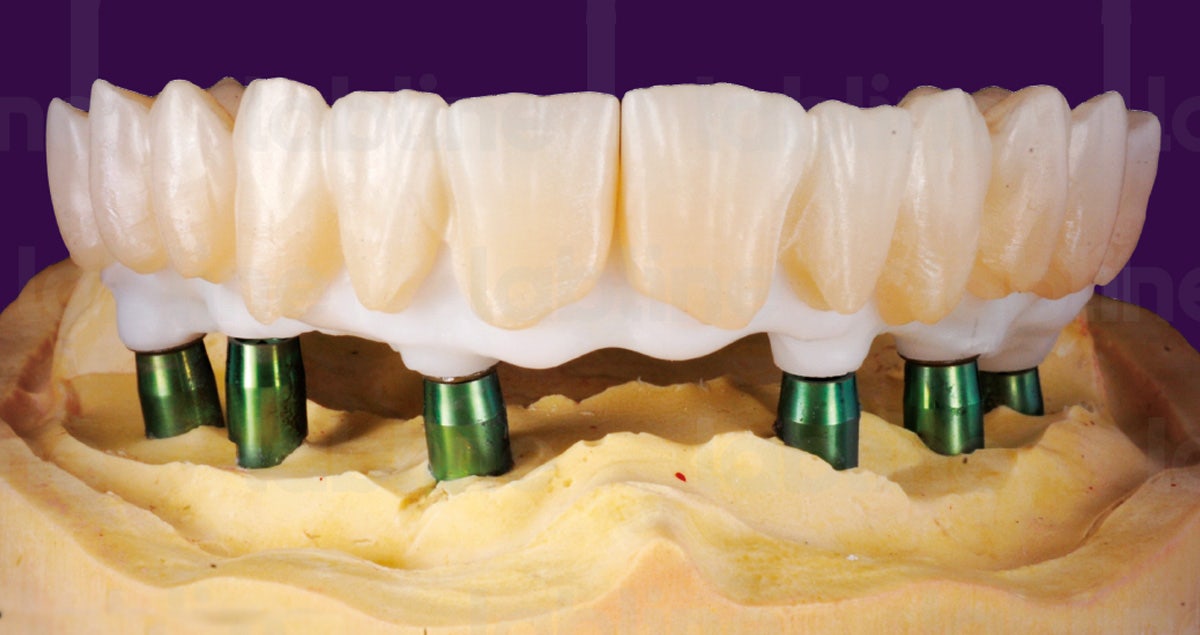
The vacation period is over and we all are slowly returning back to our everyday routines and work. With all the travel and holidays in the last months you might have missed this great article in the LabLine Summer edition: Graftless solutions and implant-supported monolithic zirconia fixed prostheses.


It is an extensive, beautiful and detailed case report created and documented by team of well known and respected KOLs: Fortunato Alfonsi, Antonio Barone, Marco Stoppaccioli, Romeggio Stefano and Vincenzo Marchio.


Check it out by clicking here.


Une nouvelle formule pour des restaurations monolithiques de longue portée esthétiques

Par le Dr Daniele Rondoni


D‘habitude, le potentiel esthétique d‘un matériau céramique dentaire – en particulier sa translucidité – peut uniquement être amélioré au détriment de la
résistance à la flexion. Le nouveau KATANA™ Zirconia YML de Kuraray Noritake Dental Inc. est différent. Avec sa grande résistance à la flexion de 1 100 MPa dans la moitié inférieure du disque et sa haute translucidité dans la partie supérieure et les zones incisales, il possède un potentiel esthétique élevé et un champ d‘indications illimité comme le montre l‘exemple de cas suivant.


Fig. 1. Bridges 4 unités et 6 unités KATANA™ Zirconia YML après usinage et frittage. Une texture naturelle de la surface vestibulaire joue un rôle décisif dans la création de restaurations monolithiques esthétiques.


Fig. 2. Les deux bridges sur modèle après stratification ultra-micro avec CERABIEN™ ZR FC Paste Stain (Kuraray Noritake Dental Inc.).


Fig. 3. Restaurations teintées et vitrifiées et leur translucidité lors de la transmission lumineuse.


SITUATION FINALE


Fig. 4. Vue buccale du bridge 6 unités cimenté dans la bouche du patient.


Fig. 5. Vue buccale du bridge 4 unités cimenté dans la bouche du patient.


Avec ce nouveau type de zircone multicouche, il est possible de produire des restaurations monolithiques esthétiques convenant même à une utilisation dans la zone antérieure. Malgré la gradation de résistance, la flexibilité de conception offerte est élevée, et la haute translucidité dans la zone incisale assure l‘aspect naturel après frittage. La stratification ultra-micro et la vitrification de la surface monolithique suffiront pour obtenir des résultats à la hauteur des attentes de
nos patients.


Daniele Rondoni | Master Dental Technician (maître-technicien dentaire)


Né en 1961 à Savone où il vit et a travaillé depuis 1982 dans son propre laboratoire avec ses collaborateurs. Diplômé de l'école de technique dentaire IPSIA « P. Gaslini » à Gênes en 1979. Il a poursuivi sa formation en participant à des ateliers pertinents de l'école dentaire italienne et a enrichi son expérience professionnelle en Suisse, en Allemagne et au Japon. Depuis 2011, il est formateur chez Kuraray Noritake Dental International.