Tagged with 'Kuraray Noritake'

Large cavity restoration with resin composite: which materials to choose?

Case by Vasiliki Tsertsidou


What kind of resin composite is recommended for core build-up procedures? While there are specific dual-cure core build-up resin composites available on the market, it is not mandatory to use them. Light curing is advisable to be applied even for materials with dual-cure polymerization. Some conventional resin composites demonstrate more favourable properties for a core build-up compared to specific core build-up resin composites itself.1 Hence, it is possible to utilize a composite generally used in the dental office, provided it is indicated to and it is not applied deep within the root canal, where proper light curing would be impossible. The critical material properties for core build-ups are high filler load, sufficient flexural modulus and flexural strength.


CLEARFIL MAJESTY™ ES-2 composite series (Kuraray Noritake Dental Inc.) are suitable option for this case. With a filler load weight percentage of 78 and a flexural strength of 118 MPa (according to manufacturer), CLEARFIL MAJESTY™ ES-2 Classic corresponds to core build-up prerequisites*. The following case is illustrating the clinical procedure.


*The indication range of CLEARFIL MAJESTY™ ES-2 composite does not cover core build-up. In the specific case it is used for creating a large Class II filling where all conditions from the IFU, such as curing depth, are met.


Fig. 1. Endodontically treated tooth with a vertical fracture of palatal wall on maxillary right second premolar.


Fig. 2. Buccal view of the tooth.


Fig. 3. Clinical image, directly after removal of fragment.


Fig. 4. Fragment of the maxillary right second premolar.


Fig. 5. Circumferential matrix band for build-up to assist endodontic retreatment.


Fig. 6. Build-up of the missing walls (margin relocation) with CLEARFIL MAJESTY™ ES-2 Classic (A3).


Fig. 7. Temporary filling of the cavity.


Fig. 8. Replacement of the temporary filling material with CLEARFIL MAJESTY™ ES-2 Classic.


Fig. 9. Crown preparation.


Fig. 10. Proximal carious lesion present on the adjacent fist premolar.


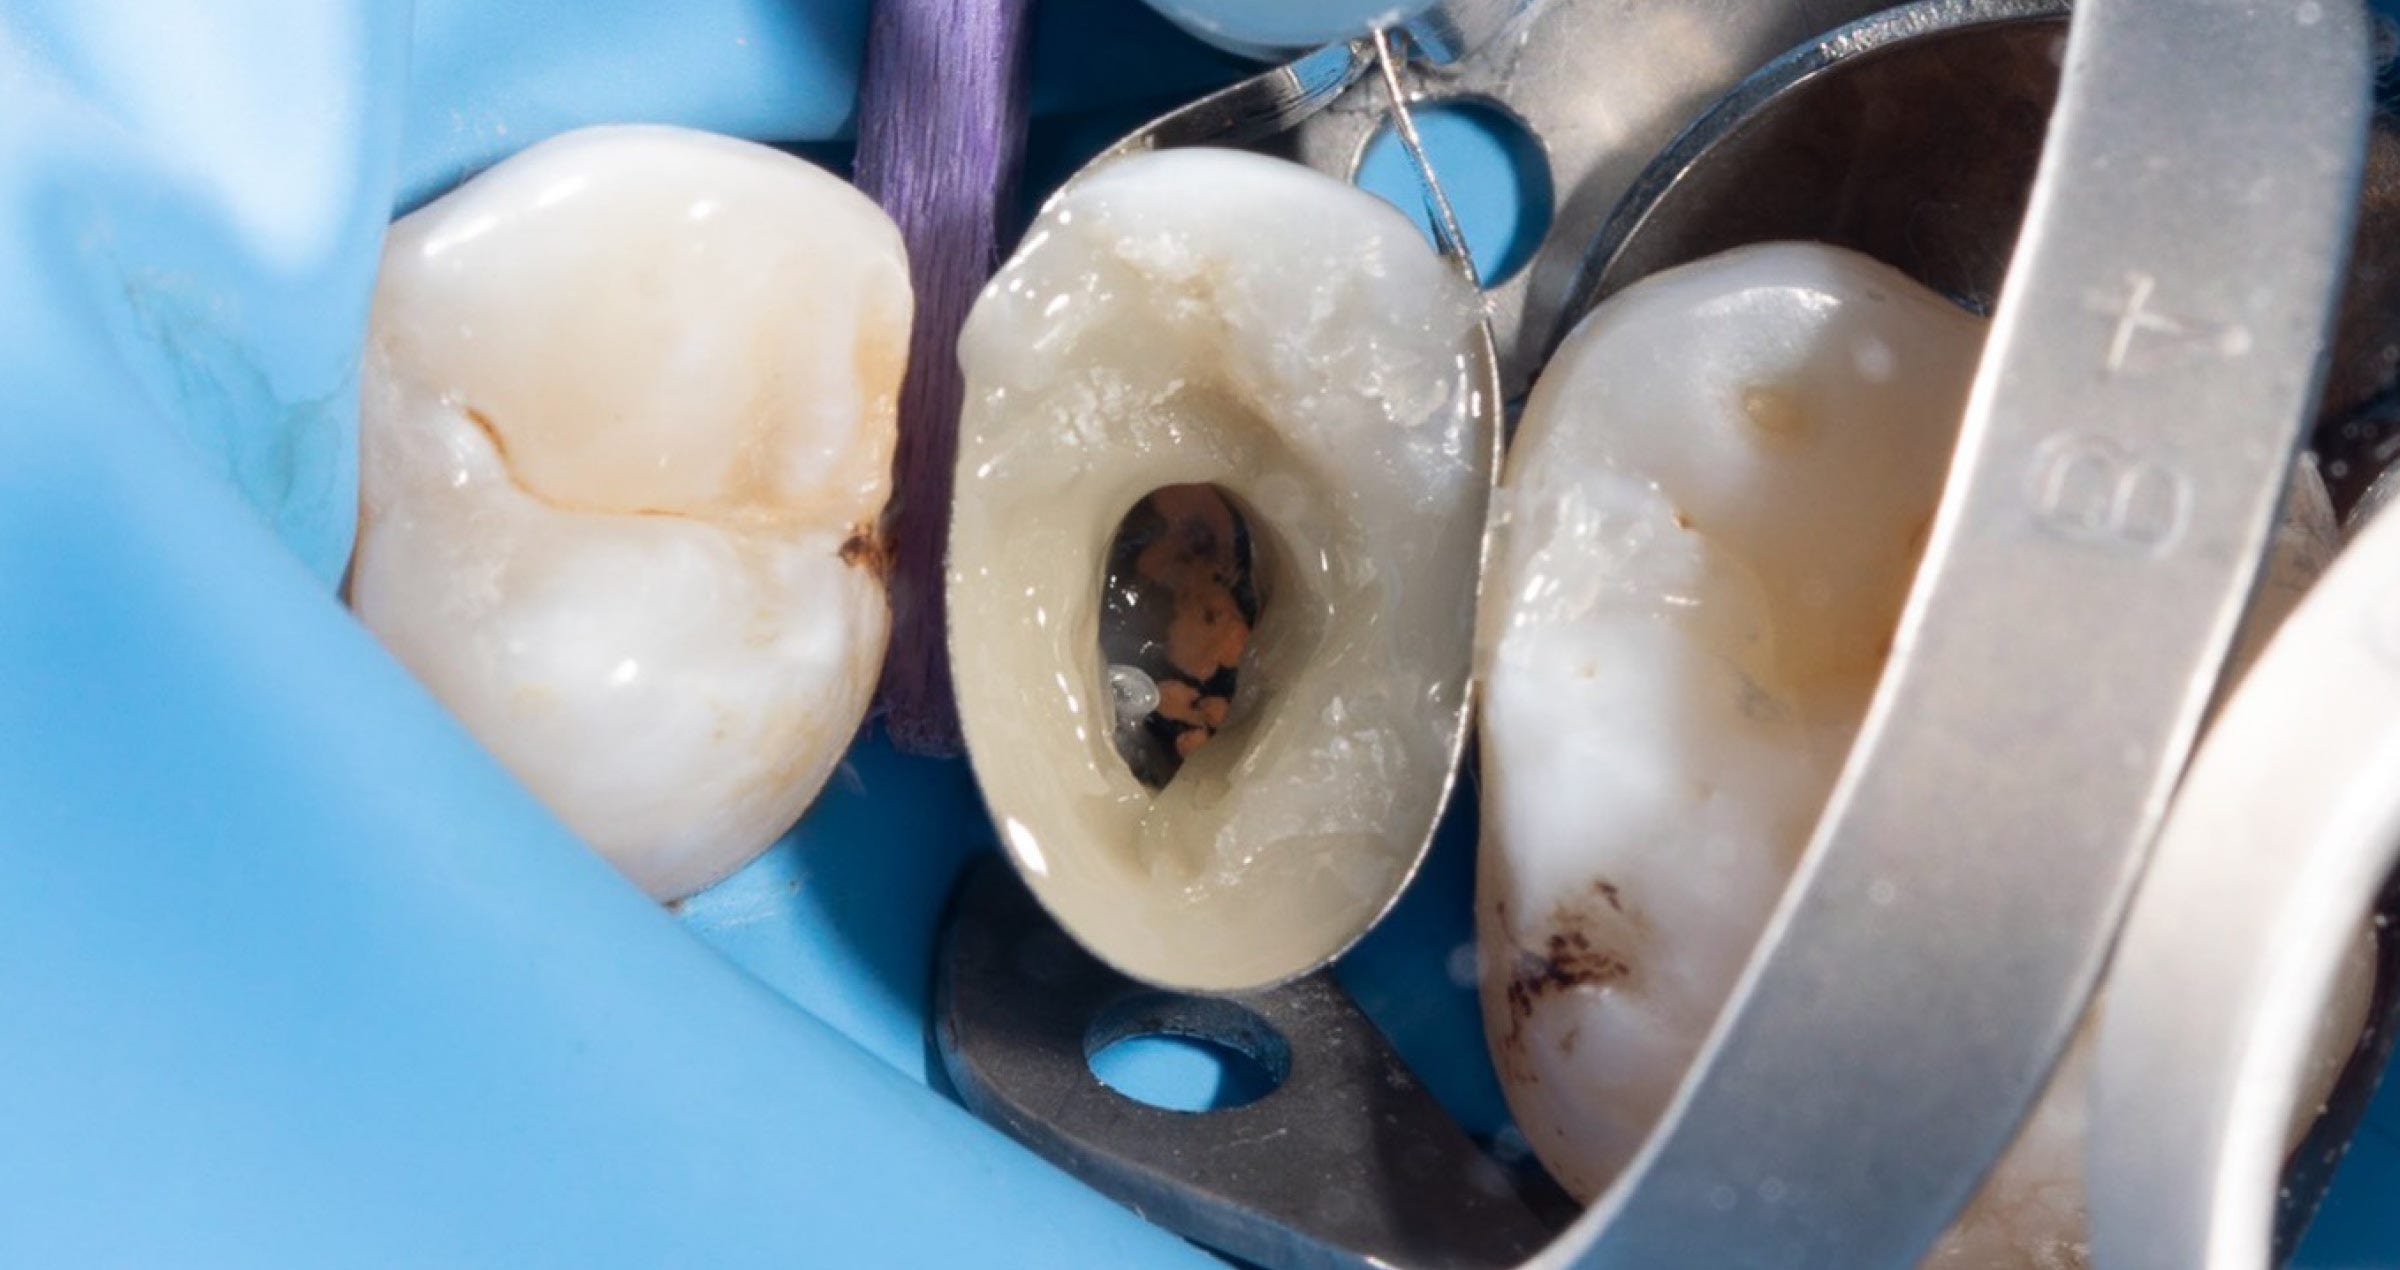
Fig. 11. Situation after rubber dam placement and caries removal.


Fig. 12. Cavity restored with CLEARFIL MAJESTY™ ES-2 Classic.


Fig. 13. Prepared crown.


Fig. 14. Crown after sandblasting of the intaglio.


Fig. 15. Mechanically cleaned abutment tooth ready for pre-treatment.


Fig. 16. Intaglio of the crown treated with CLEARFIL™ CERAMIC PRIMER PLUS.


Fig. 17. Etching of the composite surface with phosphoric acid gel.


Fig. 18. Air-drying of PANAVIA™ V5 Tooth Primer on the abutment tooth.


Fig. 19. Crown in place after cementation with PANAVIA™ V5 Paste and excess removal.


A GOOD CHOICE


Dual-cure core build-up resin composites are two-component materials that need to be mixed homogeneously, which obstracts composition from containing high filler load. However, to prevent deformation of the core, a highly filled composite is advisable. This better simulates the flexural modulus of natural tissues compared to materials with low filler load. Consequently, a light-curing material like CLEARFIL MAJESTY™ ES-2 might be a better option. Applied in 2-mm increments in the core area (and not in the root canal), it performs well and provides the desired outcomes. Additionaly, the option of utilising the same material as for any other type of direct restorations is simplifying the stock management and supporting dental practitioners striving for a simplification of clinical procedures.


References

1. Spinhayer L, Bui ATB, Leprince JG, Hardy CMF. Core build-up resin composites: an in-vitro comparative study. Biomater Investig Dent. 2020 Nov 3;7(1):159-166. doi: 10.1080/26415275.2020.1838283. PMID: 33210097; PMCID: PMC7646551.


Dentist:

VASILIKI TSERTSIDOU


Att optimera funktionella och estetiska faktorer vid fasadcementering

Av dr Clarence Tam, HBSC, DDS, AAACD, FIADFE


Att använda porslinsfasader för att förbättra och återställa form, färg och placering av anteriora tänder är en vanlig teknik inom estetisk tandvård. Biomimetiska ersättningar handlar inte bara om kosmetik utan också om funktion. Det är viktigt att komma ihåg att det intakta emaljskiktet palatinalt och facialt är avgörande för den anteriora tandens naturliga böjhållfasthet. När dental vävnad skadats av rotbehandling, karies och/eller trauma, måste man till varje pris anstränga sig för att bevara tandens kvarvarande strukturer och sträva efter att återställa tanden till dess ursprung.


BAKGRUND


En 55 år gammal kvinna med lindrig systemsjukdom (ASA II) sökte sig till kliniken för att få sina tänder blekta. Det var underförstått att blekningen inte skulle ha någon effekt på tand 12 som var försedd med en poslinsfasad. Den behövde behandlas igen, i synnerhet om färgförändningen efter blekningen blev betydande. Tändernas ursprungsfärg var VITA* 1M1:1M2; i en 50:50-blandning i överkäken och 1M1 i underkäken. Genom att bära blekskena med karbamidperoxid 10% nattetid under 3-4 veckor blektes tänderna i både över- och underkäke till VITA* 0M3. Det uppstod då en väsentlig valörskillnad mellan den fasadförsedda tanden 12 och omgivande tänder. På grund av en facial kompositfyllning (Klass III ) på kontralateralen 22 noterades en ökad kroma i den tanden. Den sistnämnda tanden matchade inte heller sin kontralateral i storlek och därför beslutades att behandla båda lateralerna med bondade fasader av litiumdisilikat. 23 uppvisade ett milt kuspslitade, men patienten ville inte göra något åt det förrän fasadterapin på 21 och 22 var färdig. Syftet med smile design i detta skede var att etablera bilateral harmoni med utsikten att i närtid ersätta den faciala volymen och kusptippen på 23 med en indirekt ersättning.


TILLVÄGAGÅNGSSÄTT


Ett protokoll för digital smile design var inte nödvändigt för den ursprungliga behandlingsplanen, som var att behandla de laterala incisiverna var för sig. En viss variation i utseendet hos dessa tänder kan tillåtas, då det kan vara en markör för både personlighet och kön. Innan bedövningen lades gjorde man en färgbestämning genom att använda både polariserade och icke-polariserade fotografier tagna med retraktor. För digital färgbestämning togs fotografierna med gråkort 18% (Fig 1).


Fig. 1. Referensfoto taget med gråkort 18%.


Basfärgen bestämdes till VITA* 0M2 med puckfärg BL2. Patienten bedövades med 1,5 kapsel 2%-ig lignocainelösning med 1:100,000 eperephine innan kofferdam applicerades. Fasaden på 12 sektionerades och avlägsnades och en minimalinvasiv fasadpereparation gjordes på tand 22 (Fig. 2). Den gamla kompositfyllningen lagades mesioincisiobuccopalatinalt. Adhesion till den gamla fyllningen åstadkoms genom att använda både blästring med mikropartiklar och silanisering (CLEARFIL™ CERAMIC PRIMER PLUS), Preparationsgränsen förfinades och retraktionstråd indränkt i klorlösning packades gingivalt. Stumpfärgen bestämdes. Därefter togs definitivavtryck med polyvinylsiloxan - både light och heavy body - i metallsked. Patienten skickades sedan iväg till laboratoriet för färgmatchning i ersättningarnas råbrända stadie. Modellerna som framställdes på laboratoriet bekräftar fallets minimalinvasiva natur.


Fig. 2. Fasadpreparationer 12 och 22.

I nästa steg av behandlingen - och enligt plan - bedövades patienten och provisorierna avlägsnades. Preparationerna rengjordes och förbereddes för bonding genom att ytorna blästrades med aluminiumoxidpulver - 27 micron och ett tryck på 30-40 psi. Fasaderna provades in med hjälp av en klar try-in glycerinpasta (PANAVIA™ V5 Tryin Paste Clear, Kuraray Noritake Dental Inc.). Retraktionstråd packades och innerytan på fasaderna behandlades med 5%-ig fluorvätesyra under 20 sekunder innan silanet, innehållande 10-MDP,(CLEARFIL™ CERAMIC PRIMER PLUS, (Fig. 3).applicerades. Tandytan etsades med 33%-ig fosforsyra under 20 sekunder och sköljdes därefter. En primer innehållande 10-MDP (PANAVIA™ V5 Tooth Primer (Fig. 4) applicerades därefter på tanden. Fasadcement (PANAVIA™ Veneer LC Paste Clear) (Fig. 5) applicerades på fasadens inneryta och fasaden sattes på plats. Cementöverskottet var fast och fint och höll fasaden på plats under det att alla kantanslutningar kontrollerades och därefter punkthärdades under 1 sekund (Fig.6).

Fig. 3. CLEARFIL™ CERAMIC PRIMER PLUS appliceras på fasadernas innerytor.


Fig. 4. PANAVIA™ V5 Tooth Primer appliceras på de etsade tandytorna och torkas enligt tillverkarens anvisningar.


Fig. 5. PANAVIA™ Veneer LC Paste Clear appliceras på fasadens förberedda inneryta.


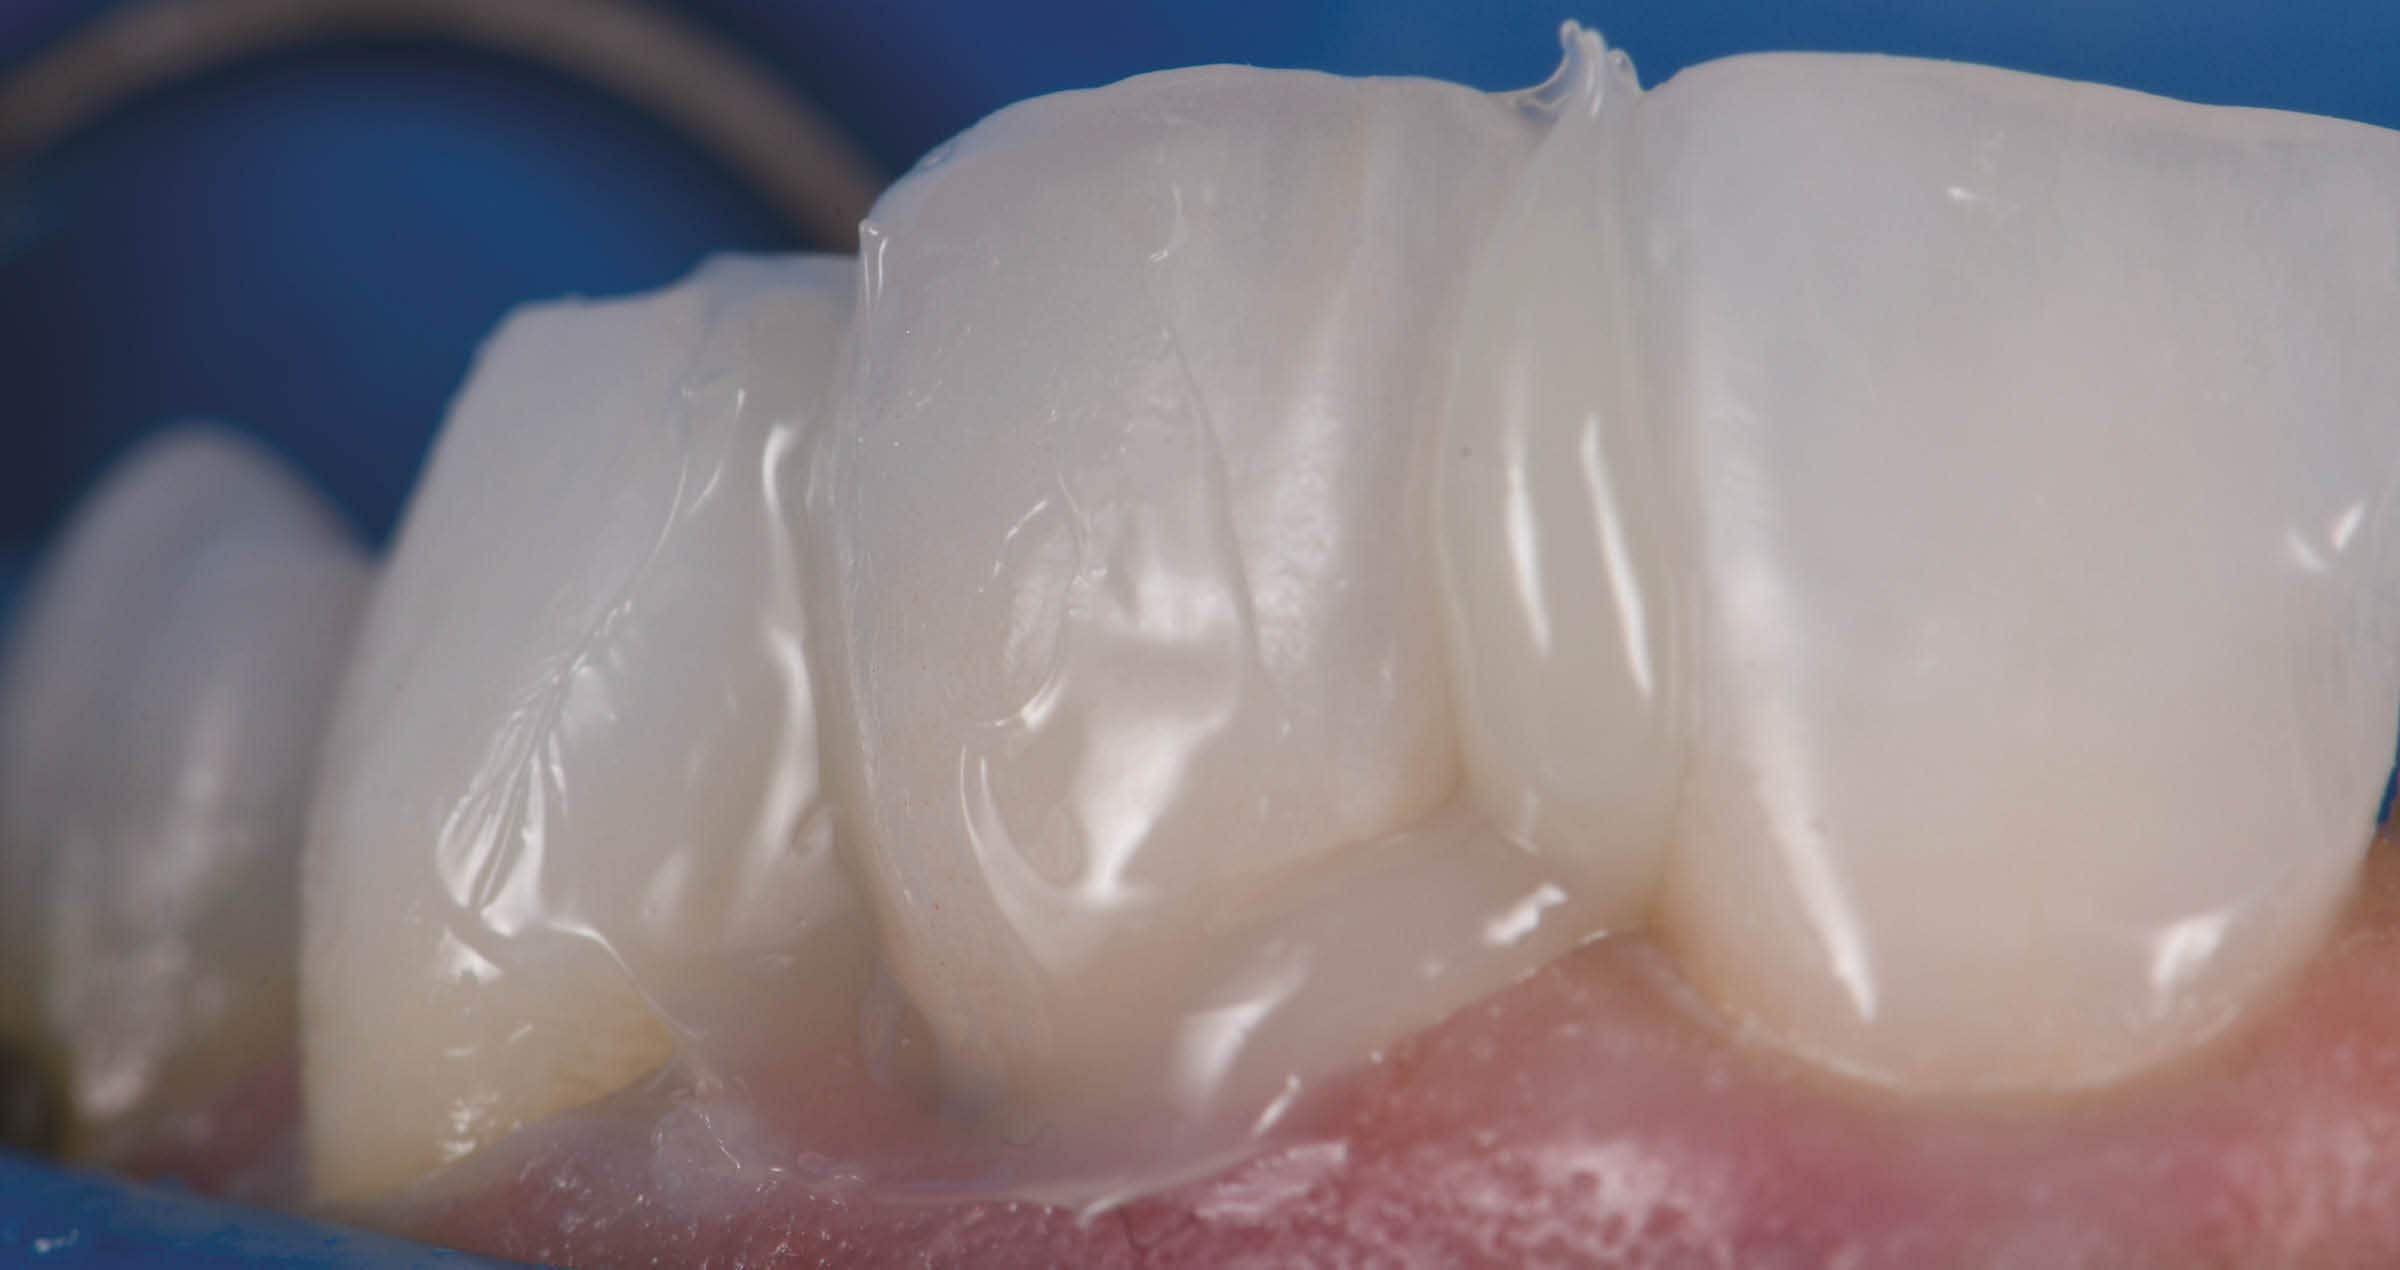
Fig. 6. PANAVIA™ Veneer LC Paste direkt efter placering. Notera cementets viskösa, fasta och fina konsistens som borgar för enkelt avlägsnande både i vått tillstånd och i gelfasen.


Cementet föredras i gelform eftersom det underlättar avlägsnandet av överskott och kräver minimal rengöring (Fig. 7). För att förhindra syreinhibering förseglades kantanslutningarna med glyceringel innan sluthärdning (Fig. 8).


Fig. 7. Avlägsnande av cementöverskott efter 1 sekunds punkthärdning.


Fig. 8. Sluthärdning av fasaderna sker samtidigt både palatinalt och facialt.


Kanterna blev avslutade och polerade till hög glans och ocklusionen av restaureringarna verifierades som anpassade. De postoperativa vyerna visar utmärkt estetisk marginalintegration. (Fig. 9).


Fig. 9. Postoperativt: fasaderna på 12 och 22 smälter in perfekt och vackert bland omgivande tandvävnad.


Utvärdering med polariserade fotografier visar att ersättningarna smälter in fint i det nya leendet, både estetiskt och funktionellt (Fig 10) och nu väntar en estetisk förlängning av kuspen på 23 för att matcha 13.


SLUTRESULTAT


Fig. 10. Slutresultat vid utvärdering med polariserat fotografi


Dentist:

CLARENCE TAM


References


1. Magne P, Douglas WH. Rationalization of esthetic restorative dentistry based on biomimetics. J Esthet Dent. 1999;11(1):5-15. doi: 10.1111/j.1708-8240.1999.tb00371.x. PMID: 10337285.
2. Magne P, Douglas WH. Porcelain veneers: dentin bonding optimization and biomimetic recovery of the crown. Int J Prosthodont. 1999 Mar-Apr;12(2):111-21. PMID: 10371912.
3. Pongprueksa P, Kuphasuk W, Senawongse P. The elastic moduli across various types of resin/dentin interfaces. Dent Mater. 2008 Aug;24(8):1102-6. doi: 10.1016/j.dental.2007.12.008. Epub 2008 Mar 4. PMID: 18304626.
4. Source: Kuraray Noritake Dental Inc. Samples (beam shape; 25 x 2 x 2 mm): The solvents of each material were removed by blowing mild air prior to the test.


Anterior crowns on teeth and an implant

Case by Martin Laurik, MDT


There are so many different restorative materials out there and so many design and finishing concepts available that it often seems difficult to select the best option for a specific case. Using an allrounder like KATANA™ Zirconia YML can facilitate decision making: It is a great choice for single- to multi-unit restorations, works on teeth and implants alike, and can be adapted to individual needs by selecting a suitable design concept and adequate finishing technique. In this way, it is even possible to solve aesthetically challenging cases as the one illustrated below.


Initial situation and temporization


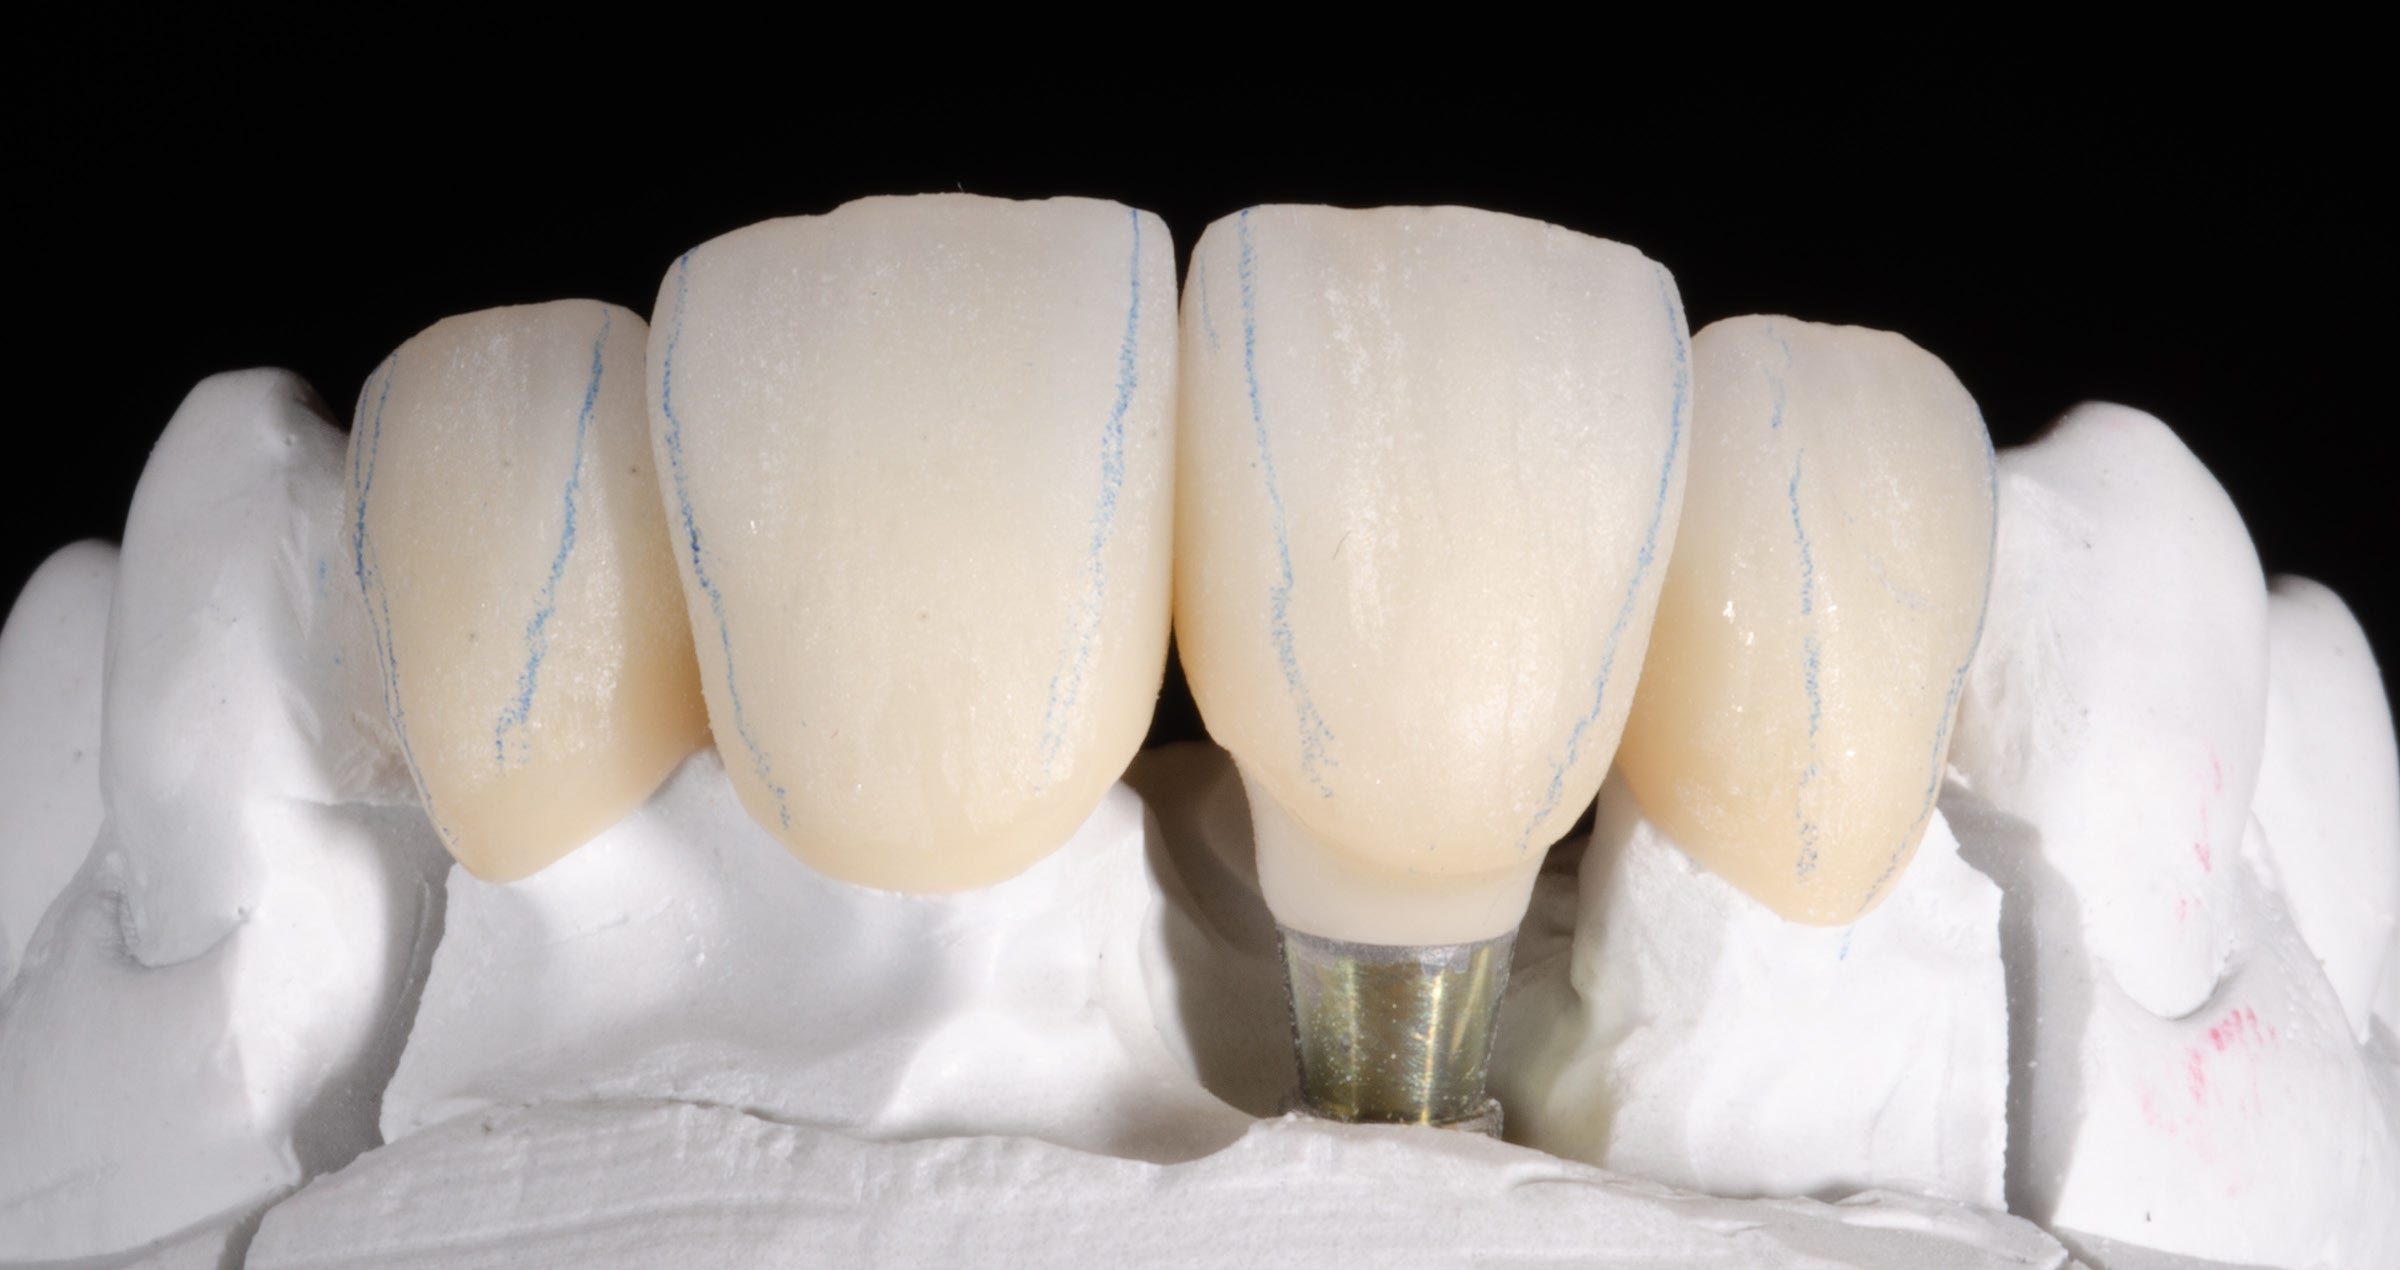
This patient was in need for treatment after the loss of her maxillary right central incisor and the placement of an implant in this region. As a replacement of the restorations on the other three maxillary incisors was necessary as well, it was decided to produce four crowns made of the same material – KATANA™ Zirconia YML. For aesthetic evaluation of the restorations’ length, angulations and shape in the mouth and a functional test drive, the crowns were digitally designed in full contour and milled from PMMA in the determined tooth shade A2 (Fig. 1).


Fig. 1. Full-contour PMMA crowns on the master cast.


Design, milling and effect dyeing of the zirconia crowns


Once the appearance and functional aspects of the temporary restorations were approved by the patient and the restorative team, the definitive crowns were produced. Their design was based on the full-contour design of the temporaries; however, a facial reduction of 0.6 mm was carried out by the software to create space for individualization with a small layer of veneering porcelain. The crowns were then milled from a KATANA™ Zirconia YML disc in the shade A1 – approximately one shade lighter than the determined tooth shade. To mask the uneven colour from the tooth stumps and the implant abutment, the intaglio of the crowns was treated with Esthetic Colorant in the shade Opaque. Some individual and intensified colour effects on the vestibular surface were also created with Esthetic Colorant.


Internal staining and porcelain layering


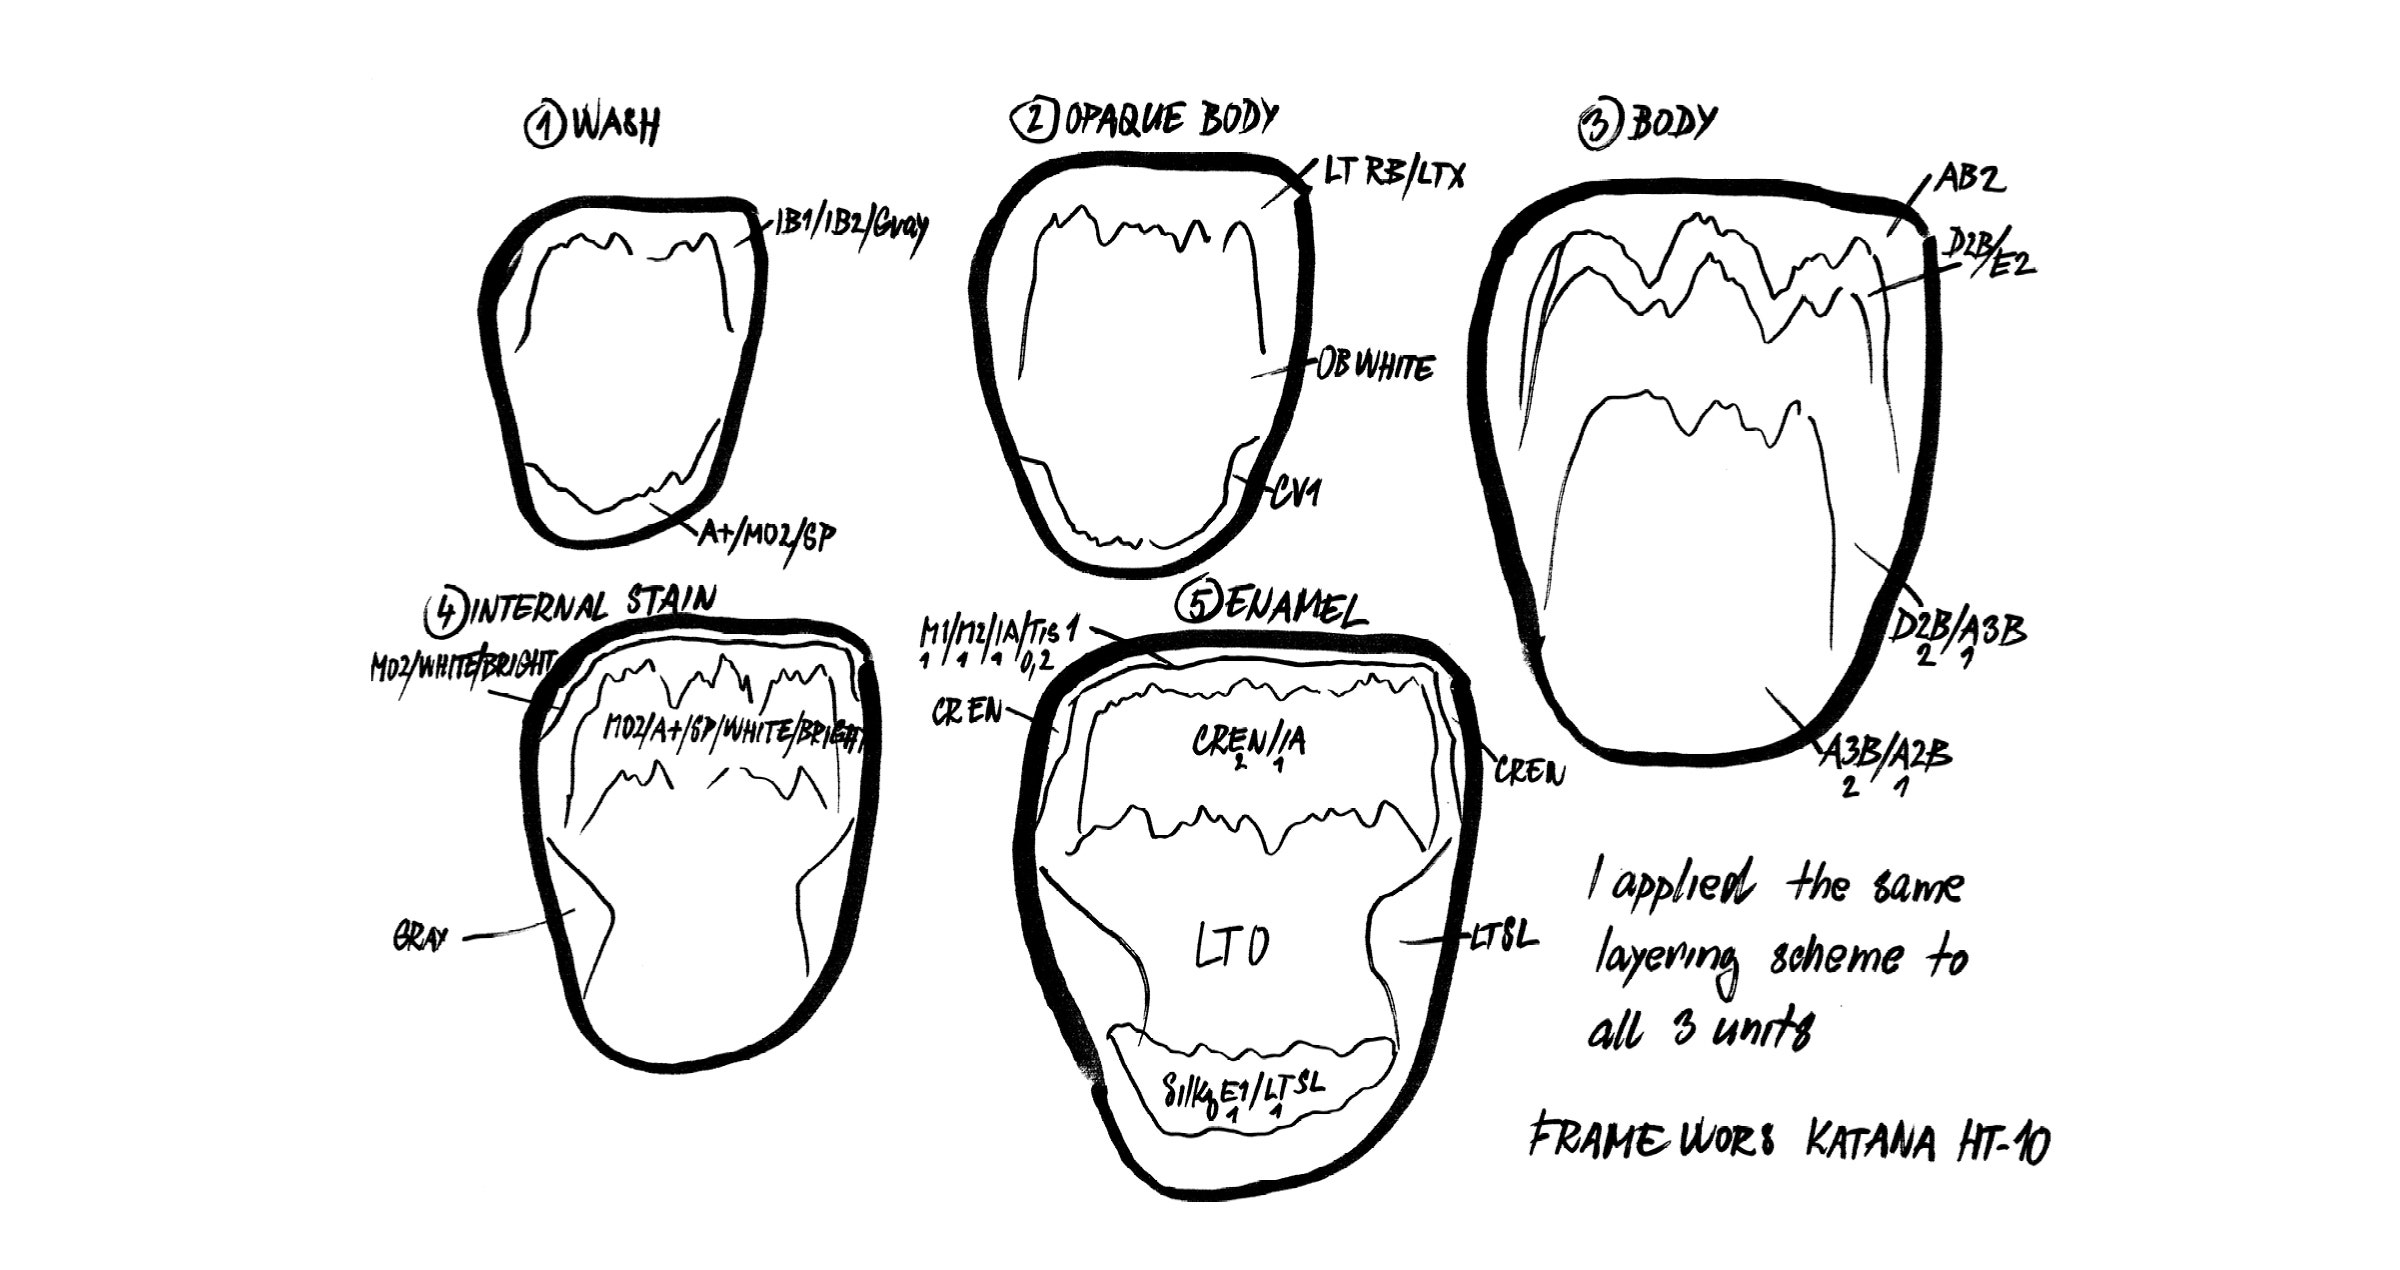
To slightly adjust the chroma and lightness, a first layer of CERABIEN™ ZR Internal Stains was added, followed by a wash bake. After the application of a first layer of CERABIEN™ ZR porcelains (Body, Enamel and Translucent) and baking (Fig. 2) – the central incisors received a layer of A1B, the lateral incisors a mixture of A1B and A2B (slightly darker to provide for a better match with the canines) with LT1, LT Natural completing the picture – additional internal staining was carried out (Fig. 3). The final layer of CERABIEN™ ZR luster porcelains (LT1, ELT2 used on the convex line angles to achieve an external reflection) was added and fixed in a fourth bake (Fig. 4).


After adjustments and very rough polishing, a self-glaze firing programme was selected (firing temperature 915 °C, holding time 5 seconds). On the highly polished incisal and palatal parts of the crowns and for contact point adjustment, CERABIEN™ ZR FC Paste Stain Glaze was applied and fixed with the same bake. The finished crowns on the model are shown in Figure 5, while Figure 6 displays the final treatment outcome.


Fig. 2. Crowns milled from KATANA™ Zirconia YML with a facial cutback of 0.6 mm after individualization with Esthetic Colorant, sintering, internal staining and the application of a first layer of porcelain.


Fig. 3. This picture shows the subtle internal stain adjustment to the ceramic mostly on the incisal part.


Fig. 4. Crowns prior to final shape adjustments and polishing.


Fig. 5. Finished crowns on the model.


FINAL SITUATION


Fig. 6. Treatment outcome.


Easy approach to beautiful restorations


The presented approach is a relatively easy way of producing highly aesthetic anterior restorations. Using an allrounder zirconia combined with a few selected effect liquids, internal stains and luster porcelains, it is possible to achieve a great optical integration even in a situation where teeth and implants need to be restored. The natural shape and surface texture of the restorations plays an important role in this context, as does the base material – a naturally shaded, highly translucent zirconia.


Dentist:

MARTIN LAURIK, MDT


Martin started working as a dental technician in 2014. In the time since, he never stopped training and learning from renowned colleagues. Continuing education courses focused on dental ceramics and occlusion in the functional concept of Slavicek. Fascinated by the beauty of natural teeth, developing an understanding of their complexity and learning how to mimic nature’s design as closely as possible has always been his primary goal, while he is well aware that there is still a lot to be learned and explored on the road to excellence.


Universal Dark: For natural results in darker teeth

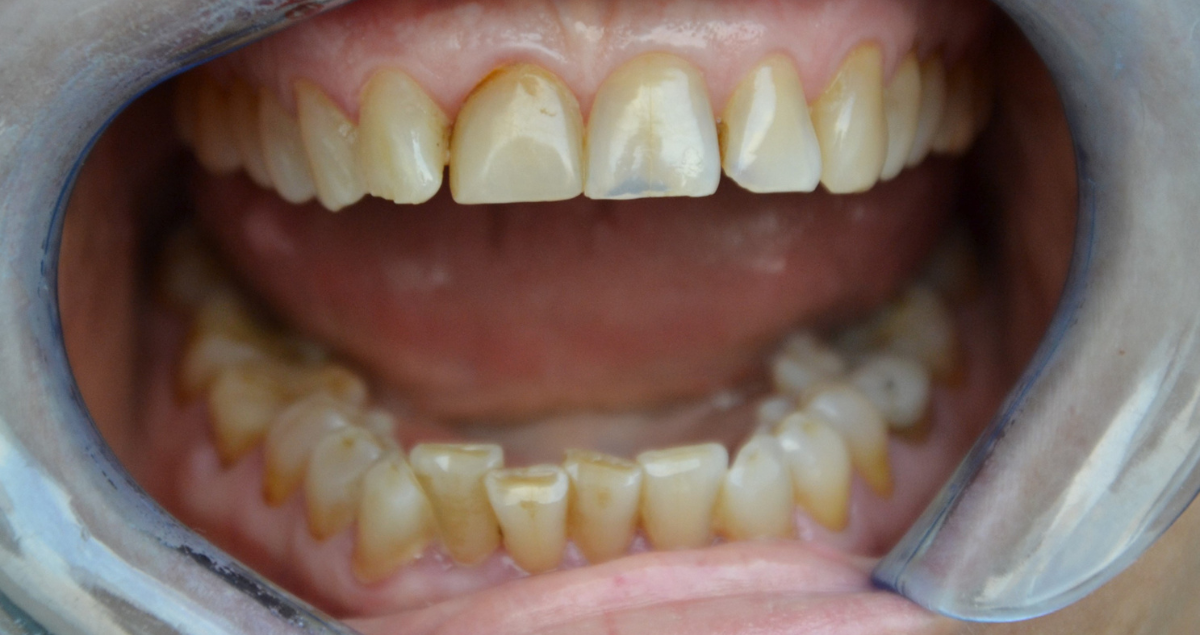
Abrasion and shape correction was also the major reason for this 58-year-old female patient to ask for cosmetic dental treatment. She was unhappy with the appearance of the anterior teeth in the maxilla, which showed signs of tooth wear and discolouration. The selected treatment approach was composite veneering with CLEARFIL MAJESTY™ ES-2 Universal in the shade UD. The shade was selected based on the indication and the somewhat darker shade of the patient’s natural teeth.


Fig. 1. Initial clinical situation.


Fig. 2. Treatment outcome.


Reasons for selecting universal dark:

- For older patients (tooth shades A3 and darker)

- Situations in which light easily passes through the composite (e.g., Class III, Class IV)


Universal dark properties:

- High light scattering effect

- Well-balanced translucency


Dentist:

JUSUF LUKARCANIN


Dr. Jusuf Lukarcanin is a Certified Dental Technician (DCT) and a Doctor of Dental Science (DDS). He studied dentistry at the Ege University Dental Faculty in Izmir, Turkey, where he obtained a Master‘s degree in 2011. In 2017, he received a Ph.D. degree from the Department of Restorative Dentistry of the same university. Between 2012 and 2019, Dr. Lukarcanin was the head doctor and general manager at a private clinic in Izmir.


Between 2019 and 2020, he worked at Tinaztepe GALEN Hospital as a Restorative Dentistry specialist, between 2020-2022 he worked at MEDICANA International Hospital Izmir as a Restorative Dentistry specialist. Currently he is an owner of a private clinic for aesthetics and cosmetics in Izmir.


Tripartite talk

Presented by Kuraray Noritake Dental Inc.


Highly translucent multi-layered zirconia developed by a proprietary material and manufacturing method from Japan


CURRENT STATUS AND FUTURE PROSPECTS OF ZIRCONIA RESTORATIONS


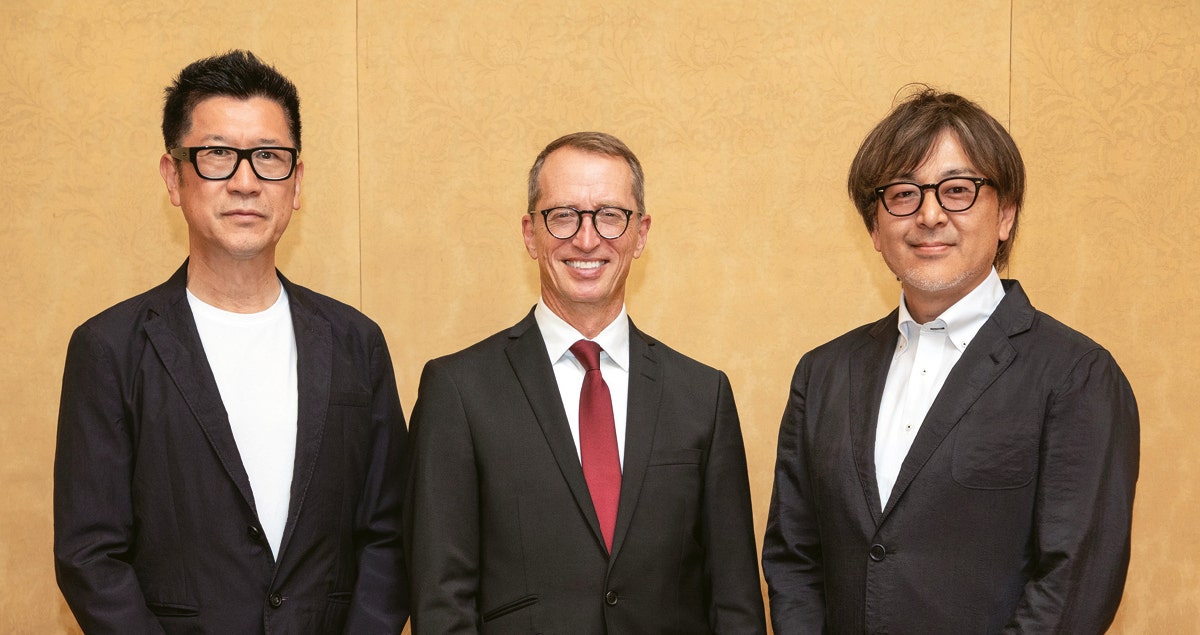
In this issue, we asked Markus B. Blatz, Professor at the University of Pennsylvania, USA, Aki Yoshida (Gnathos Dental Studio) and Naoki Hayashi (Ultimate Styles Dental Laboratory), both dental technicians active in the USA and international instructors for Kuraray Noritake Dental Inc., to give their views on zirconia restorations and their outlook for the future.


WITH THE INTRODUCTION OF ZIRCONIA, THE MAINSTREAM OF PROSTHETIC TREATMENT HAS SHIFTED FROM METAL CERAMICS1 TO ZIRCONIA CERAMICS2. WHAT CHANGES HAVE OCCURRED WITH THE INTRODUCTION OF ZIRCONIA?


Blatz: My mentor for my first Ph.D. in dental materials was in the group that developed lithium disilicate and glass-infiltrated alumina. Therefore, I have seen the evolution of dental ceramic materials, including zirconia, which is the subject of this presentation, up close and personal.


Early zirconia was white, opaque, and not as esthetic as today. However, there is no doubt that zirconia ceramics were much more esthetic than metal ceramics. At the same time, however, we often heard the opinion that bilayer zirconia ceramic restorations were problematic, and this provoked much discussion. We conducted a large study in collaboration with a Boston laboratory to compare more than 1,000 posterior porcelain-fused-to-metal crowns and 1,100 posterior porcelain-fused-to-zirconia crowns and found no difference in chipping or fracture rates after about seven years. This proves that bilayer zirconia ceramics are safe when used with the proper veneering materials and the proper sintering and cooling protocols. The fact that zirconia became established as it is today is a major change for dentistry in general.

Yoshida: I also switched from metal ceramics to zirconia ceramics, and now I don't use metal anymore. It used to take a lot of time and effort to invest and cast metal, observe it with a microscope, and fit it. Considering the recent rise in metal prices, it has also become more cost-effective. In addition, I am allergic to metal and have a skin rash every time I have a prosthetic processed, so the shift to zirconia ceramics as the mainstream prosthetic is a welcome change. Of course, the use of zirconia has also improved esthetics. The translucency of zirconia is the greatest advantage that metal does not have.


Hayashi: Yes, that's right. The big advantage of zirconia is that if the abutment is not strongly discolored, it no longer needs to be treated with an opaquer. It was not easy to control the reflection of light from the operative tooth when fabricating metal ceramics. In addition to the esthetic advantage, the prosthetic space can be thinner than that of metal ceramics.


1. Metal ceramics: Prosthetic made of metal frame with porcelain.
2. Zirconia ceramics: Prosthetic made of zirconia frame with porcelain.


THE YEAR 2023 MARKED THE 10TH ANNIVERSARY OF THE FIRST MULTI-LAYERED ZIRCONIA – KATANA™ ZIRCONIA ML. SINCE THEN, HOW DO YOU THINK HIGHLY TRANSLUCENT MULTI-LAYERED ZIRCONIA HAS REVOLUTIONIZED PROSTHETIC DEVICE MANUFACTURING?


Yoshida: I feel the ability to extend the zirconia frame to the occlusal surface and the incisal edge is the greatest advantage of using highly translucent multilayered zirconia. This allows us to provide crowns of both esthetics and strength, even for patients with para function. I have also made a zirconia Maryland bridge using highly translucent multi-layered zirconia, and it is doing very well. There are some cases where it is not possible to use zirconia, but still, it is wonderful to have a wider range of options.


Blatz: Many people still have the impression that zirconia cannot be bonded to tooth structure, but resin cement can be used to bond zirconia to tooth structure after proper pretreatment. Clinical studies of resin-bonded zirconia bridges have shown very high success after 10 or 15 years. Currently, resin bonding is recommended for very thin, highly translucent zirconia, rather than cementation. However, it should be added that this requires the dentist and technician to understand the proper bonding technique for zirconia.


In addition, Kuraray Noritake Dental's multi-layered zirconia has revolutionized monolithic zirconia without the need for veneering porcelain. However, this has also resulted in the need for dental technicians to shift to a different approach: instead of building up the restoration as with veneering ceramics, esthetic features are created on the outer surface in each case.


Maxillary 6 anterior monolithic crowns (Markus B. Blatz)


Fig. 1a and b: Initial examination.


Fig. 1c: Simulation of final prosthetic restoration.


Fig. 1d: Completed prosthetic on model (monolithic crown using KATANA™ Zirconia STML).


Fig. 1e and f: Final restoration (Dr. Julian Conejo and Sean Han, CDT).


Two cases of Maryland bridge and laminate veneers and a mandibular canine single crown implant superstructure (Aki Yoshida)


Fig. 2a and b: Case 1: A case of a congenital defect of a lateral incisor was restored with a Maryland bridge. Since the proximal and distal width of the defect was greater than the central incisor, a non-prep veneer was fabricated on the central incisor to balance the proportions. KATANA™ Zirconia STML was used for the Maryland bridge. Note the harmony between the zirconia frame extended to the incisal edge and the transparency of the laminate veneers made of Super Porcelain EX-3™ on the central incisors. This case demonstrates the characteristics of zirconia, which combines strength and esthetics.


Fig. 3a to c: Case 2: A case of a screw-retained crown restoration of an implant placed in a mandibular canine tooth. Extension of the zirconia frame from the entire lingual side to the incisal margin prevents fracture of the porcelain by the screw access hole edges and canine guides. KATANA™ Zirconia STML provides natural transparency even when zirconia is exposed at the incisal edge.


Maxillary 4 Anterior teeth implant bridge (Naoki Hayashi)


Fig. 4a to f: Implant bridge of maxillary four anterior teeth using implants placed in the maxillary bilaterallateral incisors as abutments and maxillary bilateral central incisorsaspontics. The lingual side is fully backed with zirconia and the labial side is minimally layered with CERABIEN™ ZR.


Hayashi: Indeed, the highly translucent multilayered zirconia has expanded the possibilities of monolithic crowns. For patients with high occlusal forces, monolithic crowns are suitable in terms of strength, and with the use of highly translucent multilayered zirconia, it is possible to achieve a certain level of esthetics with monolithic crowns. In fact, some patients are happy with it. However, at least in the current situation, we believe that if patients and dentists want high-end esthetics, then porcelain buildup is necessary, and monolithic crowns are only an option.


Blatz: The variety of options available is the advantage of zirconia. The dentist and the technician can work together to provide the best possible outcome for the patient.


Yoshida: In terms of options, Kuraray Noritake Dental's zirconia can be sintered in a short time (approximately 90 minutes) in addition to the normal sintering time (7 hours) using a zirconia raw material and manufacturing method developed by Kuraray Noritake Dental, which is an advantage in that it can be used for immediate restorations, remanufacturing and other unexpected situations.


FINALLY, DO YOU HAVE A MESSAGE FOR THE NEW GENERATION OF DENTISTS AND DENTAL TECHNICIANS?


Blatz: I encourage my students and colleagues to always do their best. This leads to good results, makes you happy, and makes you feel satisfied with your life. Some people only try to get rich, but just accumulating wealth is never happiness. The second is to keep an open mind. Nowadays, we are inundated with information through social media.


Some of it is very stimulating and wonderful, but there is also a lot of it that is wrong. On the other hand, there are those who believe that everything one leader says must be done. I would like to tell them, "Make sure you get your information from reliable sources, and then choose reliable information for yourself. Dentistry is changing, so let's keep an open mind. The most important thing is that the patient is ultimately satisfied with the results.


Hayashi: I would like the future generation to learn more about tooth morphology, occlusion, and fit. Color is the essence of the quality of the final prosthetic device, but we need to learn tooth morphology, occlusion, and fit before we learn color. We are all about creating a prosthetic device that will function in the patient's mouth for the long term, and that is our goal. There will be new technologies and materials in the future, but their essence will never change. I hope that you will always remember what is important in your clinical practice. This is why basic knowledge of anatomy and function is necessary.


Yoshida: New technologies and materials will continue to emerge. But human teeth will not change. The most important thing is to provide the best possible care to the patient. I hope that you will accumulate such experiences, and that when you reach the end of your life, you will be able to say that you are glad you chose this profession.


Thank you very much for the meaningful discussion today.


Source: QDT Vol.49/2024 April
The magazine may not be printed from the web and may not be forwarded
No reproduction or reprinting allowed


Dentists:

Prof. Dr. Markus B. Blatz

University of Pennsylvania
School of Dental Medicine
240 S 40th St, Philadelphia,
PA 19104, USA

Aki Yoshida, RDT

Gnathos Dental Studio
56 Colpitts Rd, Weston,
MA 02493, USA

Naoki Hayashi, RDT

Ultimate Styles
Dental Laboratory
23 Mauchly Suite 111, Irvine,
CA 92618, USA


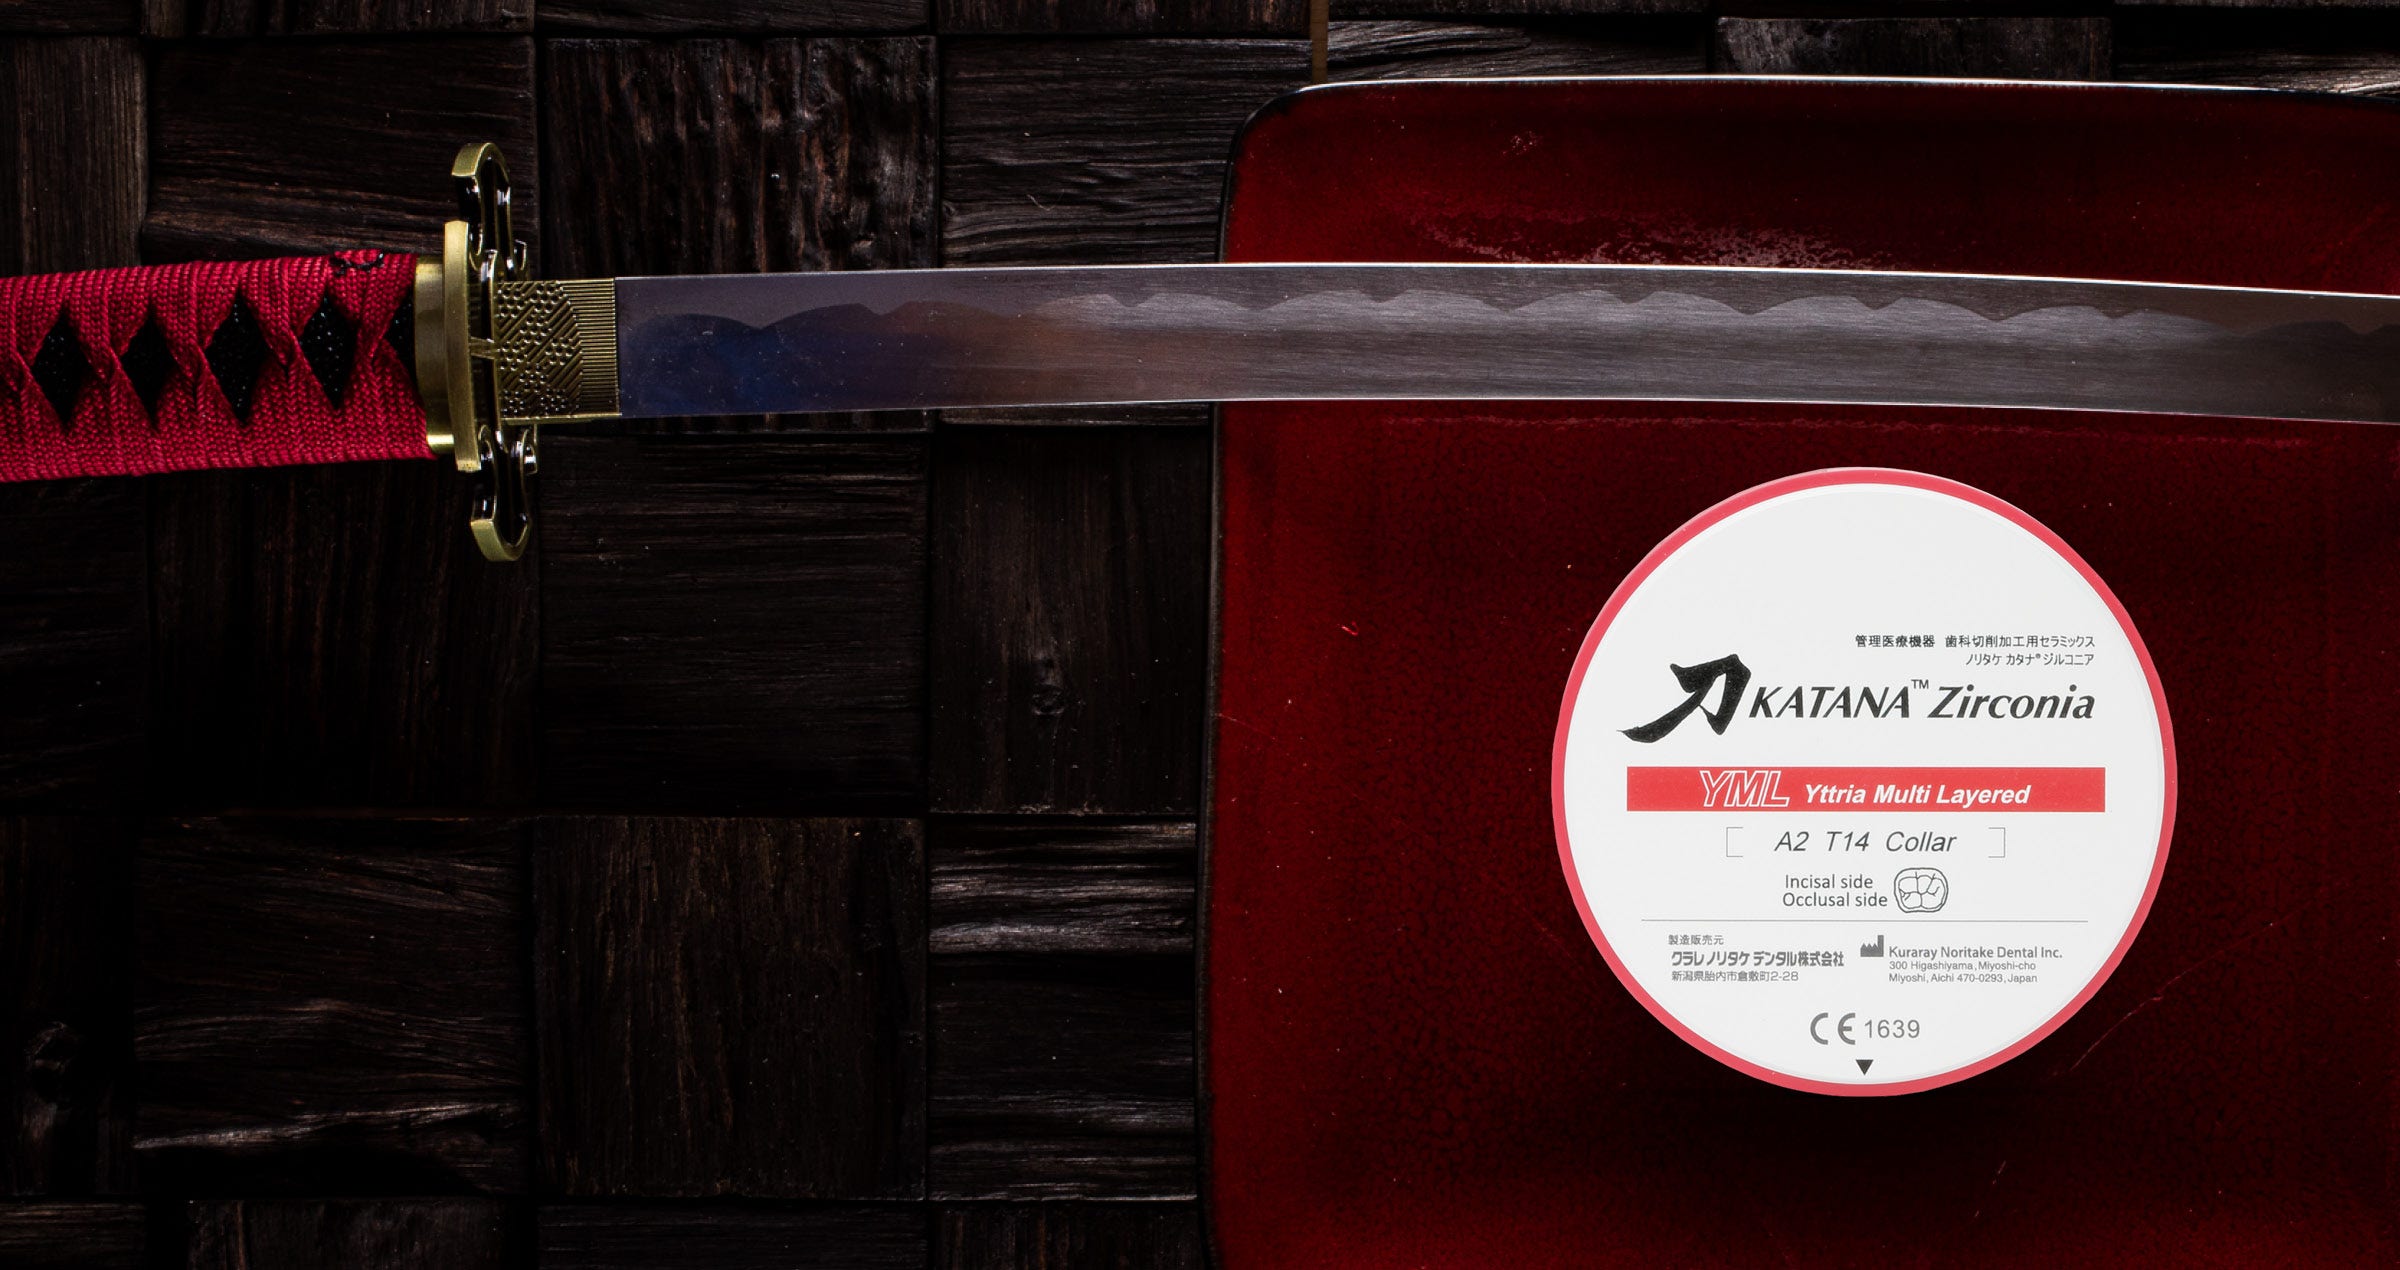
Empower your dental lab with KATANA Zirconia YML

KATANA™ Zirconia YML offers an unmatched blend of aesthetics and mechanical properties, but also provides for cost and time efficiencies.


Recognised for its strength and density at point of manufacture, the material delivers incredible hardness in its green state. This offers the fully validated opportunity to make adjustments in morphology directly after milling.


These qualities, along with its strength and translucency once sintered, deliver the possibility to produce a wide range of high aesthetic indications. KATANA™ Zirconia YML has set a new benchmark in prosthetic dentistry.


It provides dental technicians with a material that is truly universal with no compromises required.


KATANA Zirconia YML in a Nutshell


KATANA Zirconia YML represents a pinnacle of zirconia technology. With its multi-layered structure, it offers a seamless gradation of colour, strength and translucency that mimics natural teeth, making it an ideal choice for the entire indication spectrum.


The material's unique composition allows for high-speed sintering (up to 3-unit bridges), which significantly reduces production time without sacrificing optical or mechanical properties.


Colour Gradation and Physical Properties


The colour gradation of KATANA Zirconia YML is designed to replicate the natural colour transition of human teeth, from the dentin core to the translucent enamel surface.


This combined with the material's impressive flexural strength of up to 1,100 MPa and translucency of up to 49%, enables the production of restorations that are virtually indistinguishable from natural dentition.


Applications and Advantages of KATANA Zirconia YML


KATANA™ Zirconia YML's versatility extends to a wide range of indications, including crowns, veneers, inlays, onlays, and bridges of all sizes. With its strong body and highly translucent enamel layer, it offers exactly the properties required for an unlimited indication range.


Positioning of restorations in KATANA™ Zirconia YML discs is extraordinarily easy. The reason is that the gap between the lowest flexural strength found in the enamel area and the highest flexural strength found in the lowest body layer is comparatively small. Moreover, the Body Layer 1 that is found adjacent to the enamel layer already offers a flexural strength that is higher than the 800 MPa requested for bridges with four or more units. Consequently, the material is classified as a Class 5 zirconia and users are on the safe side whenever they place their long-span restorations in the middle of the blank.

Positioning of long-span restorations in the middle of the disc.


Revolutionizing Sintering with High-Speed Capabilities


One of the groundbreaking aspects of KATANA Zirconia YML is its compatibility with high-speed sintering protocols. This capability allows dental laboratories to expedite the production process, delivering high-quality restorations in a fraction of the time traditionally required. Sintered during normal working hours at daytime, small restorations can be finished within hours, while the sintering load at night is reduced automatically. Great option not only for rush cases!


The high-speed sintering process does not compromise the material's optical or mechanical properties, maintaining its aesthetics and strength.


Recommended Finishing Techniques for Optimal Results


KATANA Zirconia YML is a beautiful and aesthetic material in its own. Therefore, when it comes to finishing, CERABIEN™ ZR FC Paste Stain is a great option.


KATANA Zirconia YML: A Testament to Innovation in Dental Materials


KATANA Zirconia YML stands at the forefront of dental material technology, offering outstanding aesthetics, strength, and efficiency. Its introduction has marked a significant advancement in the capabilities of dental technicians, allowing for the creation of restorations that truly mimic the beauty of natural teeth in a fraction of time.


As the dental industry continues to evolve, KATANA Zirconia YML remains a testament to the relentless pursuit of excellence in restorative dentistry.


For more detailed information on KATANA Zirconia YML, including technical guide, FAQs and Clinical cases, visit Kuraray Noritake Dental's YML dedicated page.


Interested in articles, user experience or clinical cases using KATANA Zirconia YML? Check the blog section of our website! 


Mathias Fernandez Y Lombardi

EU Scientific Manager
Dental Ceramics & CAD/CAM Materials
Kuraray Europe GmbH


Custom abutment implant cementation technique

With PANAVIA™ SA Cement Universal and KATANA™ Zirconia


By using PANAVIA™ SA Cement Universal and its proprietary dual-monomer technology, you can now simplify the bonding of restoration to implant abutments without the use of separate primers or silane. Independent research has confirmed this new dual-monomer technology does not sacrifice adhesion or durability on glass-based ceramics or zirconia. The technique, in this case study, is for custom fabricated abutment & KATANA™ Zirconia YML crown, however, the basic technique on the treatment of the abutment and restoration may be used with any implant restoration combination as long as the proper surface treatments for type of material is followed.


INITIAL FIT OF ABUTMENT & RESTORATION

Basic technique on the treatment of the abutment and restoration.


Fig. 1. Check Initial Fit of Abutment & Restoration: abutment & crown margins should be checked to ensure proper fit.


Fig. 2. Protect base of implant with putty or light-cure block-out resin. The base of the implant should be covered so that it is not air abraded accidentally.


Fig. 3. Abrade titanium abutment with 50 μm alumina oxide powder.


Fig. 4. Clean abutment with KATANA™ Cleaner: Apply KATANA™ Cleaner by rubbing each area for 10 seconds.


KATANA™ Cleaner is a universal cleaner that is indicated to clean metal, zirconia & glass-based restorations. It is also an intra oral cleaner that may be used on dentin and enamel.


TREATMENT OF KATANA™ Zirconia RESTORATION WORKFLOW

Bonding to zirconia has been proven to be durable in research going back to the 1990’s with the original MDP adhesive monomer in the PANAVIA™ resin cements. The three requirements to bonding zirconia are:

  1. Air abrade zirconia with 50 μm alumina oxide powder.
  2. Clean zirconia
  3. Apply an MDP-Based Primer or resin cement. PANAVIA™ SA Cement Universal contains the original MDP that was developed & patented in 1981 by Kuraray Dental.


Fig. 1. Air abrade KATANA™ Zirconia at 14-58 psi.


Fig. 2. Dispense & mix PANAVIA™ SA Cement Universal (it is available in automix or handmix formulations).


Fig. 3. Apply PANAVIA™ SA Cement Universal to the abutment or inside the crown.


Fig. 4. Seat restoration on abutment.


Fig. 5. Remove excess resin with a dry micro-applicator or brush.


Fig. 6. You may light-cure the margins after cleaning up all excess resin. If you fully cure excess resin, It can be difficult to remove. If difficult to remove, change curing time or distance with your light.


Fig. 7. Leave restoration on abutment to self-cure fully for approximately 10 minutes at room temperature.


Fig. 8. Final check of custom abutment KATANA™ Zirconia YML crown on model.


Dentist:

JEAN CHIHA


Technician Jean Chiha CDT, Santa Ana, CA USA

Mr. Chiha is the owner of North Star Dental Laboratory and Milling Center, Santa Ana, CA, and has served as President of the Dental Lab Owners Association of California since 2013. He is a 1985 graduate of Institut Dento Technic, a private dental technology school in France. Mr. Chiha lectures internationally on dental communication and case planning. Jean lectures around the world on a variety of topics and has carved out a niche with his extensive knowledge of zirconia. Affectionately referred to as “Mr. Katana” due to his involvement in the creation of the material.

Universal Light: For natural results in brighter teeth

Case by Dr. Jusuf Lukarcanin


This young patient aged 35 with microdontia presented in the dental office with the desire to have more beautifully shaped teeth. His teeth were almost free of dental caries, but with deficiencies in oral hygiene and signs of gingival inflammation. A deep bite was also evident. After professional tooth cleaning and oral hygiene advice, the teeth were restored with CLEARFIL MAJESTY™ ES-2 Universal in the shade UL.


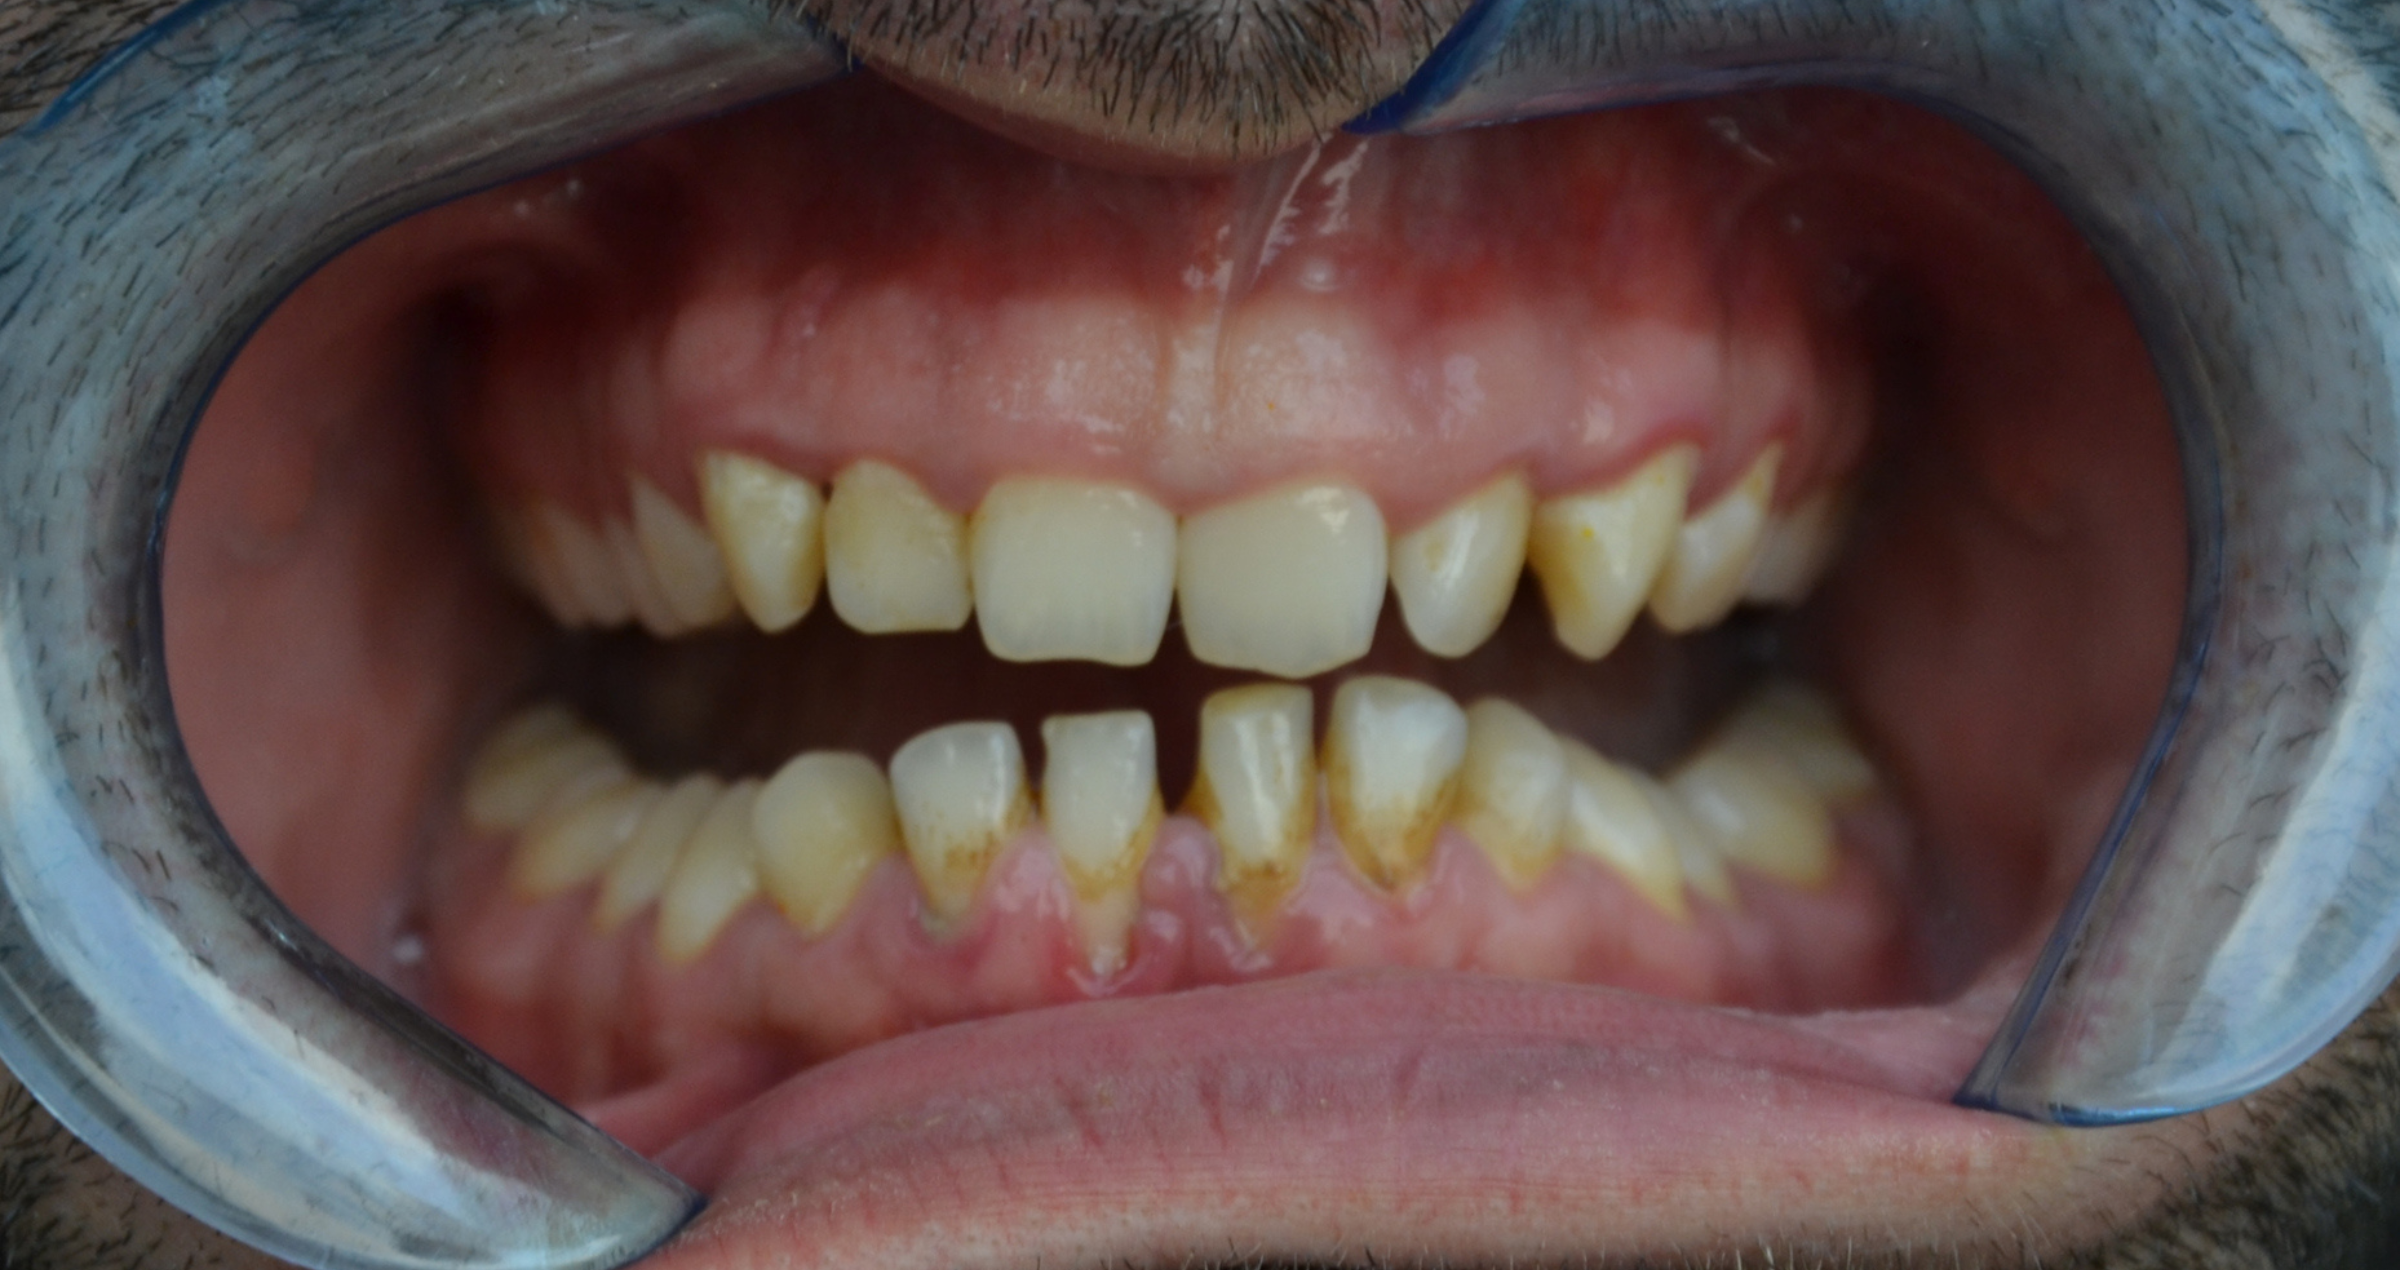
Fig. 1. Initial situation.


Fig. 2. Initial situation: Deep bite.


Fig. 3. Teeth restored with composite in the single-shade technique.


Fig. 4. Immediate treatment outcome.


Reasons for selecting universal light:

- For younger patients (tooth shades A2 and lighter)

- Situations in which light easily passes through the composite (e.g., Class III, Class IV)


Universal light properties:

- High light scattering effect

- Well-balanced translucency


Dentist:

JUSUF LUKARCANIN


Dr. Jusuf Lukarcanin is a Certified Dental Technician (DCT) and a Doctor of Dental Science (DDS). He studied dentistry at the Ege University Dental Faculty in Izmir, Turkey, where he obtained a Master‘s degree in 2011. In 2017, he received a Ph.D. degree from the Department of Restorative Dentistry of the same university. Between 2012 and 2019, Dr. Lukarcanin was the head doctor and general manager at a private clinic in Izmir.


Between 2019 and 2020, he worked at Tinaztepe GALEN Hospital as a Restorative Dentistry specialist, between 2020-2022 he worked at MEDICANA International Hospital Izmir as a Restorative Dentistry specialist. Currently he is an owner of a private clinic for aesthetics and cosmetics in Izmir.


Ti-Base implant cementation technique

With PANAVIA™ SA Cement Universal


By using PANAVIA™ SA Cement Universal and its proprietary dual-monomer technology, you can now simplify the bonding of any restoration to implant abutments without the use of separate primers or silane. Independent research has confirmed this new dual-monomer technology does not sacrifice adhesion or durability on glass-based ceramics or zirconia. The technique, in this case study, is for Ti-Base Implants, however, the basic technique on the treatment of the abutment and restoration may be used with any implant restoration combination.


TREATMENT OF TITANIUM ABUTMENT


Fig. 1. After attaching the abutment to the implant analog.


Fig. 2. Protect the base of the abutment with block out resin & light-cure.


Fig. 3. Air abrade the Titanium Abutment with 30-50 μm Alumina Powder @ 32 PSI.


Fig. 4. Clean abutment with KATANA™ Cleaner (10’s Rubbing, Rinse & Dry).


KATANA™ Cleaner is a universal cleaner that is indicated to clean metal, zirconia & glass-based restorations. It is also an intra oral cleaner that may be used on dentin and enamel.


REFERENCE INDEX POINTS TO ENSURE ACCURATE SEATING


Fig. 1. Mark Index position on implant analog.


Fig. 2. Mark index position (notch) on crown.


TREATMENT OF RESTORATION & BONDING TO THE ABUTMENT


Fig. 1. If Lithium Disilicate, HF acid etch Internal Surfaces, with 5% HF etch for 20’seconds then rinse & dry. If Zirconia, air abrade, at 14-58 PSI.


Fig. 2. Inject PANAVIA™ SA Cement Universal (White Shade) onto treated & cleaned abutment.


Fig. 3. Align index points & seat crown onto abutment.


Fig. 4. Place crown & implant into clamps & lightly tighten.


Fig. 5. Tack-Cure Clean-Up: Light-Cure excess cement for 2-5 seconds (time depends on light output & distance held).


Fig. 6. Remove excess cement & block-out resin with an explorer. PANAVIA™ SA Cement Universal has extremely easy clean-up.


Fig. 7. Wipe off remaining resin with gauze.


Fig. 8. Remove index mark with alcohol & gauze.


Fig. 9. Clean & polish restoration prior to seating. Surfaces coming in contact with soft-tissue should be polished.


Dentist:

GREG CAMPBELL


Dentist Greg Campbell DDS, Long Beach, CA USA

Greg Campbell, DDS is recognized internationally as an expert on integrating CAD/CAM dentistry into offices and is frequently sought out by industry leaders to lecture about Digital Dentistry. Dr. Campbell has a great understanding of Digital Technology and trains other dentists how to use this technology and is a certified Advanced CEREC Trainer. He is a former Beta tester for Sirona Dental and has authored two books on CAD/CAM dentistry. Dr. Campbell has created multiple polishing kits used for ceramics and has been trained on advanced adhesion materials, research & techniques and utilizing them clinically for over 8 years. Dr Campbell was an Alpha and Beta Tester for KATANA™ STML.


Dr. Campbell graduated from the University of Southern California School of Dentistry and completed advanced training in Cosmetic Dentistry at UCLA and maintains a private practice in Long Beach California.

Considerations on the use of a universal composite in the anterior region

4 Clinical cases by Dr. Jusuf Lukarcanin


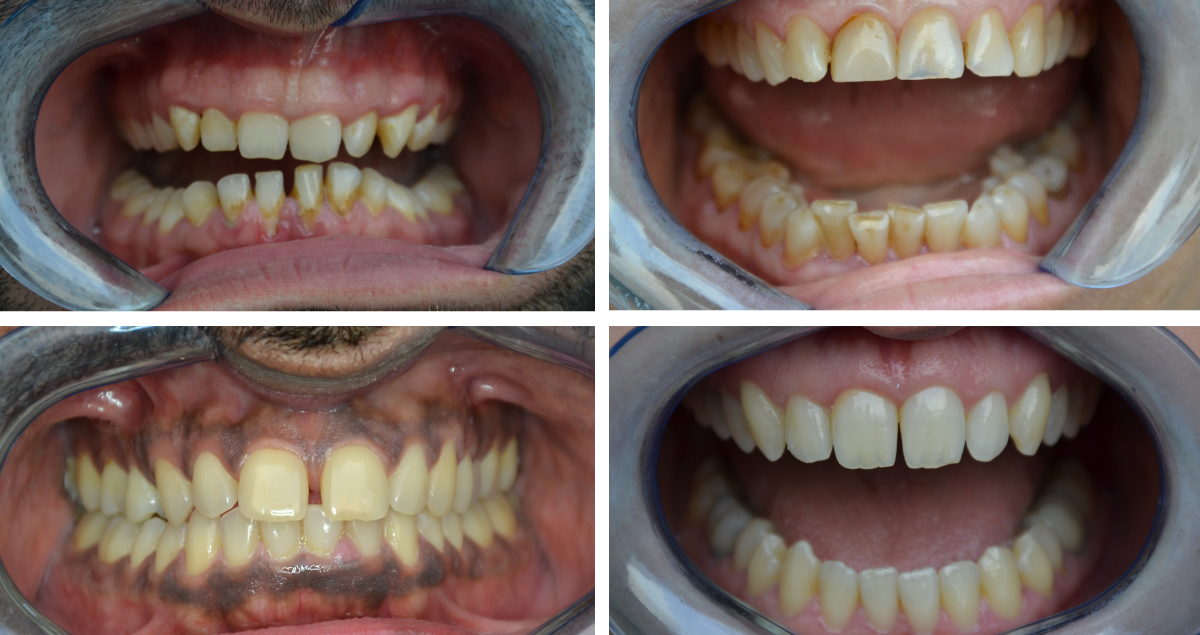
Composites with a universal shade concept, a reduced number of shades that may be selected without any shade guide are a clear trend in restorative dentistry. With specific blend-in properties, these materials can help streamline restorative procedures and reduce chair time, take some pressure off the dental practitioner and contribute to potentially good outcomes. Some users, however, are skeptical about a wide-scale use of the materials, particularly when it comes to restoring teeth in the anterior region. The reasons may be a comparatively high translucency requiring the separate application of a blocker (or opacious shade) in certain situations, or a too limited shade offering.


Personal experience shows that CLEARFIL MAJESTY™ ES-2 Universal is perfectly suitable for a wide range of single-shade restorations in anterior teeth. It offers great polishability and long-term gloss retention and is available in just four shades: One universal shade (U) originally designed for posterior restorations, universal light (UL) and universal dark (UD) as the two major options for anterior teeth and, finally, universal white (UW) for the imitation of any bleached shade. In general, all four options may be used in the anterior and posterior region. As the blend-in ability is due to proprietary light-diffusion technology and not managed via an increased translucency, the application of a blocker is usually not necessary and even larger areas can be restored quite inconspicuously.


For those asking themselves when to select which shade in the anterior region, the following clinical case examples and comments may provide some useful guidance. The recommendations and practical tips are based on personal experience. All patients were in treatment for diastema closure or shape correction, but the selection criteria are the same for other types of anterior restorations, too.


UNIVERSAL LIGHT: FOR NATURAL RESULTS IN BRIGHTER TEETH


This young patient aged 35 with microdontia presented in the dental office with the desire to have more beautifully shaped teeth. His teeth were almost free of dental caries, but with deficiencies in oral hygiene and signs of gingival inflammation. A deep bite was also evident. After professional tooth cleaning and oral hygiene advice, the teeth were restored with CLEARFIL MAJESTY™ ES-2 Universal in the shade UL.


Fig. 1. Initial situation.


Fig. 2. Initial situation: Deep bite.


Fig. 3. Teeth restored with composite in the single-shade technique.


Fig. 4. Immediate treatment outcome.


Reasons for selecting universal light:

- For younger patients (tooth shades A2 and lighter)

- Situations in which light easily passes through the composite (e.g., Class III, Class IV)


Universal light properties:

- High light scattering effect

- Well-balanced translucency


UNIVERSAL DARK: FOR NATURAL RESULTS IN DARKER TEETH


Abrasion and shape correction was also the major reason for this 58-year-old female patient to ask for cosmetic dental treatment. She was unhappy with the appearance of the anterior teeth in the maxilla, which showed signs of tooth wear and discolouration. The selected treatment approach was composite veneering with CLEARFIL MAJESTY™ ES-2 Universal in the shade UD. The shade was selected based on the indication and the somewhat darker shade of the patient’s natural teeth.


Fig. 1. Initial clinical situation.


Fig. 2. Treatment outcome.


Reasons for selecting universal dark:

- For older patients (tooth shades A3 and darker)

- Situations in which light easily passes through the composite (e.g., Class III, Class IV)


Universal dark properties:

- High light scattering effect

- Well-balanced translucency


UNIVERSAL: WHENEVER A HIGH TRANSLUCENCY IS DESIRED


In teeth in which the areas to be restored are surrounded by a lot of non-discoloured tooth structure - as may be the case in Class I, II and Class V cavities - the use of CLEARFIL MAJESTY™ ES-2 Universal in the shade U may be an option. The 28-year-old patient, who presented for diastema closure, had teeth with a comparatively low translucency and different shades due to smoking and excessive coffee consumption. As the composite was applied in enamel areas only, the relatively high translucency of the universal shade seemed beneficial in this case.


Fig. 1. Initial clinical situation.


Fig. 2. New smile of the patient.


Reasons for selecting universal:

- Large amounts of underlying or surrounding tooth structure present

- Medium light-scattering desired


Universal properties:

- High translucency

- Medium light-scattering effect


UNIVERSAL WHITE: FOR ALL PATIENTS ASKING FOR A BLEACHED EFFECT


For all cases that require a particularly bright tooth shade – e.g. children or patients with bleached teeth / asking for a bleached effect in their restorations – CLEARFIL MAJESTY™ ES-2 Universal in the shade UW is likely to be the first choice. The young patient aged 28 shown below asked for diastema closure including shape and shade correction: She wanted to have a brighter, more beautiful smile.


Fig. 1. Initial clinical situation.


Fig. 2. Shape and shade correction were desired in this case.


Fig. 3. Treatment outcome …


Fig. 4. … leading to the beautiful smile the patient desired.


Reasons for selecting universal white:

- Cases requiring a particularly high brightness or value

- Restorations in deciduous teeth

- Restorations in bleached teeth


Universal white properties:

- Well-balanced translucency

- High light-scattering effect


CONCLUSION


One universal composite, four shades: In the case of CLEARFIL MAJESTY™ ES-2 Universal, this portfolio is absolutely sufficient for single-shade restorations even in the aesthetically demanding anterior region. Properties such as a nice blend-in effect, a great polishability and gloss retention over time support dental practitioners in creating beautiful restorations. As shade determination may be based on very few criteria instead of a complex shade guide, the whole restoration procedure becomes less stressful and more efficient. Furthermore, with only four shades to stock and usually no blocker needed, the number of materials on stock is reduced, leading to facilitations in stock management as well.

Dentist:

JUSUF LUKARCANIN


Dr. Jusuf Lukarcanin is a Certified Dental Technician (DCT) and a Doctor of Dental Science (DDS). He studied dentistry at the Ege University Dental Faculty in Izmir, Turkey, where he obtained a Master‘s degree in 2011. In 2017, he received a Ph.D. degree from the Department of Restorative Dentistry of the same university. Between 2012 and 2019, Dr. Lukarcanin was the head doctor and general manager at a private clinic in Izmir.


Between 2019 and 2020, he worked at Tinaztepe GALEN Hospital as a Restorative Dentistry specialist, between 2020-2022 he worked at MEDICANA International Hospital Izmir as a Restorative Dentistry specialist. Currently he is an owner of a private clinic for aesthetics and cosmetics in Izmir.


Anmäl dig för nyheter
Gå med tusentals tandläkare och få gratis råd som kan hjälpa dig och din karriär. Vi kommer inte skräppost eller dela din e-post.