Tagged with 'Kuraray Noritake'

Simplifying esthetic composite reconstructions using CLEARFIL MAJESTY™ ES-2 Universal

Article by Dr. Clarence Tam HBSc, DDS, FIADFE, AAACD


A CHAMELEON SUPERCOMPOSITE


INTRODUCTION

The name of the game in modern-day esthetic and restorative dentistry is that of Responsible Esthetics. The goal of treatment typically strives to correct any structural and cosmetic shortfalls in both biologically-driven and trauma-affected teeth with the precise, artistic placement of various replacement layers, all whilst respecting and retaining a maximal volume of residual tooth structure. Anterior teeth can be affected by enamel and dentin dysplasia, caries and sclerotic conditions and are characterized by a laundry list of genetically-derived and environmentally-acquired conditions with an esthetic deficit that often threaten an individual’s functional and psychosocial integrity if not restored to the seamless picture of health.


Missing and defective tooth structure must be categorized into its attendant enamel and dentin components. Both substrates are distinctly different in composition, with enamel being highly inorganic in nature and dentin proportionately more collagenous in nature. The latter stratum is responsible for the refraction of light, the expression of the true color of the tooth, namely the hue and the endowment of fracture toughness or resilience in functional performance. The value and chroma are the other elements of color and are modified by the thickness of enamel. The replacement of enamel has been found to be best substituted from a biomechanical perspective by adhesively-bonded indirect porcelain restorations, and dentin using both composite resin and short fiber reinforced composite (SFRC), the latter imparting increased fracture toughness in large volume replacement restorations, especially those with pericervical structural deficits.


In adolescent patients, the gold standard of treatment involves direct composite resin, as often zero to minimal tooth structure preparation is required as a foundation to the bonded restorative. It would be impractical to use bonded indirect restorations when the development of the dentition in puberty is continuous, especially with the retraction of gingiva as one progresses to young adulthood. Resin composite allows prescience in the opportunity to predictably modify and/or add to the existing restoration if dental bleaching for the other teeth is desired or if a further traumatic incident is encountered. The ability to modify bonded porcelain is not predictable and frequent marginal failures occur due to a lower shear bond strength to bonded composite, especially after thermocycling. This is despite our ability to establish a chemical linkage via silane coupling agents from silicate ceramics to resin composite especially at a blended interface.


STATEMENT OF PROBLEM

Dental shades in clinical dentistry have long been classified using the VITA* Classical A1 – D4 shade guide. Despite being ubiquitous in dental practices, composite resin systems with corresponding shade systems do not satisfactorily match to their purported shade1. Floriani et al found that various mixtures of different shades in one system was required to achieve an acceptable color match with the VITA* Classical shades using the CIEDE2000 formula. Testing another composite resin, they found that none of the A1, A2 or A3 shades matched acceptably to the standard shade guide2. Indeed, even with indirect ceramic layering systems, a wide range of unacceptable discrepancy was noted between VITA* labeled porcelain shades and the actual shade guide3. The VITA* Classical shade guide became the standard in dental shade classification with the release of its A1-D4 shade guide in 1985. The majority of human-tested dental shades has been found to be in the A-family (78.5%), followed by C (13.2%), D (5.2%) and B (3.1%)1. As such, the shade accuracy of a given composite system must be important if they are to be visually naturomimetic.


CHAMELEON EFFECT DEVELOPMENT

There are myriad composite resin systems featuring a simplified shade Universal system that have acceptable chameleon effects due to their balance of translucency, light transmission, diffusion and refractive index properties. There is a concern over how these optical properties may change after both thermocycling and wet storage, potentially compromising the excellent initial esthetic blend4. Refractive index (RI) is best optimized when the RI of the inorganic fillers match closely with the RI of the cured organic matrix, typically in a range between 1.47 and 1.525. If the match is dissimilar, this drives up the opacity of the restoration due to heightened refraction and reflection at the filler/matrix interface6.


Layering of composite to mask an intraoral defect is complicated by the need to mask any linear defects such as fracture lines superimposed over the shadowing of the dark intraoral cavity in addition to regional color variations. It is confounded by the requirement to recreate natural maverick and translucent effects particularly in the incisal window region of upper and lower incisors and canines, giving the illusion of a virgin, healthy tooth. This has been historically difficult to accomplish in anterior teeth given the need to block out restorative interfaces with natural tooth structure and recreate a seamless internal structure and details. This detailed layer belies a well contoured enamel layer with realistic translucency, polishability and accurate primary and secondary anatomy.


Adding to the complexities described above, the histoanatomical approach to composite layering dictates that missing enamel is replaced by enamel shades, and dentin by the corresponding dentin shade in the appropriate shade. This shade must be selected at the very start of the appointment, as often even a minute of dehydration has a negative effect on both the perceptibility threshold and acceptability threshold of teeth7, resulting in the incorrect shade.


DEVELOPMENT

CLEARFIL MAJESTY™ ES-2 is a value-based super-nanofilled composite system that covers 15 VITA* shades in just 4 shade options with its Universal series. This Universal series provides a chameleon effect and has 4 variants: Universal (U), Universal Light (UL), Universal Dark (UD) and Universal White (UW). It is the VITA*-approved shading concept relative to color accuracy. Incorporating nano-fillers that consist of silanated barium glass fillers and slanted silica nanoclusters, its wear resistance is high and features minimal abrasiveness against the functional antagonist. The RI of both inorganic filler and organic matrix are well-matched, and the high refractive index of the composite mimics and is extremely similar to natural enamel (1.613) and dentin (1.540), thanks to an innovation labeled Light Diffusion Technology (LDT), which distorts light in a similar way dental tissue does8. There is comfort that the stability of refractive index and other optical transmission properties remains statistically stable even after artificial thermocycling and water-storage aging studies4. The color stability of CLEARFIL MAJESTY™ ES-2 has been proven over time, where a direct comparison to Filtek Ultimate showed CLEARFIL MAJESTY™ ES-2 to feature significantly less color variation from baseline and marginal functional wear over a three to four year period in teeth featuring amelogenesis imperfecta9. This color substantivity is important as dietary and environmental stressors applied over time should have as minimal effect on the restoration to ensure continued esthetic integration.


CLINICAL PROTOCOL

CLEARFIL MAJESTY™ ES-2 Universal is a monochromatic solution that covers the five key shades featured in the CLEARFIL MAJESTY™ ES-2 Premium. As such, it exhibits the most significant LDT relative to all five shades, as its ability is equal when blending to higher value translucent shades as it does to cervical chromatic shades. In a Class IV restoration with a defined fracture line, the challenge is to restore the tooth in a minimal volume of available space. The alchemy requires a complete visual occlusion of the fracture line position, and recreation of internal and external opaque and translucent anatomy along with maverick staining, craze lines and effects. In anterior teeth, the idiom of “the less you see, the less you notice” is not true, especially due to the presence of incisal edge window effects as above, however, materials with the best light diffusion and structure transference properties should be utilized to ensure the highest probability of success.


A 15 year old ASA I female presented to the practice exhibiting aged, chromatic composite restorations with poor marginal integration and gross axial overhangs; essentially a gross failure of primary anatomy and esthetics. She had been involved in a bike accident where she high-sided off braking sharply in a face-meets-concrete scenario, resulting in an uncomplicated moderate enamel-dentin fracture with blushing, affecting both the facial and palatal aspects of tooth 1.1 and a mild uncomplicated enamel dentin fracture affecting the distoincisobuccolingual aspect of tooth 2.1. The restoration overhangs were significant, extending into the proximal contour zone, thus obviating effective interdental cleaning. Vitality tests were confirmed along with radiographs to exclude the presence of apical pathology. The patient accepted the option of pre-prosthetic whitening, to improve the value characteristics of the adjacent teeth, allowing the selection of a brighter value shade combination. Intraoral digital scans were acquired and custom bleaching trays with a no reservoir, cervical seal-priority design were fabricated. The patient was instructed to bleach overnight for a 2 week period using a 10% carbamide peroxide solution (Opalesence, Ultradent Products, UT) until her maximal value was reached. Her baseline shade of the incisors was a 1M1/2M1 combination in the upper incisors and a 2M1 in the lower incisors. On final post-bleach assessment she exhibited a lightened shade of VITA* 0M3 in all incisors. The patient was instructed to use a fluoride-containing, amorphous calcium phosphate complex (ToothMousse Plus, GC America) during the following 2 weeks after cessation of whitening whilst the residual oxygen radical species dissipated from the teeth.


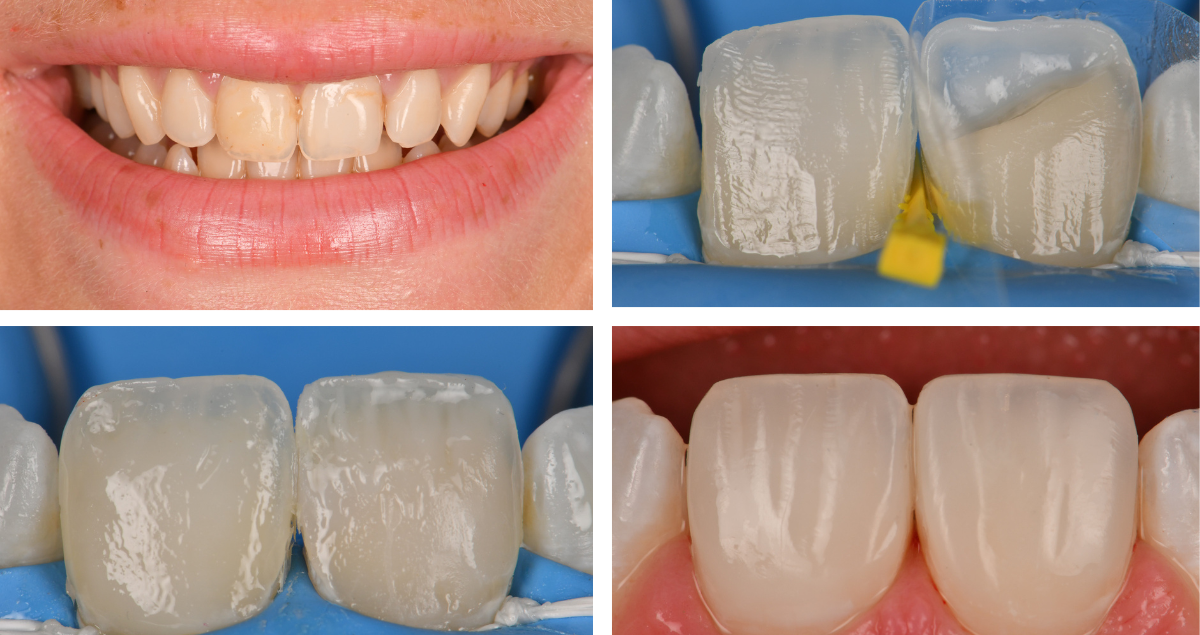
Fig. 1. Pre-operative unrestricted smile 1:2 ratio view, teeth 1.1 and 2.1 with old, defective composite restorations with excessive chroma.


On the day of the procedure, the pre-dehydrated shade was assessed using the supplied “real composite” shade guide tabs featured in the CLEARFIL MAJESTY™ ES-2 Premium system, with the enamel shade being WE (White Enamel) and the dentin shade WD (White Dentin). It was assessed that both white maverick effects as well as a moderate halo effect was desired along with moderate to strong translucency in the incisal window.


The patient was anesthetized using 1.5 carpules of 2% Lignocaine with 1:100,000 epinephrine (Septodont) before a rubber affixed with individual ties for the central incisors (NicTone Medium). Excavation of the old restorative material was undertaken, and the residual natural incisal edge was found to be undermined by a through-and-through fracture. Thus, the preparation was converted into a true Class IV design, with the facioincisal cavosurface margin subjected to an infinity bevel. The maxillary central incisors were isolated from the lateral incisors by way of a serrated metal strip (Komet) and the prepared surfaces subjected to micro particle abrasion using a 29 micron aluminum oxide powder in 17.5% ethanol carrier (Aquacare). The surfaces were subsequently treated with a calcium sodium phosphosilicate powder (Sylc, Aquacare) to increase the inorganic content of the prepared surface especially extending into the exposed tubules. The teeth were etched using a 33% orthophosphoric acid before a 1 minute 2% chlorhexidine scrub (Vista Products). The surface was reduced to a moist dentin surface before the bond applied, air thinned and cured.


A Mylar strip was pre-crimped in the palatoproximal line angles and positioned on the linguoaxial surface of both teeth 1.1 and 2.1. There is no shade guide for the CLEARFIL MAJESTY™ ES-2 Universal U shade, as it bears a significant chameleon effect however it does come in a light (L) and dark (D) variant. The UL shade was deemed the most suitable for the palatal or lingual shelf, with an average thickness of 0.3mm. This layer was applied in a freehand fashion with a focus on establishing the desired outline form of the tooth relative to the contralateral 2.1. The Mylar matrix setup was removed and a precurved metal matrix (Garrison Slickband, Garrison Dental) was oriented in a position perpendicular to its normal placement interproximally, and the end of the curved band tucked into the sulcus before being secured by a wedge. In this way, there is light separation of the central incisors and an intimate contact between the matrix band and the mesial edge of the freshly applied lingual shelf. A 0.5mm frame extending more than halfway through the contact point was created and cured. The process was repeated on tooth 2.1 with the goal of recreating both lingual and proximal walls of the restoration, leaving only the facial volume to be replaced.


Fig. 2. Pre-crimped Mylar matrix repeated on the DIBP aspect of tooth 2.1 to close the available space. CLEARFIL MAJESTY™ ES-2 Universal UL is used here.


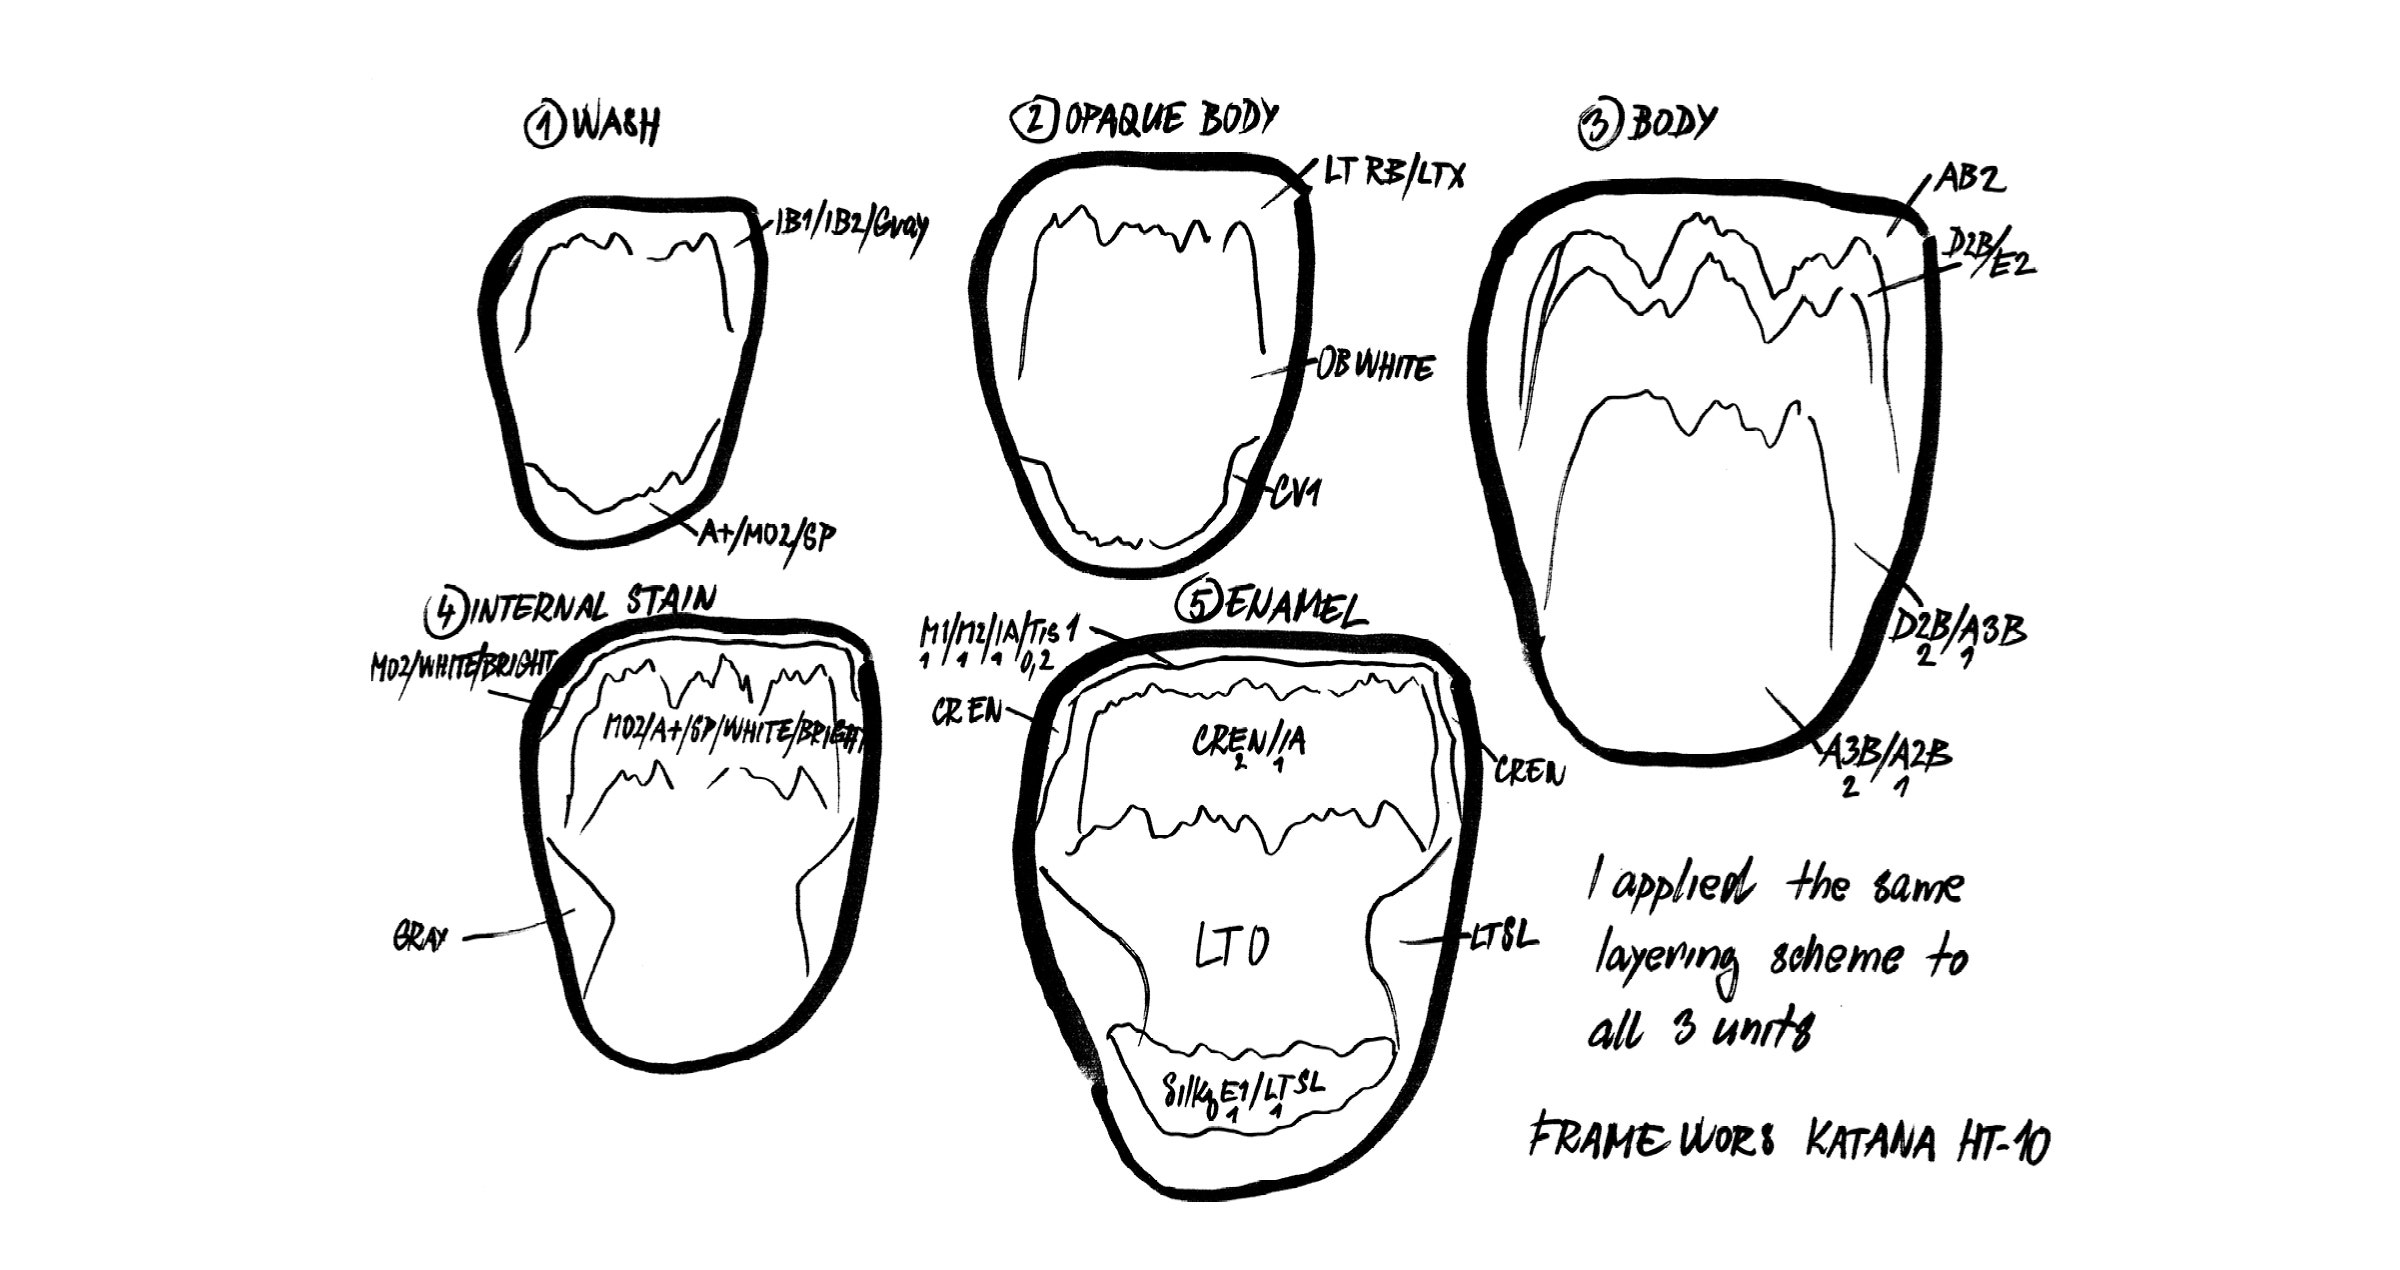
Block-out of the composite extensions against the natural tooth structure was achieved by opacification using an opaque composite resin (WD, CLEARFIL MAJESTY™ ES-2 Premium, Kuraray Noritake Dental Inc.) layered in both horizontal and vertical increments. It is noted that the restorative join line must be completely obscured at the end of layering the dentin volume, otherwise the case will have almost certain esthetic failure. The internal dentin anatomy and its inherent variation was created to mirror that of the 2.1, which had minimal compromise of its incisal window with details intact. A super translucent composite resin (Clear, CLEARFIL MAJESTY™ ES-2 Premium, Kuraray Noritake Dental Inc.) was placed between the lobes of the dentin layers and cured. A 9:1 ratio of white: orange tint was mixed and placed on the incisal edge and proximoincisal corners to recreate the halo effect. A pure white tint was placed in gentle dentin mamelon-connecting spider legs up to the incisal edge to impart the realism. This was layered in a manner consistent with the appearance of the 2.1.


Fig. 3. Both horizontal and vertical dentin composite increments are demonstrated mimicking the contralateral tooth.


Fig. 4 & 5. Final immediate post-operative result after finishing and polishing.


DISCUSSION

The esthetic merit of this case is foundationally supported by composite resin technology on multiple levels. The color and physical stability over time needs to be proven in order for the clinician to have faith in its prognostication. Specifically, the material needs to have an excellent and well-matched refractive index, and one that is unaffected by both water and thermocycling stressors.


The palatal shelf was fabricated using a new-generation super nano-filled universal composite system that boasts a strong chameleon effect. If it is our intention to fool the eye, to obscure, then this first layer works well to start the blockout process of the darkness of the mouth behind the fracture line of the restored tooth. Following this, the chroma and value of the tooth are corrected using the dentin, simultaneous to its continued opacification of the fracture line and intraoral darkness. Both dentin and enamel layers are applied histoanatomically, that is, in a manner respecting the various thickness zones observed in nature.


Ultimately, esthetic success in direct composite resin is not dictated on the first day post-operatively. Factors are in play, from dehydration to occlusal wrinkles that need to be ironed out and corrected. The win depends on what material is used, along with how that material was developed to what standards, and why shade accuracy is so important in a world of variety. In a dental world with myriad composite options, we are looking for precision. Precision in technology leads to efficiency and physicoesthetic maintenance in clinical results. This ultimately results in a boost to clinician-patient confidence and an optimal prognosis.

Dentist:

CLARENCE TAM


*VITA is a trademark of VITA Zahnfabrik, Bad Sackingen, Germany


References


1. Elamin HO, Abubakr NH, Ibrahim YE. Identifying the tooth shade in group of patients using Vita Easyshade. Eur J Dent. 2015 Apr-Jun;9(2):213-217. doi: 10.4103/1305-7456.156828. PMID: 26038652; PMCID: PMC4439848.
2. Floriani F, Brandfon BA, Sawczuk NJ, Lopes GC, Rocha MG, Oliveira D. Color difference between the vita classical shade guide and composite veneers using the dual-layer technique. J Clin Exp Dent. 2022 Aug 1;14(8):e615-e620. doi: 10.4317/jced.59759. PMID: 36046166; PMCID: PMC9422970.
3. Gurrea J, Gurrea M, Bruguera A, Sampaio CS, Janal M, Bonfante E, Coelho PG, Hirata R. Evaluation of Dental Shade Guide Variability Using Cross-Polarized Photography. Int J Periodontics Restorative Dent. 2016 Sep-Oct;36(5):e76-81. doi: 10.11607/prd.2700. PMID: 27560681.
4. Almasabi W, Tichy A, Abdou A, Hosaka K, Nakajima M, Tagami J. Effect of water storage and thermocycling on light transmission properties, translucency and refractive index of nanofilled flowable composites. Dent Mater J. 2021 May 29;40(3):599-605. doi: 10.4012/dmj.2020-154. Epub 2020 Dec 24. PMID: 33361663.
5. Arai Y, Kurokawa H, Takamizawa T, et al.. Evaluation of structural coloration of experimental flowable resin composites. J Esthet Restor Dent. 2020;e12674.
6. Ota M, Ando S, Endo H, et al.. Influence of refractive index on optical parameters of experimental resin composites. Acta Odontol Scand. 2012;70(5):362–367.
7. Suliman S, Sulaiman TA, Olafsson VG, Delgado AJ, Donovan TE, Heymann HO. Effect of time on tooth dehydration and rehydration. J Esthet Restor Dent. 2019 Mar;31(2):118-123. doi: 10.1111/jerd.12461. Epub 2019 Feb 23. PMID: 30801926.
8. Meng Z, Yao XS, Yao H, Liang Y, Liu T, Li Y, Wang G, Lan S. Measurement of the refractive index of human teeth by optical coherence tomography. J Biomed Opt. 2009 May-Jun;14(3):034010. doi: 10.1117/1.3130322. PMID: 19566303.
9. Tekçe N, Demirci M, Sancak EI, Güder G, Tuncer S, Baydemir C. Clinical Performance of Direct Posterior Composite Restorations in Patients with Amelogenesis Imperfecta. Oper Dent. 2022 Nov 1;47(6):620-629. doi: 10.2341/21-106-C. PMID: 36281978.


Wishing you a wonderful Holiday Season!

2025 MARKS THE YEAR OF THE SNAKE

We wish you a successful New Year and hope you will join us on our journey in 2025.


WISHING YOU AN INNOVATIVE YEAR!


Kuraray Noritake leads dental innovation

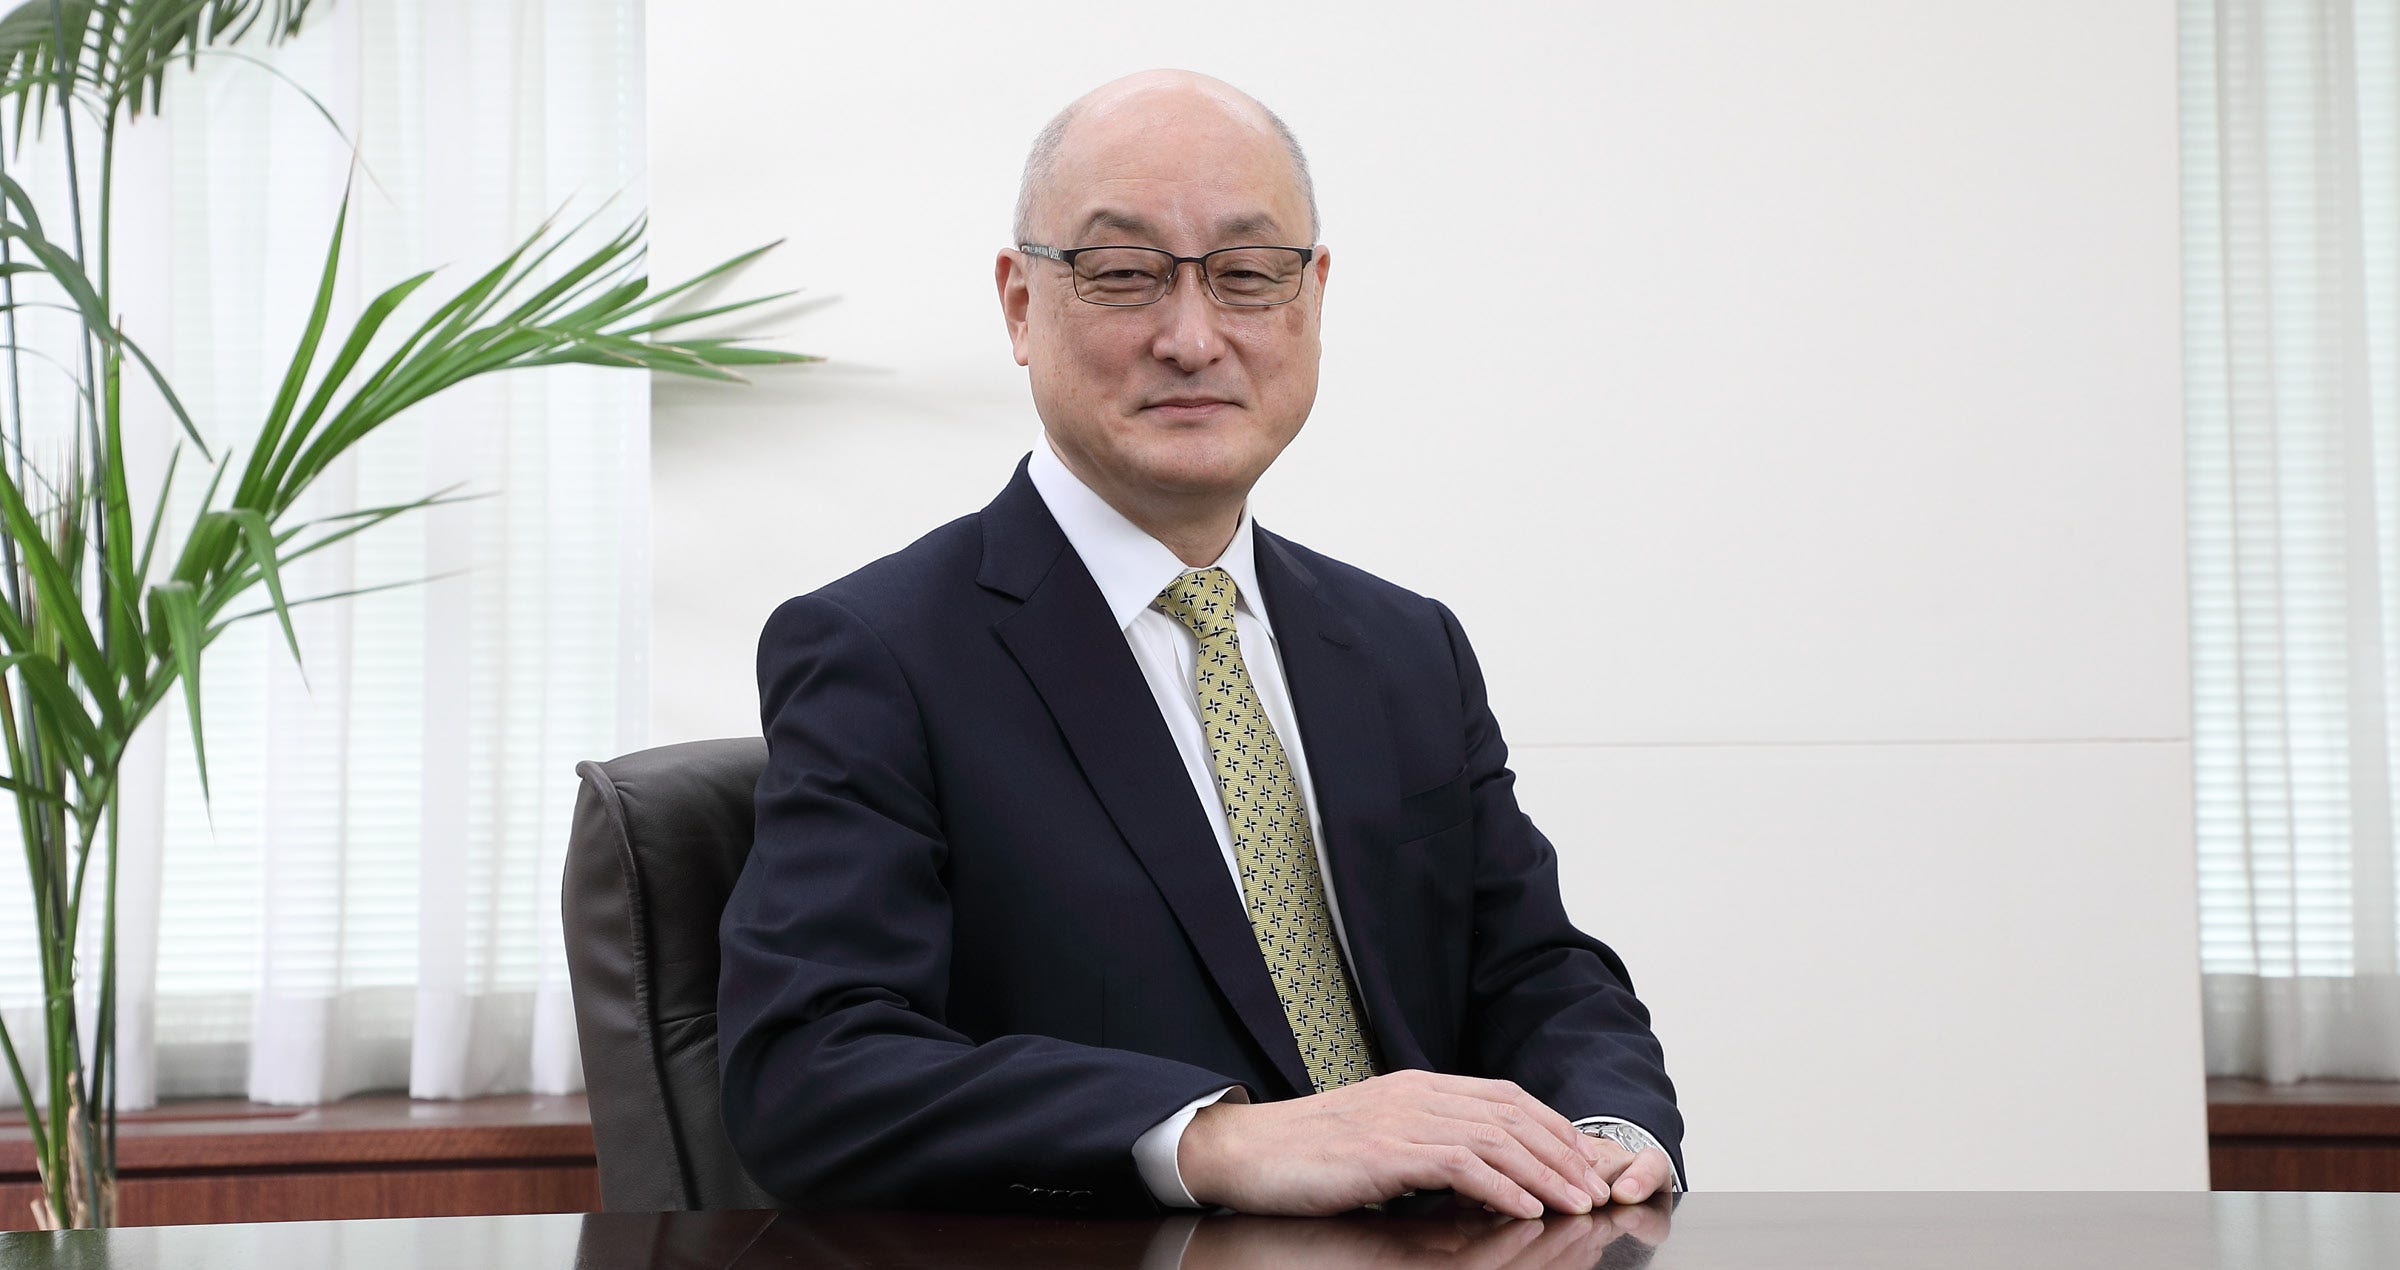
Satoshi Yamaguchi, President, Kuraray Noritake Dental Inc.


KURARAY NORITAKE DENTAL INC. EXCELS IN DENTAL TECHNOLOGY, FOCUSING ON STRENGTH, AESTHETICS AND GLOBAL ADAPTABILITY

Kuraray Noritake Dental Inc., a leader in dental materials and technology, blends innovation with a deep commitment to oral health. Established from the merger of Kuraray Medical Inc. and Noritake Dental Supply Co., Limited, the company excels in providing dental bonding agents, fillings, cements, porcelains, zirconia and CAD/CAM blocks. This synergy has allowed the company to push the boundaries of dental science.


“We aim to enhance global oral health and wellness.”


President Satoshi Yamaguchi highlights the company's approach: "We focus on strength, aesthetics and speed in our products. By developing our own zirconia powder and partnering with CAD/CAM system manufacturers, we achieve high-quality, durable and efficient dental solutions." This commitment is evident in the firm's flagship product, KATANA™ Zirconia Block, renowned for its durability and aesthetic appeal.


Kuraray Noritake Dental is also striving to develop new products for more longterm predictable dental treatment with bioactive properties. The company is not just focused on developed markets like the U.S. and Europe. Mr. Yamaguchi explains: "Understanding local treatment situations is key. In addition to the U.S. and Europe, having sales offices in places like Brazil and China helps us tailor our products to regional demands." This global presence ensures the company remains at the forefront of dental technology, adapting to diverse market needs.


Tooth crown made from KATANA™ Zirconia


Looking ahead, Mr. Yamaguchi envisions Kuraray Noritake Dental as more than just a technological innovator. "In five years, I hope we are seen not only as a tech company but as a holistic provider of oral care solutions," he says. With a commitment to reducing "invisible stress" for dental professionals and patients, the company aims to enhance global oral health and wellness.Original article published in Newsweek Magazine on September 20th, 2024 Written by The Worldfolio


Individualisation of monolithic zirconia restorations

Article by Dr. Florian Zwiener


Modern multi-layered zirconia such as KATANA™ Zirconia STML (Kuraray Noritake Dental Inc.) already meets high aesthetic demands due to its natural colour gradient and high translucency. To achieve further characterisation and optical adjustment to the adjacent teeth, there are essentially two options: veneering with feldspathic ceramic or glazing and individualisation with ceramic stains.


While there are still many indications for veneering, especially in the anterior area, more and more cases can now be solved with monolithic restorations. This allows for a time-efficient chairside workflow with same-day treatment, eliminating the need for temporary restorations. Additionally, the absence of a porcelain layer reduces the wall thickness of the restoration and thus the space required, allowing for less invasive preparation. This also reduces the risk of endodontic complications induced by tooth preparation (grinding trauma). Another advantage is a significant reduction in the chipping risk.


Below are the essential steps for individualisation using ceramic stains, demonstrated through the example of a molar crown.


PREPARATION

The restoration is designed in full contour as usual, ideally dry-milled, and then sintered. After sintering, the restoration is first sandblasted (aluminium oxide 50 μm, 1 to 1.5 bar pressure). This microscopic roughening of the ceramic surface enables an optimal bond with the glaze. Subsequently, the restoration should be cleaned using a steam cleaner or an ultrasonic cleaner to remove all blasting residue.


The functional restoration surfaces must then be polished to avoid the risk of excessive abrasion on the enamel of the opposing dentition, as zirconia is harder than enamel. Following this, optional glazing and characterization with ceramic stains can be performed. However, for areas not in the aesthetic zone, such as the palatal surfaces of maxillary anterior teeth, this is not necessarily required.


PREPARATION: STEPS AT A GLANCE

  1. Sandblasting of the sintered restoration (Al2O3 50 μm, 1-1.5 bar)
  2. Cleaning (steam cleaner or ultrasonic cleaner)
  3. Polishing the occlusal/palatal contact areas


Fig. 1. Sintered and sandblasted zirconia crown.


Fig. 2. Occlusal high-gloss polish.


Fig. 3. TWIST™ DIA for Zirconia (Kuraray Noritake Dental Inc.) enables efficient polishing of zirconia in three steps.


STAINING AND GLAZING

The shades A+, B+, C+, and D+ of the paste-like ceramic stain CERABIEN™ ZR FC Paste Stain (Kuraray Noritake Dental Inc.) enhance the chroma in the cervical area when applied in the respective tooth shade. They are used to strengthen the multicolour effect of the zirconia or to darken the restoration overall. By mixing the stains with glaze or clear glaze in different ratios, the intensity can be adjusted.


Cervical 1 and 2 are suitable for replicating exposed cervical areas or discolouration. Cervical 1 is also useful for marking fissures, as it gives the crown depth and structure without appearing overly dark. Patients typically reject excessively pronounced fissure effects. Since fissure areas in multi-layered materials generally lie in the lightest part of the block (in the enamel layer), it may make sense to darken them slightly with A+, while white hypermineralisations can be replicated on the cusp tips. A narrow band of Grayish Blue below the cusp tips creates an optical translucency effect. In cases where this translucency appears too dark blue or greyish, mixing Grayish Blue with Dark Grey can modify the appearance.


By mixing various colours, numerous different tones can be created. For instance, by adding Yellow to A+, its slightly brownish colour can be adjusted to a warmer, more yellowish tooth shade. It is generally advisable to capture the patient‘s tooth shade with a photo and a custom-made colour ring of the corresponding material before preparation. This can serve as a reference during production, especially in the laboratory, where lighting conditions may differ.


For pronounced characterisations or fine details, it may be necessary to carry out multiple firings to avoid unwanted running effects between the colours and the glaze. This is particularly recommended when replicating anatomical details with high sharpness, such as enamel cracks or local discolourations. For this, a glaze and base shade are first applied and fired, and finer structures are added in a second firing. Alternatively, a fixative firing of the stains without glaze can be performed first, with only a glaze layer fired in the second step. A benefit of CERABIEN™ ZR FC Paste Stain is that its appearance during application closely matches the final firing result. In thick consistency, glaze can also be used to easily rebuild missing proximal contacts.


STAINING AND GLAZING: STEPS AT A GLANCE

  1. Glaze with Glaze/Clear Glaze
  2. Increase chroma (in the cervical area or over large areas) with A+, B+, C+, or D+
    - Adjust intensity by mixing with Glaze/Clear Glaze
    - Create a warmer tone by mixing with Yellow
  3. Replicate discolouration/exposed cervical areas: Cervical 1 and 2
  4. Customise fissure areas
    - Darken with A+, B+, C+, or D+
    - Accentuate fissures with Cervical 1
  5. Customise cusp tips
    - Replicate hypermineralisations with White
    - Create a band below with Grayish Blue (translucency effect)
    - Adjust translucency effect below cusp tips by mixing with Dark Grey
  6. Firing


Alternatives:

  1. First firing: Glaze plus base shade, second firing: Finer structures
  2. First firing: Fixative stain firing without glaze, second firing: Glaze firing


Fig. 4. CERABIEN™ ZR FC Paste Stain assortment for the practice laboratory.


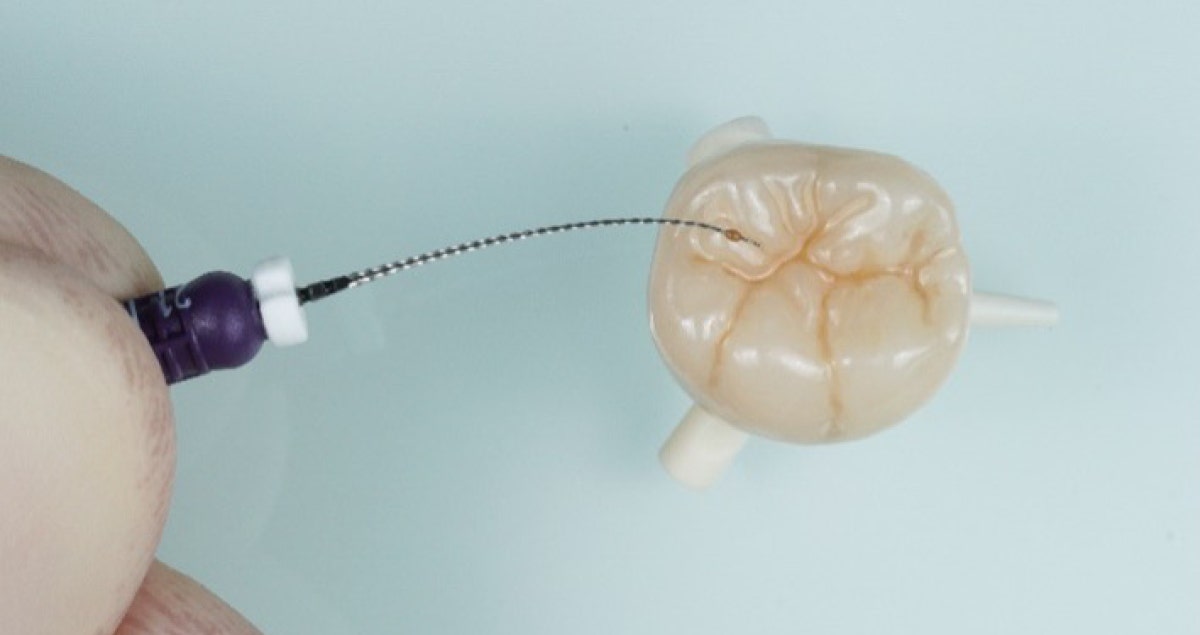
Fig. 5. Discoloured fissures can be accurately replicated with an ISO10 endodontic file.


Fig. 6 and 7. Glazing and staining in one firing.


Fig. 8. Shade determination using a custom-made KATANA™ Zirconia STML colour ring (A3.5).


Fig. 9. Bridge made from KATANA™ Zirconia STML, sandblasted and occlusally polished.


Fig. 10. Finished glazed and characterised restoration.


Fig. 11. Bridge 14-16 in place.


FINAL SITUATION

Fig. 11. Bridge 14-16 in place.


Dentist:

FLORIAN ZWIENER


When a product is as good as it claims to be

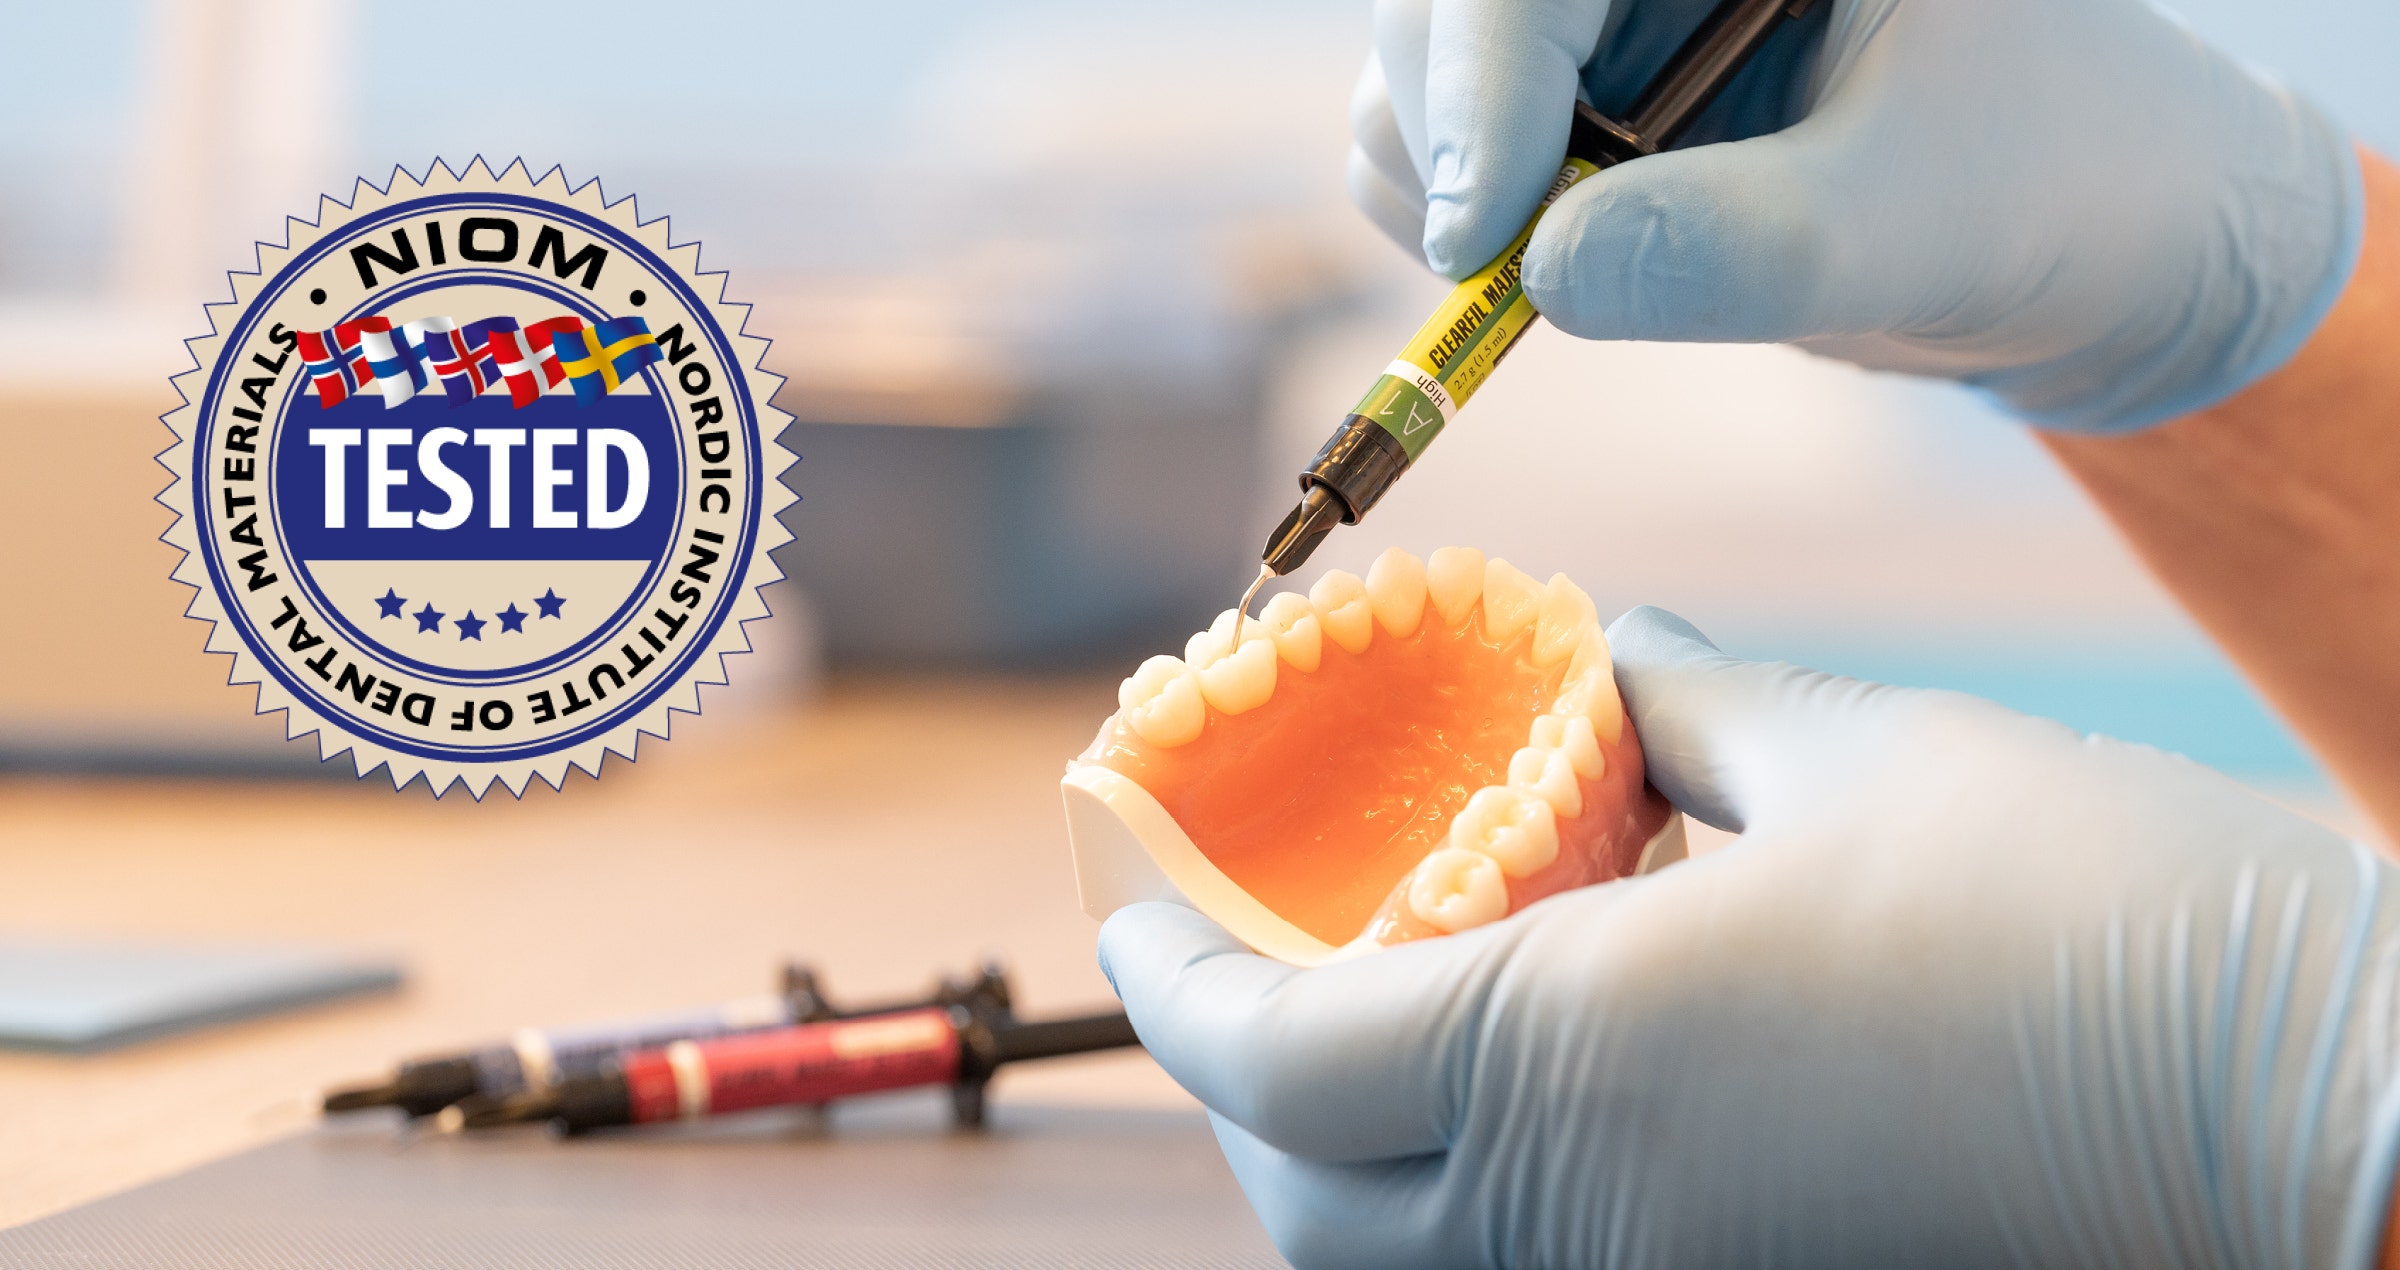
CLEARFIL MAJESTY™ ES FLOW RECEIVES “NIOM TESTED” QUALITY SEAL

Before being allowed to market a dental composite filling material, it must, among other things, meet the set standards within ISO 4049:2019 Dentistry - Polymer-based restorative materials. Prompted by the tremendous positive response Kuraray Noritake Dental Inc. received from users of the CLEARFIL MAJESTY™ ES Flow series, we asked the Nordic Institute of Dental Materials (NIOM), an independent research institute, to test this product line on key aspects within the said ISO standard.


While it was not mandatory for us to have the CLEARFIL MAJESTY™ ES Flow series tested, our confidence in the quality of our product prompted us to do so. NIOM thoroughly evaluated CLEARFIL MAJESTY™ ES Flow in all three different levels of flowability: High, Low, and Super Low (Fig. 1). Among the properties assessed were depth of cure, flexural strength, water sorption and solubility, and colour stability after irradiation and water sorption. NIOM found that regarding all properties, the three flowabilities and different shades proved to comply with the requirements.


We are pleased to have gone the extra mile and proud that an independent party verified that our product meets the stringent ISO standards.


Fig. 1. CLEARFIL MAJESTY™ ES Flow in its three different levels of flowability.


IMPLICATIONS FOR CLINICAL USE

These test results are an external proof for users of the popular flowable composite series that they safely can be used as specified by Kuraray Noritake Dental Inc. in the product’s instructions for use. The NIOM test results obtained regarding the depth of cure imply that, when applied to the recommended layer thickness, the composite will polymerise adequately – which is essential for a great long-term performance. In addition, all three flowabilities offer sufficient strength and water sorption/solubility behaviour even to be suitable for restorations, including the occlusal surface of molars and pre-molars. This means that the materials are very well suited for a wide range of indications, including restoring all cavity classes and repairing existing restorations and cementing (Fig. 2).


Fig. 2. Three variants of CLEARFIL MAJESTY™ ES Flow and the suggested use areas.


GREAT AESTHETICS AND HANDLING

On top of these well-balanced mechanical properties, CLEARFIL MAJESTY™ ES Flow in its innovative syringe handles well due to an easy dispensing, bubble-free application, easy sculpting facilitated by its non-sticky formulation, and easy polishing behaviour. Coming in a variety of shades (Fig. 3) and equipped with proprietary Light Diffusion Technology, the material in its three different levels of flowability blends nicely and effortlessly with the surrounding tooth structure, creating a natural overall look. Both handling and aesthetics have been rated very good to excellent by dental advisor consultants in the context of a clinical evaluation.


Fig. 3. Overview of shades available per flowability.


NIOM also provides proof of the positive aesthetic properties: the institute's tests to evaluate colour stability after irradiation and water sorption reveal that CLEARFIL MAJESTY™ ES Flow is expected to remain stable over time. This feature is important for the long-term aesthetics of the restorations created with the materials.


Choose a reliable, high-quality, flowable, direct restorative material that withstands rigorous testing.


Amalgam replacement: Why and when hybrid ceramics are a great option

Case by Dr. Enzo Attanasio


The selection of the restorative material is a crucial step in prosthodontics. Hybrid ceramics offer a range of properties well-suited for various therapeutic situations, both in the presence of vital teeth and of endodontically treated teeth. Using the example of a clinical case, this article will explore the advantages associated with the use of hybrid ceramics in a cracked tooth syndrome scenario.


INITIAL SITUATION

The affected tooth in this case was a mandibular right second premolar (45 according to the FDI notation) with an old amalgam restoration (Figs. 1 and 2). The patient experienced pain upon chewing (specifically upon release). Clinically, there were visible horizontal and vertical crack lines. The tooth was vital and showed no signs of pulpal pathology. It was decided to replace the amalgam restoration and restore the tooth with an overlay made of the hybrid ceramic KATANA™ AVENCIA™ Block. There were two main reasons for this decision. First, whenever root canal treatment would be necessary in the future, the hybrid ceramic material would facilitate endodontic access cavity preparation (compared to any other ceramic material) and subsequent restoration with composite filling material. Second, hybrid ceramics offer greater resistance and improved mechanical properties compared to composite filling materials applied in an incremental layering technique.


Fig. 1. Initial situation: Occlusal view.


Fig. 2. Initial situation: Buccal view.


PREPARATION AND IMMEDIATE DENTIN SEALING

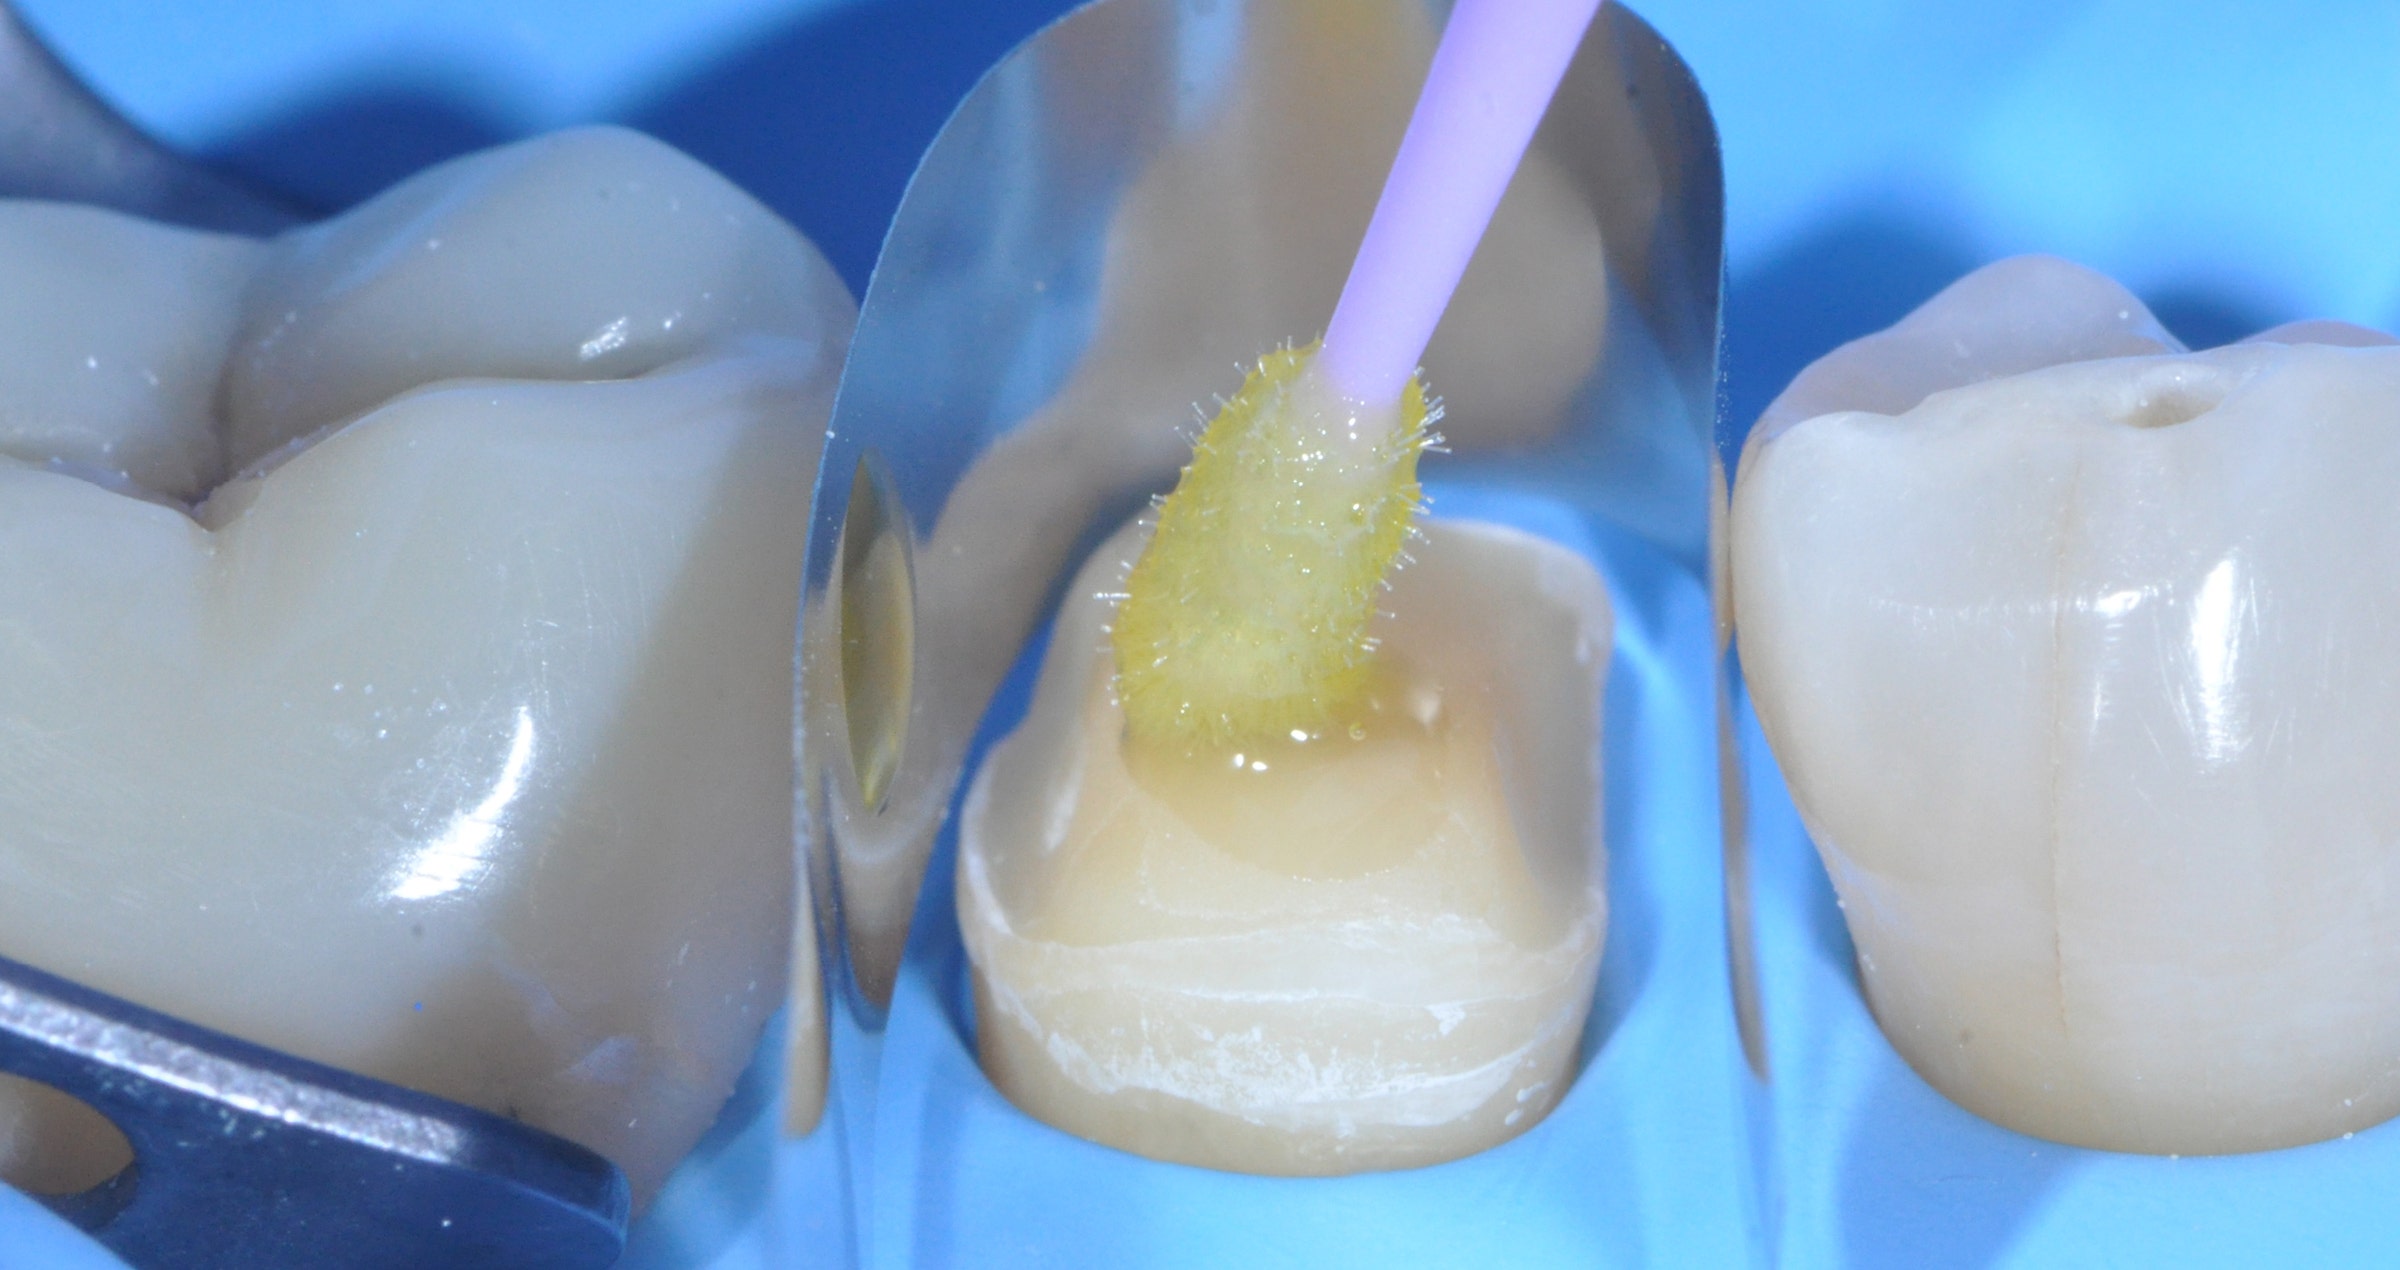
To remove the amalgam restoration and weakened surrounding tooth structure, the occlusal surface of the tooth was reduced by approximately 2 mm. For a smooth colour transition between the tooth and the restoration, the preparation outline was created at the level of interproximal boxes with a vestibular inclined plane (Fig. 3). Subsequently, Immediate Dentinal Sealing (IDS) was carried out (Figs. 4 to 10). This technique involves the use of a universal adhesive like CLEARFIL™ Universal Bond Quick, which is applied to the preparation without prior etching of the peripheral enamel. In the second step, a highly filled flowable composite is applied. In the present case, the material of choice was CLEARFIL MAJESTY™ ES Flow Super Low, applied in a thickness of just 0.5 mm. The preparation was refined using ultrasonic instrumentation: Sonic tips SFM7 and SFD7 (Komet Dental) for refining the boxes; SFD1F and SFM1F (Komet Dental) for margins and steps. Sharp edges were rounded with abrasive discs and then polished with fine polishers. It is crucial that the residual occlusal thickness (prosthetic space) is 1.5 mm, as required by the selected material.


Fig. 3. Prepared tooth structure prior to immediate dentin sealing.


Fig. 4. IDS: Application of the universal adhesive.


Fig. 5. IDS: Light curing of the adhesive layer.


Fig. 6. Thin layer of flowable composite applied to the preparation.


Fig. 7. Contouring, …


Fig. 8. … rounding off sharp edges …


Fig. 9. … and polishing of the sealed surface with dedicated instruments.


Fig. 10. Sealed tooth preparation ready for impression taking.


FROM SCANNING TO TRY-IN

Following digital scanning with the intraoral scanner Primescan™ (Dentsply Sirona), MDT Daniele Rondoni produced the restoration (Figs. 11 and 12). The cementation process involves an initial try in phase to assess the marginal fit of the overlay and the contact areas. Testing occlusion at this stage could be risky as it may lead to fracture of the restoration in case of excessive premature contacts. After try-in (when carried out without rubber dam), the restoration may be contaminated by blood, saliva, or glycerin gel used for the evaluation of fit and aesthetics. Therefore, it is necessary to clean the restoration before proceeding with adhesive phases. The use of a cotton pellet soaked in alcohol is an option, a cleaning agent like KATANA™ Cleaner may be even better as it chemically cleans the restoration and eliminates the contaminants.


Fig. 11. Hybrid ceramic overlay on the printed model.


Fig. 12. Separate overlay.


CONDITIONING OF THE TOOTH AND THE RESTORATION

Afterwards, the restoration was sandblasted (as recommended for most hybrid ceramics) with 50 μm aluminum oxide using AquaCare (Akura Medical) (Fig. 13), and then immersed in distilled water in an ultrasonic bath for 5 minutes. Meanwhile, rubber dam was placed over the entire sextant, the build-up was sandblasted like the intaglio of the overlay and a phosphoric acid etchant (Ultra Etch, Ultradent) was applied to the enamel, rinsed off and the area dried (Figs. 14 to 17). The clean restoration was subsequently conditioned with a silane containing 10-MDP (CLEARFIL™ Ceramic Primer Plus, Kuraray Noritake Dental Inc.) according to the manufacturer’s instructions (Fig. 18). What followed was the application of the universal adhesive (CLEARFIL™ Universal Bond Quick) to the intaglio of the overlay and to the preparation and light curing on both sites (Figs. 19 and 20). One of the advantages of universal adhesives compared to three-step adhesive systems is their minimal film thickness, which does not compromise the fit of the restoration.


It is important to protect adjacent teeth with metal matrix strips during adhesive phases to provide for proper fitting. These elements do not create operational difficulties, but serve their purpose: After restoration placement, the composite or cement used for placement will be easily removable from the mesial and distal surfaces of the adjacent teeth, as they are free of adhesive.


Fig. 13. Sandblasting of the overlay …


Fig. 14. … and the tooth structure.


Fig. 15. Selective etching of the enamel, …


Fig. 16. … followed by thorough rinsing. Adjacent teeth are protected by a metal matrix strip.


Fig. 17. Tooth structure after selective etching, rinsing and drying.


Fig. 18. Silane application.


Fig. 19. Application of the universal adhesive into the overlay.


Fig. 20. Treatment of the tooth structure with the universal adhesive.


DEFINITIVE PLACEMENT

In the present case, a heated composite paste (heated to a temperature of 55 °C) was extruded into the restoration, which was then placed by applying slow, gradual, and strong pressure (Figs. 21 and 22). Excess composite was removed with a scaler in the buccal and lingual areas and floss (e.g. SuperFloss®, Oral-B) in the interproximal areas. Several pressurization phases were performed until no more composite was observed at the tooth-restoration interface.


Fig. 21. Heated composite paste used for definitive placement.


Fig. 22. Restoration placed under rubber dam isolation.


Then, the composite was polymerized for 30 seconds from the buccal and lingual sides with two curing lights, before applying glycerin gel to the margins and polymerizing from occlusal for another minute (Fig. 23). If thorough attention is given to removing excess composite during placement phases, subsequent finishing steps will be quick and easy (Figs. 24 to 27). Finishing and polishing of the interproximal areas was accomplished with an EVA handpiece and 3M™ Sof-Lex™ Finishing Strips (3M). For finishing of the buccal and lingual areas, a medium-grit, flame-shaped diamond bur (diameter 14/16) was used. Finally, the margins should be polished using composite polishers like TWIST™ DIA for Composite (Kuraray Noritake Dental Inc.). After the local anesthesia wears off, one should observe the cessation of pain symptoms, as seen in the present case. The treatment outcome is displayed in Figures 28 and 29.


Fig. 23. Light curing through a layer of glycerin gel blocking the oxygen.


Fig. 24. Finishing of the buccal and lingual margin with a medium-grid, flame-shaped diamond bur.


Fig. 25. Finishing of the interproximal areas with EVA handpiece (fine grain).


Fig. 26. Checking the occlusal contacts.


Fig. 27. Occlusal polishing.


FINAL SITUATION

Fig. 28. Treatment outcome – buccal view.


Fig. 29. Treatment outcome – occlusal view.


CONCLUSION

For posterior teeth restored with amalgam and a significant level of destruction, restoration replacement with hybrid ceramic overlays can be a great option. Mechanical material properties are usually superior to those of layered composites, processing is possible chairside or labside and comparatively quick (no firing required), while the clinical placement procedure is similar to that involved in placing glass ceramics – with the major difference of sandblasting instead of etching the intaglio of the restoration. One of the most important benefits of hybrid ceramics over glass ceramics, however, is the ability to modify the restoration whenever desired. Endodontic access cavities are easily prepared and closed with composite, contact points are quickly adjusted and the surface is polished or re-polished in next to no time. Moreover, the wear properties are similar to those of tooth structure and patients are happy about a natural touch and feel. The aesthetic properties are quite impressive, too.


Dentist:

ENZO ATTANASIO


Enzo Attanasio graduated in 2008 in Dentistry and Dental Prosthetics from the Magna Graecia University of Catanzaro. In 2009, he went on to specialize in the use of laser and new technologies in the treatment of oral and perioral tissues at the University of Florence. That year he also attended Prof. Arnaldo Castellucci’s course in Clinical Endodontics at the Teaching Center of Microendodontics in Florence where, in 2012, he went on to complete his training in Surgical Microendodontics. In 2017 he attended a course on Direct and indirect Adhesive Restorations at Prof. Riccardo Becciani’s Think Adhesive training center in Florence where he later become a tutor. Today, as a member of the Italian AIC and based in Lamezia Terme, Italy, Dr Attanasio has a special interest in Endodontics and Aesthetic Conservative.


Selektiv adhesivcementering – det bästa av två världar

En beskrivning av den här nya tekniken och vetenskapligt stöd för uppnådd effekt tillhandahålls i den artikeln av prof. Breschi och hans kollegor på universitetet i Bologna. Titel; “Selective adhesive luting: A novel technique for improving adhesion achieved by universal resin cements. 


PANAVIA™ SA Cement Universal är ett universalresincement som kan användas utan andra komponenter som självhärdande cement i många kliniska situationer. Cementet ger till och med en god bindning till litiumdisilikat utan att man tillför ytterligare silan. In-vitrostudier har påvisat att resincementet är mycket fukttolerant och mångsidigt och att det ger starka och hållbara bindningar till praktiskt taget alla restaurativa material liksom till emalj och dentin. 


Till tandsubstans har dock de bästa resultaten uppnåtts genom applicering av CLEARFIL™ Universal Bond Quick som separat primer. Därför vill du kanske anamma den här tvåkomponentstekniken för adhesiv cementering som redskap i särskilt utmanande situationer. Tekniken är fortfarande mindre komplicerad än traditionella adhesiva tekniker och ger utomordentliga resultat. 


Medan självhärdande cement är mindre känsliga för fukt kräver universaladhesiver fullständig torrläggning av arbetsområdet för att de ska fungera som tänkt. Därför undrar du säkert vilken teknik som ska användas i fall där du behöver starkast möjliga kemiska bindning till emalj och dentin, men där tillräcklig torrläggning med kofferdam är utmanande eller omöjligt att åstadkomma – till exempel i fall där stödtanden är väldigt kort eller preparationsgränsen ligger subgingivalt. Lösningen i dessa fall heter selektiv adhesivcementering. 


Selektiv applicering av en universaladhesiv i de områden av etsad emalj som inte riskerar att kontamineras av fukt. 


Same-day dentistry: Replacement of two PFM crowns with zirconia restorations

Clinical case by Dr. Frank Heldenbergh


The advancements in zirconia in contemporary dentistry nowadays allow for a wider range of applications, including in the anterior sector, and for chairside production using dedicated CAD/CAM systems. Even without a cutback, KATANA™ Zirconia Block (STML), combined with CERABIEN™ ZR FC Paste Stain (both Kuraray Noritake Dental Inc.), offer an extremely satisfactory aesthetic solution.


In the present patient case, the materials were chosen to replace old PFM crowns on the maxillary central incisors. The planned treatment was in accordance with the patient's wishes, and carried out in a single appointment.


CASE DESCRIPTION

The patient asked for a replacement of the existing crowns on the two maxillary central incisors (teeth 11 and 21, FDI notation). The porcelain-fused-to-metal (PFM) restorations had been in place for about thirty years (Figure 1). She desired aesthetic improvements and slight repositioning of these two teeth.


TREATMENT PLAN

In agreement with the patient, it was decided to perform the entire procedure in one appointment: removal of the existing crowns, digital impressions, production, and bonding of new restorations. The periodontium was healthy with no bleeding. The only uncertainty was whether the existing crowns were cemented onto inlay-cores or if they were Richmond crowns. A preliminary silicone impression was taken as a precautious measure: in case something unexpected prevented the new crowns from being bonded during the session, it would be easily possible to produce temporary crowns.


Fig. 1. Initial clinical situation.


TREATMENT

Using a diamond bur followed by a tungsten carbide bur, the existing crowns were removed, revealing that they indeed were Richmond crowns. Because the anatomy of the intra-radicular posts clearly contraindicates an attempt to remove these posts, it was decided to trim the crowns to transform them into inlay cores rather than risk further damage. The corono-peripheral preparations were reworked at the same time. One of the major challenges was related to the necessity of masking the metal of the transformed coronal-radicular reconstructions. Luckily, the space available was sufficient for the production of full zirconia crowns with a significant thickness (Figure 2). The target shade of the crowns was chosen in consultation with the patient (Figure 3).


Fig. 2. Situation after removal of the existing restorations.


Fig. 3. Shade determination using a shade tab: A2 was the appropriate shade.


Subsequently, impressions were taken using and intraoral scanner, the virtual models were checked and the crowns designed, considering the patient's request to have her two incisors slightly retracted (Figures 4 and 5).


Fig. 4. Virtual models of the patient’s teeth with the newly designed crowns, revealing the space available for a slight retraction.


Fig. 5. Designing of the two crowns.


The two crowns were milled from KATANA™ Zirconia Block 14Z A2 (Figure 6). A quick reminder: unlike lithium disilicate, zirconia prosthetic parts cannot be tried in immediately after milling, as they are around 20 percent larger than their final size after sintering. Final sintering was performed within about 18 minutes using the furnace SINTRA CS (ShenPaz Dental Ltd). After this process, the crowns may be tried on to check their fit, shape, shade and optical integration.


Fig. 6. Milled crowns in the CAD/CAM blocks.


For finishing of the restorations, different options are available. In this case, we decided not to limit ourselves to mechanical polishing of the prosthetic parts, as zirconia does not fluoresce like natural teeth. To add fluorescence as an optical feature, the surface was lightly stained and glazed with CERABIEN™ ZR FC Paste Stain (Figure 7).


Fig. 7. Crowns in the furnace after staining and glazing with liquid ceramics.


After firing, the two incisor crowns were tried in again using a try-in paste corresponding to the chosen resin cement system (PANAVIA™ V5, Kuraray Noritake Dental). In this way, the final appearance was simulated to validate the shade of the cement. The intaglio surfaces of the crowns were then sandblasted before applying CLEARFIL™ CERAMIC PRIMER PLUS as the restoration primer. The prepared teeth were treated with KATANA™ Cleaner (Kuraray Noritake Dental Inc.) to decontaminate the surface from proteins in saliva and possibly blood. Those clean surfaces are ideal for bonding. After thorough rinsing and drying, PANAVIA™ V5 Tooth Primer (containing MDP monomer for bonding with the hydroxyapatite and metal of the preparation) was applied according to the manufacturer’s instructions (Figure 8).


Fig. 8. Selected cementation system and try-in.


Subsequently, PANAVIA™ V5 Paste was applied into the first crown, which was then seated, followed by tack curing (brief photopolymerization for three to five seconds), excess removal and final light curing from all sides.


The procedure was then repeated for the second maxillary central incisor. The result instantly satisfied the patient, both in terms of aesthetics (adaptation, position of the new crowns, mimicry) and the comfort provided (Figures 9 and 10).


Fig. 9. Crowns immediately after placement.


Fig. 10. Aesthetically pleasing and comfortable result.


At a recall after four months, soft tissue conditions were ideal and the patient was happy with the outcome (Figures 11 to 13). The selected zirconia had nice optical properties, masking of the metal posts was successful and the natural surface texture contributed its share to a nice overall picture. The retracted position of the teeth was also perceived positively by the patient, while comfort and function were excellent.


DISCUSSION

Although lithium disilicate has so far been considered the material of choice for prosthetic work in the anterior region, zirconia is nowadays proving to be an extremely satisfactory alternative from every point of view: milling, strength, aesthetics, assembly (among other things, no hydrofluoric acid is required for bonding). KATANA™ Zirconia Blocks (STML) with a multi-layered colour structure in a single 4Y-TZP zirconia block, combined with CERABIEN™ ZR FC Paste Stain, offer a remarkable solution. This applies to treatments around the replacement of existing crowns as well as first-line treatments with less invasive preparations (verti-prep) than those required by other types of ceramics.


Fig. 11. The patient’s smile at a recall after four months.


Fig. 12. Great optical integration.


Fig. 13. Natural surface texture contributing to success Control pictures after four months taken by Emmanuel Charleux.


Dentist:

FRANK HELDENBERGH


Dr. Frank Heldenbergh graduated with a Doctor of Dental Surgery degree from the University of Reims in 1988.Driven by a passion for prosthetics, he pursued further specialization as a Prosthetic Resident at the UFR Odontology of Reims from 1990 to 1992. Dr. Heldenbergh’s dedication to advancing dental practices led him to join the Board of the Academy of Adhesive Dentistry in 1999. His commitment to this field has been unwavering, and he currently serves as the Vice President of A.D.D.A.-R.C.A.


Recognized for his expertise in ceramic veneers, inlays and onlays, Dr. Heldenbergh supervised practical work for the Paris Odontological Society from 2000 to 2018, shaping the skills of many aspiring dentists. His influence extended to the A.D.F. Congress, where he supervised practical work on ceramic veneers from 2000 to 2016. In 2017, he was the Head of Practical Work at A.D.F., a role that allowed him to further contribute to the advancement of dental education and practices. In 2018, he was the Head of Practical Work for ceramic veneers at the Paris Odontological Society.


Recognizing the importance of technology in modern dentistry, Dr. Heldenbergh pursued a University Degree in CAD/CAM from Toulouse in 2022. This addition to his qualifications highlights his dedication to staying at the forefront of dental innovation.

Injektionsteknik: Hur putsar man kompositersättningar?

Kompositersättningens hållbarhet är beroende av många faktorer. En del av dem är relaterade till patienten; använder hen hård eller mjuk tandborste, vilken tandkäm använder hen, borstteknik, kost, alkohol, te, kaffe och tobak samt hygienvanor. Men att följa det bästa putsprotokollet är dock helt upp till tandläkaren.


Syftet med korrekt putsning är att avlägsna det syreinihiberade ytskiktet och att skapa en slät yta. En korrekt polerad ersättning förhindrar missfärgning som orsakas av mat, dryck, tobak, te, kaffe eller alkohol och garanterar en långvarig estetik.


Att putsa komposit är en process som kräver extra uppmärksamhet och det består av flera arbetsmoment och principer:


  • Att använda polerdiskar ger en jämn och slät yta, avverkar överskott och ger den slutgiltiga formen. Det är viktigt att putsen sker på fuktad yta och med ett 1:1-handtycke på maxhastigheten 5,000 - 10,000 rpm.


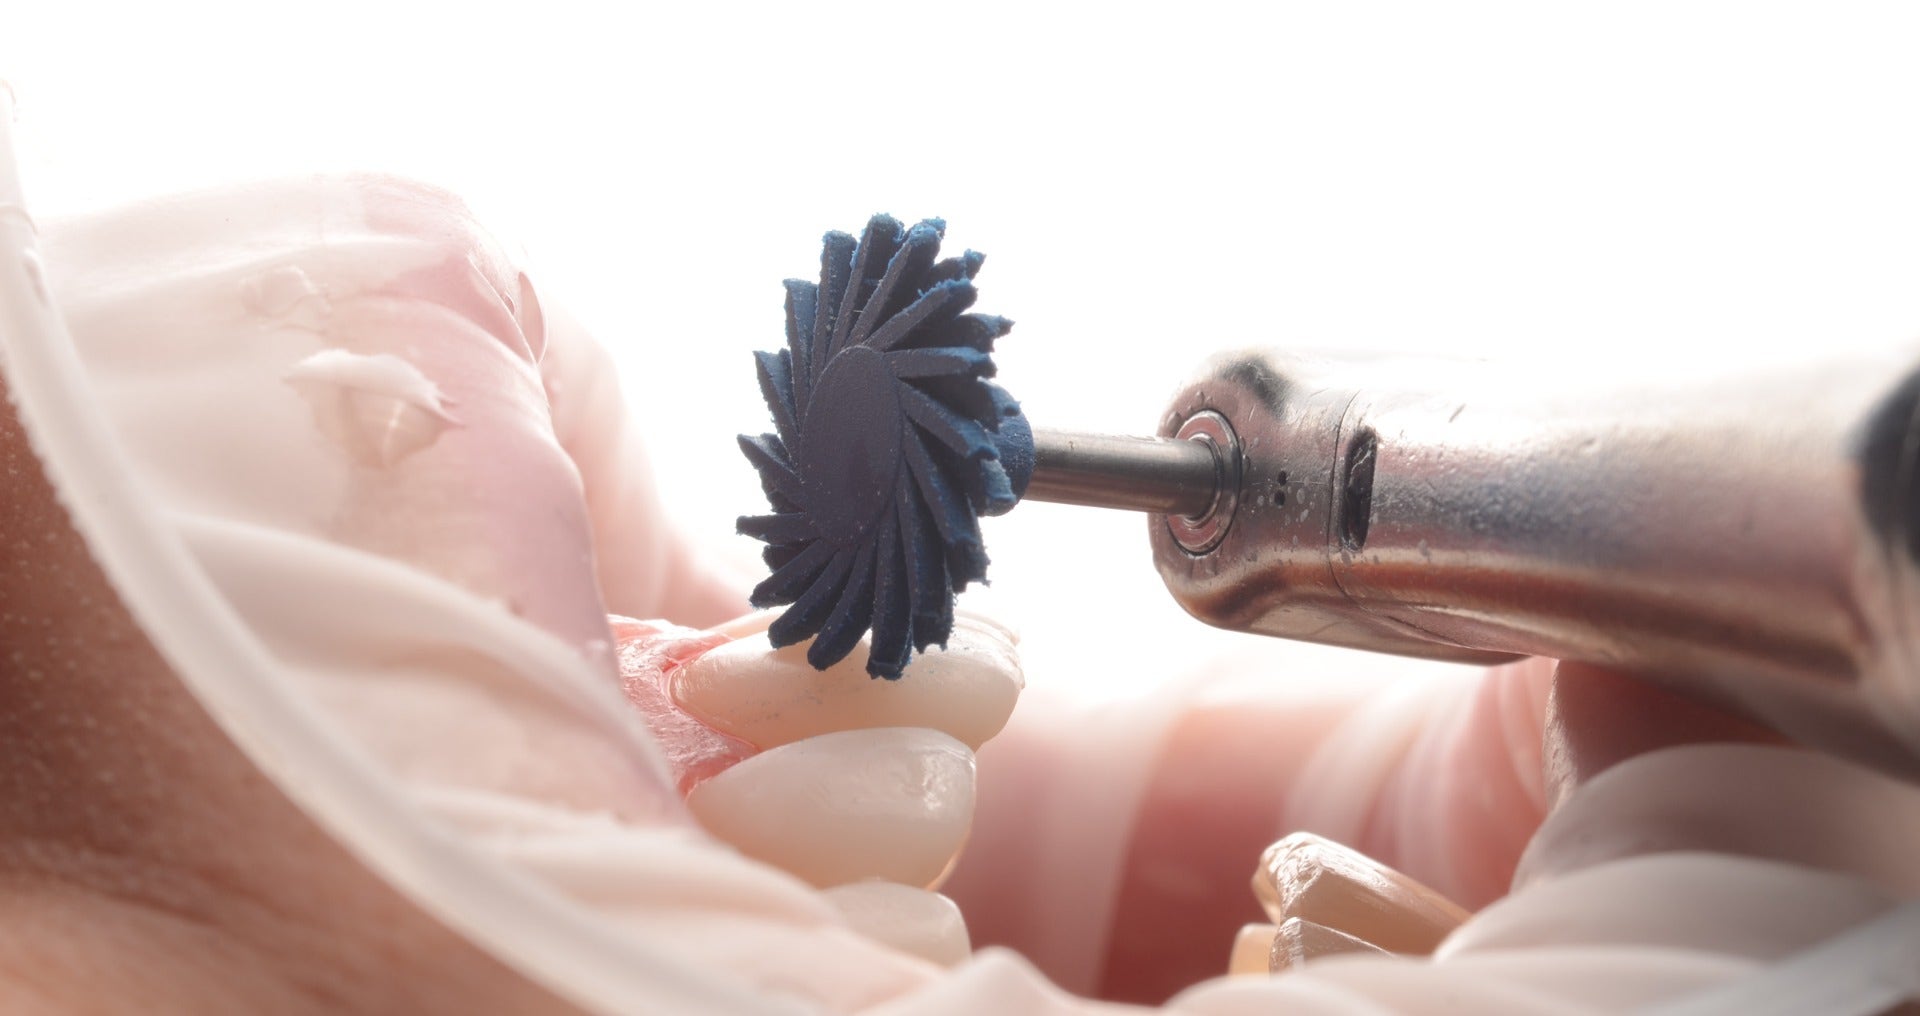
  • Gummitrissor finns i många typer och former. En av de mest användbara är TWIST™ DIA for Composite. Kitet består av två gummitrssor med olika abrasionsgrad. Den första (mörkblå) används för grovavverkning, den andra (ljusblå) används för f inputs. Puts med dessa trissor ska ske på torr yta utan vattenkylning. Att arbeta utan vattenkylning kan irritera pulpan och därför ska hastigheten begränsas till mellan 5000 och 10000 rpm och det är viktigt att undvika hårt tryck.


  • TI nästa steg använder man en diamantpasta med kornstorlekar mellan 1 och 5 micron. Rekommendationen är att använda en putstrissa av gethår tillsammans med diamantpastan. Det viktigaste är att inte använda en hård borste eftersom en sådan kan repa kompositen. Med putstrissa  och polerpasta kommer man åt svåråtkomliga skrymslen som det cervikala området och approximalytor. För att slutföra detta steg används en diamantremsa för mera exakt puts av approximalytorna. För att inte förstöra kontaktpunkterna ska lågabrasiva (Super Fine) remsor användas.


  • Ett ytterligare steg för att öka ytglansen och därigenom skydda ytan från att missfärgas är puts med aluminiumoxidpasta och bomullstrissa. Resultatet av att använda en sådan pasta, som ursprungligen är avsedd för puts av keramer, är en exceptionellt slät yta och hög glans. Detta moment utförs på torr yta och med en maxhastighet på 5,000 - 10,000 rpm.


Vid injektionstekniken, precis som vid alla andra tekniker, påverkar putsgraden hållbarheten, såväl som optiska och estetiska egenskaper. Därför ska detta nyckelmoment ägnas tillräckligt med tid. Olika sorters komposit karaktäriseras av både sin sammansättning och fyllnadsgrad, faktorer som inte bara påverkar egenskaperna utan också avgör deras polerbarhet. I vissa fall måste putsprocessen upprepas flera gånger för att man ska uppnå ett högglansigt resultat. Trots sin höga halt av fillers är CLEARFIL MAJESTY™ ES Flow är en komposit som är mycket enkel att putsa till hög glans. Särskilt anpassade gummihjul, putstrissor och pastor gör det enkelt att åstadkomma en jämn och slät yta som i sin tur avgör det långvariga resultatet.

Före


Efter


3 års återkontroll


LÅT DEM SKINA, LÅT DEM LE!


Dentist:

MICHAL JACZEWSKI


Michał Jaczewski tog examen från Wroclaw Medical Universtity 2006 och idag driver han sin privatklinik i Legnica, Polen. Han har specialiserat sig på minimalinvasiv tandvård och digital tandvård och är grundare till Biofunctional School Of Occlusion där han föreläser och ger workshops med fokus på heltäckande patientbehandlingar.


Trauma case: Cementation of a fractured crown fragment

Case by Aleksandra Łyżwińska DMD, Warsaw, Poland


Dental injuries can be stressful for patients, parents of pediatric patients, and dentists alike. The following tips offer support in turning the treatment of crown fractures into a simple, quick and predictable procedure. In the case described, we opted for a reattachment of fractured crown fragments.


YOUNG PATIENT WITH A FRACTURED CENTRAL INCISOR

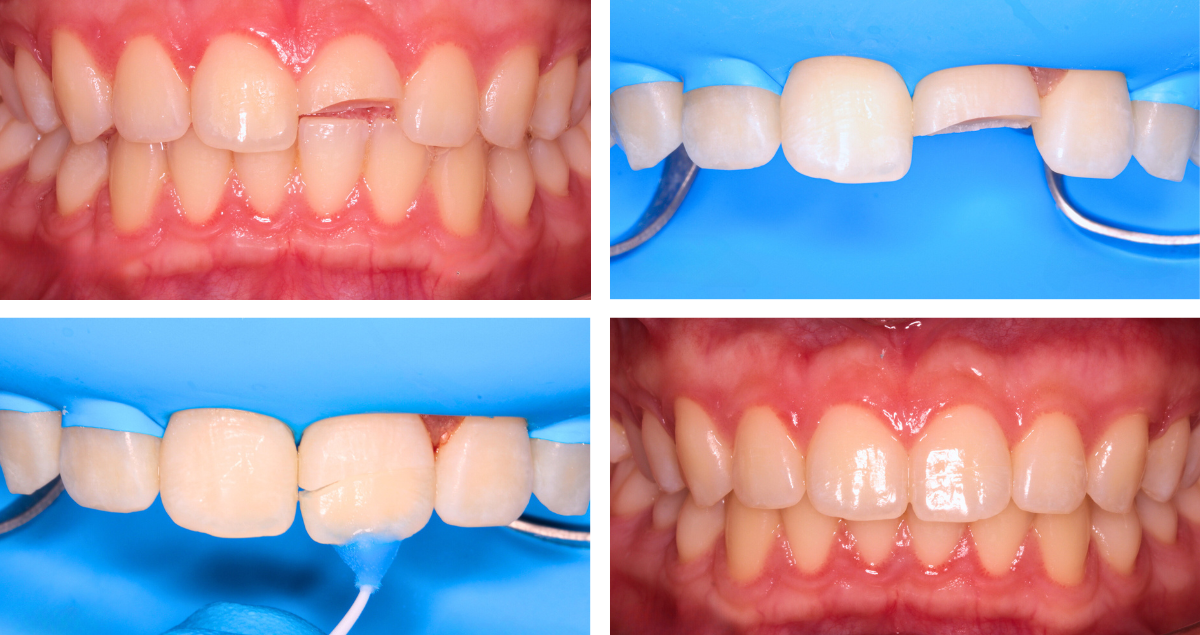
A 16-year-old patient presented immediately after an accident. Her maxillary left central incisor was fractured, involving half of the coronal enamel and dentin (Fig. 1). The pulp was not involved, but the fracture line was quite close to the pulp (Fig. 2). After examination and radiographic evaluation, the patient was anesthetized. When placing the rubber dam, it tore between the left central and lateral incisor (Figs. 3 and 4). Due to the patient’s young age and limited willingness to cooperate, the decision was made to proceed without replacing the rubber dam. This was expected to work well in this specific region due to the limited flow of saliva from the palate and a low associated risk of contamination.


Fig. 1. Fractured maxillary left central incisor at the day of the accident.


Fig. 2. Occlusal view of the maxillary anterior teeth with the pulp of the fractured central incisor shining through.


Fig. 3. Rubber dam placed and torn between the left central and lateral incisor.


Fig. 4. Occlusal view of the teeth isolated with rubber dam.


REMOVAL OF UNSUPPORTED ENAMEL PRISMS

In order to provide for a high-quality bond and natural aesthetics, unsupported enamel prisms should be removed. As the use of burs might be too invasive (removing too much structure) and thus hinder the alignment of crown fragments, air-abrasion with 50 μm alumina particles was the method of choice. To avoid iatrogenic pulp exposure, the deepest part of the affected tooth was protected with a colored flowable composite before sandblasting (Fig. 5). The adjacent teeth were protected using a metal strip (Fig. 6). Several seconds of air abrasion were sufficient to remove the enamel prisms and obtain a homogeneous enamel surface (Fig. 7). Subsequently, the colored flowable composite was removed from the dentin surface and the tooth fragment was treated in the same way.


Fig. 5. Preparations for sandblasting: Dentin area near the pulp protected with flowable composite.


Fig. 6. Protection of the adjacent teeth with a metal strip.


Fig. 7. Homogeneous enamel surface after air abrasion.


JOINING OF THE FRAGMENT WITH THE REMAINING TOOTH STRUCTURE

After air-abrasion treatment, the fit of the tooth and the fragment was checked and approved (Fig. 8). To improve retention of the fractured crown portion, it was bonded to a micro applicator using composite resin. Alternatively, prefabricated prosthetic carriers may be used. Then, selective etching of the enamel was performed on the tooth and the fragment (Figs. 9 and 10). During this procedure, the adjacent teeth were protected with a celluloid strip (Fig. 11). To better adapt the strip to the distal surface, a curved wedge was placed interproximally (Fig. 12).


The bonding system of choice was CLEARFIL™ SE Bond 2 (Kuraray Noritake Dental Inc.). After applying this adhesive to the tooth and the fragment (Fig. 13), a small portion of CLEARFIL MAJESTY™ ES Flow Super Low (Kuraray Noritake Dental Inc.) in the shade A2 was applied to the part of the fragment treated with adhesive.* After careful repositioning of the fragment and while holding it in place with the micro applicator, the composite was light cured.


Fig. 8. Perfect fit of the fragment to the tooth.


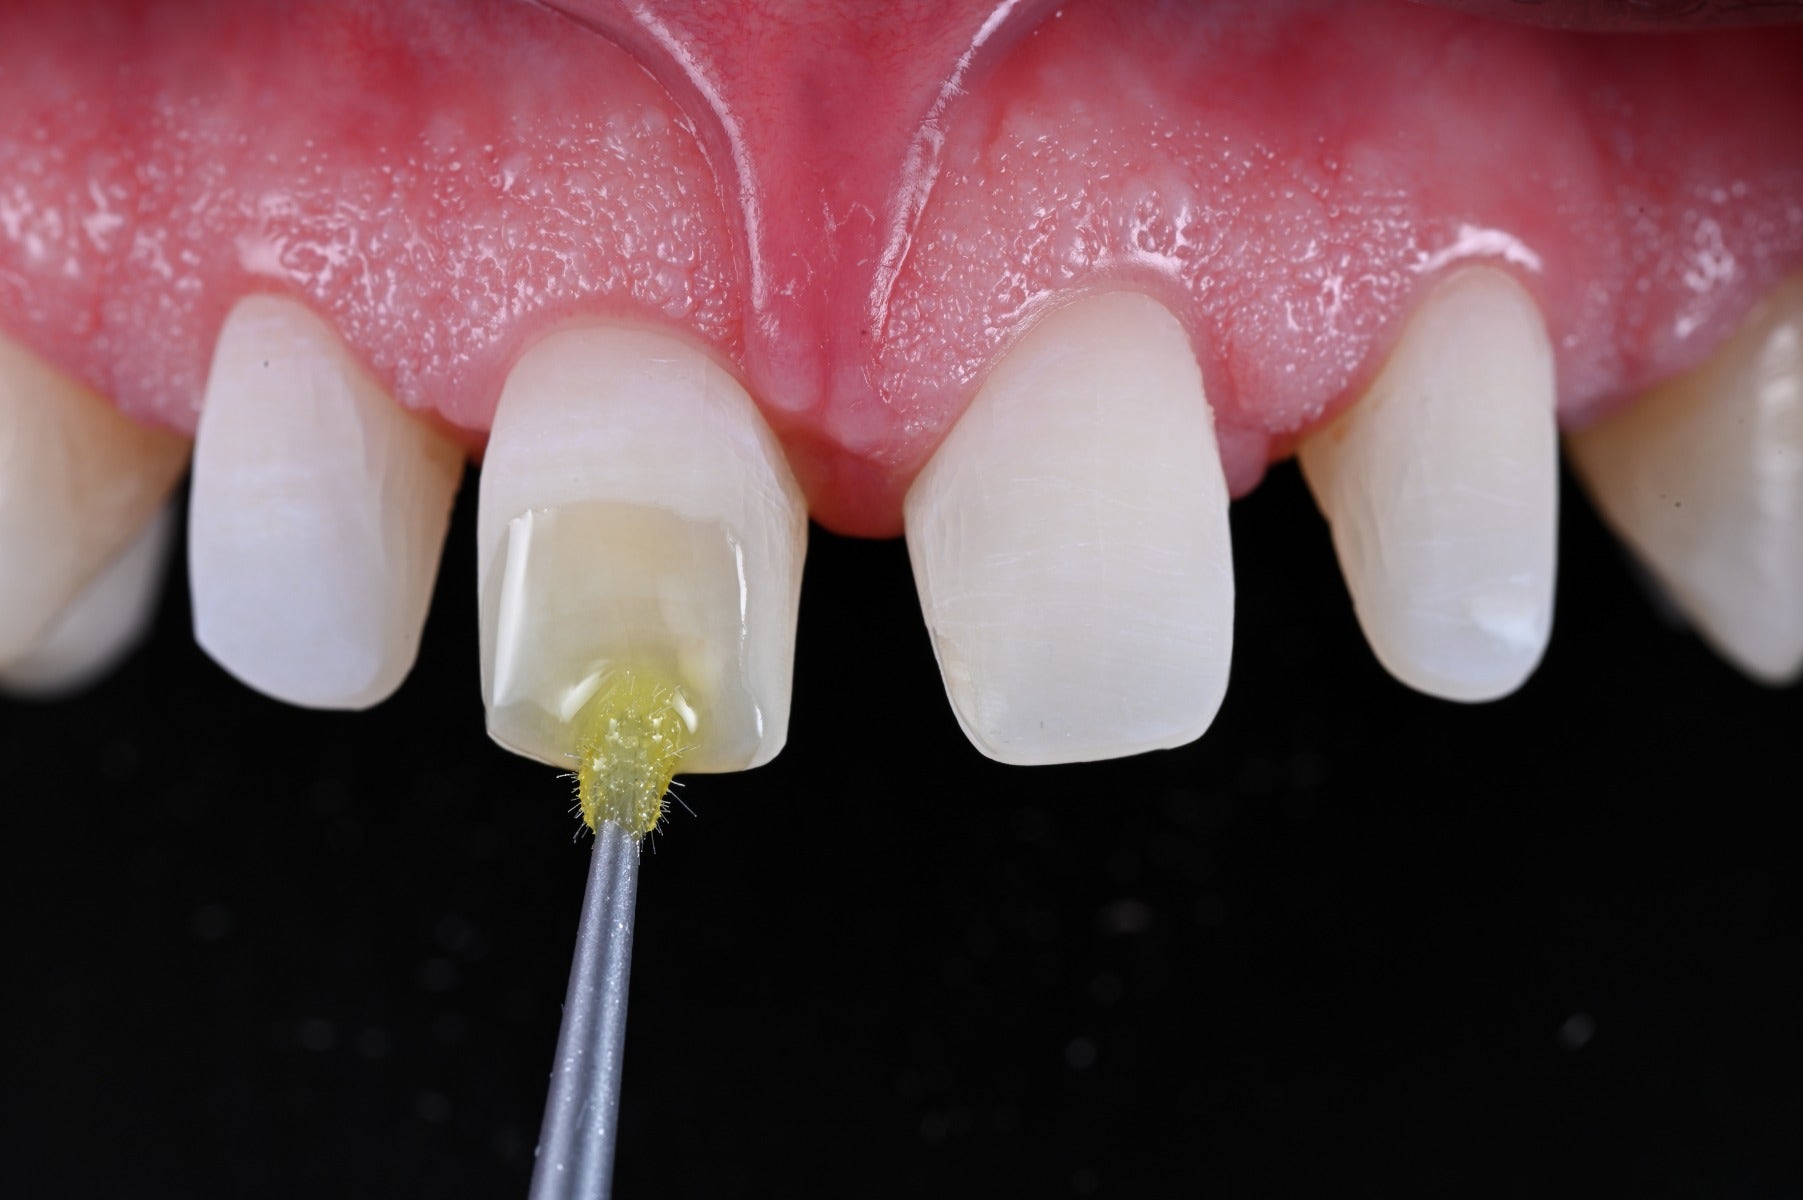
Fig. 9. Selective etching of the enamel on the tooth …


Fig. 10. … and the fragment.


Fig. 11. Position of the wedge …


Fig. 12. … used for better adaptation to the distal surface.


Fig. 13. Fragment treated with CLEARFIL™ SE Bond 2 PRIMER and BOND, which were both carefully air-dried, while the Bond was also light cured.


Fig. 14. Fragment back in place.


Fig. 15. Occlusal view of the teeth with the reattached fragment perfectly fitting the mould.


EXCESS REMOVAL AND POLISHING

Excess composite was removed with a scalpel blade and abrasive discs. The entire restoration was then polished using TWIST™ DIA for Composite (Kuraray Noritake Dental Inc., Fig. 16). A nice optical integration was obtained immediately after finishing due to fact that the fragment was stored in water during the waiting time and treatment. As observed with teeth isolated with rubber dam during treatment, teeth undergo dehydration outside the oral cavity. The effect is much stronger in the latter setting, making a fragment become chalky white. By keeping the fragment in water, dehydration is limited to a minimum and it is possible to properly evaluate the aesthetic outcome. This has a positive impact on patient satisfaction. In the present case, the fragment and the tooth structure had a similar appearance, both showing a slightly increased brightness as a result of manipulation under rubber dam or in the air, respectively.


Fig. 16. Immediately after polishing, the fragment has almost the same brightness as the tooth thanks to water storage. A slight dehydration effect is visible.


TREATMENT OUTCOME

To achieve optimal aesthetics and long-lasting gloss, the composite was repolished one week later (Fig. 17). This was accomplished with a light blue high-shine rubber polisher of the TWIST™ DIA for Composite system, followed by polishing with diamond paste and a goat hair brush.


Fig. 17. Treatment outcome after one week.


Teeth previously isolated with a rubber dam and the fractured crown fragment had undergone rehydration and returned to their natural colour. The colour adaptation is satisfactory. Harmonious light reflections on the labial surface of the treated tooth a beautiful, natural shine have made the fracture site nearly invisible. In addition to aesthetic value, good therapeutic results were also achieved - the tooth responds appropriately to stimuli and is pain-free.


CONCLUSION

The described approach is a valuable treatment option for anterior trauma cases with relatively large fragments that are still available. By reattaching the natural structure, the need for complicated and time-consuming multi-shade layering and free-hand modeling is eliminated, while all the remaining natural tooth structure is saved. Instead of preparing the tooth, a removal of the unsupported enamel prisms and roughening of the surface is absolutely sufficient. Key elements for a great optical integration and long-lasting success are the proper use of a high-performance adhesive as well as the selection of a composite that has the ability to properly blend into its environment and offers a nature-like gloss retention. The selected materials offer precisely these features, so that the great outcome may be expected to last.


*CLEARFIL MAJESTY™ ES Flow Super Low is indicated for cementation purposes. The cementation of tooth fragments, however, is not explicitly mentioned in the instructions for use. The decision to use the product in this context was made by the dental practitioner in charge of the treatment.


Dentist:

ALEKSANDRA ŁYŻWIŃSKA DMD


Aleksandra Łyżwińska graduated from the Medical University of Warsaw, where she later served as a lecturer and assistant in the Department of Conservative Dentistry with Endodontics. In her daily practice, she focuses on the broad field of adhesive dentistry. She is passionate about minimally invasive techniques and vital pulp therapy. Since 2020, she has been conducting courses in conservative dentistry, collaborating with major training centers in Poland and around the world. She is a key opinion leader for Kuraray Noritake. In her training sessions, she demonstrates that dental caries management doesn‘t have to be boring, and that the bond in the bottle is just as exciting as a spy movie. Instagram users know her as the creator of the educational profile for dentist @aleksandra.lyzwinska.


Anmäl dig för nyheter
Gå med tusentals tandläkare och få gratis råd som kan hjälpa dig och din karriär. Vi kommer inte skräppost eller dela din e-post.