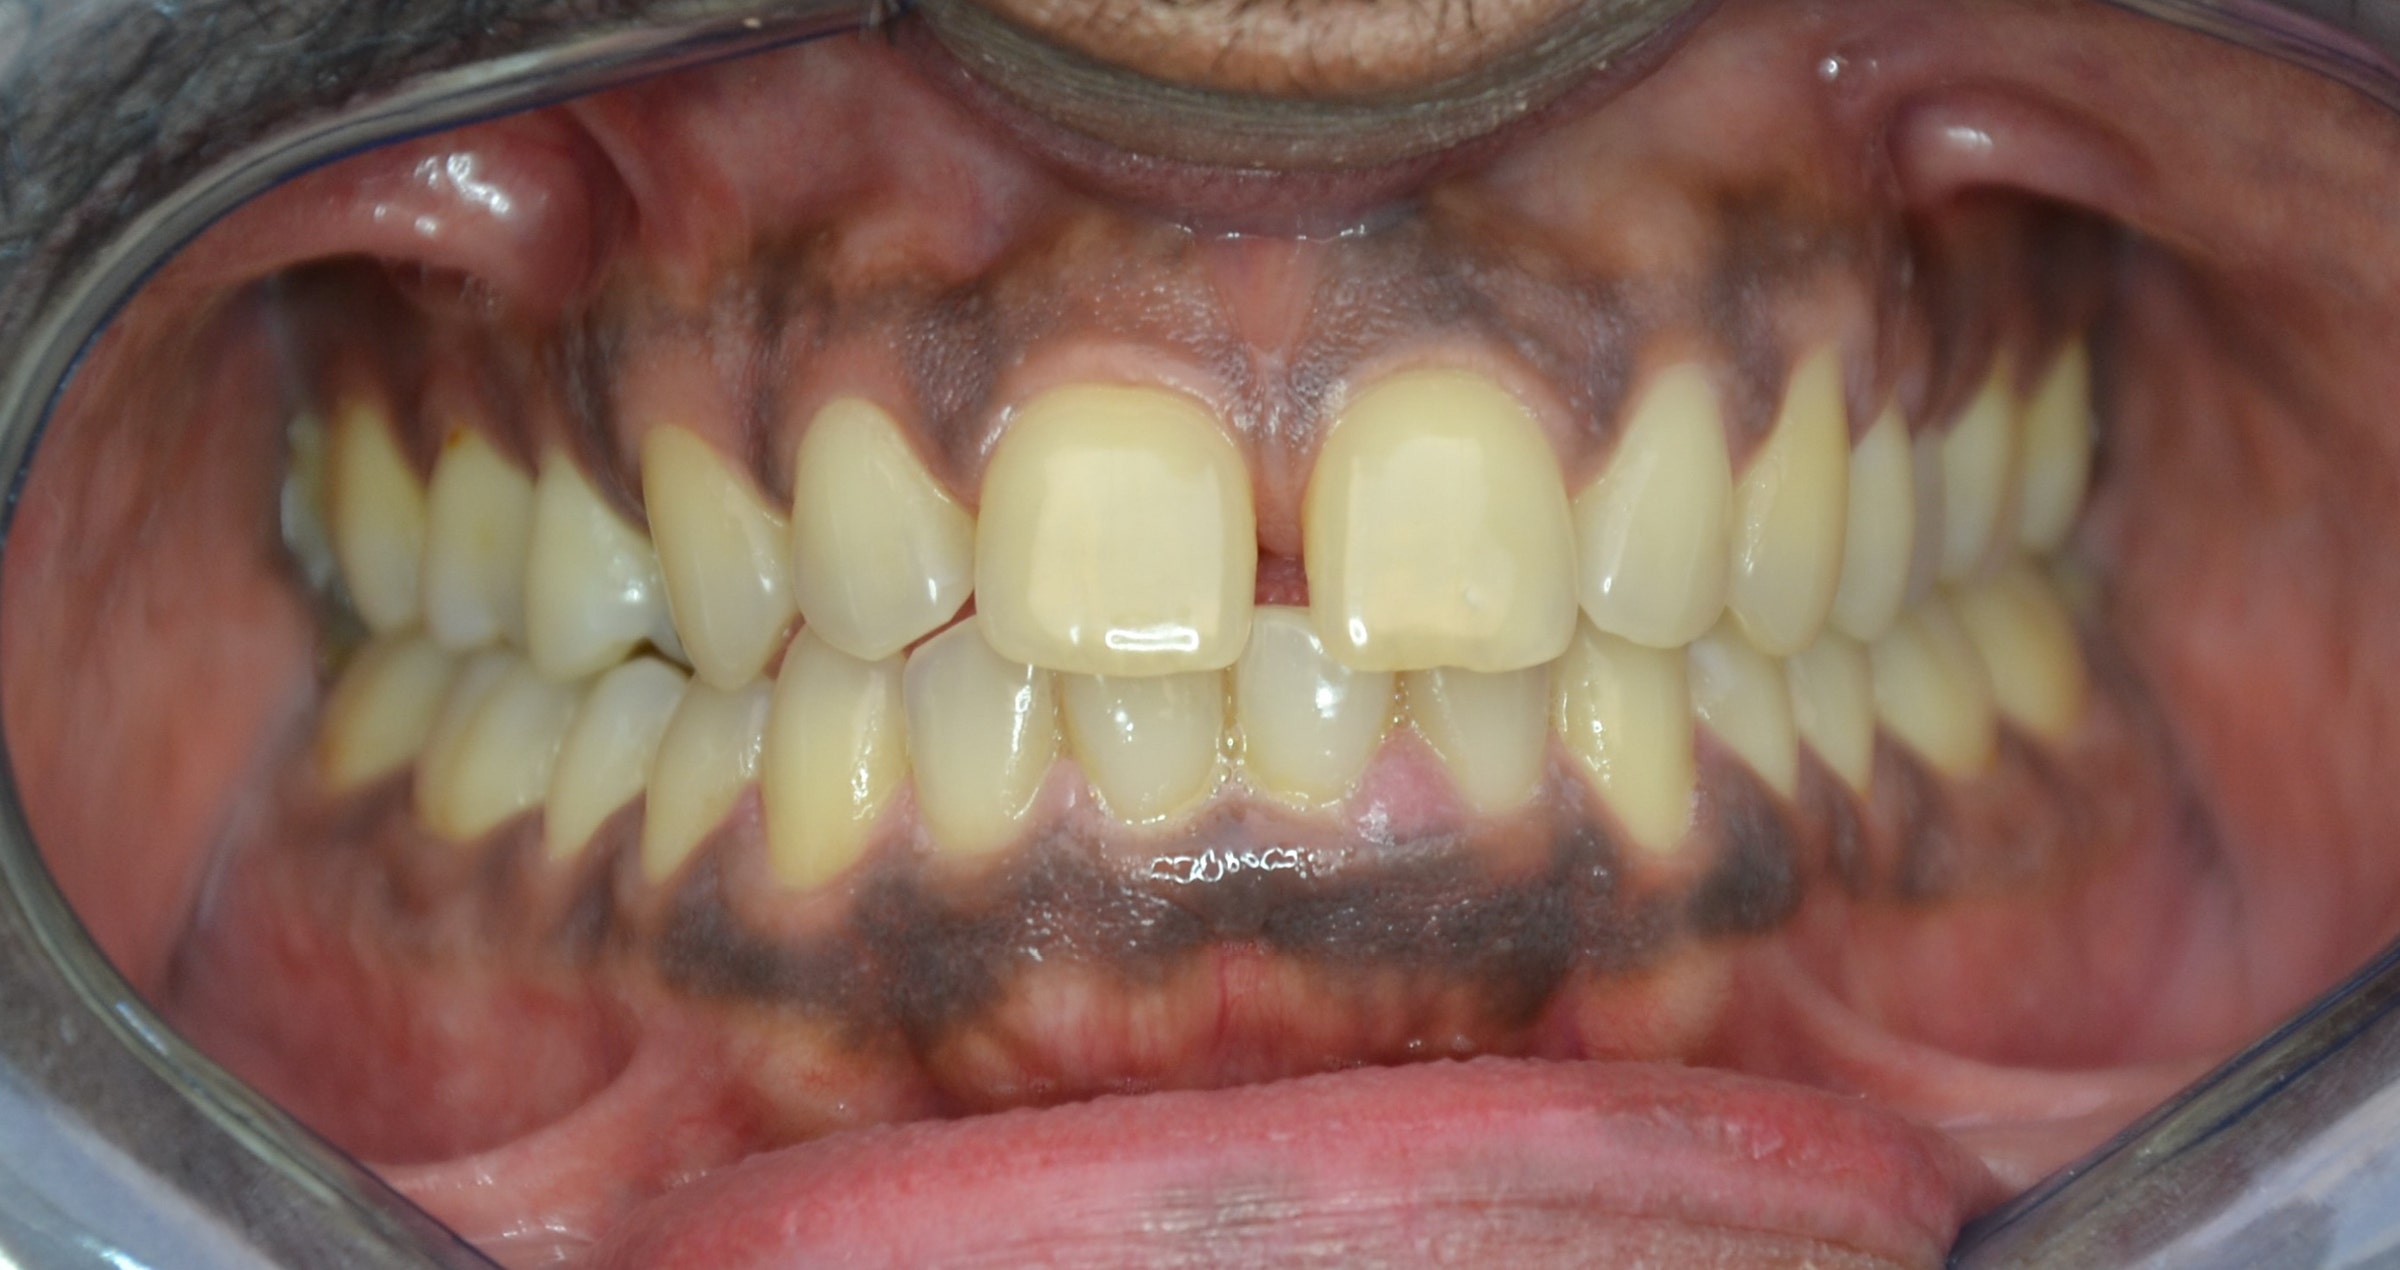
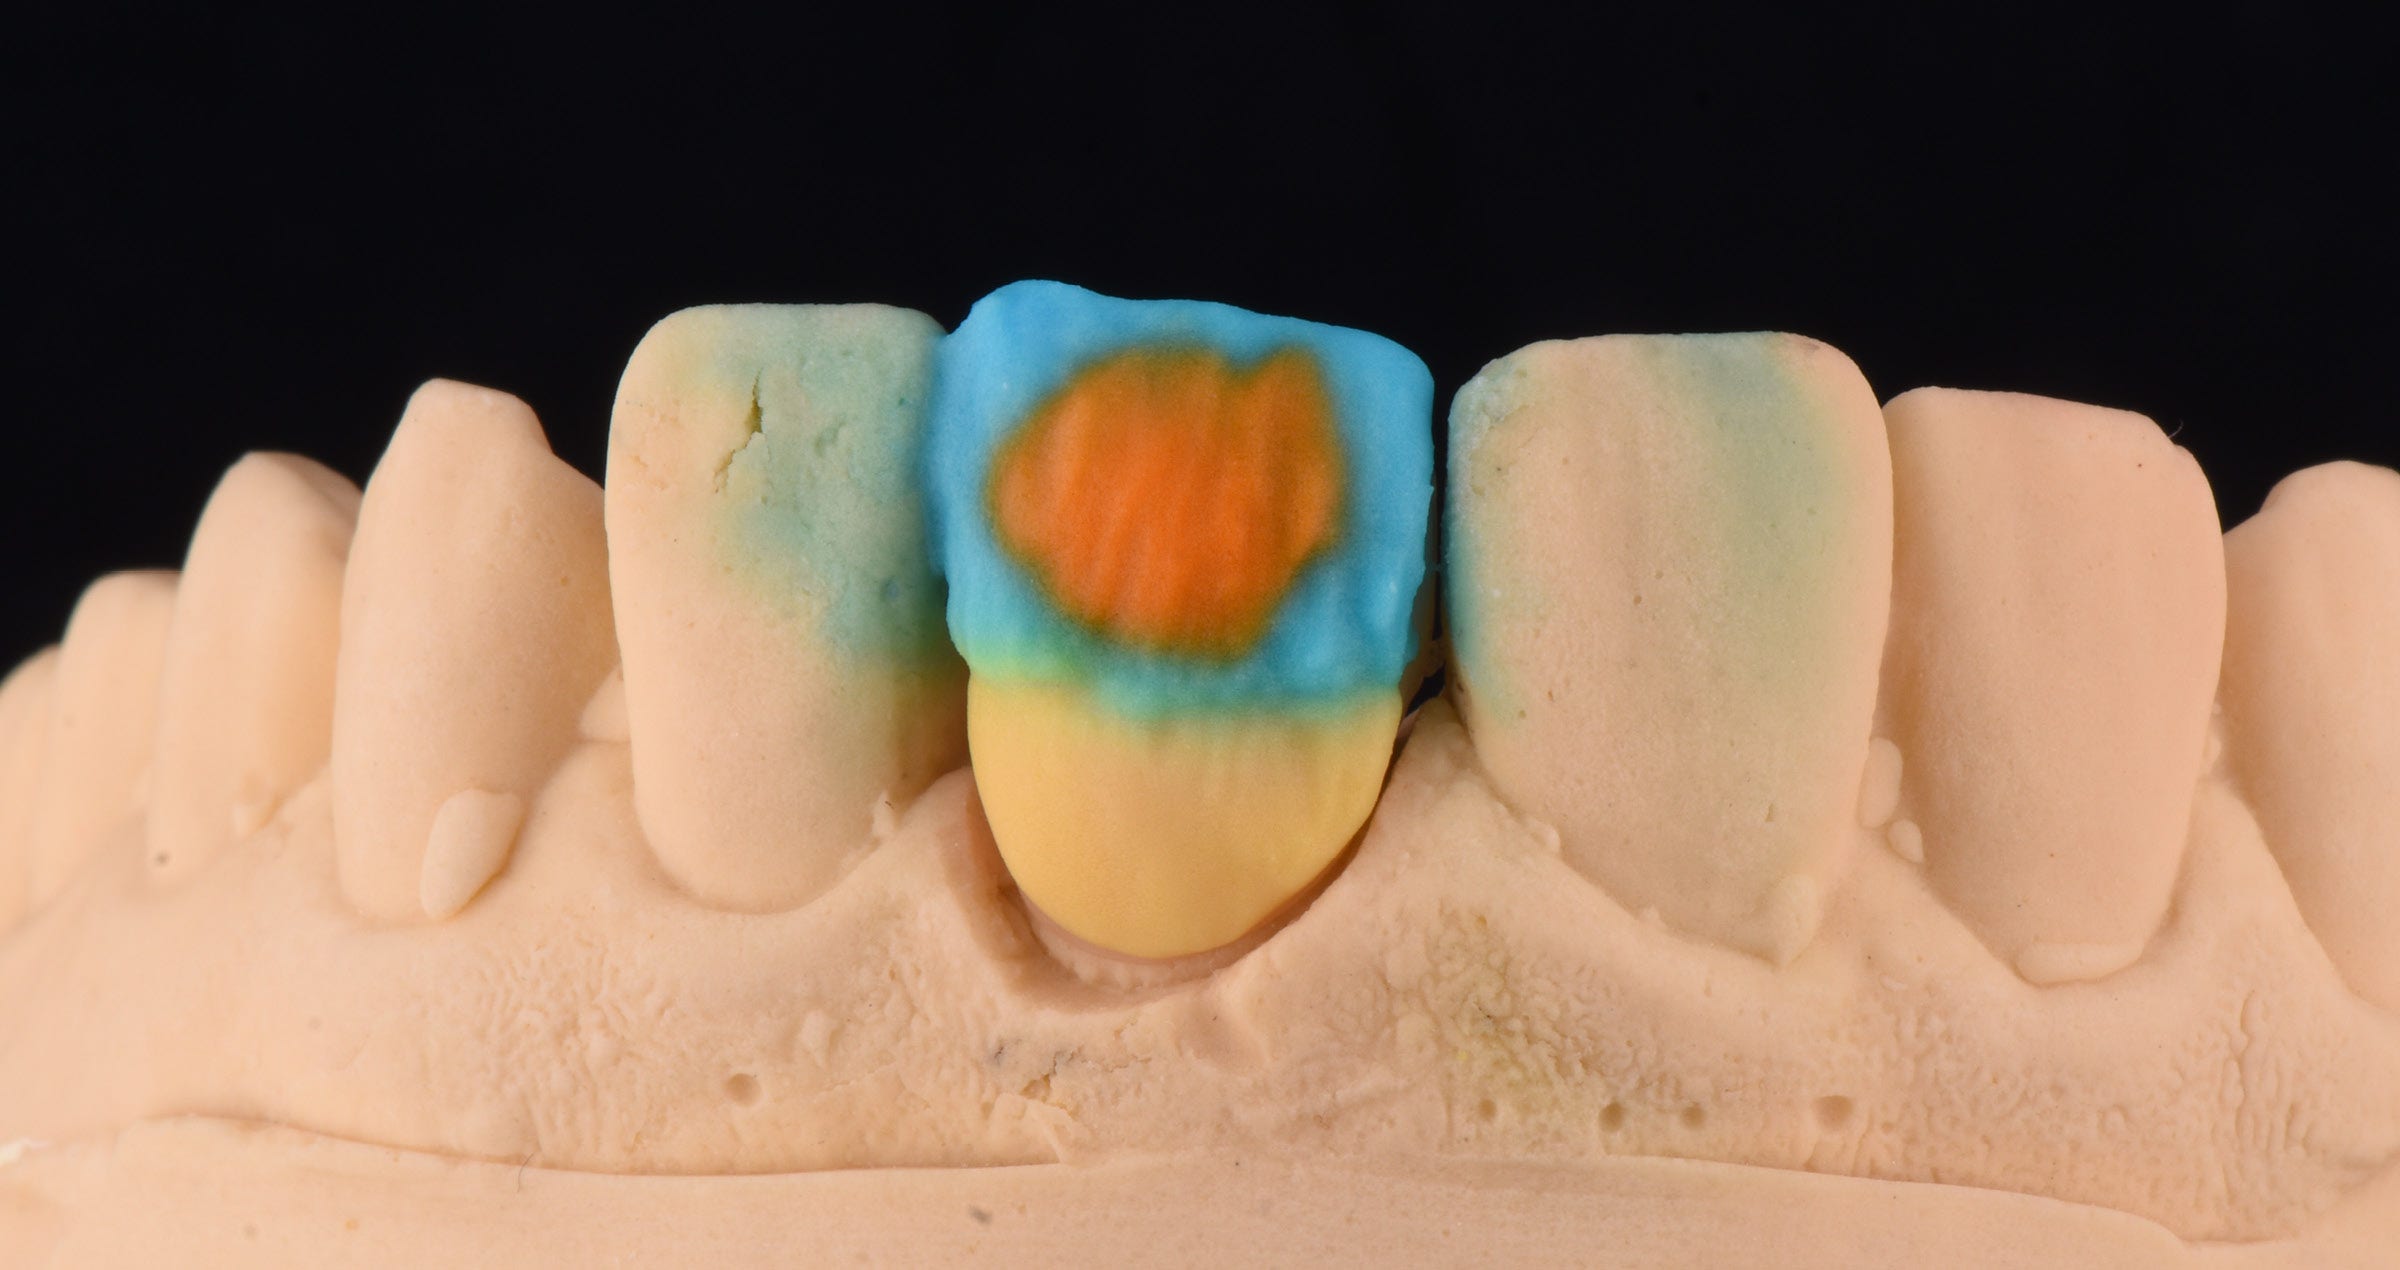
BEST.FIT: A hybrid technique for an efficient and aesthetic restoration of anterior teeth

Case by Dr. Enzo Attanasio

The introduction of new-generation composites, equipped with nanofillers and highly loaded, has opened doors to new techniques for managing direct and semi-direct restorations. In particular, over the last ten years, there has been a significant revolution in the world of flowable composites. Nowadays, these materials offer a filler percentage very similar to packable composites through precise interventions in resin matrix management. They come in various viscosities, offering numerous advantages both in terms of handling and clinical use, as well as beneficial mechanical and physical characteristics.


FLOWABLE INJECTION TECHNIQUE

This new era of flowable composites has seen the development of a technique known as the Flowable Injection Technique (also referred to as injection moulding). It enables dental practitioners to reproduce anatomical forms created by a dental technician in the laboratory through a diagnostic wax-up. The shapes planned on the model are transferred directly in the patient's mouth using transparent silicone matrices or indexes, into which the composite is injected through specific injection holes.


The main difference compared to traditional mock-ups is that the reproduced dental elements remain separate from each other. This technique provides predictable results identical to those developed on the technician's wax-up, requiring less chair time than direct veneering and offering a longevity similar to traditional composite restorations.


BENEFITS AND CHALLENGES

The major benefit of this technique is the faithful reproduction of morphological details that the technician creates on the diagnostic wax-up, which the clinician can reproduce with minimal effort. The restoration produced through the flowable injection technique, if all steps are followed correctly, requires minimal finishing by the clinican, who only needs to focus on polishing the composite.


However, one limitation is the difficulty in isolating the operative field, often requiring a split-dam technique or labial retractors, with all the associated adhesive challenges. The use of a rubber dam is only feasible if the peripheral dental tissues around the restoration are euchromatic, allowing the technician to create a wax-up with supragingival preparation margins.


Another compromise with the flowable injection technique is the management of the composite as a single mass. This makes it only possible to reproduce natural incisal translucencies typical of young patients by performing complex cutbacks and subsequent incisal painting. Without specific operator skills, the outcomes of this time-consuming manual procedure are unpredictable.


HYBRID TECHNIQUE: BEST.FIT

To leverage the advantages of both classical direct anterior restoration and flowable injection techniques and eliminate the limitations, a hybrid technique known as BEST.FIT (Buccal Enamel Shade Through Flow Injection Technique) has emerged. This technique allows the operator to manage the delicate phase of reproducing the buccal enamel layer of the anterior restoration through the flowable injection technique, keeping certain aspects in mind during the injection phase.


PROCEDURE

The transparent silicone key used for the creation of the buccal enamel layer is similar to the one used in the original flowable injection technique. The initial phase of restoration management follows all the classical steps of direct technique, requiring isolation with rubber dam. The palatal enamel layer is recreated with a highly translucent packable composite, and the palatal portion of the interproximal walls is produced using a suitable matrix system. Then, the core of the restoration is defined with opaque masses, creating mamelons and adding incisal effects. It's crucial to control the residual enamel thickness using a vestibular silicone index, aiming for about 0.3 mm of space. The buccal portion is finally reconstructed during the injection phase. The transparent silicone index created on the wax-up should be tested after each reconstruction phase to ensure passive insertion.


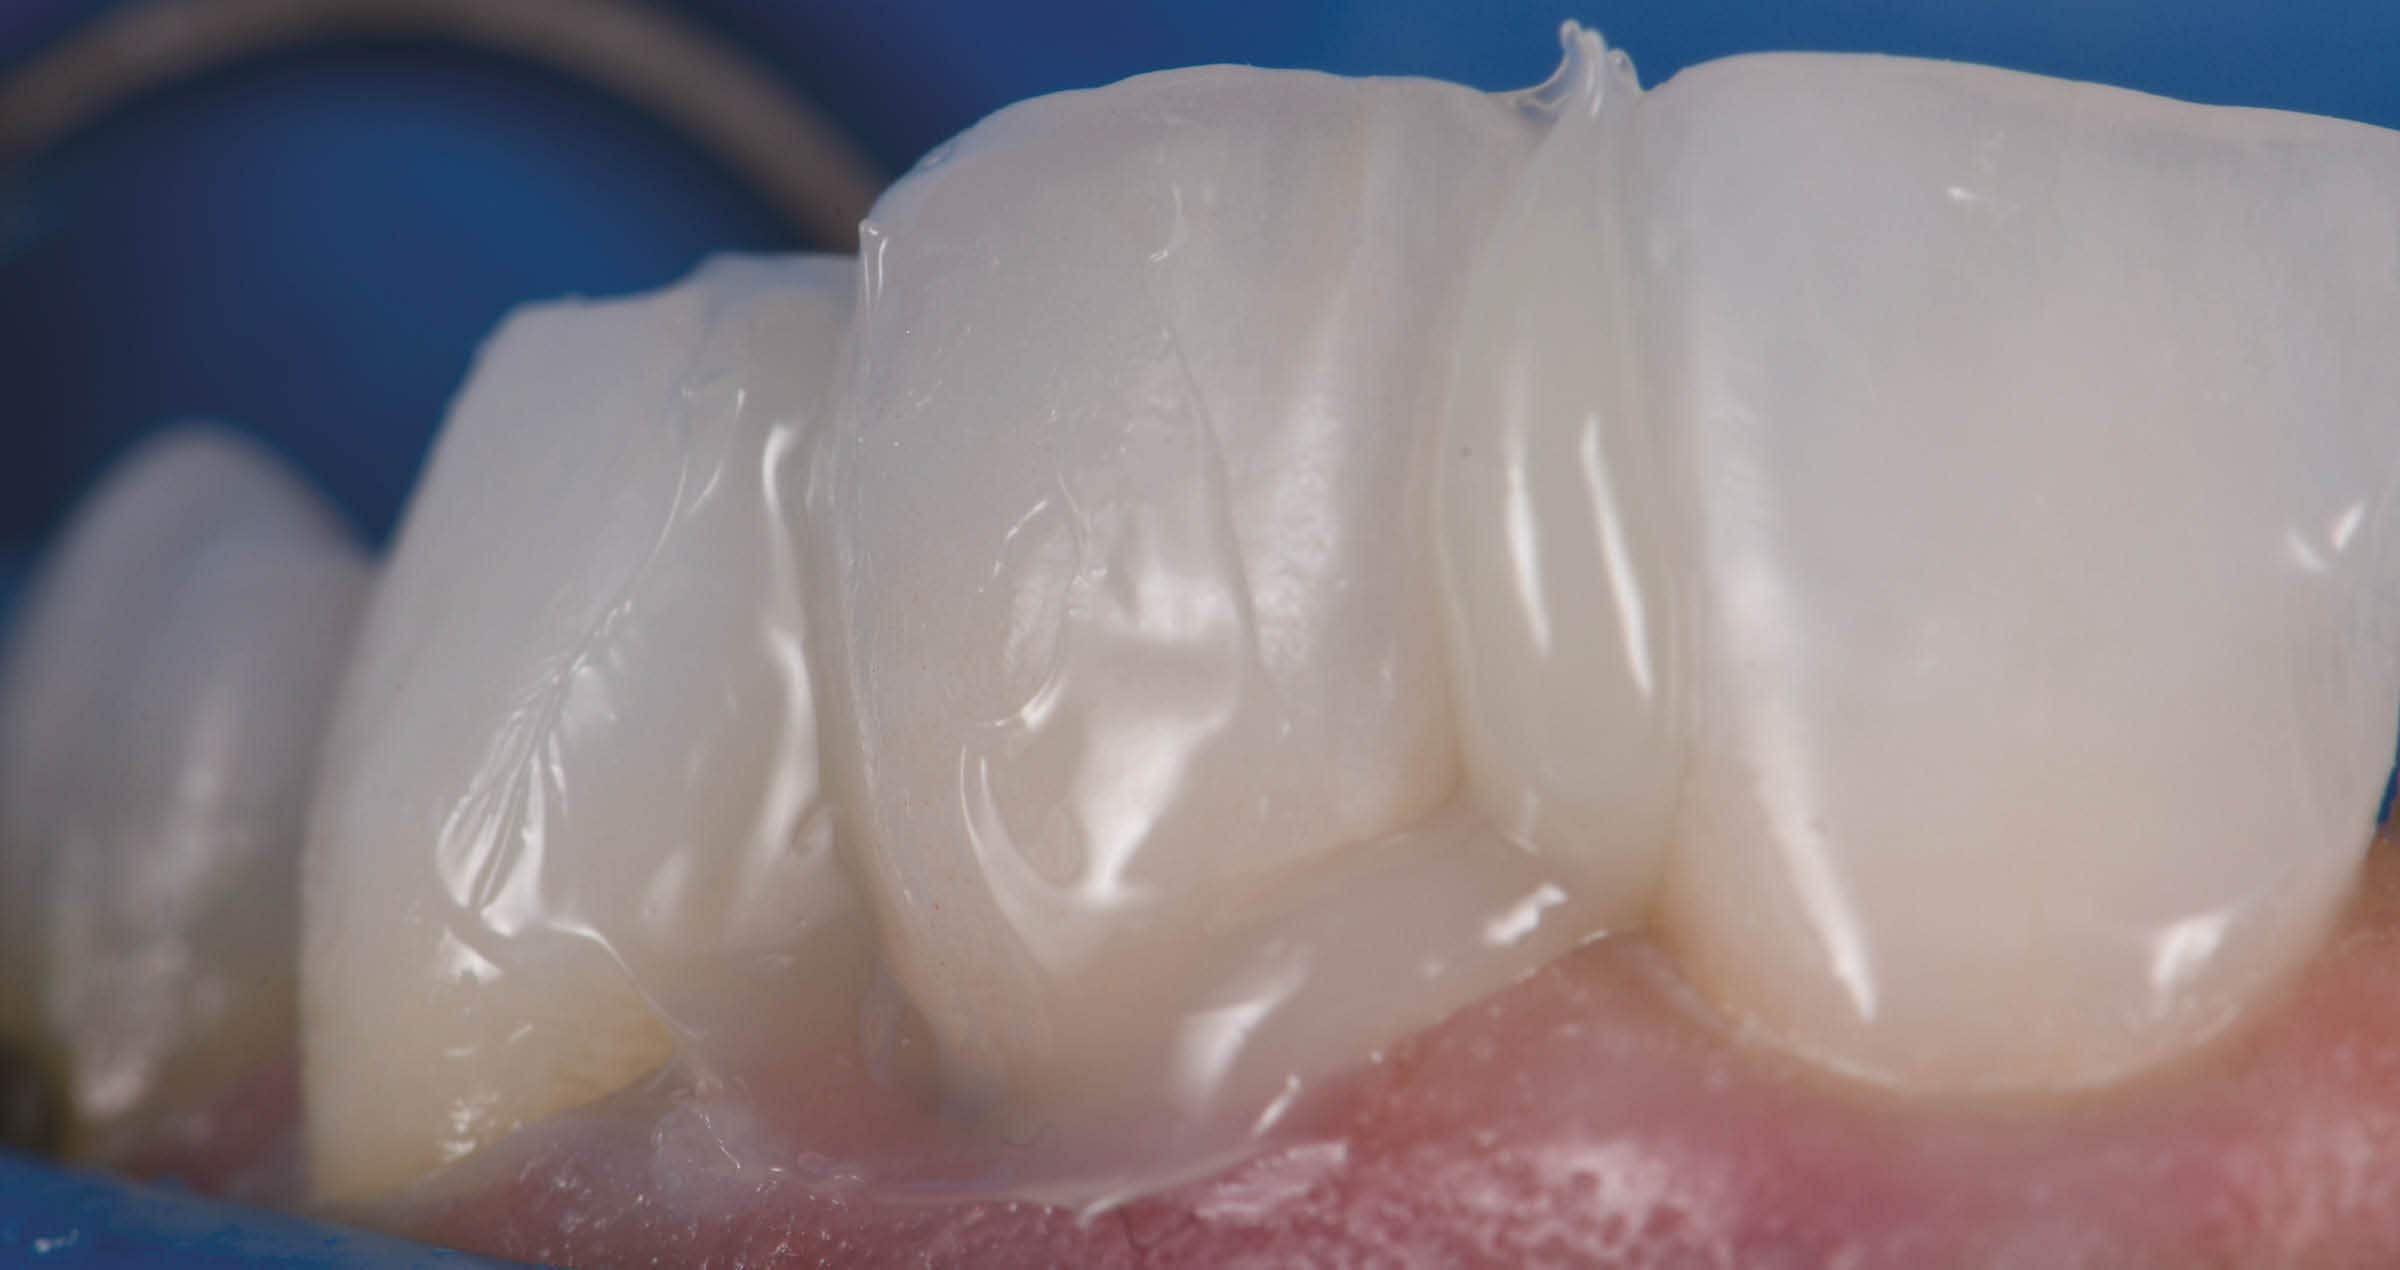
After creating the restoration core, the element to be injected is separated from the contiguous ones with thin PTFE tape. The transparent mask is then inserted, and fluid composite is injected through the injection holes to precisely reconstruct the buccal enamel thickness. The composite tip should be positioned at least halfway through the buccal surface, and the injection should be slow and controlled to avoid air bubbles in the material.


FINISHING

Following a 40-second polymerization vestibularly and occlusally, the transparent matrix is carefully removed, and excess interproximal composite above the PTFE tape as well as any remaining composite cylinder from the injection holes are removed. After completing all restorative elements, the rubber dam is dismantled, and composite excess is finished. After checking the occlusion, the composite is polished, usually requiring no further intervention.


CASE EXAMPLE

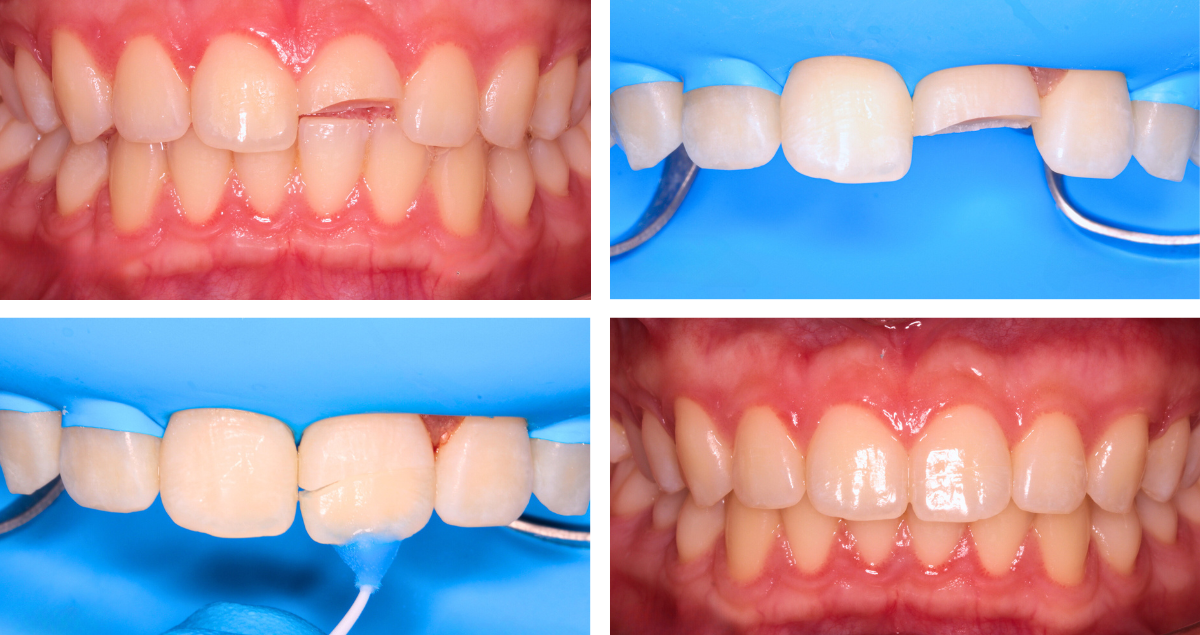
Fig. 1. Female patient with discoloured anterior restorations desiring a smile makeover.


Fig. 2. Close-up of her maxillary anterior teeth.


Fig. 3. Restorations in need of replacement: Lateral view from the right.


Fig. 4. Restorations in need of replacement: Lateral view from the left.


Fig. 5. Printed model based on a digital diagnostic wax-up based on a digital impression.


Fig. 6. Palatal silicone index produced for the conventional direct restoration steps.


Fig. 7. Transparent matrix with injection holes produced for the build-up of the buccal enamel layer using the flowable injection technique.


Fig. 8. Operative field isolated with rubber dam.


Fig. 9. Existing restorations removed and tooth surfaces roughened at the start of treatment.


Fig. 10. Palatal silicone index positioned intraorally for the build-up of the palatal wall.


Fig. 11. Checking of the space available in the vestibular area with a second silicone index.


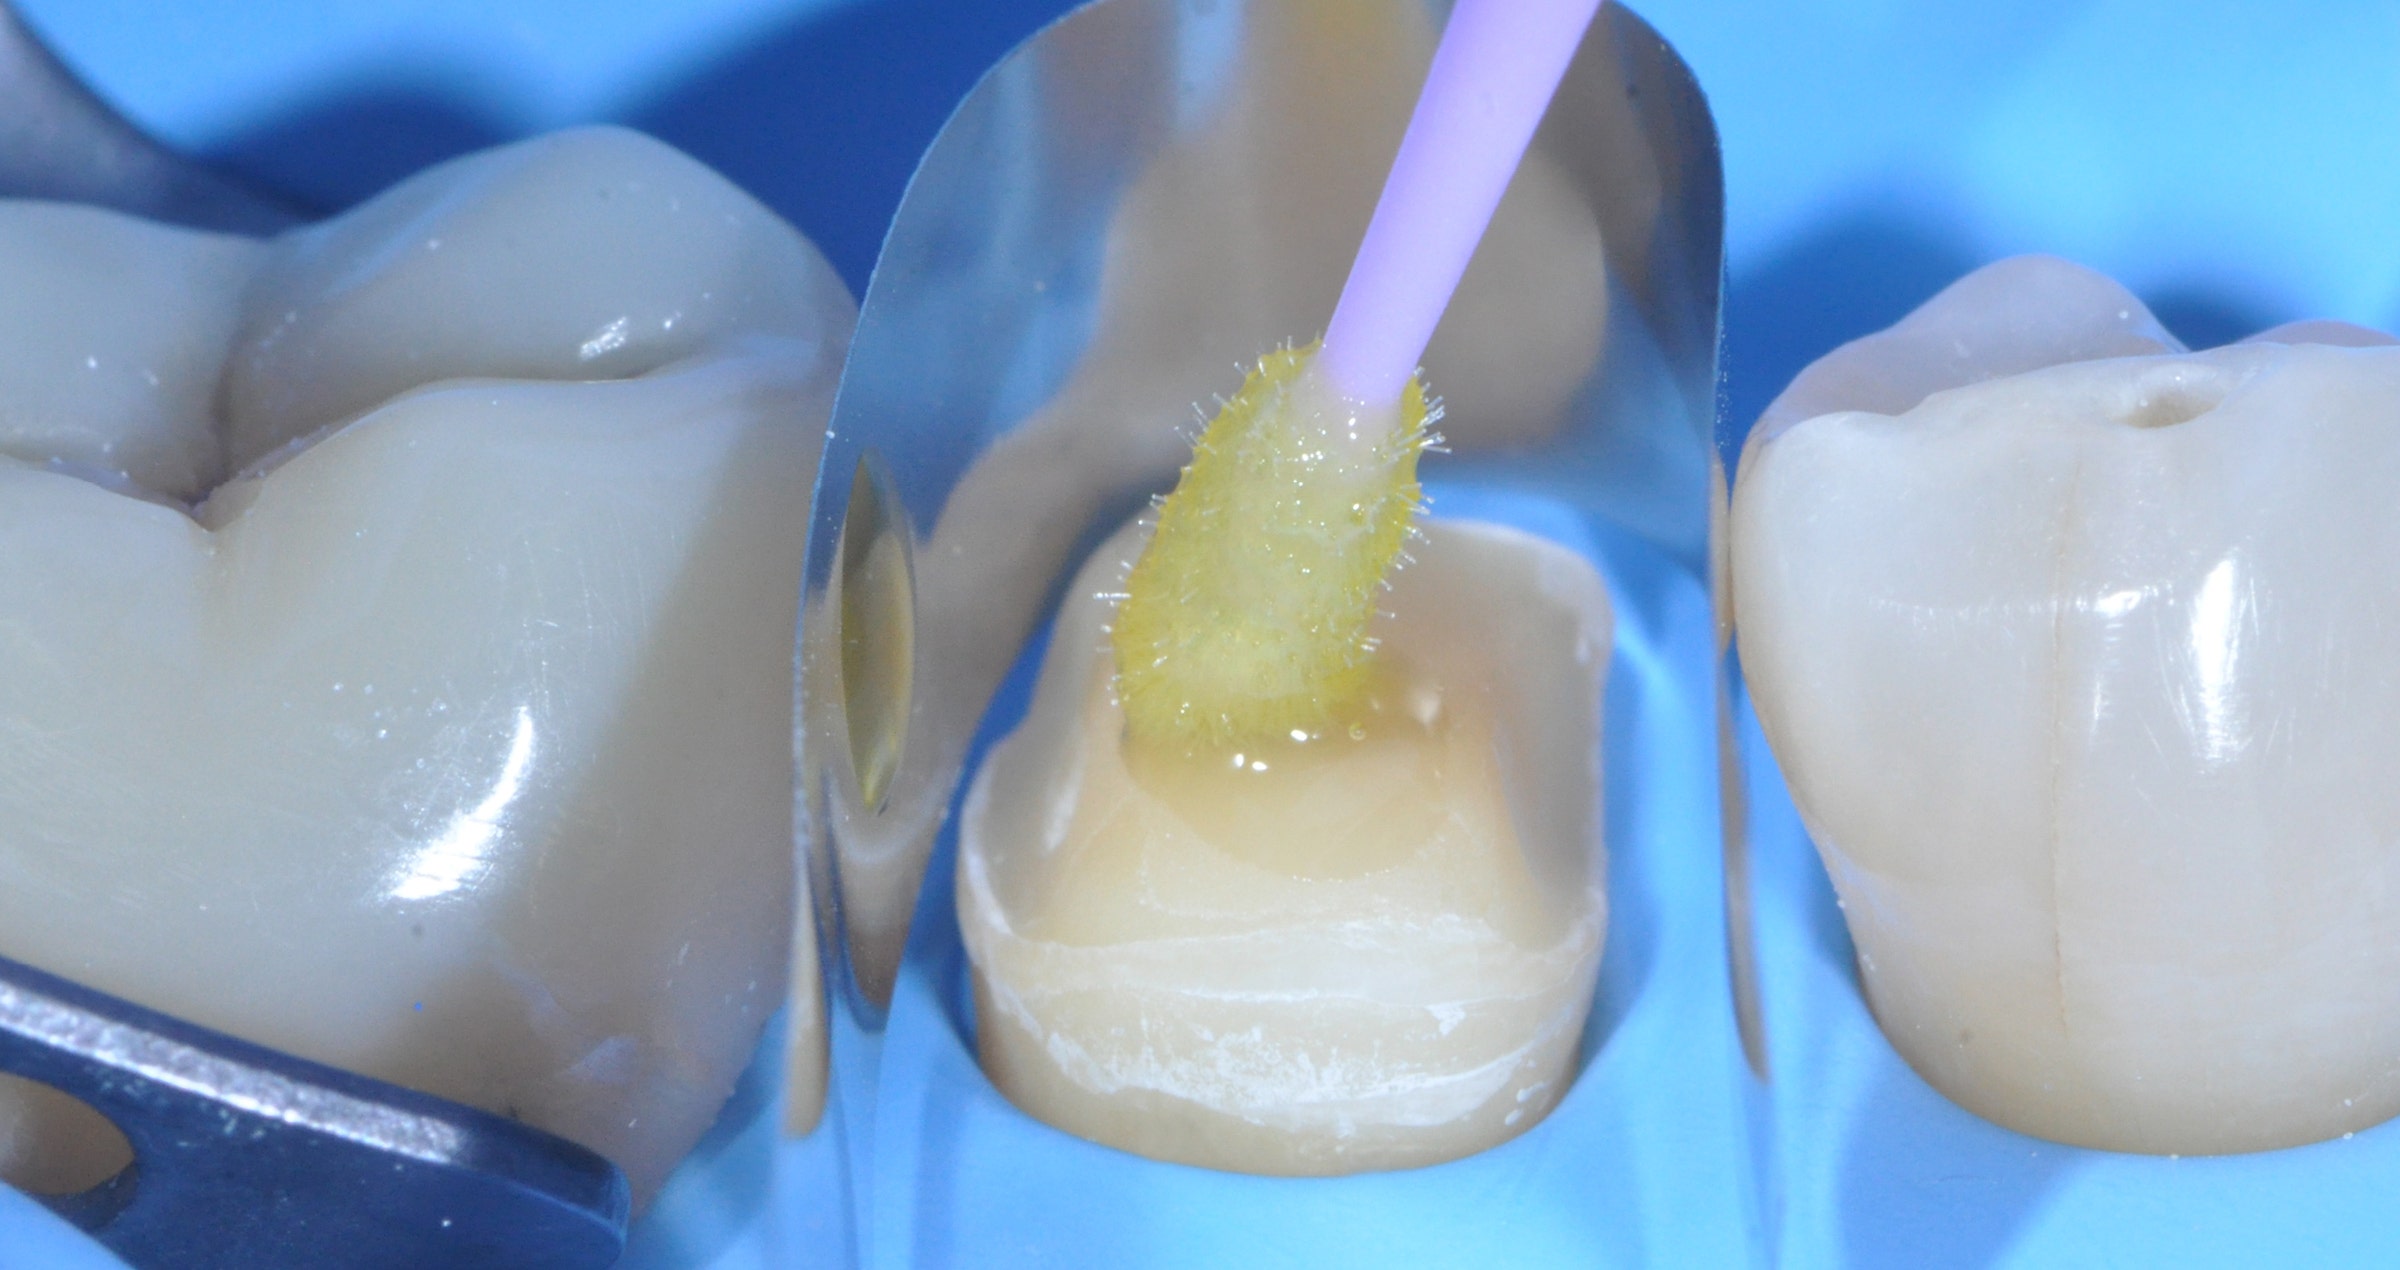
Fig. 12. Etching with phosphoric acid etchant.


Fig. 13. Application of a universal adhesive (CLEARFIL™ Universal Bond Quick, Kuraray Noritake Dental Inc.).


Fig. 14. Palatal walls built up with CLEARFIL MAJESTY™ ES-2 Premium in the shade A1E with the aid of the palatal silicone index.


Fig. 15. Build-up of the interproximal walls with CLEARFIL MAJESTY™ ES-2 Premium in the shade A1D and establishing of the contact points using anatomical sectional matrices for the posterior area placed vertically.


Fig. 16. Dentin core built up with CLEARFIL MAJESTY™ ES-2 Premium in the shade A2D. CLEARFIL MAJESTY™ ES Flow Super Low in the shade XW was applied on the mamelons, while CHROMA ZONE™ COLOR STAIN Blue (Kuraray Noritake Dental Inc.) was used to reproduce incisal translucencies in the spaces not covered by the dentin core.


Fig. 17. Try-in of the transparent matrix for flowable injection.


Fig. 18. Isolation of the adjacent teeth with PTFE tape for a one-by-one injection.


Fig. 19. CLEARFIL MAJESTY™ ES FLOW Low in the shade A2 (Kuraray Noritake Dental Inc.) injected for the anatomical shaping of the maxillary right central incisor.


Fig. 20. Situation after flowable injection for all four anterior teeth, light curing through the matrix, final matrix removal and excess removal.


Fig. 21. Treatment outcome …


Fig. 22. … with visible mamelons, natural incisal translucencies …


Fig. 23. … and a lifelike anatomical shape …


Fig. 24. … of the restorations.


CONCLUSION

Each work phase must be executed with extreme care to lay the foundations for a passive linking of all subsequent steps without creating difficult management situations. The BEST.FIT technique is a convenient and useful method for dental practitioners to manage multiple direct anterior restorations simply and predictably, especially in situations requiring complex rehabilitations with large restorations.


Dentist:

ENZO ATTANASIO


Enzo Attanasio graduated in 2008 in Dentistry and Dental Prosthetics from the Magna Graecia University of Catanzaro. In 2009, he went on to specialize in the use of laser and new technologies in the treatment of oral and perioral tissues at the University of Florence. That year he also attended Prof. Arnaldo Castellucci’s course in Clinical Endodontics at the Teaching Center of Microendodontics in Florence where, in 2012, he went on to complete his training in Surgical Microendodontics. In 2017 he attended a course on Direct and indirect Adhesive Restorations at Prof. Riccardo Becciani’s Think Adhesive training center in Florence where he later become a tutor. Today, as a member of the Italian AIC and based in Lamezia Terme, Italy, Dr Attanasio has a special interest in Endodontics and Aesthetic Conservative.


Universal: Whenever a high translucency is desired

Case by Dr. Jusuf Lukarcanin


In teeth in which the areas to be restored are surrounded by a lot of non-discoloured tooth structure - as may be the case in Class I, II and Class V cavities - the use of CLEARFIL MAJESTY™ ES-2 Universal in the shade U may be an option. The 28-year-old patient, who presented for diastema closure, had teeth with a comparatively low translucency and different shades due to smoking and excessive coffee consumption. As the composite was applied in enamel areas only, the relatively high translucency of the universal shade seemed beneficial in this case.


Fig. 1. Initial clinical situation.


Fig. 2. New smile of the patient.


Reasons for selecting universal:

- Large amounts of underlying or surrounding tooth structure present

- Medium light-scattering desired


Universal properties:

- High translucency

- Medium light-scattering effect


Dentist:

JUSUF LUKARCANIN


Dr. Jusuf Lukarcanin is a Certified Dental Technician (DCT) and a Doctor of Dental Science (DDS). He studied dentistry at the Ege University Dental Faculty in Izmir, Turkey, where he obtained a Master‘s degree in 2011. In 2017, he received a Ph.D. degree from the Department of Restorative Dentistry of the same university. Between 2012 and 2019, Dr. Lukarcanin was the head doctor and general manager at a private clinic in Izmir.


Between 2019 and 2020, he worked at Tinaztepe GALEN Hospital as a Restorative Dentistry specialist, between 2020-2022 he worked at MEDICANA International Hospital Izmir as a Restorative Dentistry specialist. Currently he is an owner of a private clinic for aesthetics and cosmetics in Izmir.


Restoration of a single central incisor: Mastering the art of observation

Case by Andreas Chatzimpatzakis


Observe and copy: This is the key to nature-like dental restorations. There are many optical effects, colour transitions and morphological details in natural teeth that need to be taken in and understood – and replicating them is only possible for those who know exactly how their materials work. Once these skills are acquired, however, they enable a dental technician to produce their restorations as truly beautiful copies of nature. Even when restoring a single maxillary central incisor, the technique delivers outstanding – or inconspicuous - outcomes, as revealed by the following example.


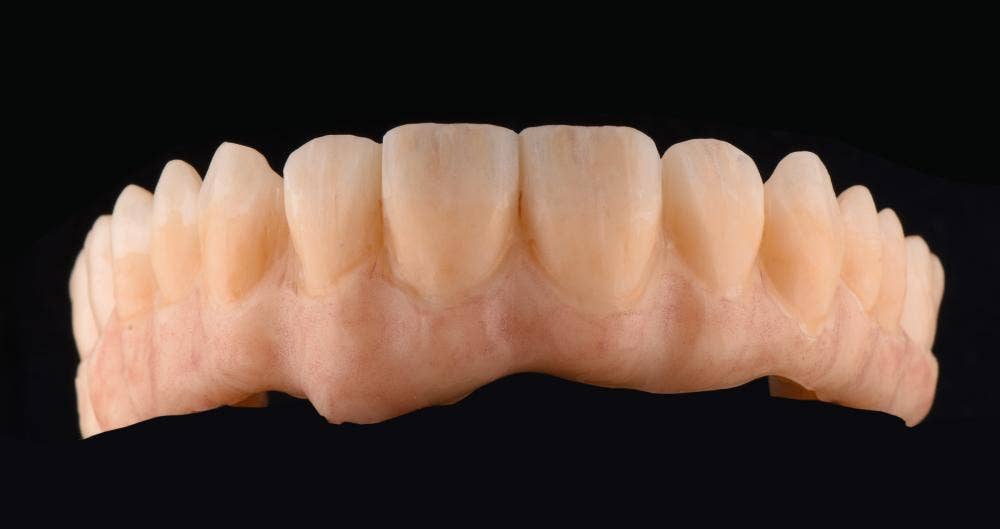
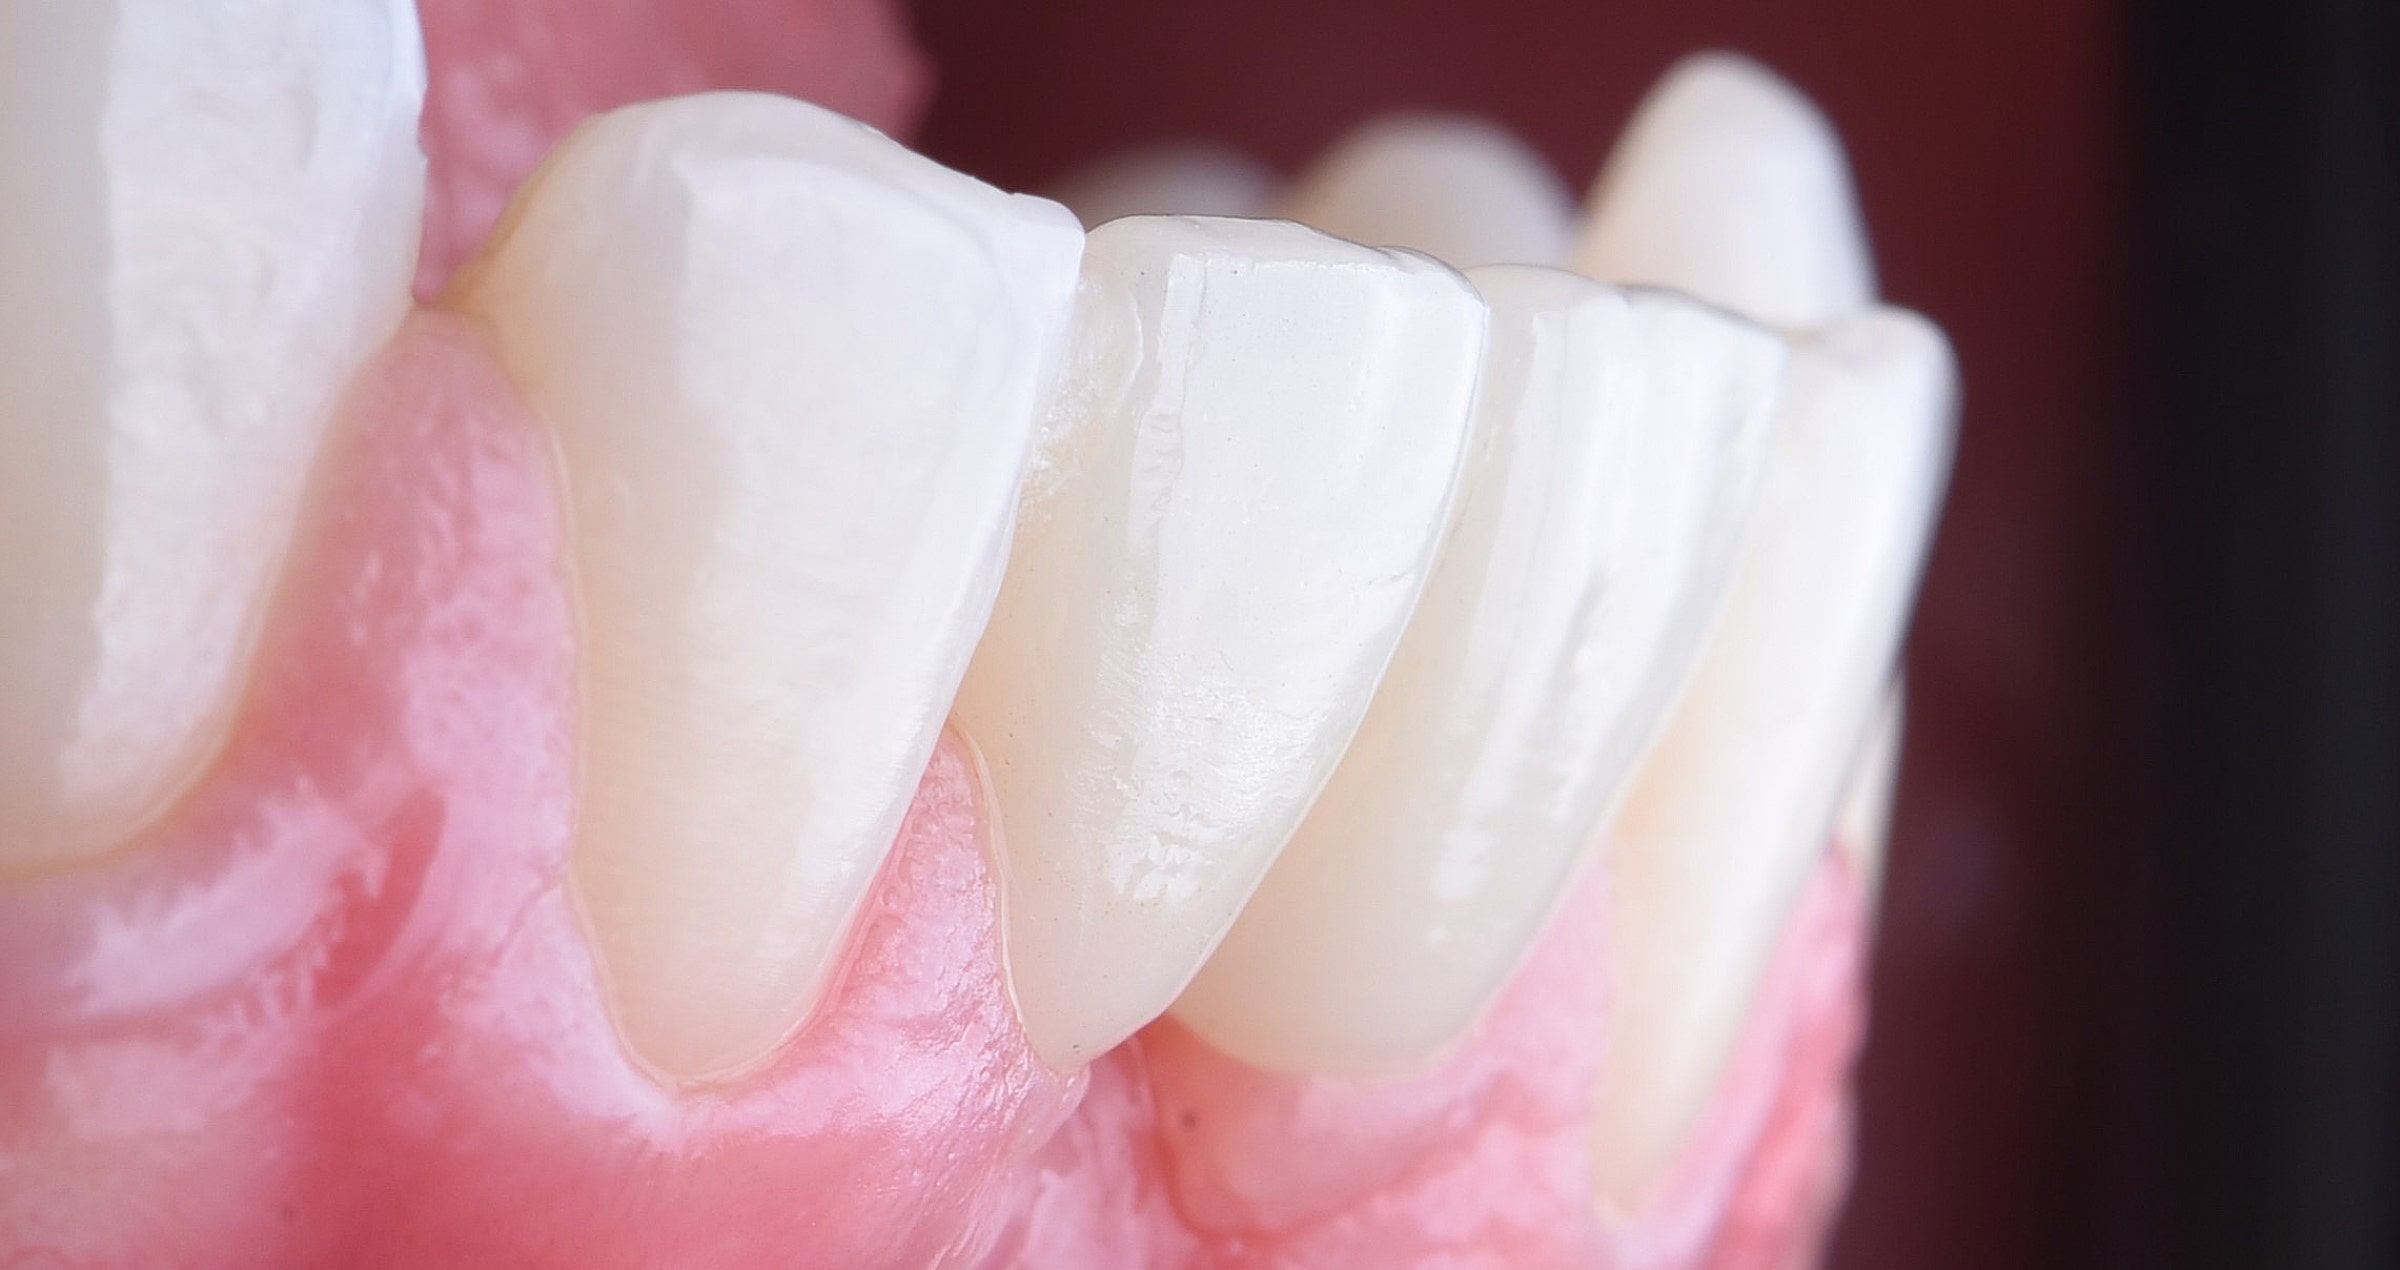
Using high-quality, translucent and gradient-shaded zirconia frameworks and porcelains, the layering technique does not have to be highly complicated. Two bakes and a number of selected effect liquids, internal stains and porcelains are usually sufficient for outcomes that exceed expectations.


CASE EXAMPLE


In the present case, a young male patient had a quite opaque crown on his maxillary right central incisor that needed to be replaced. During shade selection in the dental laboratory (Fig. 1), it was observed that the cervical third of the adjacent central incisor is lighter than the rest. Its shade in other areas corresponded to B4 on the VITA classical A1-D4® Shade Guide. Hence, it was decided to use a somewhat lighter material for the framework and darken the restoration especially in the middle and incisal areas with internal stains.


The concrete plan was to mill a coping made of KATANA™ Zirconia STML (Kuraray Noritake Dental Inc.) in the shade A3, characterize it with Esthetic Colorant (both Kuraray Noritake Dental Inc.) and sinter the piece (Figs 2 to 4). In the following layering procedure including just two bakes, a combination of internal stains and selected porcelains (CERABIEN™ ZR, Kuraray Noritake Dental Inc.) was applied as illustrated in Figures 5 to 12. Figures 13 to 17 display the result on the model, minor adjustments during try-in and the final treatment outcome.


Fig. 1. Shade selection. The cervical third of the adjacent central incisor is lighter than usual compared to the middle and incisal areas.


Fig. 2. Coping made of KATANA™ Zirconia STML in the shade A3.


Fig. 3. Intensification of some shade characteristics of the multi-layered blank using Esthetic Colorant in the shades Grey (middle) and Blue and Grey (incisal area).


Fig. 4. Coping after sintering.


Fig. 5. Colour map for internal staining, using CERABIEN™ ZR Internal Stains.


Fig. 6. Result of the use of Shade Base Stain Modifier Fluoro to increase the fluorescence and internal staining as planned.


Fig. 7. Application of Opacious Body OBA2, …


Fig. 8. … Translucent Tx …


Fig. 9.: … and Luster CCV-2.


Fig. 10. Crown after the first bake.


Fig. 11. Crown after the application of CERABIEN™ ZR Internal Stains: A+, Aqua Blue 2, White mixed with Cervical 2 (ratio: 30/70) for the cracks, and Cervical 2.


Fig. 12. Application of Luster LT1 to finalize the shape.


Fig. 13. Finished crown after the second bake on the model.


Fig. 14. Evaluation of the surface texture: Observing and copying the surface details is as important as the imitation of the shade characteristics.


Fig. 15. Minor texture adjustments during try-in.


Fig. 16. Final restoration in place after cementation with PANAVIA™ V5 (Kuraray Noritake Dental Inc.).


Fig. 17. Treatment outcome.


CONCLUSION


Mastering the art of observing natural teeth is the key to lifelike restorations. It allows a dental technician to develop a deep understanding of shade and morphology, which is – apart from knowing the selected materials very well – the only talent needed to reach a high level of excellence. Those who are observant and take in every detail with their eyes can be sure that their mind will understand and their hands will automatically follow.


Dental technician:

ANDREAS CHATZIMPATZAKIS


Andreas graduated from the Dental Technology Institute (TEI) of Athens in 1999. During his studies he followed a program at the Helsinki Polytechnic Department of Dental Technique, where he trained on implant superstructures and all ceramic prosthetic restorations. As of 2000, he is running the ACH Dental Laboratory in Athens, Greece, specialized on refractory veneers, zirconia and long span implant prosthesis. In 2017 Andreas visited Japan where he trained under the guidance of Hitoshi Aoshima, Naoto Yuasa and Kazunabu Yamanda and become International Trainer for Kuraray Noritake Dental Inc..


Large cavity restoration with resin composite: which materials to choose?

Case by Vasiliki Tsertsidou


What kind of resin composite is recommended for core build-up procedures? While there are specific dual-cure core build-up resin composites available on the market, it is not mandatory to use them. Light curing is advisable to be applied even for materials with dual-cure polymerization. Some conventional resin composites demonstrate more favourable properties for a core build-up compared to specific core build-up resin composites itself.1 Hence, it is possible to utilize a composite generally used in the dental office, provided it is indicated to and it is not applied deep within the root canal, where proper light curing would be impossible. The critical material properties for core build-ups are high filler load, sufficient flexural modulus and flexural strength.


CLEARFIL MAJESTY™ ES-2 composite series (Kuraray Noritake Dental Inc.) are suitable option for this case. With a filler load weight percentage of 78 and a flexural strength of 118 MPa (according to manufacturer), CLEARFIL MAJESTY™ ES-2 Classic corresponds to core build-up prerequisites*. The following case is illustrating the clinical procedure.


*The indication range of CLEARFIL MAJESTY™ ES-2 composite does not cover core build-up. In the specific case it is used for creating a large Class II filling where all conditions from the IFU, such as curing depth, are met.


Fig. 1. Endodontically treated tooth with a vertical fracture of palatal wall on maxillary right second premolar.


Fig. 2. Buccal view of the tooth.


Fig. 3. Clinical image, directly after removal of fragment.


Fig. 4. Fragment of the maxillary right second premolar.


Fig. 5. Circumferential matrix band for build-up to assist endodontic retreatment.


Fig. 6. Build-up of the missing walls (margin relocation) with CLEARFIL MAJESTY™ ES-2 Classic (A3).


Fig. 7. Temporary filling of the cavity.


Fig. 8. Replacement of the temporary filling material with CLEARFIL MAJESTY™ ES-2 Classic.


Fig. 9. Crown preparation.


Fig. 10. Proximal carious lesion present on the adjacent fist premolar.


Fig. 11. Situation after rubber dam placement and caries removal.


Fig. 12. Cavity restored with CLEARFIL MAJESTY™ ES-2 Classic.


Fig. 13. Prepared crown.


Fig. 14. Crown after sandblasting of the intaglio.


Fig. 15. Mechanically cleaned abutment tooth ready for pre-treatment.


Fig. 16. Intaglio of the crown treated with CLEARFIL™ CERAMIC PRIMER PLUS.


Fig. 17. Etching of the composite surface with phosphoric acid gel.


Fig. 18. Air-drying of PANAVIA™ V5 Tooth Primer on the abutment tooth.


Fig. 19. Crown in place after cementation with PANAVIA™ V5 Paste and excess removal.


A GOOD CHOICE


Dual-cure core build-up resin composites are two-component materials that need to be mixed homogeneously, which obstracts composition from containing high filler load. However, to prevent deformation of the core, a highly filled composite is advisable. This better simulates the flexural modulus of natural tissues compared to materials with low filler load. Consequently, a light-curing material like CLEARFIL MAJESTY™ ES-2 might be a better option. Applied in 2-mm increments in the core area (and not in the root canal), it performs well and provides the desired outcomes. Additionaly, the option of utilising the same material as for any other type of direct restorations is simplifying the stock management and supporting dental practitioners striving for a simplification of clinical procedures.


References

1. Spinhayer L, Bui ATB, Leprince JG, Hardy CMF. Core build-up resin composites: an in-vitro comparative study. Biomater Investig Dent. 2020 Nov 3;7(1):159-166. doi: 10.1080/26415275.2020.1838283. PMID: 33210097; PMCID: PMC7646551.


Dentist:

VASILIKI TSERTSIDOU


Anterior crowns on teeth and an implant

Case by Martin Laurik, MDT


There are so many different restorative materials out there and so many design and finishing concepts available that it often seems difficult to select the best option for a specific case. Using an allrounder like KATANA™ Zirconia YML can facilitate decision making: It is a great choice for single- to multi-unit restorations, works on teeth and implants alike, and can be adapted to individual needs by selecting a suitable design concept and adequate finishing technique. In this way, it is even possible to solve aesthetically challenging cases as the one illustrated below.


Initial situation and temporization


This patient was in need for treatment after the loss of her maxillary right central incisor and the placement of an implant in this region. As a replacement of the restorations on the other three maxillary incisors was necessary as well, it was decided to produce four crowns made of the same material – KATANA™ Zirconia YML. For aesthetic evaluation of the restorations’ length, angulations and shape in the mouth and a functional test drive, the crowns were digitally designed in full contour and milled from PMMA in the determined tooth shade A2 (Fig. 1).


Fig. 1. Full-contour PMMA crowns on the master cast.


Design, milling and effect dyeing of the zirconia crowns


Once the appearance and functional aspects of the temporary restorations were approved by the patient and the restorative team, the definitive crowns were produced. Their design was based on the full-contour design of the temporaries; however, a facial reduction of 0.6 mm was carried out by the software to create space for individualization with a small layer of veneering porcelain. The crowns were then milled from a KATANA™ Zirconia YML disc in the shade A1 – approximately one shade lighter than the determined tooth shade. To mask the uneven colour from the tooth stumps and the implant abutment, the intaglio of the crowns was treated with Esthetic Colorant in the shade Opaque. Some individual and intensified colour effects on the vestibular surface were also created with Esthetic Colorant.


Internal staining and porcelain layering


To slightly adjust the chroma and lightness, a first layer of CERABIEN™ ZR Internal Stains was added, followed by a wash bake. After the application of a first layer of CERABIEN™ ZR porcelains (Body, Enamel and Translucent) and baking (Fig. 2) – the central incisors received a layer of A1B, the lateral incisors a mixture of A1B and A2B (slightly darker to provide for a better match with the canines) with LT1, LT Natural completing the picture – additional internal staining was carried out (Fig. 3). The final layer of CERABIEN™ ZR luster porcelains (LT1, ELT2 used on the convex line angles to achieve an external reflection) was added and fixed in a fourth bake (Fig. 4).


After adjustments and very rough polishing, a self-glaze firing programme was selected (firing temperature 915 °C, holding time 5 seconds). On the highly polished incisal and palatal parts of the crowns and for contact point adjustment, CERABIEN™ ZR FC Paste Stain Glaze was applied and fixed with the same bake. The finished crowns on the model are shown in Figure 5, while Figure 6 displays the final treatment outcome.


Fig. 2. Crowns milled from KATANA™ Zirconia YML with a facial cutback of 0.6 mm after individualization with Esthetic Colorant, sintering, internal staining and the application of a first layer of porcelain.


Fig. 3. This picture shows the subtle internal stain adjustment to the ceramic mostly on the incisal part.


Fig. 4. Crowns prior to final shape adjustments and polishing.


Fig. 5. Finished crowns on the model.


FINAL SITUATION


Fig. 6. Treatment outcome.


Easy approach to beautiful restorations


The presented approach is a relatively easy way of producing highly aesthetic anterior restorations. Using an allrounder zirconia combined with a few selected effect liquids, internal stains and luster porcelains, it is possible to achieve a great optical integration even in a situation where teeth and implants need to be restored. The natural shape and surface texture of the restorations plays an important role in this context, as does the base material – a naturally shaded, highly translucent zirconia.


Dentist:

MARTIN LAURIK, MDT


Martin started working as a dental technician in 2014. In the time since, he never stopped training and learning from renowned colleagues. Continuing education courses focused on dental ceramics and occlusion in the functional concept of Slavicek. Fascinated by the beauty of natural teeth, developing an understanding of their complexity and learning how to mimic nature’s design as closely as possible has always been his primary goal, while he is well aware that there is still a lot to be learned and explored on the road to excellence.


Universal Dark: For natural results in darker teeth

Abrasion and shape correction was also the major reason for this 58-year-old female patient to ask for cosmetic dental treatment. She was unhappy with the appearance of the anterior teeth in the maxilla, which showed signs of tooth wear and discolouration. The selected treatment approach was composite veneering with CLEARFIL MAJESTY™ ES-2 Universal in the shade UD. The shade was selected based on the indication and the somewhat darker shade of the patient’s natural teeth.


Fig. 1. Initial clinical situation.


Fig. 2. Treatment outcome.


Reasons for selecting universal dark:

- For older patients (tooth shades A3 and darker)

- Situations in which light easily passes through the composite (e.g., Class III, Class IV)


Universal dark properties:

- High light scattering effect

- Well-balanced translucency


Dentist:

JUSUF LUKARCANIN


Dr. Jusuf Lukarcanin is a Certified Dental Technician (DCT) and a Doctor of Dental Science (DDS). He studied dentistry at the Ege University Dental Faculty in Izmir, Turkey, where he obtained a Master‘s degree in 2011. In 2017, he received a Ph.D. degree from the Department of Restorative Dentistry of the same university. Between 2012 and 2019, Dr. Lukarcanin was the head doctor and general manager at a private clinic in Izmir.


Between 2019 and 2020, he worked at Tinaztepe GALEN Hospital as a Restorative Dentistry specialist, between 2020-2022 he worked at MEDICANA International Hospital Izmir as a Restorative Dentistry specialist. Currently he is an owner of a private clinic for aesthetics and cosmetics in Izmir.


Custom abutment implant cementation technique

With PANAVIA™ SA Cement Universal and KATANA™ Zirconia


By using PANAVIA™ SA Cement Universal and its proprietary dual-monomer technology, you can now simplify the bonding of restoration to implant abutments without the use of separate primers or silane. Independent research has confirmed this new dual-monomer technology does not sacrifice adhesion or durability on glass-based ceramics or zirconia. The technique, in this case study, is for custom fabricated abutment & KATANA™ Zirconia YML crown, however, the basic technique on the treatment of the abutment and restoration may be used with any implant restoration combination as long as the proper surface treatments for type of material is followed.


INITIAL FIT OF ABUTMENT & RESTORATION

Basic technique on the treatment of the abutment and restoration.


Fig. 1. Check Initial Fit of Abutment & Restoration: abutment & crown margins should be checked to ensure proper fit.


Fig. 2. Protect base of implant with putty or light-cure block-out resin. The base of the implant should be covered so that it is not air abraded accidentally.


Fig. 3. Abrade titanium abutment with 50 μm alumina oxide powder.


Fig. 4. Clean abutment with KATANA™ Cleaner: Apply KATANA™ Cleaner by rubbing each area for 10 seconds.


KATANA™ Cleaner is a universal cleaner that is indicated to clean metal, zirconia & glass-based restorations. It is also an intra oral cleaner that may be used on dentin and enamel.


TREATMENT OF KATANA™ Zirconia RESTORATION WORKFLOW

Bonding to zirconia has been proven to be durable in research going back to the 1990’s with the original MDP adhesive monomer in the PANAVIA™ resin cements. The three requirements to bonding zirconia are:

  1. Air abrade zirconia with 50 μm alumina oxide powder.
  2. Clean zirconia
  3. Apply an MDP-Based Primer or resin cement. PANAVIA™ SA Cement Universal contains the original MDP that was developed & patented in 1981 by Kuraray Dental.


Fig. 1. Air abrade KATANA™ Zirconia at 14-58 psi.


Fig. 2. Dispense & mix PANAVIA™ SA Cement Universal (it is available in automix or handmix formulations).


Fig. 3. Apply PANAVIA™ SA Cement Universal to the abutment or inside the crown.


Fig. 4. Seat restoration on abutment.


Fig. 5. Remove excess resin with a dry micro-applicator or brush.


Fig. 6. You may light-cure the margins after cleaning up all excess resin. If you fully cure excess resin, It can be difficult to remove. If difficult to remove, change curing time or distance with your light.


Fig. 7. Leave restoration on abutment to self-cure fully for approximately 10 minutes at room temperature.


Fig. 8. Final check of custom abutment KATANA™ Zirconia YML crown on model.


Dentist:

JEAN CHIHA


Technician Jean Chiha CDT, Santa Ana, CA USA

Mr. Chiha is the owner of North Star Dental Laboratory and Milling Center, Santa Ana, CA, and has served as President of the Dental Lab Owners Association of California since 2013. He is a 1985 graduate of Institut Dento Technic, a private dental technology school in France. Mr. Chiha lectures internationally on dental communication and case planning. Jean lectures around the world on a variety of topics and has carved out a niche with his extensive knowledge of zirconia. Affectionately referred to as “Mr. Katana” due to his involvement in the creation of the material.

Universal Light: For natural results in brighter teeth

Case by Dr. Jusuf Lukarcanin


This young patient aged 35 with microdontia presented in the dental office with the desire to have more beautifully shaped teeth. His teeth were almost free of dental caries, but with deficiencies in oral hygiene and signs of gingival inflammation. A deep bite was also evident. After professional tooth cleaning and oral hygiene advice, the teeth were restored with CLEARFIL MAJESTY™ ES-2 Universal in the shade UL.


Fig. 1. Initial situation.


Fig. 2. Initial situation: Deep bite.


Fig. 3. Teeth restored with composite in the single-shade technique.


Fig. 4. Immediate treatment outcome.


Reasons for selecting universal light:

- For younger patients (tooth shades A2 and lighter)

- Situations in which light easily passes through the composite (e.g., Class III, Class IV)


Universal light properties:

- High light scattering effect

- Well-balanced translucency


Dentist:

JUSUF LUKARCANIN


Dr. Jusuf Lukarcanin is a Certified Dental Technician (DCT) and a Doctor of Dental Science (DDS). He studied dentistry at the Ege University Dental Faculty in Izmir, Turkey, where he obtained a Master‘s degree in 2011. In 2017, he received a Ph.D. degree from the Department of Restorative Dentistry of the same university. Between 2012 and 2019, Dr. Lukarcanin was the head doctor and general manager at a private clinic in Izmir.


Between 2019 and 2020, he worked at Tinaztepe GALEN Hospital as a Restorative Dentistry specialist, between 2020-2022 he worked at MEDICANA International Hospital Izmir as a Restorative Dentistry specialist. Currently he is an owner of a private clinic for aesthetics and cosmetics in Izmir.


Ti-Base implant cementation technique

With PANAVIA™ SA Cement Universal


By using PANAVIA™ SA Cement Universal and its proprietary dual-monomer technology, you can now simplify the bonding of any restoration to implant abutments without the use of separate primers or silane. Independent research has confirmed this new dual-monomer technology does not sacrifice adhesion or durability on glass-based ceramics or zirconia. The technique, in this case study, is for Ti-Base Implants, however, the basic technique on the treatment of the abutment and restoration may be used with any implant restoration combination.


TREATMENT OF TITANIUM ABUTMENT


Fig. 1. After attaching the abutment to the implant analog.


Fig. 2. Protect the base of the abutment with block out resin & light-cure.


Fig. 3. Air abrade the Titanium Abutment with 30-50 μm Alumina Powder @ 32 PSI.


Fig. 4. Clean abutment with KATANA™ Cleaner (10’s Rubbing, Rinse & Dry).


KATANA™ Cleaner is a universal cleaner that is indicated to clean metal, zirconia & glass-based restorations. It is also an intra oral cleaner that may be used on dentin and enamel.


REFERENCE INDEX POINTS TO ENSURE ACCURATE SEATING


Fig. 1. Mark Index position on implant analog.


Fig. 2. Mark index position (notch) on crown.


TREATMENT OF RESTORATION & BONDING TO THE ABUTMENT


Fig. 1. If Lithium Disilicate, HF acid etch Internal Surfaces, with 5% HF etch for 20’seconds then rinse & dry. If Zirconia, air abrade, at 14-58 PSI.


Fig. 2. Inject PANAVIA™ SA Cement Universal (White Shade) onto treated & cleaned abutment.


Fig. 3. Align index points & seat crown onto abutment.


Fig. 4. Place crown & implant into clamps & lightly tighten.


Fig. 5. Tack-Cure Clean-Up: Light-Cure excess cement for 2-5 seconds (time depends on light output & distance held).


Fig. 6. Remove excess cement & block-out resin with an explorer. PANAVIA™ SA Cement Universal has extremely easy clean-up.


Fig. 7. Wipe off remaining resin with gauze.


Fig. 8. Remove index mark with alcohol & gauze.


Fig. 9. Clean & polish restoration prior to seating. Surfaces coming in contact with soft-tissue should be polished.


Dentist:

GREG CAMPBELL


Dentist Greg Campbell DDS, Long Beach, CA USA

Greg Campbell, DDS is recognized internationally as an expert on integrating CAD/CAM dentistry into offices and is frequently sought out by industry leaders to lecture about Digital Dentistry. Dr. Campbell has a great understanding of Digital Technology and trains other dentists how to use this technology and is a certified Advanced CEREC Trainer. He is a former Beta tester for Sirona Dental and has authored two books on CAD/CAM dentistry. Dr. Campbell has created multiple polishing kits used for ceramics and has been trained on advanced adhesion materials, research & techniques and utilizing them clinically for over 8 years. Dr Campbell was an Alpha and Beta Tester for KATANA™ STML.


Dr. Campbell graduated from the University of Southern California School of Dentistry and completed advanced training in Cosmetic Dentistry at UCLA and maintains a private practice in Long Beach California.

Considerations on the use of a universal composite in the anterior region

4 Clinical cases by Dr. Jusuf Lukarcanin


Composites with a universal shade concept, a reduced number of shades that may be selected without any shade guide are a clear trend in restorative dentistry. With specific blend-in properties, these materials can help streamline restorative procedures and reduce chair time, take some pressure off the dental practitioner and contribute to potentially good outcomes. Some users, however, are skeptical about a wide-scale use of the materials, particularly when it comes to restoring teeth in the anterior region. The reasons may be a comparatively high translucency requiring the separate application of a blocker (or opacious shade) in certain situations, or a too limited shade offering.


Personal experience shows that CLEARFIL MAJESTY™ ES-2 Universal is perfectly suitable for a wide range of single-shade restorations in anterior teeth. It offers great polishability and long-term gloss retention and is available in just four shades: One universal shade (U) originally designed for posterior restorations, universal light (UL) and universal dark (UD) as the two major options for anterior teeth and, finally, universal white (UW) for the imitation of any bleached shade. In general, all four options may be used in the anterior and posterior region. As the blend-in ability is due to proprietary light-diffusion technology and not managed via an increased translucency, the application of a blocker is usually not necessary and even larger areas can be restored quite inconspicuously.


For those asking themselves when to select which shade in the anterior region, the following clinical case examples and comments may provide some useful guidance. The recommendations and practical tips are based on personal experience. All patients were in treatment for diastema closure or shape correction, but the selection criteria are the same for other types of anterior restorations, too.


UNIVERSAL LIGHT: FOR NATURAL RESULTS IN BRIGHTER TEETH


This young patient aged 35 with microdontia presented in the dental office with the desire to have more beautifully shaped teeth. His teeth were almost free of dental caries, but with deficiencies in oral hygiene and signs of gingival inflammation. A deep bite was also evident. After professional tooth cleaning and oral hygiene advice, the teeth were restored with CLEARFIL MAJESTY™ ES-2 Universal in the shade UL.


Fig. 1. Initial situation.


Fig. 2. Initial situation: Deep bite.


Fig. 3. Teeth restored with composite in the single-shade technique.


Fig. 4. Immediate treatment outcome.


Reasons for selecting universal light:

- For younger patients (tooth shades A2 and lighter)

- Situations in which light easily passes through the composite (e.g., Class III, Class IV)


Universal light properties:

- High light scattering effect

- Well-balanced translucency


UNIVERSAL DARK: FOR NATURAL RESULTS IN DARKER TEETH


Abrasion and shape correction was also the major reason for this 58-year-old female patient to ask for cosmetic dental treatment. She was unhappy with the appearance of the anterior teeth in the maxilla, which showed signs of tooth wear and discolouration. The selected treatment approach was composite veneering with CLEARFIL MAJESTY™ ES-2 Universal in the shade UD. The shade was selected based on the indication and the somewhat darker shade of the patient’s natural teeth.


Fig. 1. Initial clinical situation.


Fig. 2. Treatment outcome.


Reasons for selecting universal dark:

- For older patients (tooth shades A3 and darker)

- Situations in which light easily passes through the composite (e.g., Class III, Class IV)


Universal dark properties:

- High light scattering effect

- Well-balanced translucency


UNIVERSAL: WHENEVER A HIGH TRANSLUCENCY IS DESIRED


In teeth in which the areas to be restored are surrounded by a lot of non-discoloured tooth structure - as may be the case in Class I, II and Class V cavities - the use of CLEARFIL MAJESTY™ ES-2 Universal in the shade U may be an option. The 28-year-old patient, who presented for diastema closure, had teeth with a comparatively low translucency and different shades due to smoking and excessive coffee consumption. As the composite was applied in enamel areas only, the relatively high translucency of the universal shade seemed beneficial in this case.


Fig. 1. Initial clinical situation.


Fig. 2. New smile of the patient.


Reasons for selecting universal:

- Large amounts of underlying or surrounding tooth structure present

- Medium light-scattering desired


Universal properties:

- High translucency

- Medium light-scattering effect


UNIVERSAL WHITE: FOR ALL PATIENTS ASKING FOR A BLEACHED EFFECT


For all cases that require a particularly bright tooth shade – e.g. children or patients with bleached teeth / asking for a bleached effect in their restorations – CLEARFIL MAJESTY™ ES-2 Universal in the shade UW is likely to be the first choice. The young patient aged 28 shown below asked for diastema closure including shape and shade correction: She wanted to have a brighter, more beautiful smile.


Fig. 1. Initial clinical situation.


Fig. 2. Shape and shade correction were desired in this case.


Fig. 3. Treatment outcome …


Fig. 4. … leading to the beautiful smile the patient desired.


Reasons for selecting universal white:

- Cases requiring a particularly high brightness or value

- Restorations in deciduous teeth

- Restorations in bleached teeth


Universal white properties:

- Well-balanced translucency

- High light-scattering effect


CONCLUSION


One universal composite, four shades: In the case of CLEARFIL MAJESTY™ ES-2 Universal, this portfolio is absolutely sufficient for single-shade restorations even in the aesthetically demanding anterior region. Properties such as a nice blend-in effect, a great polishability and gloss retention over time support dental practitioners in creating beautiful restorations. As shade determination may be based on very few criteria instead of a complex shade guide, the whole restoration procedure becomes less stressful and more efficient. Furthermore, with only four shades to stock and usually no blocker needed, the number of materials on stock is reduced, leading to facilitations in stock management as well.

Dentist:

JUSUF LUKARCANIN


Dr. Jusuf Lukarcanin is a Certified Dental Technician (DCT) and a Doctor of Dental Science (DDS). He studied dentistry at the Ege University Dental Faculty in Izmir, Turkey, where he obtained a Master‘s degree in 2011. In 2017, he received a Ph.D. degree from the Department of Restorative Dentistry of the same university. Between 2012 and 2019, Dr. Lukarcanin was the head doctor and general manager at a private clinic in Izmir.


Between 2019 and 2020, he worked at Tinaztepe GALEN Hospital as a Restorative Dentistry specialist, between 2020-2022 he worked at MEDICANA International Hospital Izmir as a Restorative Dentistry specialist. Currently he is an owner of a private clinic for aesthetics and cosmetics in Izmir.