Welcome to the future of ceramic layering

Cases by DT Ioulianos Moustakis and MDT Andreas Chatzimpatzakis


Producing dental restorations that are not recognizable as such – this is probably the ultimate goal of every dental technician. For a long time, pursuing this goal was complicated by core materials whose optical properties were very different from those of natural teeth. The dark metal or opaque zirconia substructures had to be masked by applying multiple layers of intensively coloured ceramic powders, topped by more translucent porcelains imitating the enamel.


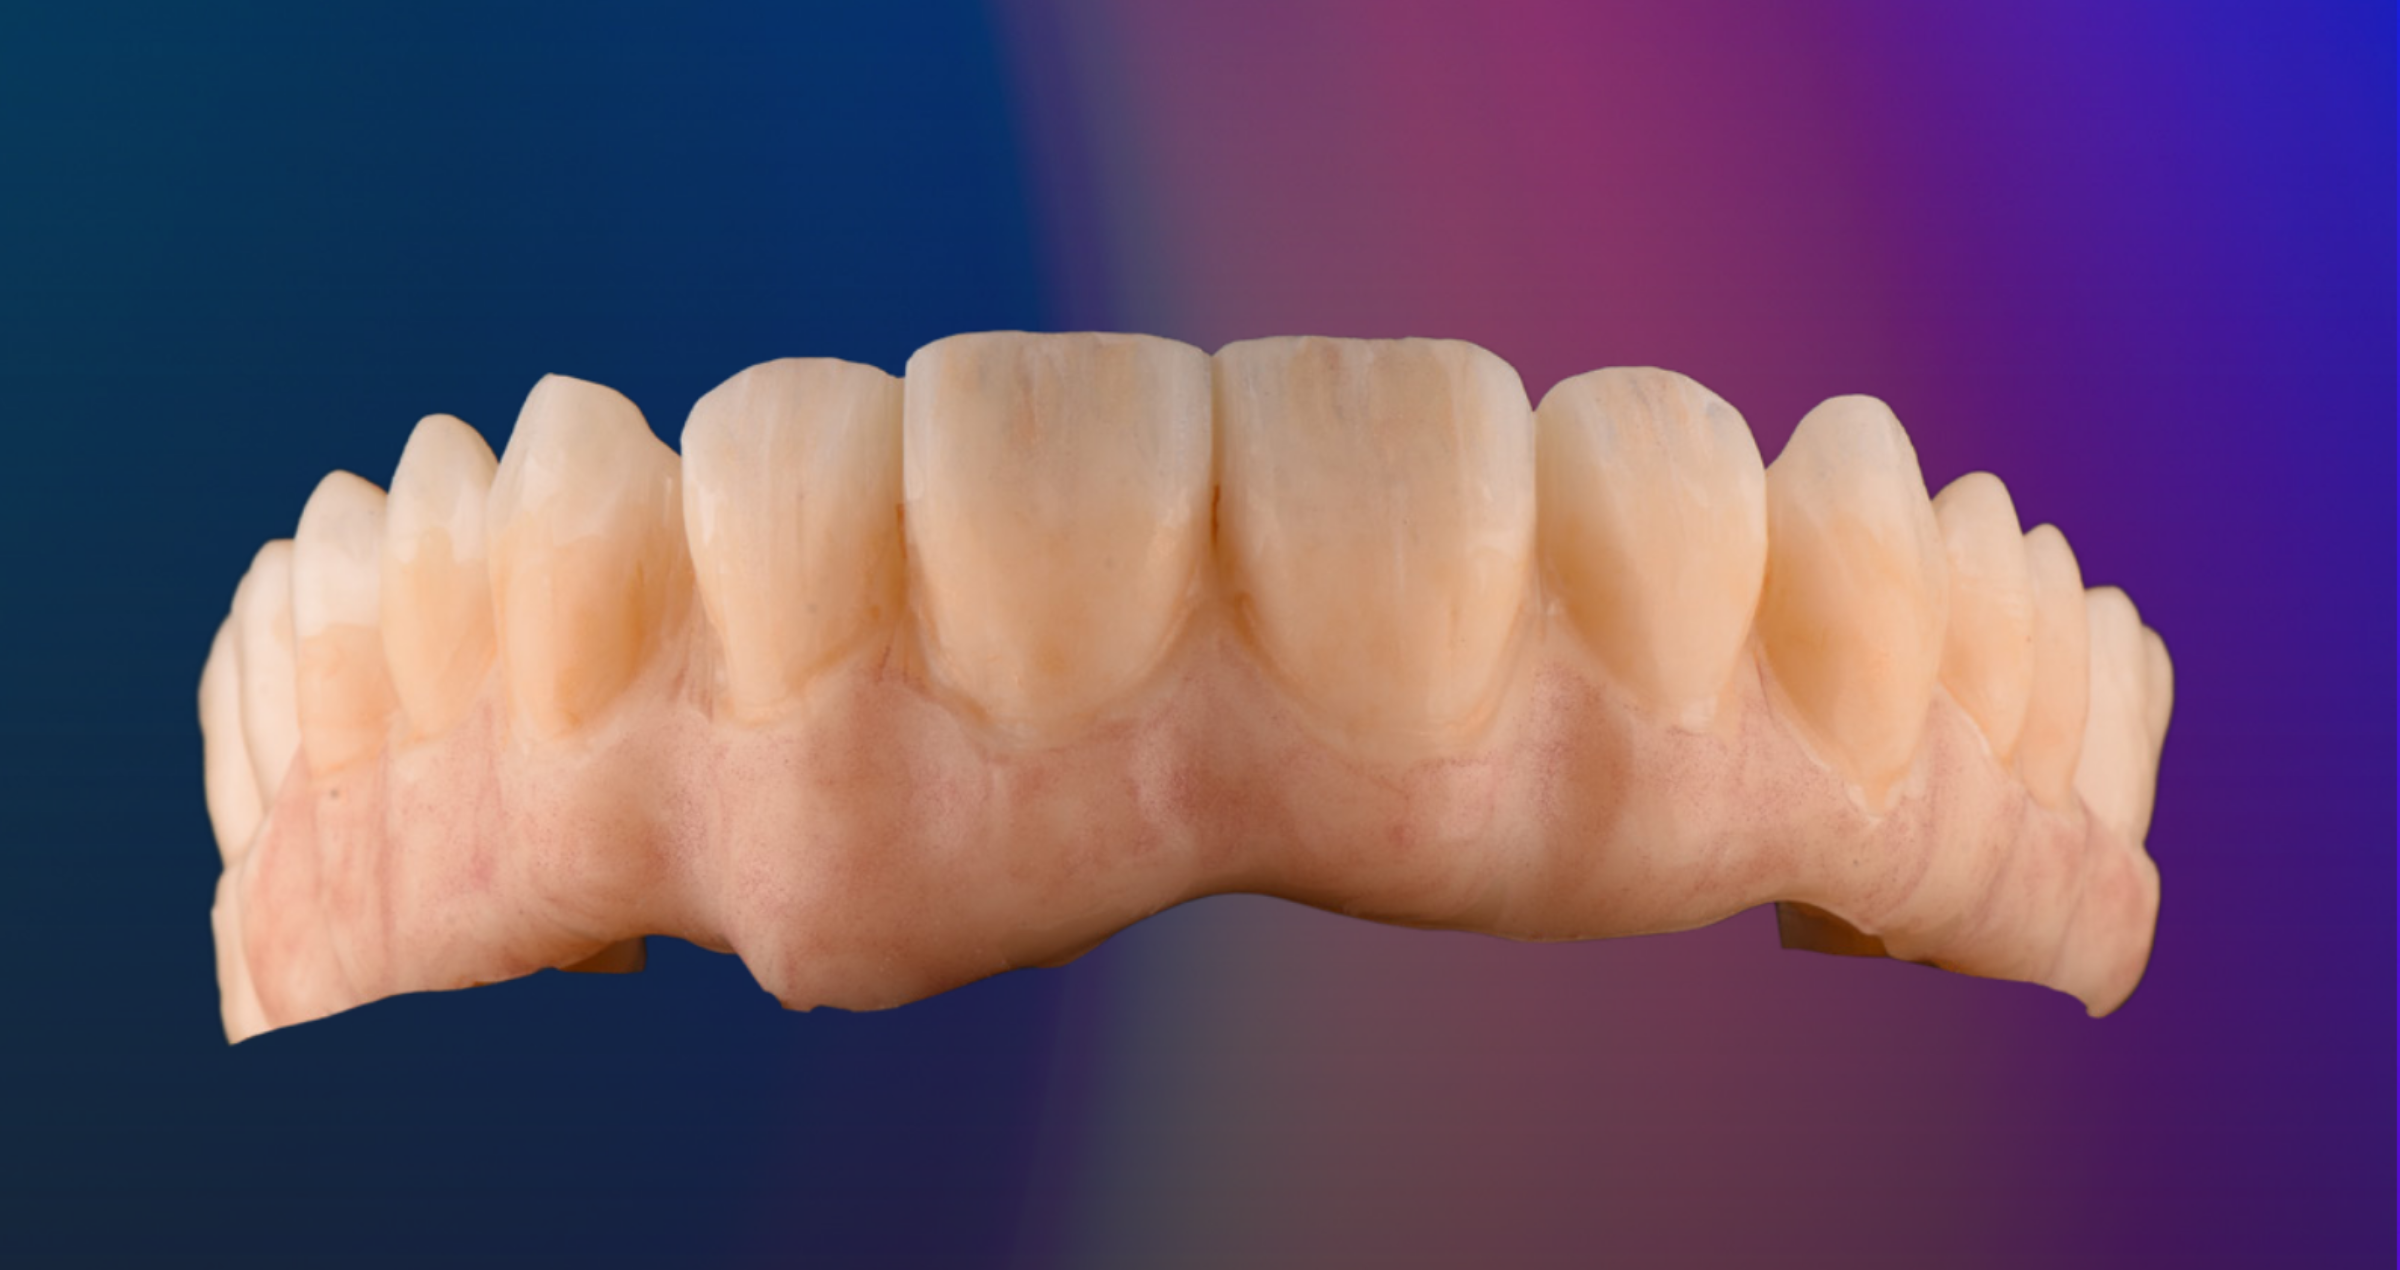
The rise of modern, tooth-coloured core materials such as lithium disilicate and zirconia has changed the game. With a core that is highly aesthetic, translucent and close to the final shade, it became much easier to produce a restoration that is virtually indistinguishable from the adjacent teeth. The thickness of the porcelain layer decreased as did the number of shades to be combined and necessary bakes to be conducted. The use of the existing porcelain systems for the new micro-layering techniques posed several new challenges: those systems originally developed for opaque zirconia were indicated for the more translucent zirconia core materials, but usually not for lithium disilicate. Moreover, the complexity of the systems made their use unnecessarily complicated for inexperienced users.


Consequently, Kuraray Noritake Dental Inc. developed a new porcelain system for micro layering on zirconia and lithium disilicate core materials. The portfolio of CERABIEN™ MiLai, which refers to micro-layering and the Japanese word for future (mirai), consists of 15 internal stains (13 tooth colours including Bright to boost the translucent and Fluoro to boost the fluorescent effect, and two tissue colours) and 16 porcelains (12 tooth porcelains and four tissue porcelains). Hence, it enables dental technicians to implement a modernized version of the original Internal Live Stain Technique developed by Hitoshi Aoshima in the early 1990s in a porcelain layer of minimal thickness.


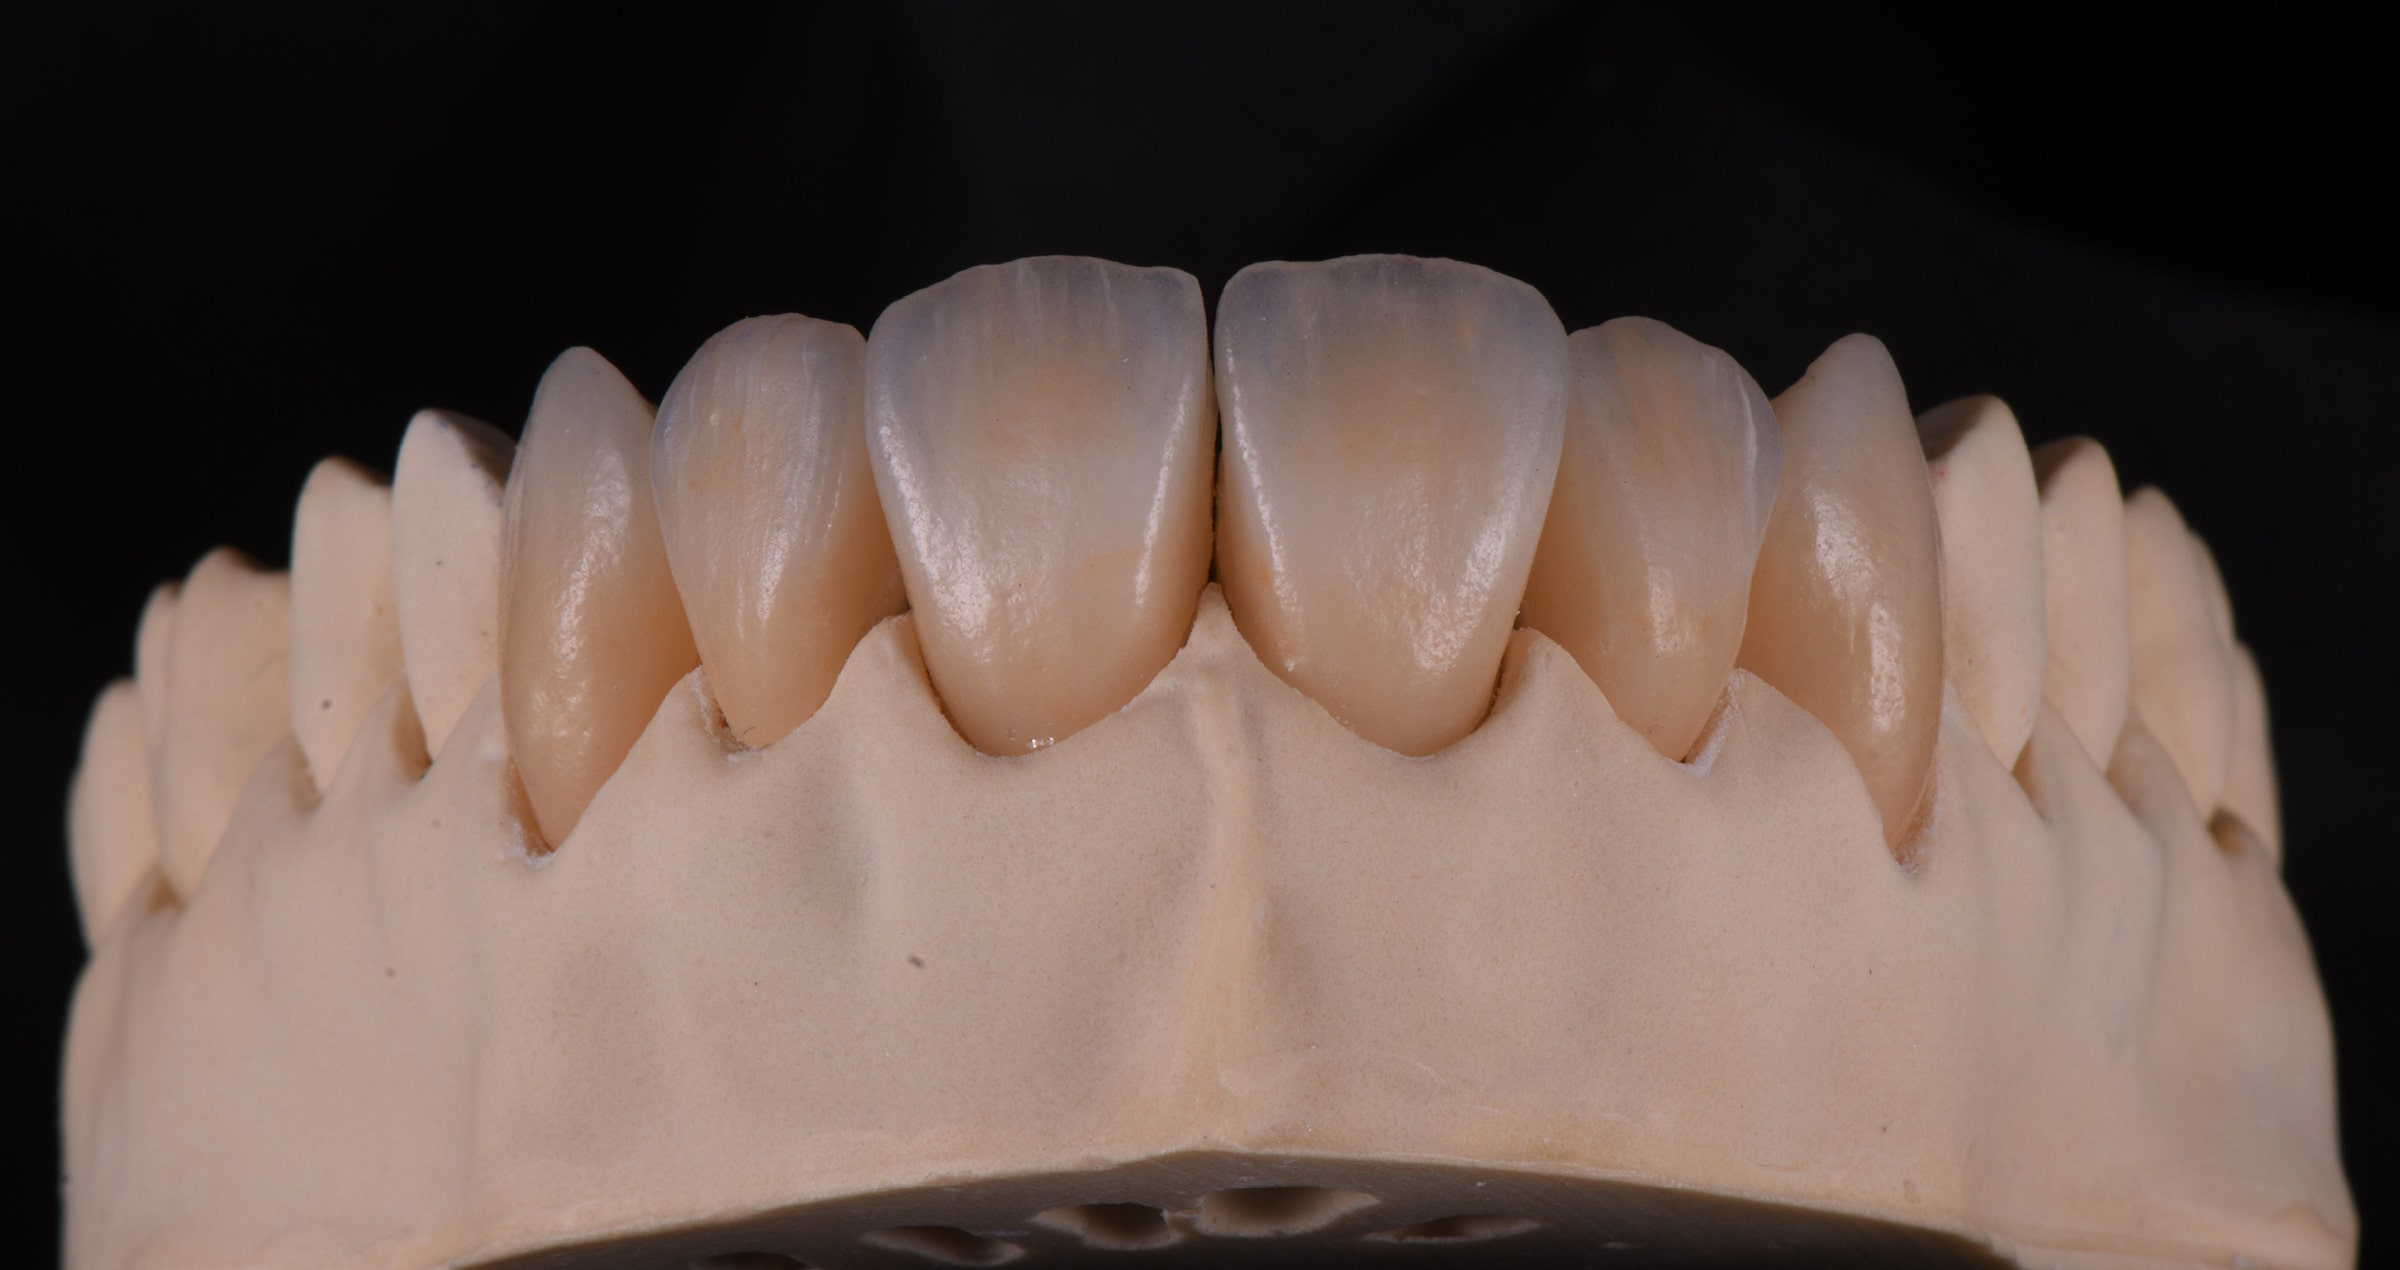
The following demo cases are used to show how to achieve lifelike aesthetic restorations based on aesthetic zirconia and on lithium disilicate. Illustrating each step, the cases allow users to anticipate how much time and effort can be saved compared to traditional layering techniques.


CASE 1

MAXIMALLY SIMPLE APPROACH ON LITHIUM DISILICATE

In this case, the idea was to restore the six maxillary anterior teeth in a simple way. The selected core material for the planned veneers was Amber Press (HASS Bio) LT in the shade B1. The lithium disilicate restorations were pressed with a micro cut-back and their fit was checked on the model, followed by surface texturing, sandblasting and steam cleaning [Fig. 1a]. When the veneers are milled instead of pressed, the procedure is the same. After that, the restorations are ready for the application of the CERABIEN™ MiLai internal stains for characterization of the core. In order to achieve the desired result, it is critical to mix the selected stains with the internal stain Bright responsible for a translucent effect. The chroma map for internal staining is shown in figure 1b, the outcome of the procedure in figure 1c. Subsequently, the veneers were built up to their final anatomy with selected CERABIEN™ MiLai Porcelains [Fig. 1d] to imitate the enamel and create a window effect. In this approach, simple layering and a single bake are sufficient to create the desired restoration. After glazing with Clear Glaze, finishing of the restorations was accomplished with paper-abrasive cones, a rubber polisher and polishing paste. The outcome is shown in figure 1e.


Fig. 1a. Pressed lithium disilicate veneers after surface optimization (grinding), sandblasting and steam cleaning on the model.


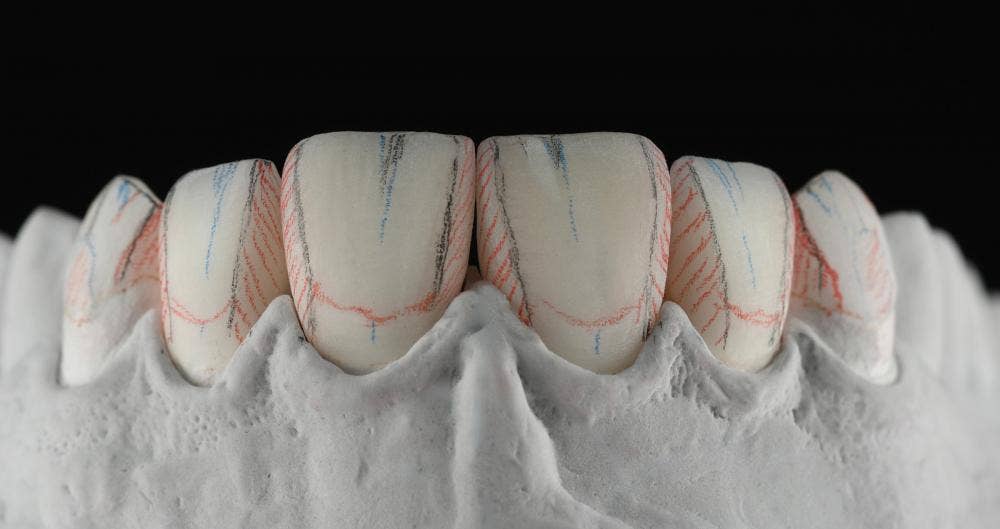
Fig. 1b. Chroma map for the application of CERABIEN™ MiLai Internal Stains to the lithium disilicate surface. We selected B+ (red colour) for the cervical area. For the proximal and middle incisal areas, Incisal Blue 1 & 2 (gradient blue colour) were applied and incisally in the middle, we chose Cervical 2 (orange colour). Tip: all internal stains were mixed with Bright and IS Liquid.


Fig. 1c. Appearance of the veneers after the application of CERABIEN™ MiLai Internal Stains.


Fig. 1d. CERABIEN™ MiLai Porcelains applied on top of the internal stains: LT1 is used for the cervical area (red) and a mixture of TX and E2 (30:70 ratio) for the middle and the incisal third.


Fig. 1e. The final restorations after glazing with Clear Glaze and mechanical polishing using paper-abrasive cones, a rubber polisher and Pearl Surface Z (Kuraray Noritake Dental Inc.).

Images courtesy of Andreas Chatzimpatzakis.


CASE 2

ADVANCED APPROACH ON LITHIUM DISILICATE

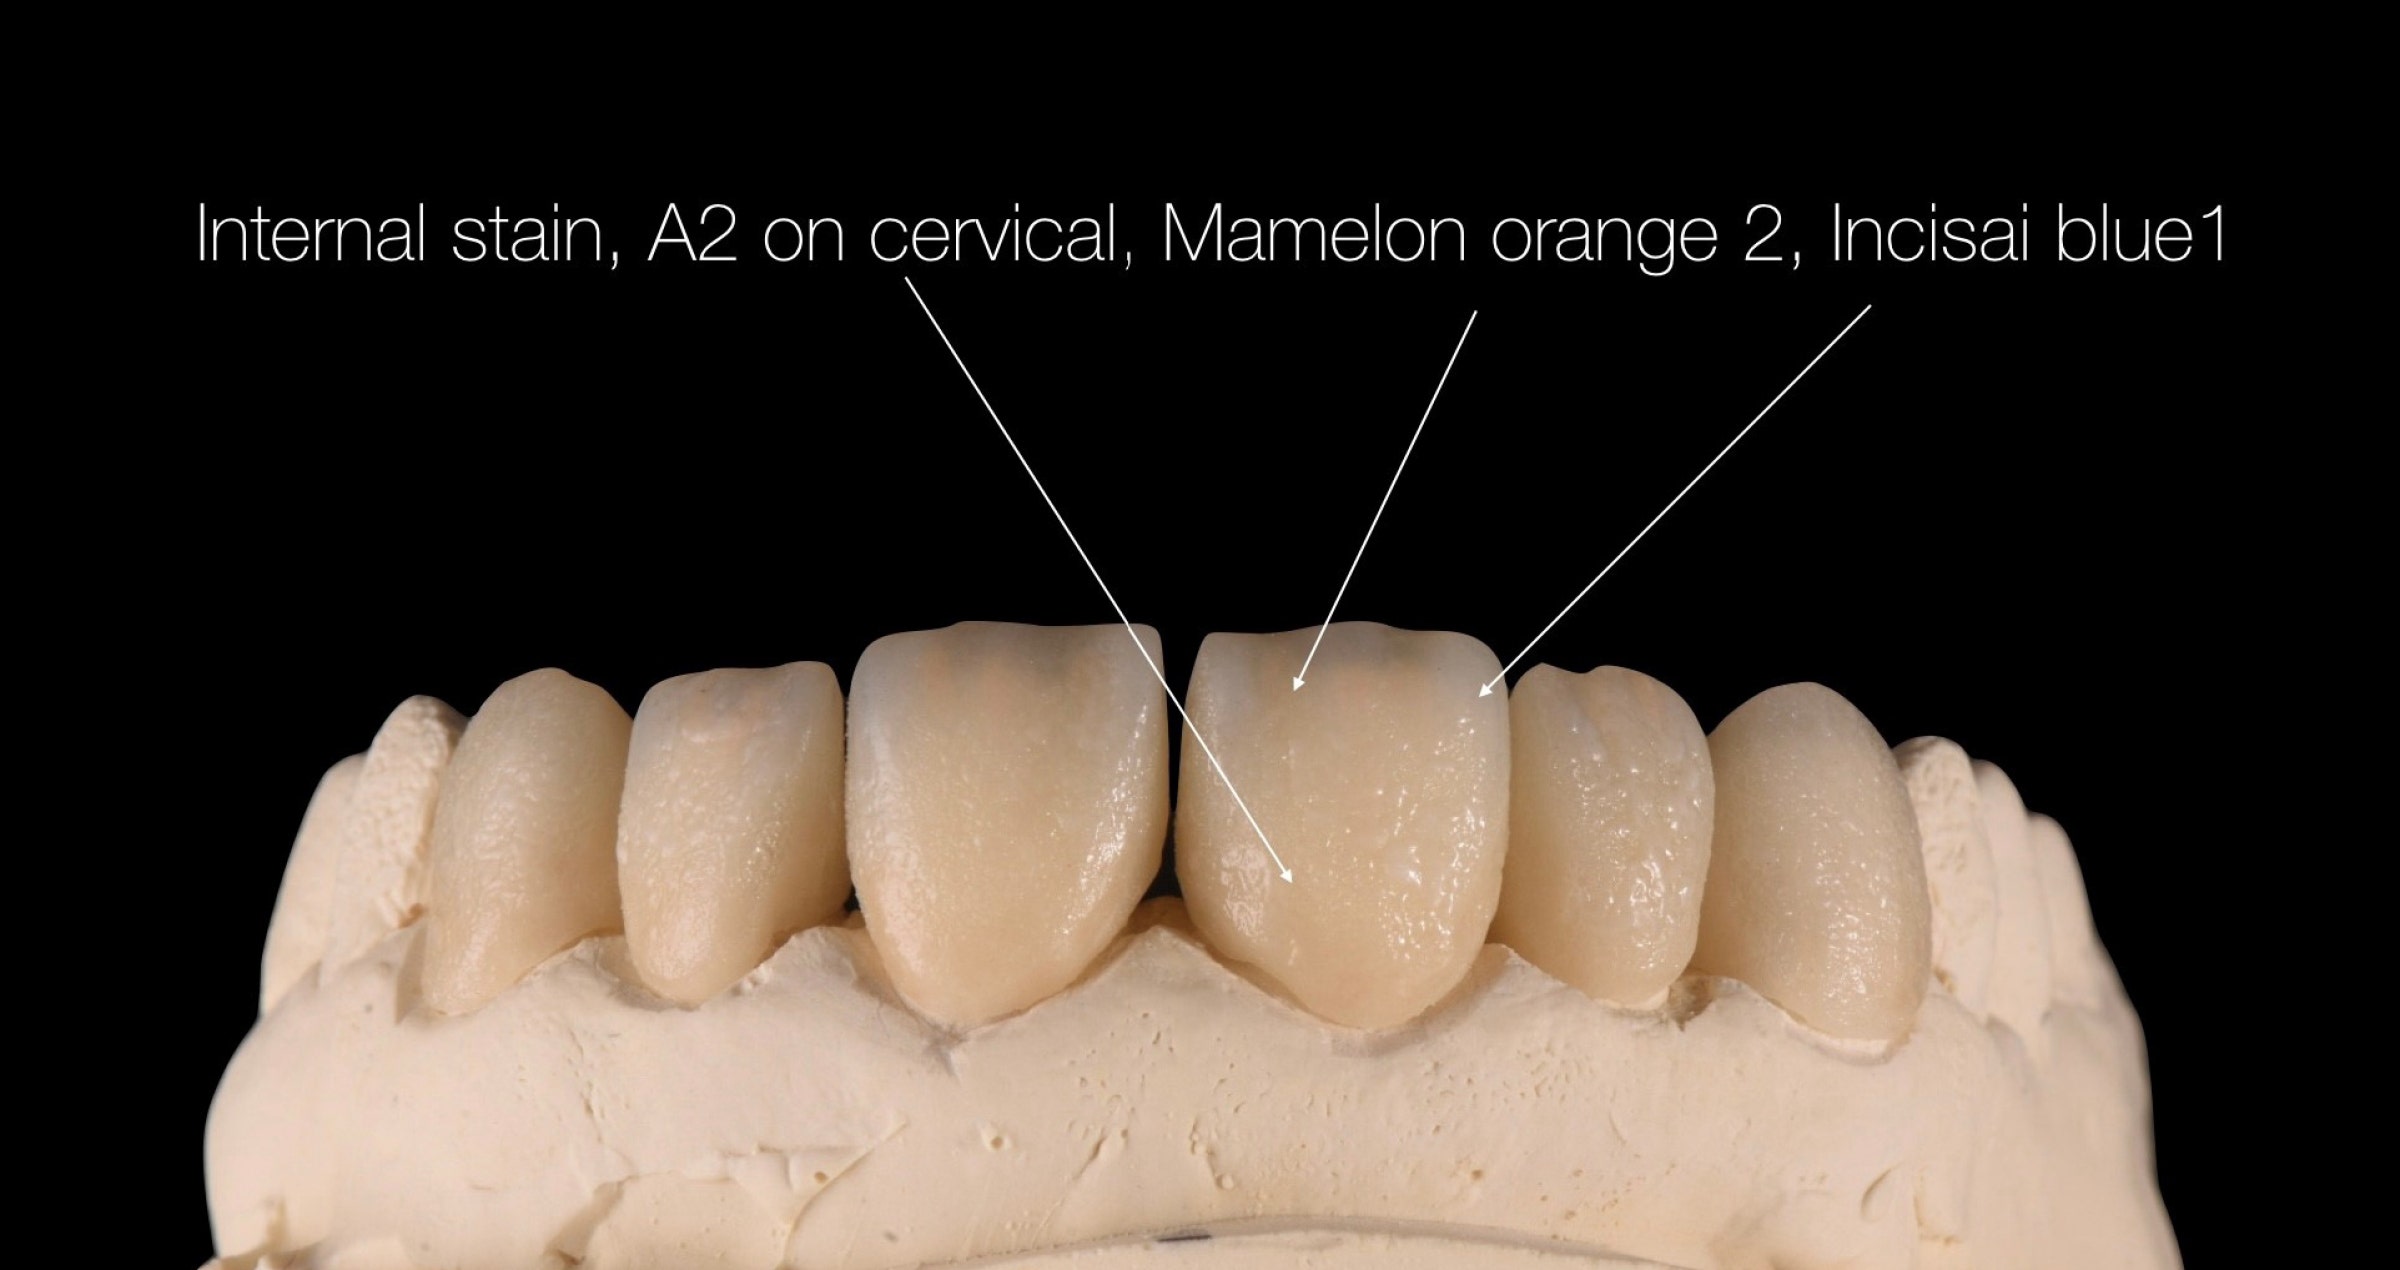
In order to imitate a more complex inner colour structure with mamelons, different levels of translucency and more individual effects, a slightly more complex micro-layering approach was selected. Again, the core was produced using Amber Press in the LT variant and the shade B1. After pressing and fitting on the model, we reduced the incisal third to create space for the transparent porcelain [Fig. 2a]. Subsequently, an extremely thin layer of CERABIEN™ MiLai Porcelain adding translucency to the enamel surface (TX) was applied in the incisal third of the veneers [Fig. 2b]. In this way, it is possible to create an optimally translucent basis for the application of the internal stains. The first bake was conducted and the surfaces were sandblasted as well as steam cleaned to create the conditions needed for internal staining [Figs. 2c and 2d]. The chroma map for and outcome of the internal stain application are shown in figures 2e and 2f. Afterwards, a final layer of CERABIEN™ MiLai Porcelain was applied [Fig. 2g]. All four incisors received a layer of LTx to add ultimate translucency and opalescence to the enamel, while LT1 was the material of choice in the cervical third of the canines, where LTx completed the layer in the other areas. As LT1 is slightly less translucent and opalescent, a natural effect is obtained in this way. The outcome obtained after glazing and mechanical polishing is shown in Figure 2h.


Fig. 2a. Lithium disilicate veneers reduced for the advanced layering procedure involving more porcelains and bakes.


Fig. 2b. Thin layer of TX applied to the incisal third of the restorations to boost the translucency in this area.


Fig. 2c. Appearance of the veneers after the first bake.


Fig. 2d. Ceramic surfaces after sandblasting and steam cleaning.


Fig. 2e. Chroma map for the application of the internal stains. Cervical 2 was used for the cervical third, Incisal Blue 2 for the proximal regions and Mamelon Orange 2 for the mamelons. As mentioned before, the selected internal stains were mixed with Bright.


Fig. 2f. Appearance of the veneers after the bake of the applied CERABIEN™ MiLai Internal Stains.


Fig. 2g. Final build-up to reach the desired shape of the veneers. LTx is the only material applied to the central and lateral incisors, while the canines are built up with LTx in the incisal and middle and LT1 in the cervical third.


Fig. 2h. Glazed and polished veneers on the model.

Images courtesy of Andreas Chatzimpatzakis.


CASE 3

ADVANCED APPROACH WITH GUM AREAS ON ZIRCONIA

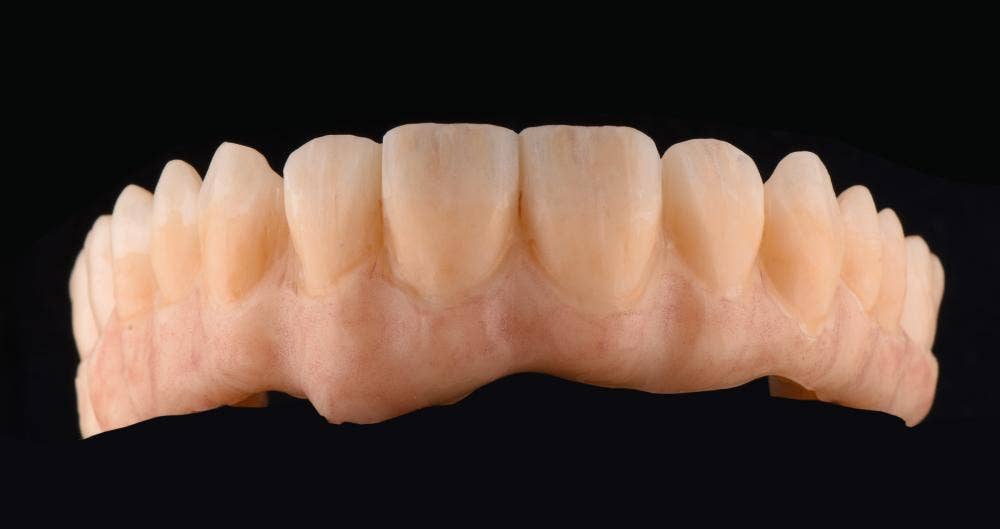
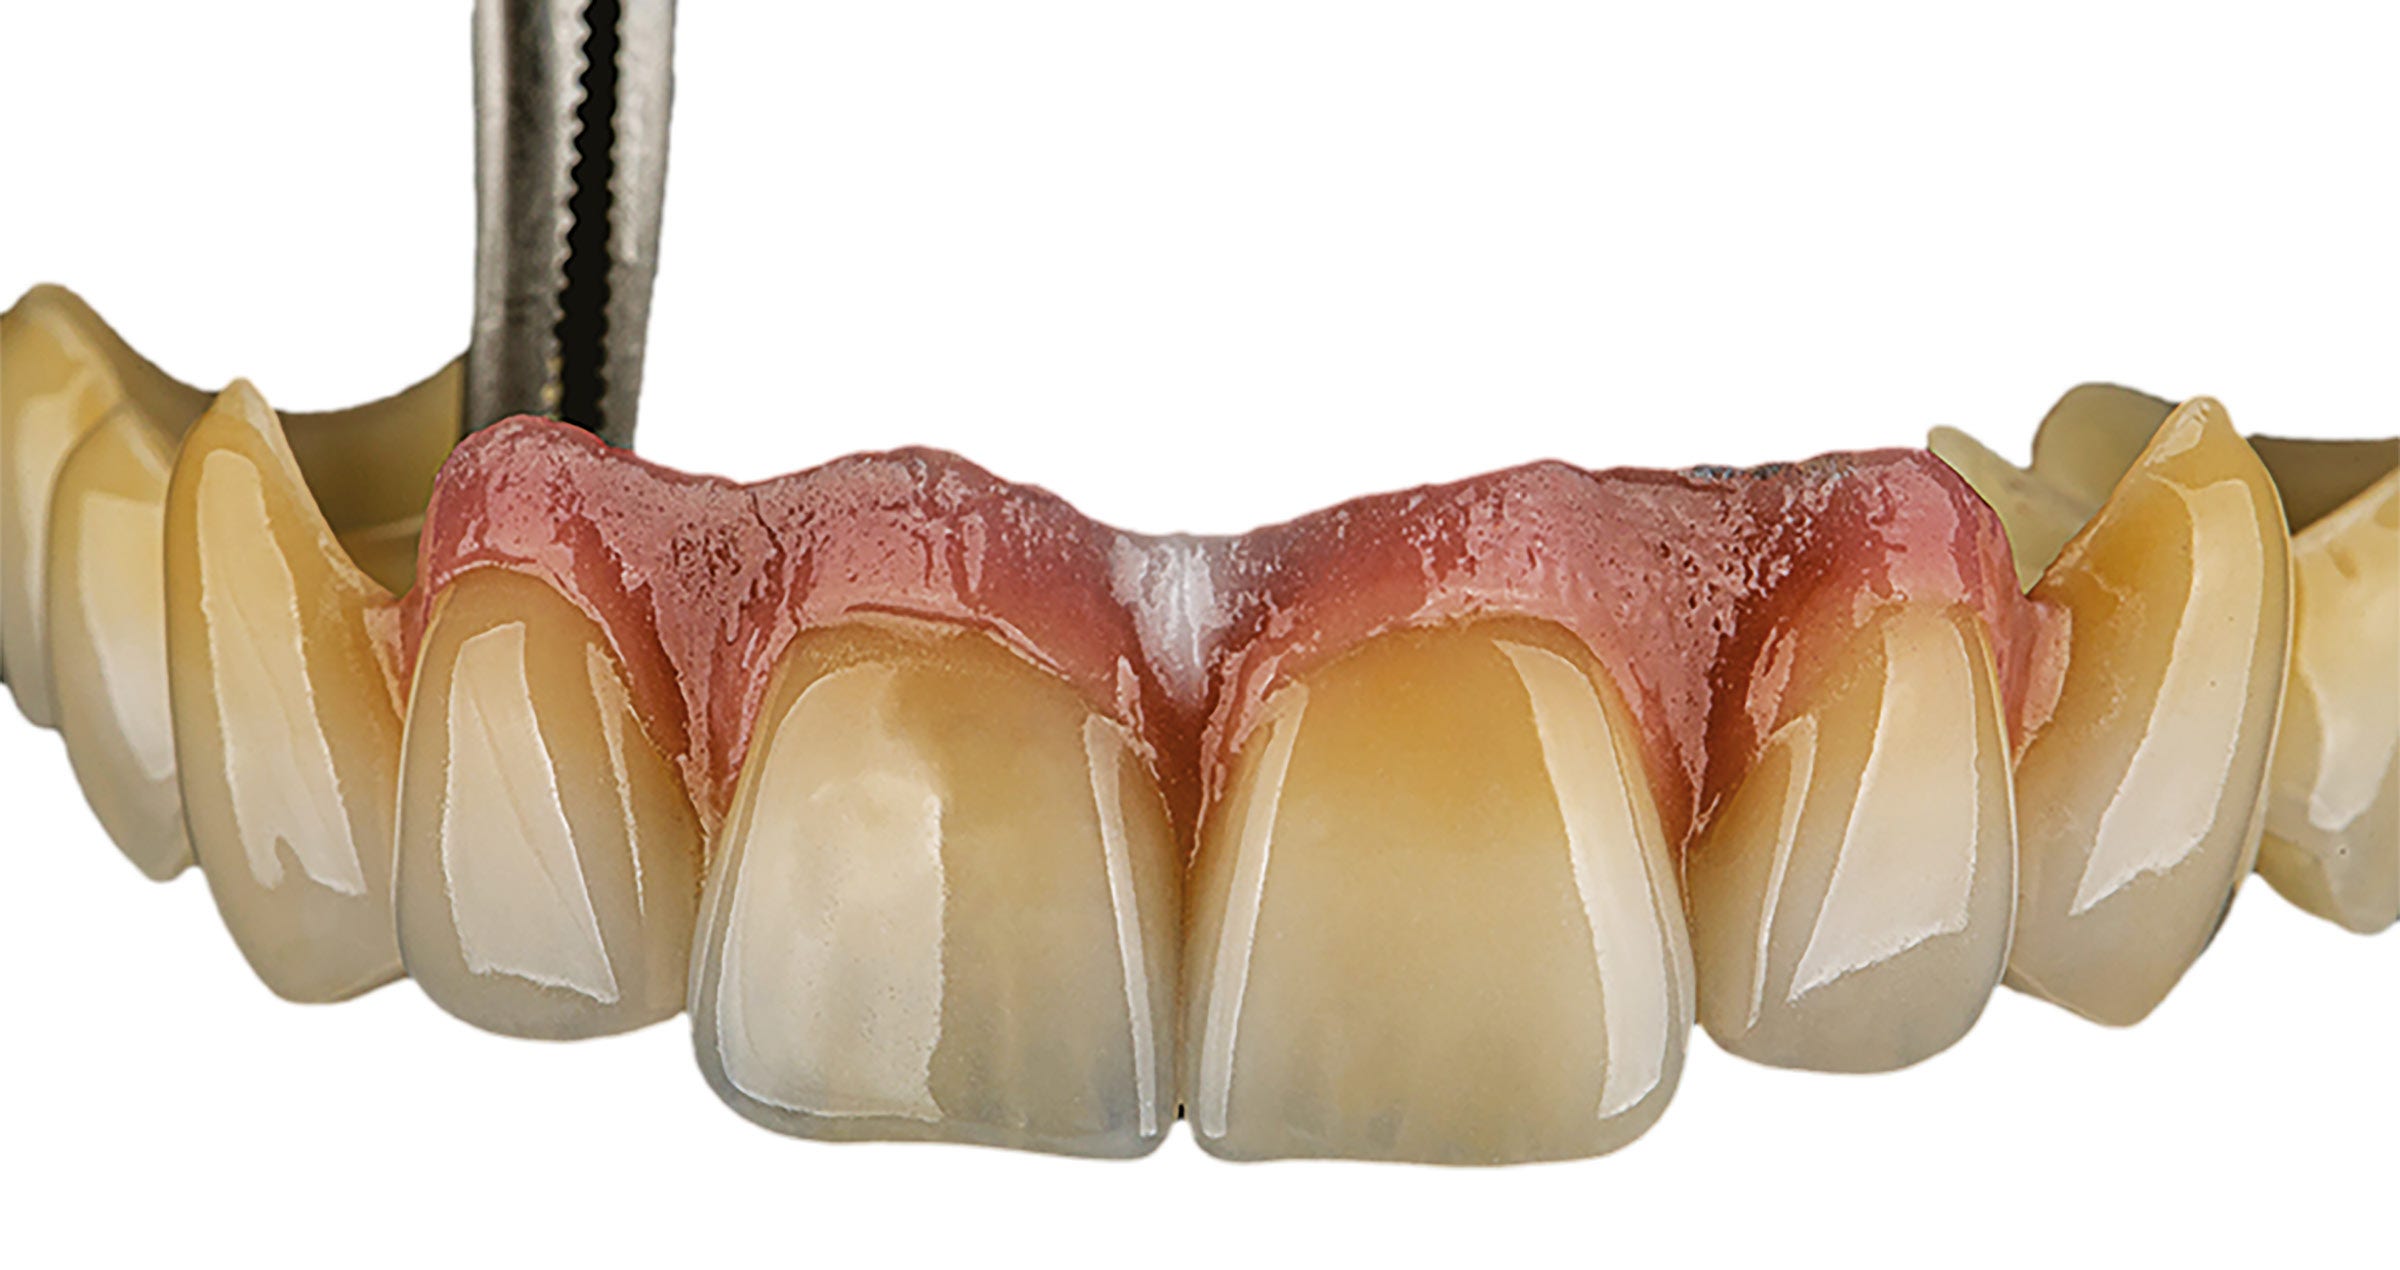
In this case, a highly complex ten-unit bridge with gum parts in the anterior region had to be produced. The selected framework material was KATANA™ Zirconia HTML Plus (Kuraray Noritake Dental Inc.), which offers a multi-layered colour structure, an optimized translucency and the high flexural strength required for long-span bridges. The restoration was milled in an anatomically reduced design and the surface texture was optimized with rotating instruments before sintering [Fig. 3a]. After the final sintering procedure, the restoration had a favourably high translucency in the incisal region and a natural shade structure [Figs. 3b and 3c]. In the first step of the micro-layering procedure, the application of the CERABIEN™ MiLai Internal Stains was planned and carried out [Figs. 3d and 3e]. Subsequently, different layers of CERABIEN™ MiLai Porcelain were applied. The images 3f to 3h reveal which shades were combined and illustrate the procedure, while the outcome before and after the last bake is shown in Figures 3i to 3k. In the next step, the gum areas were completed using the CERABIEN™ MiLai tissue porcelains Tissue 4, 5 and 6 in the order and locations described in Figures 3l to 3o. In the final layer, Tissue 1 was mixed with ELT1 to imitate the labial frenulum and with LTx to create a smooth transition to the natural gingiva [Figs. 3p and 3q]. The final restoration is shown in Figure 3r.


Fig. 3a. Milled restoration after surface texturing.


Fig. 3b. Shade and translucency of the sintered zirconia restoration.


Fig. 3c. Highly translucent bridge on the model.


Fig. 3d. Chroma map for the application of CERABIEN™ MiLai Internal Stains.


Fig. 3e. Applying a mixture of Bright, Salmon Pink and Tissue Pink to the gum area.


Fig. 3f. Application of CERABIEN™ MiLai E2 to add translucency to the structure.


Fig. 3g. Application of Tx and a mixture of Tx and CCV-2 to individualize the cervical and incisal areas while boosting the translucency of the enamel in the middle and incisal third.


Fig. 3h. Adding a final layer of LT1 for additional translucency and opalescence.


Fig. 3i. Appearance of the ten-unit bridge before the bake – labial view.


Fig. 3j. Appearance of the ten-unit bridge before the bake – palatal view.


Fig. 3k. Appearance of the ten-unit bridge after the bake.


Fig. 3l. Application of small amounts of Tissue 5 …


Fig. 3m. … covered with a layer of Tissue 6 alternating with Tissue 5.


Fig. 3n. Following another bake, Tissue 5 is applied in the proximal areas.


Fig. 3o. How to combine Tissue 6 and Tissue 4 in the next layer.


Fig. 3p. How to complete the tissue layer with Tissue 1, locally mixed with ELT1 or LTx.


Fig. 3q. Restoration before the final bake.


Fig. 3r. Final ten-unit bridge ready for placement.

Images courtesy of Ioulianos Moustakis.


ABOUT THE AUTHORS

DT IOULIANOS MOUSTAKIS
Germany


Dental Technician/Photographer
1985 - 1987 Studied at the School of Dental Technology (SBIE) in Athens / Greece
1997 - 1998 Master school in Berlin
2007 - Education as Maxillofacial prosthetic technician (IASPE)
2010 - Advanced education in Functional diagnosis temporomandibular joint
2011 - 2012 Curriculum implant prosthetics for dental technicians (DGZI)
2013 - 2014 Education as a graphic designer at the Media Design Hochschule (MDH) in Berlin
2015 - 2017 Education as a photographer at the Photocentrum of the Gilberto Bosques VHS Friedrichshain-Kreuzberg
2014 - 2016 - 2018 Further training at Noritake/Kuraray in Japan
2019 - International Instructor Noritake/Kuraray
2019 - Certified trainer of Teeth Morphology carving (Osaka Ceramic Training Center)
1998 - Implant Dental Studio - Athens/Greece
2010 - Zirkler & Moustakis Dental Technology - Falkensee/Germany
2020 - Giuliano Dentaldesign - Falkensee/Germany

Publications in Dental Journals
2014 - 5/2014 Dental Dialogue/Germany
2015 - 10/2015 The International Journal of Dental Technology/Japan
2018 - 1/2018 Cosmetic Dentistry/Germany
2018 - 4/2018 Zahntechnik Zeitung/Germany
2018 - 5/2018 Das Dental Labor/Germany
2018 - 5/2018 Dental Dialogue/Italy
2018 - 10/2018 Laborama/Greece
2019 - 1/2019 LabLine/Hungary
2019 - 3-4/2019 Dental Technologies/UK
2020 - 4/2020 LabLine/Hungary
2021 - 1+2 LabLine/Hungary
2021 - 5/2021 + 12/2021 Quintessenz Zahntechnik/Germany
2021 - 4/2021 QDRP France

Competitions
2013 – 6th place at the 8th KunstZahnWerk contest by Candulor
2017 – 5th place at the 10th KunstZahnWerk contest by Candulor
2017 – 1st place at the 10th KunstZahnWerk contest by Candulor as "Best Documentation“
2020 – 1st place at the 4th Panthera Master Cup by Panthera Dental

Memberships
NGSC Noritake Greek Study Club
DGZI German Society of Dental Implantology
IASPE International Association for Surgical Prosthetics and Epithetics
Key Opinion Leader (KOL) at company MPF Brush Company
Key Opinion Leader (KOL) at company Candulor
Key Opinion Leader (KOL) at company Kuraray/Noritake


MDT ANDREAS CHATZIMPATZAKIS
Greece


Andreas graduated from the Dental Technology Institute (TEI) of Athens in 1999. During his studies he followed a program at the Helsinki Polytechnic Department of Dental Technique, where he trained on implant superstructures and all ceramic prosthetic restorations.

From the year 2000, he is running the ACH Dental Laboratory in Athens, Greece, specialized on refractory veneers, zirconia and long span implant prosthesis.

ACH Dental Laboratory is Co-operating lab with the National and Kapodistrian University of Athens for the MSc degree in Dental Laboratory Materials.

From 2016 he is key opinion leader for the MPF Brush.co.

On 2017 he visits Japan where he trained from Hitoshi Aoshima, Naoto Yuasa and Kazunabu Yamanda and becomes International Trainer for Kuraray – Noritake company.

In 2018 he became Editor-in-chief for the dental technician magazine “LABORAMA” published by OMNIPRESS co.

On 2019 he studies carving, morphology and all ceramic restorations at the Osaka Ceramic Training Center by Shigeo Kataoka.

On 2019 he establishes the Dental Technicians’ Coaching Services and coaches dental technicians to improve their work.

Andreas has also conducted several lectures and hands on seminars in Greece and abroad and published articles in Greek and international magazines.

His lecture “An exciting journey … to be a dental technician” is about inspiring dental technicians to improve their work by observing and emulate natural teeth using the internal live stain technique.


Article first published in Labline Magazine Issue 45, Spring 2022 edition.

Mastering Ceramics: A Comprehensive Guide for Dental Ceramists

Discover a detailed walkthrough of an advanced shade reproduction technique with this comprehensive guide by DT Tomáš Forejtek. Tailored for professionals working with CERABIEN™ ZR ceramics (Kuraray Noritake Dental Inc.) and the eLAB protocol, this case study provides step-by-step insights into achieving exceptional results, from documentation to shade selection and framework design to final polish. Whether you are refining your craft or exploring new methods, this resource is a valuable addition to your toolkit.


Case report by Vasilis Vasiliou

THE ART OF RESTORING SMILES: MASTERING THE CHALLENGE OF A SINGLE CENTRAL INCISOR

Restoring a single maxillary central incisor is possibly the biggest challenge a dental technician can face in everyday work. Especially when a patient is young, it is extremely important to restore her or his smile to its original beauty. Any restoration that is perceivable as such might have a negative impact on their self-confidence and quality of life even in the long term.


A STORY OF JOY AND DESPERATION

Take Ioanna, a 14-year-old girl who presented in her dental office in a state of desperation. In the hours before, she had been floating on cloud nine: Her favourite band performed in Cyprus for the first time and she had managed to buy tickets for herself and her best friend. Thrilled, they had arrived at the concert, the band started playing and the crowd danced to the music. It felt like this was going to be the best day of her life. At the time the band played its most popular song, people were delirious, jumping up and down in ecstasy. Between all the exuberant dancing and laughing, however, Ioanna suddenly was hit by a strong push. She fell, her face hitting something hard – a seat in front of her. Pain froze time and it took a few seconds before she understood what had happened: Tasting blood in her mouth, she explored her teeth with her tongue and realized that one of her central incisors had fractured.


AFFECTING THE QUALITY OF LIFE

This is one of the many touching stories we listen to every day. A fall during a concert, a push at somebody’s birthday party, a car accident: There are many incidences that can ruin a young, beautiful smile. By paying attention to the involved patients and their stories, one will come to realize how strongly some of them are affected by all this. They cover their mouths when they laugh or hold back their smiles.


Any dental technician who is committed to restoring their lost smile in the best possible way is probably aware of the impact his or her work can have and the responsibility coming with it: A Beautiful result will restore not only their smile, but also their self-confidence, will let them start laughing happily, expressing themselves comfortably and simply enjoying social interaction again (Figs. 1 to 5). Compromised outcomes, on the other hand, might have the opposite effect. Being aware of this role should be every technician’s motivation to become better day by day. Evolve for these moments, when our work brings tears of joy to our patients.


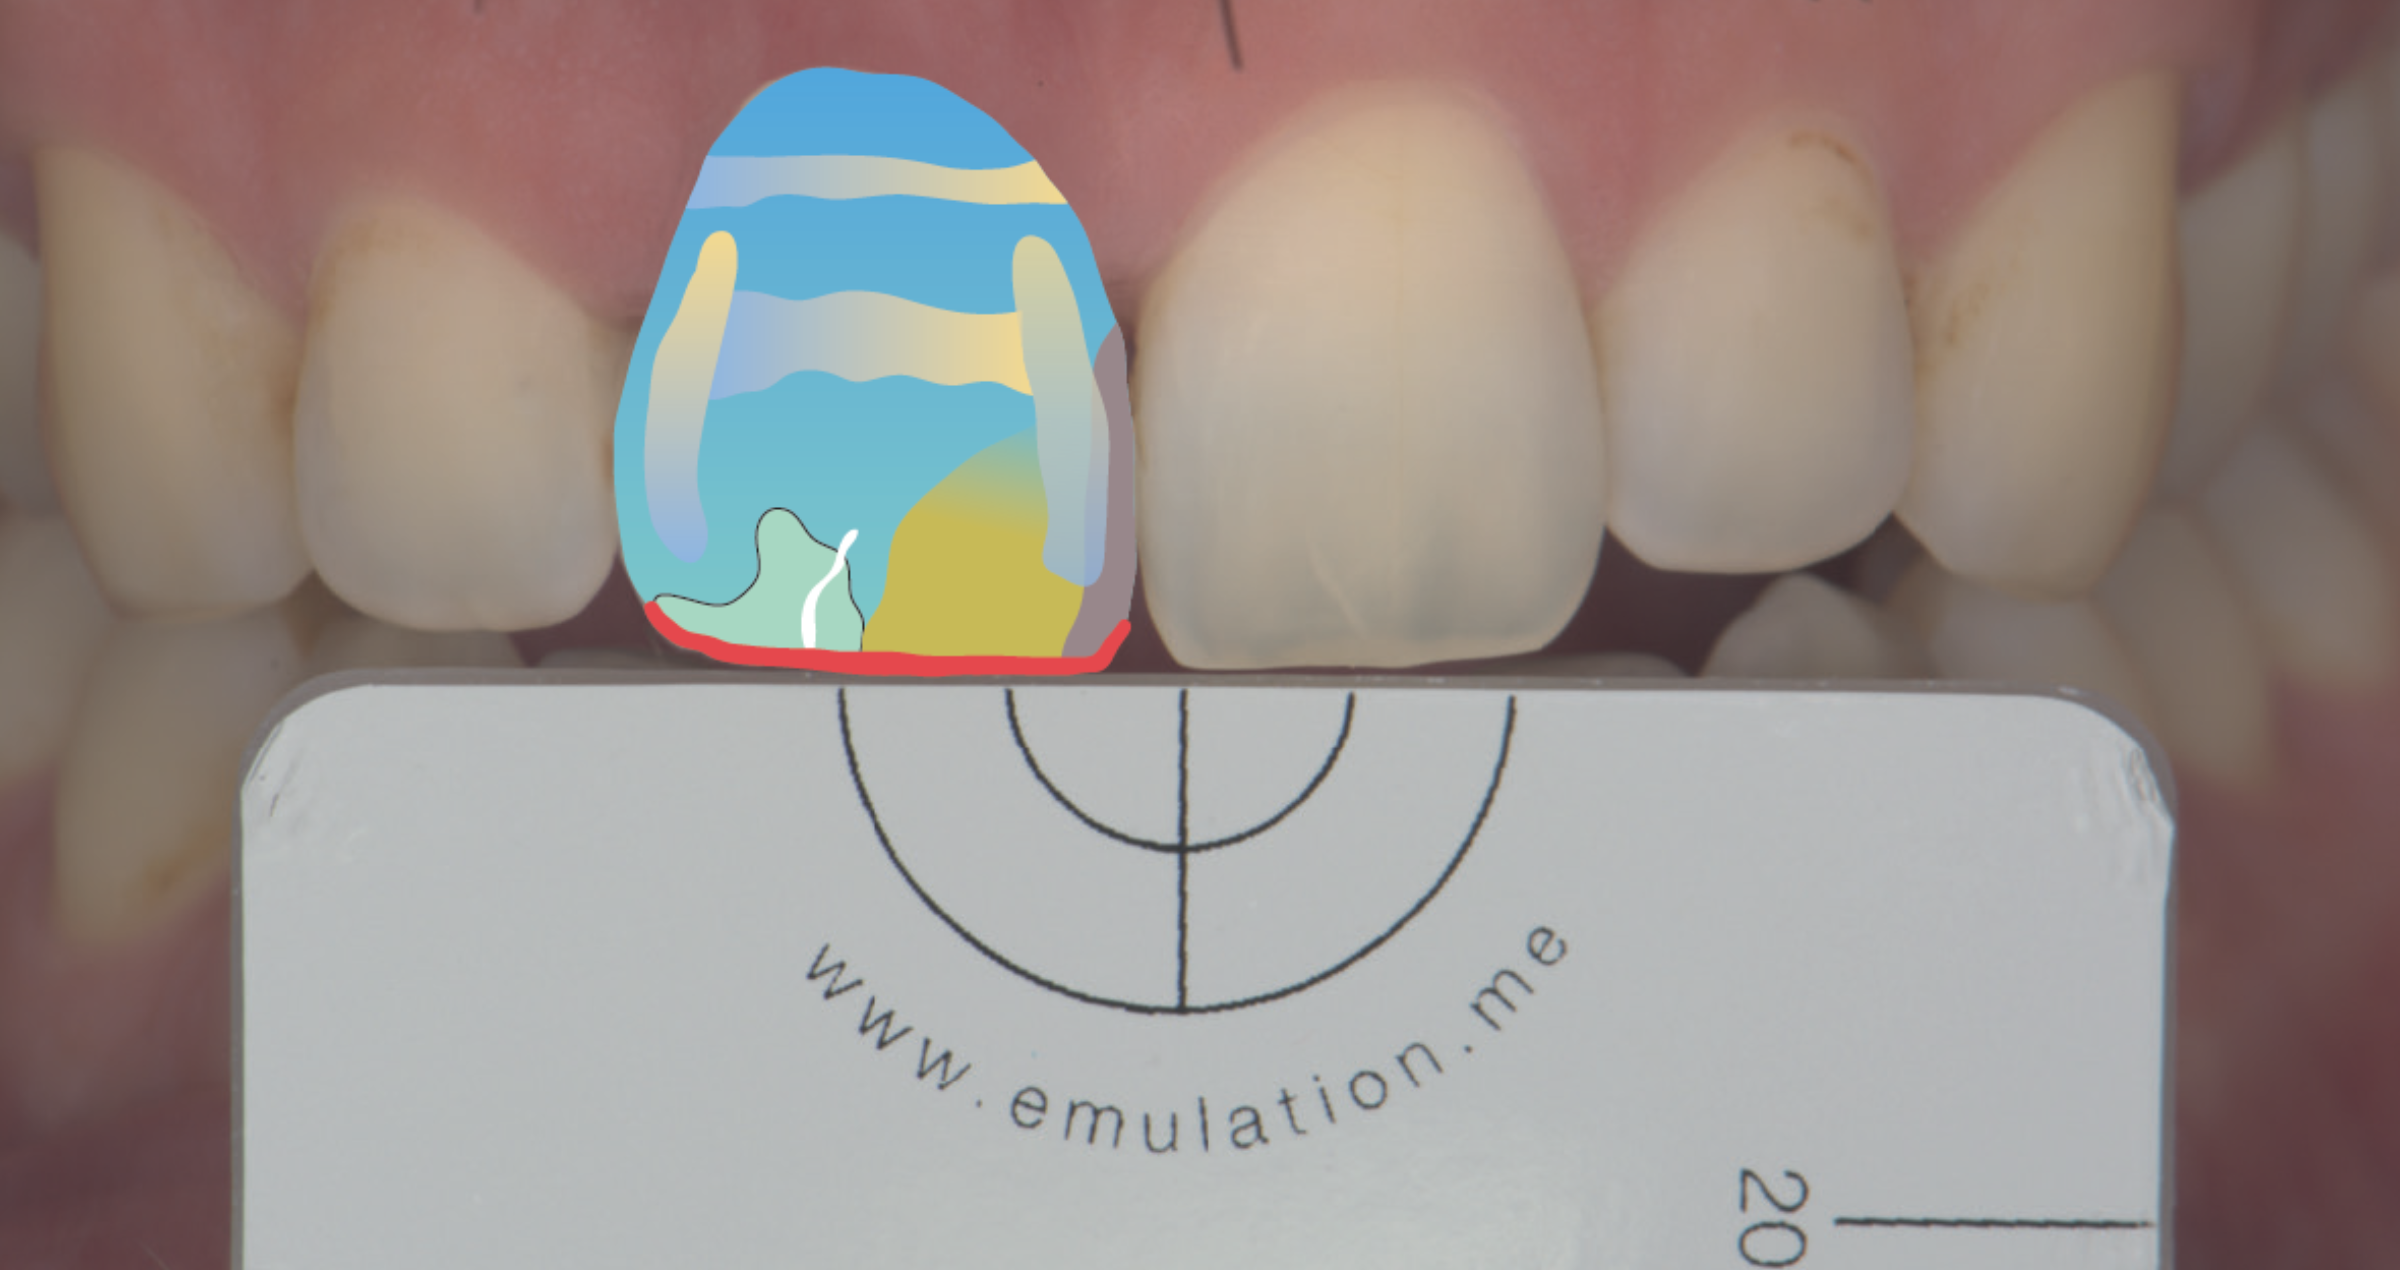
Fig. 1. Layering sketch for the restoration of a fractured central incisor in three layers: Layer one.


Fig. 2. Layering sketch for the restoration of a fractured central incisor in three layers: Layer two.


Fig. 3. Layering sketch for the restoration of a fractured central incisor in three layers: Layer three. After the first bake, small details were integrated, followed by a second bake. Finally, the restoration was finished with CERABIEN™ ZR FC Paste Stain and Glaze.


Fig. 4. Treatment outcome able to restore not only the smile, but also the self-confidence of the young girl.


Fig. 5. Immediately after cementation of the restoration, the restoration is barely identifiable, only the soft tissue needs some time for recovery.


ASPECTS TO BE CONSIDERED

But how to proceed in restoring single central incisors in the best possible way? The success of this type of restoration is hidden in the shape, which is the most difficult part. Managing to create a natural morphology is more than half the battle. The other important part is colour. The key to reproducing colour is in understanding how the utilized porcelains work. It is all about light reflection, absorption, translucency and opalescence, value and characteristic details. The more you gain experience and understand the optical properties of teeth and ceramics, the better your outcomes will be. Support is offered by a camera, a macro lens and a twin flash, which are used to capture and analyse the intraoral situation. For an initial analysis and understanding of shape and colour, I like to see the patients in my dental laboratory. Feeling the colour helps to develop the most realistic picture of what needs to be created. The key to successful realisation of the plan just developed is the use of reliable, easy-to-handle materials – in my case KATANA™ Zirconia and CERABIEN™ ZR Porcelains (both Kuraray Noritake Dental Inc.).


POSSIBLE STEPS

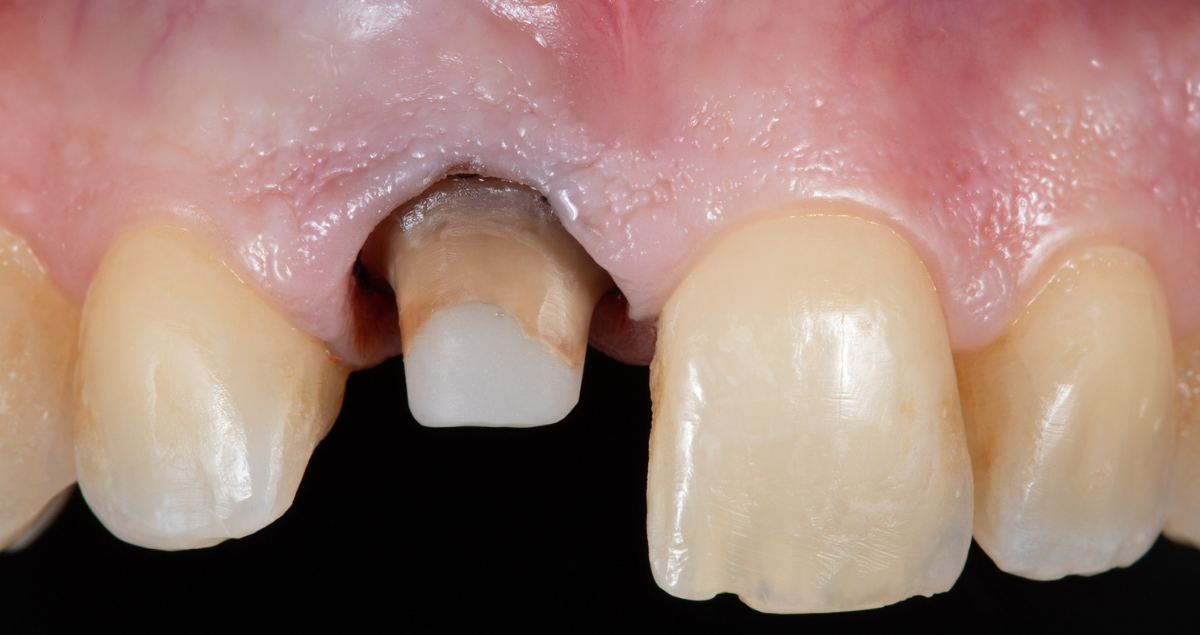
The first thing to focus on when starting to produce an anterior restoration – like in the case presented in figures 6 to 14 – is the correct value of the tooth. As soon as the framework or base is produced in the right value, you need to place what you see. Does the adjacent tooth show mamelons, traces of blue and orange? Those characteristics simply need to be observed and copied. There is no need to create something fancy. The tricky part is to use the available space reasonably. When there is plenty of space for the porcelain, it may be challenging to keep the value of the framework and avoid a greyish appearance. Depending on the die colour, age of the patient, natural surface texture and space available, an appropriate layering approach and finishing technique may be selected.


Fig. 6. Replacement of an anterior crown: Prepared tooth with severe discolouration. The adjacent central incisor has a special shape and vivid inner colour structure.


Fig. 7. Framework made of KATANA™ Zirconia ML in the shade A3. The target shade being A3.5, a quite opaque material was selected in a slightly brighter shade to achieve the required masking effect.


Fig. 8. Single-bake layering procedure: Application of CERABIEN™ ZR Opacious Body, …


Fig. 9. … Cervical Body, …


Fig. 10. … Body and Transitional Body.


Fig. 11. Incisal cut-back …


Fig. 12. … and creation of the mamelon structure.


Fig. 13. Application of Aqua Blue 1 …


Fig. 14. … followed by T Blue …


Fig. 15. … and Luster Porcelains.


Fig. 16. Halo effect created with Body.


Fig. 17. Treatment outcome. (After a first bake followed by minor adjustments, a second bake, surface texturing and glazing with CERABIEN™ ZR FC Paste Stain Clear Glaze.)


CONCLUSION

Creating a single central takes us out of our comfort zone. By paying attention, observing the adjacent teeth carefully and using materials we really understand, it is possible to meet or exceed our patients’ expectations. While specific tools like cameras and experience with the utilized materials offer support in producing predictable outcomes, my main credo is “If you want things around you to change, you must first change yourself”. For continued improvement, it is thus necessary to focus on professional growth and advancement. With the right mentors who will teach us the secrets of stratification and inspire and motivate us to continue advancing, it becomes easier to restore the smiles and self-confidence of our patients every time they need us to.


Acknowledgements

Special thanks go to the dental practitioners who treated the patients presented above – Andreas Skyllouriotis DDS, MSD, Surgically-Trained Prosthodontist, and Theo Odysseos, DDS, Diplomate, American Board of Oral Implantology / Implant Dentistry.


Dental Technician:

VASILIS VASILIOU


Vasilis Vasiliou was born in Nicosia, Cyprus, and graduated from the Technical School for Dental Technicians in Athens in 2004. He has furthered his education by attending several advanced seminars led by mentors and experts in the field, such as Ilias Psarris and Nondas Vlachopoulos.


Throughout his career, Vasilis has made significant contributions to the dental community, including presenting at various conferences in Greece and publishing articles in Greek dental magazines. Since 2020, he has been a key opinion leader for MPF Brush Company and, since 2022, a HASS Ambassador. Vasilis has been an active member of the International Team for Implantology (ITI) since 2019.


Together with his father, Vasilis runs a successful dental laboratory in Nicosia, specializing in all-ceramic and implant restorations. His extensive experience and commitment to excellence have established him as a respected professional in his field.


Performance and practicality

Case by A/Prof Alan Yap, BDS (Syd), MDSc Hons (Pros)(Syd), FAANZP


Since 1983 PANAVIA™ by Kuraray Noritake Dental Inc. has been the gold standard for dental cements throughout the world. Their latest cement, PANAVIA™ Veneer LC, sets a new standard for porcelain veneer cements through incredible performance and ease of use. The following clinical case demonstrates the use of PANAVIA™ Veneer LC.


A 31-year-old female (Fig. 1) was referred for porcelain veneers to replace lost tooth structure and to improve aesthetics. The patient exhibited moderate attrition of her anterior and bicuspid teeth (Fig. 2), the result of nocturnal bruxism and a tendency to an edge-to-edge occlusion. She had a Class I malocclusion on a Skeletal Class I tending III base with the right maxillary canine in cross-bite. The treatment plan included orthodontic treatment, porcelain veneers, and an occlusal splint.


Fig. 1


Fig. 2


Orthodontic treatment (by Dr Nour Tarraf) included full-fixed appliances with TADs and IPR of mandibular anteriors, and arch retractions to reduce protrusion (Fig. 3, post-orthodontic treatment). A preliminary digital design (Fig. 4) was performed to guide the diagnostic wax-up and a digital mock-up (Fig. 5) was utilised to verify the diagnostic wax-up prior to carrying out the intra-oral mock-up. The patient was unable to afford the restoration of the maxillary bicuspids until a later stage so the reconstruction was limited to the maxillary anterior teeth.


Fig. 3


Fig. 4


Fig. 5


Using the diagnostic wax-up, silicone keys were fabricated to guide tooth preparations. Orthodontic treatment allowed prosthetic treatment to be additive in design which meant that tooth preparations could be conservative. Labial reductions were limited to 0.3 mm and incisal reductions were performed only where needed to create an incisal butt joint for the veneer (Fig. 6). Minimal preparations allowed the veneers to be bonded almost entirely to enamel, which is important for the long-term survival of porcelain veneers (Ref 1). There was no need to significantly mask the colour of the cervical region of the tooth and non-carious cervical lesions were absent, so fine chamfer margins were prepared at equi-gingival level.


Fig. 6


Splinted provisional veneers (Fig. 7) were fabricated using bisacryl ensuring sufficient interdental space to allow hygiene access for small interdental brushes. The labial surface of the provisional veneers were glazed with a unfilled resin and cemented using the spot-etch technique, ensuring all excess flowable composite was removed prior to curing (Fig. 8). Twice daily interdental cleaning of the provisional veneers and thorough brushing of labial margins during the provisional phase maintained soft tissue health, important for the try-in and cementation of the definitive veneers.


Fig. 7


Fig. 8


A dry try-in of the definitive veneers was performed to check the fit of the veneers and a wet try-in was performed using try-in paste to assess aesthetics. The PANAVIA™ Try-in pastes accurately mimic the cement shades. Four useful shades are available (Fig. 9). The White and Brown shades are useful to correct small discrepancies in shade requiring subtle increases or decreases in shade value respectively. Conveniently the try-in pastes are the same as the PANAVIA™ V5 range of try-in pastes (excluding opaque). Following the try-in procedure the teeth were isolated using rubber dam and the floss ligature technique. KATANA™ Cleaner (Fig. 10) was used to clean the veneers prior to silanating with CLEARFIL™ CERAMIC PRIMER PLUS (Fig. 11).


Fig. 9


Fig. 10


Fig. 11


Veneers that have not been pre-etched should be etched with hydrofluoric acid prior to silanization. The use of the ProsMate™ Baton allows the cleaning, etching and silanization of all veneers simultaneously (Fig. 12). The veneers are arranged systematically on the ProsMate™ Tray ready for the cementation procedure (Fig. 13). Tooth surfaces were pre-treated with phosphoric acid (K-ETCHANT Syringe) and PANAVIA™ V5 Tooth Primer (Fig. 14).


Fig. 12


Fig. 13


Fig. 14


The newly designed cement applicator tip reduces air bubbles and the wide 16-gauge tip (Fig. 15) allows light and easy control of cement extrusion while also providing efficient wide coverage during application. PANAVIA™ Veneer LC has excellent handling because of its ideal paste consistency. It is non-sticky and its viscosity prevents the cement from flowing beyond the veneer margins until the veneer is seated. It is not runny or stringy. Furthermore its thixotropic properties results in lower film thickness during seating of the veneer. These excellent handling properties are due to the development of new filler technology which consists of spherical silica and nano cluster fillers (Fig. 16). The “touch-cure” mechanism of PANAVIA™ V5 Tooth Primer importantly seals the bonding interface while the extended working time and stability of the cement under ambient light allows the simultaneous cementation of multiple veneers. In this case all six lithium disilicate veneers (technical work by Yugo Hatai) were cemented simultaneously with PANAVIA™ Veneer LC Paste (Clear).


Fig. 15


Fig. 16


Tack-curing each veneer for one second allowed smooth and easy bulk removal of excess cement with an explorer (Fig. 17). Remaining excess of uncured paste was removed with brushes. Final curing was performed by light curing lingual and labial surfaces.


Fig. 17


The optical characteristics of PANAVIA™ Veneer LC, use of fine chamfer margins, and well-fitting translucent restorations produces a gradual and smooth transition of colour from tooth to veneer where margins disappear and soft tissues respond in a healthy way (Fig. 18). The color stability, excellent abrasion resistance and high gloss durability of PANAVIA™ Veneer LC preserves integrity and aesthetics at the margins over the long term. The extraordinary bond strength of PANAVIA™ products, so familiar to our profession over the last 20 years, is still second to none (Fig. 19).


Fig. 18


Fig. 19


“KATANA” is a registered trademark or trademark of NORITAKE CO., LIMITED - “PANAVIA” and “CLEARFIL” are registered trademarks or trademarks of KURARAY CO., LTD.


References

1. Layton DM, Walton TR. The up to 21-year clinical outcome and survival of feldspathic porcelain veneers: accounting for clustering. Int J Prosthodont. 2012 Nov-Dec; 25(6):604-12. PMID: 23101040.


Efficient production of a zirconia overdenture

Case by CDT Mathias Berger, France


Every patient is unique. Their specific backgrounds, functional needs and aesthetic demands need to be respected in any prosthodontic treatment plan. However, the importance of an individual treatment approach increases with the number of teeth to be replaced: After all, the impact of the restorations on facial aesthetics and on the patient’s quality of life is never greater than when all teeth are missing. Fortunately, adequate dental materials and techniques are available for a patient-centered, individual approach, no matter what challenges need to be overcome.


A patient with bruxism


In the present case, an elderly male patient with bruxism was in need of a new maxillary denture. Since the placement of five implants in the maxilla, he had no proprioception in this jaw. This lack of sensation had an impact on the overdenture to be produced: material and design needed to be carefully selected in a way that it would withstand uncontrolled chewing forces. As technical complications are easier to repair than biological complications, the overdenture should not be unbreakable – instead, the replacement of single units should be easily manageable.


Two-part denture design


The solution was a two-part design with a milled bar consisting of the gum area and tooth abutments (fig. 1) combined with single crowns. The material of choice for the bar was KATANA™ Zirconia HTML Plus (Kuraray Noritake Dental Inc.) with a uniform flexural strength of 1,150 MPa throughout the disc, while the single crowns were milled from KATANA™ Zirconia YML that offers natural translucency and strength gradation. While a monolithic design was selected for the posterior crowns, the six crowns for the anterior region received a micro-cutback for aesthetic micro-layering with CERABIEN™ ZR Porcelain. The shade scheme for individualization of the anterior crowns is shown in fig. 2. In a nutshell, customization was performed with the Internal Stains Cervical 1, Grayish Blue, Dark Grey and A+. The finishing layer on the incisors was created mainly using LT0 materials with some CCV-3 on the cervical and LT Natural on the mesial and distal lobes. On the canines, LT1 was used instead of LT0. The posterior crowns were merely finished with liquid ceramics (CERABIEN™ ZR FC Paste Stain, Kuraray Noritake Dental Inc.).


Fig. 1. Sintered bar milled from KATANA™ Zirconia HTML Plus.


Fig. 2. Chroma map for micro-layering in the anterior region.


Fig. 3 shows the finished single crowns with their individual, age-appropriate shade effects on the sintered bar. After checking the fit of the crowns, the gum areas of the bar were individualized using CERABIEN™ ZR Tissue Porcelain (fig. 4). Subsequently, the crowns were luted to the zirconia abutments (fig. 5), leaving screw access holes in aesthetically uncritical positions (fig. 6). The final overdenture ready for try-in is shown in fig. 7. Due to an excellent fit on the implants (fig. 8), it was possible to immediately fix the overdenture with the screws, close the access holes with composite and discharge the patient. The final appearance is shown in fig. 9.


Fig. 3. Finished crowns on the sintered bar.


Fig. 4. Bar with individualized gum areas.


Fig. 5. Placement of the central incisor crowns on the bar.


Fig. 6. Occlusal screw access hole in the finished overdenture.


Fig. 7. Overdenture ready for try-in.


Fig. 8. Intraoral try-in of the aesthetic overdenture.


FINAL SITUATION


Fig. 9. Treatment outcome.


CONCLUSION


This patient case is a good example of how important it is to respect the patient’s background, age and specific demands when producing dental restorations. Thanks to the great variety of restorative materials with different mechanical and optical properties available, it is possible to create suitable prosthetics for virtually every patient. However, for this purpose, it is important to stay up to date regarding new products launched and techniques developed. This way, it is often even possible to create beautiful and durable solutions in a simplified and efficient procedure such as micro-layering on innovative zirconia with a high aesthetic potential.


Dentist:

CDT MATHIAS BERGER


Optimalisering av funksjonelle og estetiske parametre ved sementering av skallfasetter

AV Dr. Clarence Tam, HBSC, DDS, AAACD, FIADFE


Anvendelse av skallfasetter av porselen for å forbedre form, farge og stilling på fortenner er en vanlig teknikk innen estetisk tannbehandling. Det biomimetiske målet ved tannrestaurering er ikke bare kosmetisk, men også funksjonelt. Det er avgjørende å huske på at det intakte emaljeskallet palatinalt og buccalt på anteriore tenner er ansvarlig for deres medfødte bøyestyrke. Når tannstrukturen er skadet ved endodontisk behandling, karies eller traumer, må ingen anstrengelser skys når det gjelder å bevare gjenværende tannstruktur og etterstrebe å gjenopprette eller øke styrken så den er på linje med en intakt tann.


BAKGRUNN


En 55 år gammel kvinnelig pasient tok kontakt på klinikken fordi hun ønsket å bleke tennene. Hun ble forklart at blekingen ikke ville ha effekt på en eksisterende skallfasett på 12. Denne ville måtte byttes ut etter blekingen. Pasientens utgangsfarge var VITA* 1M1 og 2M1 (på gingivale halvpart) Blekeprotokollen var nattbleking med 10% karbamidperoksid i 3-4 uker. Fargen var da VITA* 0M3 både på overkjeve og underkjeve. Det var derfor en vesentlig fargeforskjell på 12 og de øvrige tennene. Dessuten var en klasse III komposittfylling på 22 blitt mere synlig. Tann 22 matchet heller ikke 12 i dimensjon, og det ble derfor besluttet å fremstille skallfasetter av litium disilikat på begge lateraler. Tann 23 hadde mild attrisjon på cuspen, men pasienten ønsket ingen behandling av dette på det nåværende stadium. Behandlingen besto derfor i å etablere bilateral harmoni, for så å gjenopprette buccal kontur og cusp på 23 i nær fremtid.


BEHANDLINGEN


En digital smile design protokoll var ikke nødvendig for denne behandlingen, som besto i å behandle lateralene. En viss individuell og kjønnsbasert variasjon er vanlig for disse tennene. Før LA ble fargen for restaureringen tatt ut ved hjelp av fotos i polarisert og upolarisert lys.


Fig. 1. Referansefoto med 18% nøytral grått kort.


Grunnfargen (body) var Vita OM2 med en blokkfarge BL2. Pas ble bedøvd med 1,5 karpule med 2% Lignocaine med 1:100,000 adrenalin, før kofferdam ble satt på.(Split dam teknikk). Skallfasetten på 12 ble spaltet og fjernet fra tannen, og en minimal invasiv preparering gjort ferdig på 22 (Fig.2). Det ble gjort en delvis utskifting av den gamle komposittfyllingen mbp på12. Adhesjon til gammel kompositt ble oppnådd både ved sandblåsing og en silan (CLEARFIL™ CERAMIC PRIMER PLUS. Prepareringsgrensene ble frisket opp, og retraksjonstråd dyppet i aluminiumklorid-løsning ble pakket i sulcus. Fargen på de preparerte tennene ble notert. Endelig avtrykk ble tatt med light-body og heavy-body silikonmateriale i metall-skje. Pasienten fikk temporære restaureringer og fikk beskjed om å få fargen bekreftet på laboratoriet (grovbrent). Modellene som er fremstilt på laboratoriet bekrefter den minimal invasive fremgangsmåten.


Fig. 2. Preparering for skallfasetter på 12 og 22.


Da arbeidene kom fra laboratoriet, ble pas. bedøvd og provisoriene ble fjernet. Prepareringene ble rengjort og forberedt for bonding ved sandblåsing med 27 mikron aluminiumoksid-pulver med trykk på 30-40 psi. Skallfasettene ble prøvd på plass med innprøvingspasata (PANAVIA™ V5 Tryin- Paste Clear, Kuraray Noritake Dental Inc.). Retraksjonstråder ble plassert og adhesiv overflate på restaureringene ble behandlet med 5% flussyre i 20 sek. før silanet (CLEARFIL™ CERAMIC PRIMER PLUS) ble applisert. (Fig. 3). Tannoverflaten ble etset med 33% fosforsyre i 20 sek. og skylt. En primer med MDP (PANAVIA™ V5 Tooth Primer) ble så applisert på tannen (Fig. 4) og lufttørket som beskrevet i bruksanvisningen. Så ble sementen (PANAVIA™ Veneer LC Paste Clear) (Fig. 5) applisert og skallfasetten ble satt på plass. Overskuddssementen hadde en ikke-rennende konsistens og holdt skallfasetten på plass mens kanttilpasning ble sjekket, og ble så raskt lysherdet i 1 sek. (tack cure) (Fig.6).


Fig. 3. CLEARFIL™ CERAMIC PRIMER PLUS ble applisert på de flatene som skulle bondes.


Fig. 4. PANAVIA™ V5 Tooth Primer applisert på etsede tannflater.


Fig. 5. PANAVIA™ Venneer LC Paste Clear appliseres på skallfasettens innside.


Fig. 6. PANAVIA™ Veneer LC Paste Clear umiddelbart etter at fasetten er satt på plass. Legg merke til den viskøse, ikkerennende konsistensen som gjør det enkelt å fjerne sementen både i uherdet fase og i gel-fasen.


Sementen forvandles til gel-form, noe som gjør fjerning av overskudd og rengjøring av restaureringen mye enklere (Fig. 7). Kantene på restaureringen dekkes med en klar glycerin-gel før endelig herding for å eliminere oksygeninhibisjon. (Fig. 8).


Fig. 7. Fjerning av overskudds-sement etter lysherding i 1 sek. (tack-cure)


Fig. 8. Sluttherding av skallfasetter samtidig buccalt fra og palatinalt fra.


Kantene pusses til høyglans og restaureringene sjekkes i okklusjon og artikulasjon. Postoperative bilder viser usynlige skjøter (Fig. 9).


Fig. 9. Postoperativ estetisk tilpasning av skallfasetter på 12 og 22.


Vurdering med foto i polarisert lys viser at restaureringene er integrert både estetisk og funksjonelt (Fig. 10), Nå venter estetisk forbedring av tann 23 for å matche 13.


SLUTTRESULTAT


Fig. 10. Endelig resultat vurdert i polarisert lys.


Dentist:

CLARENCE TAM


References


1. Magne P, Douglas WH. Rationalization of esthetic restorative dentistry based on biomimetics. J Esthet Dent. 1999;11(1):5-15. doi: 10.1111/j.1708-8240.1999.tb00371.x. PMID: 10337285.
2. Magne P, Douglas WH. Porcelain veneers: dentin bonding optimization and biomimetic recovery of the crown. Int J Prosthodont. 1999 Mar-Apr;12(2):111-21. PMID: 10371912.
3. Pongprueksa P, Kuphasuk W, Senawongse P. The elastic moduli across various types of resin/dentin interfaces. Dent Mater. 2008 Aug;24(8):1102-6. doi: 10.1016/j.dental.2007.12.008. Epub 2008 Mar 4. PMID: 18304626.
4. Source: Kuraray Noritake Dental Inc. Samples (beam shape; 25 x 2 x 2 mm): The solvents of each material were removed by blowing mild air prior to the test.


Amalgam replacement: Why and when hybrid ceramics are a great option

Case by Dr. Enzo Attanasio


The selection of the restorative material is a crucial step in prosthodontics. Hybrid ceramics offer a range of properties well-suited for various therapeutic situations, both in the presence of vital teeth and of endodontically treated teeth. Using the example of a clinical case, this article will explore the advantages associated with the use of hybrid ceramics in a cracked tooth syndrome scenario.


INITIAL SITUATION

The affected tooth in this case was a mandibular right second premolar (45 according to the FDI notation) with an old amalgam restoration (Figs. 1 and 2). The patient experienced pain upon chewing (specifically upon release). Clinically, there were visible horizontal and vertical crack lines. The tooth was vital and showed no signs of pulpal pathology. It was decided to replace the amalgam restoration and restore the tooth with an overlay made of the hybrid ceramic KATANA™ AVENCIA™ Block. There were two main reasons for this decision. First, whenever root canal treatment would be necessary in the future, the hybrid ceramic material would facilitate endodontic access cavity preparation (compared to any other ceramic material) and subsequent restoration with composite filling material. Second, hybrid ceramics offer greater resistance and improved mechanical properties compared to composite filling materials applied in an incremental layering technique.


Fig. 1. Initial situation: Occlusal view.


Fig. 2. Initial situation: Buccal view.


PREPARATION AND IMMEDIATE DENTIN SEALING

To remove the amalgam restoration and weakened surrounding tooth structure, the occlusal surface of the tooth was reduced by approximately 2 mm. For a smooth colour transition between the tooth and the restoration, the preparation outline was created at the level of interproximal boxes with a vestibular inclined plane (Fig. 3). Subsequently, Immediate Dentinal Sealing (IDS) was carried out (Figs. 4 to 10). This technique involves the use of a universal adhesive like CLEARFIL™ Universal Bond Quick, which is applied to the preparation without prior etching of the peripheral enamel. In the second step, a highly filled flowable composite is applied. In the present case, the material of choice was CLEARFIL MAJESTY™ ES Flow Super Low, applied in a thickness of just 0.5 mm. The preparation was refined using ultrasonic instrumentation: Sonic tips SFM7 and SFD7 (Komet Dental) for refining the boxes; SFD1F and SFM1F (Komet Dental) for margins and steps. Sharp edges were rounded with abrasive discs and then polished with fine polishers. It is crucial that the residual occlusal thickness (prosthetic space) is 1.5 mm, as required by the selected material.


Fig. 3. Prepared tooth structure prior to immediate dentin sealing.


Fig. 4. IDS: Application of the universal adhesive.


Fig. 5. IDS: Light curing of the adhesive layer.


Fig. 6. Thin layer of flowable composite applied to the preparation.


Fig. 7. Contouring, …


Fig. 8. … rounding off sharp edges …


Fig. 9. … and polishing of the sealed surface with dedicated instruments.


Fig. 10. Sealed tooth preparation ready for impression taking.


FROM SCANNING TO TRY-IN

Following digital scanning with the intraoral scanner Primescan™ (Dentsply Sirona), MDT Daniele Rondoni produced the restoration (Figs. 11 and 12). The cementation process involves an initial try in phase to assess the marginal fit of the overlay and the contact areas. Testing occlusion at this stage could be risky as it may lead to fracture of the restoration in case of excessive premature contacts. After try-in (when carried out without rubber dam), the restoration may be contaminated by blood, saliva, or glycerin gel used for the evaluation of fit and aesthetics. Therefore, it is necessary to clean the restoration before proceeding with adhesive phases. The use of a cotton pellet soaked in alcohol is an option, a cleaning agent like KATANA™ Cleaner may be even better as it chemically cleans the restoration and eliminates the contaminants.


Fig. 11. Hybrid ceramic overlay on the printed model.


Fig. 12. Separate overlay.


CONDITIONING OF THE TOOTH AND THE RESTORATION

Afterwards, the restoration was sandblasted (as recommended for most hybrid ceramics) with 50 μm aluminum oxide using AquaCare (Akura Medical) (Fig. 13), and then immersed in distilled water in an ultrasonic bath for 5 minutes. Meanwhile, rubber dam was placed over the entire sextant, the build-up was sandblasted like the intaglio of the overlay and a phosphoric acid etchant (Ultra Etch, Ultradent) was applied to the enamel, rinsed off and the area dried (Figs. 14 to 17). The clean restoration was subsequently conditioned with a silane containing 10-MDP (CLEARFIL™ Ceramic Primer Plus, Kuraray Noritake Dental Inc.) according to the manufacturer’s instructions (Fig. 18). What followed was the application of the universal adhesive (CLEARFIL™ Universal Bond Quick) to the intaglio of the overlay and to the preparation and light curing on both sites (Figs. 19 and 20). One of the advantages of universal adhesives compared to three-step adhesive systems is their minimal film thickness, which does not compromise the fit of the restoration.


It is important to protect adjacent teeth with metal matrix strips during adhesive phases to provide for proper fitting. These elements do not create operational difficulties, but serve their purpose: After restoration placement, the composite or cement used for placement will be easily removable from the mesial and distal surfaces of the adjacent teeth, as they are free of adhesive.


Fig. 13. Sandblasting of the overlay …


Fig. 14. … and the tooth structure.


Fig. 15. Selective etching of the enamel, …


Fig. 16. … followed by thorough rinsing. Adjacent teeth are protected by a metal matrix strip.


Fig. 17. Tooth structure after selective etching, rinsing and drying.


Fig. 18. Silane application.


Fig. 19. Application of the universal adhesive into the overlay.


Fig. 20. Treatment of the tooth structure with the universal adhesive.


DEFINITIVE PLACEMENT

In the present case, a heated composite paste (heated to a temperature of 55 °C) was extruded into the restoration, which was then placed by applying slow, gradual, and strong pressure (Figs. 21 and 22). Excess composite was removed with a scaler in the buccal and lingual areas and floss (e.g. SuperFloss®, Oral-B) in the interproximal areas. Several pressurization phases were performed until no more composite was observed at the tooth-restoration interface.


Fig. 21. Heated composite paste used for definitive placement.


Fig. 22. Restoration placed under rubber dam isolation.


Then, the composite was polymerized for 30 seconds from the buccal and lingual sides with two curing lights, before applying glycerin gel to the margins and polymerizing from occlusal for another minute (Fig. 23). If thorough attention is given to removing excess composite during placement phases, subsequent finishing steps will be quick and easy (Figs. 24 to 27). Finishing and polishing of the interproximal areas was accomplished with an EVA handpiece and 3M™ Sof-Lex™ Finishing Strips (3M). For finishing of the buccal and lingual areas, a medium-grit, flame-shaped diamond bur (diameter 14/16) was used. Finally, the margins should be polished using composite polishers like TWIST™ DIA for Composite (Kuraray Noritake Dental Inc.). After the local anesthesia wears off, one should observe the cessation of pain symptoms, as seen in the present case. The treatment outcome is displayed in Figures 28 and 29.


Fig. 23. Light curing through a layer of glycerin gel blocking the oxygen.


Fig. 24. Finishing of the buccal and lingual margin with a medium-grid, flame-shaped diamond bur.


Fig. 25. Finishing of the interproximal areas with EVA handpiece (fine grain).


Fig. 26. Checking the occlusal contacts.


Fig. 27. Occlusal polishing.


FINAL SITUATION

Fig. 28. Treatment outcome – buccal view.


Fig. 29. Treatment outcome – occlusal view.


CONCLUSION

For posterior teeth restored with amalgam and a significant level of destruction, restoration replacement with hybrid ceramic overlays can be a great option. Mechanical material properties are usually superior to those of layered composites, processing is possible chairside or labside and comparatively quick (no firing required), while the clinical placement procedure is similar to that involved in placing glass ceramics – with the major difference of sandblasting instead of etching the intaglio of the restoration. One of the most important benefits of hybrid ceramics over glass ceramics, however, is the ability to modify the restoration whenever desired. Endodontic access cavities are easily prepared and closed with composite, contact points are quickly adjusted and the surface is polished or re-polished in next to no time. Moreover, the wear properties are similar to those of tooth structure and patients are happy about a natural touch and feel. The aesthetic properties are quite impressive, too.


Dentist:

ENZO ATTANASIO


Enzo Attanasio graduated in 2008 in Dentistry and Dental Prosthetics from the Magna Graecia University of Catanzaro. In 2009, he went on to specialize in the use of laser and new technologies in the treatment of oral and perioral tissues at the University of Florence. That year he also attended Prof. Arnaldo Castellucci’s course in Clinical Endodontics at the Teaching Center of Microendodontics in Florence where, in 2012, he went on to complete his training in Surgical Microendodontics. In 2017 he attended a course on Direct and indirect Adhesive Restorations at Prof. Riccardo Becciani’s Think Adhesive training center in Florence where he later become a tutor. Today, as a member of the Italian AIC and based in Lamezia Terme, Italy, Dr Attanasio has a special interest in Endodontics and Aesthetic Conservative.


Same-day dentistry: Replacement of two PFM crowns with zirconia restorations

Clinical case by Dr. Frank Heldenbergh


The advancements in zirconia in contemporary dentistry nowadays allow for a wider range of applications, including in the anterior sector, and for chairside production using dedicated CAD/CAM systems. Even without a cutback, KATANA™ Zirconia Block (STML), combined with CERABIEN™ ZR FC Paste Stain (both Kuraray Noritake Dental Inc.), offer an extremely satisfactory aesthetic solution.


In the present patient case, the materials were chosen to replace old PFM crowns on the maxillary central incisors. The planned treatment was in accordance with the patient's wishes, and carried out in a single appointment.


CASE DESCRIPTION

The patient asked for a replacement of the existing crowns on the two maxillary central incisors (teeth 11 and 21, FDI notation). The porcelain-fused-to-metal (PFM) restorations had been in place for about thirty years (Figure 1). She desired aesthetic improvements and slight repositioning of these two teeth.


TREATMENT PLAN

In agreement with the patient, it was decided to perform the entire procedure in one appointment: removal of the existing crowns, digital impressions, production, and bonding of new restorations. The periodontium was healthy with no bleeding. The only uncertainty was whether the existing crowns were cemented onto inlay-cores or if they were Richmond crowns. A preliminary silicone impression was taken as a precautious measure: in case something unexpected prevented the new crowns from being bonded during the session, it would be easily possible to produce temporary crowns.


Fig. 1. Initial clinical situation.


TREATMENT

Using a diamond bur followed by a tungsten carbide bur, the existing crowns were removed, revealing that they indeed were Richmond crowns. Because the anatomy of the intra-radicular posts clearly contraindicates an attempt to remove these posts, it was decided to trim the crowns to transform them into inlay cores rather than risk further damage. The corono-peripheral preparations were reworked at the same time. One of the major challenges was related to the necessity of masking the metal of the transformed coronal-radicular reconstructions. Luckily, the space available was sufficient for the production of full zirconia crowns with a significant thickness (Figure 2). The target shade of the crowns was chosen in consultation with the patient (Figure 3).


Fig. 2. Situation after removal of the existing restorations.


Fig. 3. Shade determination using a shade tab: A2 was the appropriate shade.


Subsequently, impressions were taken using and intraoral scanner, the virtual models were checked and the crowns designed, considering the patient's request to have her two incisors slightly retracted (Figures 4 and 5).


Fig. 4. Virtual models of the patient’s teeth with the newly designed crowns, revealing the space available for a slight retraction.


Fig. 5. Designing of the two crowns.


The two crowns were milled from KATANA™ Zirconia Block 14Z A2 (Figure 6). A quick reminder: unlike lithium disilicate, zirconia prosthetic parts cannot be tried in immediately after milling, as they are around 20 percent larger than their final size after sintering. Final sintering was performed within about 18 minutes using the furnace SINTRA CS (ShenPaz Dental Ltd). After this process, the crowns may be tried on to check their fit, shape, shade and optical integration.


Fig. 6. Milled crowns in the CAD/CAM blocks.


For finishing of the restorations, different options are available. In this case, we decided not to limit ourselves to mechanical polishing of the prosthetic parts, as zirconia does not fluoresce like natural teeth. To add fluorescence as an optical feature, the surface was lightly stained and glazed with CERABIEN™ ZR FC Paste Stain (Figure 7).


Fig. 7. Crowns in the furnace after staining and glazing with liquid ceramics.


After firing, the two incisor crowns were tried in again using a try-in paste corresponding to the chosen resin cement system (PANAVIA™ V5, Kuraray Noritake Dental). In this way, the final appearance was simulated to validate the shade of the cement. The intaglio surfaces of the crowns were then sandblasted before applying CLEARFIL™ CERAMIC PRIMER PLUS as the restoration primer. The prepared teeth were treated with KATANA™ Cleaner (Kuraray Noritake Dental Inc.) to decontaminate the surface from proteins in saliva and possibly blood. Those clean surfaces are ideal for bonding. After thorough rinsing and drying, PANAVIA™ V5 Tooth Primer (containing MDP monomer for bonding with the hydroxyapatite and metal of the preparation) was applied according to the manufacturer’s instructions (Figure 8).


Fig. 8. Selected cementation system and try-in.


Subsequently, PANAVIA™ V5 Paste was applied into the first crown, which was then seated, followed by tack curing (brief photopolymerization for three to five seconds), excess removal and final light curing from all sides.


The procedure was then repeated for the second maxillary central incisor. The result instantly satisfied the patient, both in terms of aesthetics (adaptation, position of the new crowns, mimicry) and the comfort provided (Figures 9 and 10).


Fig. 9. Crowns immediately after placement.


Fig. 10. Aesthetically pleasing and comfortable result.


At a recall after four months, soft tissue conditions were ideal and the patient was happy with the outcome (Figures 11 to 13). The selected zirconia had nice optical properties, masking of the metal posts was successful and the natural surface texture contributed its share to a nice overall picture. The retracted position of the teeth was also perceived positively by the patient, while comfort and function were excellent.


DISCUSSION

Although lithium disilicate has so far been considered the material of choice for prosthetic work in the anterior region, zirconia is nowadays proving to be an extremely satisfactory alternative from every point of view: milling, strength, aesthetics, assembly (among other things, no hydrofluoric acid is required for bonding). KATANA™ Zirconia Blocks (STML) with a multi-layered colour structure in a single 4Y-TZP zirconia block, combined with CERABIEN™ ZR FC Paste Stain, offer a remarkable solution. This applies to treatments around the replacement of existing crowns as well as first-line treatments with less invasive preparations (verti-prep) than those required by other types of ceramics.


Fig. 11. The patient’s smile at a recall after four months.


Fig. 12. Great optical integration.


Fig. 13. Natural surface texture contributing to success Control pictures after four months taken by Emmanuel Charleux.


Dentist:

FRANK HELDENBERGH


Dr. Frank Heldenbergh graduated with a Doctor of Dental Surgery degree from the University of Reims in 1988.Driven by a passion for prosthetics, he pursued further specialization as a Prosthetic Resident at the UFR Odontology of Reims from 1990 to 1992. Dr. Heldenbergh’s dedication to advancing dental practices led him to join the Board of the Academy of Adhesive Dentistry in 1999. His commitment to this field has been unwavering, and he currently serves as the Vice President of A.D.D.A.-R.C.A.


Recognized for his expertise in ceramic veneers, inlays and onlays, Dr. Heldenbergh supervised practical work for the Paris Odontological Society from 2000 to 2018, shaping the skills of many aspiring dentists. His influence extended to the A.D.F. Congress, where he supervised practical work on ceramic veneers from 2000 to 2016. In 2017, he was the Head of Practical Work at A.D.F., a role that allowed him to further contribute to the advancement of dental education and practices. In 2018, he was the Head of Practical Work for ceramic veneers at the Paris Odontological Society.


Recognizing the importance of technology in modern dentistry, Dr. Heldenbergh pursued a University Degree in CAD/CAM from Toulouse in 2022. This addition to his qualifications highlights his dedication to staying at the forefront of dental innovation.

Trauma case: Cementation of a fractured crown fragment

Case by Aleksandra Łyżwińska DMD, Warsaw, Poland


Dental injuries can be stressful for patients, parents of pediatric patients, and dentists alike. The following tips offer support in turning the treatment of crown fractures into a simple, quick and predictable procedure. In the case described, we opted for a reattachment of fractured crown fragments.


YOUNG PATIENT WITH A FRACTURED CENTRAL INCISOR

A 16-year-old patient presented immediately after an accident. Her maxillary left central incisor was fractured, involving half of the coronal enamel and dentin (Fig. 1). The pulp was not involved, but the fracture line was quite close to the pulp (Fig. 2). After examination and radiographic evaluation, the patient was anesthetized. When placing the rubber dam, it tore between the left central and lateral incisor (Figs. 3 and 4). Due to the patient’s young age and limited willingness to cooperate, the decision was made to proceed without replacing the rubber dam. This was expected to work well in this specific region due to the limited flow of saliva from the palate and a low associated risk of contamination.


Fig. 1. Fractured maxillary left central incisor at the day of the accident.


Fig. 2. Occlusal view of the maxillary anterior teeth with the pulp of the fractured central incisor shining through.


Fig. 3. Rubber dam placed and torn between the left central and lateral incisor.


Fig. 4. Occlusal view of the teeth isolated with rubber dam.


REMOVAL OF UNSUPPORTED ENAMEL PRISMS

In order to provide for a high-quality bond and natural aesthetics, unsupported enamel prisms should be removed. As the use of burs might be too invasive (removing too much structure) and thus hinder the alignment of crown fragments, air-abrasion with 50 μm alumina particles was the method of choice. To avoid iatrogenic pulp exposure, the deepest part of the affected tooth was protected with a colored flowable composite before sandblasting (Fig. 5). The adjacent teeth were protected using a metal strip (Fig. 6). Several seconds of air abrasion were sufficient to remove the enamel prisms and obtain a homogeneous enamel surface (Fig. 7). Subsequently, the colored flowable composite was removed from the dentin surface and the tooth fragment was treated in the same way.


Fig. 5. Preparations for sandblasting: Dentin area near the pulp protected with flowable composite.


Fig. 6. Protection of the adjacent teeth with a metal strip.


Fig. 7. Homogeneous enamel surface after air abrasion.


JOINING OF THE FRAGMENT WITH THE REMAINING TOOTH STRUCTURE

After air-abrasion treatment, the fit of the tooth and the fragment was checked and approved (Fig. 8). To improve retention of the fractured crown portion, it was bonded to a micro applicator using composite resin. Alternatively, prefabricated prosthetic carriers may be used. Then, selective etching of the enamel was performed on the tooth and the fragment (Figs. 9 and 10). During this procedure, the adjacent teeth were protected with a celluloid strip (Fig. 11). To better adapt the strip to the distal surface, a curved wedge was placed interproximally (Fig. 12).


The bonding system of choice was CLEARFIL™ SE Bond 2 (Kuraray Noritake Dental Inc.). After applying this adhesive to the tooth and the fragment (Fig. 13), a small portion of CLEARFIL MAJESTY™ ES Flow Super Low (Kuraray Noritake Dental Inc.) in the shade A2 was applied to the part of the fragment treated with adhesive.* After careful repositioning of the fragment and while holding it in place with the micro applicator, the composite was light cured.


Fig. 8. Perfect fit of the fragment to the tooth.


Fig. 9. Selective etching of the enamel on the tooth …


Fig. 10. … and the fragment.


Fig. 11. Position of the wedge …


Fig. 12. … used for better adaptation to the distal surface.


Fig. 13. Fragment treated with CLEARFIL™ SE Bond 2 PRIMER and BOND, which were both carefully air-dried, while the Bond was also light cured.


Fig. 14. Fragment back in place.


Fig. 15. Occlusal view of the teeth with the reattached fragment perfectly fitting the mould.


EXCESS REMOVAL AND POLISHING

Excess composite was removed with a scalpel blade and abrasive discs. The entire restoration was then polished using TWIST™ DIA for Composite (Kuraray Noritake Dental Inc., Fig. 16). A nice optical integration was obtained immediately after finishing due to fact that the fragment was stored in water during the waiting time and treatment. As observed with teeth isolated with rubber dam during treatment, teeth undergo dehydration outside the oral cavity. The effect is much stronger in the latter setting, making a fragment become chalky white. By keeping the fragment in water, dehydration is limited to a minimum and it is possible to properly evaluate the aesthetic outcome. This has a positive impact on patient satisfaction. In the present case, the fragment and the tooth structure had a similar appearance, both showing a slightly increased brightness as a result of manipulation under rubber dam or in the air, respectively.


Fig. 16. Immediately after polishing, the fragment has almost the same brightness as the tooth thanks to water storage. A slight dehydration effect is visible.


TREATMENT OUTCOME

To achieve optimal aesthetics and long-lasting gloss, the composite was repolished one week later (Fig. 17). This was accomplished with a light blue high-shine rubber polisher of the TWIST™ DIA for Composite system, followed by polishing with diamond paste and a goat hair brush.


Fig. 17. Treatment outcome after one week.


Teeth previously isolated with a rubber dam and the fractured crown fragment had undergone rehydration and returned to their natural colour. The colour adaptation is satisfactory. Harmonious light reflections on the labial surface of the treated tooth a beautiful, natural shine have made the fracture site nearly invisible. In addition to aesthetic value, good therapeutic results were also achieved - the tooth responds appropriately to stimuli and is pain-free.


CONCLUSION

The described approach is a valuable treatment option for anterior trauma cases with relatively large fragments that are still available. By reattaching the natural structure, the need for complicated and time-consuming multi-shade layering and free-hand modeling is eliminated, while all the remaining natural tooth structure is saved. Instead of preparing the tooth, a removal of the unsupported enamel prisms and roughening of the surface is absolutely sufficient. Key elements for a great optical integration and long-lasting success are the proper use of a high-performance adhesive as well as the selection of a composite that has the ability to properly blend into its environment and offers a nature-like gloss retention. The selected materials offer precisely these features, so that the great outcome may be expected to last.


*CLEARFIL MAJESTY™ ES Flow Super Low is indicated for cementation purposes. The cementation of tooth fragments, however, is not explicitly mentioned in the instructions for use. The decision to use the product in this context was made by the dental practitioner in charge of the treatment.


Dentist:

ALEKSANDRA ŁYŻWIŃSKA DMD


Aleksandra Łyżwińska graduated from the Medical University of Warsaw, where she later served as a lecturer and assistant in the Department of Conservative Dentistry with Endodontics. In her daily practice, she focuses on the broad field of adhesive dentistry. She is passionate about minimally invasive techniques and vital pulp therapy. Since 2020, she has been conducting courses in conservative dentistry, collaborating with major training centers in Poland and around the world. She is a key opinion leader for Kuraray Noritake. In her training sessions, she demonstrates that dental caries management doesn‘t have to be boring, and that the bond in the bottle is just as exciting as a spy movie. Instagram users know her as the creator of the educational profile for dentist @aleksandra.lyzwinska.


Universal White: For all patients asking for a bleached effect

Case by Dr. Jusuf Lukarcanin


For all cases that require a particularly bright tooth shade – e.g. children or patients with bleached teeth / asking for a bleached effect in their restorations – CLEARFIL MAJESTY™ ES-2 Universal in the shade UW is likely to be the first choice. The young patient aged 28 shown below asked for diastema closure including shape and shade correction: She wanted to have a brighter, more beautiful smile.


Fig. 1. Initial clinical situation.


Fig. 2. Shape and shade correction were desired in this case.


Fig. 3. Treatment outcome …


Fig. 4. … leading to the beautiful smile the patient desired.


Reasons for selecting universal white:

- Cases requiring a particularly high brightness or value

- Restorations in deciduous teeth

- Restorations in bleached teeth


Universal white properties:

- Well-balanced translucency

- High light-scattering effect


CONCLUSION

One universal composite, four shades: In the case of CLEARFIL MAJESTY™ ES-2 Universal, this portfolio is absolutely sufficient for single-shade restorations even in the aesthetically demanding anterior region. Properties such as a nice blend-in effect, a great polishability and gloss retention over time support dental practitioners in creating beautiful restorations. As shade determination may be based on very few criteria instead of a complex shade guide, the whole restoration procedure becomes less stressful and more efficient. Furthermore, with only four shades to stock and usually no blocker needed, the number of materials on stock is reduced, leading to facilitations in stock management as well.

Dentist:

JUSUF LUKARCANIN


Dr. Jusuf Lukarcanin is a Certified Dental Technician (DCT) and a Doctor of Dental Science (DDS). He studied dentistry at the Ege University Dental Faculty in Izmir, Turkey, where he obtained a Master‘s degree in 2011. In 2017, he received a Ph.D. degree from the Department of Restorative Dentistry of the same university. Between 2012 and 2019, Dr. Lukarcanin was the head doctor and general manager at a private clinic in Izmir.


Between 2019 and 2020, he worked at Tinaztepe GALEN Hospital as a Restorative Dentistry specialist, between 2020-2022 he worked at MEDICANA International Hospital Izmir as a Restorative Dentistry specialist. Currently he is an owner of a private clinic for aesthetics and cosmetics in Izmir.