429 Too Many Requests

429 Too Many Requests


nginx

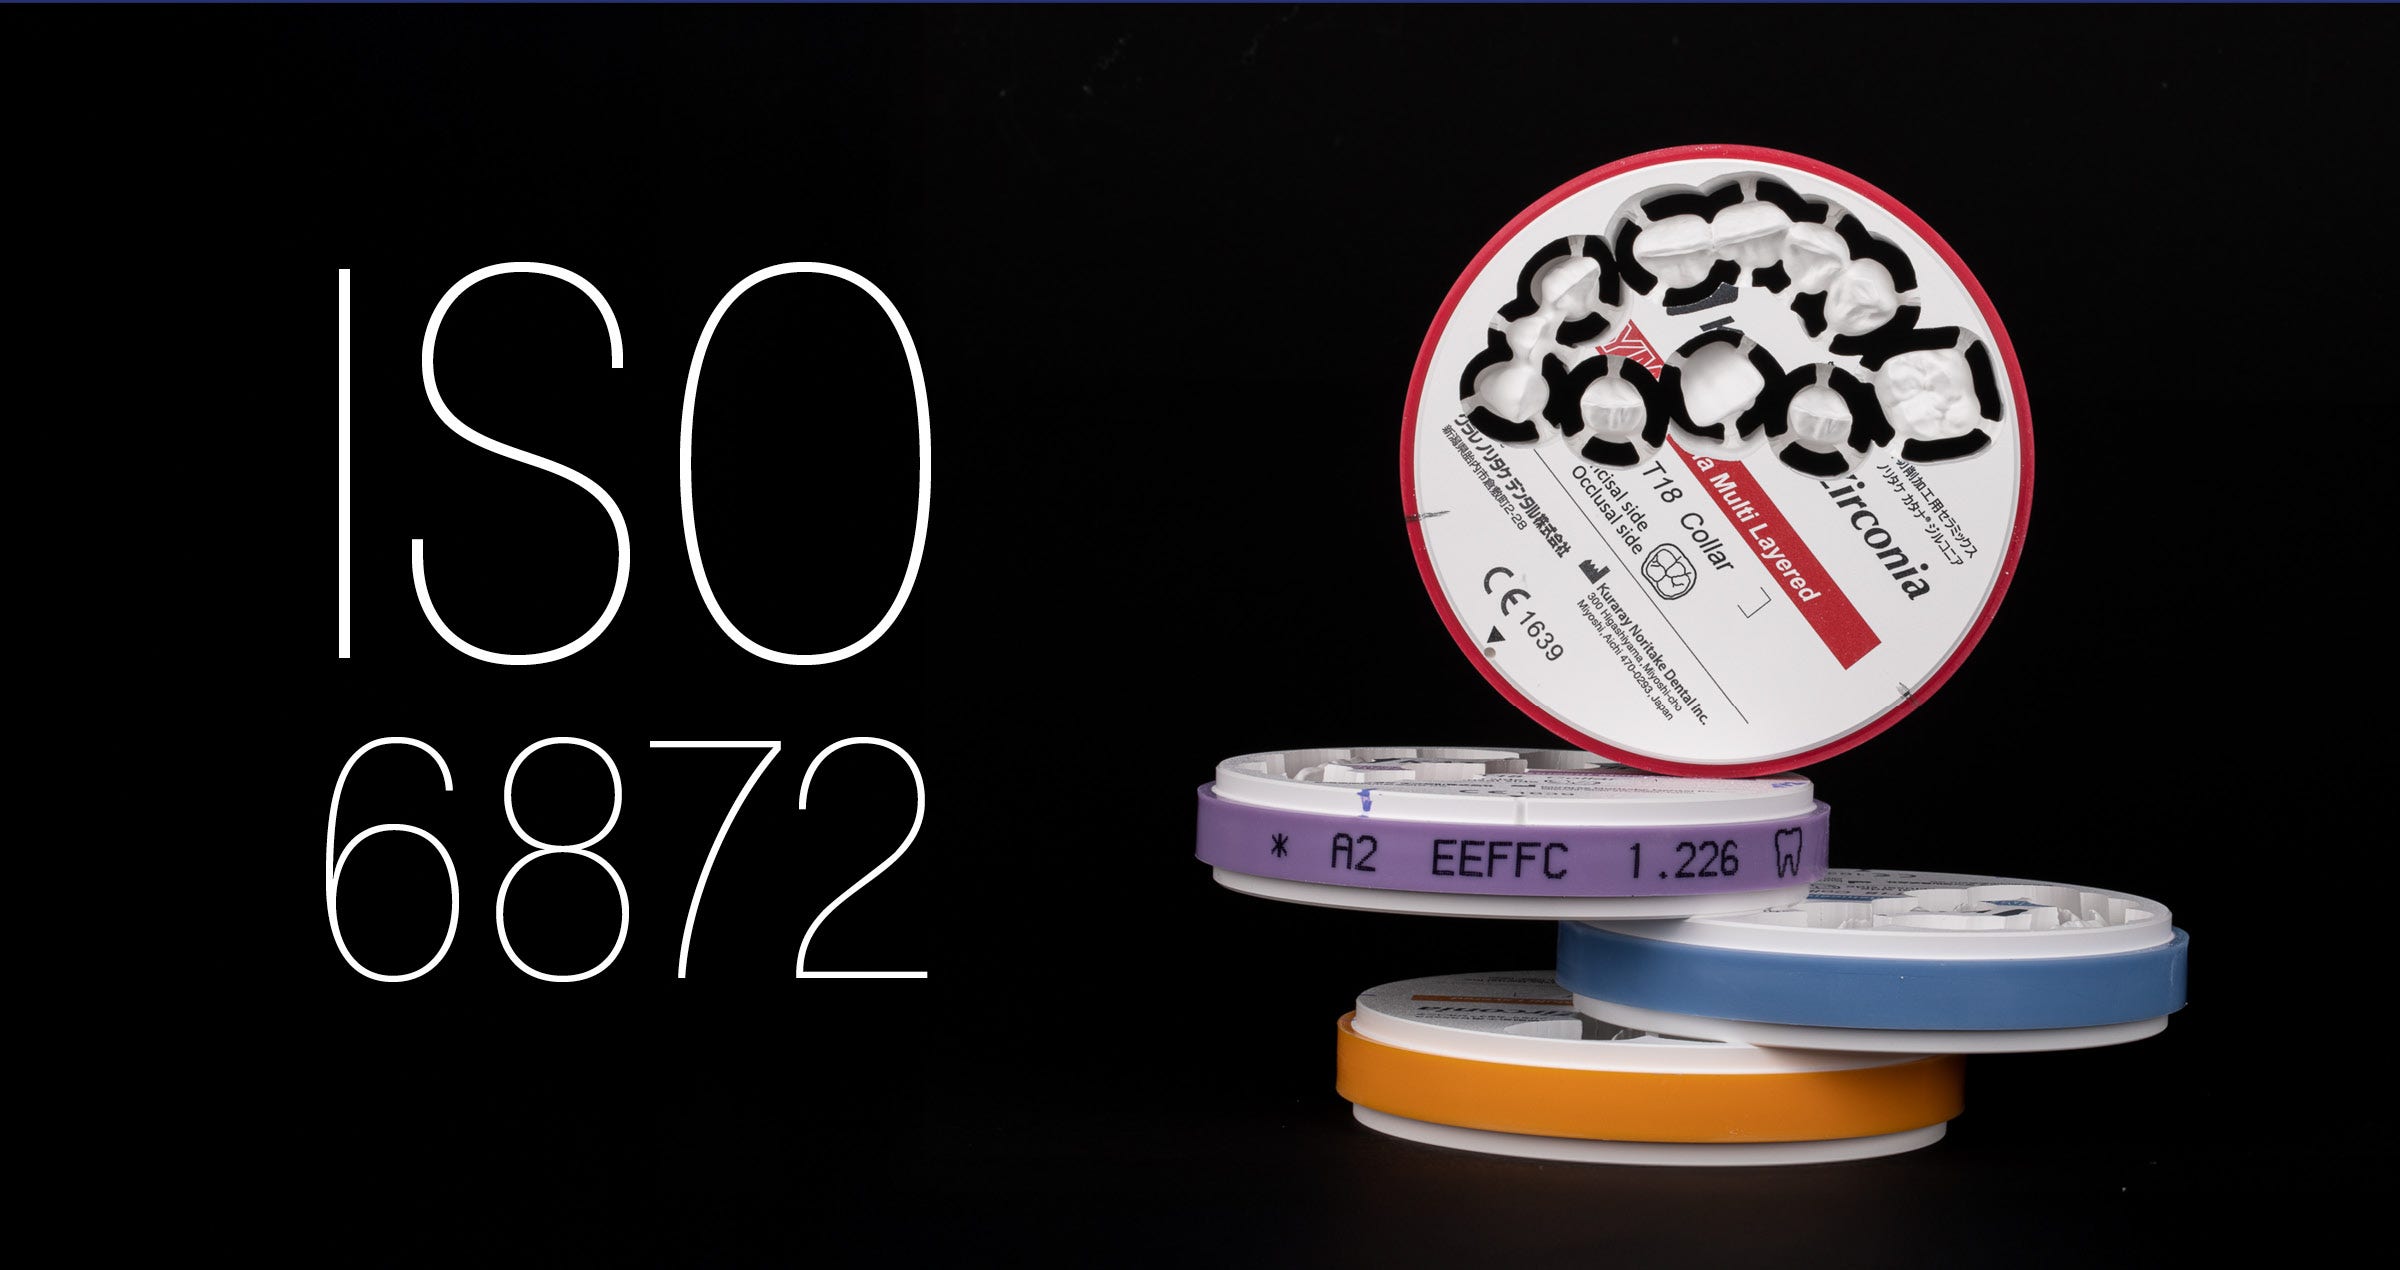
10 years KATANA™ Zirconia multi-layered series

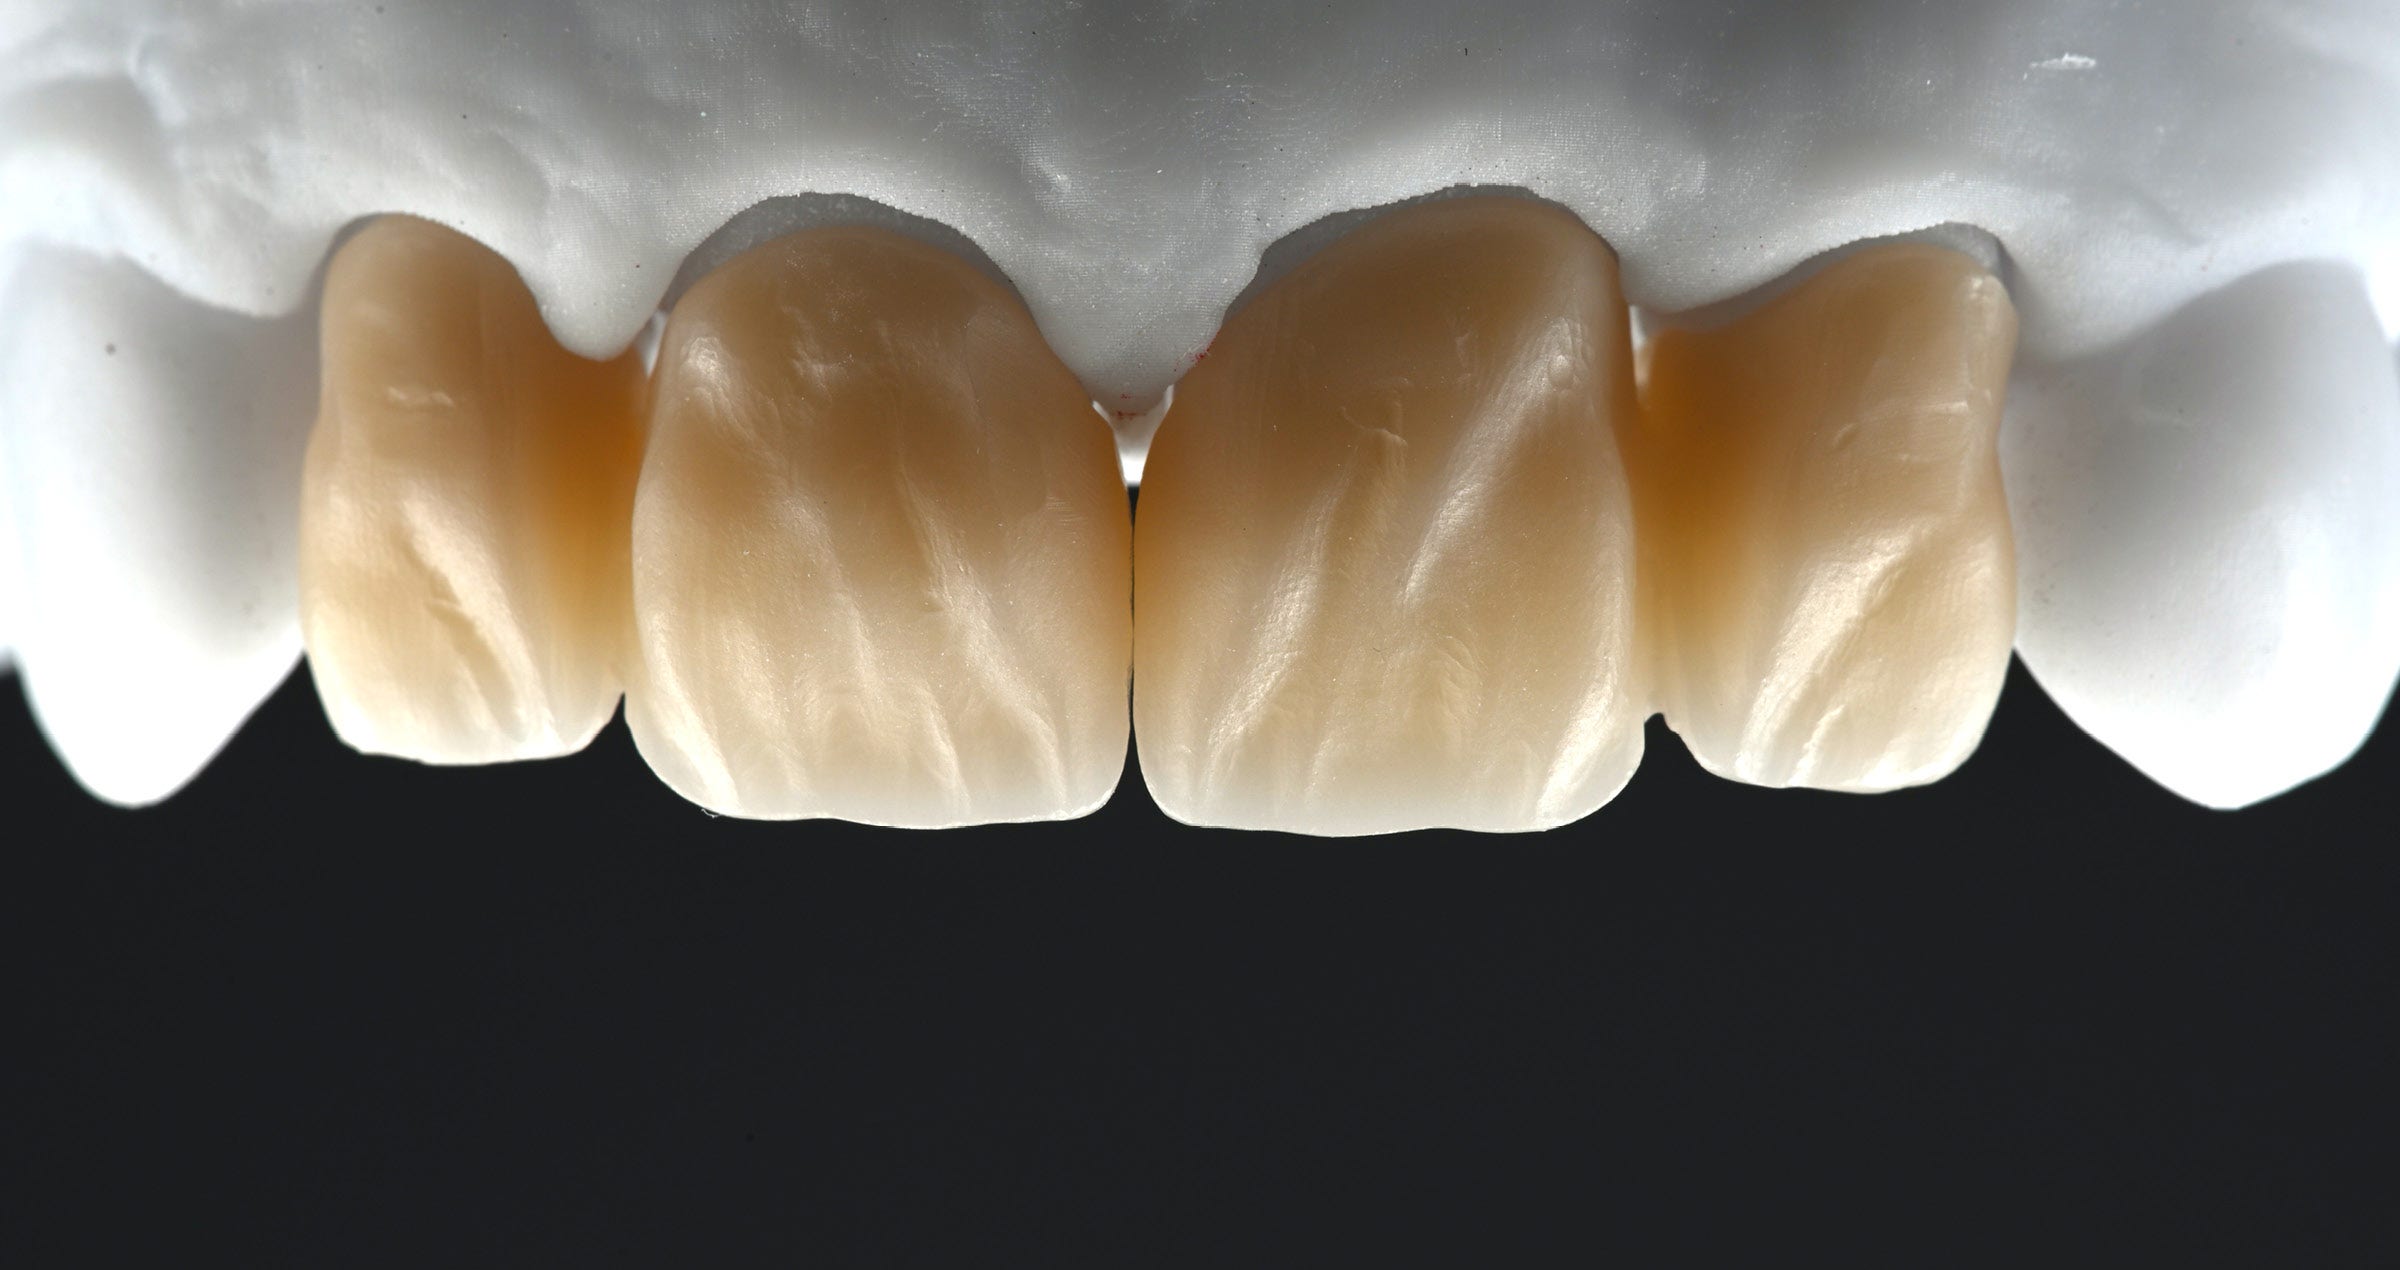
Photo credits to Giuliano Moustakis


Can you imagine a world without multi-layered zirconia? The invention of a zirconia material with natural colour gradation and well-balanced translucency and strength led to fundamental changes in the way zirconia-based restorations are produced. When the first product of its kind – KATANA™ Zirconia ML – was introduced to the dental market exactly ten years ago, dental technicians all over the world suddenly started rethinking their manufacturing concepts.


Since then, the trend towards a decreased thickness of the porcelain layer, a limiting of this layer to the vestibular area and the production of monolithic restorations is clearly perceivable. Technicians have developed their own concepts of micro-layering, which allow for more patient-centred approaches. This is also due to the fact that the total wall thicknesses of the restorations may be decreased without compromising the aesthetics. The line-up of multi-layered zirconia currently available from Kuraray Noritake Dental Inc. (KATANA™ Zirconia UTML, STML, HTML Plus and KATANA™ Zirconia YML with additional translucency and strength gradation) enables users to make indication-related material choices for the production of restorations that are precisely aligned to the individual demands of each case.


The reasons to choose KATANA™ quality


But why choose KATANA™ Zirconia instead of any other multi-layered zirconia disc? According to experienced users of the KATANA™ Zirconia Multi-Layered series, there are many reasons to opt for KATANA™.


For Jean Chiha, owner at North Star Dental Laboratories and Milling Center in Santa Ana, California, it is the combination of optical and mechanical properties that makes the difference: 


“KATANA™ Zirconia is the game changing material with well-balanced esthetics and strength!”. 


Naoki Hayashi, president of Ultimate Styles Dental Laboratory in Irvine, California, aesthetics is the most decisive argument to opt for the discs from Kuraray Noritake Dental Inc. He states:


“KATANA™ Zirconia discs offer trusted esthetics which gives me confidence in my clinical cases”.


Naoto Yuasa, chief ceramist at Otani Dental Clinic in Tokyo, adds predictability as an important factor:


“KATANA™ sustains my passions for aesthetic restorations and those of a predictable future in the long run”
, whereas dependability is the key element.


For Hiroki Goto, the laboratory manager at Sheets and Paquette Dental Practice in Newport Beach, California reports:


“Without KATANA™ there is no pride. Haven’t experienced it yet? You have to see how reliable it is!”


Finally, we have asked Kazunobu Yamada, a pioneer in making porcelain laminate veneers using complementary color techniques and a first-hour user of KATANA™ Zirconia, what comes to his mind when thinking about KATANA™ Zirconia. According to the president of CUSP Dental Laboratory in Nagoya City, there is a clear link between the product name and its characteristics:

“Did you know that the word "KATANA" also means "protection against misfortune and evil"? Katana zirconia, the culmination of many years of research and development by Kuraray Noritake, has an unparalleled quality. KATANA™, for me, is truly "Protection for all technicians".”


The origin of well-balanced properties


It seems that the KATANA™ Zirconia Multi-Layered line-up stands out due to set of valuable properties enabling a dental technician to produce beautiful, high-quality restorations every time. The secret of success lies in meticulous raw material selection and controlled processing from the powder to the pre- sintered blank carried out at the production facilities of Kuraray Noritake Dental Inc. in Japan. They provide for the high product quality that is responsible for the materials’ outstanding behaviour supporting the best possible outcomes.


Achieving maximum quality in a minimum amount of time

Interview with Andreas Chatzimpatzakis


Fewer bakes, fewer ceramic powders - there is clearly a trend toward simplification in the production of zirconia-based prosthetic work. This is also true for implant-based restorations, which often involve gum parts. DT Andreas Chatzimpatzakis, international trainer for Kuraray Noritake Dental Inc., and the owner of ACH Dental Laboratory in Athens, Greece, shares his approach to high aesthetics in implant prosthodontics in the following conversation.


You are a user of the CERABIEN™ ZR portfolio from the outset. When did you test the products for the first time and why?


Well, it was many years ago when I finished my very first zirconia-based restoration. The reason to test CERABIEN™ ZR was that when I asked the dental technician who had milled the framework which porcelain system to use. He suggested to use CERABIEN™ ZR, which I did. I was immediately impressed by the system and by the outcome I was able to achieve on the first attempt.


Did you ever test any other porcelain systems for ceramic layering?


Yes. Before I becoming an international trainer for Kuraray Noritake Dental Inc., I had the opportunity to test many other porcelain systems for layering on zirconia. Based on this experience, I can say that CERABIEN™ ZR is unique and the best system I have ever used. The reason is that its translucency and chroma are extremely close to natural teeth. In addition, due to a controlled firing shrinkage, a One-Bake Technique may be employed even in long-span restorations.


Your hands-on demonstration at the Kuraray Noritake Dental booth during the IDS 2023 in Cologne focused on White and Pink Aesthetics achieved with CERABIEN™ ZR. Is there a specific concept you use?


Nowadays, everyone producing dental restorations – no matter whether based on natural teeth or on implants – is confronted with increasing aesthetic demands of patients and dental practitioners. The high demands are developed because life-like restorations and cosmetic dental treatment outcomes are presented everywhere in the web and on social media. The showcased quality of outcomes is simply expected, even if the financial budget is limited. To be able to fulfil these demands in the field of implant-based prosthodontics, I have developed an approach that allows me to achieve high aesthetics with little effort. My concept is based on using not too many ceramic powders. For extra chroma and special characterization, I rely on the power of the internal live stain technique, first introduced by Hitoshi Aoshima-sensei.


Please summarize the most important details of your presentation.


The first important detail is the design and characterization of the framework. Before sintering, I apply Esthetic Colorant for KATANA™ Zirconia. After the sintering process, shade base stain and internal stains are mixed and applied. In this way, I create a nice canvas that helps me to achieve a life-like result with only a few selected ceramic powders. In most cases, three to five powders are enough to produce a great result. Among the powders used most frequently are Opacious Body, Body, LTX, Mamelon and CCV. After the first bake and a little grinding, I make use of internal stains again. They offer support in the controlling of the chroma and the integration of special characteristics. When this step is completed, the final build-up is done with one or two ceramic powders, most of the times LT1 and Enamel or LT0. Pink aesthetics are usually created with Tissue 1, 3 and 5. For the free gingiva, LT Coral is my go-to solution. The major goal is always to obtain maximum quality in a minimum of time. To achieve this, a good knowledge of the materials and of course practicing – on both, porcelain build-up and morphology – are strictly required.


Fig. 1. Complex implant-based restoration: Framework design.


Fig. 2. Esthetic Colorant …


Fig. 3.  … applied prior to the final sintering procedure.


Fig. 4. Appearance after sintering.


Fig. 5. Final outcome.


Are there any concrete tips and tricks you would like to share?


For the characterization of the framework, I mix the internal stains with shade base stain powders; mostly with SS Fluoro. For the first bake, especially when the restoration is large and the amount of ceramic to be applied huge, I reduce the heating rate up to 38 degrees per minute. I also increase the drying process up to 17 or even 20 minutes depending to the restoration. Experience shows that these measures optimize the aesthetic outcomes.


You often mention that it is extraordinarily important to understand the morphology of natural teeth to be able to produce beautiful restorations. Why is this the case?


A successful prosthetic restoration needs to offer proper function and aesthetics. Function means a precise fit, perfect contact points and occlusion, a proper emergence profile and interproximal embrasures for self-cleaning etc. All this is described by the term morphology. Aesthetics, on the other hand, is guided by shape and colour. The effort required to establish a proper morphology is much higher (about 70 percent of the total work) than the effort involved in obtaining the right translucency, opalescence and chroma.


What instruments do you use to imitate the morphology of natural teeth and how do you do it?


I usually make use of the Optimum™ Spring Ceramic Brush Size 8 (MPF Brush Co.), stones and diamond burs for detailed grinding and carving after the final bake. I studied morphology at the Osaka Ceramic Training Centre in Japan with Shigeo Kataoka-sensei. According to him, a key factor in creating a perfect macro and micro morphology lies in the shadows. To be able to take into account the interference of light and shadow during grinding, a light source is placed on one side of the restoration.


How many bakes do you need to produce highly aesthetic restorations?


It depends on the case, although in many situations, I nowadays opt for some kind of micro-layering. Lately, I have used micro-layering a lot with internal stain directly on the zirconia framework. In other cases, I do a quick first bake, then the internal staining, a final bake and glazing. For small or single-unit restorations in the posterior region, a One-Bake Technique is often sufficient. Even a Zero-Bake approach using Esthetic Colorant on a monolithic zirconia restoration may be appropriate here, and it is very convenient. If there is a restoration with high aesthetic demands – these are typically single anterior restorations – the technique I select depends on the shade. In some cases, using only the internal stain technique is enough to reach a high aesthetic level, while in other cases, additional steps need to be taken. To my mind, there is no single technique that fits all cases. As mentioned before, I try to achieve high aesthetics in a minimum of time.


Fig. 6. Clinical example of achieving high aesthetics in a minimum of time: Before …


Fig. 7. … and after crown placement.


Fig. 8. High aesthetics …


Fig. 9. … achieved in a minimum of time.


Did your approach change due to the availability of high-translucency zirconia materials with colour (and flexural strength) gradation?


Well, yes! My overall approach changed more to micro-layering. Several years ago, we needed to consider how to mask the framework and how to achieve translucency in areas with limited space. The problem was solved for single-unit and small anterior bridge restorations with the availability of KATANA™ Zirconia UTML and STML. With the introduction of KATANA™ Zirconia YML, a high-translucency material became available for long-span or implant-based restorations as well. We have strength and translucency all in one disc. In most of my cases, the framework material replaces the dentin with regard to morphology and shade. Hence, I need to focus on adding the enamel by applying the transparent and translucent powders. The powders of the internal stain technique are used to characterize the framework, and with a micro-layer of porcelain, the goal of creating an aesthetic restoration in the minimum of time is achieved. This is exactly why I am sure that micro-layering is the future.


What drives you to share your knowledge with others?


My passion! I love my work! And I love to see technicians become better and better. Dental technology is an exciting journey, a journey that begins when the first impression arrives in the dental laboratory, and it ends when the final restoration is cemented into the patient’s mouth. And this journey is so exciting because we change lives. We change people’s personalities, we give them back their smile, we give them back their self-respect. Consider that every day, every single moment working on our bench trying to imitate nature… there is nothing more exciting than that!!!


My approach as an instructor is to lead dental technicians to master the art of observing natural teeth. This is the way every individual will understand morphology and shade. You need no special talent to be a very good dental technician. You need to observe! Your eyes see, your mind understands, and your hands will follow.

Interview with Alexander Aronin

Alexander (Alek) Aronin is a master dental technician who dedicated himself to the creation of high-end, handmade porcelain restorations. He runs a dental laboratory and morphology school in Spain, and travels the world as a lecturer and teacher.


The greatest source of inspiration in his professional life is the book Collection of Ceramic Works by Hitoshi Aoshima. Through reading it in 1996, he discovered superb outcomes of working with dental ceramics. Moreover, the book’s content made him realize that the creation of handmade porcelain work is a result of special education and manual skills. Those who want to become masters need a lot of commitment and a striving for continuous improvement, which Alek shows in his work and his classes. We talked to him about his philosophy and his enthusiasm for the creation of lifelike restorations. He shared with us his perspective on the future of dental technology and gave some practical tips on how to achieve a high level of professional satisfaction.


Photo courtesy of Dennis Debiase


Alek, many dental technicians decide to focus on CAD/CAM technology and automated processing of dental ceramics. Due to improvements on the material side, a handmade porcelain layer is no longer necessary in many clinical cases. In this context, the manual refinement process is reduced to a minimum. Why did you decide to take a completely different path and focus on fully manual dental craftsmanship?


The shift towards automated processing is not a matter of choice for dental technicians rather, it is a natural response to the evolution of technology. The high-end manual refinement process remains unchanged. The human element, from communication to hand crafting among skilled individuals and demanding clients, has been a constant so far throughout history. This traditional connection remains stable for centuries.


Digitalisation is not the revolution in the dental industry, and I do not see the benefit of it in our narrow specialization yet. In the area we are working, we do all steps of our case faster, incomparably more precise and more profitable. But we are keeping eye on machines and waiting for a suitable one.


Machines and automated processes widely serve mass production businesses focused on fast, affordable and uniform results in a highly competitive field. Our goal and workflow are different - we provide individual work and personal attention to each of our partners and patients.


So, we do not compete with the production labs and do not interrupt each other, we coexist in parallel worlds as always. A small number of dentists and their patients will always demand personal attention and valued restorations and service of the highest quality.


Many dental technicians admire your work. Yet, you continue to strive for improvement. Why is this the case?


On one side, we are limited by static ceramic material used to mimic dynamic natural teeth that keep changing for a lifetime. On the other side, we are limited by our manual skills. I am still far away from my teachers and Japanese colleagues. My target is to improve the fabrication process. My goal is to achieve the simplicity and imperfectness like Aoshima-sensei.


Alek lecturing at the IDS 2023 in Cologne.
Photo courtesy of Dennis Debiase


We are enjoying the outcome, but prefer to focusing on the improvement of the process, and move on to create a better one. This is what I am learning in Japan, and this is what I teach my students.


Talking about learning: What are the most important aspects a dental technician who wants to improve his skills should have in mind when looking for a good teacher?


Manual skills are very important, but not the only aspect that should be taken into account. Every individual should be motivated and guided and this is a teacher’s job.


I love the traditional Japanese way of teaching and learning: The teachers are passionate, leading the way by evoking emotions and manual skills to bring the best out of every single student. My personal advice for dental technicians who want to become masters in the creation of lifelike high-end dental restorations is to select their teachers carefully and go to a private school or courses whenever they have the chance.


What are the most important tools a dental technician needs to use when trying to create high-end lifelike restorations?


I suggest to focus on four aspects:

  1. Documentary dental photography - required for documentation and communication with the dental office and patients using constant (once set and never changed) parameters of the photo equipment.
  2. Focus to the biomimetic additive dentistry. This is a minimum machine invasive field. Dental technicians and dentists should be able to develop a deep knowledge about clinical and lab-side procedures to be able communicate with each other.
  3. Mastering morphology and function (shape carving), and anatomy (internal staining), which comes with value control and mimicking fine tooth details for best integration in the mouth.
  4. Written communication (stop phone calls) is very important, this is the way how to exchange the information between the patient, clinic and lab by strict protocols.


I teach these complex skills in my morphology school and in many of my trainings worldwide. Focusing on the four aspects, a dental technician has a great chance to become a good specialist in a relatively short period of time in a narrow field.


Is material selection important for achieving great results?


I’ve been using Noritake ceramic for most of my life, and the reason is simple: Noritake created their EX-3 porcelain over 40 years ago, and it was so well-made that it has not needed any changes since.


This is showing their consistently high quality and creates unbroken succession in the valuable tradition of passing on techniques and knowledge.


Today, among different generations of dental technicians, we can use and share the same methods, vocabulary and abbreviations, powders, and temperature charts developed by our skilled teachers 30 to 40 years ago. This unique feature sets Noritake and Creation porcelains apart from all other brands and systems in the world.


The other Noritake porcelain I use quite frequently is CERABIEN™ ZR, which is also well-tried and tested and has even some more advantages than EX3.


Is there any final advice you would like to give?


To become a good professional, I suggest to developing in four parallel directions:

  1. Practicing on phantoms - fabricating cases and ceramic samples. It helps to experiment and practice with varied materials and techniques.
  2. Implementing the achieved techniques in clinical cases.
  3. Working with case presentation PowerPoint or Keynote: documenting the working steps in pictures and videos from beginning to end.
  4. Mastering the communication using e-mails. Constantly calibrate and adjust the information exchange process between the clinic and lab. Acquire deeper knowledge about the work of each other.


Good luck!


Zero-bake technique: a simplified approach to zirconia aesthetics

Interview with DT Giuliano Moustakis


The percentage of restorations made of zirconia in a full-contour (monolithic) design is steadily increasing. As an enabler of this development, companies like Kuraray Noritake Dental Inc. have introduced high-performance zirconia materials with well-balanced optical and mechanical properties along with innovative finishing solutions. A popular example is KATANA™ Zirconia YML with its multi-layered flexural strength, translucency and colour structure. Combined with Esthetic Colorant for KATANA™ Zirconia and CERABIEN™ ZR FC Paste Stain, it is very well suited for a simplified approach to zirconia aesthetics: The Zero-Bake Technique. We had a conversation with DT Giuliano Moustakis about its benefits and areas of application.


Giuliano Moustakis, why is there a need for a new technique related to the finishing of monolithic zirconia restorations?


Like many manufacturers of restorative materials, I truly believe that the trend towards monolithic zirconia restorations is here to stay. The reason is that there is a huge number of patients who place great value on high-quality dental treatments, but have a limited budget. Many of them are interested in metal-free restorations that blend in nicely with the surrounding dentition and are able to withstand the test of time. Reasonable cost is more important to them than highest-end aesthetics. The new materials available on the market allow us to produce restorations with the desired properties, but we need to think about how to combine them in the most effective way to be able to respond to all those demands including the financial one.


Please describe the Zero-Bake Technique.


This technique is based on a monolithic restoration design carried out in the preferred design software. In this step, it is already important to focus on a natural surface morphology – about 80 percent of the morphology are realized in the digital manufacturing procedure. After milling, some morphological details (the last 20 percent) are added with hand instruments. My personal set of instruments consists of two kinds of diamond discs used for the interproximal area of bridges (with virtually no pressure), a round-end straight carbide bur (fine), Panther stones and a zirconia-blade carving instrument. However, any set of instruments that feels comfortable in the hands of its user may be selected for this task. Taking into account the volumetric shrinkage during sintering and the final polishing and glazing, the structure created is ideally slightly over-contoured and clearly defined. It is definitely worth investing time in this preparatory step, as it will make our lives much easier later in the process. After surface texturing, selected colours of Esthetic Colorant for KATANA™ Zirconia – specific dyeing liquids designed for the imitation of natural optical effects – are applied to the surface.


Fig. 1. Working out the details in the interproximal area with rotating disc-shaped instruments.


Fig. 2.  Integration of the micro morphology with a round-end straight carbide bur.


Do you have any recommendations on how to proceed with this set of liquids?


Just follow the colour reproduction of the adjacent natural teeth. With Esthetic Colorant, we want to create beautiful illusions, and nature is our best source of inspiration. To be able to copy what we see, however, we need to understand the properties and behaviour of the materials we use. Consequently, I strongly recommend to test them extensively. For example, you may train on remnants of zirconia blanks before moving on to real patient cases. The duration of the testing period should depend on the outcomes produced, which should be highly predictable at the moment the first patient case is started. I experimented and practiced with Esthetic Colorant for about six months, and did use it on the first real case after one moth of practicing.


Nowadays, there are five effect liquids which I use on a daily basis in almost every case:

  • A Plus: Used mainly in the vestibular cervical and palatal cervical and mamelon areas to increase the chroma of A dentin shades
  • Blue: Used to reproduced the blueish enamel colour found in the area of the incisal edge and occlusal cusps
  • Gray: Used (often in addition to Blue) to reproduce the grayish enamel colour found on the incisal edge and cusps
  • Orange: Used to give an orange appearance to the cervical area and to intensify the contours of the mamelons
  • Brown: Used to reproduce the dentin colour in the cervical area and to darken the colour in the main groove


In addition, there is a liquid with a special function I value highly: Opaque. This modifier liquid is applied on the intaglio of a restoration to mask discoloured or metal abutments. In order to intensify the effects of this and other liquids, they may be applied to a single spot up to three times.


Fig. 3.  Basic chromatic map for Individualization in the anterior region.


Fig. 4.  Restoration after sintering.


Fig. 5.  Frontal view of a complex restoration including gum parts with information on where to apply which type of Esthetic Colorant.


Fig. 6.  Basal view of the restoration with Opaque applied to mask the screws, and Violet and Pink to add colour to the gums.


Fig. 7.  Occlusal view with colour recommendations.


How do you apply Esthetic Colorant and what are the steps that follow once you have applied them?


For application, I use the dedicated Liquid Brush Pen for Esthetic Colorant. They allow for a controlled application of the desired amount of liquid and thus support predictable outcomes. Once all Esthetic Colorant liquids are applied, it is essential to dry the zirconia at a temperature between 80 and 200° C for a minimum of 30 minutes. During application of the liquids and drying, any contact with metal must be prevented. Therefore, the brushes used during application must be metal-free, and the same holds true for the tray. By adhering to this rule, discolouration is effectively prevented. The subsequently selected sintering protocols are not affected by the effect liquids – and the same for all types of zirconia from the KATANA™ Zirconia Multi-Layered series. Once sintered and cooled down, the surface of the restorations is finished with a set of polishing instruments. My tip in this context is to be careful not to destroy the micro morphology created in the pre-sintering step. To add the final gloss and natural fluorescence, the surface is treated by sandblasting for the application of CERABIEN™ ZR FC Paste Stain, fixed in a single glaze firing procedure.


Does the technique also work without glazing?


Yes, it is definitely possible to do without this step. In this case, however, the restoration will not offer a fluorescent effect. Whenever a restoration is finished without glazing, the surface must be perfectly polished. If completely smooth, the hardness of the material will not cause any harm to the opposing dentition.


What are the main indications for the Zero Bake Technique?


Personally, I use it most often in the context of complex reconstructions and in the posterior region, especially when the available space is limited. It allows for minimal wall thicknesses and the surface is – when well-polished – more antagonist-friendly than a lithium disilicate surface. In other cases, and depending on the financial budget, digitally produced dentin-core crowns are a great option. The dentin core is milled from KATANA™ Zirconia YML, the enamel added using CERABIEN™ ZR Luster Porcelains. Esthetic Colorant, internal stans and CERABIEN™ ZR FC Paste Stain may be added for individual effects. Compared to traditional full porcelain layering, this concept is quicker, involves a lower shrinkage, offers a high stability due to the specific framework design and requires a thinner wall thickness (e.g. 0.6 mm strength of the dentin core plus 0.6 mm porcelain).


Fig. 8.  Example of a dentin-core restoration. The surface morphology is refined with a Panther stone.


Why is it important to develop new design and finishing concepts nowadays?


To my mind, a lack of time is the greatest issue of modern dental technology. Due to a lack of skilled personnel and an expected decrease in the number of dental laboratories in many countries around the globe, we have to keep looking for concepts that help us reduce the time pressure and make our lives easier. While simplifying procedures, however, we need to provide for the same or even a higher quality of the outcomes. This is exactly what I wanted to achieve when starting to develop the Zero-Bake Technique. My personal gain is more free time.


Why do you share your ideas with others by working as an instructor and lecturer?


I simply enjoy interacting with colleagues, equipping them with knowledge and letting them benefit from good ideas.


Dentist:

DT GIULIANO MOUSTAKIS


Giuliano Moustakis has more than 30 years of expertise as dental technician. He was born in Greece but currently resides in Germany, where he has a lab in Falkensee. Giuliano studied at the School of Dental Technology (SBIE) in Athens, Greece. Over the years he completed several other studies in Germany and Japan, including: the maxillofacial prosthetic technician (IASPE), advanced education in functional diagnosis of the temporomandibular joint, Curriculum implant prosthetics for dental technicians (DGZI). He has been a global instructor at Kuraray Noritake Dental Inc. since 2019. Last but not least it is important to note that he is also a gifted and enthusiastic photographer.


PANAVIA™: 40 years of success in adhesive luting

DID YOU EVER WONDER WHY THE PRODUCTS OF THE PANAVIA™ BRAND OFFER SUCH OUTSTANDING PERFORMANCE?


You probably know that they all contain the original MDP monomer developed in the early 1980s. It has attracted much attention because it is such an excellent adhesive monomer. This phosphate ester monomer forms a very strong bond to tooth structure, zirconia, and dental metals. It has been used in every PANAVIA™ product. In reality, however, other catalytic technologies and ingredients alongside MDP are important technological contributors supporting the performance of our cementation solutions.


INGREDIENTS AFFECTING THE POLYMERISATION REACTION


One of these decisive additional technologies and ingredients is the polymerization catalyst triggering the curing process. Different from the MDP monomer used in every PANAVIA™ product, the polymerization catalyst has been continuously improved since the introduction of PANAVIA™ EX in 1983. New versions have been developed for PANAVIA™ 21, PANAVIA™ Fluoro Cement and PANAVIA™ V5, for example. Another important component also affecting the curing process is the Touch Cure Technology used in two of the three major products of the current PANAVIA™ Portfolio: PANAVIA™ V5 and PANAVIA™ Veneer LC. This technology was first used in PANAVIA™ 21, which was launched in 1993. The contact of the chemical polymerization activator contained in the self-etching primer with the resin cement paste accelerates the polymerization of the cement from the adhesive interface, thus providing better adhesion of the resin cement. In developing PANAVIA™ V5, we reviewed the chemical composition of the existing PANAVIA™ products and updated it substantially. The Touch Cure technology has also been adopted for use in the case of PANAVIA™ V5 Tooth Primer and the concomitantly used PANAVIA™ V5 Paste. When cementing veneers with PANAVIA™ Veneer LC, we also use PANAVIA™ V5 Tooth Primer for conditioning teeth. This also involves the application of Touch Cure technology for achieving an adhesive connection with the tooth without compromising the working time of the cement paste.


ADDITIONAL ADHESIVE MONOMERS


Even in the field of adhesive monomers, we did not stand still: We developed the LCSi monomer, a long carbon chain silane-coupling agent which made possible to integrate the function of a ceramic primer in our universal self-adhesive resin cement PANAVIA™ SA Cement Universal. With its high level of hydrophobicity, this monomer provides stable, long-term bond strength. Generally speaking, it may be said that the reason bond durability may drop is a hydrolytic reaction damaging the chemical bond between the silica contained in the glass ceramics and the silane-coupling agent.


THREE PRODUCTS COVERING VIRTUALLY EVERY NEED


By combining these technologies and ingredients smartly, we have succeeded in developing a resin cement portfolio that covers virtually every need. With PANAVIA™ V5, PANAVIA™ SA Cement Universal and PANAVIA™ Veneer LC, it is possible to treat a wide variety of cases. The products allow for the luting of various types of restorations, prosthetic appliances and for the placement of posts and produce great outcomes if used properly according to the instructions for use.


PANAVIA™ V5 is the resin cement that has the widest range of uses among the three cement systems just mentioned. It covers almost all the intended uses of the other two cements. Therefore, it is possible for the dental practitioner to choose the right cement system for treatment, according to the cases arriving at the clinic and patient needs, from among these three major resin cement products: PANAVIA™ V5, a resin cement with a wide range of applications; PANAVIA™ SA Cement Universal, a simple and easy-handling self-adhesive resin cement; and PANAVIA™ Veneer LC when there is a need to bond laminate veneers.

EXPLORING NEW OPPORTUNITIES


The good thing about developing technologies in a company like Kuraray Noritake Dental is that their application is not limited to a certain product or product group. The R&D Department always carries out research on how to leverage the benefits of the technologies in other applications. Take, for example, KATANA™ Cleaner, which was released in 2019. This cleaning agent can be used to remove saliva, blood, temporary cement, or other contaminants that can adhere to the surfaces of teeth or prosthetic devices during trial fitting and temporary cementation of a prosthetic device. This unique product has been developed by taking advantage of the surfactant function of the MDP monomer.


CONCLUSION


Hence, it is mainly our long-standing knowledge and experience in the development of dental resin cements and adhesive solutions that provides for the excellence of the current PANAVIA™ Portfolio. We know how to improve on existing technologies, to never stop developing new ones and to continuously look for the best way to combine proven and new components to obtain the best possible outcomes. In the steps of the product development procedure, clinical tests are conducted and feedback from dental practitioners is gathered in order to take into account the extreme conditions found in the oral environment. In the past 40 years, this strategy has proven successful, and we are sure it will help us to develop many other innovative products that offer ideal support in striving to improve the oral health of patients.


Esthetic Colorant – first impressions by Francesco Napolitano

As an instructor and consultant for Kuraray Noritake Italia, I received my first set of Esthetic Colorant dyeing liquids for testing purposes approximately one year ago. When the package arrived in the dental laboratory, it made me curious immediately and I simply could not wait to start using the colourful liquids on KATANA™ Zirconia.


I started with some simple test work, applied the basic liquids like A Plus to pre-sintered zirconia, played a little with Gray and Violet and put the structures into the sintering furnace to reveal the obtained effects. The outcome was so convincing that I was sure Esthetic Colorant would be a great addition to the range of materials used in my laboratory for the production of zirconia restorations. The liquids would support me ideally by giving more character to my restorations from the inside.


To my mind, the use of Esthetic Colorant is convenient for two reasons:


  1. KATANA™ Zirconia is a very compact material, even in its green (pre-sintered) state. This property is not only responsible for a great performance in terms of milling accuracy, stability and surface quality, but also provides for a controlled penetration of the effect liquids into the structure. They neither diffuse too deep into the zirconia nor do they spread too much on the surface.

  2. Esthetic Colorants are water-based infiltrating liquids with a very light colour effect. Hence, they do not create such marked characterization effects like liquids from other companies. This is a huge advantage in my eyes, because I can characterize my zirconia internally without exaggerating. This allows me to copy lightly to moderately intensive effects, while giving depth to some areas of the tooth. Great examples are the occlusal table of a posterior restoration or incisal effects in the anterior region. In addition, I am able to shield the grayish effect resulting from a metal post or discoloured abutment tooth with the Esthetic Colorant Opaque applied to the inner surface of a restoration.


In short: I think Esthetic Colorants are fantastic. Just try them out yourself, because seeing is believing!


DT FRANCESCO NAPOLITANO

Nola (NA) ITALY


Time to celebrate PANAVIA’s 40th anniversary

Interview with Mitsunobu Kawashima
Manager, Technology Division of Kuraray Noritake Dental Inc.


In 1983 – exactly 40 years ago – PANAVIA™ EX was introduced in Japan as the first product of the PANAVIA™ family and the first product containing the original MDP monomer. Since then, the PANAVIA™ family of resin cements has been continuously expanded by developing new resin-cement materials that are precisely adjusted to the contemporary demands of dental practitioners. The current line-up of easy-to-use, high-performance adhesive luting materials is globally available and used by dental practitioners with high quality standards.


We had a conversation with Mr. Mitsunobu Kawashima about PANAVIA™ EX as a ground-breaking innovation in the field of dental resin cements and subsequent steps toward the current well-balanced resin cement portfolio. He is currently responsible for the development of chair-side materials in the Technology Division of Kuraray Noritake Dental Inc. (Kuraray Noritake Dental) and has been part of the team developing the many products of the PANAVIA™ family for more than 30 years.


The resin cements developed by the company before the introduction of PANAVIA™ EX contained the adhesive monomer Phenyl-P. Why did you decide not to use Phenyl-P in the new formulation?


At the time we decided to develop PANAVIA™ EX, we were engaged in the development of new adhesive monomers to replace Phenyl-P. The main aim of this project was an improvement of our products’ bond strength to metal alloys and dentin. Among the new adhesive monomers being developed, we decided to use the MDP monomer, because it features excellent bonding to tooth structure and metal alloys used in dentistry, as well as superb resistance to water. Incidentally, our first products to contain the original MDP monomer were the resin cement PANAVIA™ EX and the bonding agent CLEARFIL™ NEW BOND.


Where did the name PANAVIA™ come from?


The name “PANAVIA™” is a compound word consisting of “PAN” and “VIA”. The former is of Greek origin, and the latter is of Latin origin. “PAN” means “everything” and “VIA” means “way” or “method”. Consequently, the name “PANAVIA” describes a “method for bonding everything”; it represents our desire to have products launched under the umbrella of the PANAVIA™ brand recognized as dental materials that can bond to all types of restoration and tooth structure.


Would you please tell us the story behind the development of PANAVIA™ EX?


Back in the early 1980s, it was indispensable for us to develop new adhesive monomers as a part of our project to develop a new resin cement with unprecedented adhesive properties. In this context, we conducted a comprehensive literature search for compounds thought to be involved in adhesion. At the same time, we carried out a variety of R&D activities, including basic research to quantitatively clarify the relationship between the molecular structures of monomers and their adhesive qualities, synthesis trials of various monomers and bond strength tests. Consequently, we succeeded in developing the MDP monomer that had the physical properties we were working to obtain. Following the development of that MDP adhesive monomer, we were finally able to create PANAVIA™ EX in our laboratory. In early 1982, we completed the first prototype of PANAVIA™ EX for external evaluation and asked a dental college in Japan to evaluate it. He found that the prototype cement might cure too quickly in clinical use. This was due to the fact that we had not taken into account the difference between room temperature and intraoral temperature, which has a huge impact on the curing time. This error led us to recognize how important clinical evaluations are during the development of dental materials. To this day, we continue to place great importance on the opinions of clinicians whenever a new material is being developed.


The name “PANAVIA™” is a compound word consisting of “PAN” and “VIA”. The former is of Greek origin, and the latter is of Latin origin. “PAN” means “everything” and “VIA” means “way” or “method”.


What were the key technological features of this new PANAVIA™ EX cementation system?


The system had five key features: Appropriate film thickness, appropriate flow properties of the paste, radiopacity, improved bond strength and improved surface-cure characteristics. At the time that PANAVIA™ EX was developed, a film thickness of 30 μm or less was desired for luting cements. The largest components we wanted to use in the formulation – the silica filler particles present in our composite resin – had a maximum particle diameter of 50 μm. We were able to achieve a film thickness of 30 μm or less by significantly extending the silica grinding time, which made the filler particles much finer. An appropriate paste consistency – a low level of viscosity and good flowability – was achieved by using low-viscosity monomers for PANAVIA™ EX. In order to make the cement radiopaque, we dispersed radiopaque filler within the powder component. In fact, we were convinced that it was essential to be able to check for the presence of excess cement under the gingival margins after a restoration was placed. The increase in bond strength was achieved by blending the MDP monomer into the liquid component.


What about the surface-cure characteristics of the cement?


Every dental practitioner knows that the surface of resin cements must be protected from oxygen in the air in order to cure properly. For this purpose, we developed OXYGUARD, a water-soluble gel material. It is applied to the restoration margins to cover the unpolymerized resin cement surface and protect it from exposure to oxygen. In this way, the formation of an oxygen inhibition layer – a layer of uncured resin on the surface that compromises the marginal integrity of the restoration – is prevented and an intact, fully polymerized cement surface can develop. In this way, the use of OXYGUARD has contributed greatly to improving the cure characteristics of cements.


What do today’s PANAVIA™ products and PANAVIA™ EX have in common?


The PANAVIA™ family of products, including PANAVIA™ EX, share the concept of “being a resin cement product that opens new dimensions in dentistry”. PANAVIA™ EX was our first resin cement, and it was conceived as a cement for a new era. It can bond to tooth structure and dental metals very well, thanks to the use of the MDP monomer. This important adhesive monomer is still used today in many of our products. Ever since the launch of PANAVIA™ EX, Kuraray Noritake Dental has continued to take on new challenges and has developed many new products in the growing PANAVIA™ family. These include PANAVIA™ 21, a cement in paste form that has a self-etching primer as an accessory; PANAVIA™ Fluoro Cement, a dual-cure cement paste that releases fluoride; and PANAVIA™ F2.0, which can be used with an LED curing unit. The current portfolio consists of PANAVIA™ V5, which features the substantially improved bonding performance that was achieved after a major review of the basic composition of the series, PANAVIA™ SA Cement Universal, which works as a standalone product without separate primers, and PANAVIA™ Veneer LC, PANAVIA™ family’s latest product. The latter is a light-curing resin cement with the specialized purpose of bonding laminate veneers.


In retrospect, what did the introduction of PANAVIA™ EX mean to Kuraray Noritake Dental?


In the development of new resin cements, it is important to quickly respond to the rapidly changing trends in the market. Whenever new prosthodontic treatment concepts appear – like adhesive bridges as a minimally invasive treatment option replacing a single tooth – or new restorative materials are introduced, such as different types of ceramics – we need to check if our resin cement systems are compatible with the tasks that come with these changes, as well as possibly developing new ones. Following the launch of PANAVIA™ EX, we received a wide range of feedback from experts working at dental clinics and laboratories. We leveraged this feedback in subsequent development projects, always striving to stick close to the clinical setting. After Kuraray Medical Inc. merged with Noritake Dental Supply Co., Limited, this ethos was embedded in the work ethic of all employees of Kuraray Noritake Dental.


Among the new adhesive monomers being developed, we decided to use the MDP monomer, because it features excellent bonding to tooth structure and metal alloys used in dentistry, as well as superb resistance to water.


Can you give us a brief history of the PANAVIA™ EX journey to the currently available PANAVIA™ family portfolio?


Since the launch of PANAVIA™ EX 40 years ago, six different PANAVIA™ products have been released. Each of them has received high acclaim for their unique features, both in the Japanese resin cement market and abroad. For 40 years, we have been improving PANAVIA™ in response to the demands of the times. We developed a product with increased adhesion when non-retentive preparation designs (adhesive bridges) and smaller bonding surfaces (due to less invasive preparations) became popular. And for users concerned about secondary caries, we developed a material with fluoride-releasing properties. At the same time, we focused strongly on making dental cementation easier by finding ways to make our resin cements bond well to various types of crown-restoration materials, including precious metals and ceramics. During these drives towards improvement, “achieving reliable general luting” has always been at the forefront of our goals. We believe that the successful evolution of the PANAVIA™ brand owes a great deal to our incessant efforts to obtain a high level of bond strength to dentin after chemical polymerisation”.


How did the R&D department evolve over the years?


Initially, our efforts in the development of dental materials had focused on bonding agents and restorative composite resins. PANAVIA™ EX was just one of our new development projects and only a few staff members were assigned to that product. After PANAVIA™ EX was launched in 1983 and it was accepted worldwide, our product line-up of resin cements was expanded considerably. Consequently, we have increased the number of development staff assigned to resin cements and set up a special development team responsible for the self-adhesive resin cement product line that includes PANAVIA™ SA Cement Universal. As a result, the size of the team assigned to resin cements has expanded substantially.


How did production change?


When PANAVIA™ EX was launched in 1983, the product was manufactured exclusively for the Japanese market in a relatively small facility. Today, in order to produce all products of the PANAVIA™ family for the global market, we have automated our production facilities and increased the production equipment and systems dedicated to producing the resin cement paste. To support our product quality, we have also set up a quality control system that assures we turn out safe and high-quality products, drawing on over 40 years of technical knowhow and experience in the production of resin cements.


For 40 years, we have been improving PANAVIA™ in response to the demands of the times.


When did external researchers start showing interest in PANAVIA™?


The development of PANAVIA™ EX was carried out with the active participation of researchers at a dental college in Japan, involving such activities as performing basic adhesion tests and experimenting with clinical applications using adhesive bridges. At that time, resin cements that provided a strong bond to tooth structure or metal alloys were not widely used. I believe that overseas researchers were interested in the development of PANAVIA™ EX at a relatively early stage, for this reason.


What current concept do you have in mind as you continue developing your adhesive cements?


We have two basic central concepts: “Achieving greater bond strength” and “Delivering easier handling characteristics”. I think that the shades of resin cements are also devised in each product in order to get the most of the characteristics of aesthetic restorative materials. At our company, we have embodied “achieving greater bond strength” in PANAVIA™ V5, and “delivering easier handling characteristics” in PANAVIA™ SA Cement Universal. We will continue to explore the development and introduction of various new technological applications, to bring even higher performance products to market.


What do you think is the strength of Kuraray Noritake Dental’s R&D team?


We conduct R&D activities continuously, focusing on the development of luting materials. In our product development department, the same person is often responsible for one product category over long period of time. For example, I have been engaged in the development of PANAVIA™ products for much of my time with the company. The result is that each person in the development department can be said to be an expert in a certain category of products. They leverage the technical knowledge acquired in the past for the development of new products, resulting in entirely new discoveries.


Do you have any ideas about what the future of PANAVIA™ will be?


We will continue to focus on the development of even simpler, easier-to-use resin cements suitable for a wide range of applications – products based on the concept of universality. This should allow users to focus more on the actual treatment than ever before, while of course delivering a strong and durable bond between the tooth structure and the restoration.


MITSUNOBU KAWASHIMA


TEETHMATE™ DESENSITIZER

Eight-time DENTAL ADVISOR Top Product selection provides effective relief for a painful condition


Dentine hypersensitivity is a painful condition that affects millions of people worldwide. It generally occurs when tubules are exposed for any number of reasons, including gingival recession, dental erosion or excessive tooth brushing. It can also be a side effect of professional tooth cleaning, scaling and root planning, tooth whitening, or restorative procedures.


TEETHMATE™ DESENSITIZER, which was honored by DENTAL ADVISOR every year from 2015 to 2022 as a Top Product selection, allows an effective non-invasive approach to the treatment of hypersensitivity when used as directed by dental professionals.


TEETHMATE™ DESENSITIZER is designed to crystalize hydroxyapatite (HAp), a mineral that is naturally found in enamel and dentin, and is the human body’s strongest material. When applied to exposed, mechanically treated, or freshly prepared dentin, the calcium phosphate based mixture blocks the exposed tubules and provides immediate pain relief. During setting, HAp is formed, providing for long-term prevention of hypersensitivity. Further, when used in the context of restorative treatment, TEETHMATE™ DESENSITIZER does not have a negative effect on the bond strength of subsequently utilized dental adhesives or cements.


DENTAL ADVISOR clinical study found TEETHMATE™ DESENSITIZER effective in providing hypersensitivity relief immediately following and for up to six months after application. The study evaluated 27 patients diagnosed with gingival recession-related hypersensitivity, which was diagnosed using thermal testing with cold air. For the initial assessment, patients were asked to evaluate their level and frequency of hypersensitivity per tooth on a five-point scale. They were questioned about their level of sensitivity immediately after TEETHMATE™ DESENSITIZER was applied, according to the instructions for use, and again six months later. At baseline, 91 percent of the patients stated that they had no or only mild, sporadic sensitivity, which was still the case for 85 percent after six months.


This natural, tissue-friendly product is highly biocompatible and is free of gum irritants such as glutaraldehyde or methacrylates. It is indicated for use by dental professionals for all  sensitivity challenges in everyday practice, including prevention of cervical hypersensitivity before/after bleaching, scaling or root planning, and underneath restorations.


The Top Product or Preferred Product Awards conferred by US-based DENTAL ADVISOR were introduced to support potential users in identifying high-quality dental materials and determining which among them are best suited to fulfill their individual requirements. Awards are based on results of its practice-based clinical evaluations and product performance tests, which are conducted shortly after product launch.


Among products honored this year are five from Kuraray Noritake Dental Inc.: CLEARFIL™ SE Protect, CLEARFIL MAJESTY™ ES Flow (Low), and PANAVIA™ SA Cement Universal were selected as Top Products; and CLEARFIL™ Universal Bond Quick and CLEARFIL™ CERAMIC PRIMER PLUS were chosen as Preferred Products.


Innovative resin cements forming the basis of minimally invasive prosthodontics

Article by Dr. Adham Elsayed


High-performance adhesive resin cements are often the enablers of minimally invasive prosthodontic treatments. When the main aim is to save as much healthy tooth structure as possible, preparation designs that offer sufficient macro-mechanical retention for conventional cements are usually abandoned. The designs chosen instead need to rely on a strong and durable chemical adhesion established between the tooth structure and the restorative material – a task successfully accomplished by modern adhesive resin cement systems.


An excellent example of a minimally invasive, non-retentive preparation and restoration design is the single-retainer resin-bonded fixed dental prosthesis (RBFDPs), nowadays usually made of 3Y-TZP zirconia. With its single cantilever bonded to the oral and proximal enamel surface of an adjacent tooth, it requires minimal to no healthy tooth structure removal. The RBFDP is often used to replace a congenitally missing tooth – in many cases a maxillary lateral incisor – in young patients with incomplete dentoalveolar development and narrow edentulous spaces unsuitable for conventional implant placement1 (Fig. 1 and 2). Additional factors hindering implant therapy – like an insufficient bone volume or angulated roots – are also not an issue for this type of restoration. And compared to orthodontic gap closure, the treatment approach with a RBFDP is less risky, as it does not affect the vertical jaw relationship, prevent canine guidance or compromise the aesthetic appearance2. Finally, it is much less invasive than conventional FDPs, which is usually not a treatment option for young patients in the anterior region. The level of patient satisfaction and the success rates of this treatment approach are impressive3-7.


Fig. 1-2. Replacement of both congenitally missing maxillary lateral incisors with single-retainer zirconia RBFDPs after soft tissue augmentation and gingival margin correction.


Despite the numerous advantages and excellent clinical performance – single-retainer RBFDP made of zirconia showed a survival of 98.2 percent and a success rate of 92.0 percent after ten years4 – many dental practitioners still opt for alternative treatment options. The reason may be a lack of trust in the bond strength and durability to zirconia. However, this bond can be very strong and durable – provided that a few rules are respected.


HOW TO ESTABLISH A STRONG BOND TO THE TOOTH STRUCTURE


In order to decide whether a missing tooth may be successfully replaced by a single-retainer RBFDP made of zirconia, the abutment tooth should be examined carefully. It needs to be vital and largely free of caries or direct restorations, while the oral enamel surface must be large enough for resin bonding1. In addition, the space required for the placement of a retainer wing (thickness: about 0.7 mm) needs to be available, as a non-contact design is important for the success of the restoration. Among the preparation designs described in the literature is a lingual veneer and small proximal box preparation with retentive elements located in the enamel only1, or no preparation at all7. For restoration placement, the abutment tooth is treated as usual: after cleaning e.g., with fluoride-free prophylaxis paste, phosphoric acid etchant is applied to the bonding surface, which is then thoroughly rinsed and dried.


HOW TO ESTABLISH A STRONG BOND TO THE RESTORATION


The recommended pre-treatment for the bonding surface of the retainer wing made of zirconia is small-particle (50 μm) aluminium oxide air-abrasion at a low pressure (approx. 1 bar)8,9, followed by ultrasonic cleaning. Figures 3 (A-E) shows the sequence of surface treatment of zirconia restorations. As a visual aid for a controlled air-abrasion treatment, the marking of the surface with a pen has proven its worth. The whole air-abrasion procedure should be carried out after try-in, during which the tooth surface and the restoration usually becomes contaminated through contact with saliva and sometimes blood. Proteins present in saliva and blood that contaminate the bonding surface are safely removed in this way, while the required surface modification necessary to establish a strong and durable bond to the selected resin cement system is achieved10.


FIGURE 3: SEQUENCE OF SURFACE TREATMENT OF ZIRCONIA RESTORATION.


Fig. 3A. Cleaning of the restoration prior to luting with water steam cleaner.


Fig. 3B. Marking of the bonding surface as an visual aid for the air-abrasion.


Fig. 3C. Air-abrasion with 50-μm Al2O3 particles with 1 bar pressure.


Fig. 3D. Application of a primer containing 10-MDP.


Fig. 3E. Application of the composite resin cement.


WHICH RESIN CEMENT SYSTEM TO CHOOSE


Subsequently, the components of the resin cement system are applied. Regarding the selection of the system, it is generally recommended to use a restoration primer or resin cement that contains 10-Methacryloyloxydecyl dihydrogen phosphate (10-MDP)11. In this way, a high-quality chemical bond is established. Among the resin cement systems used in the available long-term clinical studies is PANAVIA™ 21 (Kuraray Noritake Dental Inc.)4-6. Launched in 1993, this anaerobic-curing adhesive resin cement contains several important technologies like the MDP monomer and the Touch Cure Technology found in PANAVIA™ V5, the state-of-the art dual-cure multi-bottle adhesive resin cement system of the company. In order to further improve the bonding performance of this present product, however, the team of developers reviewed the basic composition, updated existing technologies and combined them with completely new ingredients.


Even with PANAVIA™ 21 introduced 30 years ago, high success rates were obtained4-6. The few observed failures were mainly due to chipping of the veneering ceramic or debonding. Sometimes caused by traumatic incidents, the debondings resulted in no further damage and the restorations were simply rebonded using the same cementation system and procedure.


One might expect that with its improved formulation, PANAVIA™ V5 will offer an even stronger and more durable bond than predecessor products, so that it is even better suited for such demanding applications as the resin-bonded fixed dental prosthesis. In a pilot study, this assumption was confirmed7. Without any preparation of the abutment tooth, but a defined size of the bonding surface of at least 35 mm2, the team of researchers placed 24 monolithic zirconia resin-bonded bridges (made of KATANA™ Zirconia HT) to replace congenitally missing lateral incisors. The palatal sides of the central incisors were cleaned with pumice paste and treated with phosphoric acid, while the bonding surfaces of the restorations were sandblasted with aluminum oxide particles (50 μm, 2.5 bar pressure). Afterwards, twelve restorations were luted with PANAVIA™ V5, the other twelve with PANAVIA™ F2.0 (another earlier-version resin cement from Kuraray Noritake Dental Inc.). After an observation period of 32 to 50.47 months, the success and survival rates in the PANAVIA™ V5 group were 100 percent. In the other group, a connector fracture, a chipping and two debondings occurred. Based on these results, the authors of the publication concluded that “it has been seen that the new generation cement (PANAVIA™ V5) is more successful”7.


CONCLUSION


For many years, minimally invasive indirect restorative approaches like the replacement of missing incisors with resin-bonded fixed dental prostheses have been performed successfully by some dental practitioners. Many others, however, still seem to be hesitant whether these approaches will lead to the desired results in their hands. The available clinical study results, however, have confirmed that the procedure is highly advantageous and successful, while ongoing development efforts in the field of adhesive resin cements have led to products further decreasing the failure rates related to debonding. Even if a debonding occurs, however, no damage is usually done, so that the restoration can be rebonded again with little effort. These findings – together with the well-known benefits of minimally invasive dentistry in general – should encourage dental practitioners to start exploring the full potential of adhesive dentistry for themselves. In this context, PANAVIA™ V5 is definitely an excellent choice.


References


1. Sasse M, Kern M. All-ceramic resin-bonded fixed dental prostheses: treatment planning, clinical procedures, and outcome. Quintessence Int. 2014 Apr;45(4):291-7. doi: 10.3290/j.qi.a31328. PMID: 24570997.
2. Tetsch J, Spilker L, Mohrhardt S, Terheyden H (2020) Implant Therapy for Solitary and Multiple Dental Ageneses. Int J Dent Oral Health 6(6): dx.doi. org/10.16966/2378-7090.332.
3. Wei YR, Wang XD, Zhang Q, Li XX, Blatz MB, Jian YT, Zhao K. Clinical performance of anterior resin-bonded fixed dental prostheses with different framework designs: A systematic review and meta-analysis. J Dent. 2016 Apr;47:1-7. doi: 10.1016/j.jdent.2016.02.003. Epub 2016 Feb 11. PMID: 26875611.
4. Kern M, Passia N, Sasse M, Yazigi C. Ten-year outcome of zirconia ceramic cantilever resin-bonded fixed dental prostheses and the influence of the reasons for missing incisors. J Dent. 2017 Oct;65:51-55. doi: 10.1016/j.jdent.2017.07.003. Epub 2017 Jul 5. PMID: 28688950.
5. Kern M. Fifteen-year survival of anterior all-ceramic cantilever resin-bonded fixed dental prostheses. J Dent. 2017 Jan;56:133-135.
6. Sasse M, Kern M. Survival of anterior cantilevered all-ceramic resin-bonded fixed dental prostheses made from zirconia ceramic. J Dent. 2014 Jun;42(6):660-3. doi: 10.1016/j.jdent.2014.02.021. Epub 2014 Mar 5. PMID: 24613605.
7. Bilir H, Yuzbasioglu E, Sayar G, Kilinc DD, Bag HGG, Özcan M. CAD/CAM single-retainer monolithic zirconia ceramic resin-bonded fixed partial dentures bonded with two different resin cements: Up to 40 months clinical results of a randomized-controlled pilot study. J Esthet Restor Dent. 2022 Oct;34(7):1122-1131. doi: 10.1111/jerd.12945. Epub 2022 Aug 3. PMID: 35920051.
8. Kern M. Bonding to oxide ceramics—laboratory testing versus clinical outcome. Dent Mater. 2015 Jan;31(1):8-14. doi: 10.1016/j.dental.2014.06.007. Epub 2014 Jul 21. PMID: 25059831.
9. Kern M, Beuer F, Frankenberger R, Kohal RJ, Kunzelmann KH, Mehl A, Pospiech P, Reis B. All-ceramics at a glance. An introduction to the indications, material selection, preparation and insertion techniques for all-ceramic restorations. Arbeitsgemeinschaft für Keramik in der Zahnheilkunde. 3rd English edition, January 2017.
10. Comino-Garayoa R, Peláez J, Tobar C, Rodríguez V, Suárez MJ. Adhesion to Zirconia: A Systematic Review of Surface Pretreatments and Resin Cements. Materials (Basel). 2021 May 22;14(11):2751.
11. Al-Bermani ASA, Quigley NP, Ha WN. Do zirconia single-retainer resin-bonded fixed dental prostheses present a viable treatment option for the replacement of missing anterior teeth? A systematic review and meta-analysis. J Prosthet Dent. 2021 Dec 7:S0022-3913(21)00588-6. doi: 10.1016/j.prosdent.2021.10.015. Epub ahead of print. PMID: 34893319.


Flowable injection technique: simple, predictable and repeatable

Interview with Dr. Michał Jaczewski


The flowable injection technique is becoming a popular technique used to aesthetically restore multiple teeth with flowable composite. A renowned instructor who teaches dental practitioners the skills needed to use the technique successfully is Michał Jaczewski. He graduated from Wroclaw Medical University (Poland) in 2006 and runs his own private practice in the city of Legnica since 2011. He is the founder of the Biofunctional School of Occlusion, which conducts trainings in the field of comprehensive dental treatments, and is passionate about aesthetic digital dentistry. At the International Dental Show 2023 in Cologne, he showed us when, why and how he uses flowable injection in his dental office.


Could you please describe the technique in a few words?


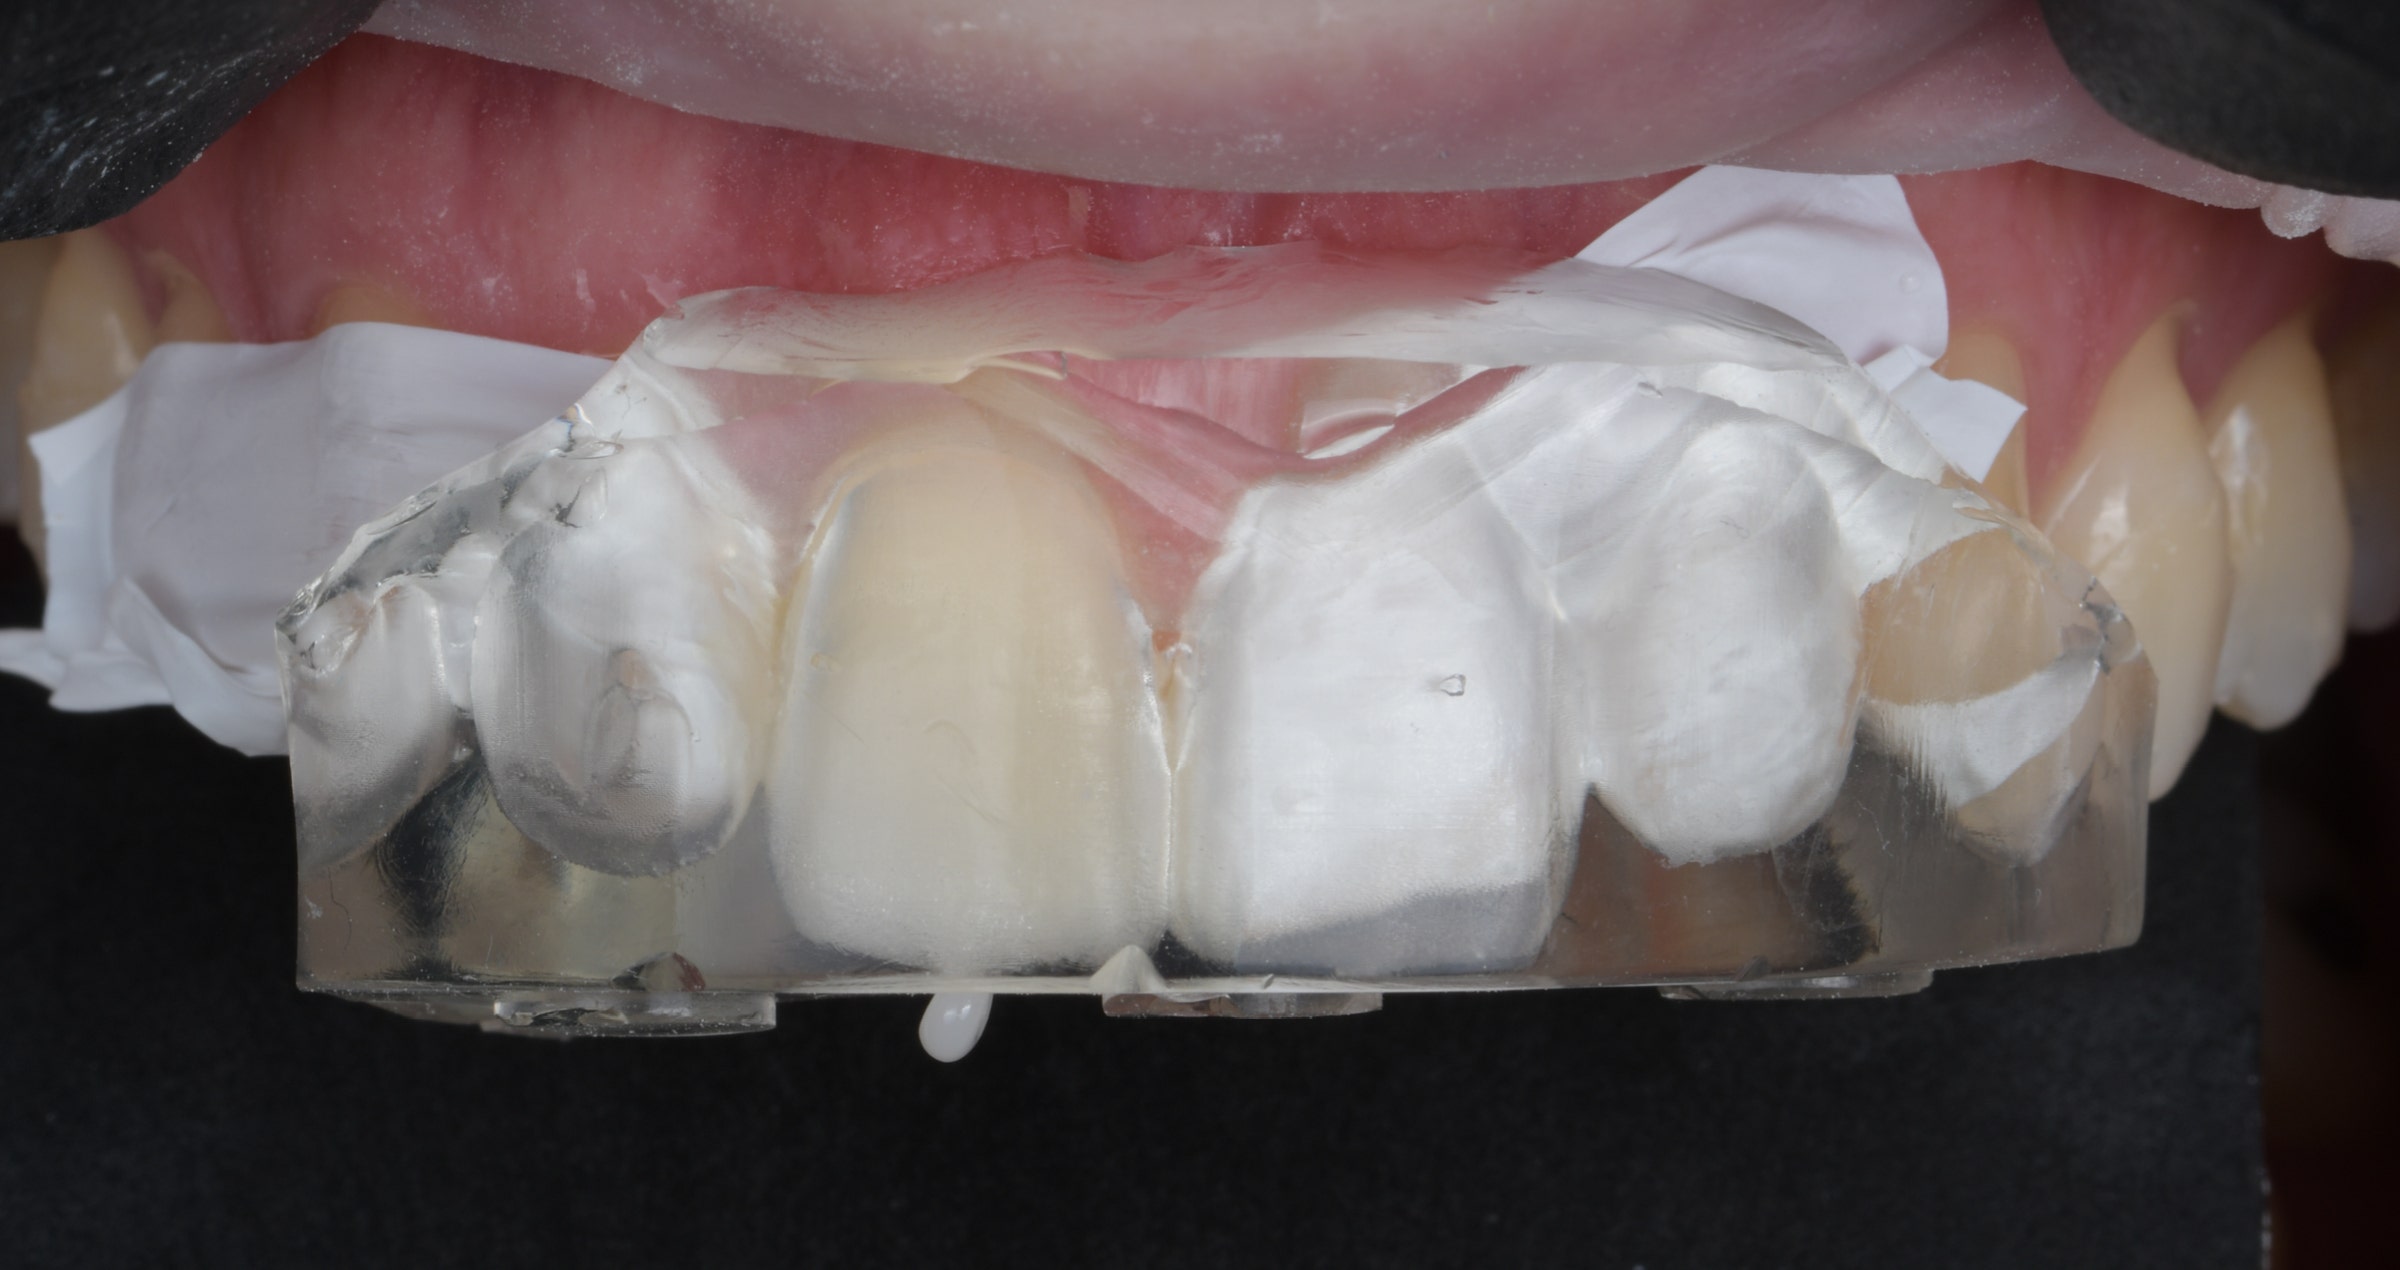
The flowable injection technique is a simple, predictable, repeatable way to restore teeth using flowable composite. It is based on a wax-up, over which a silicone index is produced. This index then serves as the key for the injection of the flowable composite, which is light-cured through the transparent silicone. The most important benefit is that this technique works without or in some cases with a very minimal tooth preparation. It is a minimally invasive technique that can be used by beginners and by experienced dentists. Using a composite with a well-balanced opacity in a thickness of 0.3 mm and a special polishing protocol, it is possible to achieve excellent morphological and optical outcomes.


When did you start using the flowable injection technique and what are its major indications?


I started using the technique in 2018. It was originally invented to restore anterior teeth, but nowadays, it is successfully used in the posterior region as well. To my mind, it is particularly useful whenever the shape of multiple teeth needs to be corrected to improve a patient’s smile, no matter whether young or old. This may be the case after orthodontic treatment. The teeth are simply aligned and then restored to the perfect shape using this non-invasive technique. I also use flowable injection for a smile makeover, to restore worn teeth and to change the vertical dimension of occlusion in the context of full-mouth reconstructions. In the latter case, the restoration may be temporary and used for a mid- to long-term “test drive”. However, it can also serve as the final restoration.


How do you start when planning to restore a patient’s teeth with the flowable injection technique?


The most important phase heavily influencing the success of this technique is the planning phase. It consists of documentation, impression taking and the creation of a wax-up and mock-up as well as the production of the silicone index. You can of course work in the traditional way with a silicone impression and conventional wax-up, but the use of digital technologies in this phase will improve your workflow significantly. I usually start with photo and video documentation and a digital impression. Records of the centric relation and occlusion are needed as well. Then, a virtual wax-up is created using digital smile design software. In this step, it is important to take into account the facial characteristics of the patient, a task that is best accomplished using the facial flow concept. Based on the resulting design, a virtual treatment outcome can be displayed and discussed with the patient. Once approved, the model with wax-up is printed in different versions: the full wax-up model and an “interlip model” with an alternating design – one tooth with wax-up followed by one tooth without. These models are used to produce the required indexes made of transparent silicone.


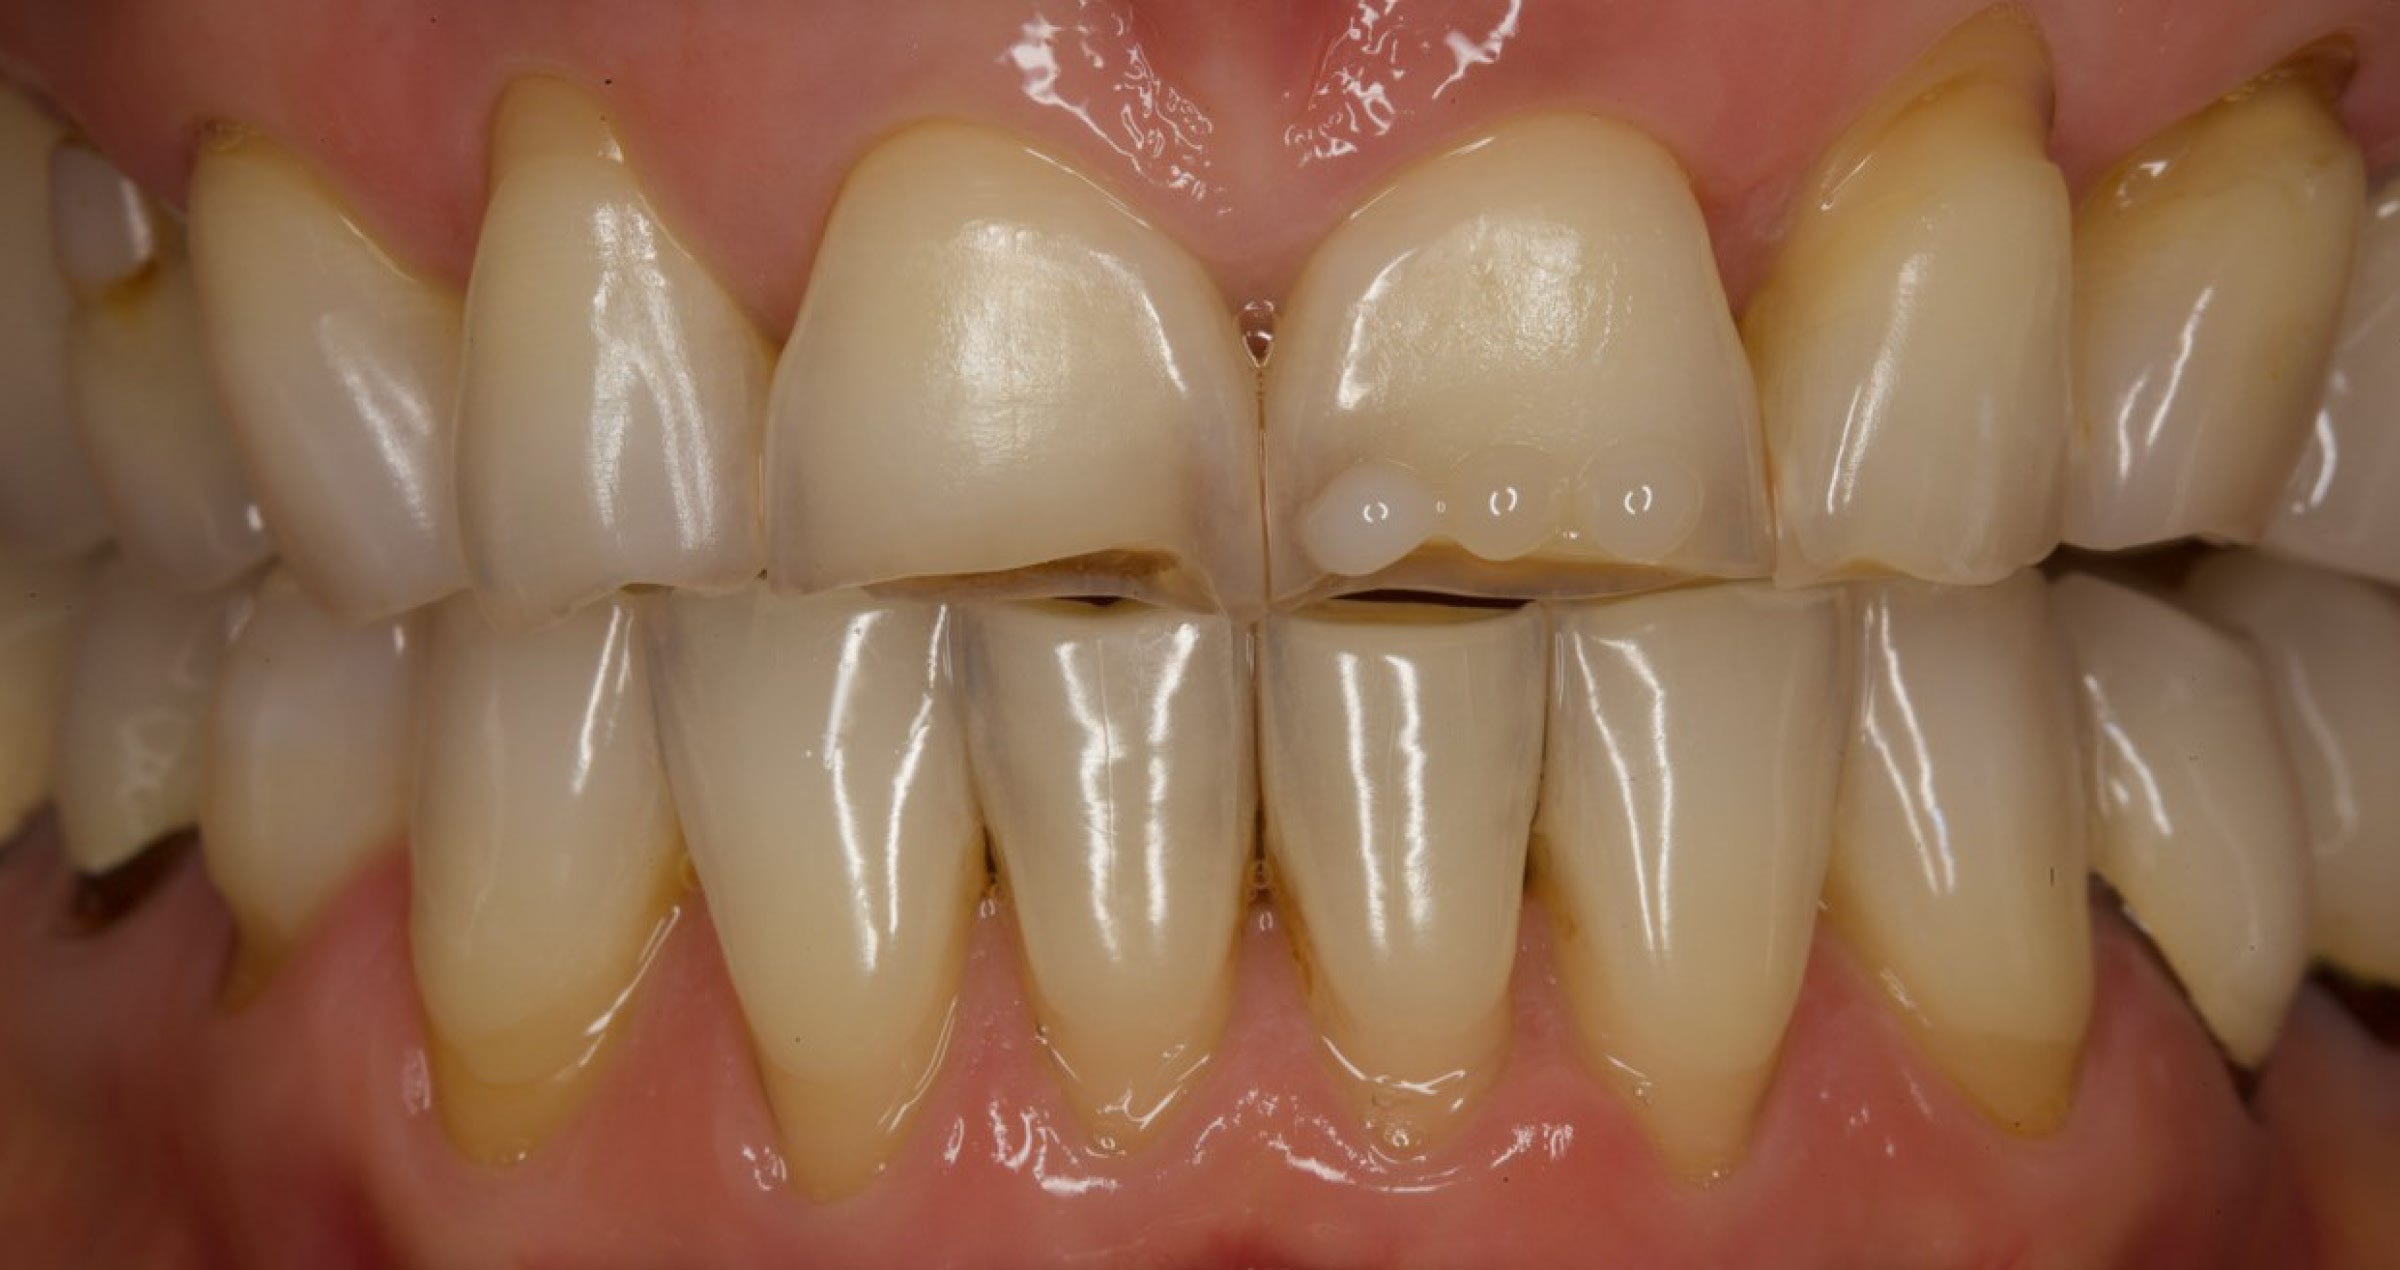
Digital Smile Design: Patient with severe tooth wear.


Virtual wax-up displayed in the patient’s mouth.


Models printed on the basis of the virtual mock-up.


Silicone index produced on the alternating (interlip) model.


When and why do you produce more than one silicone index?


It is particularly useful to work with the complete and the alternating (partial) silicone index when planning to restore all teeth in the maxilla. Starting with the alternating index gives me additional stability and lays the foundation for a precise outcome especially with regard to the planned occlusal height. In the lower jaw, where the handling of the index and the composite is more difficult due to the presence of saliva and moving soft tissues, I always recommend to divide the working field into three sections – one anterior and two posterior regions – and work on them separately.


How do you prepare the teeth and inject the flowable composite?


In most cases, all we need is a roughening of the enamel surfaces for the bonding procedure, which is usually possible by air abrasion with aluminum oxide (50 μm at low pressure). Then, the enamel is etched with phosphoric acid etchant and a universal bonding agent is applied. The silicone index is equipped with an injection hole on the incisal edge. This is easily accomplished with the cannula of the flowable composite syringe pressed through the material from the inside to the outside. In the posterior region, it may be useful to utilize a harder material and integrate two holes for each tooth on separate cusps – one for the injection and one for the outward flow. On a hard index, a diamond bur is needed for this procedure. I place the index, inject the flowable composite from the bottom to the top, light-cure the material shortly and remove the index. Final polymerization is carried out after index removal and the application of a layer of glycerin gel. Once the excess material is removed and the proximal part of the restoration is finished perfectly, the procedure is repeated for the other teeth before the restorations are polished.


Do you have any favourite products for the technique?


For the silicone index, I use EXACLEAR (GC), as it is the most transparent silicone available on the market. My favourite composite for the flowable injection technique is CLEARFIL MAJESTY™ ES Flow of low viscosity (Kuraray Noritake Dental Inc.). In my dental office and during my courses, I had the chance to test a lot of different products. In this context, I found that the material from Kuraray Noritake Dental offers a few advantages. It is a modern type of nano composite with a wide range of indications and a large shade offering. With its three viscosities, it can be used in many different clinical situations. I started using it five years ago and for the flowable injection technique, the Low variant is my first choice, as it is the most universal one suitable for anterior and posterior teeth. The most decisive advantages that influenced my decision to use it are its natural aesthetics and superior polishability. You can achieve a spectacular effect without any special skills. As a bonding agent, I prefer to use CLEARFIL™ Universal Bond Quick, which makes my workflow even easier, faster and more predictable. For polishing, I have developed my own protocol.


How do you finish and polish your restorations?


I start in the proximal area with polishing strips and sometimes a proximal saw. For shape adjustments, three different diamond and carbide burs have proven their worth. Subsequently, I proceed with fine or extra fine Sof-Lex™ Finishing and Polishing Discs (3M) used for contouring and finishing and rubber polishers TWIST DIA™ for Composite (Kuraray Noritake Dental Inc.), which already create a nice, natural surface gloss with low effort. Then, a wheel brush made of goat hair is used with diamond polishing paste (Diamond excel, FGM) and finally, I use a cotton wheel along with an aluminum oxide polishing paste (Pasta Grigia II, anaxDENT). In this way, it is possible to create a mirror finish.


Etching of the enamel with phosphoric acid etchant.


Complete silicone index in place.


Application of CLEARFIL™ Universal Bond Quick.


Situation immediately after the injection of CLEARFIL MAJESTY™ ES Flow (Low), light curing and removal of the silicone index.


Proximal adjustments with rotating instruments.


What are the biggest benefits of the flowable injection technique?


For patients and dental practitioners, the biggest advantages are savings in time and money. Many patients cannot afford ceramic veneers, and they are extremely happy to be offered a high-quality alternative that can be delivered in a single appointment. The procedure is prepless and the restorations can easily be repaired or the colour changed if they wish, so that there is virtually no risk involved in the treatment. Dental practitioners are usually able to start treating patients after they have attended a single course. While practicing makes them perfect, the first results are often already quite impressive, so that there is no huge investment involved for beginners – neither in time nor in new materials. Of course, you can invest lots of time in the finishing and polishing procedure, but I am sure you will find the right balance between effort and outcome.

Set of instruments for the flowable injection technique.


Do you have any recommendation of how to start using the technique?


First of all, I would like to encourage everyone to leave their comfort zone and try something new on a regular basis. For me, starting to work with the flowable injection technique was a real gamechanger, and I would never want to work without it again. Before starting to use the technique, I would definitely attend a course that teaches you all the theoretical knowledge needed for a successful first case, and maybe even a practical workshop.


Michał Jaczewski during his presentation at the Kuraray Noritake Dental booth in Cologne.


For further insights and resources on the Flowable Injection Technique, we invite you to explore additional materials available. Dive deeper into this innovative approach, check out another clinical case using Flowable Injection Technique, as demonstrated by Dr. Michał Jaczewski. Additionally, read the expert advise on how to avoid air bubbles in the composite restorations! These valuable tips will enhance your understanding and application of the technique.


KATANA™ Zirconia UTML veneers and crown on zirconia implant cemented with PANAVIA™ Veneer LC

Article by Dr. Bassem Jaidane


Among the most common problems in modern dentistry is that of restoring a patient‘s lost aesthetic dental appearance. To do this, new technologies are available to practitioners. For anterior teeth where aesthetics are paramount, dentists prefer the least invasive treatments possible, such as layered dental veneers (cut-back). In cosmetic dentistry, practitioners are often faced with cases requiring a multidisciplinary treatment plan or different types of restorative materials to be used at the same time. For cases of prosthetic restoration combining dental veneers, dental crowns and dental bridges, dentists are often faced with situations where the difference in shade is noticeable in the final result, this is explained by the difference in restorative material, product, adhesion technique, the thickness of the prosthetic element and the colour of the abutment, whether it is a living natural tooth, devitalized, or even an implant abutment1-2.


In the presence of a treatment plan requiring dental veneers, crowns and dental bridges, choosing zirconia as the only restorative material is no longer an option but an obligation. The is due to the limited mechanical properties of lithium disilicate and feldspar porcelain restorations, which contraindicate their use as dental bridges. There are different factors explaining the reluctance of practitioners to use the zirconia dental veneer technique3: One is the absence of the vitreous phase. It makes impossible to create an optimal adhesion surface with hydrofluoric acid at the level of the intaglio of the zirconia veneers. Another is the lack of translucency of the first zirconia generations.


Modern zirconia materials, however, are particularly well-suited for cases requiring a combination of veneers, crowns and dental bridges of the same optical appearance. This is due to their increased translucency and excellent mechanical properties. The following article describes and discusses the realization of a clinical case treated with dental veneers and a crown using KATANA™ Zirconia UTML (Kuraray Noritake Dental Inc.). the veneers were placed with PANAVIA™ Veneer LC (Kuraray Noritake Dental Inc.). The patient presented an aesthetic problem at the level of an anterior implant-supported crown.


CASE OBSERVATION


Patient S, from the Tunisian Sahel, engineer in France, with no significant pathological history and aged 29, presented in January 2023 due to an aesthetic problem negatively affecting her smile. The extraoral examination was without abnormalities, while the intraoral examination showed good oral hygiene, healthy gums, a thin free gingiva and a protruded zirconia crown on an implant in the region of the maxillary right central incisor (figs 1 and 2).


Fig. 1. Initial clinical situation.


Fig. 2. Occlusal view revealing the volume and position of the crown on the central incisor.


During the preliminary interview, it turned out that the implant in the region of the right central incisor had been placed in 2020. The patient’s former dentist had left Tunisian territory. The patient does not have any document or reference on the dental implant, and she wishes to “straighten” the crown and improve the aesthetics of her smile before her planned wedding ten days after her first consultation.


TREATMENT PLAN


After having had the informed consent of the patient and after having asked the indication of dental veneers for aesthetic reasons, the treatment was initiated. According to the treatment plan, seven maxillary anterior teeth (from first premolar to first premolar) should receive an incisal overlap preparation (depth: 0.1 to 0.3 mm) for the placement of veneers made of KATANA™ Zirconia UTML. For the implant in the region of the right central incisor, it was planned to replace the existing crown by a crown made of KATANA™ Zirconia UTML without replacing the abutment. This was due to the lack of information about the implant type and the lack of time.


TREATMENT


After taking the preoperative photos (fig 3), choosing the color of the veneers and anesthetizing the maxillary anterior region, the incisal overlap preparation was carried out on the seven maxillary teeth and the zirconia crown was removed from the implant. A cylindrical diamond bur was used to separate the zirconia part from the abutment. Subsequently, a bite record and impressions were taken using the wash technique. In addition, a temporary crown was produced and placed on the abutment.


Fig. 3. Preoperative picture.


In the dental laboratory, virtual models were created based on the conventional impressions (fig. 4). Then, the zirconia restorations were designed in full contour, cut back for the veneering porcelain and finished by layering with CERABIEN™ ZR porcelain (Kuraray Noritake Dental Inc.). At try-in during the second session, we checked the insertion, the gingival margins, and the contact points between the veneers and the crown on the implant. Given the superior mechanical properties of the zirconia veneer, the shape and thickness of the veneers were modified chairside to have a harmonious anterior curve and a better aesthetic rendering. After determining the colour of the resin cement, the temporary crown was put back in place.


Fig. 4. Virtual model.


After glazing and preparation of the bonding surfaces in the dental laboratory, the upper veneers were cemented according to the PANAVIA™ Veneer LC protocol. We ended the session by removing excess cement. An occlusion check and postoperative photos were taken after three days.


DISCUSSION


In this case, the dental veneers and the crown on the implant were produced using a KATANA™ Zirconia UTML disc. This type of zirconia has an yttrium oxide proportion of 5 mol%, leading to about 70 % cubic zirconia phase, and therefore a higher translucency than earlier generations of zirconia. With a translucency of 51 % (light transmission, illuminant: D65, specimen thickness: 1.0 mm. Source: Kuraray Noritake Dental Inc); this zirconia allows us to have remarkable optical properties (fig 5).


Fig. 5. Remarkable optical properties of the final restorations.


The patient chose color BL1 and requested a transparent incisal edge. For this reason, a cutback design of the zirconia (fig. 6) and porcelain layering was the technique of choice. Figure 7 shows the slight transparency in the incisal edge region of the new restorations. The zirconia veneers technique was chosen to avoid the color difference between the crown on the implant and the veneers. The pleasant aesthetic appearance and a harmonious smile are confirmed by the post-operative picture (fig 8). According to the manufacturer, the flexural strength of KATANA™ Zirconia UTML is 557 MPa, which is higher than that of lithium disilicate and feldspathic porcelains. As zirconia veneers will be more resistant to shear forces, it is possible to eliminate contact points that interfere during try-in or even safely modify the shape of the restorations in vivo. This is done with specific burs adapted to zirconia during different stages of the fittings according to the wishes of the patient4.


Fig. 6. Cutback design of the restorations.


Fig. 7. Slight transparency at the incisal edges of the restorations.


Fig. 8. Immediate post-operative picture.


In the present case, we were able to adjust the crown until we had a perfect anterior line. It was thus possible to optimize the inclination of the crown without replacing the dental implant, in just one week.


Given the significant shear resistance, the dental laboratory technician made zirconia dental veneers with an average thickness of 0.3 mm. Such a thin veneer requires less preparation of the dental tissue, which will be limited to enamel instead of extending into the dentin, where the adhesion value is lower due to its low chemical composition in minerals5.


The expected difficulty in bonding zirconia veneers is explained by the absence of a vitreous phase given the poor adhesion of the crystalline phase to the bonding cement. However, the desired surface modification can be achieved with a different procedure: tribochemical silica coating. It was used in the present case to improve the adhesion of the zirconia veneers to the resin cement system. Indeed, it was found in an in-vitro evaluation that the tribochemical preparation technique and the application of MDP provide an optimized adhesive interface6. In this study, dual-beam focused ion-beam technology followed by scanning electron microscopy were used to compare the resin/zirconia bonding interface with tribochemical preparation/MDP and the bonding interface between resin/zirconia without this preparation.


The tribochemical process consists of an aero-abrasion of the zirconia surface with particles coated with silica combined with a silane primer containing MDP. The phosphate ester groups of this silane bind to the surface oxides of the zirconia, and the methacrylate group makes covalent bonds with the resin matrix of the PANAVIA™ Veneer LC cement7.


In the present clinical cases, the KATANA™ Zirconia UTML veneers were abraded with silicon dioxide with the formula SiO2. As a primer, we chose CLEARFIL™ CERAMIC PRIMER PLUS (Kuraray Noritake Dental Inc.), because it contains the original MDP monomer, developed Kuraray Co., Ltd.8.


To clean the veneers before applying CLEARFIL™ CERAMIC PRIMER PLUS, KATANA™ Cleaner (Kuraray Noritake Dental Inc.) was used. The presence of saliva and residues from fittings can alter the interface with the resin cement, which presents a risk of bonding failure of Zirconia veneers9.


One of the most important challenges in this case was to be able to hide the greyish color of the implant abutment which was visible through the zirconia crown. To hide the gray of the abutment, a resin opaker was applied. These techniques combined with the PANAVIA™ Veneer LC white gave us an optimal result (figs. 9 and 10)10.


Fig. 9. Treatment outcome.


Fig. 10. New smile designed according to the individual desires of the patient.


CONCLUSION


KATANA™ Zirconia UTML veneers have better mechanical properties than conventional veneers, so that the zirconia veneers technique allows users to combine bridges, crowns and dental veneers without a noticeable difference in shade. It offers acceptable translucency and aesthetics according to our observation. The technique of bonding the zirconia veneers with PANAVIA™ Veneer LC combined with a tribochemical treatment and the application of MDP on the adhesion surfaces allowed for a secure bonding, while the dyschromia caused by the implant abutment was effectively concealed.


Dentist:

DR. BASSEM JAIDANE


Born in Sousse, Tunisia, on June 12, 1983, Dr. Bassem Jaidane obtained his Doctorate in Dental Medicine in 2010 at the Faculty of Monastir. He opened his own clinic in 2010, specializing in aesthetics and dental implants, as well as dental veneers. Omni-patrician and passionate about all areas of dentistry, he has also developed advanced knowledge in dental prosthetics: 3D design, ceramic layering, finishing and glazing of crowns, bridges and veneers…


Dr. Bassem Jaidane has therefore acquired a certain expertise on the different types of dental veneers, whether pressed ceramic veneers, machined veneers, layereded veneers with the cut-back technique and lumineers veneers, after having carried out numerous cases. in feldspathic and lithium disilicate veneers, Dr. Bassem Jaidane has become one of the pioneers of the technique of dental veneers on zirconia.


References


1. Restaurations esthétiques grâce à la technique du cut-back Par Fleur Nadal, Geoffrey Di Bacco, Julien Chesnot Publié le 01.06.2019. Paru dans L‘Information Dentaire n°23 – 12 juin 2019 (page 28-29).
2. Effects of ceramic layer thickness, cement color, and abutment tooth color on color reproduction of feldspathic veneers Christopher Igiel, Michael Weyhrauch, Barbara Mayer, Herbert Scheller, Karl Martin Lehmann PMID: 29379907 Int J Esthet Dent 2018;13(1):110-119.
3. Influence of Air-Particle Deposition Protocols on the Surface Topography and Adhesion of Resin Cement to Zirconia. Acta Odontol: Sarmento, H.R.; Campos, F.; Sousa, R.S.; Machado, J.P.B.; Souza, R.O.A.; Bottino, M.A.; Ozcan, M: Acta Odontol Scand . 2014 Jul;72(5):346-53.doi: 10.3109/00016357.2013.837958. Epub 2013 Oct 31.
4. Comparison of the Mechanical Properties of Translucent Zirconia and Lithium Disilicate:Kwon, S.J.; Lawson, N.C.; McLaren, E.E.; Nejat, A.H.; Burgess, J.O. J.Prosthet:: J Prosthet Dent . 2018 Jul;120(1):132-137. doi: 10.1016/j.prosdent.2017.08.004. Epub 2018 Jan 6.
5. The Success of Dental Veneers According To Preparation Design and Material Type:Yousef Alothman, Maryam Saleh Bamasoud: Open Access Maced J Med Sci. 2018 Dec 14;6(12):2402-408.doi:10.3889/oamjms.2018.353. eCollection 2018 Dec 20.
6. The Effect of Resin Bonding on Long-Term Success of High-Strength Ceramics: Blatz, M.B.; Vonderheide, M.; Conejo, J: J Dent Res 2018 Feb;97(2):132-139. doi: 10.1177/0022034517729134. Epub 2017 Sep 6.
7. Ultra-thin monolithic zirconia veneers: reality or future? Report of a clinical case and one-year follow-up: Rodrigo Othávio Assunção Souza, Fernanda Pinheiro Barbosa, Gabriela Monteiro de Araújo, Eduardo Miyashita, Marco Antonio Bottino, Renata Marques de Melo, and Yu Zhang :Oper Dent :2018 ;43(1) :3_11.doi :10.234/16-350-T.
8. Functional monomer impurity affects adhesive performance :Kumiko Yoshihara 1 , Noriyuki Nagaoka, Takumi Okihara , Manabu Kuroboshi, Satoshi Hayakawa, Yukinori Maruo, Goro Nishigawa, Jan De Munck, Yasuhiro Yoshida, Bart Van Meerbeek : Dent Mater : 2015 Dec;31(12):1493-501.doi: 10.1016/j.dental.2015.09.019. Epub 2015 Oct 28.
9. Effect of decontamination materials on bond strength of saliva-contaminated CAD/CAM resin block and dentin Kei Takahashi, Tomohiro Yoshiyama, Akihito Yokoyama, Yasushi Shimada, Masahiro Yoshiyama : Dent Mater J 2022 Jul 30;41(4):601-607. doi: 10.4012/dmj.2021-268. Epub 2022 Apr 13.
10. Masking ability of implant abutment substrates by using different ceramic restorative systems Pablo Machado Soares , Ana Carolina Cadore-Rodrigues , Maria Gabriela Packaeser , Atais Bacchi , Luiz Felipe Valandro , Gabriel Kalil Rocha Pereira , Marília Pivetta Rippe J Prosthet Dent 2022 Sep;128(3):496.e1-496.e8. doi: 10.1016/j.prosdent.2022.05.010. Epub 2022 Aug 16. Affiliations PMID: 35985853 DOI: 10.1016/j.prosdent.2022.05.010.