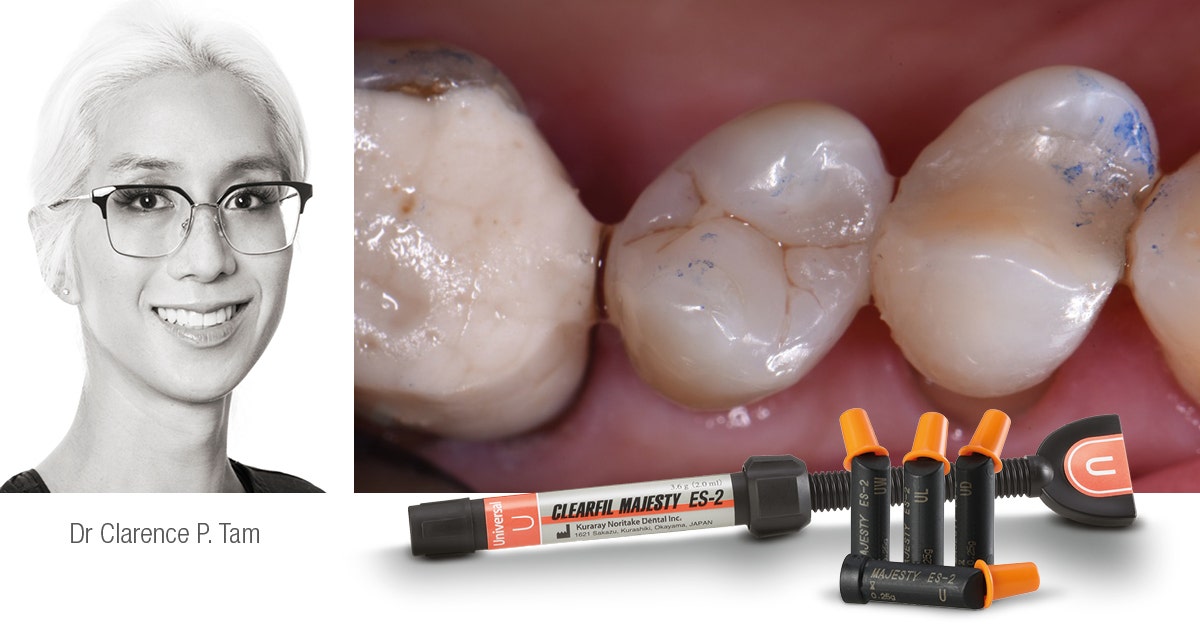
Case by Dr. Aleksandra Łyżwińska, Warsaw, Poland
ABSTRACT
Indirect overlays are the contemporary restoration standard for posterior teeth with extensive hard tissue loss. They provide for cuspal coverage, which decreases the likeliness of coronal and/or root fracture. At the same time and in contrast to crowns, overlay preparations minimize the removal of sound tooth structure especially in the cervical region, which is a critical factor.1 Modern dental resin composites allow for direct cuspal coverage in a single-visit appointment. The results of in-vitro studies suggest that these direct overlays are a suitable alternative to their indirect counterparts in specific situations.2-6 The following case report is used to describe the direct restoration procedure by means of a maxillary right molar with an extensive, deep MOD lesion.
INTRODUCTION
In the context of treating a tooth with an extensive carious lesion, a biomechanical risk assessment should be performed. The primary method of reducing the likeliness of tooth fracture is treatment with a restoration that provides cuspal coverage. The contemporary gold standard for biomechanically compromised teeth are adhesively cemented overlays as an alternative to crowns.1 Another option that does not involve labwork is a direct overlay restoration.2-6 The direct approach is especially suitable for long-term temporization, which may be required during orthodontic treatment, for example.
CLINICAL CASE
The 40-year-old male patient was referred to my office before an orthodontic and prosthetic treatment. Intraoral examination (Figs. 1 and 2) revealed:
- Tetracycline discolouration,
- Multiple extensive composite restorations with marginal leakage,
- Primary and secondary carious lesions, and
- Significant mechanical weakness7,8 (mesio-occluso-distal (MOD) cavities, cusp loss, cracks).
Fig. 1. Initial situation – extensive MOD composite resin restoration.
Fig. 2. Initial situation – unacceptable contact points, palatal wall crack line.
Based on a clinical and radiological examination (Fig. 3), it was decided to restore the maxillary right first molar with a direct overlay, which should serve as a long-term temporary for the duration of orthodontic treatment. Once the local anaesthetic had been administered, rubber dam was placed in the first quadrant and the cusps of the affected first molar were reduced. For subgingival tooth preparation, a rubber dam sheet was temporarily moved behind the second upper molar (Fig. 4). In order to obtain a good emergence profile of the restoration and a tight fit of the sectional matrix, the gingivectomy was performed with an electric surgical knife (Surtron 50D, LED SPA) (Fig. 5). The main advantages of a diathermal cut are instant tissue coagulation and hemostasis9.
Fig. 3. Bite-wing radiograph: Maxillary fist molar with an overhang and negative profile of the distal wall.
Fig. 4. Initial preparation with reduction of the cusps and exposure of gingiva.
Fig. 5. Gingivectomy performed using a surgical electric knife.
In accordance with the European Society of Endodontology’s guidelines on the management of deep caries10, the deepest part of the cavity was cleaned in full rubber dam isolation (Nic Tone Dental Dam, MDC Dental) (Fig. 6). Carious-tissue excavation was carried out using round burs, then the enamel and dentin were air-abraded with 50-μm aluminum oxide (Microetcher IIa, Danville). Multiple cracks, penetrating through the enamel and partially the dentin, occurred within the mesial and palatal walls. The presence of cracks crossing the dentin-enamel junction is an absolute indication to cuspal coverage8,11.
An appropriate rubber dam isolation is essential in adhesive dentistry. Beyond the obvious advantage of a clean operation field uncontaminated by saliva and moisture, the rubber dam contributes to keeping periodontal tissues at a distance form a tooth. In order to ensure both, maximum retraction and sufficient space to work, the rubber dam was inverted (introduced to the gingival sulcus) and stabilized using PTFE tape (Fig. 7). The mesial wall was restored using a blue 3D Composite-Tight 3D Fusion matrix ring (Garrison) and a medium standard Sectional Contoured Metal Matrix (TOR VM, Fig. 8). Due to its extensiveness and shape, restoration of the distal wall was more difficult to perform.
Fig. 6. Rubber dam newly placed in the interproximal area. Full isolation is essential for the excavation of the infected dentin in the deepest part of the cavity.
Fig. 7. PTFE tape placement for improving isolation in the gingival area. Al2O3 sandblasting.
Fig. 8. Mesial matrix fit.
The first attempt to adapt an elongated Sectional Contoured Metal Matrix and the green 3D Composite-Tight 3D Fusion (Garrison) ended with failure (Fig. 9). The matrix was changed for a longer and more curved one (Fig. 10). The ring was replaced by a smaller Palodent V3 Ring (Dentsply Sirona, Fig. 11). Due to the depth of the carious lesion, an antibacterial adhesive system was used (CLEARFIL™ SE Protect, Kuraray Noritake Dental Inc.). It contains the MDPB monomer, which offers an antibacterial effect that lasts even after hybrid layer formation12-14. Furthermore, the fluoride included in the bond liquid intensifies the cariostatic mechanism of CLEARFIL™ SE Protect and supports the so-called “Super Dentin” formation15.
Fig. 9. Insufficient fit of the distal matrix.
Fig. 10. New, longer and more curved matrix in place.
Fig. 11. Different matrix ring placed in the distal area.
After polymerization of the bonding agent, the nanohybrid flowable composite resin (CLEARFIL MAJESTY™ ES Flow High, Kuraray Noritake Dental Inc.) was applied in a thin layer. The proximal wall was restored using both packable (CLEARFIL MAJESTY™ ES-2 Universal, Kuraray Noritake Dental Inc.) and flowable composite resin (CLEARFIL MAJESTY™ ES Flow Super Low, Kuraray Noritake Dental Inc.) (Figs. 12 and 13). Core build-up was performed with bulk-fill type composite. The cusps were reconstructed free-hand with the previously used CLEARFIL MAJESTY™ ES-2 Universal (Figs. 14 and 15). The universality of this product provides for a good optical integration and blending with the adjusted tissue, regardless of the colour of the underlying tooth structure. The fissures were gently highlighted using brown tints.
Fig. 12. Thin layer of flowable composite resin CLEARFIL MAJESTY™ ES Flow High (A2) applied on the cavity floor. The proximal walls are built up with build-up by CLEARFIL MAJESTY™ ES-2 Universal and CLEARFIL MAJESTY™ ES Flow Super Low (A2).
Fig. 13. Proximal walls build-up – palatal view.
Fig. 14. Core build-up. Free-hand cusp coverage with CLEARFIL MAJESTY™ ES-2 Universal, palatal view.
Fig. 15. Cusp coverage – occlusal view.
The initial polishing was performed with the rubber dam still in place. The excesses of composite resin were removed with the aid of abrasive discs, diamond burs and a “Brownie” polisher (BAL, Nevadent). Pre-polishing and high-shine polishing were executed with TWIST™ DIA for Composite (Kuraray Europe GmbH.) supported by a goat hair brush (Micerium) (Figs. 16 to 17).
Fig. 16. Occlusal surface after surface modeling with CLEARFIL MAJESTY™ ES-2 Universal and initial polishing.
Fig. 17. Occlusal surface after modeling with CLEARFIL MAJESTY™ ES-2 Universal and initial polishing – palatal view.
After removal of the rubber dam, the occlusal contact points of the direct overlay were adjusted (Figs. 18 and 19). Every spot touched by the burr was subsequently repolished according to the previously described protocol (Figs. 20 and 21).
Fig. 18. Occlusal adjustment. Contact points recorded with articulation paper (100 μm).
Fig. 19. Occlusal adjustment. Contact points recorded with articulation paper (100 μm= and articulation foil (16 μm).
Fig. 20. Final effect after polishing with TWIST™ DIA for Composite.
FINAL SITUATION
Fig. 21. Final effect – palatal view.
CONCLUSION
As a result of decades of improvements mainly with regard to the filler density and polishability, modern dental composites offer a great gloss retention and favourable wear properties. In addition, polymerization shrinkage has been decreased due to the integration of nanohybrid filler technology. Those features allow us to restore biomechanically compromised teeth using a direct restoration technique.
Direct overlays are a suitable alternative for a conventional indirect restoration in many situations.18,19 According to researchers, the advantages of direct restorations with cuspal coverage include minimal tooth preparation, vital pulp-oriented treatment, the possibility to treat patients in a single appointment and a potentially lower cost of the treatment.18-20 However, it should be emphasized that the presented technique requires advanced restorative skills that need to be acquired first before starting to implement it.
Dentist:
DR. ALEKSANDRA ŁYŻWIŃSKA
Warsaw, Poland
Dr. Aleksandra Łyżwińska is a restorative dentist. She graduated from the Warsaw Medical University in 2017, where she was an assistant professor at the Department of Conservative Dentisyty and Endodontics. Her focus lies in modern adhesive techniques, resin composites and biomaterials.
REFERENCES
1. Dietschi D, Duc O, Krejci I, Sadan A. Biomechanical considerations for the restoration of endodontically treated teeth: a systematic review of the literature--Part 1. Composition and micro- and macrostructure alterations. Quintessence Int. 2007 Oct;38(9):733-43.
2. van Dijken JW. Direct resin composite inlays/onlays: an 11 year follow-up. J Dent. 2000 Jul;28(5):299-306. doi: 10.1016/s0300-5712(00)00010-5. PMID: 10785294.
3. Mondelli RF, Ishikiriama SK, de Oliveira Filho O, Mondelli J. Fracture resistance of weakened teeth restored with condensable resin with and without cusp coverage. J Appl Oral Sci. 2009 May-Jun;17(3):161-5.
4. Deliperi S, Bardwell DN. Multiple cuspal-coverage direct composite restorations: functional and esthetic guidelines. J Esthet Restor Dent. 2008;20(5):300-8; discussion 309-12.
5. Deliperi S, Bardwell DN. Clinical evaluation of direct cuspal coverage with posterior composite resin restorations. J Esthet Restor Dent. 2006;18(5):256-65; discussion 266-7.
6. Mincik J, Urban D, Timkova S, Urban R. Fracture Resistance of Endodontically Treated Maxillary Premolars Restored by Various Direct Filling Materials: An In Vitro Study. Int J Biomater. 2016;2016:9138945.
7. Reeh ES, Messer HH, Douglas WH. Reduction in tooth stiffness as a result of endodontic and restorative procedures. J Endod. 1989 Nov;15(11):512-6.
8. Banerji S, Mehta SB, Millar BJ. The management of cracked tooth syndrome in dental practice. Br Dent J. 2017 May 12;222(9):659-666.
9. Bashetty K, Nadig G, Kapoor S. Electrosurgery in aesthetic and restorative dentistry: A literature review and case reports. J Conserv Dent. 2009 Oct;12(4):139-44.
10. European Society of Endodontology (ESE) developed by:, Duncan HF, Galler KM, Tomson PL, Simon S, El-Karim I, Kundzina R, Krastl G, Dammaschke T, Fransson H, Markvart M, Zehnder M, Bjørndal L. European Society of Endodontology position statement: Management of deep caries and the exposed pulp. Int Endod J. 2019 Jul;52(7):923-934.
11. Lynch CD, McConnell RJ. The cracked tooth syndrome. J Can Dent Assoc. 2002 Sep;68(8):470-5.
12. Hashimoto M, Hirose N, Kitagawa H, Yamaguchi S, Imazato S. Improving the durability of resindentin bonds with an antibacterial monomer MDPB. Dent Mater J. 2018 Jul 29;37(4):620-627.
13. Imazato S, Kinomoto Y, Tarumi H, Torii M, Russell RR, McCabe JF. Incorporation of antibacterial monomer MDPB into dentin primer. J Dent Res. 1997 Mar;76(3):768-72.
14. Imazato S, Kinomoto Y, Tarumi H, Ebisu S, Tay FR. Antibacterial activity and bonding characteristics of an adhesive resin containing antibacterial monomer MDPB. Dent Mater. 2003 Jun;19(4):313-9.
15. Nakajima M, Okuda M, Ogata M, Pereira PN, Tagami J, Pashley DH. The durability of a fluoride-releasing resin adhesive system to dentin. Oper Dent. 2003 Mar-Apr;28(2):186-92.
16. Bore Gowda V, Sreenivasa Murthy BV, Hegde S, Venkataramanaswamy SD, Pai VS, Krishna R. Evaluation of Gingival Microleakage in Class II Composite Restorations with Different Lining Techniques: An In Vitro Study. Scientifica (Cairo). 2015;2015:896507.
17. Oficjalne informacje producenta Kuraray Noritake Dental https://www.kuraraynoritake.eu/pl/clearfil-majesty-es-flow (dostęp 08.02.2022).
18. Angeletaki F, Gkogkos A, Papazoglou E, Kloukos D. Direct versus indirect inlay/onlay composite restorations in posterior teeth. A systematic review and meta-analysis. J Dent. 2016 Oct;53:12-21.
19. Dhadwal AS, Hurst D. No difference in the long-term clinical performance of direct and indirect inlay/onlay composite restorations in posterior teeth. Evid Based Dent. 2017 Dec 22;18(4):121-122.
20. Banerji S, Mehta SB, Millar BJ. Cracked tooth syndrome. Part 2: restorative options for the management of cracked tooth syndrome. Br Dent J. 2010 Jun;208(11):503-14.
21. Opdam NJ, Roeters JJ, Loomans BA, Bronkhorst EM. Seven-year clinical evaluation of painful cracked teeth restored with a direct composite restoration. J Endod. 2008 Jul;34(7):808-11.
22. van Dijken JW. Direct resin composite inlays/onlays: an 11 year follow-up. J Dent. 2000 Jul;28(5):299-306.


