Class II cavities restored with composite raising the margin and re-establishing the contact point

Case by Kokla Thalia, Postgraduate student in Restorative Dentistry program, Faculty of Dentistry, National and Kapodistrian University of Athens, Greece


Restoring Class II cavities can be challenging due to limited access to the posterior area, where the interproximal contact needs to re-established in a proper way. Inadequate contacts tend to result in increased plaque accumulation, food impaction and, as a consequence, the development of caries and irritation of the interproximal gingiva. Therefore, it is essential that the interproximal contact is restored based on the model of nature. A suitable matrix system and a proper clinical protocol can help us succeed in this context. The following clinical case is used to illustrate a possible strategy.


Fig. 1. Initial clinical situation. 23-year-old female patient with caries on the mandibular left second premolar.


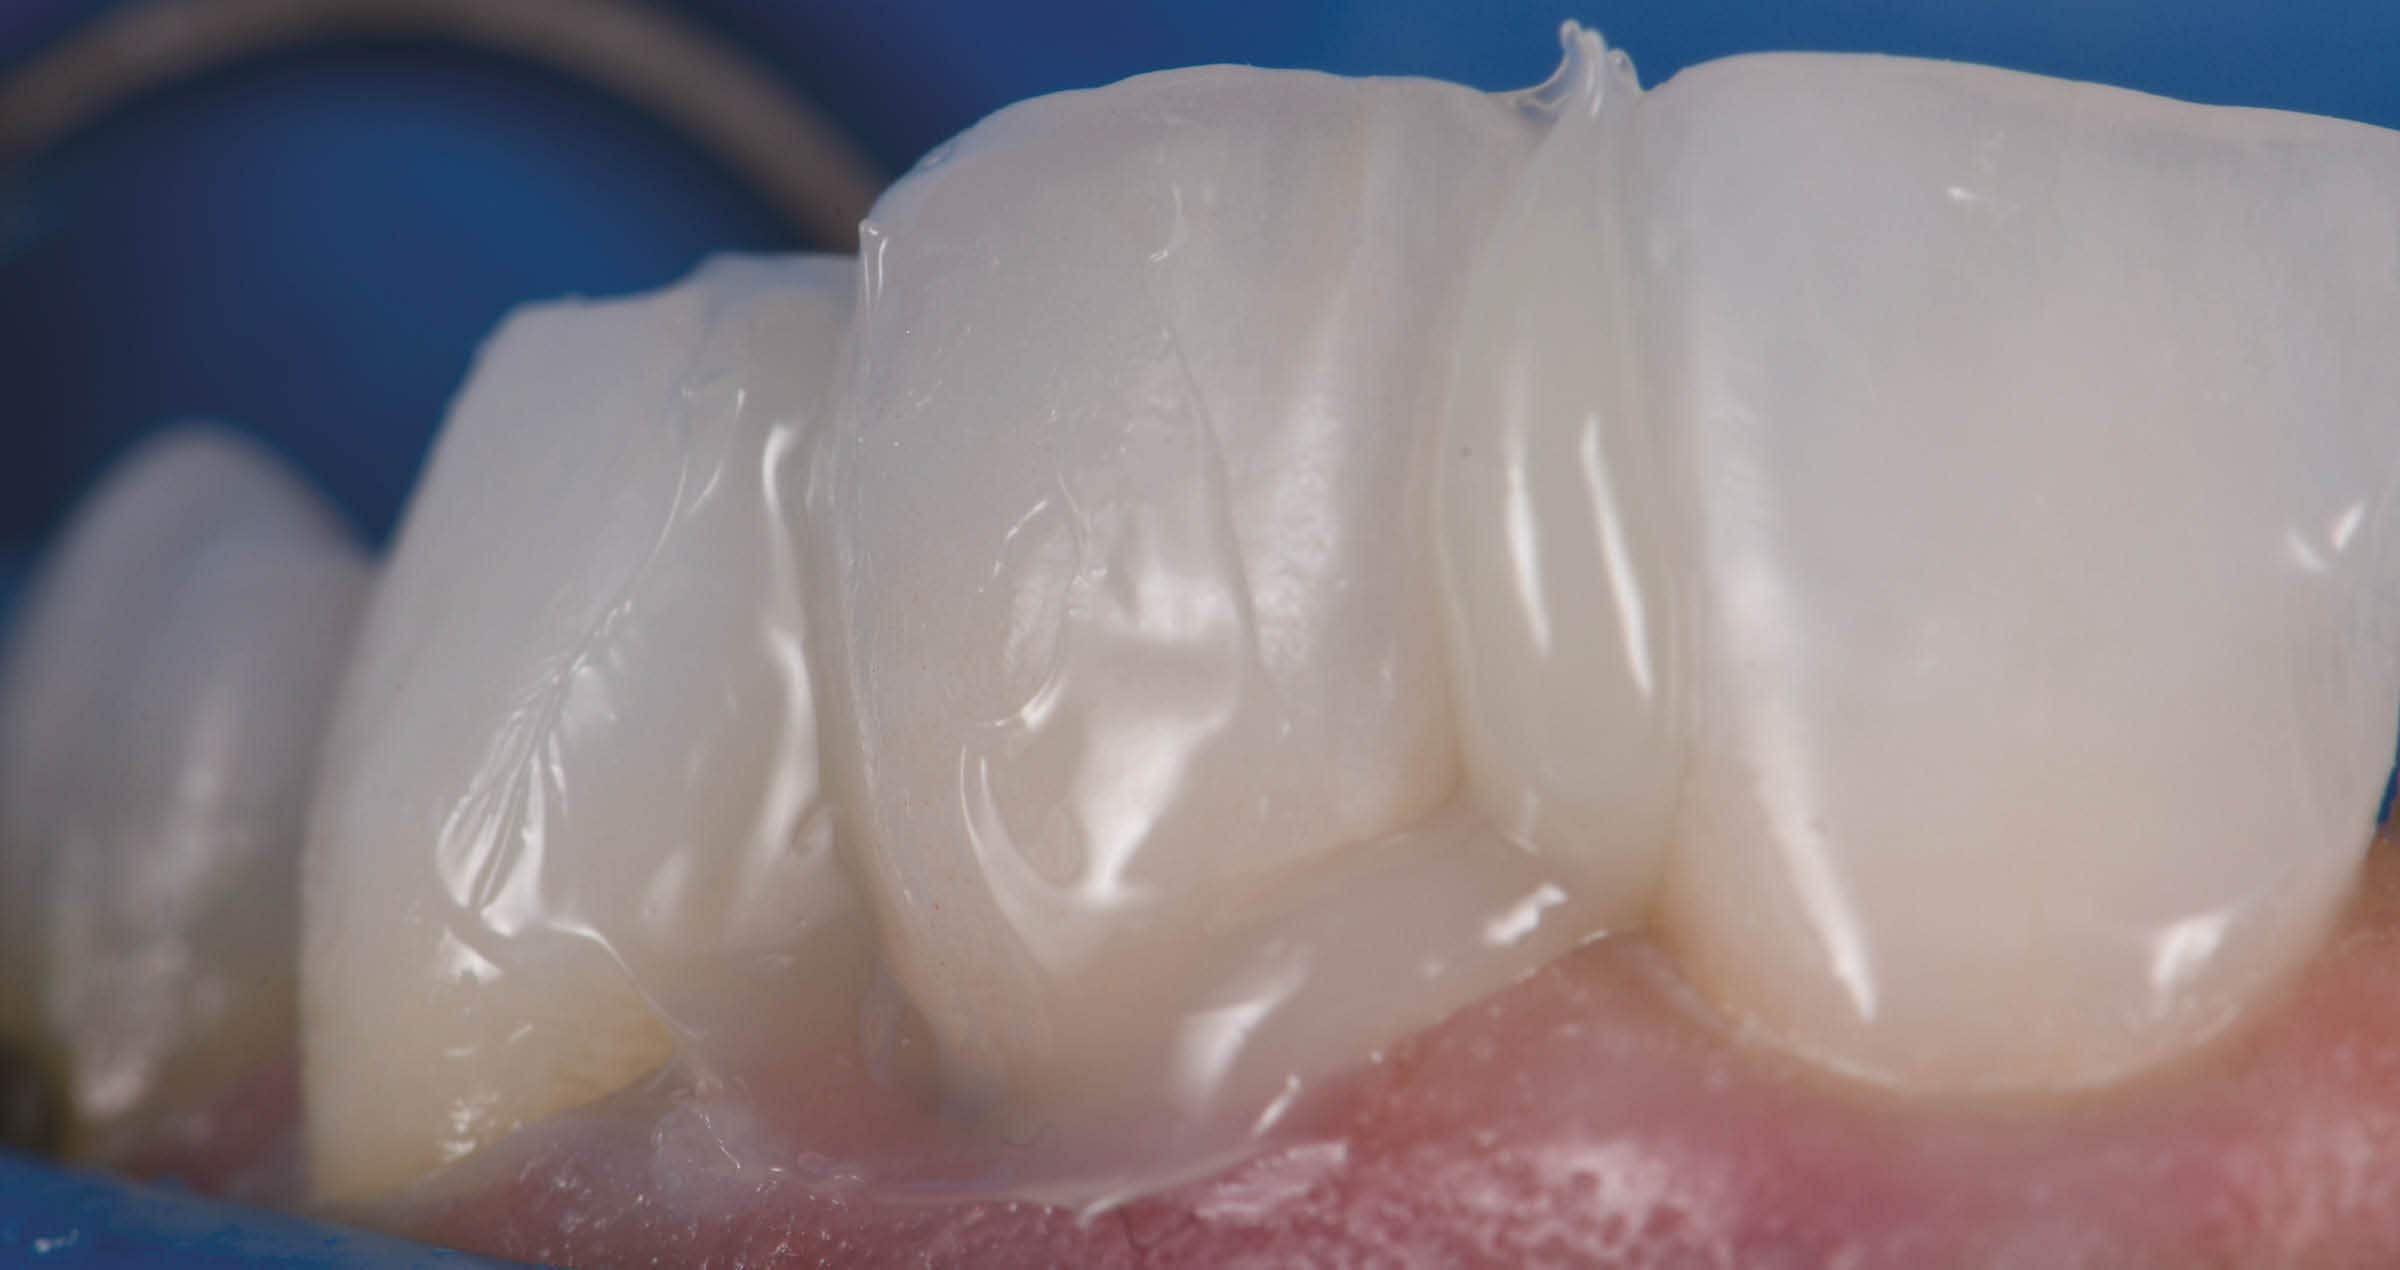
Fig. 2. Situation after cavity preparation, isolation of the working field with rubber dam and the placement of a sectional matrix fixed with a ring. It is essential that the matrix imitates the natural shape of the contact area, which is usually rather flat or concave cervically and convex in the middle and occlusal parts.


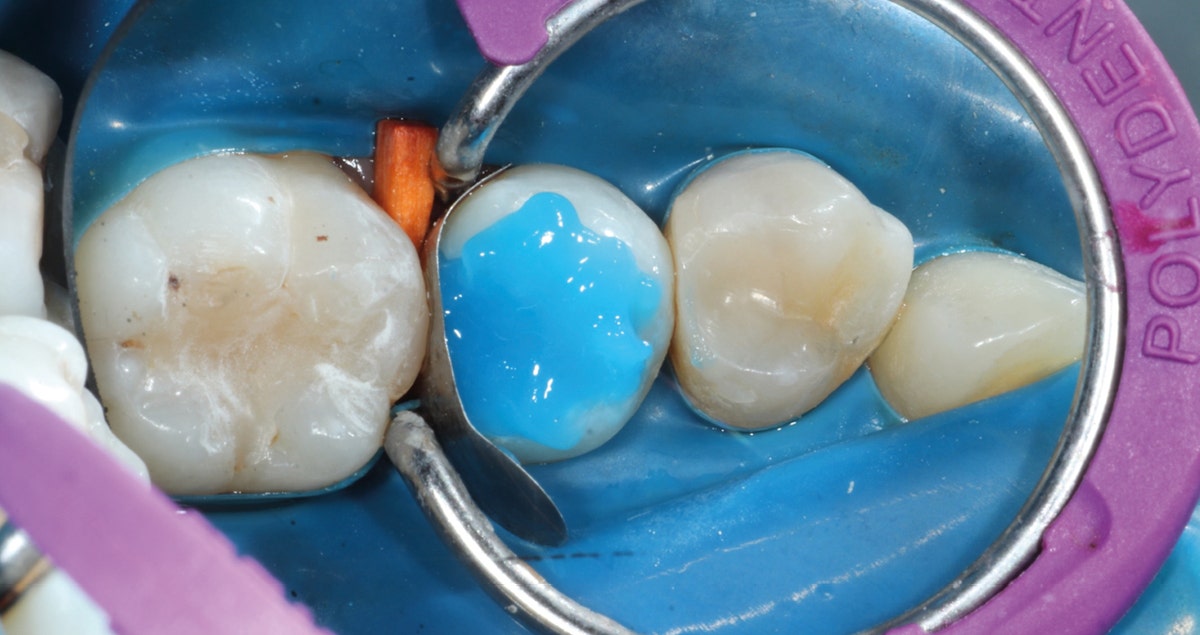
Fig. 3. Etching of the tooth structure with phosphoric acid etchant. Afterwards, the adhesive needs to be applied (in this case, Universal Bond Quick was used according to the manufacturer’s instructions).


Fig. 4. CLEARFIL MAJESTY™ ES-2 Premium in the shade A3E is applied in the distal box to build up the wall first. In this way, the available space is used to model the most critical part of the restoration before simply filling the cavity in increments with the dentin shade A3D.


FINAL SITUATION


Fig. 5. Final restoration after finishing and polishing. In accordance with the concept behind CLEARFIL MAJESTY™ ES-2 Premium with its pre-defined shade combinations, the final enamel layer was build-up using the shade A3E. However, the use of a single opacity is also possible in the posterior region depending on the aesthetic demands.


CONCLUSION


By elevating deep interproximal margins, it is possible to focus on the critical designing of the contact point when there is still sufficient space available to do so. This simplifies the procedure, while all that is left to do can be managed in a straightforward way like a Class I restoration.


Composite restorations in the anterior region

HOW MANY SHADES DO WE NEED?


Case by Gasparatos Spyros, Postgraduate student in Restorative Dentistry program, Faculty of Dentistry, National and Kapodistrian University of Athens, Greece


Restoring anterior teeth with large defects using composite seems to be quite challenging. With high-performance materials at hand and a systematic layering concept in mind, however, it is possible to produce highly aesthetic results in a reproducible way. The clinical case below is used to illustrate a dual-shade layering technique with CLEARFIL MAJESTY™ ES-2 Premium, a composite system with pre-defined colour combinations.


CASE EXAMPLE


The patient, a young male, was unhappy with the appearance of his maxillary anterior teeth. Several years ago, his central incisors had been restored with composite. These existing restorations had defective and heavily discoloured margins, while their shade did not match the adjacent natural tooth structure. The maxillary lateral incisors were peg-shaped (microdontia). Economic considerations and the desire to save as much natural tooth structure as possible made the team decide to restore all four maxillary incisors with composite. CLEARFIL MAJESTY™ ES-2 Premium became the material of choice as it eliminates the need for complicated shade combination formulas and supports predictable outcomes.


Fig. 1. The patient’s initial smile.


Fig. 2. Intraoral image of the initial situation with defective composite restorations and microdonts. Two composite buttons on the right lateral incisor are used to verify the determined shade combination.


RESTORING THE CENTRAL INCISORS


We decided to restore the central incisors first and then focus on the lateral incisors. The tooth shade was determined using the VITA™ classical A1-D4 shade guide, while composite buttons were applied to the teeth to verify the determined shade combination. In order to simplify the restoration procedure, a palatal silicon index was produced before removing the existing restorations. During minimally invasive tooth preparation, bevels were created at the margins to provide for a smooth optical transition from the natural tooth structure to the composite.


An adhesive (CLEARFIL™ Universal Bond Quick) was applied after selective etching of the enamel to achieve a strong bond. With the aid of the silicon index, it was easy to create the palatal shells of the restorations with CLEARFIL MAJESTY™ ES-2 Premium in the shade A3E (enamel), which matches the determined tooth shade A3. The dentin core was built up with the same composite in the recommended shade A3D (dentin), mamelons were modelled and some CLEARFIL MAJESTY™ ES-2 Premium in the shade WD added for the incisal halo, while some individual effects (like enamel cracks) were imitated with brown stain. The build-up was finalized in the interproximal and labial areas with composite in the shade A3E. Between the central incisors, a wedge was used to retract the papilla and facilitate the designing of the interproximal contact area. The finished and pre-polished restorations already had a natural appearance.


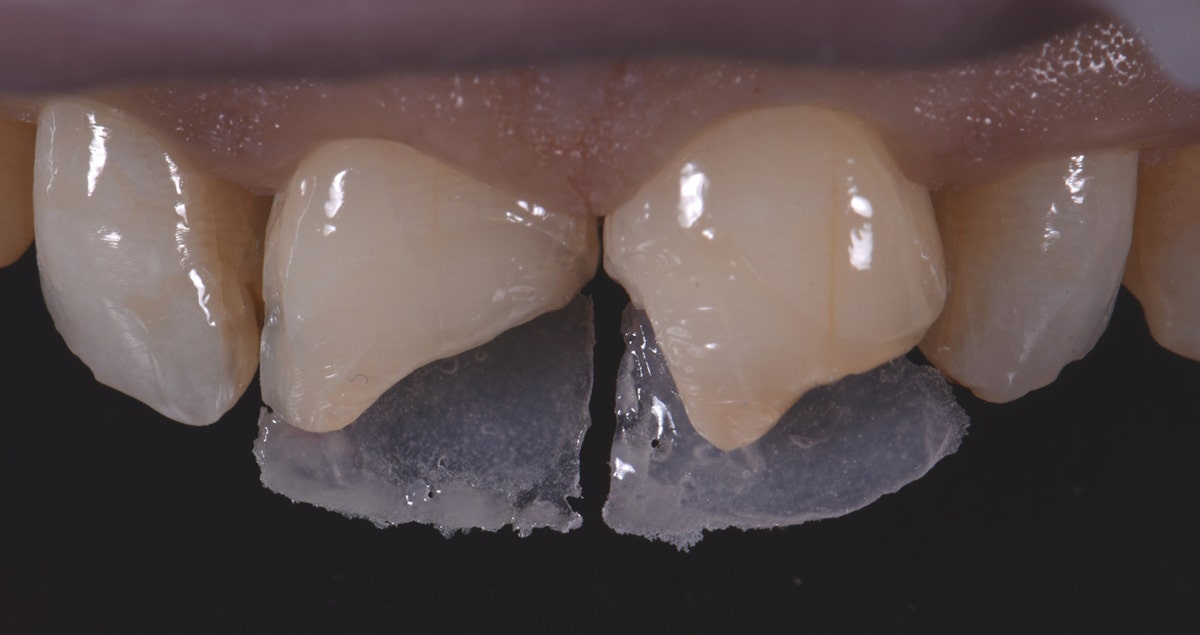
Fig. 3. Central incisors after removal of the old restorations and the beveling of the enamel.


Fig. 4. Light-cured palatal shells made of CLEARFIL MAJESTY™ ES-2 Premium in the shade A3E.


Fig. 5. Build-up of the dentin core with mamelons individualized with the shade WD and brown stain.


Fig. 6. Situation after finalization of the central incisor restorations with composite in the enamel opacity.


Fig. 7. Central incisor restorations after finishing and initial polishing.


RESTORING THE LATERAL INCISORS


Tooth preparation was not required on the lateral incisors. Instead, they were merely cleaned after a slight roughening of the enamel surfaces. The build-up procedure was similar to the one used for the central incisors. The adjacent tooth was protected with PTFE tape, and the palatal shell was created with the aid of a finger instead of a silicone index. Afterwards, we focused on the build-up of the interproximal walls before a small amount of dentin was placed and the shape was finalized by applying the labial enamel layer.


Fig. 8. Build-up of the left lateral incisor.


Fig. 9. Situation after finishing and polishing.


FINAL SITUATION


Fig. 10. Final smile of the patient's demands.


CONCLUSION


Two different opacities, a single shade combination and some bleached shade plus stain for special effects – in the present patient case, a simple formula allowed us to create lifelike anterior restorations. With one enamel and one dentin paste used, it is possible to simply rebuild the natural anatomy without the risk of ending up with a bulky core that – once reduced – will lose its special optical structure. It is also easy to control the thickness of the final enamel layer with its huge impact on the light-optical properties of the whole restoration. For most patients and teeth with a simple or medium-to-complex internal colour structure, the selected concept is very well suited and will lead to pleasing outcomes.


Case report: direct cuspal coverage with resin composite

Case by Aleksandra Łyżwińska, Warsaw, Poland.


ABSTRACT


Indirect overlays are the contemporary restoration standard for posterior teeth with extensive hard tissue loss. They provide for cuspal coverage, which decreases the likeliness of coronal and/or root fracture. At the same time and in contrast to crowns, overlay preparations minimize the removal of sound tooth structure especially in the cervical region, which is a critical factor.1 Modern dental resin composites allow for direct cuspal coverage in a single-visit appointment. The results of in-vitro studies suggest that these direct overlays are a suitable alternative to their indirect counterparts in specific situations.2-6 The following case report is used to describe the direct restoration procedure by means of a maxillary right molar with an extensive, deep MOD lesion.


INTRODUCTION


In the context of treating a tooth with an extensive carious lesion, a biomechanical risk assessment should be performed. The primary method of reducing the likeliness of tooth fracture is treatment with a restoration that provides cuspal coverage. The contemporary gold standard for biomechanically compromised teeth are adhesively cemented overlays as an alternative to crowns.1 Another option that does not involve labwork is a direct overlay restoration.2-6 The direct approach is especially suitable for long-term temporization, which may be required during orthodontic treatment, for example.


Laminate veneer restoration using lithium disilicate glass prosthetic restorations

Case by Dr. Yohei Sato, DMD, PhD, Department of Removable Prosthodontics, Tsurumi University School of Dental Medicine, JAPAN and Dr. Keisuke Ihara, CDT, i- Dental Lab, JAPAN.


Fig. 1. The patient visited us with a chief complaint of a desire for improved esthetics of the maxillary right and left lateral incisors.


Fig. 2. A core fabricated from a diagnostic wax model was applied and the necessary clearances were determined.


Fig. 3. Since the teeth are microdonts, the preparation of each abutment was completed by simply exposing a fresh surface to be covered by the laminate veneers.


Fig. 4. A layer of porcelain was applied on the lithium disilicate glass substrate, to make a complete laminate veneer.


Fig. 5. After a trial fitting, the inner surface of the laminate veneer was cleaned with KATANA™ Cleaner. The inner surface was conditioned according to the prosthesis‘ IFU.


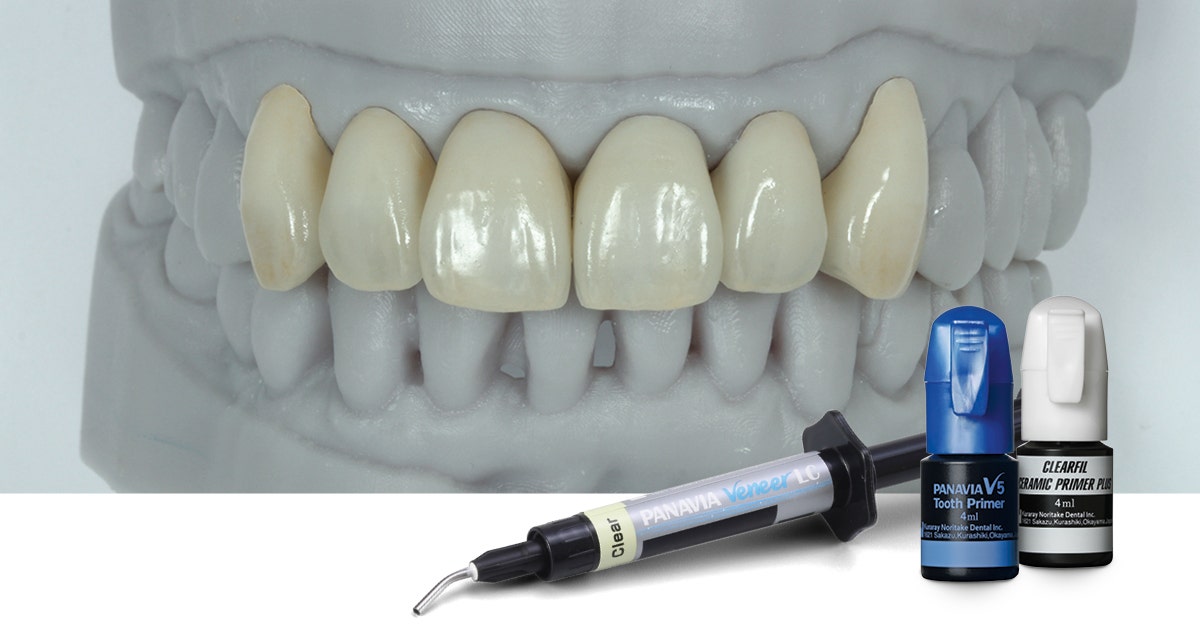
Fig. 6. Milling. CLEARFIL™ CERAMIC PRIMER PLUS was applied and dried to silane couple the restoration.


Fig. 7. After a trial fitting, KATANA™ Cleaner was applied to the abutment, and rubbed for more than 10 seconds. Then, it was washed off sufficiently (until the cleaner color had completely disappeared), and dried with compressed air.


Fig. 8. K-ETCHANT Syringe was applied and left for 10 seconds before water-washing and compressed air-drying.


Fig. 9. PANAVIA™ V5 Tooth Primer was applied and left for 20 seconds before compressed-air drying.


Fig. 10. PANAVIA™ Veneer LC Paste was applied to the inner surface of the laminate veneer.


Fig. 11. The laminate veneer was seated and the fit checked. Then, the excess cement was tack-cured (not more than 1 second at any one point) and removed. Finally, the restoration was light-cured and finished.


FINAL SITUATION


Fig. 12. This photo shows the laminate veneer restorations one month after placement. The morphology and color of the right and left lateral incisors have been improved, providing a good balance to the entire anterior dentition.


Lithium disilicate crown placement

Case by Richard Young DDS, San Bernardino, CA


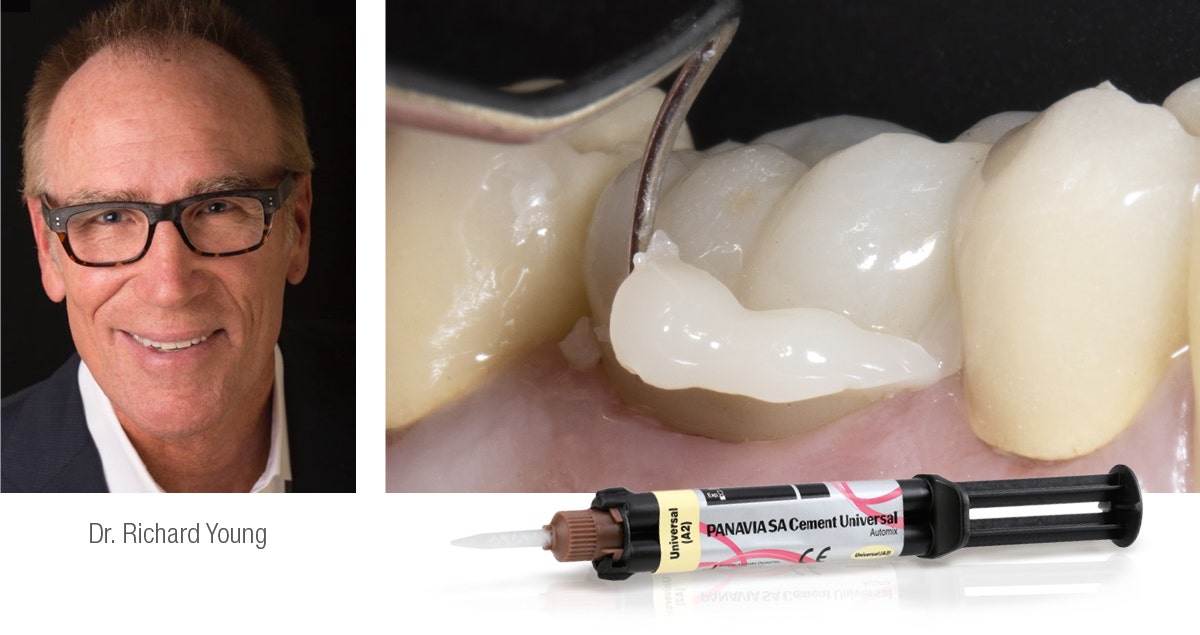
Easy procedure, reliable outcome: that is what most dental practitioners may wish for when placing indirect restorations. The following clinical case example is used to demonstrate an easy, but highly successful clinical protocol for the luting of a lithium disilicate crown.


Fig. 1. Lithium disilicate crown after etching of the intaglio surface with hydrofluoric acid and try-in.


Fig. 2a. Application of KATANA™ Cleaner into the crown for a complete removal of contaminants such as proteins from blood and saliva, which may compromise the performance of any resin cement system.

OR Fig. 2b. Alternatively, KATANA™ Cleaner is applied into a mixing well.


Fig. 3. Application of KATANA™ Cleaner to the restoration.


Fig. 4. KATANA™ Cleaner is applied to the prepared tooth structure in the same way (rubbing for ten seconds followed by rinsing and drying).


Fig. 5. Application of PANAVIA™ SA Cement Universal into the cleaned crown.


Fig. 6. The cement contains a unique silane coupling agent – the LCSi monomer - for a strong and reliable bond to lithium disilicate and other restorative materials like glass ceramics and hybrid ceramics.


   The Silane is activated in the mixing tip by Original MDP.


Fig. 7. Easy clean-up after two to five seconds of tack-curing.


Fig. 8. The excess resin cement is in its gel-state and removed in one piece with an explorer.


FINAL SITUATION


Fig. 9. Treatment outcome immediately after crown placement.


Dentist:

RICHARD YOUNG DDS


Case and images courtesy of Richard Young DDS, San Bernardino, CA


Case study about PANAVIA SA Cement Universal

USING THE NEXT-GENERATION SELF-ADHESIVE CEMENTS

by Dr. Tomohiro Takagaki.


INTRODUCTION


In recent years, the use of CAD/CAM systems for the production of indirect restorations has become increasingly popular. The shortage of young, qualified staff in the field of dental technology in Japan1) is likely to contribute to a further increase of automated production techniques such as CAD/CAM, which require fewer manual production steps compared to traditional manufacturing techniques. Also globally, the number of restorations fabricated using CAD/CAM systems is rapidly increasing. This leads to an even more widespread use of innovative, tooth-coloured restorative materials such as zirconia, silicate ceramics and resins.


Demand for placing restorations using the principle of adhesion by resin cements is more and more increasing in daily clinical settings. However, it is difficult and complicated to condition the tooth and restoration surfaces using many primers correctly. In addition, the combination of many different components is time-consuming, complex and cost-intensive. Self-adhesive resin cements, which do not require conditioning the surface of teeth or some restorations with primers, have been released recently, and have become popular among dental practitioners. However, there are many reports2) on the dislodgement of resin-based CAD/CAM restorations and full-zirconia crowns that have been placed using self-adhesive cements. Hence, demand is high for a resin cement system that is both simple to use and reliable in performance.


In this document, I explain the fundamental technology of resin cement systems and their range of applications. In addition, I will introduce the method of using a next-generation self-adhesive cement, PANAVIA™ SA Cement Universal (Kuraray Noritake Dental Inc., Fig. 1), as an example.


Laminate veneer restoration using KATANA™ Zirconia STML prostheses

Case by Dr. Yohei Sato, DMD, PhD, Department of Removable Prosthodontics, Tsurumi University School of Dental Medicine, JAPAN and Dr. Keisuke Ihara, CDT, i-Dental Lab, JAPAN


Fig. 1. The patient was referred to our hospital by an orthodontist. The chief complaints were improper esthetics of the teeth due to black triangles at the edges of the gaps between the teeth and occlusal wear of the teeth.


Fig. 2. On the basis of the pre-treatment diagnosis using a mockup, the abutments were prepared without anesthesia, keeping in mind that the enamel should be preserved to the extent possible.

Fig. 3. Since a fixation retainer was installed on the palate side, it was difficult to take impressions using silicone. Therefore, an intraoral scanner for impression taking was used.


Fig. 4. A layer of porcelain on each of KATANA™ Zirconia STML substrates was applied to complete the laminate veneer resto-rations. The inner surface of each restoration was sandblasted, being careful to prevent chipping.


Fig. 5. After trial fitting, bonding inhibiting substances as blood and saliva were removed using KATANA™ Cleaner.


Fig. 6. Milling. CLEARFIL™ CERAMIC PRIMER PLUS, which contains the phosphoric ester monomer MDP, was applied and dried using compressed air.


Fig. 7. The surface of each tooth was cleaned and treated with K-ETCHANT Syringe for 10 seconds before washing it away with water and compressed air-dried the area.


Fig. 8. PANAVIA™ V5 Tooth Primer was applied and left it for 20 seconds, then compressed air-dried it.


Fig. 9. PANAVIA™ Veneer LC Paste was applied and the laminate veneer was seated. For this case, we treated six teeth during one session.


Fig. 10. The unpolymerized excess paste was removed with a brush. PANAVIA™ Veneer LC Paste is a light-cured type, which was designed to provide sufficient working time.


Fig. 11. This photo shows the results after the final light curing. Since the excess cement was easily removed, there were almost no cement residues.


FINAL SITUATION


Fig. 12. The photo shows the inside of the oral cavity one month after the fitting of the laminate veneer restorations. It can also be noted that the teeth’s marginal gingiva has been improved, thanks to the good fit of the laminate veneer restorations.


Premolar case with CLEARFIL MAJESTY™ ES-2 Universal

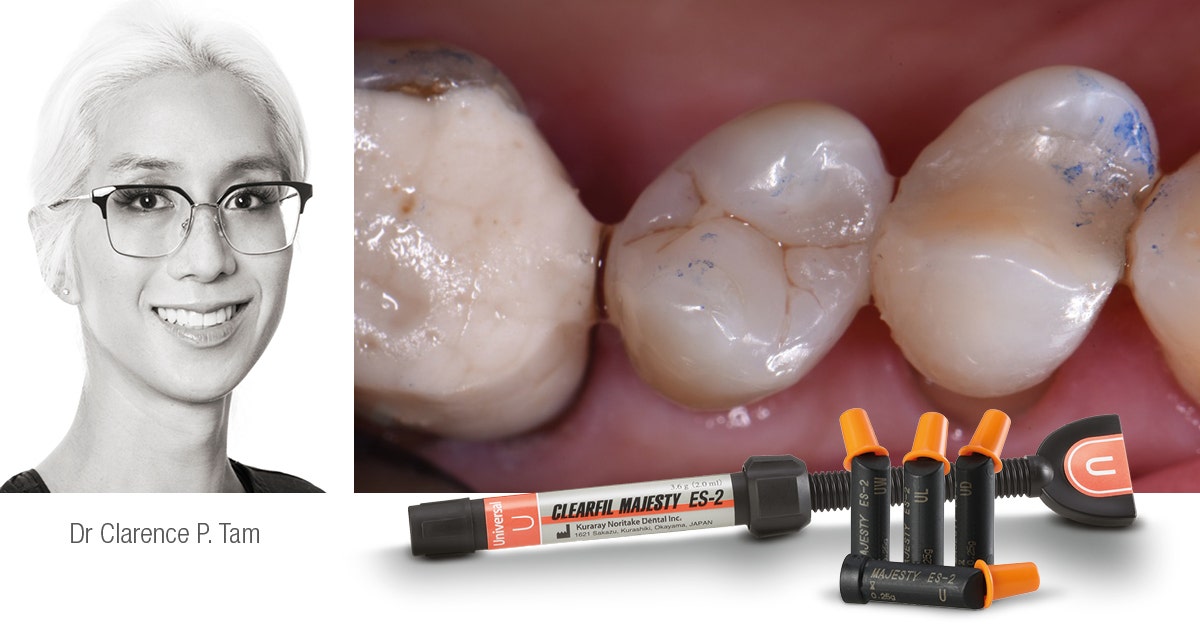
Case by Dr. Clarence P. Tam, HBSC, DDS, AAACD, FIADFE


Case background


A stable ASA 2 65 year old female presented to the practice for restorative dentistry with a medical history significant for a non-descript immunoglobulin deficiency, for which she receives regular infusions. She reports no known drug allergies. Clinically, she was diagnosed with an occlusal peripheral rim fracture leaving a food trap on tooth 14 (FDI notation). Tooth 15 featured an extensive amalgam with extreme proximity to the distal marginal ridge, which exhibited distal vertical axial fractures as a result of cyclic expansion-contraction over time. The restorative goal of minimally invasive direct dentistry would be complicated by the undoubtedly dark dentin substrate under the amalgam. A material was sought that featured both an excellent chameleon mechanism as well as physical properties to maximize the prognosis of direct restorations in this area.


Restorative procedure


The patient was subjected to topical anesthetic prior to buccal infiltration using 1 carpule of 2% Lignocaine with 1:100,000 epinephrine. A rubber dam was affixed prior to preparation of tooth 15MO with dissection of the distal vertical marginal ridge fracture. The margins of tooth 14O and 15MOD were refined before bevelling as the ends of enamel rods facilitate better bonding relative to the sides of enamel rods. A 27 micron aluminum oxide micro air abrasion treatment was completed prior to affixing, wedge and matrix to reconstruct the mesial marginal ridge of tooth 15. A matrix-in-matrix solution was used to recreate the proximoaxial contour of 15D. This provided hermetic closure at the proximogingival cavosurface margin as well as an ideal contour for the missing axial wall.


Following a total etch technique, a 2% Chlorhexidine scrub was completed for 30 seconds and the dentin blot dried to a moist state. A 5th generation bond was applied, air thinned and cured as per manufacturer instructions. Microlayers are important during the delicate first 5 minutes of hybrid layer formation, and were completed using 0.25 mm increments of CLEARFIL MAJESTY™ Flow (Kuraray Noritake Dental Inc.). This technique can be expected to increase significantly the shear bond strength to dentin1,2.


This was completed both in the proximal box floor area as well as mid-occlusally. The marginal ridge was completed using CLEARFIL MAJESTY™ ES-2 Universal (Kuraray Noritake Dental Inc.). Since the dentin base was heavily stained, CLEARFIL MAJESTY™ Flow was used before utilizing CLEARFIL MAJESTY™ ES-2 Universal in a lobe-by-lobe creation of occlusal anatomy. Post-operative occlusal checks verify that the restoration is conformative to occlusion and esthetically excellent with no visible marginal show.


Rationale for material choice


The marginal ridges were micro-layered horizontally as was the floor of the resulting Class I preparation as per a reduced layer thickness-technique modification of Nikolaenko et al3, whereas the highest shear bond strengths were found when a 1mm horizontal layering technique was used.


CLEARFIL MAJESTY™ ES-2 Universal is at the forefront of a simplified restorative armamentarium for the modern practice. It takes cloud-shading one step further by offering a “Universal” shaded composite featuring Light Diffusion Technology (LDT) with simultaneous ideal sculptability, optical metamerism and physical properties for use in any restorative situation in the mouth. Featuring barium glass nano fillers and proprietary pre-polymerized nanoparticle fillers, the latter boasts a high refractive matrix that is able to disperse light and fool the eye with even the thinnest of layers, obviating the need for opaquer composites in cases like the one featured. When paired with CLEARFIL MAJESTY™ Flow in a conservative layered technique, the 81% filled flowable produces a radiographically well-demarcated layer, and the superficial CLEARFIL MAJESTY™ ES-2 Universal boasts an easy-to-polish robust single shade restorative solution that will virtually fulfil all of your restorative needs for non-bleaching patients. Physically, with compressive strength is rated at 348 MPa and flexural strength at 116 MPa, CLEARFIL MAJESTY™ ES-2 Universal is in the range of natural enamel and dentin. The built-in fluorescence is very enamelomimetic, which is excellent for nightclub social situations.


FINAL SITUATION


Dentist:

DR CLARENCE P. TAM, HBSC, DDS, AAACD, FIADFE


Clarence is originally from Toronto, Canada, where she completed her Doctor of Dental Surgery and General Practice Residency at the University of Western Ontario and the University of Toronto, respectively. Clarence’s practice is limited to cosmetic and restorative dentistry and she is well-published to both the local and international dental press, writing articles, reviewing and developing prototype products and techniques in clinical dentistry. She frequently and continually lectures internationally. Clarence is the Immediate Past Chairperson of the New Zealand Academy of Cosmetic Dentistry.


She is currently one of two individuals in Australasia to hold Board-Certified Accredited Member Status with the American Academy of Cosmetic Dentistry. Clarence is an Opinion Leader for multinational dental companies Kuraray Noritake, J Morita Corp, Henry Schein NZ, Ivoclar Vivadent, Dentsply Sirona, 3M, Kerr, GC Australasia, SDI and Coltene and is the only Voco Fellow in Australia and New Zealand. She holds Fellowship status with the International Academy for DentoFacial Esthetics and is a passionate and approachable individual, committed to having an interactive approach with patients in all of her cases to maximize predictability.


References


1. Bertschinger C, Paul SJ, Luthy H, Scharer P. Dual application of dentin bonding agents: effect on bond strength. Am J Dent. 1996;9(3):115-119.
2. Magne P, Kim TH, Cassione D, Donovan TE. Immediate dentin sealing improves bond strengths of indirect restorations. J Prosthet Dent. 2005;94(6):511-519.
3. Nikolaenko SA, Lohbauer U, Roggendorf M, Petschelt A, Dasch W, Franenberberger R. Influence of C-Factor and layering technique on microtensile bond strength to dentin. Dental Mater. 2004;20(6):579-585.


Direct cuspal coverage with resin composite

Case by Dr. Aleksandra Łyżwińska, Warsaw, Poland


ABSTRACT


Indirect overlays are the contemporary restoration standard for posterior teeth with extensive hard tissue loss. They provide for cuspal coverage, which decreases the likeliness of coronal and/or root fracture. At the same time and in contrast to crowns, overlay preparations minimize the removal of sound tooth structure especially in the cervical region, which is a critical factor.1 Modern dental resin composites allow for direct cuspal coverage in a single-visit appointment. The results of in-vitro studies suggest that these direct overlays are a suitable alternative to their indirect counterparts in specific situations.2-6 The following case report is used to describe the direct restoration procedure by means of a maxillary right molar with an extensive, deep MOD lesion.


INTRODUCTION


In the context of treating a tooth with an extensive carious lesion, a biomechanical risk assessment should be performed. The primary method of reducing the likeliness of tooth fracture is treatment with a restoration that provides cuspal coverage. The contemporary gold standard for biomechanically compromised teeth are adhesively cemented overlays as an alternative to crowns.1 Another option that does not involve labwork is a direct overlay restoration.2-6 The direct approach is especially suitable for long-term temporization, which may be required during orthodontic treatment, for example.


CLINICAL CASE


The 40-year-old male patient was referred to my office before an orthodontic and prosthetic treatment. Intraoral examination (Figs. 1 and 2) revealed:

  • Tetracycline discolouration,
  • Multiple extensive composite restorations with marginal leakage,
  • Primary and secondary carious lesions, and
  • Significant mechanical weakness7,8 (mesio-occluso-distal (MOD) cavities, cusp loss, cracks).


Fig. 1. Initial situation – extensive MOD composite resin restoration.


Fig. 2. Initial situation – unacceptable contact points, palatal wall crack line.


Based on a clinical and radiological examination (Fig. 3), it was decided to restore the maxillary right first molar with a direct overlay, which should serve as a long-term temporary for the duration of orthodontic treatment. Once the local anaesthetic had been administered, rubber dam was placed in the first quadrant and the cusps of the affected first molar were reduced. For subgingival tooth preparation, a rubber dam sheet was temporarily moved behind the second upper molar (Fig. 4). In order to obtain a good emergence profile of the restoration and a tight fit of the sectional matrix, the gingivectomy was performed with an electric surgical knife (Surtron 50D, LED SPA) (Fig. 5). The main advantages of a diathermal cut are instant tissue coagulation and hemostasis9.


Fig. 3. Bite-wing radiograph: Maxillary fist molar with an overhang and negative profile of the distal wall.


Fig. 4. Initial preparation with reduction of the cusps and exposure of gingiva.


Fig. 5. Gingivectomy performed using a surgical electric knife.


In accordance with the European Society of Endodontology’s guidelines on the management of deep caries10, the deepest part of the cavity was cleaned in full rubber dam isolation (Nic Tone Dental Dam, MDC Dental) (Fig. 6). Carious-tissue excavation was carried out using round burs, then the enamel and dentin were air-abraded with 50-μm aluminum oxide (Microetcher IIa, Danville). Multiple cracks, penetrating through the enamel and partially the dentin, occurred within the mesial and palatal walls. The presence of cracks crossing the dentin-enamel junction is an absolute indication to cuspal coverage8,11.


An appropriate rubber dam isolation is essential in adhesive dentistry. Beyond the obvious advantage of a clean operation field uncontaminated by saliva and moisture, the rubber dam contributes to keeping periodontal tissues at a distance form a tooth. In order to ensure both, maximum retraction and sufficient space to work, the rubber dam was inverted (introduced to the gingival sulcus) and stabilized using PTFE tape (Fig. 7). The mesial wall was restored using a blue 3D Composite-Tight 3D Fusion matrix ring (Garrison) and a medium standard Sectional Contoured Metal Matrix (TOR VM, Fig. 8). Due to its extensiveness and shape, restoration of the distal wall was more difficult to perform.


Fig. 6. Rubber dam newly placed in the interproximal area. Full isolation is essential for the excavation of the infected dentin in the deepest part of the cavity.


Fig. 7. PTFE tape placement for improving isolation in the gingival area. Al2O3 sandblasting.


Fig. 8. Mesial matrix fit.


The first attempt to adapt an elongated Sectional Contoured Metal Matrix and the green 3D Composite-Tight 3D Fusion (Garrison) ended with failure (Fig. 9). The matrix was changed for a longer and more curved one (Fig. 10). The ring was replaced by a smaller Palodent V3 Ring (Dentsply Sirona, Fig. 11). Due to the depth of the carious lesion, an antibacterial adhesive system was used (CLEARFIL™ SE Protect, Kuraray Noritake Dental Inc.). It contains the MDPB monomer, which offers an antibacterial effect that lasts even after hybrid layer formation12-14. Furthermore, the fluoride included in the bond liquid intensifies the cariostatic mechanism of CLEARFIL™ SE Protect and supports the so-called “Super Dentin” formation15.


Fig. 9. Insufficient fit of the distal matrix.


Fig. 10. New, longer and more curved matrix in place.


Fig. 11. Different matrix ring placed in the distal area.


After polymerization of the bonding agent, the nanohybrid flowable composite resin (CLEARFIL MAJESTY™ ES Flow High, Kuraray Noritake Dental Inc.) was applied in a thin layer. The proximal wall was restored using both packable (CLEARFIL MAJESTY™ ES-2 Universal, Kuraray Noritake Dental Inc.) and flowable composite resin (CLEARFIL MAJESTY™ ES Flow Super Low, Kuraray Noritake Dental Inc.) (Figs. 12 and 13). Core build-up was performed with bulk-fill type composite. The cusps were reconstructed free-hand with the previously used CLEARFIL MAJESTY™ ES-2 Universal (Figs. 14 and 15). The universality of this product provides for a good optical integration and blending with the adjusted tissue, regardless of the colour of the underlying tooth structure. The fissures were gently highlighted using brown tints.


Fig. 12. Thin layer of flowable composite resin CLEARFIL MAJESTY™ ES Flow High (A2) applied on the cavity floor. The proximal walls are built up with build-up by CLEARFIL MAJESTY™ ES-2 Universal and CLEARFIL MAJESTY™ ES Flow Super Low (A2).


Fig. 13. Proximal walls build-up – palatal view.


Fig. 14. Core build-up. Free-hand cusp coverage with CLEARFIL MAJESTY™ ES-2 Universal, palatal view.


Fig. 15. Cusp coverage – occlusal view.


The initial polishing was performed with the rubber dam still in place. The excesses of composite resin were removed with the aid of abrasive discs, diamond burs and a “Brownie” polisher (BAL, Nevadent). Pre-polishing and high-shine polishing were executed with TWIST™ DIA for Composite (Kuraray Europe GmbH.) supported by a goat hair brush (Micerium) (Figs. 16 to 17).


Fig. 16. Occlusal surface after surface modeling with CLEARFIL MAJESTY™ ES-2 Universal and initial polishing.


Fig. 17. Occlusal surface after modeling with CLEARFIL MAJESTY™ ES-2 Universal and initial polishing – palatal view.


After removal of the rubber dam, the occlusal contact points of the direct overlay were adjusted (Figs. 18 and 19). Every spot touched by the burr was subsequently repolished according to the previously described protocol (Figs. 20 and 21).


Fig. 18. Occlusal adjustment. Contact points recorded with articulation paper (100 μm).


Fig. 19. Occlusal adjustment. Contact points recorded with articulation paper (100 μm= and articulation foil (16 μm).


Fig. 20. Final effect after polishing with TWIST™ DIA for Composite.


FINAL SITUATION


Fig. 21. Final effect – palatal view.


CONCLUSION


As a result of decades of improvements mainly with regard to the filler density and polishability, modern dental composites offer a great gloss retention and favourable wear properties. In addition, polymerization shrinkage has been decreased due to the integration of nanohybrid filler technology. Those features allow us to restore biomechanically compromised teeth using a direct restoration technique.


Direct overlays are a suitable alternative for a conventional indirect restoration in many situations.18,19 According to researchers, the advantages of direct restorations with cuspal coverage include minimal tooth preparation, vital pulp-oriented treatment, the possibility to treat patients in a single appointment and a potentially lower cost of the treatment.18-20 However, it should be emphasized that the presented technique requires advanced restorative skills that need to be acquired first before starting to implement it.


Dentist:

DR. ALEKSANDRA ŁYŻWIŃSKA
Warsaw, Poland


Dr. Aleksandra Łyżwińska is a restorative dentist. She graduated from the Warsaw Medical University in 2017, where she was an assistant professor at the Department of Conservative Dentisyty and Endodontics. Her focus lies in modern adhesive techniques, resin composites and biomaterials.


REFERENCES


1. Dietschi D, Duc O, Krejci I, Sadan A. Biomechanical considerations for the restoration of endodontically treated teeth: a systematic review of the literature--Part 1. Composition and micro- and macrostructure alterations. Quintessence Int. 2007 Oct;38(9):733-43.
2. van Dijken JW. Direct resin composite inlays/onlays: an 11 year follow-up. J Dent. 2000 Jul;28(5):299-306. doi: 10.1016/s0300-5712(00)00010-5. PMID: 10785294.
3. Mondelli RF, Ishikiriama SK, de Oliveira Filho O, Mondelli J. Fracture resistance of weakened teeth restored with condensable resin with and without cusp coverage. J Appl Oral Sci. 2009 May-Jun;17(3):161-5.
4. Deliperi S, Bardwell DN. Multiple cuspal-coverage direct composite restorations: functional and esthetic guidelines. J Esthet Restor Dent. 2008;20(5):300-8; discussion 309-12.
5. Deliperi S, Bardwell DN. Clinical evaluation of direct cuspal coverage with posterior composite resin restorations. J Esthet Restor Dent. 2006;18(5):256-65; discussion 266-7.
6. Mincik J, Urban D, Timkova S, Urban R. Fracture Resistance of Endodontically Treated Maxillary Premolars Restored by Various Direct Filling Materials: An In Vitro Study. Int J Biomater. 2016;2016:9138945.
7. Reeh ES, Messer HH, Douglas WH. Reduction in tooth stiffness as a result of endodontic and restorative procedures. J Endod. 1989 Nov;15(11):512-6.
8. Banerji S, Mehta SB, Millar BJ. The management of cracked tooth syndrome in dental practice. Br Dent J. 2017 May 12;222(9):659-666.
9. Bashetty K, Nadig G, Kapoor S. Electrosurgery in aesthetic and restorative dentistry: A literature review and case reports. J Conserv Dent. 2009 Oct;12(4):139-44.
10. European Society of Endodontology (ESE) developed by:, Duncan HF, Galler KM, Tomson PL, Simon S, El-Karim I, Kundzina R, Krastl G, Dammaschke T, Fransson H, Markvart M, Zehnder M, Bjørndal L. European Society of Endodontology position statement: Management of deep caries and the exposed pulp. Int Endod J. 2019 Jul;52(7):923-934.
11. Lynch CD, McConnell RJ. The cracked tooth syndrome. J Can Dent Assoc. 2002 Sep;68(8):470-5.
12. Hashimoto M, Hirose N, Kitagawa H, Yamaguchi S, Imazato S. Improving the durability of resindentin bonds with an antibacterial monomer MDPB. Dent Mater J. 2018 Jul 29;37(4):620-627.
13. Imazato S, Kinomoto Y, Tarumi H, Torii M, Russell RR, McCabe JF. Incorporation of antibacterial monomer MDPB into dentin primer. J Dent Res. 1997 Mar;76(3):768-72.
14. Imazato S, Kinomoto Y, Tarumi H, Ebisu S, Tay FR. Antibacterial activity and bonding characteristics of an adhesive resin containing antibacterial monomer MDPB. Dent Mater. 2003 Jun;19(4):313-9.
15. Nakajima M, Okuda M, Ogata M, Pereira PN, Tagami J, Pashley DH. The durability of a fluoride-releasing resin adhesive system to dentin. Oper Dent. 2003 Mar-Apr;28(2):186-92.
16. Bore Gowda V, Sreenivasa Murthy BV, Hegde S, Venkataramanaswamy SD, Pai VS, Krishna R. Evaluation of Gingival Microleakage in Class II Composite Restorations with Different Lining Techniques: An In Vitro Study. Scientifica (Cairo). 2015;2015:896507.
17. Oficjalne informacje producenta Kuraray Noritake Dental https://www.kuraraynoritake.eu/pl/clearfil-majesty-es-flow (dostęp 08.02.2022).
18. Angeletaki F, Gkogkos A, Papazoglou E, Kloukos D. Direct versus indirect inlay/onlay composite restorations in posterior teeth. A systematic review and meta-analysis. J Dent. 2016 Oct;53:12-21.
19. Dhadwal AS, Hurst D. No difference in the long-term clinical performance of direct and indirect inlay/onlay composite restorations in posterior teeth. Evid Based Dent. 2017 Dec 22;18(4):121-122.
20. Banerji S, Mehta SB, Millar BJ. Cracked tooth syndrome. Part 2: restorative options for the management of cracked tooth syndrome. Br Dent J. 2010 Jun;208(11):503-14.
21. Opdam NJ, Roeters JJ, Loomans BA, Bronkhorst EM. Seven-year clinical evaluation of painful cracked teeth restored with a direct composite restoration. J Endod. 2008 Jul;34(7):808-11.
22. van Dijken JW. Direct resin composite inlays/onlays: an 11 year follow-up. J Dent. 2000 Jul;28(5):299-306.


Replacement of Class II restorations with hybrid-ceramic overlays

Case by CDT Daniele Rondoni


When planning to replace Class II restorations, many things need to be considered. In order to select the most appropriate restorative technique and preparation design, it is essential to evaluate the amount and state of the remaining tooth structure, first. After repeated restoration replacement or in teeth originally restored with amalgam, for example, the remaining walls and cusps are often weakened and prone to fractures and cracks. When the cavity walls appear to be too thin or the structure is weak at the time of restoration replacement, it may be better to remove walls and cusps and opt for indirect adhesive restorations (overlays) instead of direct composite restorations. Due to favourable material properties – in particular a high flexural and compressive strength while being gentle to the opposing dentition and not too rigid for the surrounding tooth structures – we often opt adhesive restorations made of KATANA™ AVENCIA™ Block in those situations.


The following clinical case is used to describe the replacement of two composite restorations with overlays made of the innovative hybrid ceramic material.


Fig. 1. Initial clinical situation with composite restorations on the second premolar and first molar in need of replacement. The tooth structure particularly of the first molar was weak, with the distobuccal cusp already fractured.


Fig. 2. Prepared tooth structure ...


Fig. 3. Restorations milled from a KATANA™ AVENCIA™ Block after high-gloss polishing and characterization.


Fig. 4. Finalized restorations on a resin model.


Fig. 5. Adhesively cemented restorations in the patient’s mouth.


FINAL SITUATION


Fig. 6. Treatment outcome with a nice transition from the tooth structure to the restoration.


Dentist:

DANIELE RONDONI, MDT


Born in Savona in 1961 where he lives and has worked in his own laboratory since 1982 with his collaborators. Graduated from the dental technician school IPSIA “P. Gaslini” in Genoa in 1979. He continued his education by attending relevant workshops for the “Italian dental school“ and broadened his professional experience in Switzerland, Germany and Japan. Since 2011 Kuraray Noritake Dental International Instructor.