429 Too Many Requests

429 Too Many Requests


nginx

Individualisation of monolithic zirconia restorations

Article by Dr. Florian Zwiener


Modern multi-layered zirconia such as KATANA™ Zirconia STML (Kuraray Noritake Dental Inc.) already meets high aesthetic demands due to its natural colour gradient and high translucency. To achieve further characterisation and optical adjustment to the adjacent teeth, there are essentially two options: veneering with feldspathic ceramic or glazing and individualisation with ceramic stains.


While there are still many indications for veneering, especially in the anterior area, more and more cases can now be solved with monolithic restorations. This allows for a time-efficient chairside workflow with same-day treatment, eliminating the need for temporary restorations. Additionally, the absence of a porcelain layer reduces the wall thickness of the restoration and thus the space required, allowing for less invasive preparation. This also reduces the risk of endodontic complications induced by tooth preparation (grinding trauma). Another advantage is a significant reduction in the chipping risk.


Below are the essential steps for individualisation using ceramic stains, demonstrated through the example of a molar crown.


PREPARATION

The restoration is designed in full contour as usual, ideally dry-milled, and then sintered. After sintering, the restoration is first sandblasted (aluminium oxide 50 μm, 1 to 1.5 bar pressure). This microscopic roughening of the ceramic surface enables an optimal bond with the glaze. Subsequently, the restoration should be cleaned using a steam cleaner or an ultrasonic cleaner to remove all blasting residue.


The functional restoration surfaces must then be polished to avoid the risk of excessive abrasion on the enamel of the opposing dentition, as zirconia is harder than enamel. Following this, optional glazing and characterization with ceramic stains can be performed. However, for areas not in the aesthetic zone, such as the palatal surfaces of maxillary anterior teeth, this is not necessarily required.


PREPARATION: STEPS AT A GLANCE

  1. Sandblasting of the sintered restoration (Al2O3 50 μm, 1-1.5 bar)
  2. Cleaning (steam cleaner or ultrasonic cleaner)
  3. Polishing the occlusal/palatal contact areas


Fig. 1. Sintered and sandblasted zirconia crown.


Fig. 2. Occlusal high-gloss polish.


Fig. 3. TWIST™ DIA for Zirconia (Kuraray Noritake Dental Inc.) enables efficient polishing of zirconia in three steps.


STAINING AND GLAZING

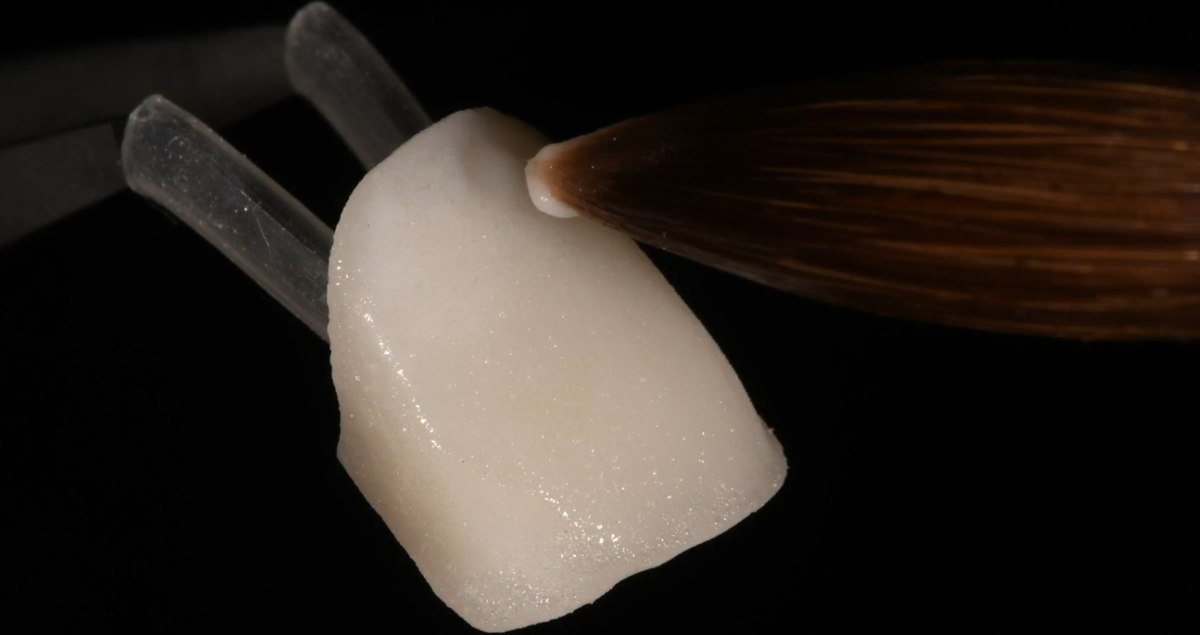
The shades A+, B+, C+, and D+ of the paste-like ceramic stain CERABIEN™ ZR FC Paste Stain (Kuraray Noritake Dental Inc.) enhance the chroma in the cervical area when applied in the respective tooth shade. They are used to strengthen the multicolour effect of the zirconia or to darken the restoration overall. By mixing the stains with glaze or clear glaze in different ratios, the intensity can be adjusted.


Cervical 1 and 2 are suitable for replicating exposed cervical areas or discolouration. Cervical 1 is also useful for marking fissures, as it gives the crown depth and structure without appearing overly dark. Patients typically reject excessively pronounced fissure effects. Since fissure areas in multi-layered materials generally lie in the lightest part of the block (in the enamel layer), it may make sense to darken them slightly with A+, while white hypermineralisations can be replicated on the cusp tips. A narrow band of Grayish Blue below the cusp tips creates an optical translucency effect. In cases where this translucency appears too dark blue or greyish, mixing Grayish Blue with Dark Grey can modify the appearance.


By mixing various colours, numerous different tones can be created. For instance, by adding Yellow to A+, its slightly brownish colour can be adjusted to a warmer, more yellowish tooth shade. It is generally advisable to capture the patient‘s tooth shade with a photo and a custom-made colour ring of the corresponding material before preparation. This can serve as a reference during production, especially in the laboratory, where lighting conditions may differ.


For pronounced characterisations or fine details, it may be necessary to carry out multiple firings to avoid unwanted running effects between the colours and the glaze. This is particularly recommended when replicating anatomical details with high sharpness, such as enamel cracks or local discolourations. For this, a glaze and base shade are first applied and fired, and finer structures are added in a second firing. Alternatively, a fixative firing of the stains without glaze can be performed first, with only a glaze layer fired in the second step. A benefit of CERABIEN™ ZR FC Paste Stain is that its appearance during application closely matches the final firing result. In thick consistency, glaze can also be used to easily rebuild missing proximal contacts.


STAINING AND GLAZING: STEPS AT A GLANCE

  1. Glaze with Glaze/Clear Glaze
  2. Increase chroma (in the cervical area or over large areas) with A+, B+, C+, or D+
    - Adjust intensity by mixing with Glaze/Clear Glaze
    - Create a warmer tone by mixing with Yellow
  3. Replicate discolouration/exposed cervical areas: Cervical 1 and 2
  4. Customise fissure areas
    - Darken with A+, B+, C+, or D+
    - Accentuate fissures with Cervical 1
  5. Customise cusp tips
    - Replicate hypermineralisations with White
    - Create a band below with Grayish Blue (translucency effect)
    - Adjust translucency effect below cusp tips by mixing with Dark Grey
  6. Firing


Alternatives:

  1. First firing: Glaze plus base shade, second firing: Finer structures
  2. First firing: Fixative stain firing without glaze, second firing: Glaze firing


Fig. 4. CERABIEN™ ZR FC Paste Stain assortment for the practice laboratory.


Fig. 5. Discoloured fissures can be accurately replicated with an ISO10 endodontic file.


Fig. 6 and 7. Glazing and staining in one firing.


Fig. 8. Shade determination using a custom-made KATANA™ Zirconia STML colour ring (A3.5).


Fig. 9. Bridge made from KATANA™ Zirconia STML, sandblasted and occlusally polished.


Fig. 10. Finished glazed and characterised restoration.


Fig. 11. Bridge 14-16 in place.


FINAL SITUATION

Fig. 11. Bridge 14-16 in place.


Dentist:

FLORIAN ZWIENER


When a product is as good as it claims to be

CLEARFIL MAJESTY™ ES FLOW RECEIVES “NIOM TESTED” QUALITY SEAL

Before being allowed to market a dental composite filling material, it must, among other things, meet the set standards within ISO 4049:2019 Dentistry - Polymer-based restorative materials. Prompted by the tremendous positive response Kuraray Noritake Dental Inc. received from users of the CLEARFIL MAJESTY™ ES Flow series, we asked the Nordic Institute of Dental Materials (NIOM), an independent research institute, to test this product line on key aspects within the said ISO standard.


While it was not mandatory for us to have the CLEARFIL MAJESTY™ ES Flow series tested, our confidence in the quality of our product prompted us to do so. NIOM thoroughly evaluated CLEARFIL MAJESTY™ ES Flow in all three different levels of flowability: High, Low, and Super Low (Fig. 1). Among the properties assessed were depth of cure, flexural strength, water sorption and solubility, and colour stability after irradiation and water sorption. NIOM found that regarding all properties, the three flowabilities and different shades proved to comply with the requirements.


We are pleased to have gone the extra mile and proud that an independent party verified that our product meets the stringent ISO standards.


Fig. 1. CLEARFIL MAJESTY™ ES Flow in its three different levels of flowability.


IMPLICATIONS FOR CLINICAL USE

These test results are an external proof for users of the popular flowable composite series that they safely can be used as specified by Kuraray Noritake Dental Inc. in the product’s instructions for use. The NIOM test results obtained regarding the depth of cure imply that, when applied to the recommended layer thickness, the composite will polymerise adequately – which is essential for a great long-term performance. In addition, all three flowabilities offer sufficient strength and water sorption/solubility behaviour even to be suitable for restorations, including the occlusal surface of molars and pre-molars. This means that the materials are very well suited for a wide range of indications, including restoring all cavity classes and repairing existing restorations and cementing (Fig. 2).


Fig. 2. Three variants of CLEARFIL MAJESTY™ ES Flow and the suggested use areas.


GREAT AESTHETICS AND HANDLING

On top of these well-balanced mechanical properties, CLEARFIL MAJESTY™ ES Flow in its innovative syringe handles well due to an easy dispensing, bubble-free application, easy sculpting facilitated by its non-sticky formulation, and easy polishing behaviour. Coming in a variety of shades (Fig. 3) and equipped with proprietary Light Diffusion Technology, the material in its three different levels of flowability blends nicely and effortlessly with the surrounding tooth structure, creating a natural overall look. Both handling and aesthetics have been rated very good to excellent by dental advisor consultants in the context of a clinical evaluation.


Fig. 3. Overview of shades available per flowability.


NIOM also provides proof of the positive aesthetic properties: the institute's tests to evaluate colour stability after irradiation and water sorption reveal that CLEARFIL MAJESTY™ ES Flow is expected to remain stable over time. This feature is important for the long-term aesthetics of the restorations created with the materials.


Choose a reliable, high-quality, flowable, direct restorative material that withstands rigorous testing.


International Marketing Coordinator (32 - 40 uur)

International Marketing Coordinator (32 – 40 uur)

Ben jij een ervaren marketingprofessional met een passie voor communicatie en commerciële projecten? Houd je van het coördineren en uitvoeren van marketingcampagnes en heb je een hands-on mentaliteit? Sluit je dan aan bij ons groeiende team als International Marketing Coordinator!


Over Kuraray Noritake Dental

Kuraray Noritake Dental is wereldwijd actief in de tandheelkundige sector, gespecialiseerd in hoogwaardige materialen voor tandartsen en tandtechnici. Met onze innovatieve producten ondersteunen wij tandheelkundige professionals in het bieden van de beste zorg aan hun patiënten. Ons hoofdkantoor is gevestigd in Tokio, Japan, en ons Noord-Europese kantoor in IJmuiden bedient de Benelux, Nordics, Baltische Staten, het Verenigd Koninkrijk en Ierland.

Als dochteronderneming van Kuraray Inc., een multinational met een jaarlijkse omzet van
4 miljard euro, combineren we de voordelen van een grote organisatie met de persoonlijke cultuur van een kleiner bedrijf (ca. 30 FTE).


Jouw rol als International Marketing Coordinator

In deze rol ben jij de spil tussen diverse afdelingen en marktpartijen, en zorg je ervoor dat onze merken en producten prominent gepositioneerd worden in de diverse regio’s. Je werkt nauw samen met collega’s van Marketing en Sales en houdt contact met lokale markten door middel van reizen en het bijwonen van beurzen en evenementen.


Taken en verantwoordelijkheden:

  • Creatief bijdragen aan marketingactiviteiten en initiëren van projecten ter ondersteuning van sales- en marketingdoelstellingen.
  • Ontwikkelen van lokale communicatie-uitingen en promotiematerialen, en het coördineren van media-inzet.
  • Organiseren en coördineren van evenementen zoals cursussen, beurzen en educatieve events.
  • Samenwerken met de afdeling sales voor marketingactiviteiten gericht op tussenhandelaren.
  • Je helpt mee met het ontwikkelen van relevante content voor geïntegreerde marketingcampagnes, website en social media.
  • Beheren van projectbudgetten en rapporteren aan de Marketing Manager


Jouw profiel:

  • HBO werk- en denkniveau.
  • Minimaal enkele jaren ervaring in bijvoorbeeld productmanagement, eventorganisatie, marketingcommunicatie of soortgelijke functies.
  • Creatief en vaardig in het schrijven van overtuigende teksten.
  • Uitstekende beheersing van zowel de Nederlandse als Engelse taal.
  • Zelfstandig, flexibel, en goed in het beheren van meerdere projecten tegelijkertijd.
  • Zowel analytisch als pragmatisch en altijd gericht op het behalen van resultaten.


Wat wij bieden:

  • Grote verantwoordelijkheid en ruimte voor eigen initiatieven.
  • Een stabiele en internationale werkomgeving met veel aandacht voor persoonlijke ontwikkeling.
  • Enthousiaste collega's en een comfortabele kantooromgeving.
  • Een uitstekend salaris, aantrekkelijke arbeidsvoorwaarden, een jaarlijkse bonus, en een zakelijke smartphone en laptop.


Solliciteren:

Heb je vragen over deze vacature? Neem contact op met Saskia van Daalen - ten Brink, Marketing Manager Benelux, Nordics, Baltics & UK en Ireland.
E-mail saskia.tenbrink@kuraray.com 

Solliciteren door je CV te sturen naar hrbenelux@kuraray.com 

Kuraray Europe Benelux B.V.
Margadantstraat 20
1976 DN IJmuiden
+(0) 31 255 523 701

Flowable injection technique: hoe het beste composietrestauraties te polijsten?

De duurzaamheid van een composietrestauratie is afhankelijk van diverse factoren. Sommige factoren vallen buiten de invloedssfeer van de praktijkbeoefenaar en weer andere zijn sterk patiëntgerelateerd. Zo hebben de tandenborstel, het type tandpasta, de poetstechniek, een dieet, genotmiddelen en hygiënische gewoonten allemaal invloed op de restauratie. Het optimale protocol voor het afwerken en polijsten is echter volledig in handen van de tandheelkundige.


Polijsten is bedoeld om de zuurstofinhibitielaag te verwijderen en een glad restauratieoppervlak te realiseren. Een goed gepolijste restauratie absorbeert geen kleurmiddelen uit voedsel, drank of genootsmiddelen die leiden tot verkleuring van de composiet, zodat een langdurig esthetisch effect van de restauratie is gewaarborgd.


Het polijsten van de composiet is een proces dat speciale aandacht vraagt en het proces is opgebouwd uit meerdere stappen en principes.


  • Met behulp van afwerkschijfjes komt een glad restauratieoppervlak tot stand, wordt de overmaat van composiet verwijderd en de uiteindelijke vorm aan de restauratie gegeven. Bedenk vooral dat er moet worden gewerkt op een bevochtigd oppervlak met een 1:1 tandheelkundig handstuk bij een snelheid van maximaal 5.000 tot 10.000 tpm.


  • Polijstrubbers zijn verkrijgbaar in diverse soorten en formaten. Een van de meest universele polijstrubbers, speciaal ontwikkeld voor composiet, is TWIST™ DIA for Composite. Dit is een set van twee polijstrubbers met verschillende niveaus van ruwheid. De eerste (donkerblauw) wordt gebruikt voor inleidend of voorpolijsten; de tweede (lichtblauw) voor de uiteindelijke hoogglans en gladheid. Er wordt op gewezen dat er met deze instrumenten moet worden gewerkt op een droog oppervlak zonder waterkoeling. Het risico van droog werken is dat er warmte wordt gegenereerd en de pulpa dus kan worden geïrriteerd. Daarom moet de werksnelheid worden beperkt tot 5.000 à 10.000 tpm en dient excessieve druk te worden vermeden.


  • De volgende stap is het gebruik van een diamantpolijstpasta met een verloop van 1 tot 5 micron. Bij deze pasta wordt het gebruik van een polijstwieltje van geitenhaar aanbevolen. Het borsteltype is niet belangrijk, maar gebruik vooral geen borstel met stugge haren om krassen op de composiet te voorkomen. Dankzij het gebruik van een polijstborsteltje met pasta kunnen er plekken worden bereikt die anders moeilijk bereikbaar zijn, zoals het cervicale gebied en de proximale vlakken. Naast deze stap wordt er nog een schuurstrip met celluloiddiamant gebruikt om de proximale vlakken preciezer te polijsten. Om de contactpunten intact te laten, moeten er zacht schurende (superfijne) strips worden gebruikt.


  • Nog een stap om de glans van de restauratie te verhogen en deze tegen verkleuring te beschermen, is het gebruik van een aluminiumoxidepasta met een katoenen polijstborsteltje. Het gebruik van zo'n pasta - oorspronkelijk bedoeld voor keramiek - resulteert in een uitzonderlijk glad oppervlak en een hoge gans van het restauratieoppervlak. Deze stap wordt uitgevoerd in een droge omgeving bij een snelheid van maximaal 5.000 tot 10.000 tpm.

Bij alle technieken, dus ook de Flowable Injection Technique, heeft het niveau van polijsten invloed op de duurzaamheid en de optische en esthetische eigenschappen van de restauratie. Er moet dan ook voldoende tijd worden besteed aan deze cruciale stap van de tandrestauratie. Composieten worden gekenmerkt door de verschillende samenstellingen en gehalten van vuldeeltjes, die niet alleen hun eigenschappen beïnvloeden, maar tevens het gemak waarmee ze kunnen worden gepolijst. In sommige gevallen moet de procedure meerdere keren worden herhaald om een 'spiegeleffect' te realiseren. CLEARFIL MAJESTY™ ES Flow is een hoog gevuld composiet die zich heel gemakkelijk laat polijsten tot een niveau van hoogglans. Met behulp van polijst rubbers, borsteltjes en pasta's kan er een uitzonderlijk esthetisch resultaat worden behaald.

BEFORE


AFTER


3-YEARS RECALL


ZORG VOOR EEN STRALENDE LACH!


Dentist:

MICHAL JACZEWSKI


Michał Jaczewski studeerde in 2006 af aan de Wroclaw Medical University en momenteel runt hij zijn eigen praktijk in de Poolse stad Legnica. Hij is gespecialiseerd in minimaal invasieve en digitale tandheelkunde, en is de oprichter van de Biofunctional School of Occlusion. Op deze school is hij docent en organiseert hij workshops die zijn gericht op een allesomvattende behandeling van patiënten.


Bonding in minimally invasive repair procedures: tips and tricks

Article by Dr. Michał Jaczewski


Resin composites are wonderful restorative materials: They allow for minimally invasive, defect oriented tooth preparation, may be modelled as desired, and can be modified and repaired whenever necessary. To achieve all of this, however, a strong and long-lasting bond is an absolute requirement. The bond needs to be established either between enamel and dentin on one side and the resin composite on the other, or between the existing and the newly applied composite material.


UNIVERSAL ADHESIVE

Committed to keeping clinical procedures as simple as possible, I use an 8th-generation bonding agent – CLEARFIL™ Universal Bond Quick (Kuraray Noritake Dental Inc.) in my dental office. Containing Rapid Bond Technology, it allows for a particularly easy and straightforward use without the need for extensive rubbing or long waiting times. At the same time, it bonds well to various substrates including enamel, dentin and resin composite as it contains the original MDP monomer.


Its composition and resulting versatility make CLEARFIL™ Universal Bond Quick the first choice for many indications including non- to minimally-invasive repair procedures. As it works extraordinarily well in situations where we want to bond to dentin, enamel or old composite (Fig.1), it is usually not necessary to remove the whole existing restoration that needs to be repaired or modified. Instead, preparation may be limited to the composite part, so that no additional tooth structure needs to be removed.


Fig. 1. CLEARFIL™ Universal Bond Quick establishes a strong bond to dentin, enamel or old composite.


CLINICAL PROTOCOL

Depending on the condition of the existing restoration surface, the repair protocol may be slightly different. The basic steps are as follows:


PROTOCOL 1: OXYGEN INHIBITION LAYER STILL ON THE SURFACE

- No surface treatment required, rinse with water in case of contamination with blood or saliva, followed by air-drying and (optionally) adhesive application

- Apply new layer of composite immediately


PROTOCOL 2: OXYGEN INHIBITION LAYER ALREADY REMOVED FROM THE COMPOSITE SURFACE

- Remove the composite around the defect and create a bevel at the cavity margin with rotating instruments

- Sandblast the surface with aluminium oxide particles

- Fresh composite surface: Clean the surface with KATANA™ Cleaner (Kuraray Noritake Dental Inc.) or etch with phosphoric acid etchant

- Composite surface older than two weeks: Etch with phosphoric acid etchant

- Apply the universal adhesive (which contains silane)

- Apply a new layer of composite


CLINICAL RECOMMENDATIONS

1. STAY IN THE COMPOSITE DURING PREPARATION

When an old composite restoration needs to be replaced – e.g. because the existing restoration shows discolouration or the patient asks for a brighter shade – it is possible to remove only a part of the composite and leave the rest in place to save the underlying healthy tooth structure. Accurate control over the amount of material removed and the amount of material left in place is offered by the use of UV light. Under UV light, the composite is perfectly visible (Fig. 2). Hence, a highly conservative structure removal is supported (Fig. 3).


Fig. 2. Controlling structure removal with UV light, which nicely reveals the old composite.


Fig. 3. Tooth preparation with rotating instruments.


2. INCREASE ADHESION BY SANDBLASTING

Creating a clean, micro-retentive composite surface ideal for bonding: This is the aim of sandblasting the affected composite area with aluminium oxide particles (Fig. 4). The particle size I prefer is 27 μm. Residual particles, may be removed with 37% orthophosphoric acid, which needs to be rinsed off thoroughly before air-drying the surface (Figs. 5a and 5b).


Fig. 4. Air-abrasion with 27 μm aluminium oxide particles.


Fig. 5a. Phosphoric acid etching. Adjacent teeth are protected with PTFE tape.


Fig. 5b. Thorough rinsing to remove the etchant from the surface.


3. USE A UNIVERSAL ADHESIVE THAT CONTAINS SILANE

When bonding to old composite, silanisation of the surface is recommended to increase the bond strength. On dentin, a separate silane shows no positive effect. Hence, it is recommended to apply a separate silane to the composite surface only, a challenging task in situations with a surface consisting of tooth structure and composite. As CLEARFIL™ Universal Bond Quick contains silane, the separate silane application step may be skipped, which clearly simplifies the procedure (Figs. 6a and 6b).


Fig. 6a. Application of CLEARFIL™ Universal Bond Quick to the prepared surface.


Fig. 6b. Solvent evaporation with a gentle stream of air.


4. IF IN DOUBT, USE A UNIVERSAL ADHESIVE DURING REPAIR PROCEDURES

Whenever detected during restoration, defects in the composite layer or air bubbles can be repaired or eliminated right away. As long as the oxygen inhibition layer is still present, another layer of composite may be applied immediately without any prior steps. However, if the surface has been contaminated by saliva or blood (Figs. 7a and 7b) or it is unclear whether we are bonding to dentin, enamel or composite, CLEARFIL™ Universal Bond Quick may be applied (Fig. 8). On top, a new layer of composite is placed to restore the defect (Fig. 9).


Fig. 7a. Composite surface with a defect near the margin with blood contaminating the affected area.


Fig. 7b. Composite surface with a defect near the margin after thorough rinsing and drying.


Fig. 8. Application of the universal adhesive.


Fig. 9. Application of composite material to restore the defect.


5. IF AVAILABLE, PLACE A SILICONE INDEX TO SIMPLIFY ANATOMICAL SHAPING

If the defect is small, it is possible to apply the flowable composite directly and remove the excesses (Fig. 10). The obtaining of a natural shape and smooth transition between old and new composite, however, is simplified by the use of a silicone index or matrix (Fig. 11), which might still be present from the original restoration procedure. A possible outcome of this type of repair is shown in Figure 12; both images were taken prior to finishing and polishing.


Fig. 10. Flowable composite spreading and excess removal.


Fig. 11. Silicone index placed over the teeth including the tooth with the defect.


Fig. 12. Outcome of the flowable injection procedure.


CONCLUSION

Elimination of bubbles or defects in a freshly created restoration, changes in the colour of an existing filling or a shape correction due to wear processes: Modifying composite restorations can be easy – provided that appropriate materials and techniques are used. One of the key elements on the path to success is the selection of a suitable adhesive system, preferably a universal single-bottle adhesive like CLEARFIL™ Universal Bond Quick, which allows for streamlined procedures and supports excellent outcomes. By respecting the provided tips, it is possible to create the desired outcomes in a minimally invasive, straightforward way, laying the foundation for long-lasting aesthetics and function.


Dentist:

MICHAŁ JACZEWSKI


Michał Jaczewski graduated from Wroclaw Medical University in 2006 and today runs his private practice in the city of Legnica, Poland. He specializes in minimally invasive dentistry and digital dentistry and is the founder of the Biofunctional School of Occlusion. Here he lectures and runs workshops with focus on full comprehensive patient treatments.


Don't take your work with you

Leaving work at work, unplugging your mind from the dental office is not rocket science - provided that high-quality dental materials are used. Ideally, they are well-adapted to operator, case, and patient-specific needs. When it comes to restoring cavities with composite, Kuraray Noritake Dental Inc. has got the right products for any dental professional.


The CLEARFIL MAJESTY ES family of dental composites is composed of different product lines designed to meet specific needs. Altogether, the line-up offers a solution for every technique and handling preference, clinical situation and patient requirement.


UNIVERSAL SOLUTION FOR UTMOST SIMPLICITY


When utmost simplicity is desired, a highly innovative universal solution such as CLEARFIL MAJESTY ES-2 Universal is an excellent choice. This paste-type composite system includes only four shades: Universal, Universal Light, Universal Dark, and Universal White.


The Universal shade has the highest translucency and is, therefore, most suitable in cases where several cavity walls are still present, such as in Class I or II cavities and the cervical area. In cavities where light easily passes through, the lower-translucency variants Universal Light (for teeth with shades up to A3) and Universal Dark (for teeth darker than A3) are the best options. Universal White is the go-to solution for young patients and whitened teeth. Consequently, there is usually no need for a shade guide, and the optical properties allow application without an opaquer or blocker in most of cases. Both features greatly simplify the clinical procedure.


CLASSIC AND PREMIUM OPTIONS FOR SINGLE- AND DUAL-SHADE LAYERING

Clinicians who prefer classical single-shade layering according to a shade guide and a greater number of shades available may prefer CLEARFIL MAJESTY ES-2 Classic. With a line-up of 18 shades, it supports straightforward procedures and leads to aesthetic results.


Whenever the aesthetic needs are very high, such as in the context of restoring a large cavity in the aesthetic anterior region, CLEARFIL MAJESTY ES-2 Premium may be the best option. Designed for simplified multi-shade layering, it comes with fixed shade combinations of dentin and enamel opacity, that greatly support predictable outcomes.


MECHANICAL PROPERTIES

All the CLEARFIL MAJESTY ES paste-type composite systems offer a well-balanced viscosity and excellent mechanical properties, including

  • a high flexural strength of 118 MPa
  • a filler load of 78 wt%
  • a compressive strength of 347 MPa
  • a low volumetric shrinkage of 1.9 %
  • a curing depth of 2.0 mm and
  • a long working time under ambient light of 4.5 minutes

VERSATILITY POWERHOUSE IN THREE VISCOSITIES>

A flowable composite completes the portfolio. As the ideal level of viscosity depends on individual preferences and on the specific indication, CLEARFIL MAJESTY ES Flow comes in three different flowabilities: high, low and super low.


They have:

  • a high flexural strength of 145, 151 and 152 MPa, respectively
  • a filler load of 71, 75 and 78 wt%, respectively
  • a compressive strength of 358, 373 and 374 MPa, respectively and
  • a working time under ambient light of 100 seconds.

In addition, they are well-received for their easy application, fast polishing and high polish retention. All these features make the product a true versatility powerhouse. Moreover, it is offered in an innovative syringe designed for bubble-free application of the desired amount of composite and easy modelling.


THE IDEAL PORTFOLIO FOR PEACE OF MIND

The CLEARFIL MAJESTY ES portfolio offers highly suitable products for many clinical situations, demands and treatment techniques. As they support predictable outcomes and long-lasting success, using them gives dental practitioners the peace of mind needed to leave work at work and truly enjoy their free time—in the evening at home, on weekends or on holiday.


For more information about Kuraray Noritake Dental Inc.’s composite solutions visit the website.


Universal adhesive in the context of different repair procedures

Article by Dr. Michał Jaczewski


When working with composite, one of the most important aspects is to understand the mechanisms of adhesion. Choosing the right composite is one thing, but choosing a suitable bonding system and using it correctly is an equally important aspect affecting the long-term performance of a direct restoration.


There are many bonding products on the market - two-bottle (primer and bond) but also single-bottle systems. For anyone trying to select an ideal adhesive for a specific clinical case, the sheer number of available products can be challenging. The temptation to use them all, in slightly different ways, has the potential to create errors. In my dental practice, I am committed to simplifying procedures.


This is why I started looking for a bonding system that would offer a sense of security in terms of adhesion, but also ease of use in different clinical situations. I have opted for the 8th-generation bonding agent with the desired features - CLEARFIL™ Universal Bond Quick (Kuraray Noritake Dental Inc.). The single-bottle universal adhesive is ideal for a broad variety of bonding procedures carried out in the dental office.


IMPRESSIVE FEATURES

CLEARFIL™ Universal Bond Quick can be used in the total-etch as well as the selective enamel etching technique in combination with an etching gel such as K-ETCHANT Syringe (Kuraray Noritake Dental Inc.). It is also a self-etching adhesive. Used in combination with the dual-cure build-up material CLEARFIL™ DC CORE PLUS or the dual-cure universal resin cement PANAVIA™ SA Cement Universal (both Kuraray Noritake Dental Inc.), it is also an ideal choice for cementation in the root canal and for cementing inlays or crowns made of a variety of different restorative materials – from metal to zirconia or lithium disilicate. Efficient clinical procedures are supported by the incorporated Rapid Bond Technology, which eliminates the need for extensive rubbing or waiting for the adhesive to penetrate the substrate and the solvent to evaporate. Among the key components of this technology are hydrophilic amide monomers, which allow the adhesive solution to penetrate moist dentin extraordinarily quickly, while also having a high curing ability. In addition, the original MDP monomer is included in the formulation. Together with the amide monomers, it provides for a high bond strength to enamel and dentin – achievable in a simple procedure of application, air-drying and light-curing.


The described properties turn CLEARFIL™ Universal Bond Quick into one of the most versatile and easy-to-use adhesive bonding solutions in the dental office. Operator sensitivity is low, as is its technique sensitivity, since the three-step procedure is always the same. The following case examples illustrate its use in the context of different repair procedures.


REPAIR OF COMPOSITE RESTORATIONS

One of the major benefits of using composite as a restorative material lies in the fact that it may be modified and repaired at any time. Regardless of whether an air bubble is detected on the surface, the shade needs to be adjusted, a fracture occurs or materials need to be added as a result of wear, modification or repair is easily accomplished without needing to sacrifice additional amounts of healthy tooth structure. Whenever a silicone index has been produced for the initial treatment and is still available, and the user knows which composite has been utilized for the original restoration, the Flowable Injection Technique may be selected as a particularly easy and efficient way of repairing a restoration. However the recommended protocol is slightly different depending on the state of the restoration surface.


CASE EXAMPLE 1: IMMEDIATE REPAIR PROCEDURE

When a restoration has been damaged or an air bubble has appeared during injection of a flowable composite, the procedure is slightly different. In this case, the oxygen inhibition layer is usually still present on the surface of the restoration. Therefore, it is possible to simply apply an additional portion of composite (Figs. 1a to 1d). Even after contamination of the composite surface with water, saliva or blood, this measure is possible. The surface merely needs to be rinsed thoroughly and dried before applying the new portion of composite. For maximum safety, a universal adhesive may be used as well.


Fig. 1a. Repair procedure applicable for defect within a composite restoration whenever the oxygen inhibition layer has not yet been removed: Air bubble detected in the interproximal region.


Fig. 1b. Application of a new portion of composite after rinsing and drying. The adjacent surface is protected with PTFE tape.


Fig. 1c. Repositioned silicone index used to give the restoration the originally planned shape.


Fig. 1d. Final restoration.


CASE EXAMPLE 2: REPAIR PROCEDURE AFTER POLISHING

If a similar defect is detected during finishing and polishing, i.e. when the oxygen inhibition layer has already been removed (Fig. 2), a roughening of the surface is strictly necessary. With a bevelled preparation of the area with the air bubble, optimal conditions are created for another layer of composite that blends in well with the surrounding material (Fig. 3). After bevelling, the surface needs to be sandblasted and cleaned either with KATANA™ Cleaner (Kuraray Noritake Dental Inc.) (Fig. 4a) or with 37 % orthophosphoric acid (Fig. 4b). After thorough rinsing and drying, an additional portion of composite may be applied to the surface (Figs. 5a to 5c). As the defect is small, the composite may be applied instead of injected and the silicone index repositioned afterwards.


Fig. 2. Void on the surface, detected during finishing.


Fig. 3.  Removed void and bevelled area around the defect.


Fig. 4a. Option 1: Cleaning of the surface with KATANA™ Cleaner.


Fig. 4b. Option 2: Etching with K-ETCHANT Syringe.


Fig. 5a. Application of composite (CLEARFIL MAJESTY™ ES Flow Low).


Fig. 5b. Repositioning of the original silicone index to obtain the desired shape.


Fig. 5c. Final restoration with a nice blend-in of the different layers of composite.


CASE EXAMPLE 3: REPAIR PROCEDURE AFTER TWO OR MORE WEEKS

For damaged restorations which have been in place for more than two weeks, an ideal composite-composite interface needs to be created by bevelling and roughening of the surface. A perfect example is presented in Figure 6. The most important step influencing the success of the procedure is proper preparation of the composite surface. To lay the foundation for a strong bond between the new and the old composite as well as for aesthetic outcomes, a bevel needs to be created (Figs 7a and 7b) to facilitate a smooth transition between the two layers. Once the bevel is completed, the surface should be sandblasted with alumina particles sized 27 μm (Fig. 8). The following recommended steps are etching of the composite with 37 % orthophosphoric acid (Fig. 9) and finally application of CLEARFIL™ Universal Bond Quick (Fig. 10). As the universal adhesive contains a silane coupling agent, separate silane application is not necessary. Instead, the new layer of composite may be applied immediately e.g. using the flowable injection technique with an existing matrix (Fig. 11).


Fig. 6. Fractured anterior composite restoration benefitting hugely from repair – the remaining composite is in a great state regarding colour and shape.


Fig. 7a.  Bevelling with dedicated instruments.


Fig. 7b.  Ideal bevel created to provide for a strong bond and great optical blend-in.


Fig. 8. Sandblasting of the surface with alumina particles.


Fig. 9.  Phosphoric acid etching.


Fig. 10. Application of the universal adhesive.


Fig. 11. Composite applied using the flowable injection technique.


Fig. 12. Treatment outcome.


CONCLUSION

The three described repair protocols are straightforward and work well – provided that a strong bond is established at the composite-composite interface. The way it is established may be slightly different depending on whether the oxygen inhibition layer is still present or has already been removed. Using a universal adhesive like CLEARFIL™ Universal Bond Quick, the procedure is simplified owing to elimination of steps such as the separate application of silane.


Dentist:

MICHAŁ JACZEWSKI


Michał Jaczewski graduated from Wroclaw Medical University in 2006 and today runs his private practice in the city of Legnica, Poland. He specializes in minimally invasive dentistry and digital dentistry and is the founder of the Biofunctional School of Occlusion. Here he lectures and runs workshops with focus on full comprehensive patient treatments.


Quality and Inventory Management in the Dental Lab

DELICATE BALANCE BETWEEN COSTS AND AESTHETICS IN DENTAL LAB

When you are a lab owner striving to achieve high-end results using modern digital techniques, the initial investment in CAD/CAM technology is significant, followed by ongoing costs for expendable items such as milling tools and blanks. That cost can be reduced by selecting universal, high-quality materials.


Undoubtedly, zirconia stands out as one of the most popular materials on the market. From an inventory perspective, however, lab owners often find themselves purchasing multiple discs of the same shade and thickness. The reason is that they need to meet all requirements for strength and aesthetics in different settings – enabling them to cover all kinds of restorations and deliver excellent patient outcomes.


UNIVERSAL SOLUTION FOR DENTAL LABS

At Kuraray Noritake Dental Inc., we take pride in not only developing the first-ever multilayer zirconia, KATANA™ Zirconia ML, but also in our commitment to delivering the highest quality materials that we can.


KATANA™ Zirconia YML, our latest addition to the KATANA™ Zirconia line-up, exemplifies this dedication and offers universal applicability. The universal feature is based on the fact that KATANA™ Zirconia YML disc not only offers colour gradation, but also impressive flexural strength and translucency gradation, with maximum values of up to 1,100 MPa and 49 % translucency, respectively.


INHOUSE PRODUCTION - THE PATH TO HIGH QUALITY ZIRCONIA DISC

Like all our zirconia offerings, KATANA™ Zirconia YML begins its journey to the dental lab in our Japanese facility where raw zirconia powder undergoes special treatment process before the addition of essential components.


Once the material has undergone this thorough initial stage, it progresses to the pressing and pre-sintering phase to form the disc. Every detail is carefully calculated, managed and controlled. This phase of the process takes several days, underscoring our goal to achieve the most aesthetic product.


HIGH-SPEED SINTERING PROGRAM: 54 MINUTES

The unique powder formulation and refinement process, as well as the pressing and pre-sintering technique, is the key to allow our customers to realize restorations of up to three-unit bridges without any compromise in terms of aesthetics or mechanical properties using the 54-minute high-speed sintering* process.


This high quality, lengthy production process results in an exceptionally dense material, which once sintered, goes on to deliver a high strength, high aesthetic final restoration.


HIGH PRECISION SHRINKAGE AND STABLE CTE VALUES FOR EXCEPTIONAL FIT

Outstanding deformation stability during the sintering procedure, contributes to the stability during the final sintering process in the dental laboratory, providing for an exceptional fit of large-span bridges and other restorations.


MULTI-LAYERED STRUCTURE AND EASE OF POSITIONING OF RESTORATIONS IN THE BLANK

To enhance aesthetic qualities, all KATANA™ Zirconia YML discs are designed using ratios rather than fixed measurements of different layers in the multi-layered structure. This means that regardless of the disc's thickness, there is always a consistent ratio of 35 % of raw material that constitutes the translucent enamel zone. Hence, discs with an increased height, which are typically used for the production of larger restorations, will always offer sufficient space in the enamel zone, while smaller discs are optimized for smaller restorations.


ONE DISC. ALL INDICATIONS.

These qualities empower dental lab owners to deliver a wide range of restorations. The material is suitable for single crowns to full-arch structures, for full-contour designs to conventional frameworks, using a single material without compromising on aesthetics: KATANA™ Zirconia YML. For finishing, we offer a well-aligned portfolio of solutions designed for internal and external staining, micro-layering and full layering.


EXPLORE KATANA™ Zirconia YML: WEALTH OF RESOURCES, CLINICAL CASES AND FAQS

Visit our website to discover more about KATANA™ Zirconia YML. You will find useful materials such as brochure, technical guide, in-depth technical information.


Would you like to see the material in action – browse the blog section of our website that offers a variety of clinical cases and articles by world-renowned experts showcasing and proving the versatility and aesthetics of KATANA™ Zirconia YML.


*The material is removed from the furnace at 800°C. A furnace with a configurable KATANA™ Zirconia YML firing program is required.


Article by Dr. Michał Jaczewski

FLOWABLE INJECTION AND STAMP TECHNIQUE: RESTORING TEETH IN THE POSTERIOR REGION

Restoring the occlusal surface of posterior teeth while preserving the natural morphology and re-establishing correct occlusal contacts has always been challenging for dental practitioners. Free-hand layering requires knowledge of tooth anatomy, composite handling skills and experience. When the occlusal surface of a tooth is damaged at the start of treatment (as is usually the case in teeth with large MOD cavities) or an increase of the vertical dimension of occlusion is planned (e.g. in severely worn teeth), the use of the flowable injection technique may be a suitable alternative. It truly speeds up and facilitates the process of building up the restoration to a natural shape, but requires thorough planning and preparation. In cases with an intact occlusal surface, the stamp technique might be the first choice.


FLOWABLE INJECTION TECHNIQUE: GENERAL CONSIDERATIONS

It is up to the user how exactly the restorations, to be built up by flowable injection, are planned and how the plan is implemented: One can either opt for a conventional wax-up or make use of digital tools in the planning phase. Dedicated design software offers the benefit of facilitating the creation of a natural shape and morphology of the desired restoration and allows for the establishing of an ideal occlusal relationship. Once the wax-up is ready, it needs to be transferred into the patient’s mouth. This is accomplished via a printed or classical model with wax-up, which forms the basis for the production of a matrix or silicon index. This index is then used intraorally for the injection of the flowable composite. To enable proper light curing through the index, the index material should be as transparent as possible.


AREA-SPECIFIC CONSIDERATIONS

In the posterior area, an index made of two different materials – a soft inner silicon structure and a hard outer shell – may be advisable. Due to its higher dimensional stability compared to a soft silicon index, it is possible to put pressure on it for proper adaptation to the isolated teeth and soft tissue without the risk of altering the shape of the tooth. Figure 1 shows such an index on and next to a printed model. It consists of a hard shell made of acrylic and a soft inner structure made of a transparent silicone material (e.g. EXACLEAR™, GC). For production, a high-capacity hydraulic pressure curing unit designed for use with self-curing resins (Aquapres™, Lang Dental) has proven its worth: It ensures a highly accurate reproduction of the (digital) wax-up.


Fig. 1. Printed model and silicone index.


Reconstruction of posterior teeth with the flowable injection technique requires prior removal of all carious lesions and reconstruction of the proximal surfaces to restore the contact points. Hence, the injected composite serves the exclusive purpose of restoring the occlusal surface. When several teeth are treated, a two-step procedure with an alternating technique is recommended to provide for proper separation of the teeth. Blocking the proximal surfaces below the contact point with PTFE tape will reduce the amount of excess material in these areas and make it easier to clean and prepare the proximal surfaces after flowable injection. Proximal and deeper occlusal lesions should be restored with the aid of a matrix, wedge and ring.


CLINICAL PROTOCOL

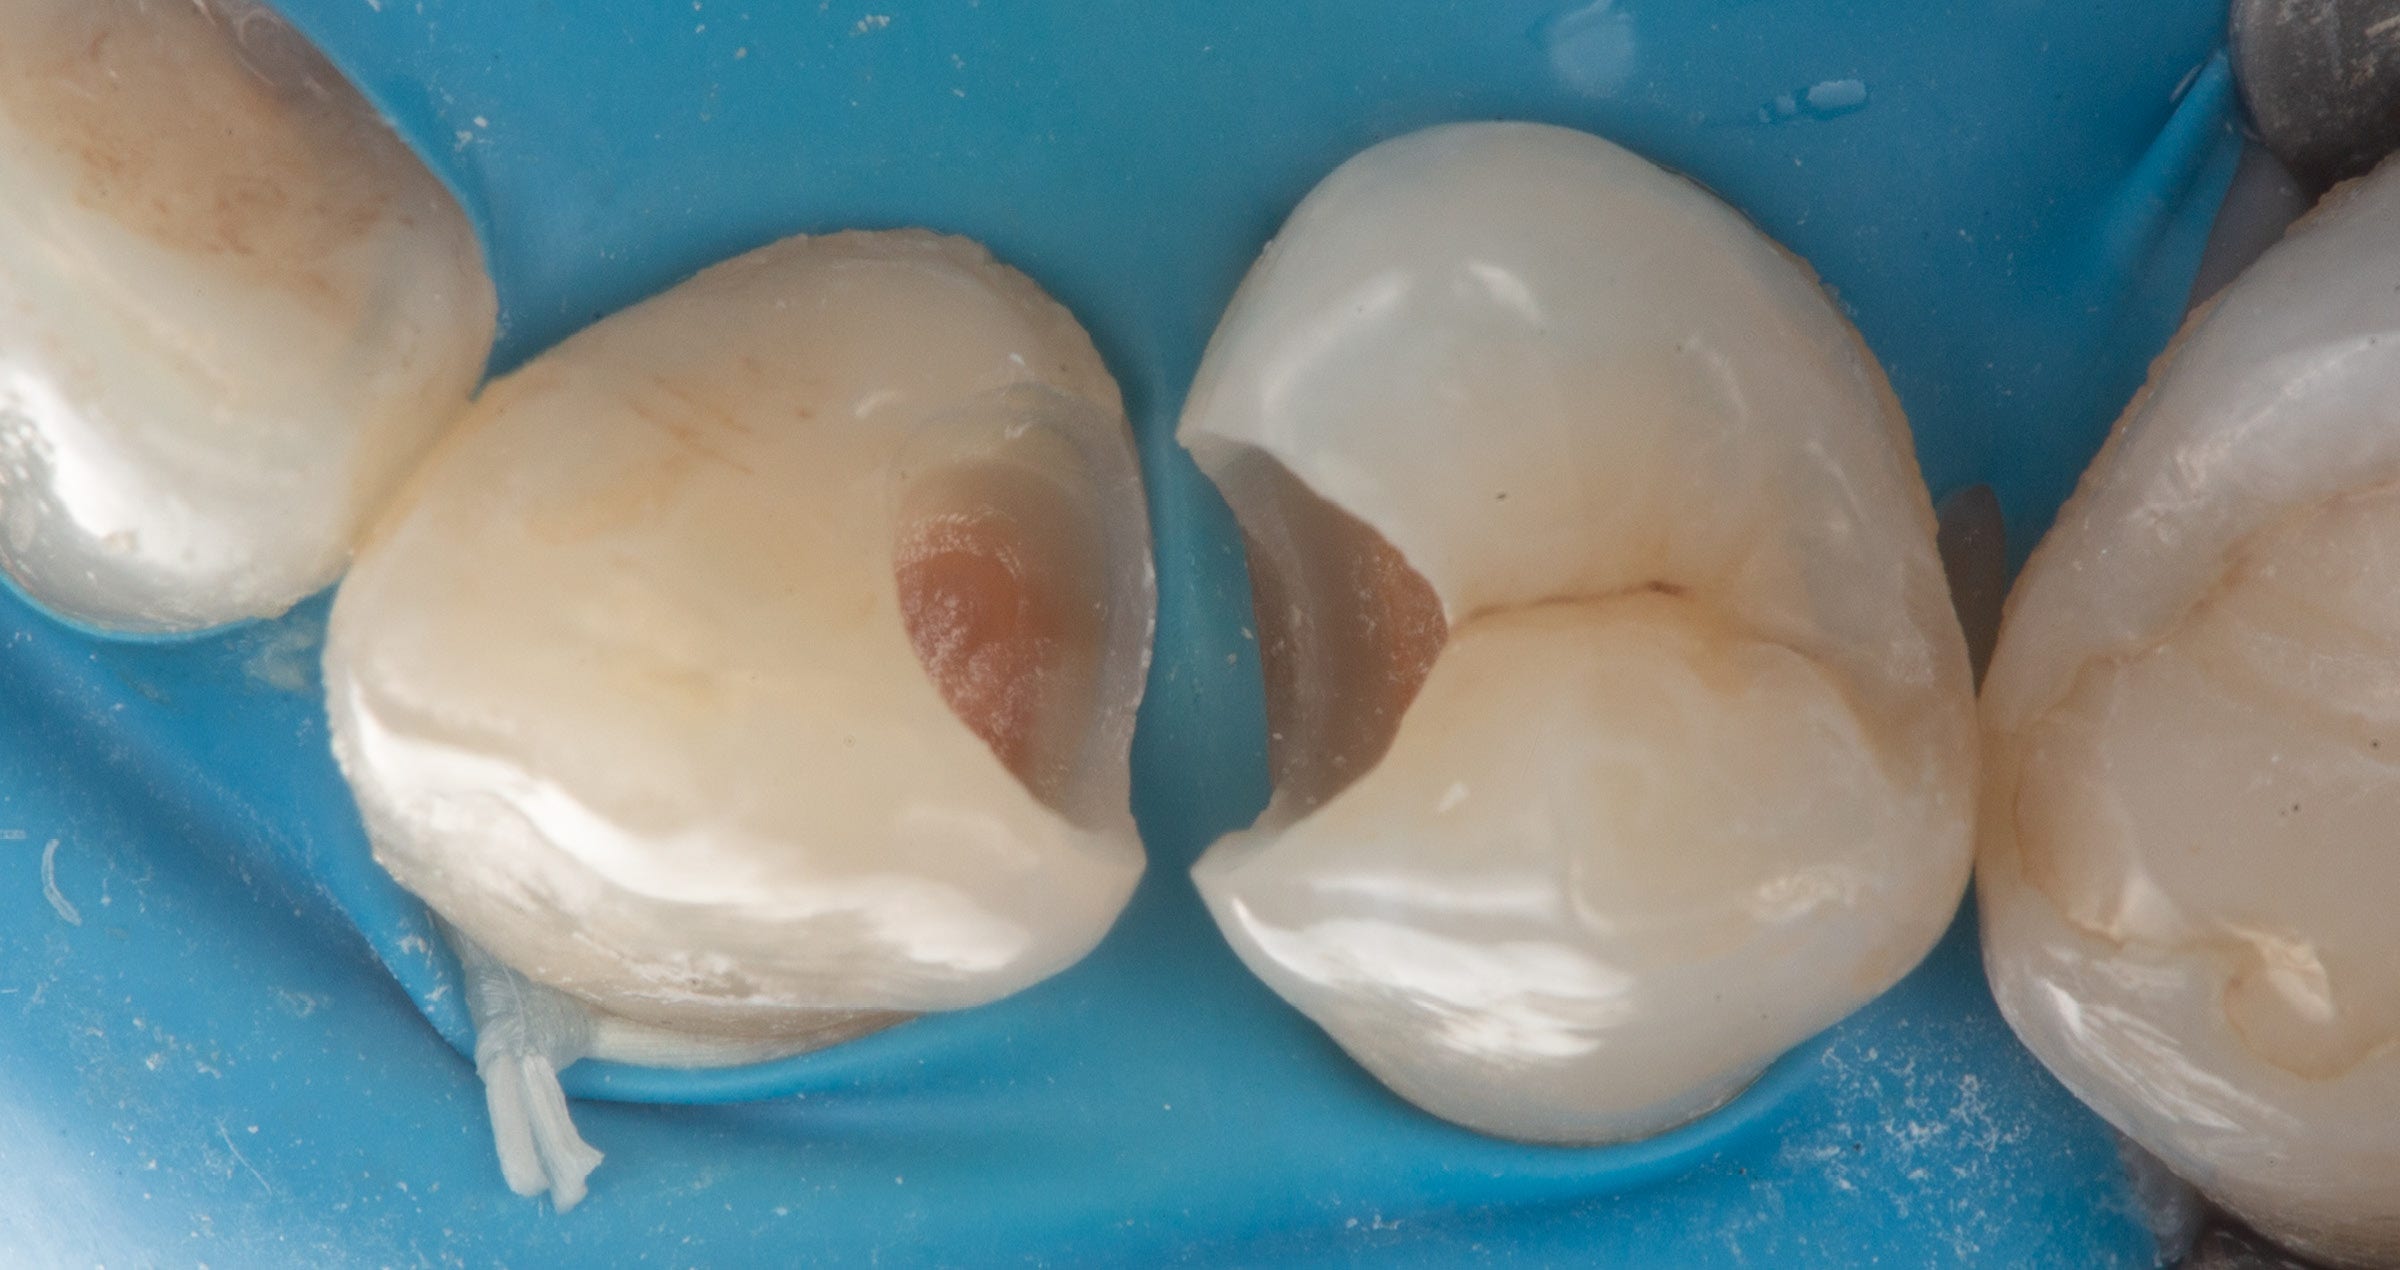
A possible clinical protocol is illustrated in Figures 2 to 5: After caries excavation and tooth preparation, sectional matrices, wedges and rings were placed to allow for simultaneous treatment of the mesial and occlusal cavities. Following etching and application of the universal adhesive CLEARFIL™ Universal Bond Quick (Kuraray Noritake Dental Inc.), the cavities were restored with CLEARFIL MAJESTY™ ES Flow Super Low in the shade A1 and CLEARFIL MAJESTY™ ES-2 Universal in the shade U. The distal cavity of the first molar was filled in the last step of the free-hand modeling procedure. In order to restore the occlusal surfaces in their original vertical dimension, every second tooth was isolated with rubber dam and the exposed molar etched (total-etch technique with K-ETCHANT Syringe, Kuraray Noritake Dental Inc.). the alternating index was positioned with some pressure and the flowable composite (CLEARFIL MAJESTY™ ES Flow Super Low) injected. Once light curing was completed, it was possible to remove the index, chip off the excess and finish and polish the restoration before repeating the procedure for the adjacent molar.


Fig. 2. Restoration of two molars: Teeth preparation and caries excavation.


Fig. 3. Restoration of two molars: Filling of the proximal and occlusal cavities.


Fig. 4.  Restoration of two molars: Re-establishing the occlusion with the aid of the flowable injection technique.


Fig. 5. Alternating approach: Restoration of the second molar by injecting flowable composite.


DISCUSSION

The use of the flowable injection technique allows for rapid restoration of teeth and the establishment of precise occlusal contacts. This reduces the time spend on occlusal surface modelling and minimizes the risk for prolonged treatment due to a repeated need for occlusal adjustments. In addition to saving time, it is possible with this technique to restore a greater number of teeth in a single appointment. The aesthetics of this type of restoration may be somewhat limited: A skilled practitioner is able to achieve better aesthetic results on the occlusal surface. However, with a detailed wax-up and high-quality model great outcomes can be obtained. The surface quality of printed models can be increased by adjusting the printing parameters including the layer height (Fig. 6). The use of a hydraulic pressure curing unit for silicone index production further increases the quality of the occlusal surface.


When planned and implemented correctly, the established occlusal surface and contacts reflect the natural anatomy without the need for adjustments (Fig. 7). Especially when restoring an entire quadrant, it is possible to increase the efficiency by opting for the flowable injection technique. Doing so reduces the number of appointments and the chair time decisively (Fig. 8).


STAMP TECHNIQUE: CONSIDERATIONS

If the occlusal surface of the tooth is intact, a wax-up may not be necessary. In this case, the better strategy is to duplicate what is still available before initiating treatment. A flowable composite or liquid rubber dam can be used for this purpose. It is important to coat the tooth surface with glycerin gel before applying the material. This will facilitate separation of the stamp from the tooth. It is always advisable to create a stamp that covers not only the details that need to be recorded and duplicated, but is extended over the cusps. This offers better stability in the restoration phase.


CLINICAL PROTOCOL

Figures 9 to 11 illustrate a possible clinical procedure. In this case, a molar with an occlusal carious lesion needed to be restored. The tooth surface was cleaned and a thin layer of glycerin gel applied, followed by a thick layer of liquid rubber dam, which covered the entire occlusal surface. Then, a micro applicator was immersed into the material and the stamp cured. After preparation, etching and application of the bonding system, the cavity was restored with flowable composite (CLEARFIL MAJESTY™ ES Flow Super Low in the shade A2). When the cavity is larger and depending on personal preferences, a paste-type composite (CLEARFIL MAJESTY™ ES-2 Universal) may also be used. Prior to light curing of the composite, the occlusal surface was covered with PTFE tape and the stamp pressed onto it. After firm pressing, the tape and excess material were removed and the restoration polymerized. This restoration faithfully reproduces the occlusal surface and did not require any occlusal adjustments.


Fig. 6. Stamp production with liquid rubber dam.


Fig. 7. The stamp.


Fig. 8. Restoration procedure: From preparation to bonding.


Fig. 9. Restoration procedure: Filling with flowable composite.


Fig. 10. Restoration procedure: Duplication the original occlusal surface with the stamp.


Fig. 11. Tooth before and after treatment using the stamp technique.


CONCLUSION

Techniques that add simplicity and efficiency to clinical procedures are always welcome in the busy practice environment. Depending on the information available at the start of treatment and the number of teeth to be restored, the flowable injection or the stamp technique may be an ideal choice. They are easily implemented and speed up the clinical procedure, but most importantly support predictable outcomes. This saves time in the finishing phase and minimized the risk of repeated adjustments, hence protecting everyone involved from additional appointments and frustration. Especially for practitioners with limited routine in free-hand modelling and for those with maximum patient comfort in mind, both techniques are worth being integrated in their clinical procedures.


Dentist:

MICHAL JACZEWSKI


Michał Jaczewski graduated from Wroclaw Medical University in 2006 and today runs his private practice in the city of Legnica, Poland. He specializes in minimally invasive dentistry and digital dentistry and is the founder of the Biofunctional School of Occlusion. Here he lectures and runs workshops with focus on full comprehensive patient treatments.


Flowable injection technique. Hoe kunnen we luchtbelletjes in composietrestauraties voorkomen?

Artikel van Dr. Michał Jaczewski


Composietrestoraties in de tandheelkunde

Composietrestauraties zijn de meest voorkomende behandelingen die tandartsen uitvoeren. Binnen de tandheelkunde worden diverse restauratieve technieken toegepast en allerlei restauratiematerialen gebruikt. Luchtbelletjes in of bij het oppervlak van composietlagen vormen - ongeacht het type materiaal, de restauratiemethode en de locatie - een veel voorkomend probleem. De composietrestauratie dient homogeen te zijn om de dichtheid van de vulling en de duurzaamheid daarvan te waarborgen. De reparatie van defecten vanwege luchtbelletjes is omslachtig en vergt soms een gehele of gedeeltelijke vervanging van de vulling. Het aantal defecten kan - afhankelijk van het type composiet (flowable of pasta) en/of de plaatsingstechniek - variëren, maar verschillende factoren spelen een rol.


Materiaalkeuze

Bij de Flowable Injection Technique gebruiken we vloeibare composieten, die uiteraard soepel vloeien, maar óók gevoelig zijn voor onjuiste applicatie. De eerste oorzaak van de vorming van luchtbelletjes is gelegen in de homogeniteit van het materiaal zelf. De spuit kan al in de productiefase of tijdens gebruik luchtbelletjes bevatten. Door gebruik van hoogwaardige producten kunnen we ons verzekeren van de hoogste kwaliteit en mogen we rekenen op een correcte werking dankzij de structuur en het ontwerp van de spuit, zodat de vorming van luchtbelletjes in het materiaal wordt teruggedrongen.


Belang van spuitontwerp 

De composiet CLEARFIL MAJESTY™ ES Flow is ontwikkeld om de vorming van luchtbelletjes tijdens dosering te voorkomen. Dankzij het speciale ontwerp van de spuit en plunjer wordt de mogelijkheid van morsen beperkt, evenals het terugvloeien van materiaal tijdens of na het doseren.


Een unieke veiligheidsvoorziening in de spuit is de speciale O-ringconstructie, die voorkomt dat het materiaal vloeit nadat de druk wordt vrijgegeven en tegelijkertijd zorgt voor minimale retractie, overigens zonder overmatige retractie van de plunjer.


Terugtrekken van de plunjer

Nog een oorzaak van luchtbelletjes is luchtinsluiting in de spuit doordat de plunjer doelbewust wordt teruggetrokken. Als de praktijkbeoefenaar of een medewerker gewoon is om de plunjer na het aanbrengen van de composiet in te trekken, kan er lucht in de spuit ontstaan. Het is dan heel aannemelijk dat die lucht als een holte in de restauratie terugkomt.


Belang van druk op de index

Binnen de Flowable Injection Technique gebruiken we een silicone index, waarin we het materiaal voor de tandopbouw opnemen. Deze index moet strak op de tand passen en mag niet bewegen - of worden bewogen - tijdens het injecteren. Als dat wél gebeurt, kunnen er luchtbelletjes optreden. Het aandrukken en weer loslaten van de index veroorzaakt een zuigend effect, waardoor de composiet wordt weggetrokken van de tand én index. Om defecten te voorkomen, dient er constant druk op de index te worden gehouden vanaf het moment dat het materiaal wordt geïnjecteerd tot aan het uitharden.


De siliconenindex kan op meerdere manieren worden aangepast om de mobiliteit te beperken en het risico van ongecontroleerde druk op de tand te verminderen. Een voorbeeld is het creëren van de index volgens het 'interlipmodel' (één wel, één niet); hiermee wordt - naast bedrijfszekerheid - een heel hoge mate van stabiliteit gerealiseerd.


Breedte van het injectiegat

De breedte van de injectieopening kan ook een oorzaak zijn van de vorming van luchtbelletjes. Als die opening te nauw is, kan de index door de applicatiepunt worden verplaatst tijdens het inbrengen of appliceren. Om dit probleem te voorkomen, dient de opening te worden verwijd, zodat de punt goed kan worden ingebracht en gemanipuleerd tijdens het injecteren. Bovendien kan eventuele lucht dankzij een bredere opening ontsnappen tijdens het appliceren. Het belangrijkste is echter dat het materiaal onder een constante druk wordt aangebracht en dat de punt niet uit de index wordt getrokken en opnieuw ingebracht. Dat kan namelijk leiden tot een niet uniforme composietlaag.


Wilt u meer weten over Flowable Injection Technique? Lees het inzichtelijke en inspirerende interview met Dr. Michal Jachzewski.

Tandarts:

MICHAL JACZEWSKI


Michał Jaczewski studeerde in 2006 af aan de Wroclaw Medical University en momenteel runt hij zijn eigen praktijk in de Poolse stad Legnica. Hij is gespecialiseerd in minimaal invasieve en digitale tandheelkunde, en is de oprichter van de Biofunctional School of Occlusion. Op deze school is hij docent en organiseert hij workshops die zijn gericht op een allesomvattende behandeling van patiënten.


A GUIDE TO SUCCESSFUL ZIRCONIA BONDING


Unlock the power of zirconia: perfect for adhesive cementation, the ideal material for a wide range of indications, and essential in minimal invasive dentistry. Time to trust zirconia bonding!

This article demystifies zirconia bonding, providing clear, practical steps to ensure long-term functionality and patient satisfaction, all based on scientific research. Master the three adhesion pillars: mechanical retention, chemical activation, and wetting capacity. Discover how to successfully prepare zirconia surfaces, avoid pitfalls like misapplying silica coating and silane, and choose proven bonding systems for optimal results. Optimise retention even with minimal tooth preparation and achieve reliable zirconia restorations. Say goodbye to doubts and hello to successful zirconia bonding!


Factors influencing retention

Loss of retention due to de-cementation or debonding is a common cause of dental prostheses' failure.  First, let’s have a look at how to cope with the three main factors significantly influencing retention: tooth preparation, restoration pre-treatment, and cement type/bonding.

Tooth preparation

The abutment tooth's height, angle, and surface texture must be considered to achieve sufficient retention and resistance from the preparation. The retention form counteracts tensile stresses, whereas the resistance counteracts shear stresses 4. With the proper preparation, a restoration resists dislodgement and subsequent loss.

Full coverage restorations

To achieve sufficient retention and resistance for full-coverage crowns, the tooth abutment should be at least 4 mm high, and the convergence angle should range from 6 to 12 degrees with a maximum of 15 degrees 1, 5-8.

Source; Conventional cementation or adhesive luting - A guideline, Dr. A. Elsayed, Prof. Dr Florian Beuer 


Adhering to the tooth preparation guidelines is crucial for full-coverage restorations (e.g., crowns, and FDPs). These practical guidelines are designed to achieve the required retention and resistance to make conventional luting possible. However, optimal retention and resistance are, in reality, hard to achieve. An unwanted amount of sound tooth substance often should be removed to achieve a highly retentive preparation. Moreover, several studies2,3 show that, in daily practice, the preparation angle often exceeds 15 degrees.

Minimal-invasive restorations

Minimal-invasive restorations, such as single retainer FDPs, veneers, table-tops and inlay-retained FDPs, are based on a non- or low-retentive preparation form. In this case, retention shifts from (macro-)mechanical to micro-mechanical and chemical, necessitating the use of adhesive techniques 9-11. Even though the preparations for minimal-invasive restorations largely lack mechanical retention, the long-term success of these types of restorations is well-documented when using a suitable resin cement (e.g. PANAVIA™, Kuraray Noritake Dental, Japan), including a proper pre-treatment and bonding procedure 10, 11.

In high-retentive situations, conventional luting is acceptable for full-coverage restorations*. In all other cases, choosing a resin cement is a better solution. With proper tooth preparation (e.g., shaping, (self-)etching, abrasion) and the right adhesive resin cement system, a non-retentive preparation form provides a reliable basis using mainly chemical retention and micro-mechanical retention instead of macro-mechanical retention.

*Please review the articles available regarding the debate over whether to use a conventional cementation procedure, adhesive cementing, or selective adhesive luting


Restoration pre-treatment

Zirconia is densely sintered and does not contain a glass phase. Therefore, it cannot be etched with hydrofluoric acid to create a micro-retentive etching pattern. In addition, silanes cannot effectively promote zirconia bonding. Several studies have shown that air abrasion with 50-µm alumina at a reduced pressure of 0.5 bar (0.05 MPa; 7 psi) will create a sufficient micro-retentive pattern12 and greatly enhances the wetting capacity.

In addition to air abrasion, chemical coupling agents such as bifunctional phosphate resin monomers are used on air-abraded zirconia. Bonding with phosphate monomer-containing adhesive resin systems gives very reliable results27,28. The use of phosphate monomer-based resin cement systems (e.g., Panavia [Kuraray Noritake Dental, Tokyo, Japan]) and/or phosphate monomer primers, such as CLEARFIL CERAMIC Primer Plus (Kuraray Noritake Dental, Tokyo, Japan)  on freshly air-abraded zirconia, offer the most reliable bonding methods today 13,27,28. We therefor consider MDP-based composite resin cements the material choice for our bonding procedure. However, it must be stressed that contamination of the air-abraded zirconia with saliva, phosphoric acid or other contaminants will limit the formation of chemical bonds and, therefore, must be avoided.

Avoiding contamination

For optimal moisture control, absolute isolation of the working field is crucial. Minimising  the risk of contamination, avoiding exposure to oral fluids. Before restoration placement, a thorough cleaning of the abutment tooth is essential. Following trial placement, a meticulous recleaning step is recommended to remove any potential introduced contamination. KATANA Cleaner (Kuraray Noritake Dental, Tokyo, Japan) is an ideal choice due to its unique properties. Its slightly acidic pH of 4.5 allows for effective cleaning intraoral and extraoral adhesion surfaces. Additionally, the incorporation of MDP monomer technology makes it highly efficient. The MDP salt in this product effectively bonds with contaminants, breaks them down and results in easy removal by water rinsing.


Cement type/bonding

After pre-treatment of surfaces to optimise the , it is important to understand that the properties of highly translucent zirconia differ highly from those of earlier generation zirconia. Early-generation zirconium oxides, including 3 mol% yttrium oxide (3Y-TZP), are high in strength and low in translucency. With the increase in yttria, creating 4-5 mol% yttria, or higher, zirconium oxides, the number of cubic crystals increases, resulting in higher translucency but leading to a reduction in strength. Therefore, attention must be paid to zirconia type, material thickness, restoration type, and application area. These factors may influence the choice of cement based on the adhesive properties demanded for lasting restorations and high aesthetic outcomes.


PANAVIA V5

For a resin cement system to deliver a strong bond, it is not always enough to have it contain an appropriate adhesive monomer. It is necessary for that adhesive monomer to be polymerised effectively under different circumstances. The PANAVIA™ V5 system contains an innovative “ternary catalytic system” consisting of a highly stable peroxide, a non-amine reducing agent* and a highly active polymerisation accelerator. Since this catalytic system is amine-free, the hardened cement has unsurpassed colour stability. In addition, the highly active polymerisation accelerator, one of the components in PANAVIA™ V5 Tooth Primer, is not only an excellent reducer that promotes polymerisation effectively, but it is also capable of coexisting with the (in this product) acidic MDP. This makes it possible to create a single-bottle self-etching primer. This accelerator is also responsible for the so-called touch-cure reaction when it comes into contact with the paste. Resulting in the sealing of the dentin interface and, at the same time, allowing the paste to set even in situations where light curing is limited.

*PANAVIA™ V5 Tooth Primer applied and left for 20 seconds, followed by air drying.

The second primer in the PANAVIA V5 system is CLEARFIL™ CERAMIC PRIMER PLUS, which incorporates Kuraray Noritake Dental’s original MDP and a silane. This product is used to prime zirconia but is also an excellent choice for priming silica-based ceramics, composites, and metals.


CLEARFIL™ CERAMIC PRIMER PLUS, which contains the original MDP, applied and dried.


The PANAVIA™ V5 full adhesive resin cement system consists of all three above-mentioned components, always used in the same way, independent of the material, for a straightforward procedure to ensure reliable bonding. The PANAVIATM V5 systems offer try-in pastes to visualise the final results before final cementing and confirm the appropriate shade of the resin cement to be used.


PANAVIA VENEER LC


Offering a flexible workflow and high bondability of thin, translucent restorations like veneers but also inlays and onlays, PANAVIA™ Veneer LC was designed. It is a light-curing resin cement system allowing a long working time of 200 seconds under ambient light*. This allows multiple veneers to be placed simultaneously without racing against the setting. The final light-curing can be started anytime after positioning the provisions. The PANAVIA™ Veneer LC cementing system includes PANAVIA™ Tooth Primer and CLEARFIL CERAMIC PRIMER Plus as primers to chemically interact with the adhesive surfaces.


PANAVIA™ Veneer LC Paste applied and the laminate veneer seated. In this case six veneers were simultaneously placed during one session.

Unpolymerized excess paste removed with a brush. PANAVIA™ Veneer LC Paste is a light-cured type rein cement, designed to provide sufficient working time.

This photo shows the results after the final light curing. Since the excess cement was easily removed, there were almost no cement residues.


PANAVIA SA CEMENT Universal

Still, clinicians seek efficiency and effectiveness in everyday practice by using a straightforward but durable resin cement solution. PANAVIA™ SA Cement Universal is developed to offer this ease-of-use property without losing focus on bonding properties.  PANAVIA™ SA Cement Universal is developed with the original MDP monomer in the hydrophilic paste compartment, allowing for chemical reactiveness with zirconia and tooth structure. The other compartment contains the hydrophobic paste, to which a unique silane coupling agent, LCSi monomer, is added, which allows the cement to deliver a strong and durable chemical bond to silica-based materials like porcelain, lithium disilicate and composite resin*. Furthermore, PANAVIA™ SA Cement Universal is less moisture sensitive than full adhesive resin cement systems. This also makes it the ideal cement in situations where rubberdam isolation is difficult.

*The product is available in both auto mix and hand mix options.

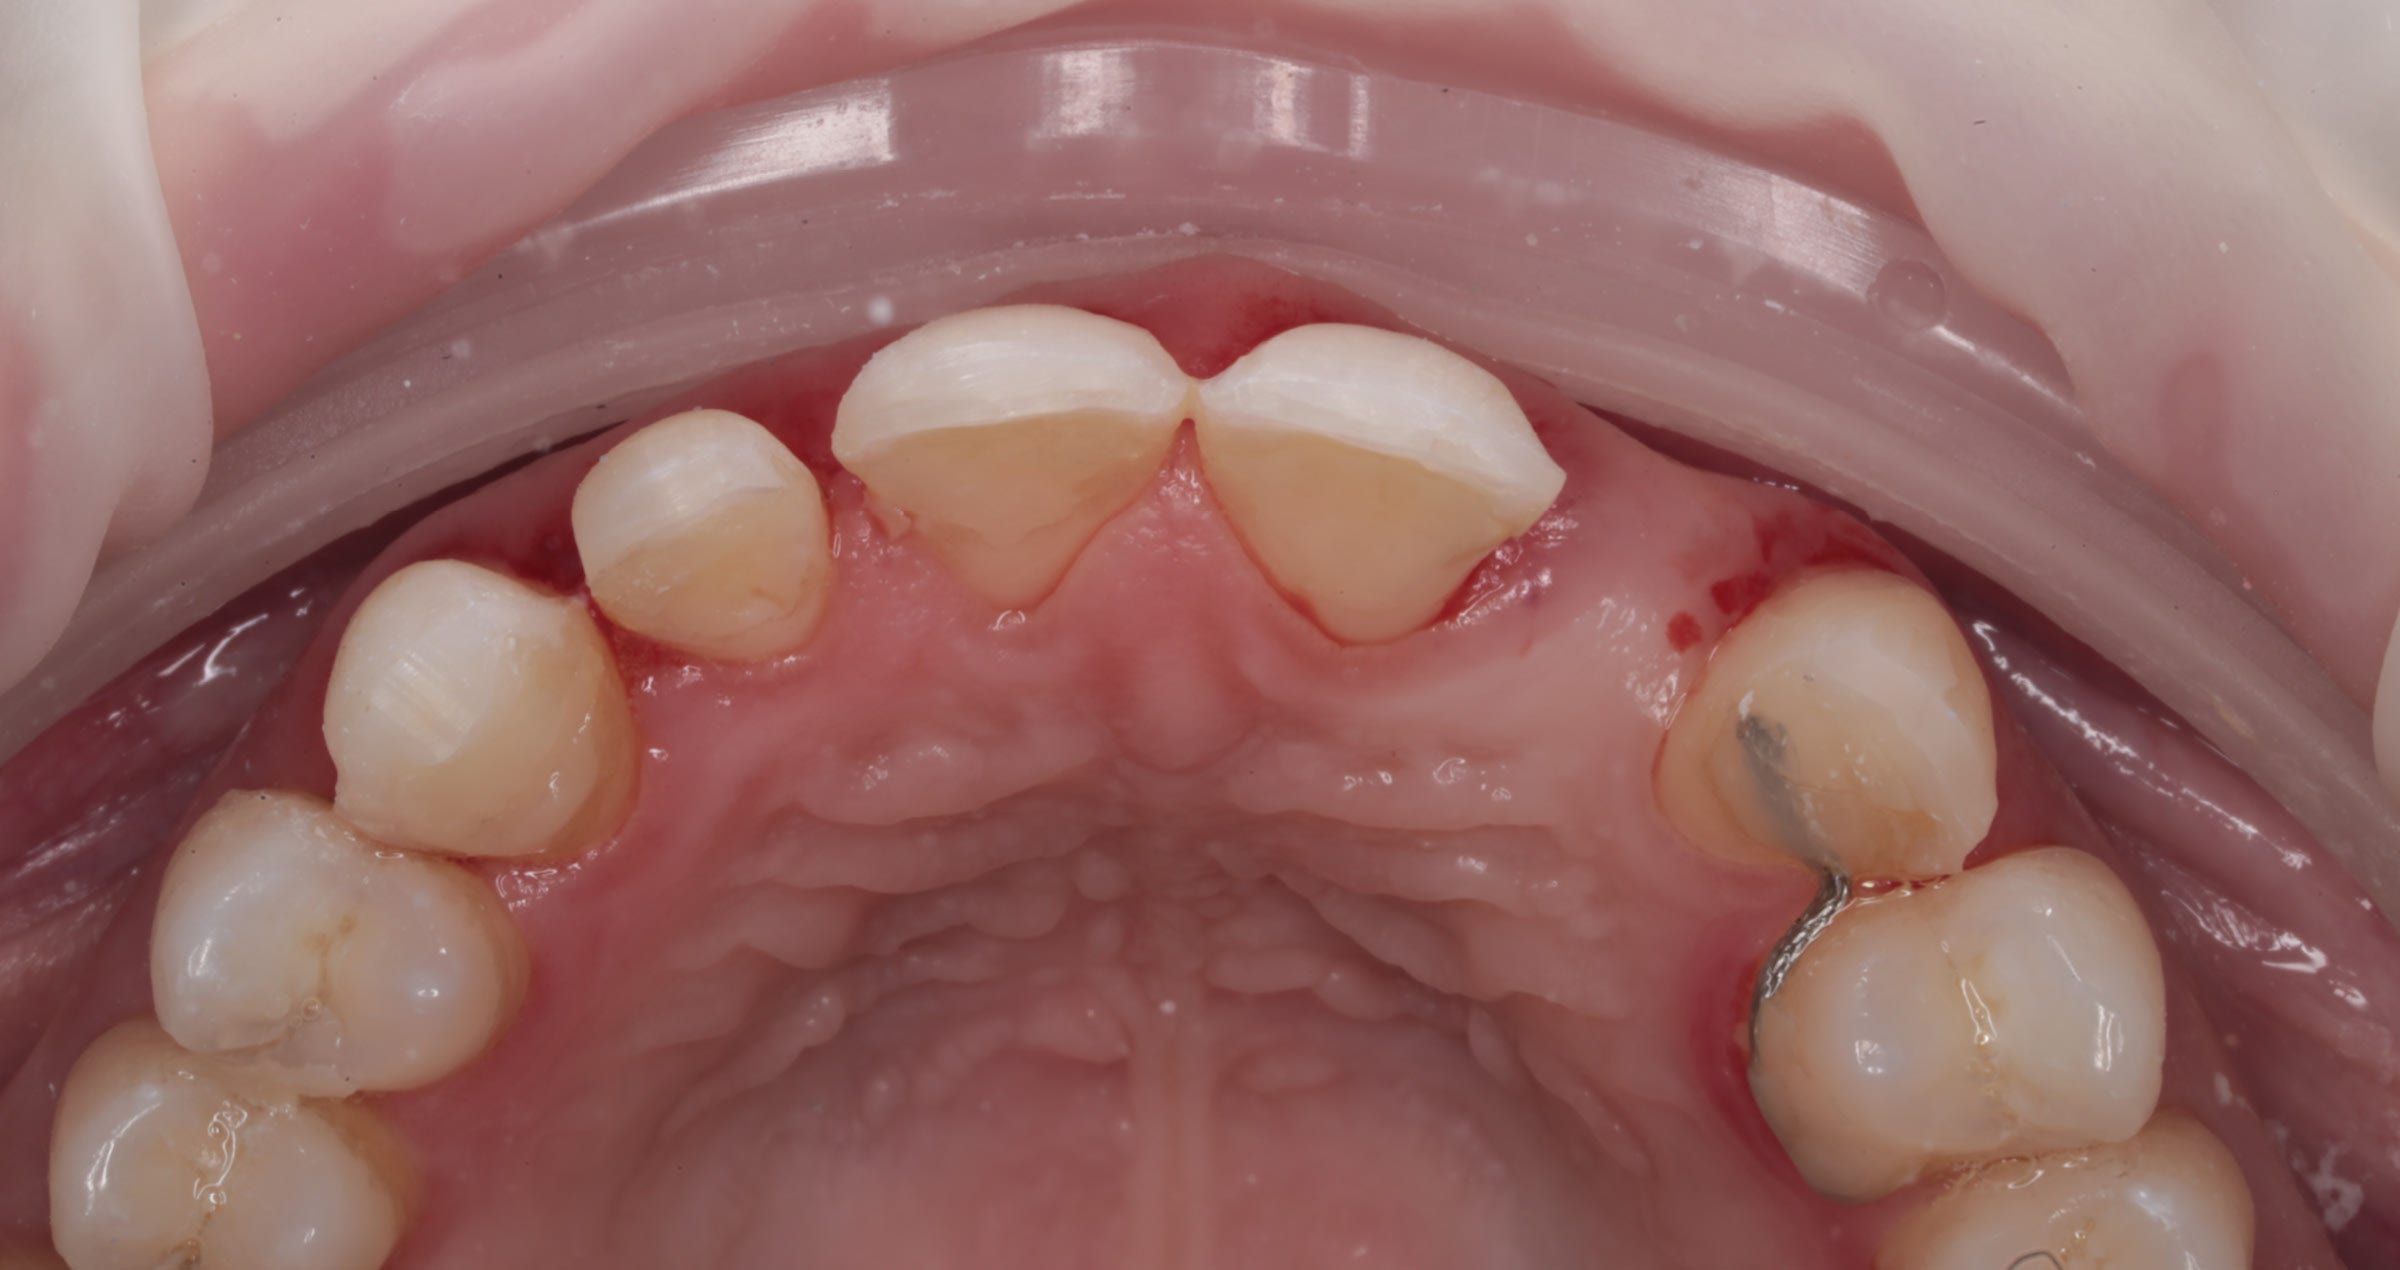
*Old PFM bridge (shown here) removed, and existing preparations modified to accommodate a 3-unit KATANA™ Zirconia bridge. The upper right canine was prepared to receive a single-unit KATANA™ crown.

Before

After. Seating & Final Smile. PANAVIA™ SA Cement Universal and CLEARFIL™ Universal Bond Quick were used for cementation and bonding. “I love the ease of use and clean-up with PANAVIA™ SA Cement Universal, and its MDP monomer creates a strong chemical bond to the tooth structure and zirconia. CLEARFIL™ Universal Bond Quick has a quick technique without reducing bond strengths, releases fluoride and has a low film thickness. I simply rub CLEARFIL™ Universal Bond Quick into the tooth for a few seconds and air dry. There is no need to light-cure, since it cures very well with PANAVIA™ SA Cement Universal. The patient was very happy with the results. She loved that she no longer saw metal margins, and her smile was much more uniform and lifelike.” Dr. Kristine Aadland


*Images are a part of a case by Dr. Kristine Aadland; 3-Unit anterior maxillary


Bonding to zirconia in three steps

Over the last century, the popularity of highly translucent zirconia has skyrocketed due to its excellent properties and wide range of anterior and posterior clinical applications. Because zirconium oxide prostheses are, if processed correctly, antagonist-friendly and easy (and relatively inexpensive) to fabricate, the material keeps gaining popularity in dentistry.

Several steps need to be taken into account for reliable and durable bonding. Years of research on achieving high and long-term bond strength to zirconia have concluded into three practical steps, summarised as the APC concept13 as a reliable procedure guideline.

APC-Step A

Zirconia should be air-particle abraded (APC-Step A) with alumina or silica-coated alumina particles; the sandblasting or micro-etching procedure. Air abrasion with a chairside micro-etcher using aluminium oxide particles (size: up to 50 μm) at a low pressure of 0,5 bar (0.05 – 0.25 MPa) is sufficient.14,18,25-27

APC-Step P

The subsequent step includes applying a special ceramic primer (APC-Step P), which typically contains specially designed adhesive phosphate monomers, onto the zirconia adhesive surfaces.29,30 The MDP monomer has been shown to be particularly effective at bonding to metal oxides like zirconium oxide.

APC-Step C

Dual- or self-cure resin cement systems should be used to reach an adequate C=C conversion rate underneath the zirconia restoration since the lack of translucency in zirconia reduces light transmission.13 However, in cases where high-translucent zirconia (HTZr02) is used, the zirconia transmits light so that the shade of composite or resin cement might influence the final appearance of such restorations. It is, thereforebased on the individual situation and shade of the abutment tooth.

The APC zirconia-bonding concept is not limited to intra-oral situations and can also be applied in the laboratory for implant reconstructions that include cemented zirconia components.

Conclusion

Rapid developments in high-quality translucent zirconia have made the utility and reliability of adhesive cementing systems even more crucial. This applies to fully opaque restorations but also minimally invasive and ultra-translucent restorations of low thickness. In all cases, the longevity of the bonding and, thus, the provision directly affects patient  satisfaction. By taking into account the three primary parameters we have discussed in this article and following the predictable APC protocol, you will successfully realise durable bonded zirconia restorations from now on.


References

  1. Ladha K, Verma M. Conventional and contemporary luting cements: an overview. J Indian Prosthodont Soc. 2010;10(2):79-88.

  2. Nam, Y., Eo, M.Y. & Kim, S.M. Development of a dental handpiece angle correction device. BioMed Eng OnLine17, 173 (2018). https://doi.org/10.1186/s12938-018-0606-1
  1. Florian BEUER, Daniel EDELHOFF, Wolfgang GERNET, Michael NAUMANN, Effect of preparation angles on the precision of zirconia crown copings fabricated by CAD/CAM system, Dental Materials Journal, 2008, Volume 27, Issue 6, Pages 814-820
  1. Muruppel AM, Thomas J, Saratchandran S, Nair D, Gladstone S, Rajeev MM. Assessment of Retention and Resistance Form of Tooth Preparations for All Ceramic Restorations using Digital Imaging Technique. J Contemp Dent Pract. 2018;19(2):143-9.

  2. Edelhoff D, Özcan M. To what extent does the longevity of fixed dental prostheses depend on the function of the cement? Working Group 4 materials: cementation. Clin Oral Implants Res. 2007;18 Suppl 3:193-204.

  3. Güth JF, Stawarczyk B, Edelhoff D, Liebermann A. Zirconia and its novel compositions: What do clinicians need to know? Quintessence Int. 2019;50(7):512-20.

  4. Smith CT, Gary JJ, Conkin JE, Franks HL. Effective taper criterion for the full veneer crown preparation in preclinical prosthodontics. J Prosthodont. 1999;8(3):196-200.

  5. Uy JN, Neo JC, Chan SH. The effect of tooth and foundation restoration heights on the load fatigue performance of cast crowns. J Prosthet Dent. 2010;104(5):318-24.

  6. Blatz MB, Vonderheide M, Conejo J. The Effect of Resin Bonding on Long-Term Success of High-Strength Ceramics. J Dent Res. 2018;97(2):132-9.

  7. Chaar MS, Kern M. Five-year clinical outcome of posterior zirconia ceramic inlay-retained FDPs with a modified design. J Dent. 2015;43(12):1411-5.

  8. Kern M, Passia N, Sasse M, Yazigi C. Ten-year outcome of zirconia ceramic cantilever resin-bonded fixed dental prostheses and the influence of the reasons for missing incisors. J Dent. 2017;65:51-5.
  1. Kern M, Dr Med Habil, M. BONDING TO ZIRCONIA. Jerd_40. 3DOI 10.1111/j.1708-8240.2011.00403.x VOLUME 2 3 , NUMBER 2 , 2011
  1. Blatz MB, Alvarez M, Sawyer K, Brindis M. How to Bond Zirconia: The APC Concept. Compend Contin Educ Dent. 2016 Oct;37(9):611-617; quiz 618. PMID: 27700128.
  1. Blatz M.B., Oppes S., Chiche G., et al. Influence of cementation technique on fracture strength and leakage of alumina all-ceramic crowns after cycling loading. Quintessence Int. 2008; 39(1): 23-32
  1. Burke F.J., Fleming G.J., Nathanson D., Marquis P.M. Are adhesive technologies needed to support ceramics? An assessment of the current evidence. J Adhes Dent. 2002;4(1)): 7-22
  1. Blatz M.B. Sadan A., Maltezos C., et al. In vitro durability of the resin bond to feldspathic ceramics. AM J Dent 2004;17 (3):169-172
  1. Blatz M.B., Bergler M. Clinical applications of a new self-adhesive resin cement for zirconium-oxide ceramic crowns. Compend Contin Educ Dent. 2012;33(10):776-781
  1. Maggio M., Bergler M., Kerrigan D., Blatz M.D. Treatment of maxillary lateral incisor agenesis with zirconia-based all-ceramic resin bonded fixed partial dentures: a case report. Amer J esthet Dent. 2012;2(4):226-237
  2. Ozer F., Blatz M.B., Self-etch and etch-and0rinse adhesive systems in clinical dentistry. Compend Contin Edus Dent. 2013;24 (1):12-20
  1. Kern M., Thomson V.P., Bonding to glass infiltrated alumina ceramic: adhesive methods and their durability. J Prosthet Dent. 1995;73 (3):240-249
  1. Kern M., Wegner S.M., Bonding to zirconia ceramics: adhesion methods and their durability. Dent Mater. 1998;14(1):64-71
  1. Wegner S.M., Kern M. Long-term resin bond strength to zirconia ceramic. J Adhes Dent. 2000;2 (2):139-147
  1. Blatz M.B., Sadan A., Martin J., Lang B. In vitro evaluation of shear bond strength of resin to densely-sintered high-purity zirconium-oxide ceramics after long-term sorage and thermos cycling. J Posthet Dent. 2004;9(4):356-362
  1. Blatz M.B., Chiche G., Holst S., Sadan A. Influence of surface treatment and simulated aging on bond strength of luting agents to zirconia. Quintessence Int. 2007;38 (9):745-753
  1. Quaas A.C., Yang B., Kern M., Panavia F 2.0 bonding to contaminated zirconia ceramic after different cleaning procedures. Dent Mater. 2007;23(4):506-512
  1. Song J.Y., Park S.w., Lee K., et al. Fracture strength and microstructire of Y-TZP zirconia after different surface treatments. J Prosthet Dent. 2013;110(4):274-280
  1. Koizumi H., Nakayama D., Komine F., et al. Bonding of resin-based luting cements to zirconia with and without the use of ceramic priming agent. J adhes Dent. 2012;14(4):385-392
  1. Nakayama D., Koizumi H., Komine F., et al. Adhesive bonding of zirconia with single -liquid acidic primers and a tri-n0butylborane initiated acrylic resin. J Adhes Dent. 2010;12(4):305-310
  1. Alnassar T., Ozer F., Chiche G., Blatz M.B. Effect of different ceramic primers on shear bond strength of resin-modified glass ionomer cement to zirconia. J Adhes Sci Technol. 2016;DOI:10.1080/01694243.1184404
  1. Blatz M.B. Long-term clinical success of all-ceramic posterior restorations. Quintessence Int. 2002;33(6):415-426
  1. Mante F.K., Ozer F., Walter R., et al. The current state of adhesive dentistry: a guide for clinical practice. Compend Contin Educ Dent. 2013;34:Spec 9:2-8
  1. Ozcan M., Bernasconi M. Adhesion to zirconia used for dental restorations: a systematic review and meta-analysis. J Adhes Dent. 2015;17(1):7-26
  1. Inokoshi M., De Munck J., Minakuchi S., Van Meerbeek B. Meta-analysis of bonding effectivenss to zirconia ceramics. J Dent Res. 2014;93(4):329-334