Simplifying esthetic composite reconstructions using CLEARFIL MAJESTY™ ES-2 Universal

Article by Dr. Clarence Tam HBSc, DDS, FIADFE, AAACD


A CHAMELEON SUPERCOMPOSITE


INTRODUCTION

The name of the game in modern-day esthetic and restorative dentistry is that of Responsible Esthetics. The goal of treatment typically strives to correct any structural and cosmetic shortfalls in both biologically-driven and trauma-affected teeth with the precise, artistic placement of various replacement layers, all whilst respecting and retaining a maximal volume of residual tooth structure. Anterior teeth can be affected by enamel and dentin dysplasia, caries and sclerotic conditions and are characterized by a laundry list of genetically-derived and environmentally-acquired conditions with an esthetic deficit that often threaten an individual’s functional and psychosocial integrity if not restored to the seamless picture of health.


Missing and defective tooth structure must be categorized into its attendant enamel and dentin components. Both substrates are distinctly different in composition, with enamel being highly inorganic in nature and dentin proportionately more collagenous in nature. The latter stratum is responsible for the refraction of light, the expression of the true color of the tooth, namely the hue and the endowment of fracture toughness or resilience in functional performance. The value and chroma are the other elements of color and are modified by the thickness of enamel. The replacement of enamel has been found to be best substituted from a biomechanical perspective by adhesively-bonded indirect porcelain restorations, and dentin using both composite resin and short fiber reinforced composite (SFRC), the latter imparting increased fracture toughness in large volume replacement restorations, especially those with pericervical structural deficits.


In adolescent patients, the gold standard of treatment involves direct composite resin, as often zero to minimal tooth structure preparation is required as a foundation to the bonded restorative. It would be impractical to use bonded indirect restorations when the development of the dentition in puberty is continuous, especially with the retraction of gingiva as one progresses to young adulthood. Resin composite allows prescience in the opportunity to predictably modify and/or add to the existing restoration if dental bleaching for the other teeth is desired or if a further traumatic incident is encountered. The ability to modify bonded porcelain is not predictable and frequent marginal failures occur due to a lower shear bond strength to bonded composite, especially after thermocycling. This is despite our ability to establish a chemical linkage via silane coupling agents from silicate ceramics to resin composite especially at a blended interface.


STATEMENT OF PROBLEM

Dental shades in clinical dentistry have long been classified using the VITA* Classical A1 – D4 shade guide. Despite being ubiquitous in dental practices, composite resin systems with corresponding shade systems do not satisfactorily match to their purported shade1. Floriani et al found that various mixtures of different shades in one system was required to achieve an acceptable color match with the VITA* Classical shades using the CIEDE2000 formula. Testing another composite resin, they found that none of the A1, A2 or A3 shades matched acceptably to the standard shade guide2. Indeed, even with indirect ceramic layering systems, a wide range of unacceptable discrepancy was noted between VITA* labeled porcelain shades and the actual shade guide3. The VITA* Classical shade guide became the standard in dental shade classification with the release of its A1-D4 shade guide in 1985. The majority of human-tested dental shades has been found to be in the A-family (78.5%), followed by C (13.2%), D (5.2%) and B (3.1%)1. As such, the shade accuracy of a given composite system must be important if they are to be visually naturomimetic.


CHAMELEON EFFECT DEVELOPMENT

There are myriad composite resin systems featuring a simplified shade Universal system that have acceptable chameleon effects due to their balance of translucency, light transmission, diffusion and refractive index properties. There is a concern over how these optical properties may change after both thermocycling and wet storage, potentially compromising the excellent initial esthetic blend4. Refractive index (RI) is best optimized when the RI of the inorganic fillers match closely with the RI of the cured organic matrix, typically in a range between 1.47 and 1.525. If the match is dissimilar, this drives up the opacity of the restoration due to heightened refraction and reflection at the filler/matrix interface6.


Layering of composite to mask an intraoral defect is complicated by the need to mask any linear defects such as fracture lines superimposed over the shadowing of the dark intraoral cavity in addition to regional color variations. It is confounded by the requirement to recreate natural maverick and translucent effects particularly in the incisal window region of upper and lower incisors and canines, giving the illusion of a virgin, healthy tooth. This has been historically difficult to accomplish in anterior teeth given the need to block out restorative interfaces with natural tooth structure and recreate a seamless internal structure and details. This detailed layer belies a well contoured enamel layer with realistic translucency, polishability and accurate primary and secondary anatomy.


Adding to the complexities described above, the histoanatomical approach to composite layering dictates that missing enamel is replaced by enamel shades, and dentin by the corresponding dentin shade in the appropriate shade. This shade must be selected at the very start of the appointment, as often even a minute of dehydration has a negative effect on both the perceptibility threshold and acceptability threshold of teeth7, resulting in the incorrect shade.


DEVELOPMENT

CLEARFIL MAJESTY™ ES-2 is a value-based super-nanofilled composite system that covers 15 VITA* shades in just 4 shade options with its Universal series. This Universal series provides a chameleon effect and has 4 variants: Universal (U), Universal Light (UL), Universal Dark (UD) and Universal White (UW). It is the VITA*-approved shading concept relative to color accuracy. Incorporating nano-fillers that consist of silanated barium glass fillers and slanted silica nanoclusters, its wear resistance is high and features minimal abrasiveness against the functional antagonist. The RI of both inorganic filler and organic matrix are well-matched, and the high refractive index of the composite mimics and is extremely similar to natural enamel (1.613) and dentin (1.540), thanks to an innovation labeled Light Diffusion Technology (LDT), which distorts light in a similar way dental tissue does8. There is comfort that the stability of refractive index and other optical transmission properties remains statistically stable even after artificial thermocycling and water-storage aging studies4. The color stability of CLEARFIL MAJESTY™ ES-2 has been proven over time, where a direct comparison to Filtek Ultimate showed CLEARFIL MAJESTY™ ES-2 to feature significantly less color variation from baseline and marginal functional wear over a three to four year period in teeth featuring amelogenesis imperfecta9. This color substantivity is important as dietary and environmental stressors applied over time should have as minimal effect on the restoration to ensure continued esthetic integration.


CLINICAL PROTOCOL

CLEARFIL MAJESTY™ ES-2 Universal is a monochromatic solution that covers the five key shades featured in the CLEARFIL MAJESTY™ ES-2 Premium. As such, it exhibits the most significant LDT relative to all five shades, as its ability is equal when blending to higher value translucent shades as it does to cervical chromatic shades. In a Class IV restoration with a defined fracture line, the challenge is to restore the tooth in a minimal volume of available space. The alchemy requires a complete visual occlusion of the fracture line position, and recreation of internal and external opaque and translucent anatomy along with maverick staining, craze lines and effects. In anterior teeth, the idiom of “the less you see, the less you notice” is not true, especially due to the presence of incisal edge window effects as above, however, materials with the best light diffusion and structure transference properties should be utilized to ensure the highest probability of success.


A 15 year old ASA I female presented to the practice exhibiting aged, chromatic composite restorations with poor marginal integration and gross axial overhangs; essentially a gross failure of primary anatomy and esthetics. She had been involved in a bike accident where she high-sided off braking sharply in a face-meets-concrete scenario, resulting in an uncomplicated moderate enamel-dentin fracture with blushing, affecting both the facial and palatal aspects of tooth 1.1 and a mild uncomplicated enamel dentin fracture affecting the distoincisobuccolingual aspect of tooth 2.1. The restoration overhangs were significant, extending into the proximal contour zone, thus obviating effective interdental cleaning. Vitality tests were confirmed along with radiographs to exclude the presence of apical pathology. The patient accepted the option of pre-prosthetic whitening, to improve the value characteristics of the adjacent teeth, allowing the selection of a brighter value shade combination. Intraoral digital scans were acquired and custom bleaching trays with a no reservoir, cervical seal-priority design were fabricated. The patient was instructed to bleach overnight for a 2 week period using a 10% carbamide peroxide solution (Opalesence, Ultradent Products, UT) until her maximal value was reached. Her baseline shade of the incisors was a 1M1/2M1 combination in the upper incisors and a 2M1 in the lower incisors. On final post-bleach assessment she exhibited a lightened shade of VITA* 0M3 in all incisors. The patient was instructed to use a fluoride-containing, amorphous calcium phosphate complex (ToothMousse Plus, GC America) during the following 2 weeks after cessation of whitening whilst the residual oxygen radical species dissipated from the teeth.


Fig. 1. Pre-operative unrestricted smile 1:2 ratio view, teeth 1.1 and 2.1 with old, defective composite restorations with excessive chroma.


On the day of the procedure, the pre-dehydrated shade was assessed using the supplied “real composite” shade guide tabs featured in the CLEARFIL MAJESTY™ ES-2 Premium system, with the enamel shade being WE (White Enamel) and the dentin shade WD (White Dentin). It was assessed that both white maverick effects as well as a moderate halo effect was desired along with moderate to strong translucency in the incisal window.


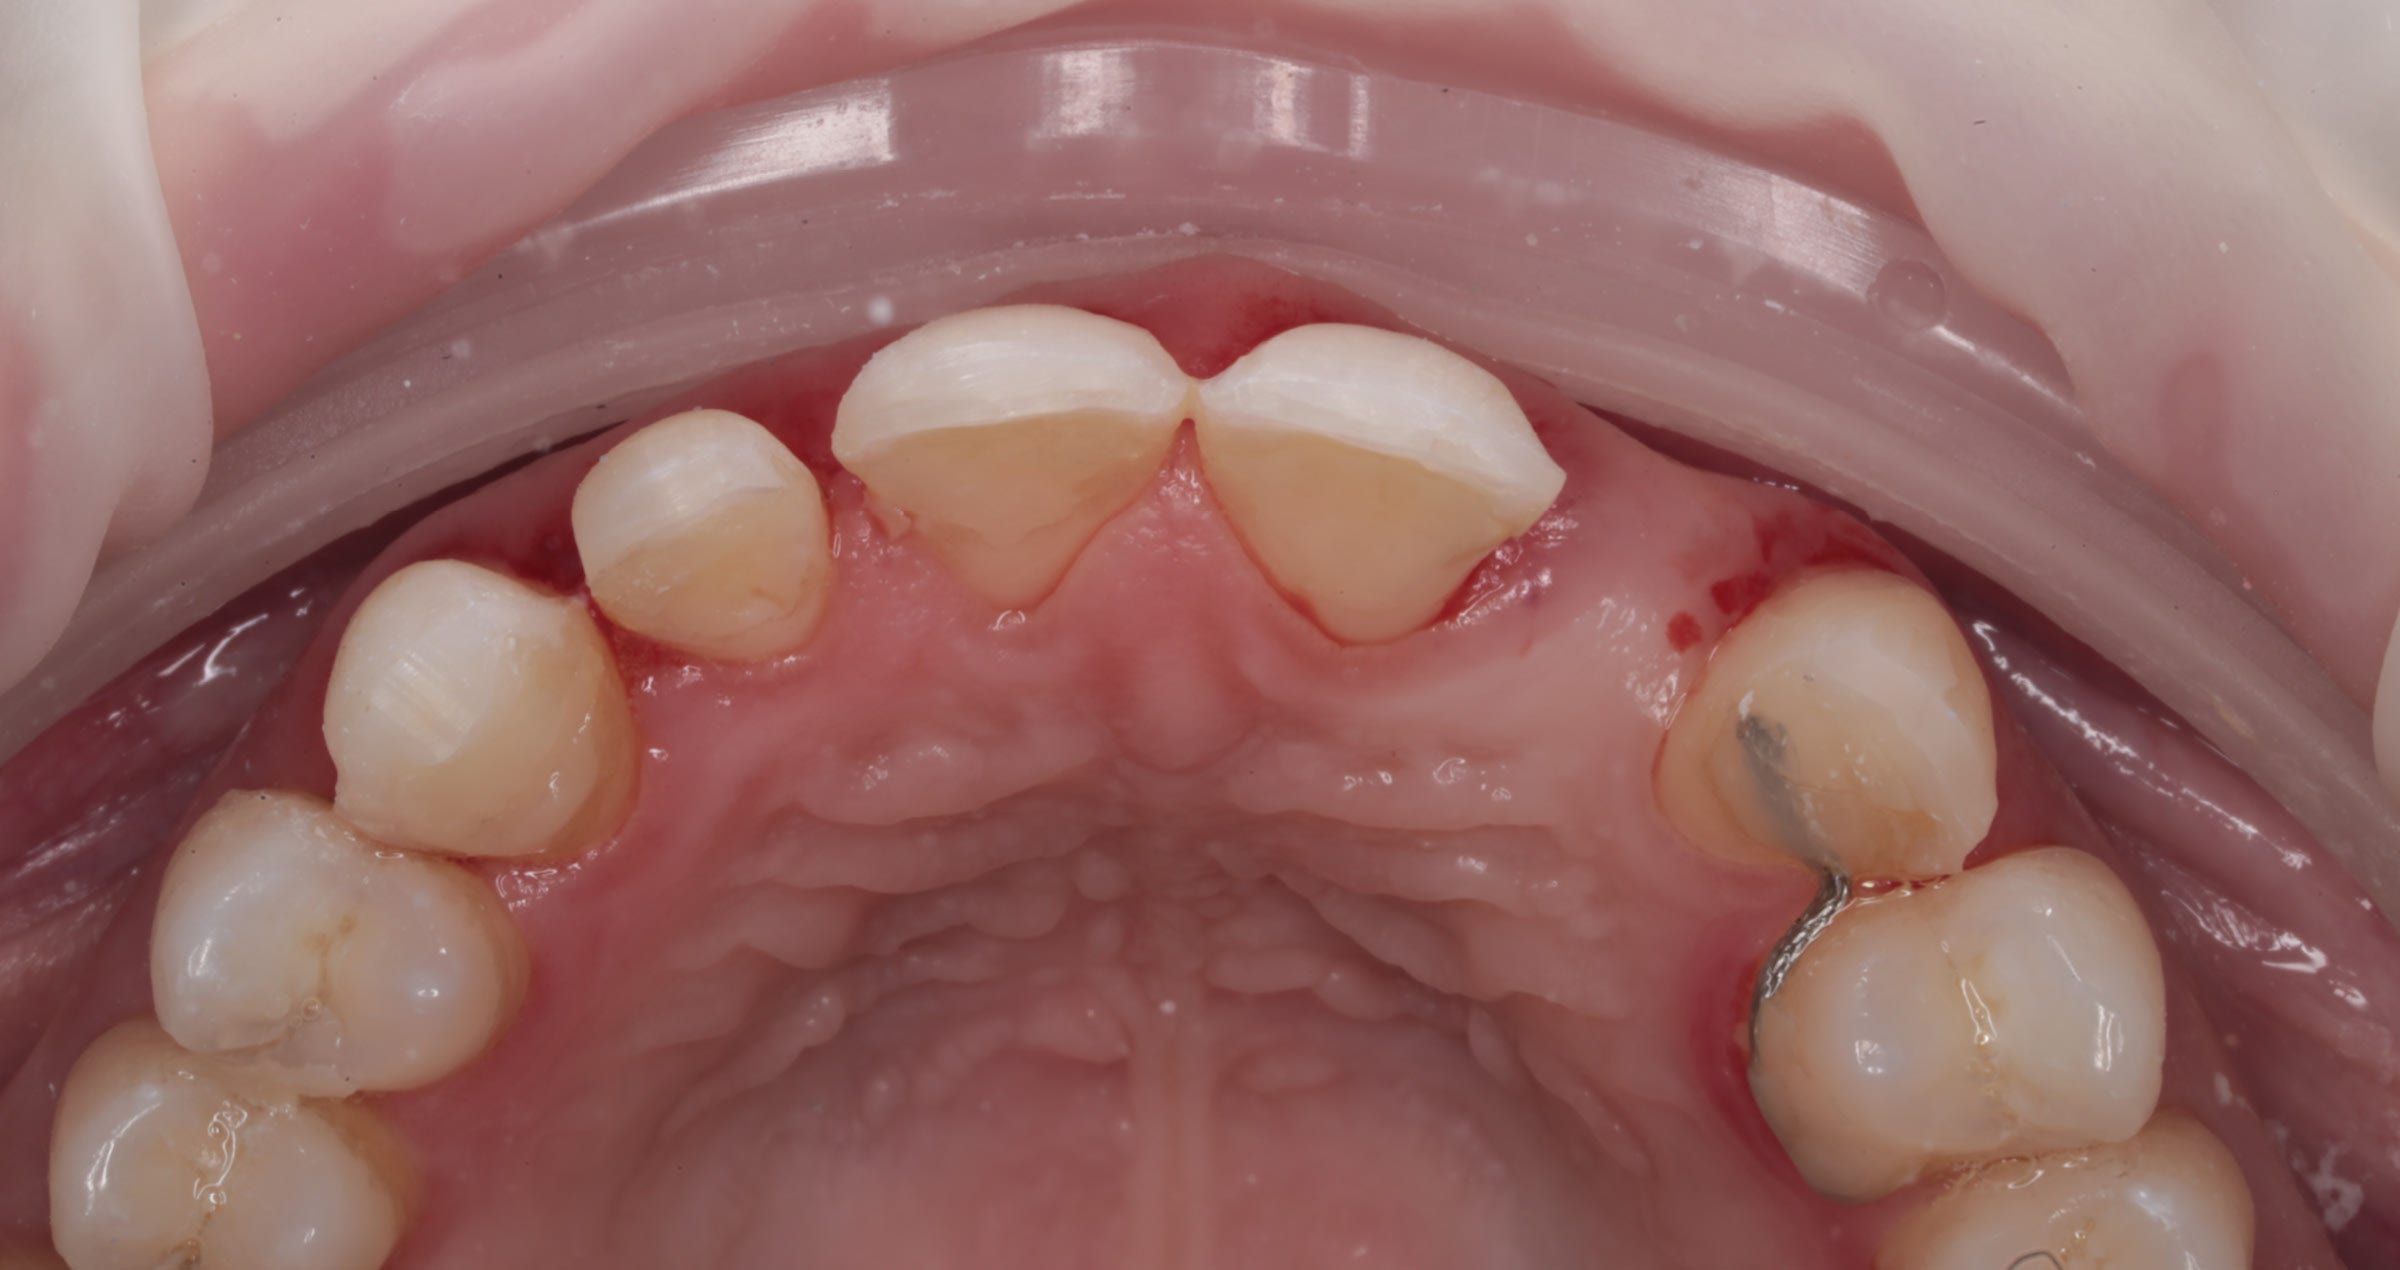
The patient was anesthetized using 1.5 carpules of 2% Lignocaine with 1:100,000 epinephrine (Septodont) before a rubber affixed with individual ties for the central incisors (NicTone Medium). Excavation of the old restorative material was undertaken, and the residual natural incisal edge was found to be undermined by a through-and-through fracture. Thus, the preparation was converted into a true Class IV design, with the facioincisal cavosurface margin subjected to an infinity bevel. The maxillary central incisors were isolated from the lateral incisors by way of a serrated metal strip (Komet) and the prepared surfaces subjected to micro particle abrasion using a 29 micron aluminum oxide powder in 17.5% ethanol carrier (Aquacare). The surfaces were subsequently treated with a calcium sodium phosphosilicate powder (Sylc, Aquacare) to increase the inorganic content of the prepared surface especially extending into the exposed tubules. The teeth were etched using a 33% orthophosphoric acid before a 1 minute 2% chlorhexidine scrub (Vista Products). The surface was reduced to a moist dentin surface before the bond applied, air thinned and cured.


A Mylar strip was pre-crimped in the palatoproximal line angles and positioned on the linguoaxial surface of both teeth 1.1 and 2.1. There is no shade guide for the CLEARFIL MAJESTY™ ES-2 Universal U shade, as it bears a significant chameleon effect however it does come in a light (L) and dark (D) variant. The UL shade was deemed the most suitable for the palatal or lingual shelf, with an average thickness of 0.3mm. This layer was applied in a freehand fashion with a focus on establishing the desired outline form of the tooth relative to the contralateral 2.1. The Mylar matrix setup was removed and a precurved metal matrix (Garrison Slickband, Garrison Dental) was oriented in a position perpendicular to its normal placement interproximally, and the end of the curved band tucked into the sulcus before being secured by a wedge. In this way, there is light separation of the central incisors and an intimate contact between the matrix band and the mesial edge of the freshly applied lingual shelf. A 0.5mm frame extending more than halfway through the contact point was created and cured. The process was repeated on tooth 2.1 with the goal of recreating both lingual and proximal walls of the restoration, leaving only the facial volume to be replaced.


Fig. 2. Pre-crimped Mylar matrix repeated on the DIBP aspect of tooth 2.1 to close the available space. CLEARFIL MAJESTY™ ES-2 Universal UL is used here.


Block-out of the composite extensions against the natural tooth structure was achieved by opacification using an opaque composite resin (WD, CLEARFIL MAJESTY™ ES-2 Premium, Kuraray Noritake Dental Inc.) layered in both horizontal and vertical increments. It is noted that the restorative join line must be completely obscured at the end of layering the dentin volume, otherwise the case will have almost certain esthetic failure. The internal dentin anatomy and its inherent variation was created to mirror that of the 2.1, which had minimal compromise of its incisal window with details intact. A super translucent composite resin (Clear, CLEARFIL MAJESTY™ ES-2 Premium, Kuraray Noritake Dental Inc.) was placed between the lobes of the dentin layers and cured. A 9:1 ratio of white: orange tint was mixed and placed on the incisal edge and proximoincisal corners to recreate the halo effect. A pure white tint was placed in gentle dentin mamelon-connecting spider legs up to the incisal edge to impart the realism. This was layered in a manner consistent with the appearance of the 2.1.


Fig. 3. Both horizontal and vertical dentin composite increments are demonstrated mimicking the contralateral tooth.


Fig. 4 & 5. Final immediate post-operative result after finishing and polishing.


DISCUSSION

The esthetic merit of this case is foundationally supported by composite resin technology on multiple levels. The color and physical stability over time needs to be proven in order for the clinician to have faith in its prognostication. Specifically, the material needs to have an excellent and well-matched refractive index, and one that is unaffected by both water and thermocycling stressors.


The palatal shelf was fabricated using a new-generation super nano-filled universal composite system that boasts a strong chameleon effect. If it is our intention to fool the eye, to obscure, then this first layer works well to start the blockout process of the darkness of the mouth behind the fracture line of the restored tooth. Following this, the chroma and value of the tooth are corrected using the dentin, simultaneous to its continued opacification of the fracture line and intraoral darkness. Both dentin and enamel layers are applied histoanatomically, that is, in a manner respecting the various thickness zones observed in nature.


Ultimately, esthetic success in direct composite resin is not dictated on the first day post-operatively. Factors are in play, from dehydration to occlusal wrinkles that need to be ironed out and corrected. The win depends on what material is used, along with how that material was developed to what standards, and why shade accuracy is so important in a world of variety. In a dental world with myriad composite options, we are looking for precision. Precision in technology leads to efficiency and physicoesthetic maintenance in clinical results. This ultimately results in a boost to clinician-patient confidence and an optimal prognosis.

Dentist:

CLARENCE TAM


*VITA is a trademark of VITA Zahnfabrik, Bad Sackingen, Germany


References


1. Elamin HO, Abubakr NH, Ibrahim YE. Identifying the tooth shade in group of patients using Vita Easyshade. Eur J Dent. 2015 Apr-Jun;9(2):213-217. doi: 10.4103/1305-7456.156828. PMID: 26038652; PMCID: PMC4439848.
2. Floriani F, Brandfon BA, Sawczuk NJ, Lopes GC, Rocha MG, Oliveira D. Color difference between the vita classical shade guide and composite veneers using the dual-layer technique. J Clin Exp Dent. 2022 Aug 1;14(8):e615-e620. doi: 10.4317/jced.59759. PMID: 36046166; PMCID: PMC9422970.
3. Gurrea J, Gurrea M, Bruguera A, Sampaio CS, Janal M, Bonfante E, Coelho PG, Hirata R. Evaluation of Dental Shade Guide Variability Using Cross-Polarized Photography. Int J Periodontics Restorative Dent. 2016 Sep-Oct;36(5):e76-81. doi: 10.11607/prd.2700. PMID: 27560681.
4. Almasabi W, Tichy A, Abdou A, Hosaka K, Nakajima M, Tagami J. Effect of water storage and thermocycling on light transmission properties, translucency and refractive index of nanofilled flowable composites. Dent Mater J. 2021 May 29;40(3):599-605. doi: 10.4012/dmj.2020-154. Epub 2020 Dec 24. PMID: 33361663.
5. Arai Y, Kurokawa H, Takamizawa T, et al.. Evaluation of structural coloration of experimental flowable resin composites. J Esthet Restor Dent. 2020;e12674.
6. Ota M, Ando S, Endo H, et al.. Influence of refractive index on optical parameters of experimental resin composites. Acta Odontol Scand. 2012;70(5):362–367.
7. Suliman S, Sulaiman TA, Olafsson VG, Delgado AJ, Donovan TE, Heymann HO. Effect of time on tooth dehydration and rehydration. J Esthet Restor Dent. 2019 Mar;31(2):118-123. doi: 10.1111/jerd.12461. Epub 2019 Feb 23. PMID: 30801926.
8. Meng Z, Yao XS, Yao H, Liang Y, Liu T, Li Y, Wang G, Lan S. Measurement of the refractive index of human teeth by optical coherence tomography. J Biomed Opt. 2009 May-Jun;14(3):034010. doi: 10.1117/1.3130322. PMID: 19566303.
9. Tekçe N, Demirci M, Sancak EI, Güder G, Tuncer S, Baydemir C. Clinical Performance of Direct Posterior Composite Restorations in Patients with Amelogenesis Imperfecta. Oper Dent. 2022 Nov 1;47(6):620-629. doi: 10.2341/21-106-C. PMID: 36281978.


Individualisation of monolithic zirconia restorations

Article by Dr. Florian Zwiener


Modern multi-layered zirconia such as KATANA™ Zirconia STML (Kuraray Noritake Dental Inc.) already meets high aesthetic demands due to its natural colour gradient and high translucency. To achieve further characterisation and optical adjustment to the adjacent teeth, there are essentially two options: veneering with feldspathic ceramic or glazing and individualisation with ceramic stains.


While there are still many indications for veneering, especially in the anterior area, more and more cases can now be solved with monolithic restorations. This allows for a time-efficient chairside workflow with same-day treatment, eliminating the need for temporary restorations. Additionally, the absence of a porcelain layer reduces the wall thickness of the restoration and thus the space required, allowing for less invasive preparation. This also reduces the risk of endodontic complications induced by tooth preparation (grinding trauma). Another advantage is a significant reduction in the chipping risk.


Below are the essential steps for individualisation using ceramic stains, demonstrated through the example of a molar crown.


PREPARATION

The restoration is designed in full contour as usual, ideally dry-milled, and then sintered. After sintering, the restoration is first sandblasted (aluminium oxide 50 μm, 1 to 1.5 bar pressure). This microscopic roughening of the ceramic surface enables an optimal bond with the glaze. Subsequently, the restoration should be cleaned using a steam cleaner or an ultrasonic cleaner to remove all blasting residue.


The functional restoration surfaces must then be polished to avoid the risk of excessive abrasion on the enamel of the opposing dentition, as zirconia is harder than enamel. Following this, optional glazing and characterization with ceramic stains can be performed. However, for areas not in the aesthetic zone, such as the palatal surfaces of maxillary anterior teeth, this is not necessarily required.


PREPARATION: STEPS AT A GLANCE

  1. Sandblasting of the sintered restoration (Al2O3 50 μm, 1-1.5 bar)
  2. Cleaning (steam cleaner or ultrasonic cleaner)
  3. Polishing the occlusal/palatal contact areas


Fig. 1. Sintered and sandblasted zirconia crown.


Fig. 2. Occlusal high-gloss polish.


Fig. 3. TWIST™ DIA for Zirconia (Kuraray Noritake Dental Inc.) enables efficient polishing of zirconia in three steps.


STAINING AND GLAZING

The shades A+, B+, C+, and D+ of the paste-like ceramic stain CERABIEN™ ZR FC Paste Stain (Kuraray Noritake Dental Inc.) enhance the chroma in the cervical area when applied in the respective tooth shade. They are used to strengthen the multicolour effect of the zirconia or to darken the restoration overall. By mixing the stains with glaze or clear glaze in different ratios, the intensity can be adjusted.


Cervical 1 and 2 are suitable for replicating exposed cervical areas or discolouration. Cervical 1 is also useful for marking fissures, as it gives the crown depth and structure without appearing overly dark. Patients typically reject excessively pronounced fissure effects. Since fissure areas in multi-layered materials generally lie in the lightest part of the block (in the enamel layer), it may make sense to darken them slightly with A+, while white hypermineralisations can be replicated on the cusp tips. A narrow band of Grayish Blue below the cusp tips creates an optical translucency effect. In cases where this translucency appears too dark blue or greyish, mixing Grayish Blue with Dark Grey can modify the appearance.


By mixing various colours, numerous different tones can be created. For instance, by adding Yellow to A+, its slightly brownish colour can be adjusted to a warmer, more yellowish tooth shade. It is generally advisable to capture the patient‘s tooth shade with a photo and a custom-made colour ring of the corresponding material before preparation. This can serve as a reference during production, especially in the laboratory, where lighting conditions may differ.


For pronounced characterisations or fine details, it may be necessary to carry out multiple firings to avoid unwanted running effects between the colours and the glaze. This is particularly recommended when replicating anatomical details with high sharpness, such as enamel cracks or local discolourations. For this, a glaze and base shade are first applied and fired, and finer structures are added in a second firing. Alternatively, a fixative firing of the stains without glaze can be performed first, with only a glaze layer fired in the second step. A benefit of CERABIEN™ ZR FC Paste Stain is that its appearance during application closely matches the final firing result. In thick consistency, glaze can also be used to easily rebuild missing proximal contacts.


STAINING AND GLAZING: STEPS AT A GLANCE

  1. Glaze with Glaze/Clear Glaze
  2. Increase chroma (in the cervical area or over large areas) with A+, B+, C+, or D+
    - Adjust intensity by mixing with Glaze/Clear Glaze
    - Create a warmer tone by mixing with Yellow
  3. Replicate discolouration/exposed cervical areas: Cervical 1 and 2
  4. Customise fissure areas
    - Darken with A+, B+, C+, or D+
    - Accentuate fissures with Cervical 1
  5. Customise cusp tips
    - Replicate hypermineralisations with White
    - Create a band below with Grayish Blue (translucency effect)
    - Adjust translucency effect below cusp tips by mixing with Dark Grey
  6. Firing


Alternatives:

  1. First firing: Glaze plus base shade, second firing: Finer structures
  2. First firing: Fixative stain firing without glaze, second firing: Glaze firing


Fig. 4. CERABIEN™ ZR FC Paste Stain assortment for the practice laboratory.


Fig. 5. Discoloured fissures can be accurately replicated with an ISO10 endodontic file.


Fig. 6 and 7. Glazing and staining in one firing.


Fig. 8. Shade determination using a custom-made KATANA™ Zirconia STML colour ring (A3.5).


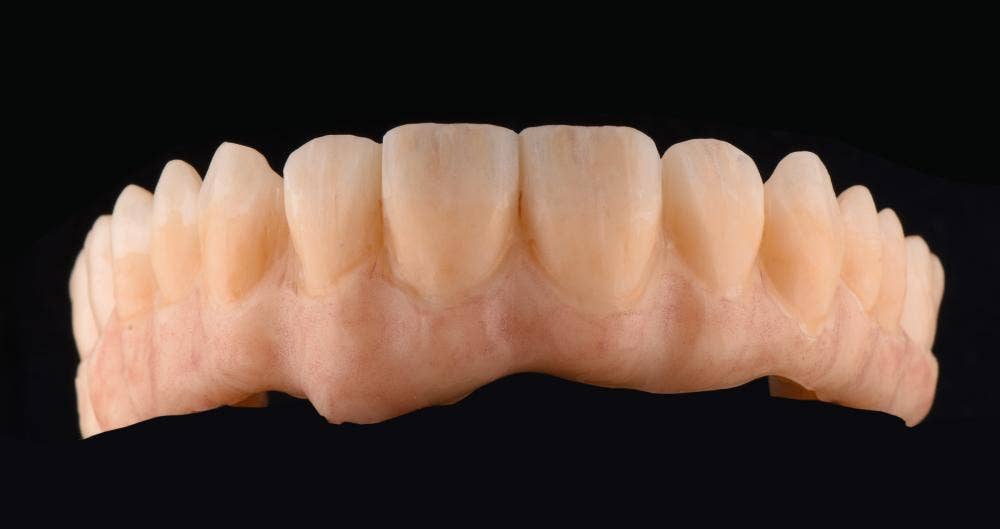
Fig. 9. Bridge made from KATANA™ Zirconia STML, sandblasted and occlusally polished.


Fig. 10. Finished glazed and characterised restoration.


Fig. 11. Bridge 14-16 in place.


FINAL SITUATION

Fig. 11. Bridge 14-16 in place.


Dentist:

FLORIAN ZWIENER


When a product is as good as it claims to be

CLEARFIL MAJESTY™ ES FLOW RECEIVES “NIOM TESTED” QUALITY SEAL

Before being allowed to market a dental composite filling material, it must, among other things, meet the set standards within ISO 4049:2019 Dentistry - Polymer-based restorative materials. Prompted by the tremendous positive response Kuraray Noritake Dental Inc. received from users of the CLEARFIL MAJESTY™ ES Flow series, we asked the Nordic Institute of Dental Materials (NIOM), an independent research institute, to test this product line on key aspects within the said ISO standard.


While it was not mandatory for us to have the CLEARFIL MAJESTY™ ES Flow series tested, our confidence in the quality of our product prompted us to do so. NIOM thoroughly evaluated CLEARFIL MAJESTY™ ES Flow in all three different levels of flowability: High, Low, and Super Low (Fig. 1). Among the properties assessed were depth of cure, flexural strength, water sorption and solubility, and colour stability after irradiation and water sorption. NIOM found that regarding all properties, the three flowabilities and different shades proved to comply with the requirements.


We are pleased to have gone the extra mile and proud that an independent party verified that our product meets the stringent ISO standards.


Fig. 1. CLEARFIL MAJESTY™ ES Flow in its three different levels of flowability.


IMPLICATIONS FOR CLINICAL USE

These test results are an external proof for users of the popular flowable composite series that they safely can be used as specified by Kuraray Noritake Dental Inc. in the product’s instructions for use. The NIOM test results obtained regarding the depth of cure imply that, when applied to the recommended layer thickness, the composite will polymerise adequately – which is essential for a great long-term performance. In addition, all three flowabilities offer sufficient strength and water sorption/solubility behaviour even to be suitable for restorations, including the occlusal surface of molars and pre-molars. This means that the materials are very well suited for a wide range of indications, including restoring all cavity classes and repairing existing restorations and cementing (Fig. 2).


Fig. 2. Three variants of CLEARFIL MAJESTY™ ES Flow and the suggested use areas.


GREAT AESTHETICS AND HANDLING

On top of these well-balanced mechanical properties, CLEARFIL MAJESTY™ ES Flow in its innovative syringe handles well due to an easy dispensing, bubble-free application, easy sculpting facilitated by its non-sticky formulation, and easy polishing behaviour. Coming in a variety of shades (Fig. 3) and equipped with proprietary Light Diffusion Technology, the material in its three different levels of flowability blends nicely and effortlessly with the surrounding tooth structure, creating a natural overall look. Both handling and aesthetics have been rated very good to excellent by dental advisor consultants in the context of a clinical evaluation.


Fig. 3. Overview of shades available per flowability.


NIOM also provides proof of the positive aesthetic properties: the institute's tests to evaluate colour stability after irradiation and water sorption reveal that CLEARFIL MAJESTY™ ES Flow is expected to remain stable over time. This feature is important for the long-term aesthetics of the restorations created with the materials.


Choose a reliable, high-quality, flowable, direct restorative material that withstands rigorous testing.


Juoksevan yhdistelmämuovin injektiotekniikka. Ilmakuplien välttäminen yhdistelmämuovirestauraatioissa

Yhdistelmämuovisen restauraation tekeminen on yleisin hammaslääkärin suorittama toimenpide. Hampaiden korjaukseen käytetään monenlaisia tekniikoita ja paikkamateriaaleja. Materiaalista, paikkausmenetelmästä ja täytteen paikasta riippumatta ongelmana ovat usein yhdistelmämuovikerrosten sisälle tai niiden pinnoille muodostuvat kuplat. Yhdistelmämuovista valmistetun restauraation on oltava homogeeninen, jotta täytteen saumasta tulee tiivis ja täyte kestää pitkään käytössä. Kuplavirheiden korjaaminen on työlästä, ja joskus osa täytteestä tai koko täyte on vaihdettava niiden takia. Virheiden määrä voi vaihdella yhdistelmämuovityypin (juokseva vai tahnamainen) sekä applikointitekniikan mukaan, mutta moni muukin tekijä vaikuttaa niiden syntyyn. 


Juoksevan yhdistelmämuovin injektiotekniikassa käytetään juoksevia yhdistelmämuoveja, joilla on luonnollisesti hyvä juoksevuus, mutta ne ovat myös alttiimpia käsittelyvirheille.  Ensinnäkin kuplia voi muodostua, jos itse materiaali ei ole homogeenistä. Kuplia voi tulla ruiskuun joko valmistuksen tai ruiskun käytön aikana. Laadukkaita tuotteita käyttämällä voidaan varmistaa, että toimitetut materiaalit ovat korkealaatuisia. Lisäksi hyvin suunniteltu ruiskun rakenne mahdollistaa oikeanlaisen käytön, jolloin kuplia syntyy vähemmän itse materiaalissa. 


CLEARFIL MAJESTY™ ES Flow -yhdistelmämuovi on suunniteltu niin, että kuplia syntyy mahdollisimman vähän annosteluvaiheessa. Ruiskun ja männän huolellinen suunnittelu vähentävät materiaalin vuotamisen ja takaisinvirtauksen mahdollisuutta annostelun aikana ja sen jälkeen.  


Ruiskun sisällä on turvaominaisuutena erityinen O-rengasrakenne, joka estää materiaalia valumasta ruiskusta paineen vapauttamisen jälkeen, ja varmistaa samalla sen, että retraktio on mahdollisimman vähäistä, eikä mäntä pääse vetäytymään liikaa. 


Kuplia voi tulla ruiskuun myös männän tietoisen vetämisen myötä. Jos hammaslääkärillä tai avustavilla henkilöillä on tapana vetää mäntä sisään yhdistelmämuovin annostelun jälkeen, ruiskuun voi päästä ilmaa. Ilma päätyy sitten luultavasti seuraavaan restauraatioon ilmahuokosen muodossa. 


Juoksevan yhdistelmämuovin injektiotekniikassa käytetään silikoni-indeksiä, johon materiaali ruiskutetaan hampaan valmistusta varten. Indeksin oltava on tiukasti kiinni hampaassa, eikä se saa liikkua injektoinnin aikana. Jos niin käy, ilmakuplia voi syntyä. Indeksin painaminen ja vapauttaminen aiheuttaa imua, joka vetää yhdistelmämuovia poispäin hampaasta ja indeksistä. Defektien välttämiseksi indeksiin on kohdistettava tasaista painetta aina materiaalin injektoinnista sen polymerointiin saakka. 


Silikoni-indekseistä on saatavilla useita muunnelmia, joilla voidaan vähentää sen liikkuvuutta ja siten hampaaseen kohdistuvaa hallitsematonta painetta. Yksi tällaisista malleista on vuorotteleva interlip-malli ("one yes one no"), joka tekee työskentelystä huomattavasti vakaampaa ja turvallisempaa. 


Injektioreiän koko voi myös vaikuttaa siihen, kuinka paljon restauraatioon pääsee ilmaa. Jos reikä on liian tiukka, indeksi voi liikkua paikaltaan applikointikärjen sisäänviennin tai käytön aikana. Ongelman välttämiseksi reiän tulisi olla tarpeeksi leveä, jotta kärjen sisäänvienti ja kärjen käsittely injektion aikana onnistuu vaivatta. Aukon ollessa leveämpi mahdollinen ilma pääsee myös poistumaan annostelun aikana. Tärkeintä on kuitenkin käyttää tasaista painetta materiaalin annostelun aikana ja välttää vetämästä ja työntämästä kärkeä uudelleen indeksiin, mikä voisi tehdä yhdistelmämuovikerroksesta epätasaisen. 


TOHTORI

MICHAL JACZEWSKI


Vuonna 2006 Wroclawin lääketieteellisestä yliopistosta valmistunut Michał Jaczewski toimii nykyään omassa yksityispraktiikassaan Puolan Legnican kaupungissa. Jaczewski on erikoistunut minimaalisesti invasiiviseen ja digitaaliseen hammashoitoon. Hän on myös okkluusiohoitojen biofunktionaalisen koulun perustaja. Sieltä käsin hän luennoi ja järjestää työpajoja, joissa keskitytään kokonaisvaltaisiin potilaiden hoitoihin. 


Bonding in minimally invasive repair procedures: tips and tricks

Article by Dr. Michał Jaczewski


Resin composites are wonderful restorative materials: They allow for minimally invasive, defect oriented tooth preparation, may be modelled as desired, and can be modified and repaired whenever necessary. To achieve all of this, however, a strong and long-lasting bond is an absolute requirement. The bond needs to be established either between enamel and dentin on one side and the resin composite on the other, or between the existing and the newly applied composite material.


UNIVERSAL ADHESIVE

Committed to keeping clinical procedures as simple as possible, I use an 8th-generation bonding agent – CLEARFIL™ Universal Bond Quick (Kuraray Noritake Dental Inc.) in my dental office. Containing Rapid Bond Technology, it allows for a particularly easy and straightforward use without the need for extensive rubbing or long waiting times. At the same time, it bonds well to various substrates including enamel, dentin and resin composite as it contains the original MDP monomer.


Its composition and resulting versatility make CLEARFIL™ Universal Bond Quick the first choice for many indications including non- to minimally-invasive repair procedures. As it works extraordinarily well in situations where we want to bond to dentin, enamel or old composite (Fig.1), it is usually not necessary to remove the whole existing restoration that needs to be repaired or modified. Instead, preparation may be limited to the composite part, so that no additional tooth structure needs to be removed.


Fig. 1. CLEARFIL™ Universal Bond Quick establishes a strong bond to dentin, enamel or old composite.


CLINICAL PROTOCOL

Depending on the condition of the existing restoration surface, the repair protocol may be slightly different. The basic steps are as follows:


PROTOCOL 1: OXYGEN INHIBITION LAYER STILL ON THE SURFACE

- No surface treatment required, rinse with water in case of contamination with blood or saliva, followed by air-drying and (optionally) adhesive application

- Apply new layer of composite immediately


PROTOCOL 2: OXYGEN INHIBITION LAYER ALREADY REMOVED FROM THE COMPOSITE SURFACE

- Remove the composite around the defect and create a bevel at the cavity margin with rotating instruments

- Sandblast the surface with aluminium oxide particles

- Fresh composite surface: Clean the surface with KATANA™ Cleaner (Kuraray Noritake Dental Inc.) or etch with phosphoric acid etchant

- Composite surface older than two weeks: Etch with phosphoric acid etchant

- Apply the universal adhesive (which contains silane)

- Apply a new layer of composite


CLINICAL RECOMMENDATIONS

1. STAY IN THE COMPOSITE DURING PREPARATION

When an old composite restoration needs to be replaced – e.g. because the existing restoration shows discolouration or the patient asks for a brighter shade – it is possible to remove only a part of the composite and leave the rest in place to save the underlying healthy tooth structure. Accurate control over the amount of material removed and the amount of material left in place is offered by the use of UV light. Under UV light, the composite is perfectly visible (Fig. 2). Hence, a highly conservative structure removal is supported (Fig. 3).


Fig. 2. Controlling structure removal with UV light, which nicely reveals the old composite.


Fig. 3. Tooth preparation with rotating instruments.


2. INCREASE ADHESION BY SANDBLASTING

Creating a clean, micro-retentive composite surface ideal for bonding: This is the aim of sandblasting the affected composite area with aluminium oxide particles (Fig. 4). The particle size I prefer is 27 μm. Residual particles, may be removed with 37% orthophosphoric acid, which needs to be rinsed off thoroughly before air-drying the surface (Figs. 5a and 5b).


Fig. 4. Air-abrasion with 27 μm aluminium oxide particles.


Fig. 5a. Phosphoric acid etching. Adjacent teeth are protected with PTFE tape.


Fig. 5b. Thorough rinsing to remove the etchant from the surface.


3. USE A UNIVERSAL ADHESIVE THAT CONTAINS SILANE

When bonding to old composite, silanisation of the surface is recommended to increase the bond strength. On dentin, a separate silane shows no positive effect. Hence, it is recommended to apply a separate silane to the composite surface only, a challenging task in situations with a surface consisting of tooth structure and composite. As CLEARFIL™ Universal Bond Quick contains silane, the separate silane application step may be skipped, which clearly simplifies the procedure (Figs. 6a and 6b).


Fig. 6a. Application of CLEARFIL™ Universal Bond Quick to the prepared surface.


Fig. 6b. Solvent evaporation with a gentle stream of air.


4. IF IN DOUBT, USE A UNIVERSAL ADHESIVE DURING REPAIR PROCEDURES

Whenever detected during restoration, defects in the composite layer or air bubbles can be repaired or eliminated right away. As long as the oxygen inhibition layer is still present, another layer of composite may be applied immediately without any prior steps. However, if the surface has been contaminated by saliva or blood (Figs. 7a and 7b) or it is unclear whether we are bonding to dentin, enamel or composite, CLEARFIL™ Universal Bond Quick may be applied (Fig. 8). On top, a new layer of composite is placed to restore the defect (Fig. 9).


Fig. 7a. Composite surface with a defect near the margin with blood contaminating the affected area.


Fig. 7b. Composite surface with a defect near the margin after thorough rinsing and drying.


Fig. 8. Application of the universal adhesive.


Fig. 9. Application of composite material to restore the defect.


5. IF AVAILABLE, PLACE A SILICONE INDEX TO SIMPLIFY ANATOMICAL SHAPING

If the defect is small, it is possible to apply the flowable composite directly and remove the excesses (Fig. 10). The obtaining of a natural shape and smooth transition between old and new composite, however, is simplified by the use of a silicone index or matrix (Fig. 11), which might still be present from the original restoration procedure. A possible outcome of this type of repair is shown in Figure 12; both images were taken prior to finishing and polishing.


Fig. 10. Flowable composite spreading and excess removal.


Fig. 11. Silicone index placed over the teeth including the tooth with the defect.


Fig. 12. Outcome of the flowable injection procedure.


CONCLUSION

Elimination of bubbles or defects in a freshly created restoration, changes in the colour of an existing filling or a shape correction due to wear processes: Modifying composite restorations can be easy – provided that appropriate materials and techniques are used. One of the key elements on the path to success is the selection of a suitable adhesive system, preferably a universal single-bottle adhesive like CLEARFIL™ Universal Bond Quick, which allows for streamlined procedures and supports excellent outcomes. By respecting the provided tips, it is possible to create the desired outcomes in a minimally invasive, straightforward way, laying the foundation for long-lasting aesthetics and function.


Dentist:

MICHAŁ JACZEWSKI


Michał Jaczewski graduated from Wroclaw Medical University in 2006 and today runs his private practice in the city of Legnica, Poland. He specializes in minimally invasive dentistry and digital dentistry and is the founder of the Biofunctional School of Occlusion. Here he lectures and runs workshops with focus on full comprehensive patient treatments.


Don't take your work with you

Leaving work at work, unplugging your mind from the dental office is not rocket science - provided that high-quality dental materials are used. Ideally, they are well-adapted to operator, case, and patient-specific needs. When it comes to restoring cavities with composite, Kuraray Noritake Dental Inc. has got the right products for any dental professional.


The CLEARFIL MAJESTY ES family of dental composites is composed of different product lines designed to meet specific needs. Altogether, the line-up offers a solution for every technique and handling preference, clinical situation and patient requirement.


UNIVERSAL SOLUTION FOR UTMOST SIMPLICITY


When utmost simplicity is desired, a highly innovative universal solution such as CLEARFIL MAJESTY ES-2 Universal is an excellent choice. This paste-type composite system includes only four shades: Universal, Universal Light, Universal Dark, and Universal White.


The Universal shade has the highest translucency and is, therefore, most suitable in cases where several cavity walls are still present, such as in Class I or II cavities and the cervical area. In cavities where light easily passes through, the lower-translucency variants Universal Light (for teeth with shades up to A3) and Universal Dark (for teeth darker than A3) are the best options. Universal White is the go-to solution for young patients and whitened teeth. Consequently, there is usually no need for a shade guide, and the optical properties allow application without an opaquer or blocker in most of cases. Both features greatly simplify the clinical procedure.


CLASSIC AND PREMIUM OPTIONS FOR SINGLE- AND DUAL-SHADE LAYERING

Clinicians who prefer classical single-shade layering according to a shade guide and a greater number of shades available may prefer CLEARFIL MAJESTY ES-2 Classic. With a line-up of 18 shades, it supports straightforward procedures and leads to aesthetic results.


Whenever the aesthetic needs are very high, such as in the context of restoring a large cavity in the aesthetic anterior region, CLEARFIL MAJESTY ES-2 Premium may be the best option. Designed for simplified multi-shade layering, it comes with fixed shade combinations of dentin and enamel opacity, that greatly support predictable outcomes.


MECHANICAL PROPERTIES

All the CLEARFIL MAJESTY ES paste-type composite systems offer a well-balanced viscosity and excellent mechanical properties, including

  • a high flexural strength of 118 MPa
  • a filler load of 78 wt%
  • a compressive strength of 347 MPa
  • a low volumetric shrinkage of 1.9 %
  • a curing depth of 2.0 mm and
  • a long working time under ambient light of 4.5 minutes

VERSATILITY POWERHOUSE IN THREE VISCOSITIES>

A flowable composite completes the portfolio. As the ideal level of viscosity depends on individual preferences and on the specific indication, CLEARFIL MAJESTY ES Flow comes in three different flowabilities: high, low and super low.


They have:

  • a high flexural strength of 145, 151 and 152 MPa, respectively
  • a filler load of 71, 75 and 78 wt%, respectively
  • a compressive strength of 358, 373 and 374 MPa, respectively and
  • a working time under ambient light of 100 seconds.

In addition, they are well-received for their easy application, fast polishing and high polish retention. All these features make the product a true versatility powerhouse. Moreover, it is offered in an innovative syringe designed for bubble-free application of the desired amount of composite and easy modelling.


THE IDEAL PORTFOLIO FOR PEACE OF MIND

The CLEARFIL MAJESTY ES portfolio offers highly suitable products for many clinical situations, demands and treatment techniques. As they support predictable outcomes and long-lasting success, using them gives dental practitioners the peace of mind needed to leave work at work and truly enjoy their free time—in the evening at home, on weekends or on holiday.


For more information about Kuraray Noritake Dental Inc.’s composite solutions visit the website.


Universal adhesive in the context of different repair procedures

Article by Dr. Michał Jaczewski


When working with composite, one of the most important aspects is to understand the mechanisms of adhesion. Choosing the right composite is one thing, but choosing a suitable bonding system and using it correctly is an equally important aspect affecting the long-term performance of a direct restoration.


There are many bonding products on the market - two-bottle (primer and bond) but also single-bottle systems. For anyone trying to select an ideal adhesive for a specific clinical case, the sheer number of available products can be challenging. The temptation to use them all, in slightly different ways, has the potential to create errors. In my dental practice, I am committed to simplifying procedures.


This is why I started looking for a bonding system that would offer a sense of security in terms of adhesion, but also ease of use in different clinical situations. I have opted for the 8th-generation bonding agent with the desired features - CLEARFIL™ Universal Bond Quick (Kuraray Noritake Dental Inc.). The single-bottle universal adhesive is ideal for a broad variety of bonding procedures carried out in the dental office.


IMPRESSIVE FEATURES

CLEARFIL™ Universal Bond Quick can be used in the total-etch as well as the selective enamel etching technique in combination with an etching gel such as K-ETCHANT Syringe (Kuraray Noritake Dental Inc.). It is also a self-etching adhesive. Used in combination with the dual-cure build-up material CLEARFIL™ DC CORE PLUS or the dual-cure universal resin cement PANAVIA™ SA Cement Universal (both Kuraray Noritake Dental Inc.), it is also an ideal choice for cementation in the root canal and for cementing inlays or crowns made of a variety of different restorative materials – from metal to zirconia or lithium disilicate. Efficient clinical procedures are supported by the incorporated Rapid Bond Technology, which eliminates the need for extensive rubbing or waiting for the adhesive to penetrate the substrate and the solvent to evaporate. Among the key components of this technology are hydrophilic amide monomers, which allow the adhesive solution to penetrate moist dentin extraordinarily quickly, while also having a high curing ability. In addition, the original MDP monomer is included in the formulation. Together with the amide monomers, it provides for a high bond strength to enamel and dentin – achievable in a simple procedure of application, air-drying and light-curing.


The described properties turn CLEARFIL™ Universal Bond Quick into one of the most versatile and easy-to-use adhesive bonding solutions in the dental office. Operator sensitivity is low, as is its technique sensitivity, since the three-step procedure is always the same. The following case examples illustrate its use in the context of different repair procedures.


REPAIR OF COMPOSITE RESTORATIONS

One of the major benefits of using composite as a restorative material lies in the fact that it may be modified and repaired at any time. Regardless of whether an air bubble is detected on the surface, the shade needs to be adjusted, a fracture occurs or materials need to be added as a result of wear, modification or repair is easily accomplished without needing to sacrifice additional amounts of healthy tooth structure. Whenever a silicone index has been produced for the initial treatment and is still available, and the user knows which composite has been utilized for the original restoration, the Flowable Injection Technique may be selected as a particularly easy and efficient way of repairing a restoration. However the recommended protocol is slightly different depending on the state of the restoration surface.


CASE EXAMPLE 1: IMMEDIATE REPAIR PROCEDURE

When a restoration has been damaged or an air bubble has appeared during injection of a flowable composite, the procedure is slightly different. In this case, the oxygen inhibition layer is usually still present on the surface of the restoration. Therefore, it is possible to simply apply an additional portion of composite (Figs. 1a to 1d). Even after contamination of the composite surface with water, saliva or blood, this measure is possible. The surface merely needs to be rinsed thoroughly and dried before applying the new portion of composite. For maximum safety, a universal adhesive may be used as well.


Fig. 1a. Repair procedure applicable for defect within a composite restoration whenever the oxygen inhibition layer has not yet been removed: Air bubble detected in the interproximal region.


Fig. 1b. Application of a new portion of composite after rinsing and drying. The adjacent surface is protected with PTFE tape.


Fig. 1c. Repositioned silicone index used to give the restoration the originally planned shape.


Fig. 1d. Final restoration.


CASE EXAMPLE 2: REPAIR PROCEDURE AFTER POLISHING

If a similar defect is detected during finishing and polishing, i.e. when the oxygen inhibition layer has already been removed (Fig. 2), a roughening of the surface is strictly necessary. With a bevelled preparation of the area with the air bubble, optimal conditions are created for another layer of composite that blends in well with the surrounding material (Fig. 3). After bevelling, the surface needs to be sandblasted and cleaned either with KATANA™ Cleaner (Kuraray Noritake Dental Inc.) (Fig. 4a) or with 37 % orthophosphoric acid (Fig. 4b). After thorough rinsing and drying, an additional portion of composite may be applied to the surface (Figs. 5a to 5c). As the defect is small, the composite may be applied instead of injected and the silicone index repositioned afterwards.


Fig. 2. Void on the surface, detected during finishing.


Fig. 3.  Removed void and bevelled area around the defect.


Fig. 4a. Option 1: Cleaning of the surface with KATANA™ Cleaner.


Fig. 4b. Option 2: Etching with K-ETCHANT Syringe.


Fig. 5a. Application of composite (CLEARFIL MAJESTY™ ES Flow Low).


Fig. 5b. Repositioning of the original silicone index to obtain the desired shape.


Fig. 5c. Final restoration with a nice blend-in of the different layers of composite.


CASE EXAMPLE 3: REPAIR PROCEDURE AFTER TWO OR MORE WEEKS

For damaged restorations which have been in place for more than two weeks, an ideal composite-composite interface needs to be created by bevelling and roughening of the surface. A perfect example is presented in Figure 6. The most important step influencing the success of the procedure is proper preparation of the composite surface. To lay the foundation for a strong bond between the new and the old composite as well as for aesthetic outcomes, a bevel needs to be created (Figs 7a and 7b) to facilitate a smooth transition between the two layers. Once the bevel is completed, the surface should be sandblasted with alumina particles sized 27 μm (Fig. 8). The following recommended steps are etching of the composite with 37 % orthophosphoric acid (Fig. 9) and finally application of CLEARFIL™ Universal Bond Quick (Fig. 10). As the universal adhesive contains a silane coupling agent, separate silane application is not necessary. Instead, the new layer of composite may be applied immediately e.g. using the flowable injection technique with an existing matrix (Fig. 11).


Fig. 6. Fractured anterior composite restoration benefitting hugely from repair – the remaining composite is in a great state regarding colour and shape.


Fig. 7a.  Bevelling with dedicated instruments.


Fig. 7b.  Ideal bevel created to provide for a strong bond and great optical blend-in.


Fig. 8. Sandblasting of the surface with alumina particles.


Fig. 9.  Phosphoric acid etching.


Fig. 10. Application of the universal adhesive.


Fig. 11. Composite applied using the flowable injection technique.


Fig. 12. Treatment outcome.


CONCLUSION

The three described repair protocols are straightforward and work well – provided that a strong bond is established at the composite-composite interface. The way it is established may be slightly different depending on whether the oxygen inhibition layer is still present or has already been removed. Using a universal adhesive like CLEARFIL™ Universal Bond Quick, the procedure is simplified owing to elimination of steps such as the separate application of silane.


Dentist:

MICHAŁ JACZEWSKI


Michał Jaczewski graduated from Wroclaw Medical University in 2006 and today runs his private practice in the city of Legnica, Poland. He specializes in minimally invasive dentistry and digital dentistry and is the founder of the Biofunctional School of Occlusion. Here he lectures and runs workshops with focus on full comprehensive patient treatments.


Quality and Inventory Management in the Dental Lab

DELICATE BALANCE BETWEEN COSTS AND AESTHETICS IN DENTAL LAB

When you are a lab owner striving to achieve high-end results using modern digital techniques, the initial investment in CAD/CAM technology is significant, followed by ongoing costs for expendable items such as milling tools and blanks. That cost can be reduced by selecting universal, high-quality materials.


Undoubtedly, zirconia stands out as one of the most popular materials on the market. From an inventory perspective, however, lab owners often find themselves purchasing multiple discs of the same shade and thickness. The reason is that they need to meet all requirements for strength and aesthetics in different settings – enabling them to cover all kinds of restorations and deliver excellent patient outcomes.


UNIVERSAL SOLUTION FOR DENTAL LABS

At Kuraray Noritake Dental Inc., we take pride in not only developing the first-ever multilayer zirconia, KATANA™ Zirconia ML, but also in our commitment to delivering the highest quality materials that we can.


KATANA™ Zirconia YML, our latest addition to the KATANA™ Zirconia line-up, exemplifies this dedication and offers universal applicability. The universal feature is based on the fact that KATANA™ Zirconia YML disc not only offers colour gradation, but also impressive flexural strength and translucency gradation, with maximum values of up to 1,100 MPa and 49 % translucency, respectively.


INHOUSE PRODUCTION - THE PATH TO HIGH QUALITY ZIRCONIA DISC

Like all our zirconia offerings, KATANA™ Zirconia YML begins its journey to the dental lab in our Japanese facility where raw zirconia powder undergoes special treatment process before the addition of essential components.


Once the material has undergone this thorough initial stage, it progresses to the pressing and pre-sintering phase to form the disc. Every detail is carefully calculated, managed and controlled. This phase of the process takes several days, underscoring our goal to achieve the most aesthetic product.


HIGH-SPEED SINTERING PROGRAM: 54 MINUTES

The unique powder formulation and refinement process, as well as the pressing and pre-sintering technique, is the key to allow our customers to realize restorations of up to three-unit bridges without any compromise in terms of aesthetics or mechanical properties using the 54-minute high-speed sintering* process.


This high quality, lengthy production process results in an exceptionally dense material, which once sintered, goes on to deliver a high strength, high aesthetic final restoration.


HIGH PRECISION SHRINKAGE AND STABLE CTE VALUES FOR EXCEPTIONAL FIT

Outstanding deformation stability during the sintering procedure, contributes to the stability during the final sintering process in the dental laboratory, providing for an exceptional fit of large-span bridges and other restorations.


MULTI-LAYERED STRUCTURE AND EASE OF POSITIONING OF RESTORATIONS IN THE BLANK

To enhance aesthetic qualities, all KATANA™ Zirconia YML discs are designed using ratios rather than fixed measurements of different layers in the multi-layered structure. This means that regardless of the disc's thickness, there is always a consistent ratio of 35 % of raw material that constitutes the translucent enamel zone. Hence, discs with an increased height, which are typically used for the production of larger restorations, will always offer sufficient space in the enamel zone, while smaller discs are optimized for smaller restorations.


ONE DISC. ALL INDICATIONS.

These qualities empower dental lab owners to deliver a wide range of restorations. The material is suitable for single crowns to full-arch structures, for full-contour designs to conventional frameworks, using a single material without compromising on aesthetics: KATANA™ Zirconia YML. For finishing, we offer a well-aligned portfolio of solutions designed for internal and external staining, micro-layering and full layering.


EXPLORE KATANA™ Zirconia YML: WEALTH OF RESOURCES, CLINICAL CASES AND FAQS

Visit our website to discover more about KATANA™ Zirconia YML. You will find useful materials such as brochure, technical guide, in-depth technical information.


Would you like to see the material in action – browse the blog section of our website that offers a variety of clinical cases and articles by world-renowned experts showcasing and proving the versatility and aesthetics of KATANA™ Zirconia YML.


*The material is removed from the furnace at 800°C. A furnace with a configurable KATANA™ Zirconia YML firing program is required.


Article by Dr. Michał Jaczewski

FLOWABLE INJECTION AND STAMP TECHNIQUE: RESTORING TEETH IN THE POSTERIOR REGION

Restoring the occlusal surface of posterior teeth while preserving the natural morphology and re-establishing correct occlusal contacts has always been challenging for dental practitioners. Free-hand layering requires knowledge of tooth anatomy, composite handling skills and experience. When the occlusal surface of a tooth is damaged at the start of treatment (as is usually the case in teeth with large MOD cavities) or an increase of the vertical dimension of occlusion is planned (e.g. in severely worn teeth), the use of the flowable injection technique may be a suitable alternative. It truly speeds up and facilitates the process of building up the restoration to a natural shape, but requires thorough planning and preparation. In cases with an intact occlusal surface, the stamp technique might be the first choice.


FLOWABLE INJECTION TECHNIQUE: GENERAL CONSIDERATIONS

It is up to the user how exactly the restorations, to be built up by flowable injection, are planned and how the plan is implemented: One can either opt for a conventional wax-up or make use of digital tools in the planning phase. Dedicated design software offers the benefit of facilitating the creation of a natural shape and morphology of the desired restoration and allows for the establishing of an ideal occlusal relationship. Once the wax-up is ready, it needs to be transferred into the patient’s mouth. This is accomplished via a printed or classical model with wax-up, which forms the basis for the production of a matrix or silicon index. This index is then used intraorally for the injection of the flowable composite. To enable proper light curing through the index, the index material should be as transparent as possible.


AREA-SPECIFIC CONSIDERATIONS

In the posterior area, an index made of two different materials – a soft inner silicon structure and a hard outer shell – may be advisable. Due to its higher dimensional stability compared to a soft silicon index, it is possible to put pressure on it for proper adaptation to the isolated teeth and soft tissue without the risk of altering the shape of the tooth. Figure 1 shows such an index on and next to a printed model. It consists of a hard shell made of acrylic and a soft inner structure made of a transparent silicone material (e.g. EXACLEAR™, GC). For production, a high-capacity hydraulic pressure curing unit designed for use with self-curing resins (Aquapres™, Lang Dental) has proven its worth: It ensures a highly accurate reproduction of the (digital) wax-up.


Fig. 1. Printed model and silicone index.


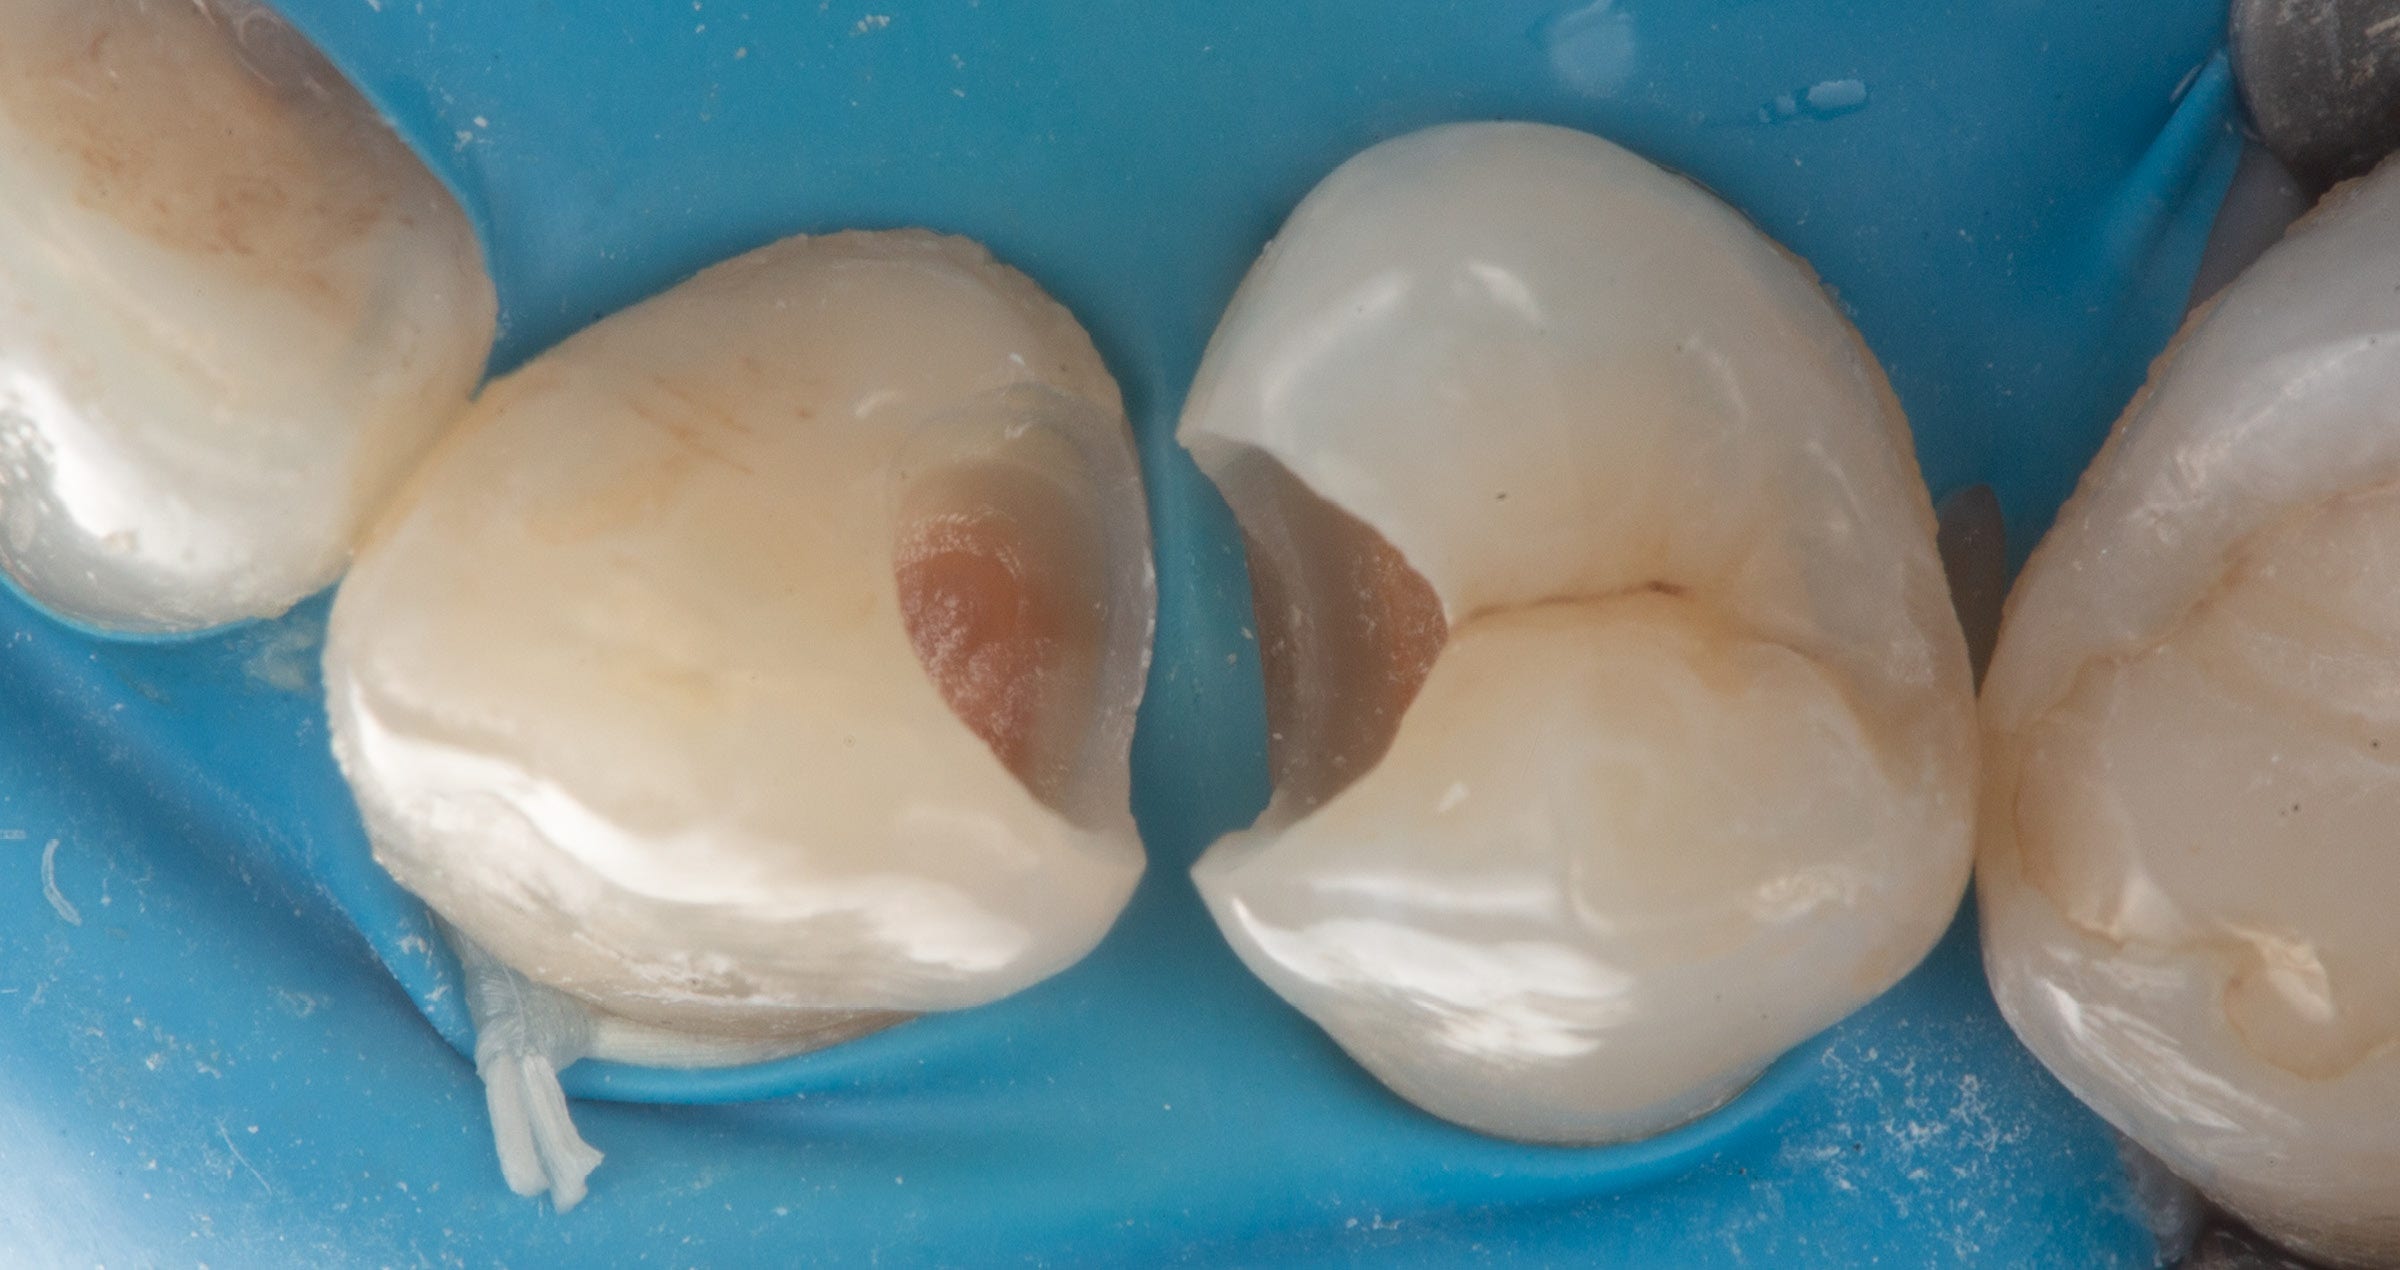
Reconstruction of posterior teeth with the flowable injection technique requires prior removal of all carious lesions and reconstruction of the proximal surfaces to restore the contact points. Hence, the injected composite serves the exclusive purpose of restoring the occlusal surface. When several teeth are treated, a two-step procedure with an alternating technique is recommended to provide for proper separation of the teeth. Blocking the proximal surfaces below the contact point with PTFE tape will reduce the amount of excess material in these areas and make it easier to clean and prepare the proximal surfaces after flowable injection. Proximal and deeper occlusal lesions should be restored with the aid of a matrix, wedge and ring.


CLINICAL PROTOCOL

A possible clinical protocol is illustrated in Figures 2 to 5: After caries excavation and tooth preparation, sectional matrices, wedges and rings were placed to allow for simultaneous treatment of the mesial and occlusal cavities. Following etching and application of the universal adhesive CLEARFIL™ Universal Bond Quick (Kuraray Noritake Dental Inc.), the cavities were restored with CLEARFIL MAJESTY™ ES Flow Super Low in the shade A1 and CLEARFIL MAJESTY™ ES-2 Universal in the shade U. The distal cavity of the first molar was filled in the last step of the free-hand modeling procedure. In order to restore the occlusal surfaces in their original vertical dimension, every second tooth was isolated with rubber dam and the exposed molar etched (total-etch technique with K-ETCHANT Syringe, Kuraray Noritake Dental Inc.). the alternating index was positioned with some pressure and the flowable composite (CLEARFIL MAJESTY™ ES Flow Super Low) injected. Once light curing was completed, it was possible to remove the index, chip off the excess and finish and polish the restoration before repeating the procedure for the adjacent molar.


Fig. 2. Restoration of two molars: Teeth preparation and caries excavation.


Fig. 3. Restoration of two molars: Filling of the proximal and occlusal cavities.


Fig. 4.  Restoration of two molars: Re-establishing the occlusion with the aid of the flowable injection technique.


Fig. 5. Alternating approach: Restoration of the second molar by injecting flowable composite.


DISCUSSION

The use of the flowable injection technique allows for rapid restoration of teeth and the establishment of precise occlusal contacts. This reduces the time spend on occlusal surface modelling and minimizes the risk for prolonged treatment due to a repeated need for occlusal adjustments. In addition to saving time, it is possible with this technique to restore a greater number of teeth in a single appointment. The aesthetics of this type of restoration may be somewhat limited: A skilled practitioner is able to achieve better aesthetic results on the occlusal surface. However, with a detailed wax-up and high-quality model great outcomes can be obtained. The surface quality of printed models can be increased by adjusting the printing parameters including the layer height (Fig. 6). The use of a hydraulic pressure curing unit for silicone index production further increases the quality of the occlusal surface.


When planned and implemented correctly, the established occlusal surface and contacts reflect the natural anatomy without the need for adjustments (Fig. 7). Especially when restoring an entire quadrant, it is possible to increase the efficiency by opting for the flowable injection technique. Doing so reduces the number of appointments and the chair time decisively (Fig. 8).


STAMP TECHNIQUE: CONSIDERATIONS

If the occlusal surface of the tooth is intact, a wax-up may not be necessary. In this case, the better strategy is to duplicate what is still available before initiating treatment. A flowable composite or liquid rubber dam can be used for this purpose. It is important to coat the tooth surface with glycerin gel before applying the material. This will facilitate separation of the stamp from the tooth. It is always advisable to create a stamp that covers not only the details that need to be recorded and duplicated, but is extended over the cusps. This offers better stability in the restoration phase.


CLINICAL PROTOCOL

Figures 9 to 11 illustrate a possible clinical procedure. In this case, a molar with an occlusal carious lesion needed to be restored. The tooth surface was cleaned and a thin layer of glycerin gel applied, followed by a thick layer of liquid rubber dam, which covered the entire occlusal surface. Then, a micro applicator was immersed into the material and the stamp cured. After preparation, etching and application of the bonding system, the cavity was restored with flowable composite (CLEARFIL MAJESTY™ ES Flow Super Low in the shade A2). When the cavity is larger and depending on personal preferences, a paste-type composite (CLEARFIL MAJESTY™ ES-2 Universal) may also be used. Prior to light curing of the composite, the occlusal surface was covered with PTFE tape and the stamp pressed onto it. After firm pressing, the tape and excess material were removed and the restoration polymerized. This restoration faithfully reproduces the occlusal surface and did not require any occlusal adjustments.


Fig. 6. Stamp production with liquid rubber dam.


Fig. 7. The stamp.


Fig. 8. Restoration procedure: From preparation to bonding.


Fig. 9. Restoration procedure: Filling with flowable composite.


Fig. 10. Restoration procedure: Duplication the original occlusal surface with the stamp.


Fig. 11. Tooth before and after treatment using the stamp technique.


CONCLUSION

Techniques that add simplicity and efficiency to clinical procedures are always welcome in the busy practice environment. Depending on the information available at the start of treatment and the number of teeth to be restored, the flowable injection or the stamp technique may be an ideal choice. They are easily implemented and speed up the clinical procedure, but most importantly support predictable outcomes. This saves time in the finishing phase and minimized the risk of repeated adjustments, hence protecting everyone involved from additional appointments and frustration. Especially for practitioners with limited routine in free-hand modelling and for those with maximum patient comfort in mind, both techniques are worth being integrated in their clinical procedures.


Dentist:

MICHAL JACZEWSKI


Michał Jaczewski graduated from Wroclaw Medical University in 2006 and today runs his private practice in the city of Legnica, Poland. He specializes in minimally invasive dentistry and digital dentistry and is the founder of the Biofunctional School of Occlusion. Here he lectures and runs workshops with focus on full comprehensive patient treatments.


Hammaszirkonia Ja miksi hammaslääkäreiden tulisi osallistua materiaalien valintaan protetiikassa

Laadukkaiden proteettisten hoitojen merkitys

Hoidonlaatu on luultavasti tärkein potilastyytyväisyyteen vaikuttava tekijä. Potilaat haluavat kokea, että joka ikisellä käynnillä heidän hoitoonsa paneutuu osaava ja välittävä ammattilainen. Käyntien keston ja määrän tulisi kuitenkin olla mahdollisimman pieni. Proteettisten hoitojen kohdalla tämä tarkoittaa sitä, että protetiikan tulisi sopia täydellisesti hampaistoon jo ensikokeilulla. Sen on myös pysyttävä stabiilina käytössä, jotta lisäkäynneiltä vältytään, eikä uusia proteesiversioita tarvitsisi tehdä.


Mutta miten on mahdollista tuottaa kerta toisensa jälkeen laadukkaita, täydellisesti potilaan suuhun sopivia restauraatioita? Tiedetään, että tavalliset klinikoiden ja laboratorioiden tekemät valmistusvirheet sekä kommunikointiongelmat voivat heikentää epäsuorien täytteiden lopputulosta, mutta huonolaatuisen hammaszirkonian käytön vaikutus usein sivuutetaan.


Zirkoniarestauraatiot – nykyaikainen ja esteettinen hammashoidon ratkaisu

Yli 20 vuotta sitten zirkoniaa alettiin käyttämään hammasalalla metallin sijaan kruunujen ja siltojen valmistuksessa. Sekä zirkonia- että metallirestauraatioihin lisättiin yleensä posliinikerros, jolloin tuloksena oli joko metallokeraaminen tai kerrostettu zirkonia restauraatio. Tulevina vuosina useat johtavat hammaszirkonian valmistajat (kuten Kuraray Noritake Dental Inc.) paneutuivat uuden materiaalin kehitystyöhön. Kehitystyön tuloksena alkuperäisestä läpikuultamattomasta, vaaleasta runkomateriaalista kehkeytyi lopulta luja keraaminen materiaali, jonka erinomaiset optiset ja mekaaniset ominaisuudet mahdollistavat luonnollisten restauraatioiden valmistamisen. Monet hammasalan ammattilaiset eri puolilta maailmaa pitävät useilla läpikuultavuuksilla ja lujuuksilla saatavilla olevaa hammaszirkoniaa parhaana materiaalivalintana monentyyppisille potilaille ja eri indikaatioihin. Ohut posliinikerros riittää, tai sitä ei välttämättä tarvita lainkaan, mikä onkin yksi syy zirkoniarestauraatioiden suosioon. Lisäksi zirkoniarestauraatioiden maltillinen seinämän vähimmäispaksuus mahdollistaa hammasta säästävän preparoinnin, ja restauraatiot toimivat hyvin pitkällä aikavälillä. Näin on kuitenkin vain silloin, kun restauraatioihin käytetään korkealuokkaisia materiaaleja.


Eri laatuiset hammaszirkoniat

Zirkoniatuotteen laatu voi vaihdella esimerkiksi zirkonian ja alumiini- ja yttriumoksidin tai väriaineiden ja muiden raakamateriaalien puhtauden, tuotteen eksaktin kemiallisen koostumuksen, rakeiden koon, hiukkasjakauman ja monen muun eri tekijän mukaan. Lisäksi kukin aihion valmistusvaihe jauheen koostamisesta aihion prässäykseen ja esisintraukseen vaikuttaa lopputuloksen laatuun, eli zirkonian mekaanisiin ja optisiin ominaisuuksiin.


Yleisiä heikkolaatuisen zirkonian aiheuttamia ongelmia

Mahdolliset optiset ominaisuuksien ongelmat tulevat ilmi laboratorion tekemän viimeisen sintrauksen yhteydessä. Ne voivat liittyä esimerkiksi restauraation läpikuultavuuteen, yleiseen värisävyyn tai monikerroszirkonioiden tapauksessa kerrosten värisiirtymiin. Restauraation valmistusprosessi voidaan joutua aloittamaan alusta, ja restauraation sovituksen yhteydessä esille tullut laatuvirhe on omiaan heikentämään potilastyytyväisyyttä. Sama pätee myös esimerkiksi epätasaisesta materiaalista johtuviin istuvuuspulmiin. Huono bioyhteensopivuus, pinnanlaatu, reunojen stabiilius sekä taivutus- ja murtumislujuus ja voivat erityisesti heikentää huomattavasti lopputuloksen laatua. Tällaiset ongelmat pystytään tunnistamaan vain erittäin kalliiden testauslaitteiden avulla, joita hammaslaboratorioissa ei yleensä ole saatavilla. Tällaiset laatuvirheet tulevatkin siis usein esille vasta todellisten kliinisten ongelmien yhteydessä, joita voivat olla esimerkiksi ienten vetäytyminen, plakin lisääntyminen, suurempi kuluminen tai mahdollisesti kipua tai epämukavuutta aiheuttava paikan ennenaikainen epäonnistuminen.


Mahdollisten ongelmien ja niiden potilaalle aiheuttamien seurauksien yleiskatsaus


Heikkolaatuisen zirkonian mahdollisesti aiheuttama ongelma

Mahdollinen kliininen seuraus potilaalle

Rajallinen bioyhteensopivuus

Ienten vetäytyminen / inflammaatio

Epätasainen materiaali

Huono restauraation istuvuus

Pinnan halkeamat

Esteettiset ongelmat (läpikuultavuus, väri) > uusi restauraatio on valmistettava

Huono pinnanlaatu: huokoinen pinta

Lisääntynyt plakin kertyminen > periodontaaliset ongelmat, karies

Huono pinnanlaatu: pinnan karheus

Vaikeampi tasoittaa ja kiillottaa > suuri vastapurijan kulumisaste

Alhainen reunojen stabiilius

Saumojen halkeamat ja murtumat > ennenaikainen korjaus tai vaihto

Alhainen taivutuslujuus

Lyhentynyt kesto > ennenaikainen vaihto

Rajallinen murtolujuus

Halkeamat / rajallinen kesto > ennenaikainen vaihto


Hammaszirkonioiden sertifiointi ja standardisointi

Tämän vuoksi asiantuntijat ovatkin kehittäneet ISO-standardin (ISO 6872:2015), jossa kuvataan mitkä in-vitro-testit kunkin Euroopassa tai Yhdysvalloissa hammaszirkonioitaan markkinoivan yhtiön on suoritettava, jotta tuote saa FDA-hyväksynnän tai CE-merkinnän. Standardissa mainituilla testeillä mitataan taivutus- ja murtolujuutta, jotka ovat todennäköisesti kaksi suurinta materiaalista tehtyjen restauraatioiden pitkän aikavälin toimivuuteen vaikuttavaa tekijää. Kaikkien Euroopassa tai Yhdysvalloissa käytettyjen materiaalien on läpäistävä nämä testit.


Kuinka välttyä tekemästä heikkolaatuisista hammaszirkonioista valmistettuja restauraatioita

Luulisi siis, että näiden sertifioitujen hammaszirkonioiden käyttö olisi turvallista, eikä muita toimia materiaaleihin liittyvien riskien minimoimiseksi tarvitse tehdä. Hammaszirkonian kasvava suosio on kuitenkin herättänyt sellaisten yritysten huomion, jotka haluavat oman siivunsa tienesteistä näkemättä kuitenkaan vaivaa tuotteen laadun tai sertifikaatin vaatimusten täyttämisen eteen. Kaikilla sertifioimattomilla tuotteilla, joilta CE-merkintä puuttuu, on jotakin yhteistä: ne vaarantavat yrityksesi maineen ja potilaasi turvallisuuden.


Miten zirkoniatuotteiden laadusta voidaan sitten varmistua hammasklinikalta käsin? Yksinkertaisia ohjeistuksia tähän on onneksi olemassa: niitä noudattamalla voit välttyä asettamasta väärennetyistä tai heikkolaatuisista zirkonioista tehtyjä restauraatioita potilaasi suuhun.


Älä aseta väärennetyistä tai heikkolaatuisista hammaszirkonioista tehtyjä restauraatioita potilaan suuhun.


Kolme kultaista sääntöä, joilla voit varmistaa valmistamiesi zirkonirestauraatioiden ensiluokkaisuuden:

  • Tilaa vain restauraatioita, jotka on valmistettu kotimaassasi, tai alueilla, joilla on käytössään vastaavat standardit. Esimerkiksi Kiinassa restauraatioiden valmistusprosessia koskevat standardit ovat löyhempiä, joten niillä ei ole CE-merkintääkään, eivätkä ne siten välttämättä täytä odotuksiasi.
  • Keskustele (kotimaisen) laboratoriokumppanisi kanssa tämän käyttämästä zirkoniasta: varmista, että kumppanisi ostaa zirkonian johtavien valmistajien (kuten Kuraray Noritake Dental Inc:in) valtuutetuilta jakelijoilta tai muilta varmasti luotettavilta jälleenmyyjiltä.
  • Vältä tekemästä hankintoja, jotka vaikuttavat liian hyviltä ollakseen totta: matalat hinnat voivat olla houkuttelevia, mutta lopullinen hoidon hinta voi nousta normaaliakin korkeammaksi, mikäli komplikaatioita ilmenee.


Sertifioitujen zirkoniarestauraatioiden pitkän aikavälin merkitys potilaalle

Voit vaikuttaa huomattavasti potilaiden pitkäaikaistyytyväisyyteen varmistamalla, että klinikallasi käytetään vain tiukimpien laatukriteerien mukaisia zirkonioita. Korkealaatuisten zirkoniarestauraatioiden alkukustannukset voivat olla heikkolaatuisten restauraatioiden kustannuksia suuremmat, mutta ne voivat silti tulla halvemmiksi, sillä ne kestävät pidempään eikä vaihtoja tarvitse tehdä. Tyytyväiset potilaat hakeutuvat todennäköisemmin uudelleen vastaanotollesi ja noudattavat huolellisemmin suun hygieniaa koskevia ohjeistuksia, mikä auttaa vahvistamaan sekä mainettasi että potilaspohjaasi.


Tee taustatutkimusta ja valitse sertifioitujen valmistajien zirkoniatuotteita

Voit mennä vielä astetta pidemmälle ja verrata useiden eri valmistajien sertifioituja zirkoniamateriaaleja keskenään eroavaisuuksien löytämiseksi. Kuraray Noritake Dental Inc. on esimerkiksi yksi niistä hyvin harvoista hammaszirkonian valmistajista, jotka huolehtivat itse koko valmistusprosessista raakamateriaalien valmistuksesta alkaen. Näin yhtiö voi valvoa tuotannon jokaista vaihetta, ja valmistaa ensiluokkaisia tuotteita materiaalivariantista riippumatta. Yhtiön KATANA™ Zirconia UTML (äärimmäisen läpikuultava, monikerroksinen), KATANA™ Zirconia STML (erittäin läpikuultava, monikerroksinen) ja erittäin läpikuultava HTML PLUS sekä YML (erityisen vahva, eri läpikuultavuusasteita) varmistavat, että tuotevalikoimasta löytyy oikea tuote käytännössä jokaista indikaatiota varten.