A combination for maximum aesthetics in modern zirconia rehabilitations

By DT Simone Maffei and Dr. Filippo Menini


EVOLUTION IN PROSTHODONTICS


Nowadays, digital workflows in prosthodontics are well-established, and many modern dental laboratories have already embraced the option of producing monolithic restorations or restorations with a minimal cut-back for micro-layering in a fully digital environment.


The spread of digital technologies and the availability of new restorative materials with improved aesthetic properties have increased the popularity of this technique among dental technicians. This way of working offers considerable advantages for daily procedures, starting with improved ways of communication between the clinician and dental technician. For example, it is now possible to view and evaluate impressions with the whole treatment team including the dental technician almost instantaneously after impression taking – and without anyone having to leave their office.


In addition to advanced communication options, digital technologies have allowed us to use materials that otherwise could not be processed, such as zirconia and hybrid composites. As a consequence, lots of innovative materials conquered the market, and this has opened up the possibility to always select what is perfectly suited for each specific clinical situation. Adapting to these trends is absolutely essential for anyone who wants to meet a modern dental practitioner’s increased demands.


LONG DISTANCE DENTAL COLLABORATION


Working with digital workflows has allowed us to broaden the scope of action of the modern laboratory, enabling virtually effortless collaboration with clinicians hundreds or thousands of kilometres away. The case presented below is a perfect example: In our dental laboratory in Modena, we produced two anatomical crowns made of KATANA™ Zirconia for a patient who needed a combination of direct and indirect restorative treatment to be carried out by Dr. Filippo Menini in Belluno, about 300 km to the northwest. The whole communication and coordination between practice and laboratory was performed remotely and without us seeing the patient.


MATERIAL CHOICES


Monolithic restorations offer countless clinical and technical advantages. With a major part of the process accomplished by machines, they truly rationalize procedures. The challenge resulting from this simplification, however, lies in the achieving of excellent aesthetics.


Whereas until a few years ago, it was very difficult to accomplish this task due to the poor optical properties of the available materials, today we can safely say that we have materials, techniques and protocols at our disposal that allow us to obtain aesthetically acceptable results. At the same time, those materials offer excellent mechanical resistance to the forces and stress to which they are exposed in the oral cavity and a very high precision of fit, if these restorations are produced in a fully digital workflow.


We have chosen to work with prosthetic materials and finishing solutions from a company that manufactures and develops them in-house: Kuraray Noritake Dental Inc. (Kuraray Noritake). They offer zirconia discs for milling as well as effect liquids, veneering porcelain and liquid ceramics for an aesthetic finish and even resin cement systems for adhesive luting – all from a single source. This gives us the advantage of using clear and predictable working protocols from fabrication to cementation of the restoration.


CLINICAL CASE


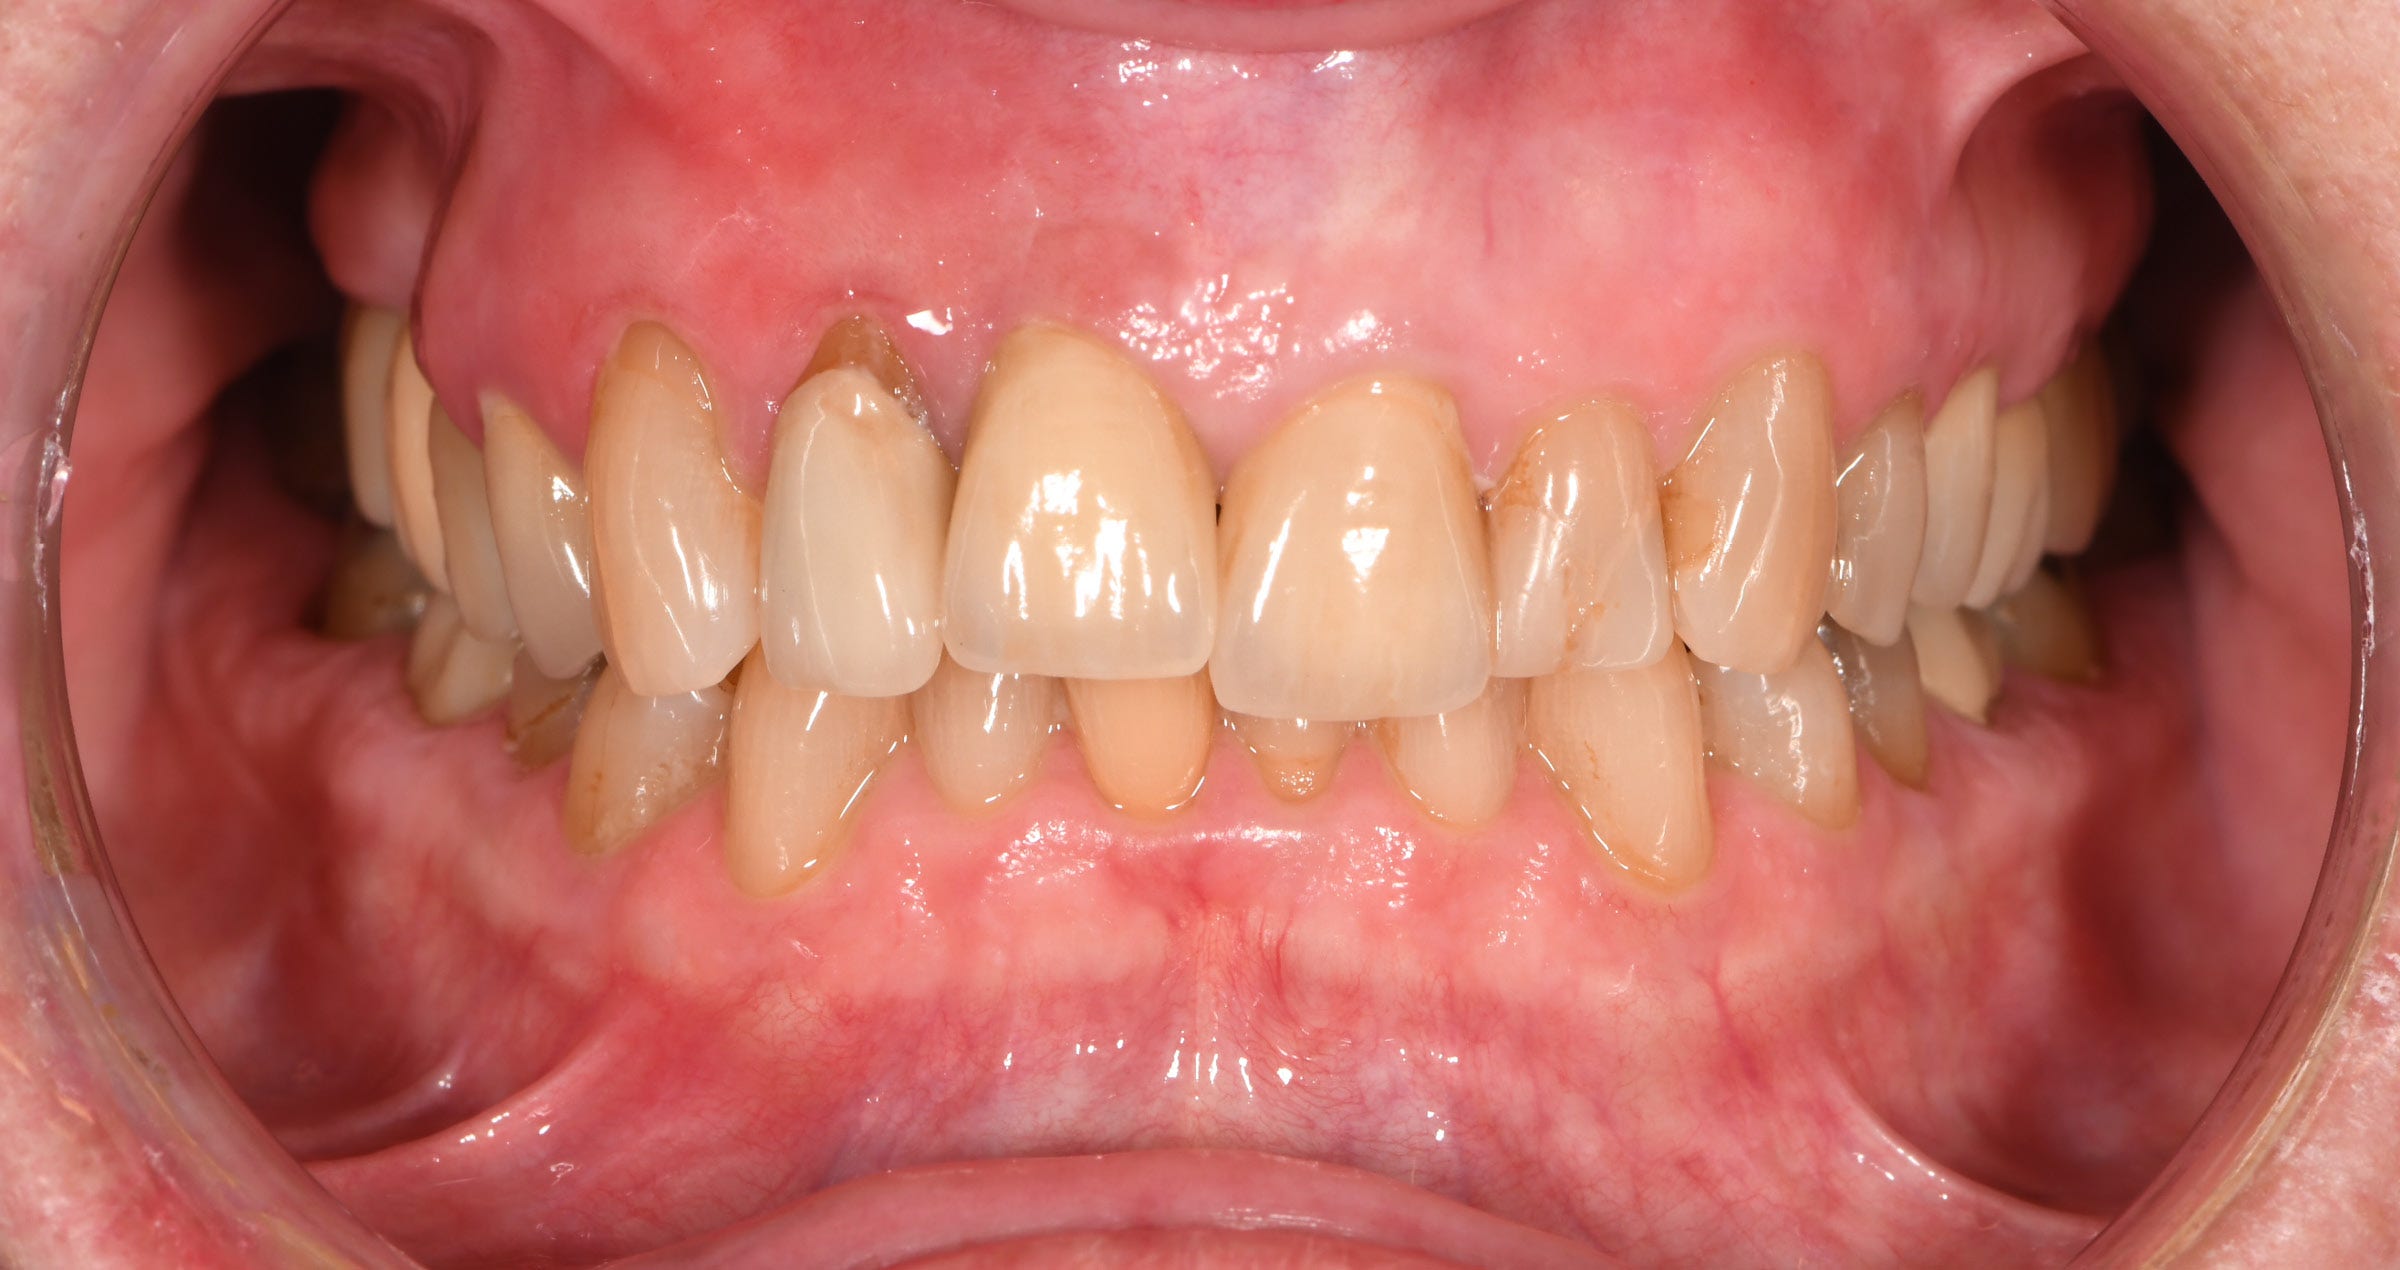
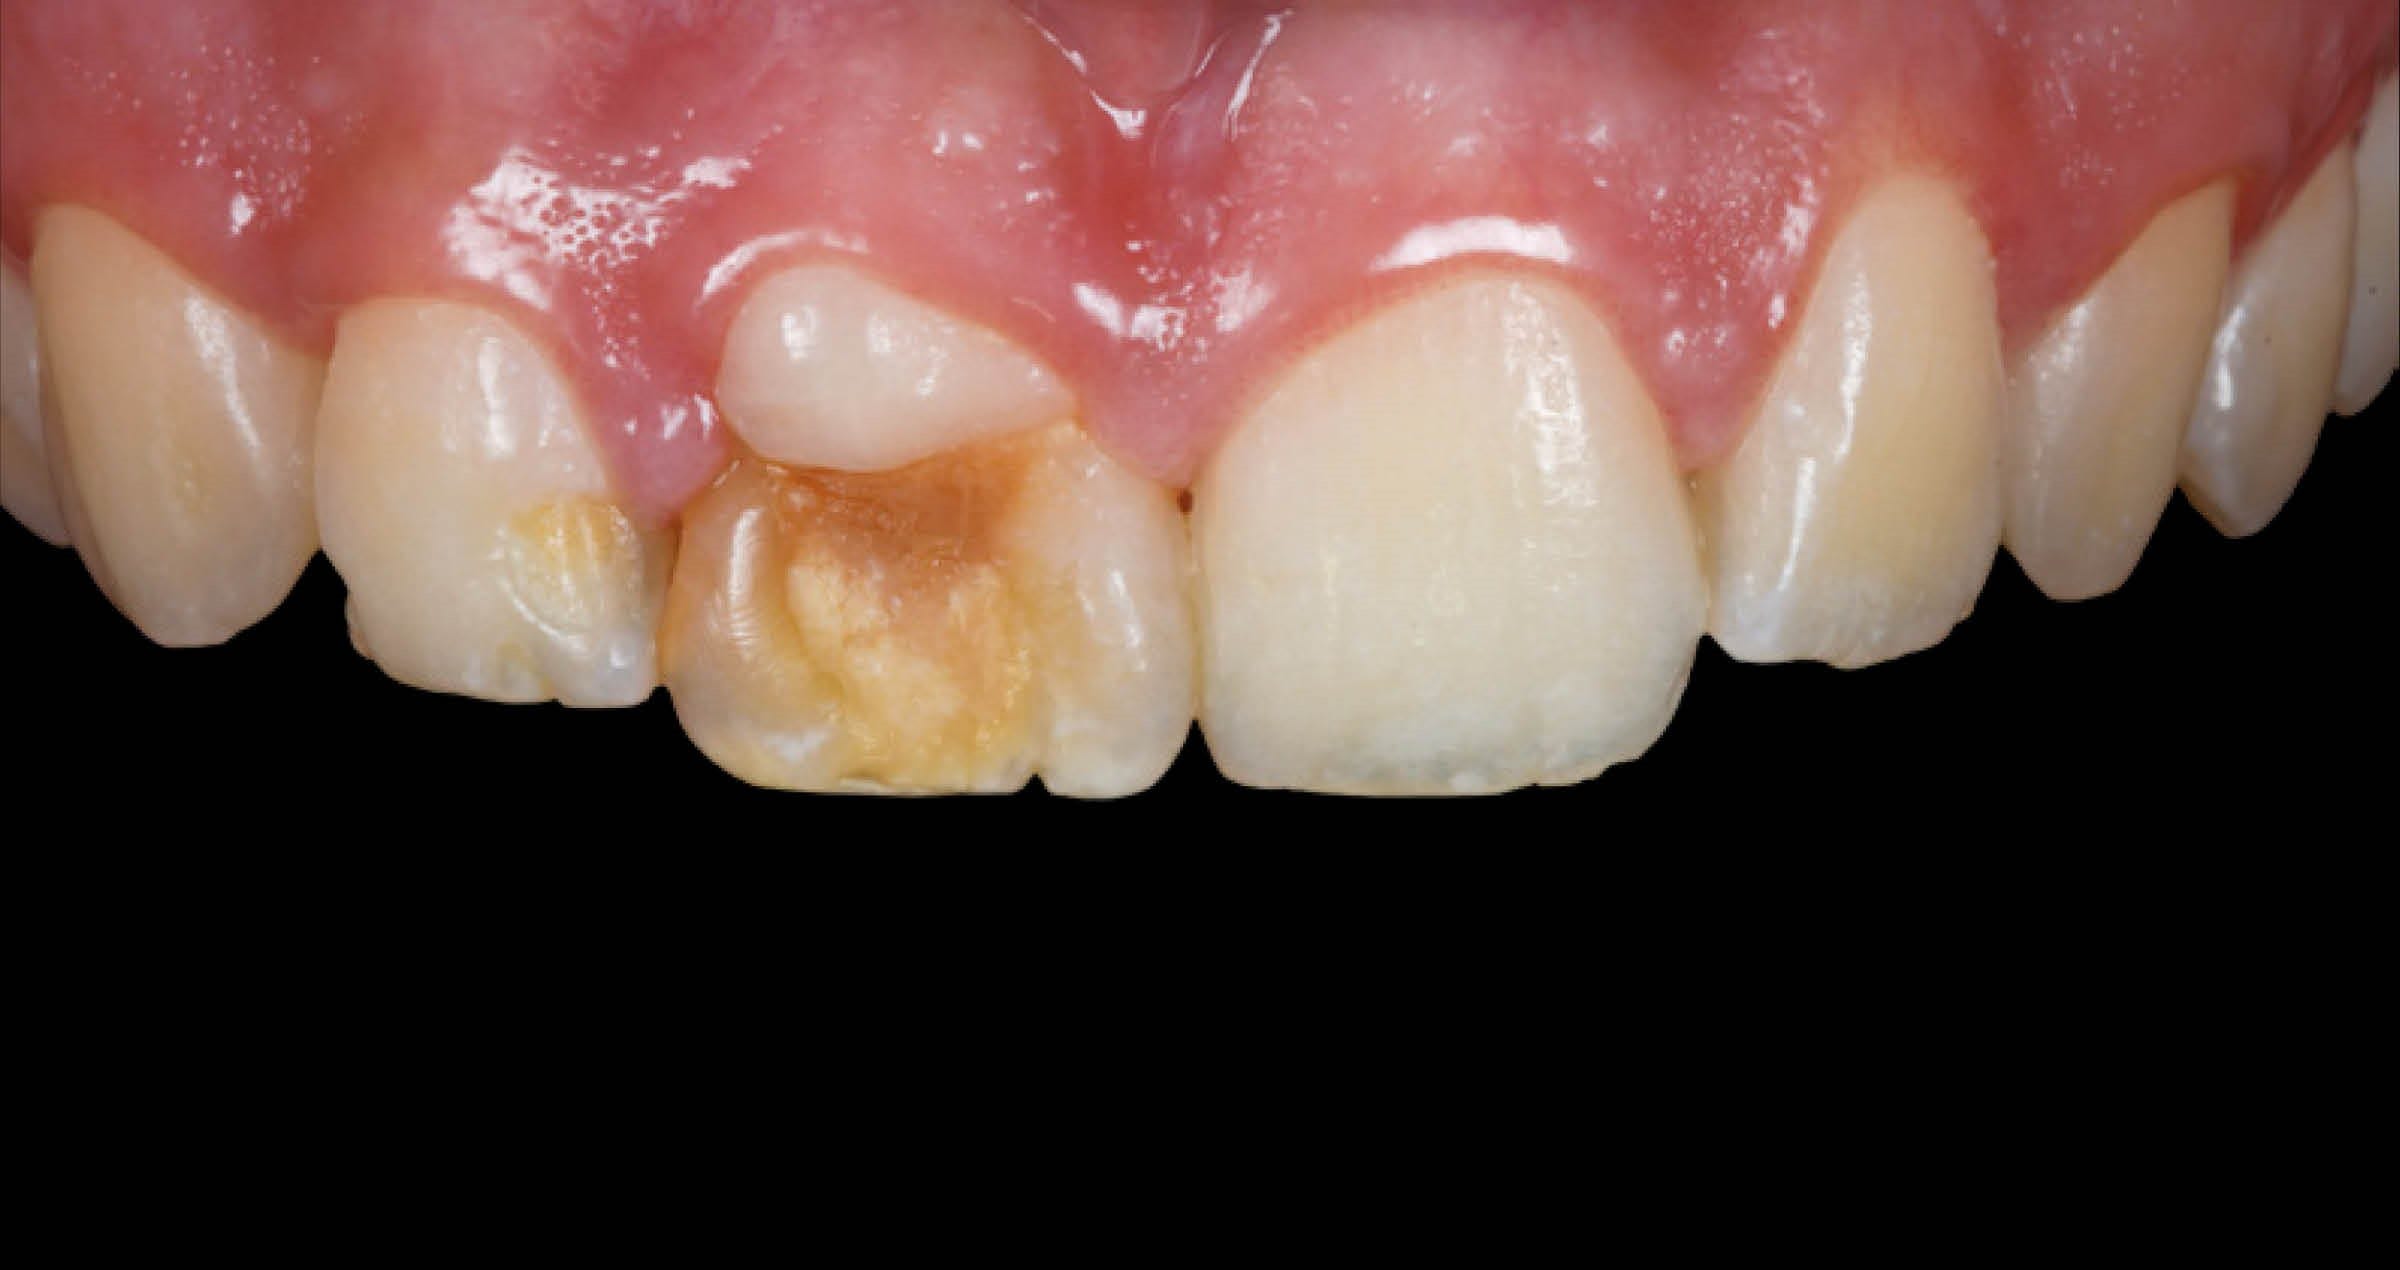
The 31-year-old patient presented with multiple carious lesions, inadequate restorations and in particular a destructive caries in the maxillary right second premolar (tooth #15, FDI notation, Fig. 1). The latter tooth was endodontically treated and built up using a glass fibre post. The X-ray revealed carious lesions and infiltrated margins of the restorations (Fig. 2). The treatment plan for this quadrant included direct composite restorations on the first premolar and first molar (teeth # 14 and 16) and an indirect zirconia crown used to restore the second premolar (tooth #15; Fig. 3). In addition, a zirconia crown needed to be produced for the mandibular right second premolar (tooth #45).


Fig. 1. Initial clinical situation in the maxillary right quadrant.


Fig. 2. Radiograph showing carious lesions and restorations with marginal leakage.


Fig. 3. Marked surfaces that will be treated.


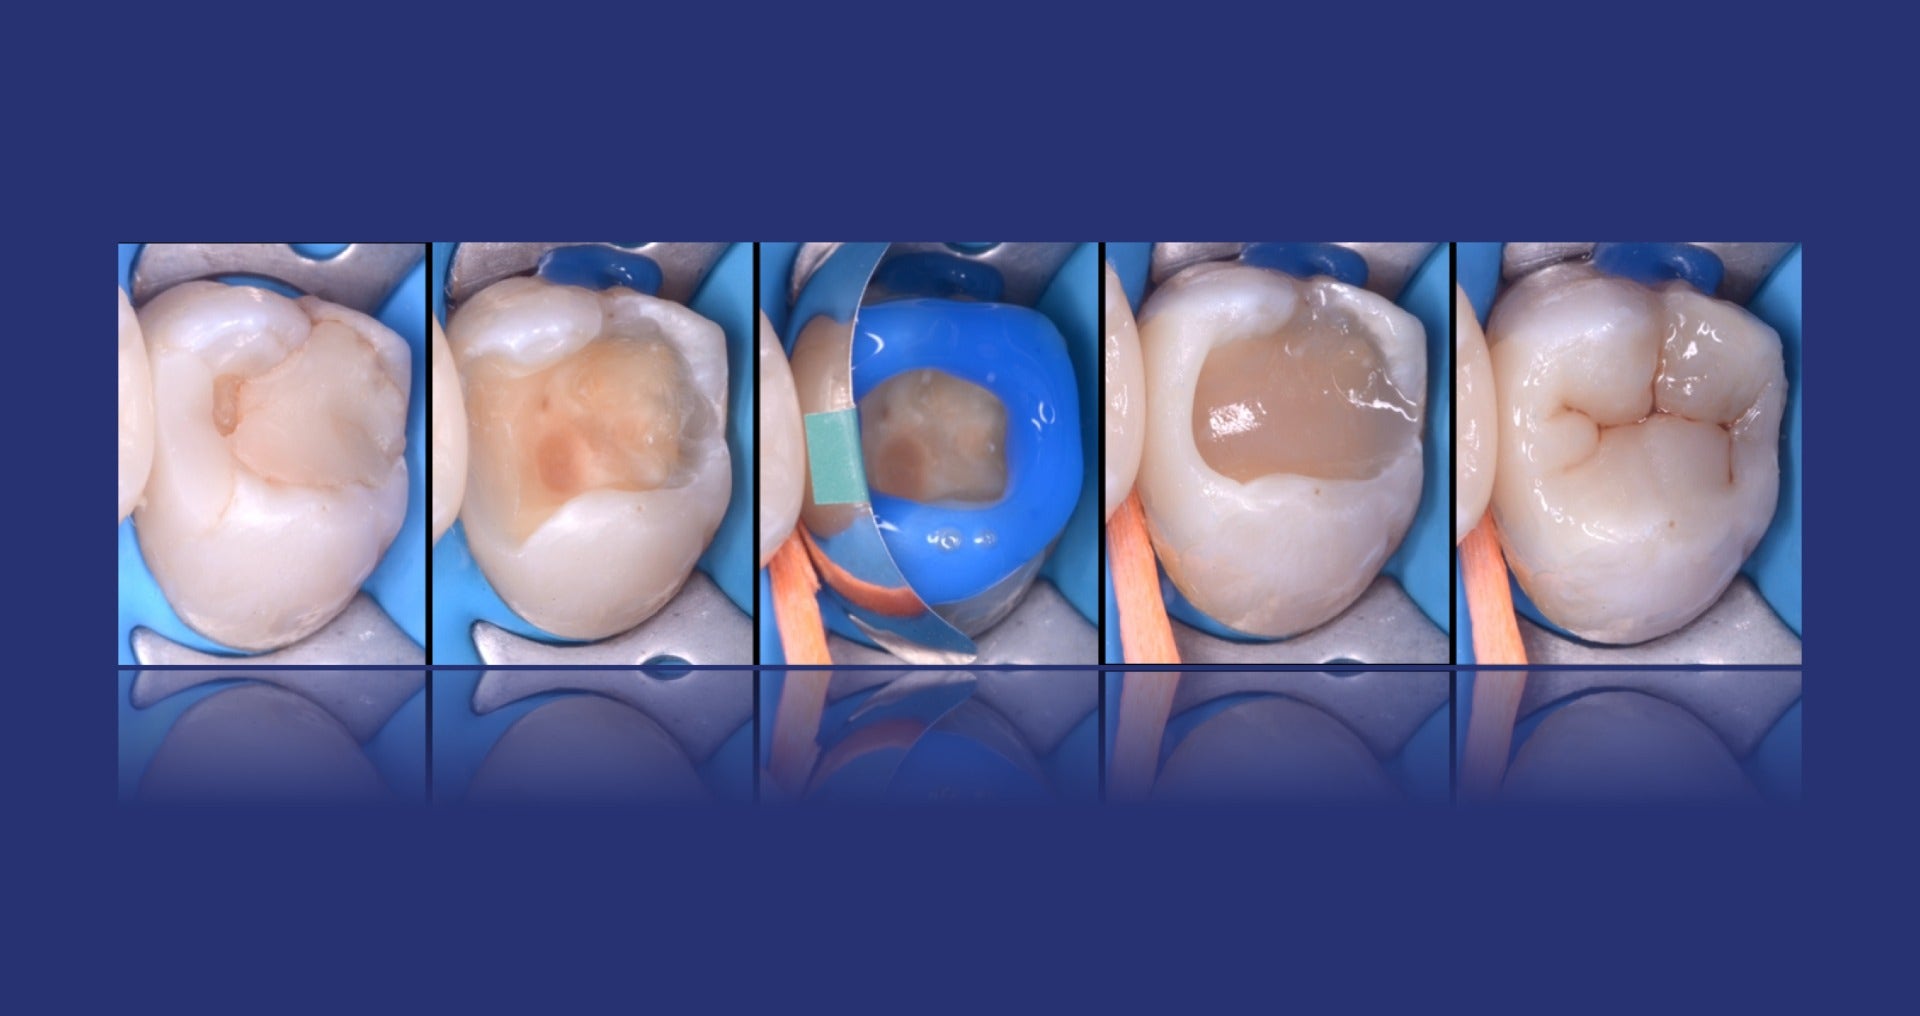
During the first session, the clinician restored the first molar and premolar with composite (Figs. 4 and 5). In addition, the tooth preparation on the maxillary and the mandibular second premolar was performed using the biologically oriented preparation technique (BOPT; Figs. 6 and 7). Two single-tooth temporaries were then produced, recreating a cervical profile according to the BOPT (Fig. 8). In the next step, the digital impression was taken using the double chord technique (Fig. 9). The file generated by the intraoral scanner was first analysed using a greyscale view. This view allows for a better assessment of the quality of the acquired data than the coloured image (Fig. 10). The temporary restorations were finished, polished and placed on the teeth using temporary cement (Fig. 11).


Fig. 4. Restoration procedure on the maxillary first molar.


Fig. 5. Restoration procedure on the maxillary first premolar.


Fig. 6. BOPT crown preparation on the maxillary second premolar.


Fig. 7. Detail of the subgingival preparation, using burs with calibrated notches, taking care not to touch the supra-crestal attachment complex, but precisely taking care to remain within the width of the sulcus.


In the dental laboratory, we received the intraoral scans in the STL format: Both arches with the prepared teeth and the usual bit register (vestibular scan of the arches in occlusion). Following a careful evaluation of the impressions and the quality of the triangulation of the points of the STL file detected by the scan, a full-contour design of the crowns was performed (zero cutback crowns). This allows us to obtain an emergence profile, according to the BOPT, which is extremely accurate. The anatomy was developed taking into account the functional movements of the patient, which were based on information retrieved from a virtual articulator integrated in the CAD software. These movements can be verified and – if necessary – corrected on the physical articulator in a subsequent step. As it is possible to use the same type of articulator (in our case ARTEX by Amann Girrbach) both in the virtual environment and the real one (control phase) offers the advantage of using the same settings and consequently the same movements in both worlds (Fig. 12).


Fig. 8. Production of the temporary restoration.


Fig. 9. Digital impression taken using the double cord technique: a 000-sized cord soaked in aluminium chloride is placed in the sulcus as the first cord, followed by a non-soaked cord of size 1.


Fig. 10. Greyscale view of the impression, facilitating the clinical evaluation.


Fig. 11. Cementation of the temporary restoration.


Fig. 12. Virtual models based on the digital impression of both arches, with the software-designed full-contour crowns in different views.


The STL files of the designed restorations were sent to the CAM software for milling of the zirconia crowns with a 5-axis CNC machine. The material of choice was in this case KATANA™ Zirconia YML (Kuraray Noritake Dental Inc), which is multi-layered in strength, translucency and colour, and thus suitable for a variety of cases (Fig. 13). Once milling was finished, the elements were removed from the disc and their surface treated with diamond burs and specific rubbers designed for the processing of pre-sintered zirconia. In this phase, it is possible to individualise the anatomy and surface texture of the restorations, a task that is very difficult to accomplish in the milling process. With the dedicated rubbers, the surface can also be smoothened, which will improve the appearance of our restorations after sintering (Fig. 14).


On top, individualization of the pre-sintered restorations was accomplished with Esthetic Colorant (Kuraray Noritake). These new effect liquids have been specifically developed for KATANA™ Zirconia. They contain a special primer that limits the depth of penetration, which results in an appearance similar to external stains, while a depth effect is created. Precise application of the liquids is possible with the Liquid Brush Pen. The Esthetic Colorant line-up consists of twelve colours to facilitate stock management in the dental laboratory, while still providing for natural aesthetics and perfect harmony in the oral cavity. Impact on the flexural strength of the zirconia substructure by the liquids is kept to a minimum, as they have been optimised to limit this effect and avoid fractures. (Fig. 15).


Sintering is carried out in a specially calibrated furnace, scrupulously following the protocol recommended by the manufacturer. Afterwards, the finishing procedure can be continued. With special stones, the cervical edge was first regularised: In the deeper, subgingival areas, the intraoral scanner usually has some difficulties capturing all the necessary information. As a consequence, the STL file is triangulated with some irregularities at the cervical margin. These irregularities need to be regularised, before the thickness of the margin is reduced to '0'. In fact, during milling it, is created with a thickness of 0.2 mm to avoid micro-chipping that would compromise the accuracy of the cervical margin. Figure 16 shows both the thickness of the cervical margin, which, despite the finishing preparation, retains a thickness of 0.2 mm, and the irregular course of the same due to the irregular shape of the STL file around the sulcus.


Fig. 13. KATANA™ Zirconia YML blank with milled crowns.


Fig. 14. Finishing with diamond burs and specific rubbers for pre-sintered zirconia.


Fig. 15. Individualisation with Esthetic Colorant.


Fig. 16. Finishing of the restorations after sintering.


The restorations were then sandblasted with 50-μm aluminium dioxide at 2 bar pressure and cleaned under a steam jet. After an evaluation of the colour revealed after sintering, the finishing phase was completed with the aid of CERABIEN™ ZR FC Paste Stain (Kuraray Noritake Dental Inc.) and polishing instruments. The ceramic emulsions FC Paste Stain allow us to adjust the chroma and value of the restorations and to imitate all those aesthetic features that will improve integration in the oral cavity. With this technique, it is very easy to achieve the desired shade match, as the appearance of the stain applied to the surface is exactly like its appearance after firing. In this way, it is easy to monitor the outcome and – if desired – compare with a reference and adjust whenever necessary (Figs. 17 and 18).


For cementation of the restorations, the clinician used PANAVIA™ SA Cement Universal in combination with KATANA™ Cleaner (both Kuraray Noritake Dental Inc.). The cleaner has a pH value of 4.5 be used both intra and extra-orally, improving adhesion in all restorative procedures. PANAVIA™ SA Cement Universal is the only self-adhesive resin cement containing the unique LCSi monomer – a long carbon-chain silane coupling agent. In combination with the original MDP monomer, which is also present in the paste and enables chemical adhesion with zirconia, dentin, enamel and metal alloys, this coupling agent provides for adhesion of the cement to any material, including glass-ceramics, without the need for a separate primer (Figs. 19, 20 and 21). At the cementation appointment, the last planned direct reconstruction of the maxillary second molar (tooth #17) was also carried out.


Fig. 17. Characterisation with CERABIEN™ ZR FC Paste Stain.


Fig. 18. Finished restorations ready to be handed over to the clinician.


Fig. 19. Cementation procedure in the maxilla: Sandblasting of the tooth and cleaning of the tooth structure with KATANA™ Cleaner.


Fig. 20. Cementation procedure in the maxilla: Sandblasting of the crown’s intaglio and cleaning of the restoration with KATANA™ Cleaner.


Fig. 21. Cementation procedure in the maxilla: Self-adhesive cementation with PANAVIA™ SA Cement Universal.


Fig. 22. Direct restoration procedure on the second molar.


Fig. 23. Restorations immediately after finishing and polishing.


Fig. 24. Detailed view of the restored quadrant.


Fig. 25. Occlusal view of the maxillary teeth.


RESULT


The aesthetic integration provided by the high quality of KATANA™ Zirconia YML, combined with the pre- and post-sintering individualisation, made it possible to achieve an excellent integration of the anatomical zirconia crowns. Figures 22 to 25 show the outcome in the newly restored maxillary right quadrant with natural tooth structure, direct composite restorations and the monolithic zirconia crown.


ABOUT THE AUTHORS


DT SIMONE MAFFEI


Simone Maffei, a dental technician since 1996 (IPSIA L.Galvani Reggio Emilia), embarked on his career in Modena at his father William's laboratory. Throughout his professional journey, he has demonstrated a commitment to excellence by participating in numerous courses led by prominent international speakers. These courses span the realms of dental technology and photography. Presently, Maffei is not only a respected speaker at national and international conferences but has also contributed articles to both Italian and foreign sector magazines. His written works delve into the intricate intersection of dental photography and the aesthetics of the smile. A testament to his expertise, Maffei earned recognition as the recipient of the prestigious AIOP International Award in 2014. He actively shares his knowledge by conducting courses in Italy and abroad, focusing on dental technology, dental photography, natural ceramic layering techniques, and the three-dimensional coloring of monolithic restorations. As a valued member of the Digital Dental Revolution (DDR) Team, Maffei serves as a speaker at courses and international conferences, where he imparts insights on various facets of digital dentistry. Simone Maffei is also the proud owner of the Laboratorio Odontotecnico Maffei in Modena. Collaborating with his sister Elisa, the laboratory specializes in crafting aesthetic ceramic reconstructions for both natural teeth and implants, showcasing a dedication to the art and science of dental aesthetics. Active Member of AIOP SOSPESO – Accademia Italiana di Odontoiatria Protesica (Italian Academy of Prosthetic Dentistry). Ordinary Member of SIPRO Società Italiana Protesi e Riabilitazione Orale (Italian Society of Oral Prosthetics and Rehabilitation).


FILIPPO MENINI


Dr. Filippo Menini graduated in Dentistry and Dental Prosthetics from the Universidad Europea De Madrid in 2017. He has been passionately dedicated to the study of direct and indirect adhesive techniques in the field of conservative dentistry. He became a Regular Member of the Italian Academy of Conservative Dentistry in 2018 and the Italian Academy of Prosthetic Dentistry in 2019. In November 2021, he joined the Think Adhesive Members, and since February 2022, he has been a contract tutor at the University of Siena in the Endo-Resto master program taught by Professor Grandini. Dr. Menini has attended numerous courses in conservative dentistry, endodontics, periodontology, and adhesive prosthetics to manage his work in a multidisciplinary perspective. He has his dental practice in Belluno.


Zirconia restorations: Design concepts should be aligned to materials portfolio

Case by MDT Daniele Rondoni and MDT Roberto Rossi


Full-contour or an anatomically reduced design? When we need to decide how we want to design and finish a zirconia restoration we are asked to produced, many factors need to be taken into account – from aesthetics to function and from time- to budget-related ones. As the outcomes are strongly dependent on the optical and mechanical properties of the zirconia used, however, we are convinced that the first thing to do is to select a portfolio of high-quality zirconia materials. By experimenting with them in the dental laboratory, using different designs and finishing approaches with aligned materials and by comparing the results, you will be able to select the most appropriate concepts for your everyday work. In addition, you will develop a clear idea on when to use which concept.


Our own selection


The zirconia portfolio used in our dental laboratory consists of the KATANA™ Zirconia Multi-Layered Series from Kuraray Noritake Dental Inc. It consists of three materials with a multi-layered colour structure designed to meet different needs with regard to flexural strength and translucency (KATANA™ Zirconia UTML, STML and HTML PLUS) and one material with colour, translucency and flexural strength gradation (KATANA™ Zirconia YML). Due to the favourable optical properties of this series and new effect liquids, it is often possible to opt for a full-contour design or – in the anterior region – for a slight cutback limited to the vestibular area plus a micro-layer of porcelain.


The effect liquids – Esthetic Colorant for KATANA™ Zirconia – were introduced n early 2023. They are applied to the surface of the milled zirconia to pre-treat tissue areas of large restorations, to add specific individual characteristics to the restoration or to prevent a greyish effect caused by the shining through of discoloured abutment teeth or metal parts. While most liquids are used on the outer surface of the restorations, the latter effect is achieved by applying Esthetic Colorant OPAQUE or WHITE to the intaglio.


Case example


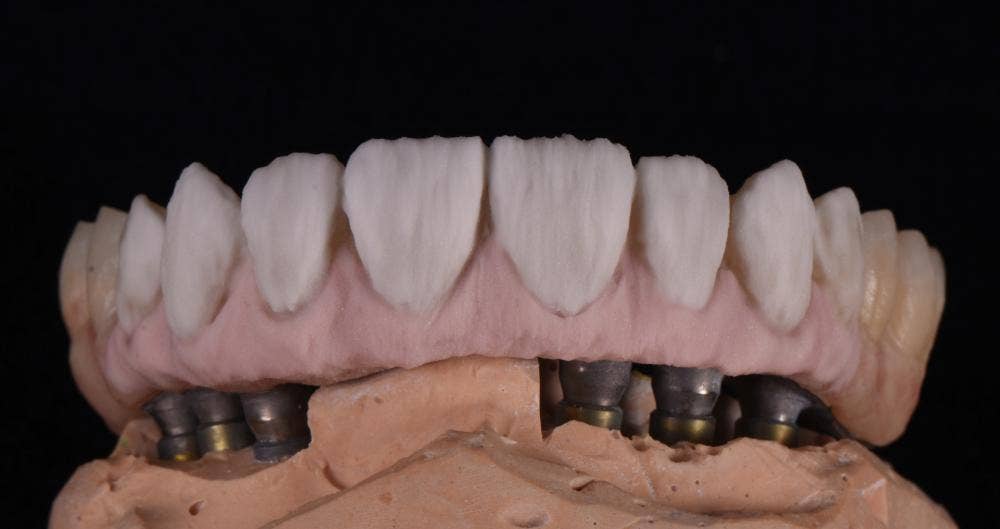
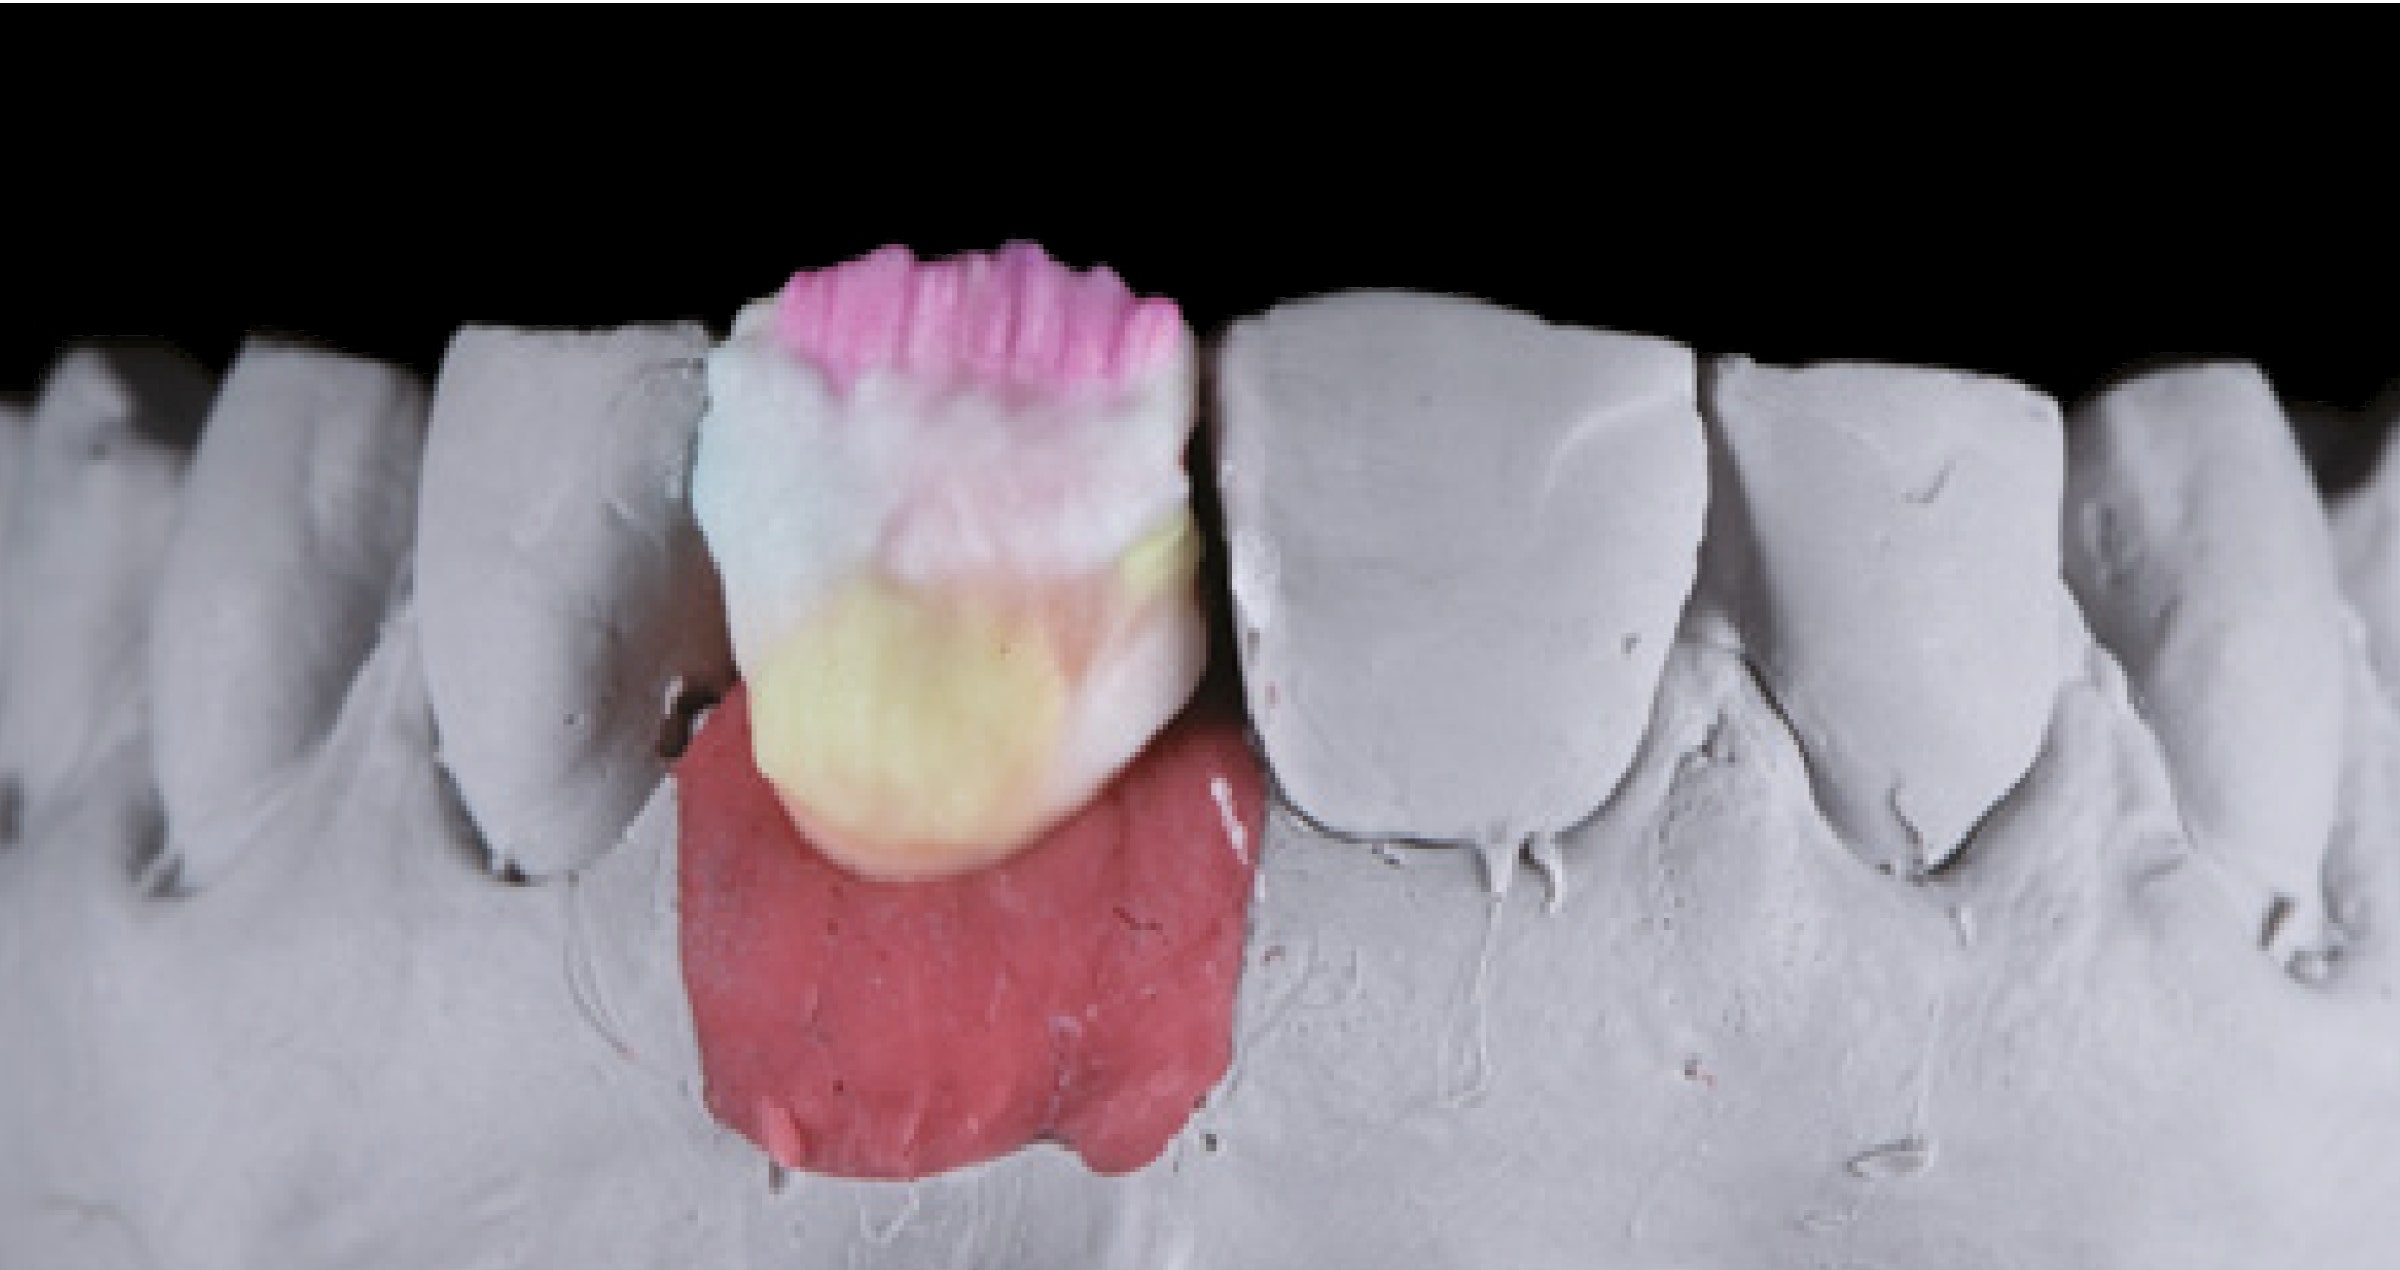
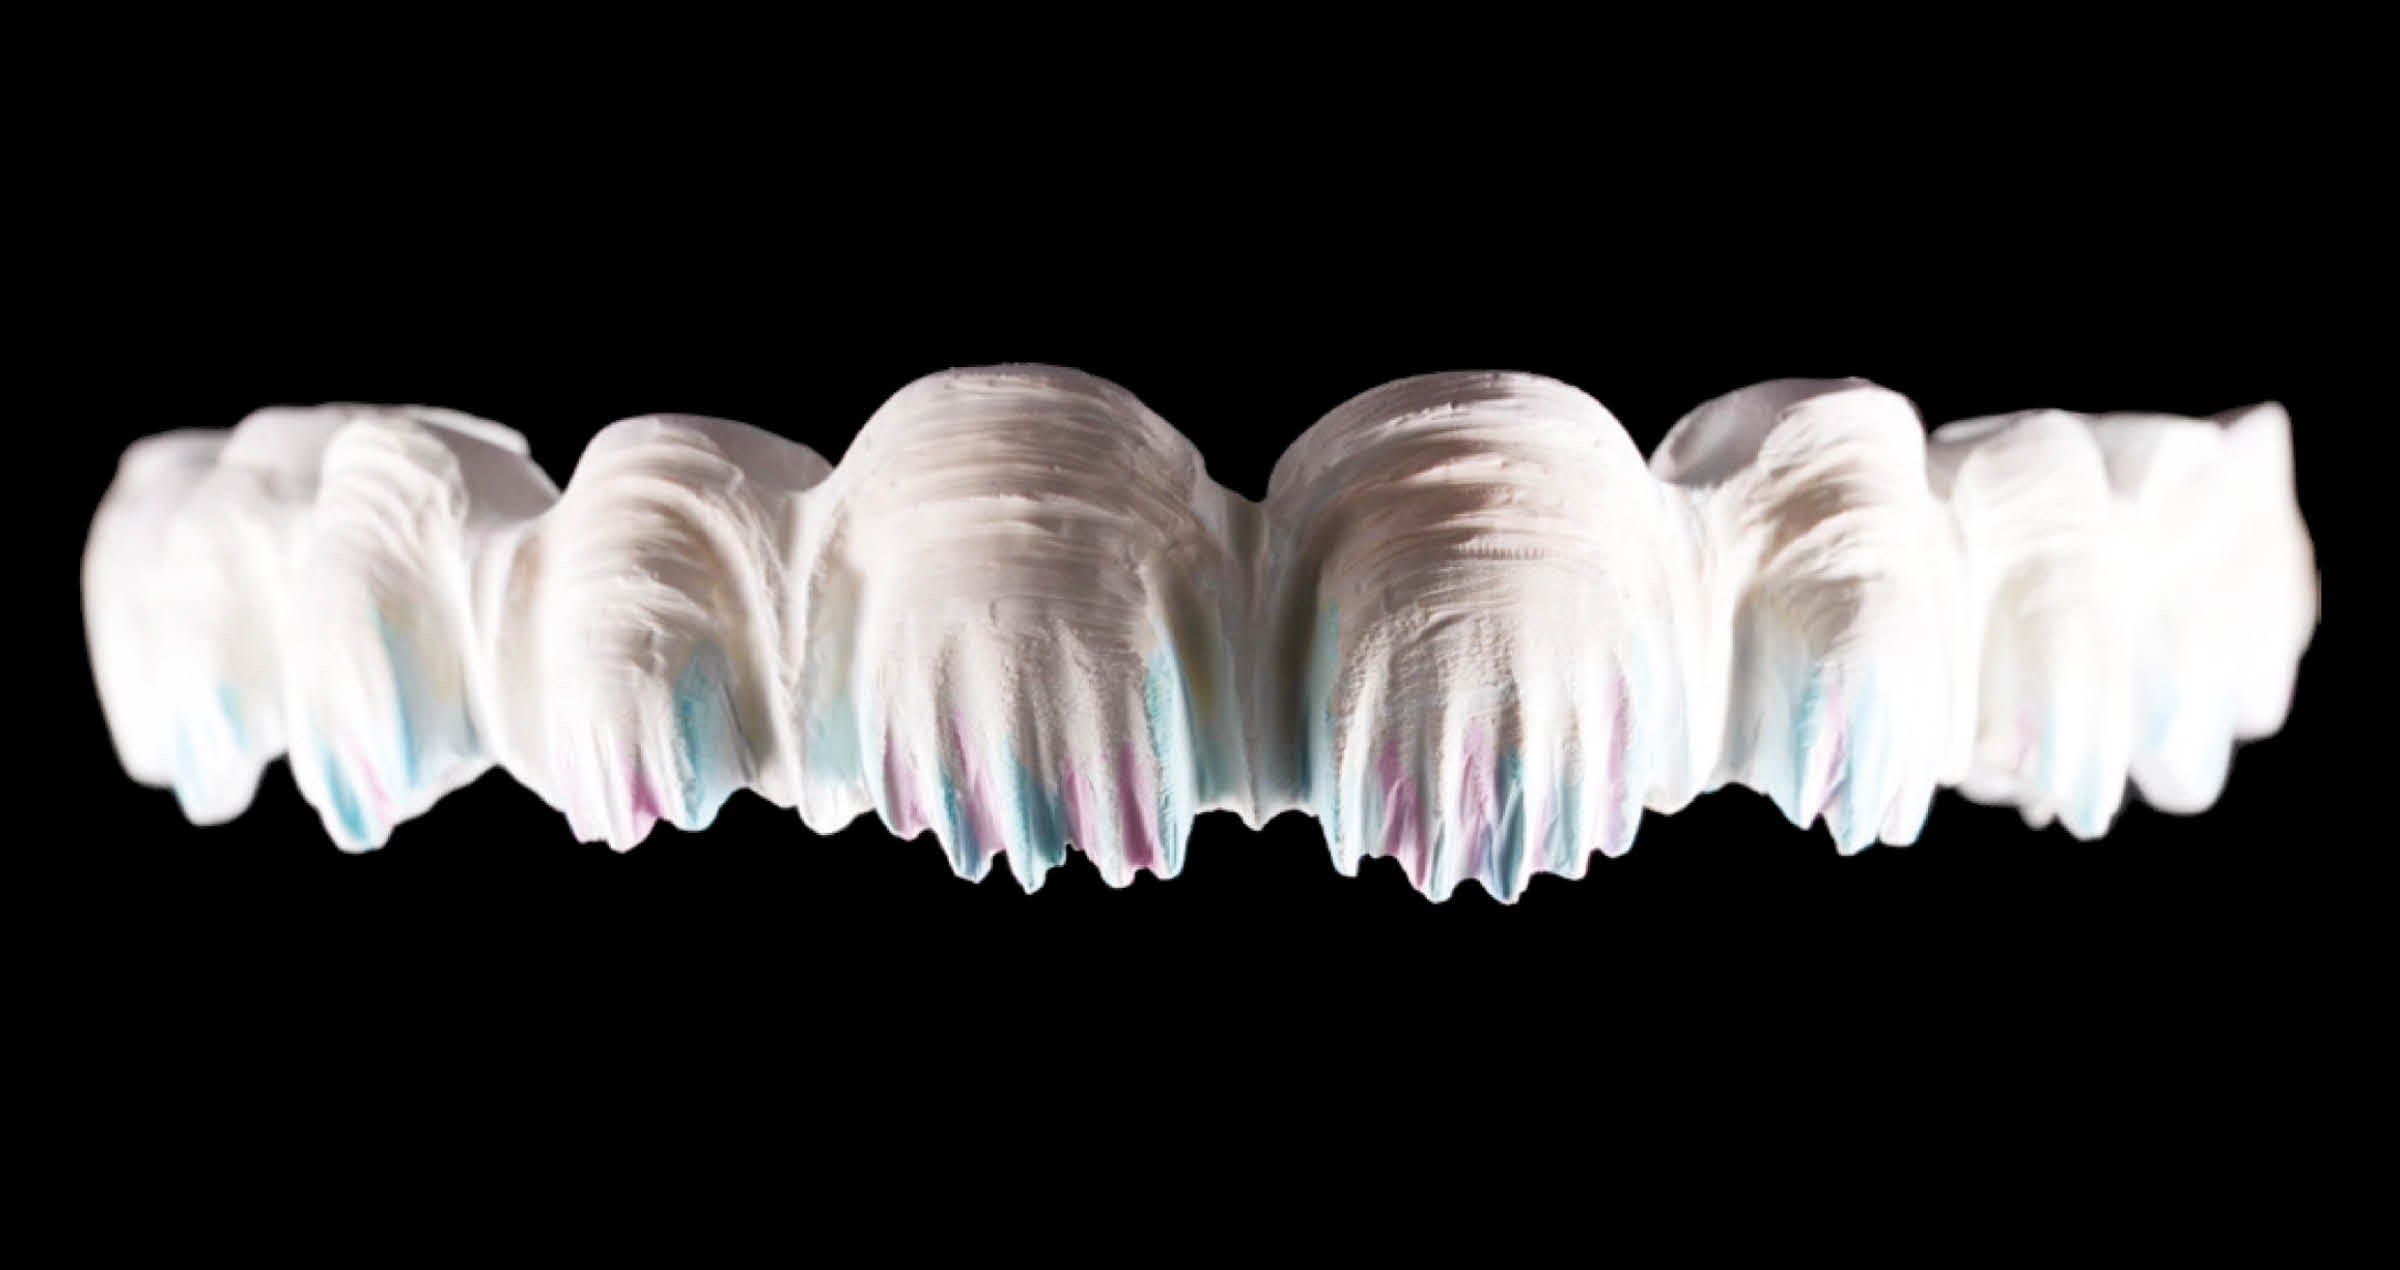
The following case example describes the use of Esthetic Colorant in the context of producing a full-contour screw-retained implant bridge made of zirconia with a titanium bar. The zirconia part was milled from KATANA™ Zirconia YML, the vestibular morphology refined with rotating instruments and then, the vestibular, palatal and occlusal surfaces were treated with Esthetic Colorant as shown in Figures 1 and 2. The true colour effect is revealed after sintering.


Fig. 1. Frontal view of the milled zirconia structure after the application of Esthetic Colorant in the shades BLUE, GRAY, ORANGE and PINK.


Fig. 2. Occlusal view of the milled zirconia structure after the application of Esthetic Colorant BLUE, GRAY, ORANGE and PINK.


Fig. 3. Nicely pre-treated zirconia structure after sintering.


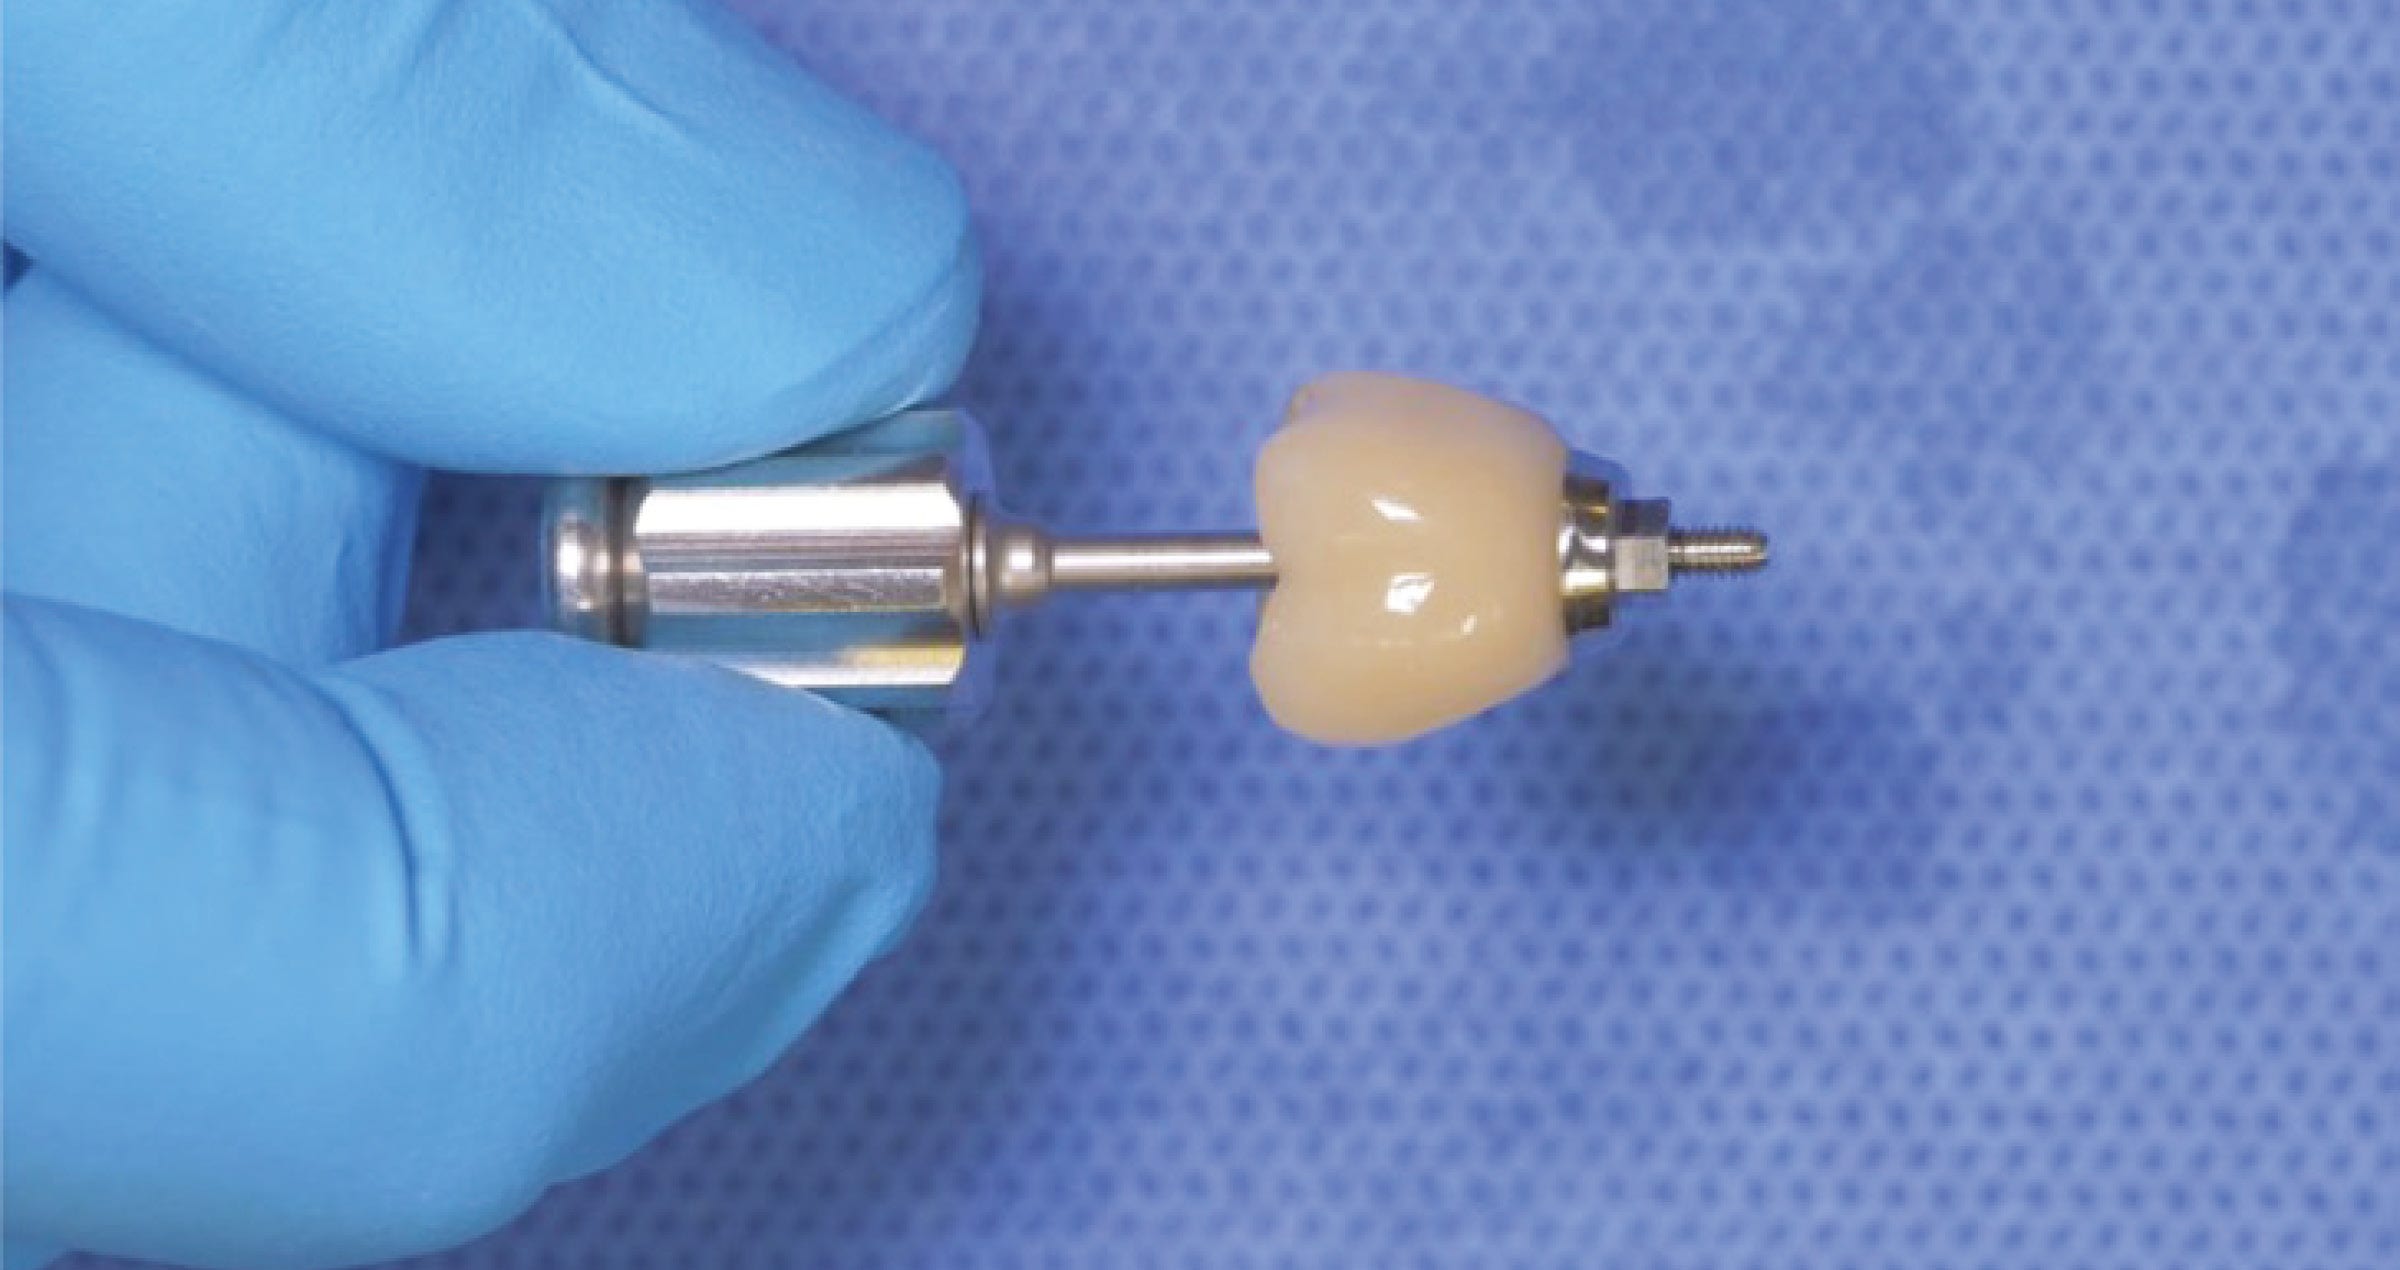
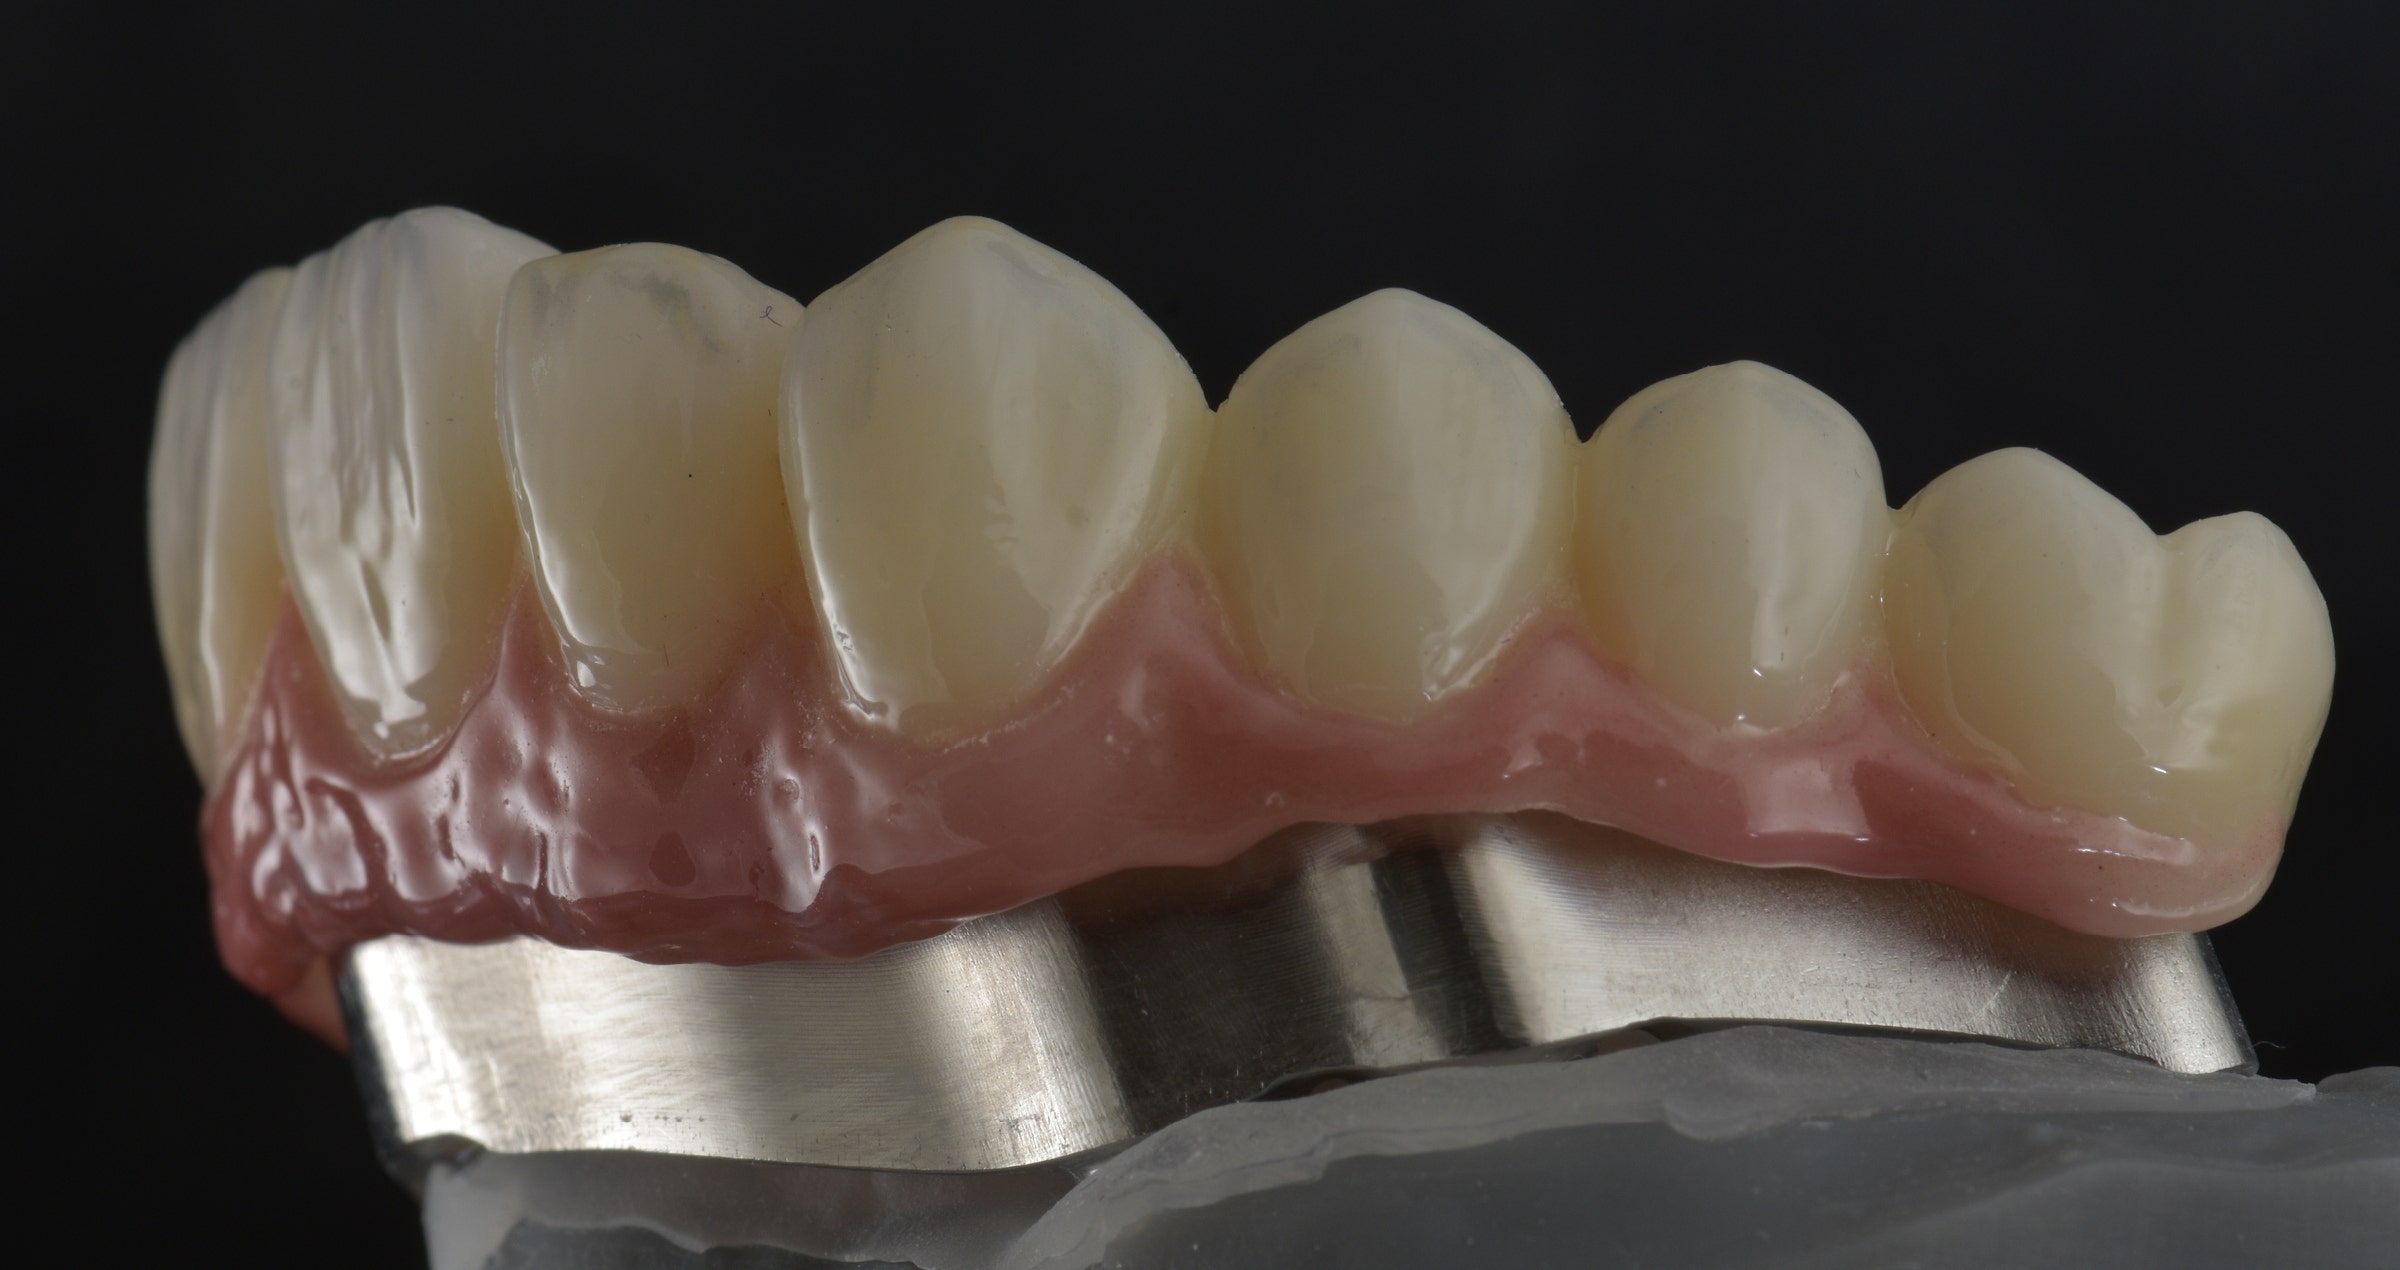
By adding some CERABIEN™ ZR FC Paste Stain and Glaze in the vestibular area and to the tissue parts, it is possible to finish this restoration in a nice way. The contact areas are always just polished to a high gloss in our approach, as it is the most antagonist-friendly way of treating the surface. As a final measure, the zirconia structure was connected to the titanium bar before it was sent to the dental office for try-in.


Fig. 4. Frontal view of the finalized zirconia part.


Fig. 5. Occlusal view of the structure after finishing.


Fig. 6. Connecting the zirconia superstructure and titanium bar.


Conclusion


With a well-selected zirconia portfolio and aligned finishing solutions, it is easy to establish concepts that allow you to respond to the needs of virtually every patient in a streamlined way. In our experience, the use of high-quality products with good aesthetic properties – a high translucency and naturally pre-shaded multi-layer structure – pays off as it allows us to reduce the thickness or do without a porcelain layer. In this way, we are able to increase the efficiency of our procedures without compromising the outcomes.


The KATANA™ Zirconia Multi-Layered Series and the new Esthetic Colorant for KATANA™ Zirconia support us in an ideal way by allowing us to efficiently produce a perfect base for whatever finishing approach we select.


Dentists:

MDT Daniele Rondoni MDT Roberto Rossi


A new smile with only 4 zirconia crowns

Case by Kanstantsin Vyshamirski


A male patient (47 years of age) presented to his dentist with severe damage to his teeth. His main request was to increase aesthetics, to achieve a more pleasing envisaged aesthetic area. A side request was to achieve a ‘whitening but natural look’. This was achieved by using a lighter colour palette of zirconia and porcelain materials.


The final result was achieved through the creation of a wax-up, followed by a mock-up, provisional restoration and finally adhesive bonding of the zirconia crowns.


INITIAL SITUATION


Fig. 1. Initial situation. Male patient (47 years of age).


Fig. 2. Planning the new smile according to patient’s aesthetic and functional parameters.


Fig. 3. Mock-up in place to check the new look in the patient’s mouth.


Fig. 4. KATANA™ Zirconia YML shade A1 crowns with labial cutback after milling.


Fig. 5. Crowns after sintering on the plaster model.


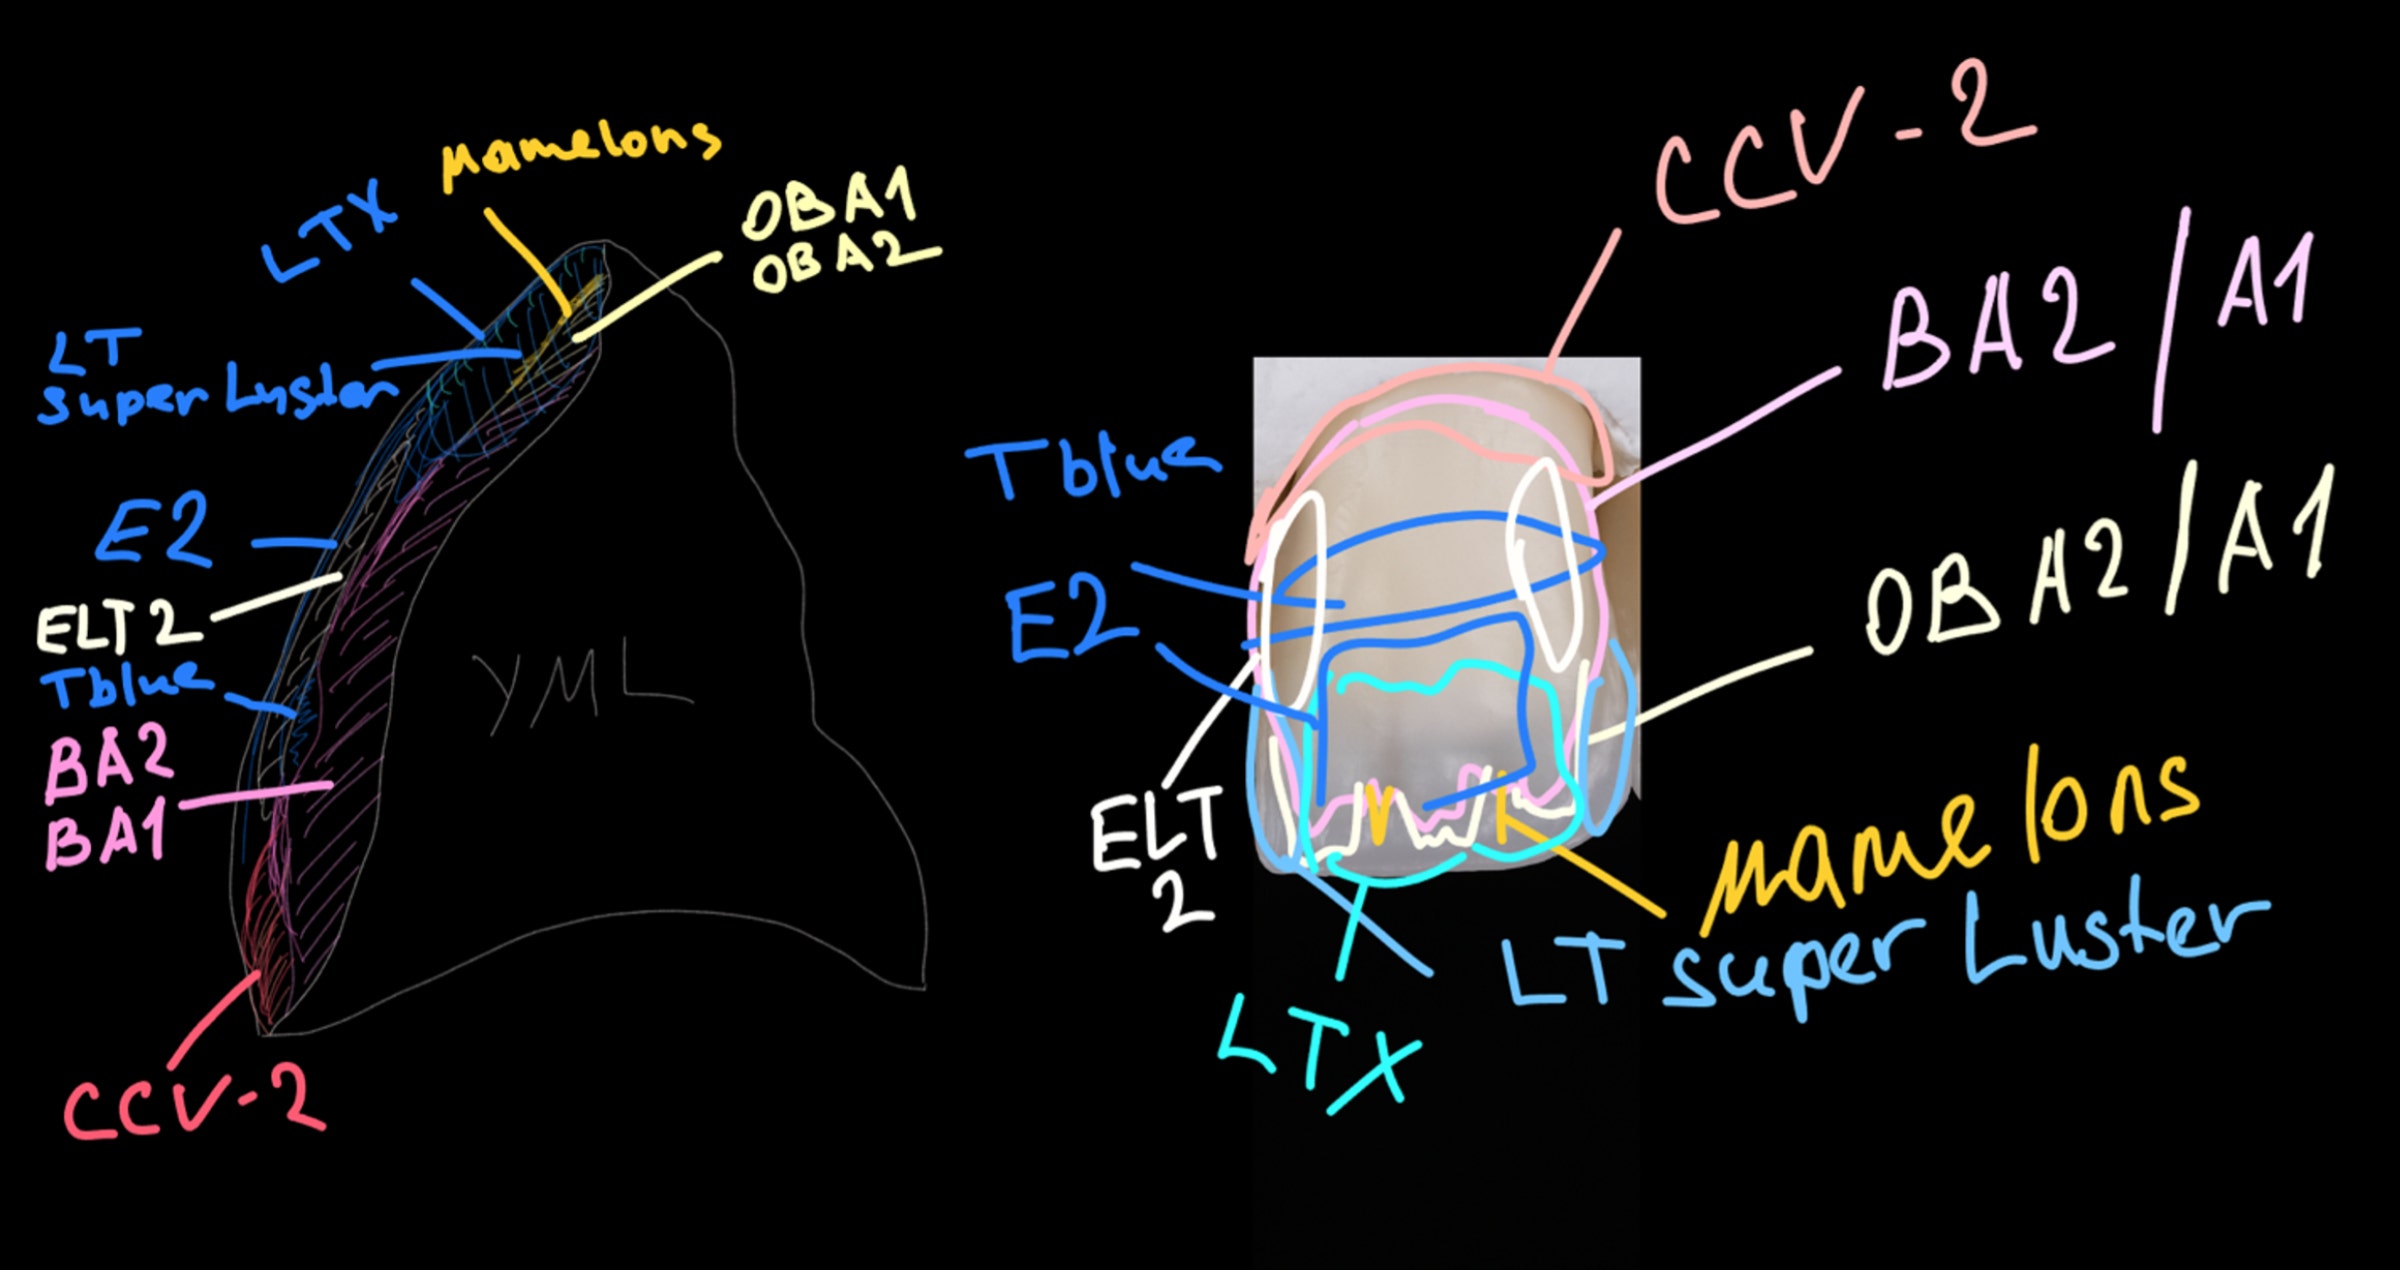
Fig. 6. Noritake CERABIEN™ ZR porcelain layering map.


Fig. 7. Finishing the labial surface using both polishing and selfglaze. On the palatal side of the crowns only CERABIEN™ FC Paste Stain stains and glaze were used for finishing. To aid in optimisation of the soft tissue condition the palato-cervical and near proximal areas were polished.


Fig. 8. Finished crowns on the plaster model.


Fig. 9. Try-in using PANAVIA™ V5 White try-in paste, to confirm the proper appearance. For the final adhesive cementation PANAVIA™ V5 White has been used.


FINAL SITUATION


Fig. 10. Situation after seven months. The result is aesthetically pleasing and the gingival condition excellent.


Fig. 11. Recall after 1.5 years.


Dentist:


KANSTANTSIN VYSHAMIRSKI


Kanstantsin started his dental technician career in 2014. His speciality is aesthetic prosthetic porcelain works. Kanstantsin is an experienced user of KATANA™ Zirconia and Noritake porcelains. He owns his lab in Riga, Latvia.


Copying nature with high performance materials

Clinical Case by DT Ghaith Alousi


What does it take to reconstruct teeth according to the patient’s individual sense of beauty? Experience shows that copying nature is the secret of success. To become a good duplicator, it is essential to develop an eye for detail with regard to tooth forms, surface morphology and the internal colour structure of the teeth to be copied. In addition, the duplicator needs to develop an understanding of the materials and tools used to copy those details. The last key success factor is taking pleasure in interacting with patients.


Read the clinical case created by Ghaith Alousi and published in the LabLine magazine’s Autumn edition now and learn about his approach to creating aesthetic restorations, mimicking nature and truly individualising restorative treatments.


Complex implant-supported maxillary reconstruction

Clinical Case by MDT Mathias Berger


Highly reliable implants, advanced surgical techniques and innovative restorative materials, designs and approaches: modern implant dentistry has evolved into a predictable discipline producing aesthetic and functional outcomes, which are successful in the long term. Asking patients what they expect from a complex implant-supported reconstruction in the maxilla, natural aesthetics and biocompatibility are often demanded apart from functional aspects. With modern zirconia materials that offer the flexural strength required and well-balanced aesthetics, these demands are easily met.


The following case example is used to demonstrate how to maximise the potential of the recently introduced KATANA™ Zirconia HTML PLUS (Kuraray Noritake Dental Inc.), a multi-layered zirconia and the successor of KATANA™ Zirconia HTML with further improved strength and aesthetics. A special cutback design refined with hand instruments, shading with Esthetic Colorant for KATANA™ Zirconia and micro-layering with CERABIEN™ ZR porcelains (both Kuraray Noritake Dental Inc.) led to a quite natural result.


Start now reading the clinical case of MDT Mathias Berger by clicking image below!


Aesthetic case

LabLine magazine is an English language publication catering to the field of lab-side dentistry. It provides comprehensive coverage of the latest techniques and trends in dental laboratory technology and materials, showcasing them via sophisticated, challenging and aesthetic clinical cases done by some of the most known experts in Europe. With its expertly curated content, LabLine serves as an invaluable resource for dental professionals seeking to enhance their knowledge and stay at the forefront of the industry.


In the SPRING edition of LabLine you can find a wonderful AESTHETIC CASE by Mikel Villar Gonzales and DT Pilar Ballesteros Galan. The patient, a 21-year-old female had a hypoplasia defect on her permanent teeth, 1.1 and 1.2., presumably due to trauma on her deciduous anterior teeth. Click the image below and check out how the case was done!


KATANA™ Zirconia & Esthetic Colorant

TIPS AND TRICKS


Case by MDT Daniele Rondoni and MDT Roberto Rossi


Recently, Kuraray Noritake Dental Inc. has introduced Esthetic Colorant for KATANA™ Zirconia – dyeing liquids applied after milling of the company’s multi-layered zirconia. Enthusiastic users of the KATANA™ Zirconia Multi-Layered Series may wonder when and how to use the innovation: In combination with external stains, veneering porcelains or liquid ceramics, or as a replacement of those products? On the monolithic surface or on a dentin structure (framework)? And how much liquid produces the desired effect? Some technical guidance is provided in this article.


The good news: Esthetic Colorant fits perfectly into any existing approach, no matter whether you prefer a full-contour or cutback design. You may apply the liquids solely in a zero-bake technique – just individualize the milled restorations with Esthetic Colorant, fix the colours during the final sintering procedure and polish the surface. On the other end of the spectrum of options is the use underneath different layers of internal stains, porcelains and glaze.


WE UTILIZE ESTHETIC COLORANT MAINLY FOR THREE PURPOSES:


  1. To add specific individual characteristics to the restoration, which are not generated by the multi-layered material structure, yet difficult to create with internal stains (examples are a more chromatic body area of a canine in comparison to the adjacent lateral incisor or pronounced mamelon structures). As the liquids diffuse into the structure, a depth effect is created.

    Eight liquids are available for the abovementioned purpose: A, B, C and D Plus for changing the brightness and creating shadows, BLUE, GRAY, ORANGE and BROWN for general characterization.
  1. To pre-treat tissue areas to produce a perfectly shaded basis for the application of liquid ceramics (CERABIEN™ ZR FC Paste Stain) or Tissue Porcelain.

    Two liquids are available for this purpose: PINK AND VIOLET.
  1. To prevent a greyish effect caused by the shining through of discoloured abutment teeth or metal parts (posts or implant abutments) – in this case, Esthetic Colorant OPAQUE or WHITE is applied to the intaglio of the restoration. The effect: the incoming light is blocked on the side of the dark element, while the natural translucency in the outer surface area of the restoration is maintained.


PURPOSE 1


An example of how to add specific individual characteristics to the surface of the restoration is the following full-arch case. After sintering, we just added a micro-layer of CERABIEN™ ZR Luster Porcelain and CERABIEN™ ZR FC Paste Stain Clear Glaze.


Fig. 1a. Frontal view of the complex restoration made of KATANA™ Zirconia HTML Plus after milling and the application of different shades of Esthetic Colorant.


Fig. 1b. Occlusal view of the complex restoration after milling and the application of different shades of Esthetic Colorant. Important: Every restoration characterized with Esthetic Colorant should be left to dry for at least 30 minutes prior to sintering.


Fig. 1c. Frontal view of the restoration after the final sintering procedure.


Fig. 1d. Occlusal view of the restoration after sintering.


Fig. 1e. Addition of a micro-layer of CERABIEN™ ZR Luster Porcelain.


FINAL SITUATION


Fig. 1f. Frontal view of the definitive restoration finished with CERABIEN™ ZR FC Paste Stain Clear Glaze.


Fig. 1g. Occlusal view of the final restoration.


Fig. 1h. Great incisal translucency.


PURPOSE 2


The effect of a pre-treatment of the tissue area of a complex restoration is illustrated with the aid of the following example case. Again, we opted for a nearly monolithic design with a minimal cutback in the incisal area of the teeth. The appearance of the originally tooth-coloured tissue area is modified visibly through the application of Esthetic Colorant in the shades PINK and GRAY. Some individual effects are added to the teeth as well.


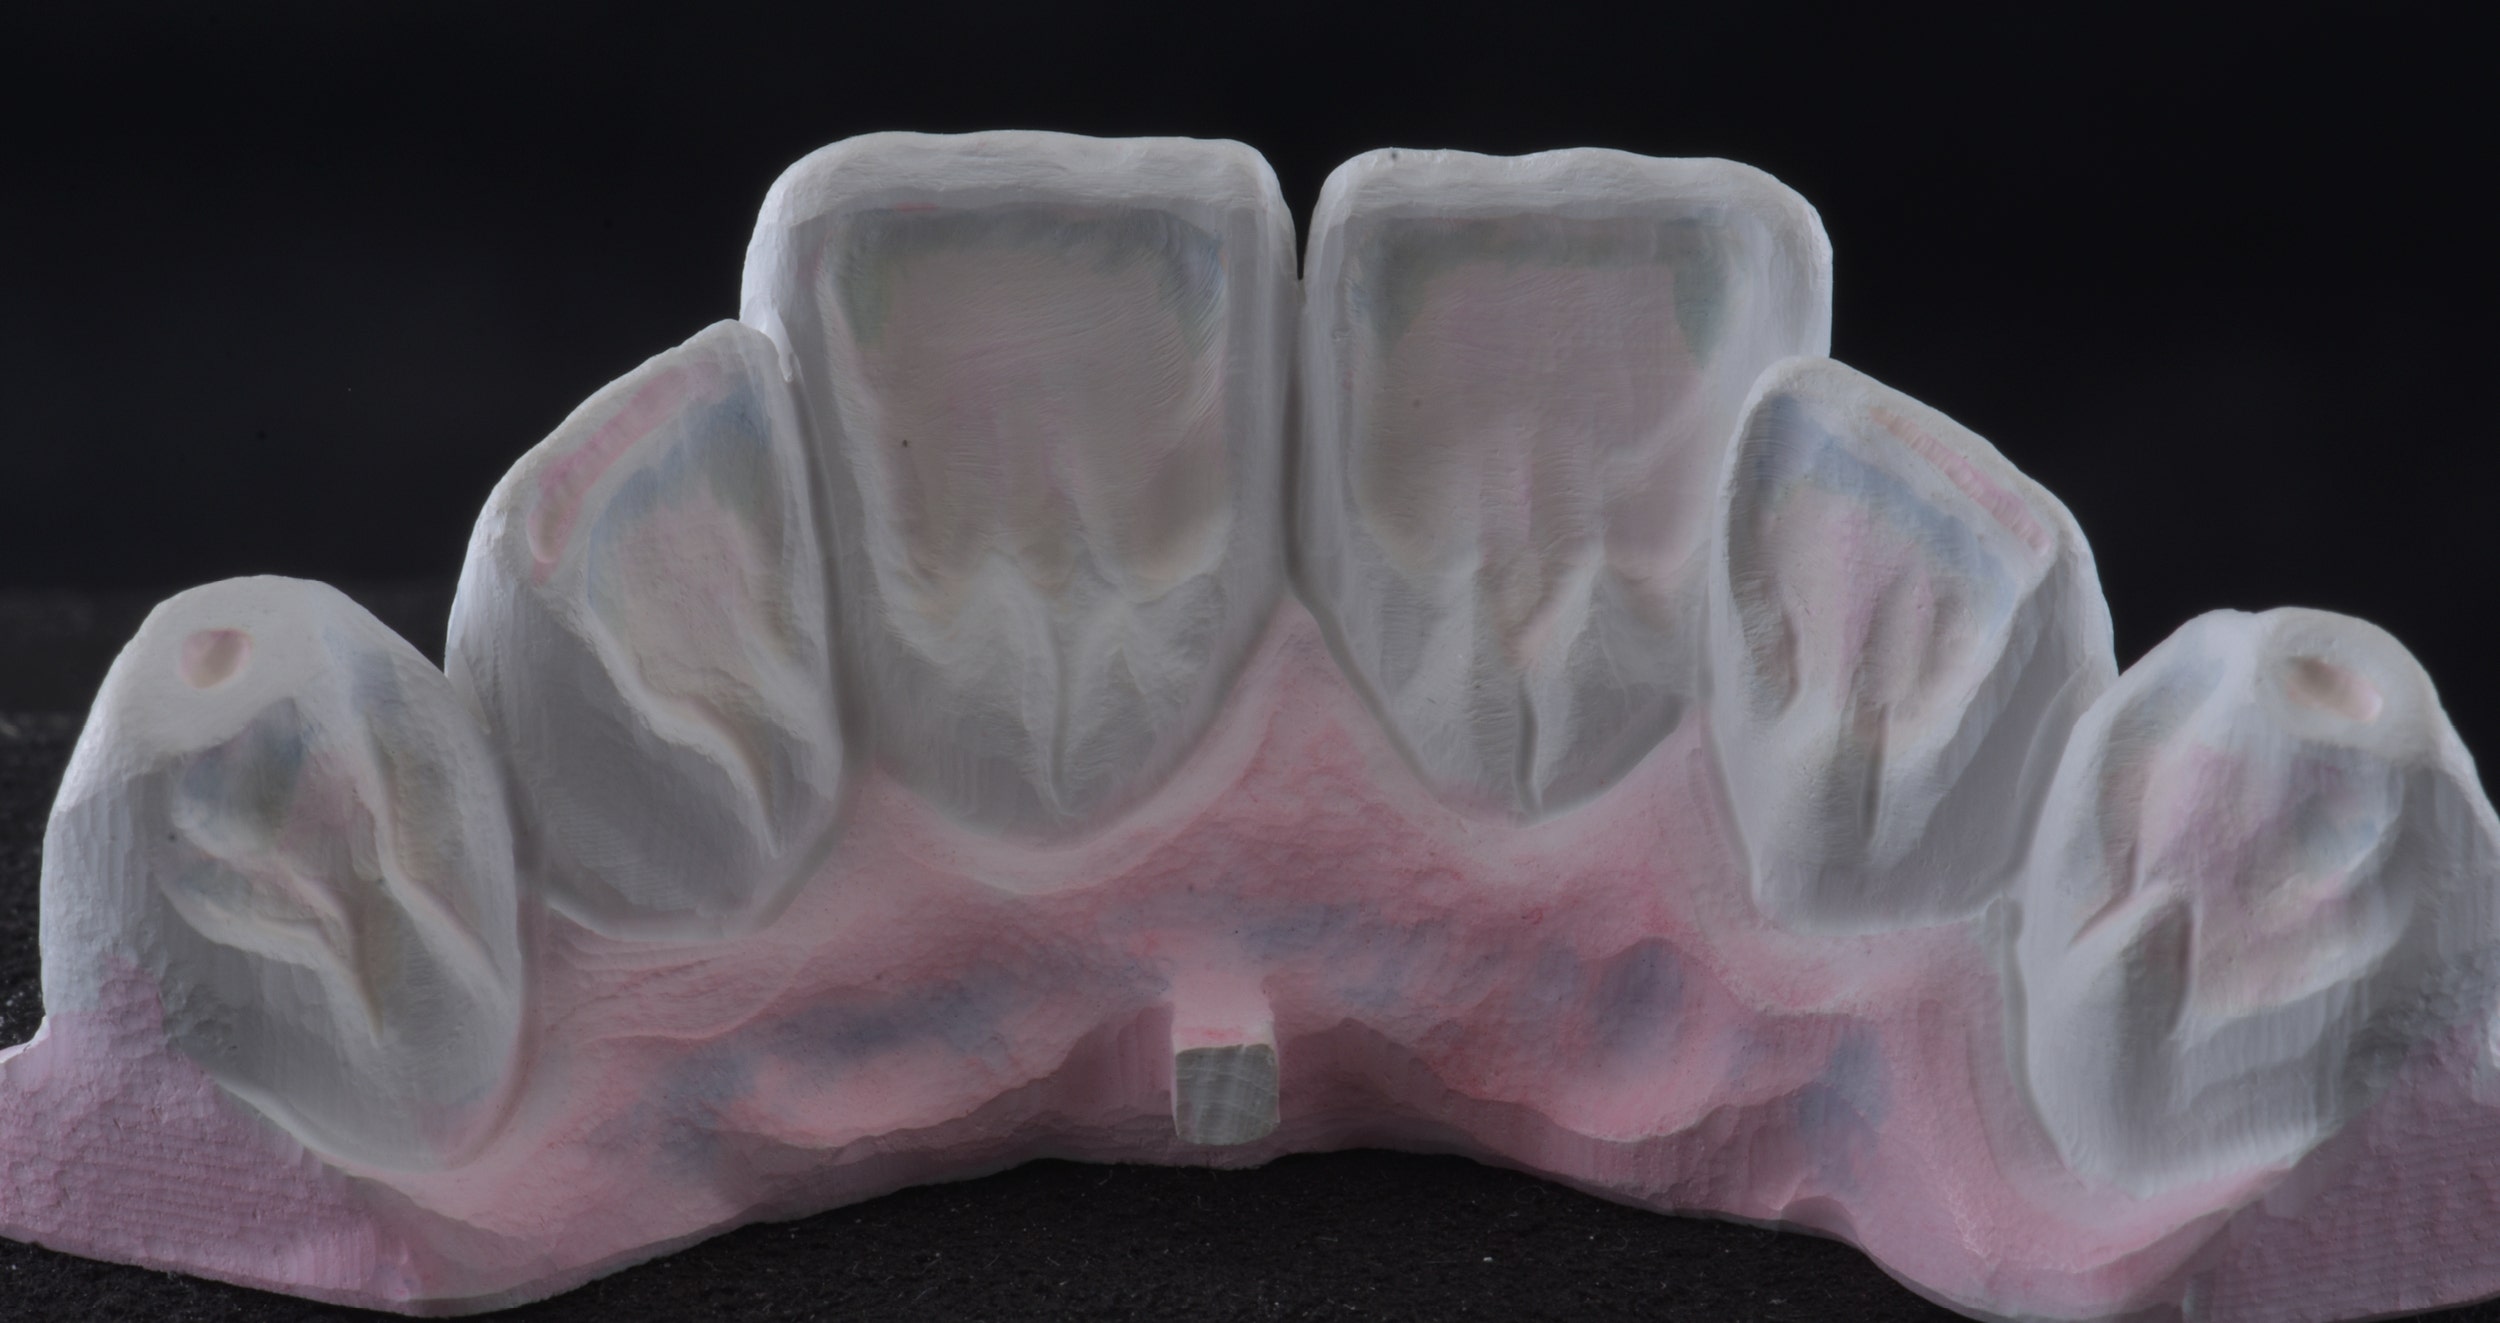
Fig. 2a. Vestibular view of the milled restoration (material: KATANA™ Zirconia YML).


Fig. 2b. Palatal view of the milled restoration.


Fig. 2c. Vestibular pattern of application of Esthetic Colorant.


Fig. 2d. Palatal pattern of application of Esthetic Colorant.


Fig. 2e. Vestibular view of the restoration after the final sintering procedure.


Fig. 2f. Palatal view of the restoration after the final sintering procedure.


PURPOSE 3


Comparison of restorations on an implant abutment with and without Esthetic Colorant (EC):


HOW TO APPLY ESTHETIC COLORANT?


Essentially, Esthetic Colorant may be applied with any metal-free brush or pen. In our opinion, the best results are obtained by using the Liquid Brush Pen that has been specifically developed for the dyeing liquids. The pen’s housing is filled with the selected shade of Esthetic Colorant and allows for a controlled application, as the tip always dispenses the right amount of liquid and does not dry out. We utilize a separate Liquid Brush Pen for every shade that is frequently in use.


SINTERING PARAMETERS


After drying, which is essential for a good outcome, the restorations treated with Esthetic Colorant may be put into the sintering furnace and sintered according to the schedule recommended for the KATANA™ Zirconia Multi-Layered series. The parameters do not need to be adjusted.


CONCLUSION


The controlled application of Esthetic Colorant is easily accomplished by using the appropriate equipment, while the desired effects are obtained predictably. The liquids’ ease of use, the appropriate number of shades available and the achievable effects are just a few of the many benefits you will find when trying out the new system in your dental laboratory.


Dentists:

MDT Daniele Rondoni MDT Roberto Rossi


Dream Team

THE COMBINATION OF EFFECT LIQUIDS AND MICRO-LAYERING ON HIGHLY AESTHETIC ZIRCONIA IS THE EFFECTIVE WAY TO ACHIEVE OUTSTANDING RESULTS


Case by Leonidas Dimitriou, MDT


As an addition to its well-aligned portfolio of multi-layered zirconia (KATANA™ Zirconia Multi-Layered series) and veneering porcelain for zirconia (CERABIEN™ ZR), Kuraray Noritake Dental Inc. has recently introduced a set of dyeing liquids. Esthetic Colorant for KATANA™ Zirconia is applied to the surface of the monolithic or anatomically reduced zirconia restoration prior to the final sintering procedure. In this way, it is possible to imitate typical internal colour effects of natural teeth quite easily. Depending on the desired outcome, users may add just a final layer of glaze, liquid ceramics or stains and porcelains to their zirconia restorations treated with Esthetic Colorant. The following two case examples are used to demonstrate two different procedures involving the use of the effect liquids.


CASE EXAMPLE 1


In the first case, we produced three two-unit splinted crown restorations for six maxillary anterior teeth. The zirconia crowns (made of KATANA™ Zirconia YML) were anatomically reduced and individualized with Esthetic Colorant mainly in the incisal and cervical areas immediately after milling. For the application of the selected liquids, we used the Liquid Brush Pen specifically developed for Esthetic Colorant. The restorations were dried for half an hour, placed in the sintering furnace for sintering according to the recommended protocol for KATANA™ Zirconia and subsequently finished with CERABIEN™ ZR porcelains. Finally, CERABIEN™ ZR Paste Stain Glaze was applied for the final high-gloss finish.


Fig. 1. Pre-sintered anatomically reduced crowns after milling.


Fig. 2. Esthetic Colorant applied to the milled restorations.


Fig. 3. Appearance of the individualized restorations after the final sintering procedure.


Fig. 4. Restorations after porcelain layering.


FINAL SITUATION


Fig. 5. Final restorations with a natural appearance. The effects created with Esthetic Colorant shine from deep within the restorations.


Fig. 6. Lateral view of the final restorations from the left.


Fig. 7. Lateral view of the final restorations from the right.


CASE EXAMPLE 2


In this second case, two three-unit restorations were produced using KATANA™ Zirconia YML in the colour A3. We designed and milled them in full contour, then reduced them with hand instruments by 0.2 mm and added some texture effects to the surface before applying Esthetic Colorant. In this case, we played with different shades of Esthetic Colorant. Even when applied on a minimally reduced or monolithic surface, the liquids are able to create a nice depth effect as they diffuse into the zirconia structure. The amount of liquid applied is easily controlled with the Liquid Brush Pen, so that the intensity of the colours is predictable. After sintering, we added some internal stains, CERABIEN™ ZR Luster Porcelain and a final layer of CERABIEN™ ZR FC Paste Stain Glaze to finish the restorations. The outcome speaks for itself.


Fig. 8. Milled monolithic restorations with a pronounced surface texture.


Fig. 9. Vestibular and palatal surfaces individualized with Esthetic Colorant to create and intensify some natural colour effects.


Fig. 10. Appearance of the restorations immediately after sintering.


Fig. 11. Restorations after internal staining.


Fig. 12. A layer of luster porcelain applied to the minimally reduced restorations.


FINAL SITUATION


Fig. 13. Final outcome after glazing.


Dentist:

LEONIDAS DIMITRIOU, MDT


First impressions: Esthetic Colorant for KATANA™ Zirconia in use

Case by CDT Daniele Rondoni and MDT Roberto Rossi


Working with high-translucency, multi layered zirconia (KATANA™ Zirconia Multi-Layered series from Kuraray Noritake Dental Inc.) paves the way toward indirect restorations that are closely adapted to our patients’ needs. Reduced wall thicknesses allow for minimally invasive tooth preparations, while polished zirconia in the occlusal contact areas provides for an antagonist-friendly behaviour. All this is possible due to the high aesthetic potential and homogeneous structure of the materials, which work well with a full-contour design or slight vestibular cutback. For individualization or characterization, different options are available. The portfolio of finishing solutions from Kuraray Noritake Dental has just been complemented by Esthetic Colorant for KATANA™ Zirconia, a set of twelve dyeing liquids for the company’s multilayered zirconia. They are applied to the milled restoration surface prior to sintering.


Some readers may wonder why there is a need for effect liquids applied to pre-shaded zirconia with a multi-layered colour structure. Being aware of natural teeth’s unique play of colours stemming from the shape and shade of the dentin core, however, the reason is quite obvious: Esthetic Colorant diffuses into the zirconia structure, hence allowing us to create depth effects even in monolithic restorations. Moreover, it enables the user to pre-treat tissue areas, and even by using the liquids on cutback designs, we are able to reproduce case-specific internal optical characteristics quite easily. Our standard approach for the use of Esthetic Colorant on KATANA™ Zirconia HTML Plus is described by means of the following case example: An implant- and tooth-based twelve-unit bridge with a slight vestibular cutback design, finished with Esthetic Colorant and CERABIEN™ ZR Porcelain.


Fig. 1. Restoration with sintering support removed from the blank.


Fig. 2. Esthetic Colorant for KATANA™ Zirconia: Available shades.


Fig. 3. Frontal view of the milled restoration after the application of Esthetic Colorant. A chromatic map is not needed since the colours of the applied liquids are clearly visible.


Fig. 4. Occlusal view of the milled restoration after the application of Esthetic Colorant. The liquids were applied with the Liquid Brush Pen for Esthetic Colorant.


Fig. 5. Frontal view: Appearance of the restoration after sintering.


Fig. 6. Occlusal view: Appearance of the restoration after sintering.


Fig. 7. Beautiful translucency and mamelon structures in the incisal area.


Fig. 8. Situation after the application of a thin layer of CERABIEN™ ZR Porcelain, which creates an enamellike window effect and reveals the play of colours found underneath.


Fig. 9. Restoration after firing and glazing.


FINAL SITUATION


Fig. 10. Beauty shots…


Fig. 11. … of the final restoration.


Easy handling and application, impressive colour effects: Esthetic Colorant perfectly fits into our micro-layering approach with a cutback design adjusted to the age and needs of every patient. Being applied on the pre-sintered zirconia surface, the liquids do not require any extra heat treatment – the restoration is simply dried and then sintered as usual. Esthetic Colorant may be used instead of or in combination with internal stains, luster porcelains and liquid ceramics – whatever complements a laboratory’s existing approach to highly aesthetic zirconia restorations.


Dentists:

CDT Daniele Rondoni MDT Roberto Rossi


This aesthetic case

Case by Dr. David Garcia Baeza and DT. Pilar Ballesteros Galan


Shade determination in the planning phase, shade evaluation at try-in: How is it possible to accomplish these highly important tasks in the production of lifelike anterior restorations without meeting the patient in person? A computer-based shade documentation and try-in system is a great solution. Download this clinical case example describing the aesthetic restoration of two maxillary anterior teeth to learn more about one such system and its use!