Blog

Takaus kompozito švirkštimo metodas: paprastas, nuspejamas ir lengvai pakartojamas

Interviu su Michał Jaczewski


Takaus kompozito švirkštimo metodas populiarus ir yra taikomas norint estetiškai atkurti kelis dantis naudojant takų kompozitą. Michał Jaczewski yra garsus instruktorius, mokantis odontologus įgūdžių, reikalingų norint sėkmingai taikyti šį metodą. M. Jaczewski 2006 m. baigė Vroclavo medicinos universitetą (Lenkijoje), o nuo 2011 m. dirba savo privačiame kabinete Legnicos mieste. Jis yra Biofunkcinės okliuzijos mokyklos, kurioje vedami mokymai visapusiško dantų gydymo srityje, įkūrėjas. Jo aistra – estetinė skaitmeninė odontologija. 2023 m. tarptautinėje odontologijos parodoje Kelne M. Jaczewski mums pademonstravo ir papasakojo, kada, kodėl ir kaip savo odontologijos kabinete taiko takaus kompozito švirkštimo metodą. 


Ar galėtumėte trumpai apibūdinti šį metodą? 


Takaus kompozito švirkštimo metodas yra paprastas, nuspėjamas, lengvai pakartojamas būdas atkurti dantis naudojant takų kompozitą. Jis pagrįstas vaškiniu modeliu, ant kurio gaminamas silikoninis gidas. Būtent šis gidas yra svarbiausias elementas švirkščiant takų kompozitą, kuris kietinamas šviesoje per skaidrų silikoną. Svarbiausias privalumas yra tas, kad dirbant šiuo metodu nereikia jokio danties paruošimo arba pakanka tik minimalaus danties paruošimo. Tai minimaliai invazinis metodas, kurį gali naudoti tiek pradedantieji, tiek patyrę odontologai. Naudojant gerai subalansuotą 0,3 mm storio opakišką kompozitą ir taikant specialų poliravimo protokolą, galima pasiekti puikų morfologinį ir optinį rezultatą. 


Kada pradėjote taikyti takaus kompozito švirkštimo metodą ir kokios yra jo pagrindinės indikacijos? 


Metodą pradėjau taikyti 2018 metais. Jis buvo išrastas priekiniams dantims atkurti, tačiau šiais laikais sėkmingai naudojamas ir atkuriant galinius dantis. Mano nuomone, jis ypač naudingas, kai reikia koreguoti kelių dantų formą ir pagerinti tiek pagyvenusių, tiek jaunų pacientų šypseną. To gali prireikti baigus ortodontinį gydymą. Taikant šį neinvazinį metodą dantys paprasčiausiai sulygiuojami ir atkuriama tobula jų forma. Takaus kompozito švirkštimo metodą taip pat taikau šypsenai pertvarkyti, susidėvėjusiems dantims atstatyti ir sąkandžio aukščiui pakeisti visos burnos rekonstrukcijos kontekste. Pastaruoju atveju restauravimas gali būti laikinas ir naudojamas vidutinės trukmės ar ilgalaikio „pabandymo“ tikslais. Visgi tokios restauracijos gali būti ir galutinės. 


Nuo ko pradėti planuojant atkurti paciento dantis takaus kompozito švirkštimo metodu? 

Svarbiausias etapas, turintis didelę įtaką šio metodo sėkmei, yra planavimo etapas. Jį sudaro dokumentavimas, atspaudų ėmimas, vaškinio modelio ir maketo sukūrimas bei silikoninio gido gamyba. Žinoma, galite dirbti tradiciniu būdu su silikoniniu atspaudu ir įprastiniu vaškiniu modeliu, tačiau skaitmeninių technologijų naudojimas šiame etape kur kas pagerins jūsų darbo eigą. Aš dažniausiai pradedu nuo dokumentavimo etapo – darau nuotraukas, vaizdo įrašus ir skaitmeninį atspaudą. Taip pat reikalingi centrinio žandikaulių santykio ir okliuzijos įrašai. Tada naudojant skaitmeninę šypsenos dizaino programinę įrangą sukuriamas virtualus vaškinis modelis. Šiame etape svarbu atsižvelgti į paciento veido ypatybes. Užduotį geriausia atlikti naudojant „Facial Flow“ koncepciją. Remiantis gauta konstrukcija, virtualus gydymo rezultatas gali būti rodomas pacientui ir su juo aptariamas. Patvirtinus planą, spausdinamos skirtingos vaškinio modelio versijos: visas vaškinis modelis ir kaitaliojimo principu (angl. interlip) pagrįstas modelis – vienas dantis su vaškiniu modeliu, kitas be. Šie modeliai naudojami norint pagaminti reikiamus gidus iš skaidraus silikono. 


Skaitmeninės šypsenos projektas. Pacientas, kurio dantys labai nusidėvėję 


Paciento burnoje pavaizduotas virtualus vaškinis modelis 


Modeliai, atspausdinti pagal virtualų maketą 


Silikoninis gidas, pagamintas ant kaitaliojimo principu (interlip) pagrįsto modelio 


Kada ir kodėl gaminate daugiau nei vieną silikoninį gidą? 


Su viso modelio ir kaitaliojimo principu pagrįstu (daliniu) silikoniniu gidu ypač naudinga dirbti, kai planuojama atkurti visus viršutinio žandikaulio dantis. Pradedant nuo kaitaliojimo principu pagrįsto gido pasiekiamas papildomas stabilumas ir sukuriamas tikslaus rezultato pagrindas, ypač atsižvelgiant į planuojamą sąkandžio aukštį. Visada rekomenduoju apatiniame žandikaulyje, kur dėl seilių ir judančių minkštųjų audinių gidą ir kompozitą valdyti sunkiau, darbo lauką padalyti į tris dalis (vieną priekinę ir dvi galines sritis) ir dirbti su šiomis sritimis atskirai. 


Kaip ruošiate dantis ir švirkščiate takų kompozitą? 


Daugeliu atvejų tereikia emalio paviršių šiurkštinimo surišimo procedūrai atlikti, o tai paprastai daroma naudojant oro abraziją aliuminio oksido dalelėmis (50 µm žemu slėgiu). Tada emalis ėsdinamas fosforo rūgšties ėsdikliu ir aplikuojama universali rišamoji medžiaga. Silikoniniame gide yra švirkštimo anga kandamajame krašte. Tai nesunku padaryti spaudžiant takaus kompozito švirkšto kaniulę. Galinėje srityje gali būti pravartu naudoti kietesnę medžiagą ir integruoti po dvi angas kiekvieno danties atskiruose gumburuose: vieną – švirkštimui, kitą – medžiagai ištekėti. Naudojant kietąjį gidą šiai procedūrai reikalingas deimantinis grąžtas. Įdedu gidą, iš apačios į viršų švirkščiu takų kompozitą, šiek tiek pakietinu medžiagą šviesoje ir išimu gidą. Galutinė polimerizacija atliekama tik išėmus gidą ir aplikavus glicerino gelio sluoksnį. Pašalinus medžiagos perteklių ir iki galo padarius proksimalinės restauracijos dalies apdailą, procedūra pakartojama su kitais dantimis prieš poliruojant restauracijas. 


Ar turite dirbant šiuo metodu pamėgtų produktų? 


Silikoniniam gidui naudoju EXACLEAR (GC), nes tai yra skaidriausias rinkoje silikonas. Mano mėgstamiausias takaus kompozito švirkštimo metodo kompozitas yra mažo klampumo „CLEARFIL MAJESTY™ ES Flow“ („Kuraray Noritake Dental Inc.“). Savo odontologijos kabinete ir per kursus turėjau galimybę išbandyti daugybę skirtingų produktų. Taip sužinojau, kad „Kuraray Noritake Dental“ medžiaga turi keletą privalumų. Tai šiuolaikiškas nanokompozitas, išsiskiriantis daugybe indikacijų ir dideliu atspalvių asortimentu. Galima rinktis iš trijų šio produkto klampumų, todėl jis gali būti naudojamas įvairiose klinikinėse situacijose. Pradėjau jį naudoti prieš penkerius metus. Taikant takaus kompozito švirkštimo metodą mano pirmasis pasirinkimas yra „Low“ variantas, nes jis yra universaliausias ir tinka tiek priekiniams, tiek galiniams dantims. Didžiausi privalumai, turėję įtakos mano apsisprendimui jį naudoti, yra natūrali estetika ir puikios poliravimo savybės. Galite pasiekti įspūdingą efektą neturėdami jokių specialių įgūdžių. Kaip rišamąją medžiagą man labiau patinka naudoti „CLEARFIL™ Universal Bond Quick“, nes tada darbo eiga tampa dar lengvesnė, greitesnė ir labiau nuspėjama. Poliravimui sukūriau savo protokolą.


Kaip darote restauracijų apdailą ir jas poliruojate?


Pradedu nuo proksimalinės srities naudodamas poliravimo juosteles ir kartais proksimalinį pjūklelį. Koreguojant formą pasiteisino trys skirtingi deimantiniai ir karbidiniai grąžtai. Paskui naudoju švelnius arba ypač švelnius „Sof-Lexapdailos ir poliravimo diskus (3M), skirtus kontūravimui ir užbaigimui, ir guminius polyrus TWIST DIA™ for Composite („Kuraray Noritake Dental Inc.“), kurie jau sukuria gražų, natūralų paviršiaus blizgesį beveik be pastangų. Tada naudojamas ožkų plaukų diskinis šepetėlis su deimantine poliravimo pasta („Diamond excel, FGM) ir galiausiai – medvilninis ratukas su aliuminio oksido poliravimo pasta („Pasta Grigia II“, „anaxDENT). Taip galima sukurti veidrodinę apdailą.


Emalio ėsdinimas fosforo rūgšties ėsdikliu 


Įstatytas galutinis silikoninis gidas 


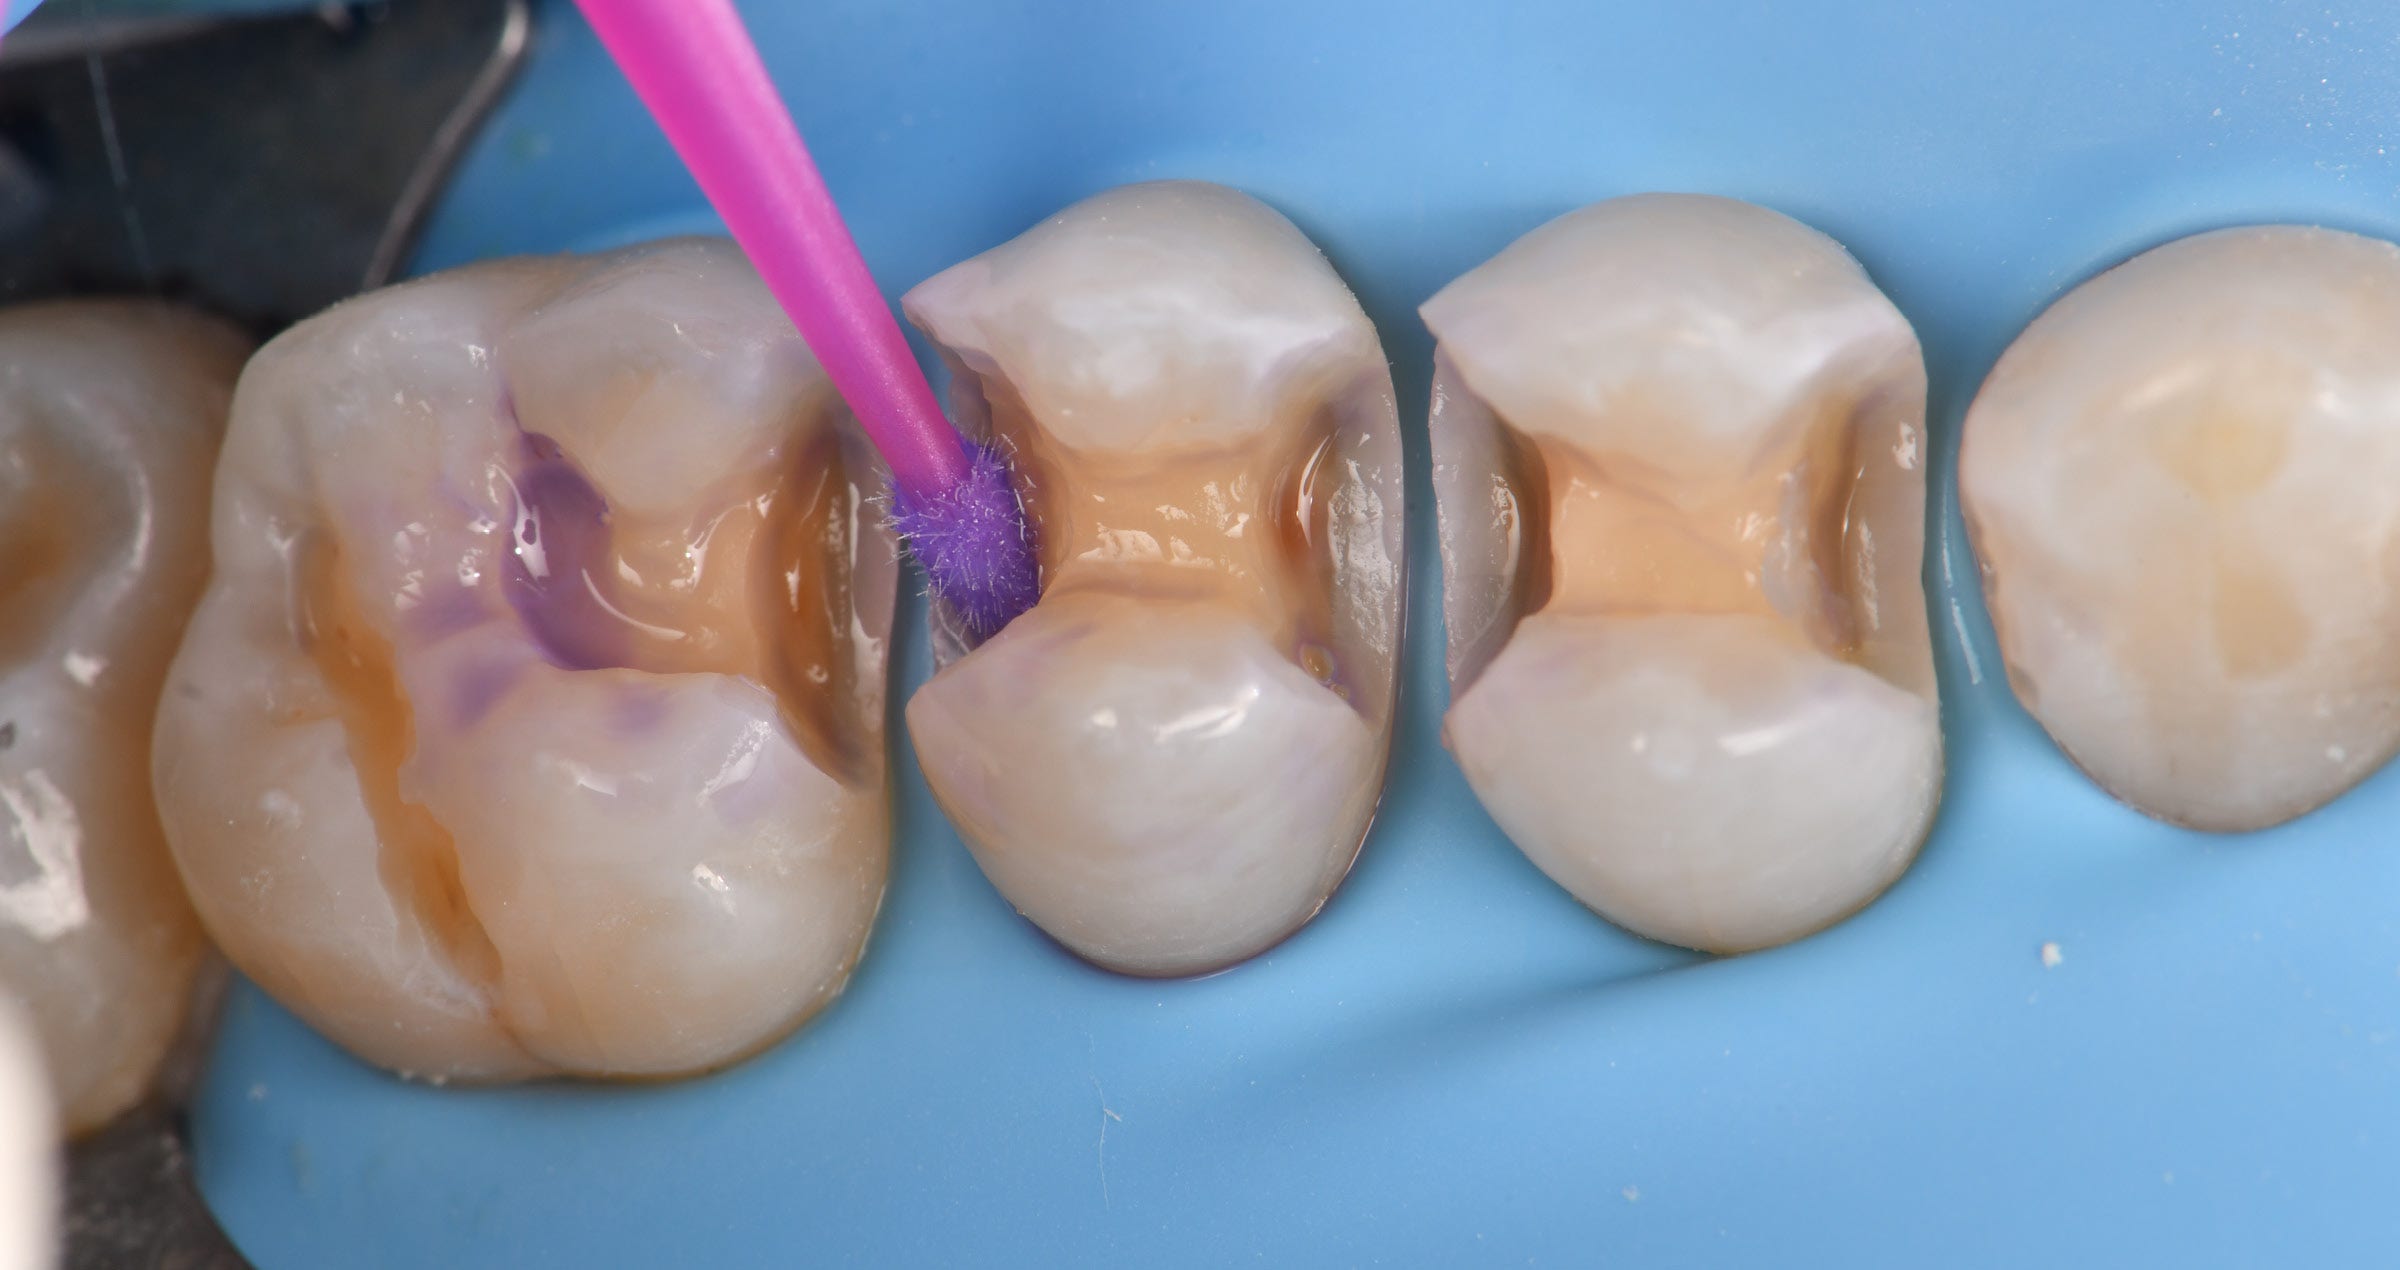
„CLEARFIL™ Universal Bond Quick“ aplikavimas 


Situacija iškart sušvirkštus „CLEARFIL MAJESTY™ ES Flow (Low)“, sukietinus šviesoje ir išėmus silikoninį gidą 


Proksimalinės dalies koregavimas sukamaisiais instrumentais 


Kokie yra didžiausi takaus kompozito švirkštimo metodo privalumai?


Pacientams ir gydytojams odontologams didžiausi privalumai – laiko ir pinigų taupymas. Daugelis pacientų negali sau leisti keraminių laminačių ir labai džiaugiasi, kai jiems pasiūloma aukštos kokybės alternatyva, kurią galima sukurti per vieną apsilankymą. Procedūra nereikalauja danties preparavimo, o restauracijas galima nesunkiai pataisyti arba, jei pageidaujama, pakeisti jų spalvą, todėl gydymo metu praktiškai nėra jokios rizikos. Gydytojai odontologai dažniausiai gali pradėti gydyti pacientus išklausę vieną kursą. Praktikuodami jie pasiekia tobulą rezultatą, tačiau ir pirmieji rezultatai dažnai būna gana įspūdingi, todėl pradedantiesiems nereikia didelių investicijų – nei laiko, nei naujų medžiagų. Žinoma, galite investuoti daug laiko į apdailos ir poliravimo procedūrą, bet esu tikras, kad rasite tinkamą pastangų ir rezultato pusiausvyrą. 

Takaus kompozito švirkštimo metodui taikyti reikalingas instrumentų rinkinys


Ar turite kokių nors rekomendacijų, kaip pradėti taikyti šį metodą? 


Visų pirma norėčiau paskatinti kiekvieną išeiti iš savo komforto zonos ir reguliariai bandyti ką nors naujo. Pradėti dirbti su takaus kompozito švirkštimo metodu man buvo didžiulis pokytis į gerąją pusę, daugiau niekada nenorėčiau dirbti be jo. Patarčiau prieš pradėdamas naudoti šį metodą būtinai baigti kursą, kuriame įgytumėte visų pirmojo atvejo sėkmei užtikrinti reikalingų teorinių žinių, o gal net ir sudalyvauti praktiniame seminare.


Michał Jaczewski per savo pristatymą „Kuraray Noritake Dental“ stende Kelne. 

Trauma case: Cementation of a fractured crown fragment

Case by Aleksandra Łyżwińska DMD, Warsaw, Poland


Dental injuries can be stressful for patients, parents of pediatric patients, and dentists alike. The following tips offer support in turning the treatment of crown fractures into a simple, quick and predictable procedure. In the case described, we opted for a reattachment of fractured crown fragments.


YOUNG PATIENT WITH A FRACTURED CENTRAL INCISOR

A 16-year-old patient presented immediately after an accident. Her maxillary left central incisor was fractured, involving half of the coronal enamel and dentin (Fig. 1). The pulp was not involved, but the fracture line was quite close to the pulp (Fig. 2). After examination and radiographic evaluation, the patient was anesthetized. When placing the rubber dam, it tore between the left central and lateral incisor (Figs. 3 and 4). Due to the patient’s young age and limited willingness to cooperate, the decision was made to proceed without replacing the rubber dam. This was expected to work well in this specific region due to the limited flow of saliva from the palate and a low associated risk of contamination.


Fig. 1. Fractured maxillary left central incisor at the day of the accident.


Fig. 2. Occlusal view of the maxillary anterior teeth with the pulp of the fractured central incisor shining through.


Fig. 3. Rubber dam placed and torn between the left central and lateral incisor.


Fig. 4. Occlusal view of the teeth isolated with rubber dam.


REMOVAL OF UNSUPPORTED ENAMEL PRISMS

In order to provide for a high-quality bond and natural aesthetics, unsupported enamel prisms should be removed. As the use of burs might be too invasive (removing too much structure) and thus hinder the alignment of crown fragments, air-abrasion with 50 μm alumina particles was the method of choice. To avoid iatrogenic pulp exposure, the deepest part of the affected tooth was protected with a colored flowable composite before sandblasting (Fig. 5). The adjacent teeth were protected using a metal strip (Fig. 6). Several seconds of air abrasion were sufficient to remove the enamel prisms and obtain a homogeneous enamel surface (Fig. 7). Subsequently, the colored flowable composite was removed from the dentin surface and the tooth fragment was treated in the same way.


Fig. 5. Preparations for sandblasting: Dentin area near the pulp protected with flowable composite.


Fig. 6. Protection of the adjacent teeth with a metal strip.


Fig. 7. Homogeneous enamel surface after air abrasion.


JOINING OF THE FRAGMENT WITH THE REMAINING TOOTH STRUCTURE

After air-abrasion treatment, the fit of the tooth and the fragment was checked and approved (Fig. 8). To improve retention of the fractured crown portion, it was bonded to a micro applicator using composite resin. Alternatively, prefabricated prosthetic carriers may be used. Then, selective etching of the enamel was performed on the tooth and the fragment (Figs. 9 and 10). During this procedure, the adjacent teeth were protected with a celluloid strip (Fig. 11). To better adapt the strip to the distal surface, a curved wedge was placed interproximally (Fig. 12).


The bonding system of choice was CLEARFIL™ SE Bond 2 (Kuraray Noritake Dental Inc.). After applying this adhesive to the tooth and the fragment (Fig. 13), a small portion of CLEARFIL MAJESTY™ ES Flow Super Low (Kuraray Noritake Dental Inc.) in the shade A2 was applied to the part of the fragment treated with adhesive.* After careful repositioning of the fragment and while holding it in place with the micro applicator, the composite was light cured.


Fig. 8. Perfect fit of the fragment to the tooth.


Fig. 9. Selective etching of the enamel on the tooth …


Fig. 10. … and the fragment.


Fig. 11. Position of the wedge …


Fig. 12. … used for better adaptation to the distal surface.


Fig. 13. Fragment treated with CLEARFIL™ SE Bond 2 PRIMER and BOND, which were both carefully air-dried, while the Bond was also light cured.


Fig. 14. Fragment back in place.


Fig. 15. Occlusal view of the teeth with the reattached fragment perfectly fitting the mould.


EXCESS REMOVAL AND POLISHING

Excess composite was removed with a scalpel blade and abrasive discs. The entire restoration was then polished using TWIST™ DIA for Composite (Kuraray Noritake Dental Inc., Fig. 16). A nice optical integration was obtained immediately after finishing due to fact that the fragment was stored in water during the waiting time and treatment. As observed with teeth isolated with rubber dam during treatment, teeth undergo dehydration outside the oral cavity. The effect is much stronger in the latter setting, making a fragment become chalky white. By keeping the fragment in water, dehydration is limited to a minimum and it is possible to properly evaluate the aesthetic outcome. This has a positive impact on patient satisfaction. In the present case, the fragment and the tooth structure had a similar appearance, both showing a slightly increased brightness as a result of manipulation under rubber dam or in the air, respectively.


Fig. 16. Immediately after polishing, the fragment has almost the same brightness as the tooth thanks to water storage. A slight dehydration effect is visible.


TREATMENT OUTCOME

To achieve optimal aesthetics and long-lasting gloss, the composite was repolished one week later (Fig. 17). This was accomplished with a light blue high-shine rubber polisher of the TWIST™ DIA for Composite system, followed by polishing with diamond paste and a goat hair brush.


Fig. 17. Treatment outcome after one week.


Teeth previously isolated with a rubber dam and the fractured crown fragment had undergone rehydration and returned to their natural colour. The colour adaptation is satisfactory. Harmonious light reflections on the labial surface of the treated tooth a beautiful, natural shine have made the fracture site nearly invisible. In addition to aesthetic value, good therapeutic results were also achieved - the tooth responds appropriately to stimuli and is pain-free.


CONCLUSION

The described approach is a valuable treatment option for anterior trauma cases with relatively large fragments that are still available. By reattaching the natural structure, the need for complicated and time-consuming multi-shade layering and free-hand modeling is eliminated, while all the remaining natural tooth structure is saved. Instead of preparing the tooth, a removal of the unsupported enamel prisms and roughening of the surface is absolutely sufficient. Key elements for a great optical integration and long-lasting success are the proper use of a high-performance adhesive as well as the selection of a composite that has the ability to properly blend into its environment and offers a nature-like gloss retention. The selected materials offer precisely these features, so that the great outcome may be expected to last.


*CLEARFIL MAJESTY™ ES Flow Super Low is indicated for cementation purposes. The cementation of tooth fragments, however, is not explicitly mentioned in the instructions for use. The decision to use the product in this context was made by the dental practitioner in charge of the treatment.


Dentist:

ALEKSANDRA ŁYŻWIŃSKA DMD


Aleksandra Łyżwińska graduated from the Medical University of Warsaw, where she later served as a lecturer and assistant in the Department of Conservative Dentistry with Endodontics. In her daily practice, she focuses on the broad field of adhesive dentistry. She is passionate about minimally invasive techniques and vital pulp therapy. Since 2020, she has been conducting courses in conservative dentistry, collaborating with major training centers in Poland and around the world. She is a key opinion leader for Kuraray Noritake. In her training sessions, she demonstrates that dental caries management doesn‘t have to be boring, and that the bond in the bottle is just as exciting as a spy movie. Instagram users know her as the creator of the educational profile for dentist @aleksandra.lyzwinska.


“Kuraray Noritake Dental Inc. is the Apple of the Dental World”

Technical Specialist for Chairside, Volkan Kacmaz, Introduces Himself


Volkan Kacmaz not only worked as a dentist in Turkey, but he also managed two clinics and earned a Master of Business Administration in Berlin. His diverse experiences seem to have led him to his current role as a Technical Specialist at Kuraray Noritake Dental Inc., headquartered near Frankfurt. Who is this friendly, smiley, and curious team member, and why did he specifically choose Kuraray?


While most dentists continue practicing dentistry throughout their careers, Volkan Kacmaz chose a different path. After graduating in 2011, he established his own dental clinic in Istanbul. A few years later, he served in the military for a year as a military dentist. Afterward, he founded two more franchise clinics, taking on the dual roles of manager and dentist. It was during this time that he realized dentistry wasn’t limited to clinical practice. “I’m eager to learn and have always been curious about how products work, the processes behind them, research and development, and the launch of new innovations,” he explains.


INNOVATION

In 2022, Kacmaz became the first dentist to enrol at the Berlin School of Economics and Law, where he learned about marketing, sales, negotiation, and regulations. Upon completing his Master of Business Administration, he made a deliberate decision to join Kuraray Noritake. “Kuraray Noritake's products are of very high quality, both labside and chairside. I already knew this from my experience as a dentist. The company has an excellent and trustworthy reputation among dental professionals,” he says.


Kacmaz also admires the innovative nature of the company. “Kuraray Noritake is responsible for some of the most significant innovations in dentistry. Just look at products like PANAVIA™ cement, the original MDP monomer, and multi-layered zirconia discs and blocks. It’s easy to see that Kuraray Noritake is a major force in the dental market. With their commitment to continuous improvement and innovation, you could call them the Apple of the dental world,” he adds.


Another aspect Kacmaz appreciates is Kuraray Noritake's product lineup. “The catalog isn't extensive, but it’s highly specialized. The company doesn’t produce just any product, but focuses on the ones it excels at, ensuring top-notch quality.” Lastly, Kacmaz loves the company culture. “It's a very respectful environment. I’ve had some bad experiences with respect in the past,” he says with a laugh, referring to his time in the military. “But at Kuraray Noritake, you can feel the respect for employees, which is very important to me. I’m very happy to be part of the Kuraray Noritake family.”


COURAGE

When comparing dentistry in Turkey to Western Europe, Kacmaz doesn’t see significant differences. “The brands, quality, and approaches are all the same.” However, he has noticed one small distinction: German dentists aren’t as enthusiastic about digital dentistry as their Turkish counterparts.


Kacmaz draws on all his previous experiences and knowledge in his role as part of the scientific marketing team. His responsibilities include finding scientific support for marketing initiatives. He collaborates with lecturers and dentists to manage research studies using Kuraray Noritake products, works to update measurements in response to market dynamics, and evaluates new products.


His goal? “To become an authority in the dental world,” he says with a smile. It may sound like an ambitious goal, but Kacmaz has learned to dream big. “The biggest decision of my life was leaving my comfort zone and moving to a country where I didn’t speak the language. But I believe it’s a courage you have to show. If you don’t, your dreams and plans will fade, and you’ll miss out on everything.”


LEARNING NEW THINGS

Moving to Germany, which Kacmaz describes as "the epicentre of the dental market," hasn’t always been easy. Coming from a Mediterranean culture, he was used to a more communal and lively environment. In Germany, he noticed that shops close early, and people value their privacy. Another challenge has been the language. While he prefers English, he says, “ein bisschen Deutsch, nicht so gut.”  Fortunately, Kuraray Noritake provides him with German lessons, and he has the best teacher at home—his three-year-old daughter, who learns the language faster than he does and sometimes corrects him.


Despite the challenges, all the adapting and hard work have been worth it. “I’ve realized that there are no limits to learning. Whether you’re in your 40s, 50s, or even 60s, there’s always something new to discover. You just have to be open to it.”


CONTACT

Volkan Kacmaz can be reached at +49 69 305 35134 or via volkan.kacmaz@kuraray.com.


ABOUT KURARAY NORITAKE DENTAL INC.

Kuraray was founded in 1926 in Kurashiki, Japan. Today, it is a leading global manufacturer of medical products, materials, textiles, chemicals, resins, and more. In 2012, Kuraray Medical and Noritake Dental Supply merged to form Kuraray Noritake Dental Inc. The company continues to deliver reliable dental bonding agents, ceramics, and other products to over 90 countries worldwide. Well-known products include the KATANA™ Zirconia range, CLEARFIL™ Universal Bond Quick, and PANAVIA™ resin cements.


Universal White: For all patients asking for a bleached effect

Case by Dr. Jusuf Lukarcanin


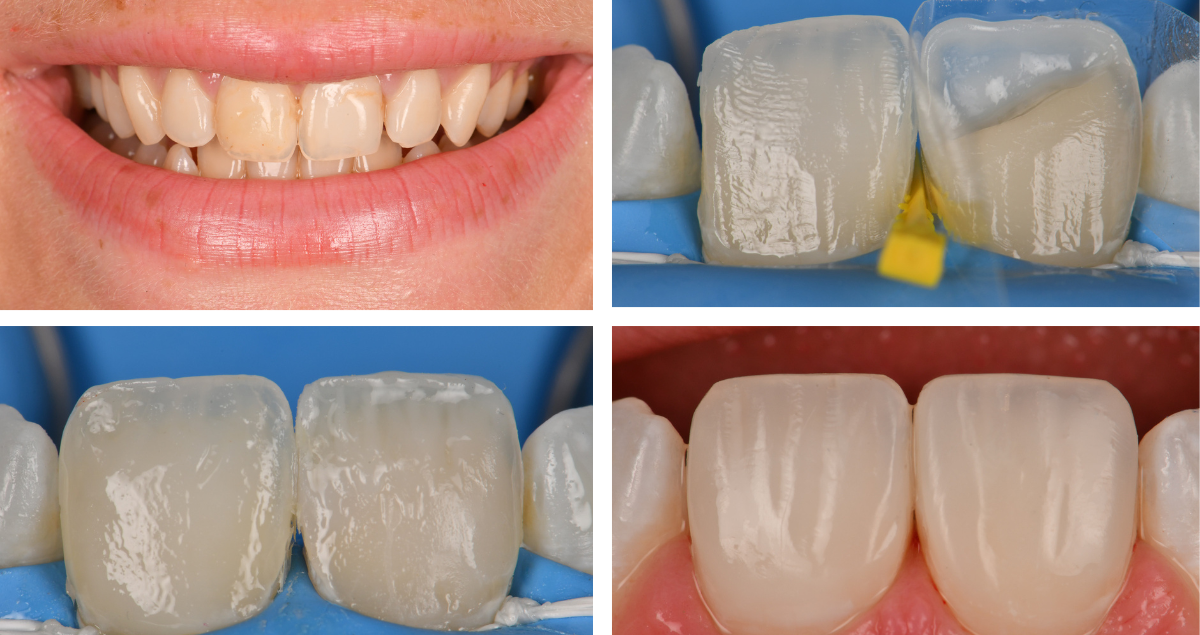
For all cases that require a particularly bright tooth shade – e.g. children or patients with bleached teeth / asking for a bleached effect in their restorations – CLEARFIL MAJESTY™ ES-2 Universal in the shade UW is likely to be the first choice. The young patient aged 28 shown below asked for diastema closure including shape and shade correction: She wanted to have a brighter, more beautiful smile.


Fig. 1. Initial clinical situation.


Fig. 2. Shape and shade correction were desired in this case.


Fig. 3. Treatment outcome …


Fig. 4. … leading to the beautiful smile the patient desired.


Reasons for selecting universal white:

- Cases requiring a particularly high brightness or value

- Restorations in deciduous teeth

- Restorations in bleached teeth


Universal white properties:

- Well-balanced translucency

- High light-scattering effect


CONCLUSION

One universal composite, four shades: In the case of CLEARFIL MAJESTY™ ES-2 Universal, this portfolio is absolutely sufficient for single-shade restorations even in the aesthetically demanding anterior region. Properties such as a nice blend-in effect, a great polishability and gloss retention over time support dental practitioners in creating beautiful restorations. As shade determination may be based on very few criteria instead of a complex shade guide, the whole restoration procedure becomes less stressful and more efficient. Furthermore, with only four shades to stock and usually no blocker needed, the number of materials on stock is reduced, leading to facilitations in stock management as well.

Dentist:

JUSUF LUKARCANIN


Dr. Jusuf Lukarcanin is a Certified Dental Technician (DCT) and a Doctor of Dental Science (DDS). He studied dentistry at the Ege University Dental Faculty in Izmir, Turkey, where he obtained a Master‘s degree in 2011. In 2017, he received a Ph.D. degree from the Department of Restorative Dentistry of the same university. Between 2012 and 2019, Dr. Lukarcanin was the head doctor and general manager at a private clinic in Izmir.


Between 2019 and 2020, he worked at Tinaztepe GALEN Hospital as a Restorative Dentistry specialist, between 2020-2022 he worked at MEDICANA International Hospital Izmir as a Restorative Dentistry specialist. Currently he is an owner of a private clinic for aesthetics and cosmetics in Izmir.


Bonding in minimally invasive repair procedures: tips and tricks

Article by Dr. Michał Jaczewski


Resin composites are wonderful restorative materials: They allow for minimally invasive, defect oriented tooth preparation, may be modelled as desired, and can be modified and repaired whenever necessary. To achieve all of this, however, a strong and long-lasting bond is an absolute requirement. The bond needs to be established either between enamel and dentin on one side and the resin composite on the other, or between the existing and the newly applied composite material.


UNIVERSAL ADHESIVE

Committed to keeping clinical procedures as simple as possible, I use an 8th-generation bonding agent – CLEARFIL™ Universal Bond Quick (Kuraray Noritake Dental Inc.) in my dental office. Containing Rapid Bond Technology, it allows for a particularly easy and straightforward use without the need for extensive rubbing or long waiting times. At the same time, it bonds well to various substrates including enamel, dentin and resin composite as it contains the original MDP monomer.


Its composition and resulting versatility make CLEARFIL™ Universal Bond Quick the first choice for many indications including non- to minimally-invasive repair procedures. As it works extraordinarily well in situations where we want to bond to dentin, enamel or old composite (Fig.1), it is usually not necessary to remove the whole existing restoration that needs to be repaired or modified. Instead, preparation may be limited to the composite part, so that no additional tooth structure needs to be removed.


Fig. 1. CLEARFIL™ Universal Bond Quick establishes a strong bond to dentin, enamel or old composite.


CLINICAL PROTOCOL

Depending on the condition of the existing restoration surface, the repair protocol may be slightly different. The basic steps are as follows:


PROTOCOL 1: OXYGEN INHIBITION LAYER STILL ON THE SURFACE

- No surface treatment required, rinse with water in case of contamination with blood or saliva, followed by air-drying and (optionally) adhesive application

- Apply new layer of composite immediately


PROTOCOL 2: OXYGEN INHIBITION LAYER ALREADY REMOVED FROM THE COMPOSITE SURFACE

- Remove the composite around the defect and create a bevel at the cavity margin with rotating instruments

- Sandblast the surface with aluminium oxide particles

- Fresh composite surface: Clean the surface with KATANA™ Cleaner (Kuraray Noritake Dental Inc.) or etch with phosphoric acid etchant

- Composite surface older than two weeks: Etch with phosphoric acid etchant

- Apply the universal adhesive (which contains silane)

- Apply a new layer of composite


CLINICAL RECOMMENDATIONS

1. STAY IN THE COMPOSITE DURING PREPARATION

When an old composite restoration needs to be replaced – e.g. because the existing restoration shows discolouration or the patient asks for a brighter shade – it is possible to remove only a part of the composite and leave the rest in place to save the underlying healthy tooth structure. Accurate control over the amount of material removed and the amount of material left in place is offered by the use of UV light. Under UV light, the composite is perfectly visible (Fig. 2). Hence, a highly conservative structure removal is supported (Fig. 3).


Fig. 2. Controlling structure removal with UV light, which nicely reveals the old composite.


Fig. 3. Tooth preparation with rotating instruments.


2. INCREASE ADHESION BY SANDBLASTING

Creating a clean, micro-retentive composite surface ideal for bonding: This is the aim of sandblasting the affected composite area with aluminium oxide particles (Fig. 4). The particle size I prefer is 27 μm. Residual particles, may be removed with 37% orthophosphoric acid, which needs to be rinsed off thoroughly before air-drying the surface (Figs. 5a and 5b).


Fig. 4. Air-abrasion with 27 μm aluminium oxide particles.


Fig. 5a. Phosphoric acid etching. Adjacent teeth are protected with PTFE tape.


Fig. 5b. Thorough rinsing to remove the etchant from the surface.


3. USE A UNIVERSAL ADHESIVE THAT CONTAINS SILANE

When bonding to old composite, silanisation of the surface is recommended to increase the bond strength. On dentin, a separate silane shows no positive effect. Hence, it is recommended to apply a separate silane to the composite surface only, a challenging task in situations with a surface consisting of tooth structure and composite. As CLEARFIL™ Universal Bond Quick contains silane, the separate silane application step may be skipped, which clearly simplifies the procedure (Figs. 6a and 6b).


Fig. 6a. Application of CLEARFIL™ Universal Bond Quick to the prepared surface.


Fig. 6b. Solvent evaporation with a gentle stream of air.


4. IF IN DOUBT, USE A UNIVERSAL ADHESIVE DURING REPAIR PROCEDURES

Whenever detected during restoration, defects in the composite layer or air bubbles can be repaired or eliminated right away. As long as the oxygen inhibition layer is still present, another layer of composite may be applied immediately without any prior steps. However, if the surface has been contaminated by saliva or blood (Figs. 7a and 7b) or it is unclear whether we are bonding to dentin, enamel or composite, CLEARFIL™ Universal Bond Quick may be applied (Fig. 8). On top, a new layer of composite is placed to restore the defect (Fig. 9).


Fig. 7a. Composite surface with a defect near the margin with blood contaminating the affected area.


Fig. 7b. Composite surface with a defect near the margin after thorough rinsing and drying.


Fig. 8. Application of the universal adhesive.


Fig. 9. Application of composite material to restore the defect.


5. IF AVAILABLE, PLACE A SILICONE INDEX TO SIMPLIFY ANATOMICAL SHAPING

If the defect is small, it is possible to apply the flowable composite directly and remove the excesses (Fig. 10). The obtaining of a natural shape and smooth transition between old and new composite, however, is simplified by the use of a silicone index or matrix (Fig. 11), which might still be present from the original restoration procedure. A possible outcome of this type of repair is shown in Figure 12; both images were taken prior to finishing and polishing.


Fig. 10. Flowable composite spreading and excess removal.


Fig. 11. Silicone index placed over the teeth including the tooth with the defect.


Fig. 12. Outcome of the flowable injection procedure.


CONCLUSION

Elimination of bubbles or defects in a freshly created restoration, changes in the colour of an existing filling or a shape correction due to wear processes: Modifying composite restorations can be easy – provided that appropriate materials and techniques are used. One of the key elements on the path to success is the selection of a suitable adhesive system, preferably a universal single-bottle adhesive like CLEARFIL™ Universal Bond Quick, which allows for streamlined procedures and supports excellent outcomes. By respecting the provided tips, it is possible to create the desired outcomes in a minimally invasive, straightforward way, laying the foundation for long-lasting aesthetics and function.


Dentist:

MICHAŁ JACZEWSKI


Michał Jaczewski graduated from Wroclaw Medical University in 2006 and today runs his private practice in the city of Legnica, Poland. He specializes in minimally invasive dentistry and digital dentistry and is the founder of the Biofunctional School of Occlusion. Here he lectures and runs workshops with focus on full comprehensive patient treatments.


Don't take your work with you

Leaving work at work, unplugging your mind from the dental office is not rocket science - provided that high-quality dental materials are used. Ideally, they are well-adapted to operator, case, and patient-specific needs. When it comes to restoring cavities with composite, Kuraray Noritake Dental Inc. has got the right products for any dental professional.


The CLEARFIL MAJESTY ES family of dental composites is composed of different product lines designed to meet specific needs. Altogether, the line-up offers a solution for every technique and handling preference, clinical situation and patient requirement.


UNIVERSAL SOLUTION FOR UTMOST SIMPLICITY


When utmost simplicity is desired, a highly innovative universal solution such as CLEARFIL MAJESTY ES-2 Universal is an excellent choice. This paste-type composite system includes only four shades: Universal, Universal Light, Universal Dark, and Universal White.


The Universal shade has the highest translucency and is, therefore, most suitable in cases where several cavity walls are still present, such as in Class I or II cavities and the cervical area. In cavities where light easily passes through, the lower-translucency variants Universal Light (for teeth with shades up to A3) and Universal Dark (for teeth darker than A3) are the best options. Universal White is the go-to solution for young patients and whitened teeth. Consequently, there is usually no need for a shade guide, and the optical properties allow application without an opaquer or blocker in most of cases. Both features greatly simplify the clinical procedure.


CLASSIC AND PREMIUM OPTIONS FOR SINGLE- AND DUAL-SHADE LAYERING

Clinicians who prefer classical single-shade layering according to a shade guide and a greater number of shades available may prefer CLEARFIL MAJESTY ES-2 Classic. With a line-up of 18 shades, it supports straightforward procedures and leads to aesthetic results.


Whenever the aesthetic needs are very high, such as in the context of restoring a large cavity in the aesthetic anterior region, CLEARFIL MAJESTY ES-2 Premium may be the best option. Designed for simplified multi-shade layering, it comes with fixed shade combinations of dentin and enamel opacity, that greatly support predictable outcomes.


MECHANICAL PROPERTIES

All the CLEARFIL MAJESTY ES paste-type composite systems offer a well-balanced viscosity and excellent mechanical properties, including

  • a high flexural strength of 118 MPa
  • a filler load of 78 wt%
  • a compressive strength of 347 MPa
  • a low volumetric shrinkage of 1.9 %
  • a curing depth of 2.0 mm and
  • a long working time under ambient light of 4.5 minutes

VERSATILITY POWERHOUSE IN THREE VISCOSITIES>

A flowable composite completes the portfolio. As the ideal level of viscosity depends on individual preferences and on the specific indication, CLEARFIL MAJESTY ES Flow comes in three different flowabilities: high, low and super low.


They have:

  • a high flexural strength of 145, 151 and 152 MPa, respectively
  • a filler load of 71, 75 and 78 wt%, respectively
  • a compressive strength of 358, 373 and 374 MPa, respectively and
  • a working time under ambient light of 100 seconds.

In addition, they are well-received for their easy application, fast polishing and high polish retention. All these features make the product a true versatility powerhouse. Moreover, it is offered in an innovative syringe designed for bubble-free application of the desired amount of composite and easy modelling.


THE IDEAL PORTFOLIO FOR PEACE OF MIND

The CLEARFIL MAJESTY ES portfolio offers highly suitable products for many clinical situations, demands and treatment techniques. As they support predictable outcomes and long-lasting success, using them gives dental practitioners the peace of mind needed to leave work at work and truly enjoy their free time—in the evening at home, on weekends or on holiday.


For more information about Kuraray Noritake Dental Inc.’s composite solutions visit the website.


Universal adhesive in the context of different repair procedures

Article by Dr. Michał Jaczewski


When working with composite, one of the most important aspects is to understand the mechanisms of adhesion. Choosing the right composite is one thing, but choosing a suitable bonding system and using it correctly is an equally important aspect affecting the long-term performance of a direct restoration.


There are many bonding products on the market - two-bottle (primer and bond) but also single-bottle systems. For anyone trying to select an ideal adhesive for a specific clinical case, the sheer number of available products can be challenging. The temptation to use them all, in slightly different ways, has the potential to create errors. In my dental practice, I am committed to simplifying procedures.


This is why I started looking for a bonding system that would offer a sense of security in terms of adhesion, but also ease of use in different clinical situations. I have opted for the 8th-generation bonding agent with the desired features - CLEARFIL™ Universal Bond Quick (Kuraray Noritake Dental Inc.). The single-bottle universal adhesive is ideal for a broad variety of bonding procedures carried out in the dental office.


IMPRESSIVE FEATURES

CLEARFIL™ Universal Bond Quick can be used in the total-etch as well as the selective enamel etching technique in combination with an etching gel such as K-ETCHANT Syringe (Kuraray Noritake Dental Inc.). It is also a self-etching adhesive. Used in combination with the dual-cure build-up material CLEARFIL™ DC CORE PLUS or the dual-cure universal resin cement PANAVIA™ SA Cement Universal (both Kuraray Noritake Dental Inc.), it is also an ideal choice for cementation in the root canal and for cementing inlays or crowns made of a variety of different restorative materials – from metal to zirconia or lithium disilicate. Efficient clinical procedures are supported by the incorporated Rapid Bond Technology, which eliminates the need for extensive rubbing or waiting for the adhesive to penetrate the substrate and the solvent to evaporate. Among the key components of this technology are hydrophilic amide monomers, which allow the adhesive solution to penetrate moist dentin extraordinarily quickly, while also having a high curing ability. In addition, the original MDP monomer is included in the formulation. Together with the amide monomers, it provides for a high bond strength to enamel and dentin – achievable in a simple procedure of application, air-drying and light-curing.


The described properties turn CLEARFIL™ Universal Bond Quick into one of the most versatile and easy-to-use adhesive bonding solutions in the dental office. Operator sensitivity is low, as is its technique sensitivity, since the three-step procedure is always the same. The following case examples illustrate its use in the context of different repair procedures.


REPAIR OF COMPOSITE RESTORATIONS

One of the major benefits of using composite as a restorative material lies in the fact that it may be modified and repaired at any time. Regardless of whether an air bubble is detected on the surface, the shade needs to be adjusted, a fracture occurs or materials need to be added as a result of wear, modification or repair is easily accomplished without needing to sacrifice additional amounts of healthy tooth structure. Whenever a silicone index has been produced for the initial treatment and is still available, and the user knows which composite has been utilized for the original restoration, the Flowable Injection Technique may be selected as a particularly easy and efficient way of repairing a restoration. However the recommended protocol is slightly different depending on the state of the restoration surface.


CASE EXAMPLE 1: IMMEDIATE REPAIR PROCEDURE

When a restoration has been damaged or an air bubble has appeared during injection of a flowable composite, the procedure is slightly different. In this case, the oxygen inhibition layer is usually still present on the surface of the restoration. Therefore, it is possible to simply apply an additional portion of composite (Figs. 1a to 1d). Even after contamination of the composite surface with water, saliva or blood, this measure is possible. The surface merely needs to be rinsed thoroughly and dried before applying the new portion of composite. For maximum safety, a universal adhesive may be used as well.


Fig. 1a. Repair procedure applicable for defect within a composite restoration whenever the oxygen inhibition layer has not yet been removed: Air bubble detected in the interproximal region.


Fig. 1b. Application of a new portion of composite after rinsing and drying. The adjacent surface is protected with PTFE tape.


Fig. 1c. Repositioned silicone index used to give the restoration the originally planned shape.


Fig. 1d. Final restoration.


CASE EXAMPLE 2: REPAIR PROCEDURE AFTER POLISHING

If a similar defect is detected during finishing and polishing, i.e. when the oxygen inhibition layer has already been removed (Fig. 2), a roughening of the surface is strictly necessary. With a bevelled preparation of the area with the air bubble, optimal conditions are created for another layer of composite that blends in well with the surrounding material (Fig. 3). After bevelling, the surface needs to be sandblasted and cleaned either with KATANA™ Cleaner (Kuraray Noritake Dental Inc.) (Fig. 4a) or with 37 % orthophosphoric acid (Fig. 4b). After thorough rinsing and drying, an additional portion of composite may be applied to the surface (Figs. 5a to 5c). As the defect is small, the composite may be applied instead of injected and the silicone index repositioned afterwards.


Fig. 2. Void on the surface, detected during finishing.


Fig. 3.  Removed void and bevelled area around the defect.


Fig. 4a. Option 1: Cleaning of the surface with KATANA™ Cleaner.


Fig. 4b. Option 2: Etching with K-ETCHANT Syringe.


Fig. 5a. Application of composite (CLEARFIL MAJESTY™ ES Flow Low).


Fig. 5b. Repositioning of the original silicone index to obtain the desired shape.


Fig. 5c. Final restoration with a nice blend-in of the different layers of composite.


CASE EXAMPLE 3: REPAIR PROCEDURE AFTER TWO OR MORE WEEKS

For damaged restorations which have been in place for more than two weeks, an ideal composite-composite interface needs to be created by bevelling and roughening of the surface. A perfect example is presented in Figure 6. The most important step influencing the success of the procedure is proper preparation of the composite surface. To lay the foundation for a strong bond between the new and the old composite as well as for aesthetic outcomes, a bevel needs to be created (Figs 7a and 7b) to facilitate a smooth transition between the two layers. Once the bevel is completed, the surface should be sandblasted with alumina particles sized 27 μm (Fig. 8). The following recommended steps are etching of the composite with 37 % orthophosphoric acid (Fig. 9) and finally application of CLEARFIL™ Universal Bond Quick (Fig. 10). As the universal adhesive contains a silane coupling agent, separate silane application is not necessary. Instead, the new layer of composite may be applied immediately e.g. using the flowable injection technique with an existing matrix (Fig. 11).


Fig. 6. Fractured anterior composite restoration benefitting hugely from repair – the remaining composite is in a great state regarding colour and shape.


Fig. 7a.  Bevelling with dedicated instruments.


Fig. 7b.  Ideal bevel created to provide for a strong bond and great optical blend-in.


Fig. 8. Sandblasting of the surface with alumina particles.


Fig. 9.  Phosphoric acid etching.


Fig. 10. Application of the universal adhesive.


Fig. 11. Composite applied using the flowable injection technique.


Fig. 12. Treatment outcome.


CONCLUSION

The three described repair protocols are straightforward and work well – provided that a strong bond is established at the composite-composite interface. The way it is established may be slightly different depending on whether the oxygen inhibition layer is still present or has already been removed. Using a universal adhesive like CLEARFIL™ Universal Bond Quick, the procedure is simplified owing to elimination of steps such as the separate application of silane.


Dentist:

MICHAŁ JACZEWSKI


Michał Jaczewski graduated from Wroclaw Medical University in 2006 and today runs his private practice in the city of Legnica, Poland. He specializes in minimally invasive dentistry and digital dentistry and is the founder of the Biofunctional School of Occlusion. Here he lectures and runs workshops with focus on full comprehensive patient treatments.


Quality and Inventory Management in the Dental Lab

DELICATE BALANCE BETWEEN COSTS AND AESTHETICS IN DENTAL LAB

When you are a lab owner striving to achieve high-end results using modern digital techniques, the initial investment in CAD/CAM technology is significant, followed by ongoing costs for expendable items such as milling tools and blanks. That cost can be reduced by selecting universal, high-quality materials.


Undoubtedly, zirconia stands out as one of the most popular materials on the market. From an inventory perspective, however, lab owners often find themselves purchasing multiple discs of the same shade and thickness. The reason is that they need to meet all requirements for strength and aesthetics in different settings – enabling them to cover all kinds of restorations and deliver excellent patient outcomes.


UNIVERSAL SOLUTION FOR DENTAL LABS

At Kuraray Noritake Dental Inc., we take pride in not only developing the first-ever multilayer zirconia, KATANA™ Zirconia ML, but also in our commitment to delivering the highest quality materials that we can.


KATANA™ Zirconia YML, our latest addition to the KATANA™ Zirconia line-up, exemplifies this dedication and offers universal applicability. The universal feature is based on the fact that KATANA™ Zirconia YML disc not only offers colour gradation, but also impressive flexural strength and translucency gradation, with maximum values of up to 1,100 MPa and 49 % translucency, respectively.


INHOUSE PRODUCTION - THE PATH TO HIGH QUALITY ZIRCONIA DISC

Like all our zirconia offerings, KATANA™ Zirconia YML begins its journey to the dental lab in our Japanese facility where raw zirconia powder undergoes special treatment process before the addition of essential components.


Once the material has undergone this thorough initial stage, it progresses to the pressing and pre-sintering phase to form the disc. Every detail is carefully calculated, managed and controlled. This phase of the process takes several days, underscoring our goal to achieve the most aesthetic product.


HIGH-SPEED SINTERING PROGRAM: 54 MINUTES

The unique powder formulation and refinement process, as well as the pressing and pre-sintering technique, is the key to allow our customers to realize restorations of up to three-unit bridges without any compromise in terms of aesthetics or mechanical properties using the 54-minute high-speed sintering* process.


This high quality, lengthy production process results in an exceptionally dense material, which once sintered, goes on to deliver a high strength, high aesthetic final restoration.


HIGH PRECISION SHRINKAGE AND STABLE CTE VALUES FOR EXCEPTIONAL FIT

Outstanding deformation stability during the sintering procedure, contributes to the stability during the final sintering process in the dental laboratory, providing for an exceptional fit of large-span bridges and other restorations.


MULTI-LAYERED STRUCTURE AND EASE OF POSITIONING OF RESTORATIONS IN THE BLANK

To enhance aesthetic qualities, all KATANA™ Zirconia YML discs are designed using ratios rather than fixed measurements of different layers in the multi-layered structure. This means that regardless of the disc's thickness, there is always a consistent ratio of 35 % of raw material that constitutes the translucent enamel zone. Hence, discs with an increased height, which are typically used for the production of larger restorations, will always offer sufficient space in the enamel zone, while smaller discs are optimized for smaller restorations.


ONE DISC. ALL INDICATIONS.

These qualities empower dental lab owners to deliver a wide range of restorations. The material is suitable for single crowns to full-arch structures, for full-contour designs to conventional frameworks, using a single material without compromising on aesthetics: KATANA™ Zirconia YML. For finishing, we offer a well-aligned portfolio of solutions designed for internal and external staining, micro-layering and full layering.


EXPLORE KATANA™ Zirconia YML: WEALTH OF RESOURCES, CLINICAL CASES AND FAQS

Visit our website to discover more about KATANA™ Zirconia YML. You will find useful materials such as brochure, technical guide, in-depth technical information.


Would you like to see the material in action – browse the blog section of our website that offers a variety of clinical cases and articles by world-renowned experts showcasing and proving the versatility and aesthetics of KATANA™ Zirconia YML.


*The material is removed from the furnace at 800°C. A furnace with a configurable KATANA™ Zirconia YML firing program is required.


BEST.FIT: A hybrid technique for an efficient and aesthetic restoration of anterior teeth

Case by Dr. Enzo Attanasio

The introduction of new-generation composites, equipped with nanofillers and highly loaded, has opened doors to new techniques for managing direct and semi-direct restorations. In particular, over the last ten years, there has been a significant revolution in the world of flowable composites. Nowadays, these materials offer a filler percentage very similar to packable composites through precise interventions in resin matrix management. They come in various viscosities, offering numerous advantages both in terms of handling and clinical use, as well as beneficial mechanical and physical characteristics.


FLOWABLE INJECTION TECHNIQUE

This new era of flowable composites has seen the development of a technique known as the Flowable Injection Technique (also referred to as injection moulding). It enables dental practitioners to reproduce anatomical forms created by a dental technician in the laboratory through a diagnostic wax-up. The shapes planned on the model are transferred directly in the patient's mouth using transparent silicone matrices or indexes, into which the composite is injected through specific injection holes.


The main difference compared to traditional mock-ups is that the reproduced dental elements remain separate from each other. This technique provides predictable results identical to those developed on the technician's wax-up, requiring less chair time than direct veneering and offering a longevity similar to traditional composite restorations.


BENEFITS AND CHALLENGES

The major benefit of this technique is the faithful reproduction of morphological details that the technician creates on the diagnostic wax-up, which the clinician can reproduce with minimal effort. The restoration produced through the flowable injection technique, if all steps are followed correctly, requires minimal finishing by the clinican, who only needs to focus on polishing the composite.


However, one limitation is the difficulty in isolating the operative field, often requiring a split-dam technique or labial retractors, with all the associated adhesive challenges. The use of a rubber dam is only feasible if the peripheral dental tissues around the restoration are euchromatic, allowing the technician to create a wax-up with supragingival preparation margins.


Another compromise with the flowable injection technique is the management of the composite as a single mass. This makes it only possible to reproduce natural incisal translucencies typical of young patients by performing complex cutbacks and subsequent incisal painting. Without specific operator skills, the outcomes of this time-consuming manual procedure are unpredictable.


HYBRID TECHNIQUE: BEST.FIT

To leverage the advantages of both classical direct anterior restoration and flowable injection techniques and eliminate the limitations, a hybrid technique known as BEST.FIT (Buccal Enamel Shade Through Flow Injection Technique) has emerged. This technique allows the operator to manage the delicate phase of reproducing the buccal enamel layer of the anterior restoration through the flowable injection technique, keeping certain aspects in mind during the injection phase.


PROCEDURE

The transparent silicone key used for the creation of the buccal enamel layer is similar to the one used in the original flowable injection technique. The initial phase of restoration management follows all the classical steps of direct technique, requiring isolation with rubber dam. The palatal enamel layer is recreated with a highly translucent packable composite, and the palatal portion of the interproximal walls is produced using a suitable matrix system. Then, the core of the restoration is defined with opaque masses, creating mamelons and adding incisal effects. It's crucial to control the residual enamel thickness using a vestibular silicone index, aiming for about 0.3 mm of space. The buccal portion is finally reconstructed during the injection phase. The transparent silicone index created on the wax-up should be tested after each reconstruction phase to ensure passive insertion.


After creating the restoration core, the element to be injected is separated from the contiguous ones with thin PTFE tape. The transparent mask is then inserted, and fluid composite is injected through the injection holes to precisely reconstruct the buccal enamel thickness. The composite tip should be positioned at least halfway through the buccal surface, and the injection should be slow and controlled to avoid air bubbles in the material.


FINISHING

Following a 40-second polymerization vestibularly and occlusally, the transparent matrix is carefully removed, and excess interproximal composite above the PTFE tape as well as any remaining composite cylinder from the injection holes are removed. After completing all restorative elements, the rubber dam is dismantled, and composite excess is finished. After checking the occlusion, the composite is polished, usually requiring no further intervention.


CASE EXAMPLE

Fig. 1. Female patient with discoloured anterior restorations desiring a smile makeover.


Fig. 2. Close-up of her maxillary anterior teeth.


Fig. 3. Restorations in need of replacement: Lateral view from the right.


Fig. 4. Restorations in need of replacement: Lateral view from the left.


Fig. 5. Printed model based on a digital diagnostic wax-up based on a digital impression.


Fig. 6. Palatal silicone index produced for the conventional direct restoration steps.


Fig. 7. Transparent matrix with injection holes produced for the build-up of the buccal enamel layer using the flowable injection technique.


Fig. 8. Operative field isolated with rubber dam.


Fig. 9. Existing restorations removed and tooth surfaces roughened at the start of treatment.


Fig. 10. Palatal silicone index positioned intraorally for the build-up of the palatal wall.


Fig. 11. Checking of the space available in the vestibular area with a second silicone index.


Fig. 12. Etching with phosphoric acid etchant.


Fig. 13. Application of a universal adhesive (CLEARFIL™ Universal Bond Quick, Kuraray Noritake Dental Inc.).


Fig. 14. Palatal walls built up with CLEARFIL MAJESTY™ ES-2 Premium in the shade A1E with the aid of the palatal silicone index.


Fig. 15. Build-up of the interproximal walls with CLEARFIL MAJESTY™ ES-2 Premium in the shade A1D and establishing of the contact points using anatomical sectional matrices for the posterior area placed vertically.


Fig. 16. Dentin core built up with CLEARFIL MAJESTY™ ES-2 Premium in the shade A2D. CLEARFIL MAJESTY™ ES Flow Super Low in the shade XW was applied on the mamelons, while CHROMA ZONE™ COLOR STAIN Blue (Kuraray Noritake Dental Inc.) was used to reproduce incisal translucencies in the spaces not covered by the dentin core.


Fig. 17. Try-in of the transparent matrix for flowable injection.


Fig. 18. Isolation of the adjacent teeth with PTFE tape for a one-by-one injection.


Fig. 19. CLEARFIL MAJESTY™ ES FLOW Low in the shade A2 (Kuraray Noritake Dental Inc.) injected for the anatomical shaping of the maxillary right central incisor.


Fig. 20. Situation after flowable injection for all four anterior teeth, light curing through the matrix, final matrix removal and excess removal.


Fig. 21. Treatment outcome …


Fig. 22. … with visible mamelons, natural incisal translucencies …


Fig. 23. … and a lifelike anatomical shape …


Fig. 24. … of the restorations.


CONCLUSION

Each work phase must be executed with extreme care to lay the foundations for a passive linking of all subsequent steps without creating difficult management situations. The BEST.FIT technique is a convenient and useful method for dental practitioners to manage multiple direct anterior restorations simply and predictably, especially in situations requiring complex rehabilitations with large restorations.


Dentist:

ENZO ATTANASIO


Enzo Attanasio graduated in 2008 in Dentistry and Dental Prosthetics from the Magna Graecia University of Catanzaro. In 2009, he went on to specialize in the use of laser and new technologies in the treatment of oral and perioral tissues at the University of Florence. That year he also attended Prof. Arnaldo Castellucci’s course in Clinical Endodontics at the Teaching Center of Microendodontics in Florence where, in 2012, he went on to complete his training in Surgical Microendodontics. In 2017 he attended a course on Direct and indirect Adhesive Restorations at Prof. Riccardo Becciani’s Think Adhesive training center in Florence where he later become a tutor. Today, as a member of the Italian AIC and based in Lamezia Terme, Italy, Dr Attanasio has a special interest in Endodontics and Aesthetic Conservative.


Universal: Whenever a high translucency is desired

Case by Dr. Jusuf Lukarcanin


In teeth in which the areas to be restored are surrounded by a lot of non-discoloured tooth structure - as may be the case in Class I, II and Class V cavities - the use of CLEARFIL MAJESTY™ ES-2 Universal in the shade U may be an option. The 28-year-old patient, who presented for diastema closure, had teeth with a comparatively low translucency and different shades due to smoking and excessive coffee consumption. As the composite was applied in enamel areas only, the relatively high translucency of the universal shade seemed beneficial in this case.


Fig. 1. Initial clinical situation.


Fig. 2. New smile of the patient.


Reasons for selecting universal:

- Large amounts of underlying or surrounding tooth structure present

- Medium light-scattering desired


Universal properties:

- High translucency

- Medium light-scattering effect


Dentist:

JUSUF LUKARCANIN


Dr. Jusuf Lukarcanin is a Certified Dental Technician (DCT) and a Doctor of Dental Science (DDS). He studied dentistry at the Ege University Dental Faculty in Izmir, Turkey, where he obtained a Master‘s degree in 2011. In 2017, he received a Ph.D. degree from the Department of Restorative Dentistry of the same university. Between 2012 and 2019, Dr. Lukarcanin was the head doctor and general manager at a private clinic in Izmir.


Between 2019 and 2020, he worked at Tinaztepe GALEN Hospital as a Restorative Dentistry specialist, between 2020-2022 he worked at MEDICANA International Hospital Izmir as a Restorative Dentistry specialist. Currently he is an owner of a private clinic for aesthetics and cosmetics in Izmir.


Užsiregistruokite naujienoms