Blogi

Clinical case with CLEARFIL™ MAJESTY ES-2 Universal

Clinical case with CLEARFIL™ MAJESTY ES-2 Universal

Case by Dr Paul Guicherit


A girl presented to the dental office after a bicycle accident. She had a traumatized maxillary left central incisor and an abrasion injury was visible on and above her upper lip.


The tooth was restored immediately using CLEARFIL™ MAJESTY ES-2 Universal in the shade UL (Universal Light).


The outcome was excellent due to a great optical integration and an invisible transition between the tooth and the resin composite.


Clinical photo credits: Dr Paul Guicherit


Fractured cusp treatment and amalgam replacement with a lithium disilicate crownlay

Fractured cusp treatment and amalgam replacement with a lithium disilicate crownlay

Case by Max Andrup


This is the story of cusp fracture due to cuspal tension. This is a common weakness of amalgam-restored teeth associated with expansion of the restorative material. The affected maxillary right first premolar was restored with a crownlay.


For seating of the crownlay, the use of warmed light-curing resin composite (CLEARFIL™ AP-X) has proven its worth. Compared to a dual-cure luting resin, the selected material offers many benefits including the fact that the heat assists in the conversion of monomers to polymers, the time available to remove excess is almost unlimited, and the composite offers better bio-mechanical properties as well as a lower polymerization shrinkage stress.


Fig. 1. Pre-operative situation. The patient requested for an emergency appointment, where we temporarily fixed the lost buccal cusp and made a new appointment for a crownlay preparation. After removing the amalgam and temporary filling, the remaining amount of tooth structure was quite beneficial with a large lingual cusp and a ring of enamel around the whole tooth.


Fig. 2. The decision was made to reduce the lingual cusp and to place a crownlay working in compression. As the thickness of the cusp was adequate for an onlay, this treatment option would have been equally suitable. After tooth preparation, immediate dentin sealing was performed: For this purpose, I air-abraded the dentin to remove the smear layer and give the adhesive the best condition for a strong bond to dentin. Then, CLEARFIL™ SE Protect was applied to the tooth surface and covered with a thin layer of flowable resin composite (CLEARFIL MAJESTY™ Flow) to ensure a total seal.


Fig. 3. The resin composite surface was air-abraded with 50 μm zirconia particles, followed by selective etching of the enamel with a 35-percent phosphoric acid etchant. After try-in of the crownlay made of lithium disilicate, the tooth surface and the restoration were cleaned with KATANA™ Cleaner.


FINAL SITUATION


Fig. 4. The cleaned crownlay was pre-treated with CLEARFIL™ Ceramic Primer, before warmed CLEARFIL™ AP-X was applied to both tooth structure and restoration for luting. The colour of the crownlay matched the colour of the adjacent premolar, while the visible part of the restored tooth’s remaining structure was stained from amalgam corrosion.


Dentist:


Max Andrup graduated from the University of Umeå in 2010 and today runs his private practice in the city of Hudiksvall, Sweden. He has a passion for restorative dentistry with a biomimetic approach.


Clinical case - Crowns on 12/11/21/22

By Dr Alessandro Devigus


This video illustrates the Cementation of Katana STML Crowns with Panavia V5.


Dentist:


DR. ALESSANDRO DEVIGUS


Dr. Alessandro Devigus received his degree from Zurich University, Switzerland, in 1987. Since 1990 his working in his own private practice with a focus on CAD CAM and Digital Dentistry. He is also CEREC Instructor at the Zurich Dental School.


Dr. Alessandro Devigus is an active member of the European Academy of Esthetic Dentistry (EAED), founder of the Swiss Society of Computerized Dentistry, Neue Gruppe member, ITI fellow and speaker.


Dr. Devigus is editor-in-chief of the International Journal of Esthetic Dentistry, author of various publications and an international lecturer.


Replacement of a fractured restoration with a new universal composite material

Case by Max Andrup


This patient had requested for an emergency appointment and presented with severe erosive tooth wear in several teeth, a crack in the mesial wall of the maxillary first molar and a failing direct restoration with recurrent decay on the adjacent second premolar. I decided to replace the direct resin composite restoration immediately as this was the main cause of discomfort. It was decided to restore the other defects during the next appointment.


The resin composite of choice was CLEARFIL MAJESTY™ ES-2 (Universal shade concept), an innovative material with a single universal shade designed for posterior restorations. The manufacturer claims that, due to the integration of Kuraray Noritake Dental Inc.’s light diffusion technology, this universal shade nicely blends in with the surrounding tooth structure virtually independent of its colour. Curious about the real potential of this concept, I wanted to put the material to a test.


Fig. 1. Pre-operative situation revealing signs of severe erosive tooth wear, a cracked mesial wall of the first molar and a failed filling on the second premolar with recurrent decay.


Fig. 2. Appearance of the tooth after removal of the direct composite restoration. The recurrent caries is obvious.


Fig. 3. Caries Detector applied to the decayed tooth structure.


Fig. 4. Establishing of a peripheral zone totally free of caries with the aid of Caries Detector. It may be useful to apply the dye several times.


Fig. 5. The final situation after several applications of Caries Detector. The peripheral zone is completely free of caries, which is a strict requirement for the establishment of a perfect seal during bonding. Affected caries stained light pink is not removed not to risk going near the pulp.


Fig. 6. Build-up of the proximal wall with CLEARFIL MAJESTY™ ES-2 (U shade) after the application of CLEARFIL™ SE Protect and a small layer of CLEARFIL MAJESTY™ ES Flow in a thickness of about 0,5 mm. By focusing on the proximal wall connecting to enamel first, the hybrid layer is given the time needed to mature. Not putting a new increment on top of the hybrid layer for the first five minutes will lead to an increased bond strength to dentin.


FINAL SITUATION

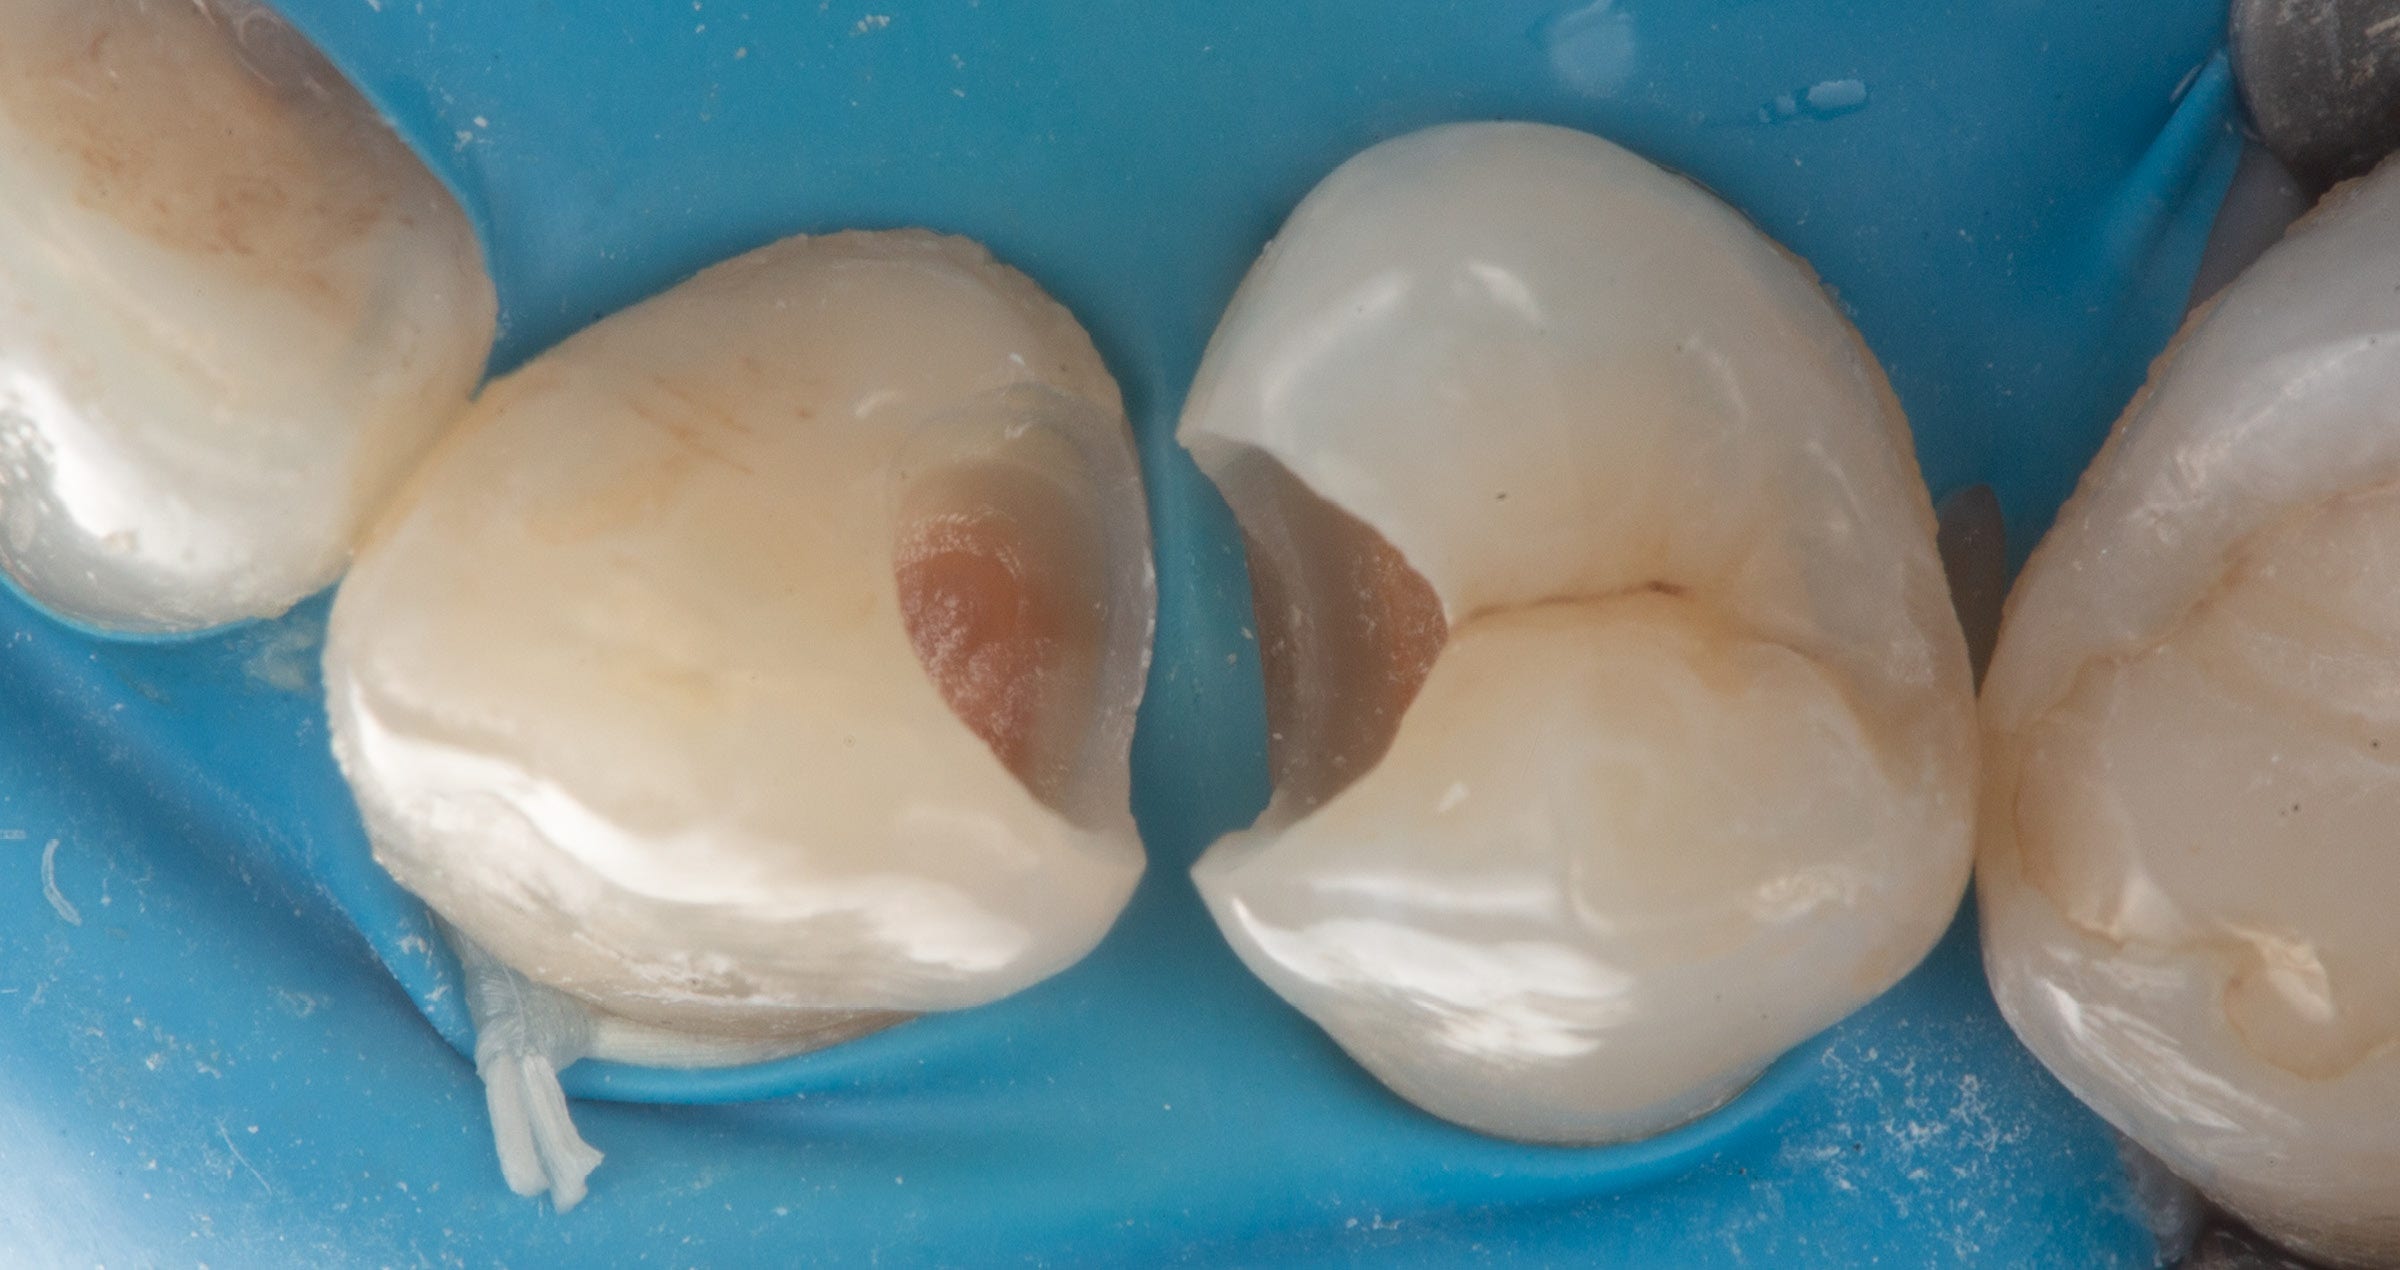
Fig. 7. Appearance of the tooth immediately after finishing and polishing. Although the rubber dam is still in place and the tooth structure is not yet rehydrated, it is evident that the composite blends in very well with the remaining tooth structure to form a seamless margin.


Dentist:


Max Andrup graduated from the University of Umeå in 2010 and today runs his private practice in the city of Hudiksvall, Sweden. He has a passion for restorative dentistry with a biomimetic approach.


Zirconia in dentistry

Zirconia ceramics are increasingly being used for dental prostheses. In the past, they were used as a substructure that was baked with porcelain; nowadays, monolithic zirconia prostheses have been made possible by the introduction of aesthetic zirconia ceramics varieties. They are used more and more, even as RBFDPs (Resin Bonded Fixed Dental Prosthesis).


There is currently quite a lot of discussion about zirconia. So much the better, because it keeps the dynamics of the subject alive. Is it possible to adhesively cement zirconia? Is it permissible to sandblast zirconia? Is it feasible to polish zirconia? Is wear of the antagonist an issue? And so on and so forth.


New dental technologies and materials have been developed in recent years to meet the demand for aesthetic, biocompatible and metal-free prostheses. Although porcelain has been used as an aesthetic dental material for more than hundred years, its restrictions are now well-known. It is the fragility of porcelain (low flexural strength and fracture toughness) in particular which restricts its application in areas where the exertion of massive force on the material is a factor. Zirconia has a high flexural strength and is therefore suitable for multiple dental applications.


Development

The first generation of zirconias used in dentistry belonged to the Partially Stabilised Zirconia (PSZ) class. This type of zirconia, stabilised with yttrium oxide, was composed of a mix of monoclinic, tetragonal and cubic crystals but is no longer used nowadays. The so-called Y-TZP variant was then used for many years, and still is. Its main characteristics are high flexural strength (> 1.000 MPa) and an opaque white appearance. For the most part, this variant is composed of tetragonal crystals of a few hundred nanometers. To keep the material stable at room temperature, approximately 3 mol% of yttrium oxide is added to the composition, which is why it is sometimes referred to as 3Y zirconia.


In order to improve its aesthetic properties, a start was made on the development of a new variety, so-called cubic zirconia. Cubic zirconia is characterised by a high translucence, meaning that a lower flexural strength must be accepted. Admittedly, the flexural strength of this variant is lower than that of the tetragonal variety, but still much higher than the flexural strength of lithium disilicate. It also contains more yttrium oxide; approximately 5 mol%.


Crystal phases

We currently know zirconia crystals in three varieties: monoclinic, tetragonal and cubic. In general, zirconia only exists in the monoclinic phase at room temperature. Monoclinic zirconia has low strength as well as low translucence. Tetragonal zirconia crystals are metastable and can only exist at room temperature after having been stabilised with yttrium oxide, among other metal oxides. The characteristics of tetragonal zirconia are that it is strong, but at the same time devoid of aesthetic
properties. Cubic crystals are stable and ensure improved translucence. Although prostheses made from cubic zirconia are not as strong as the tetragonal variety, they are highly aesthetic, and are even suitable for monolithic restorations in the aesthetic zones.


Multilayer

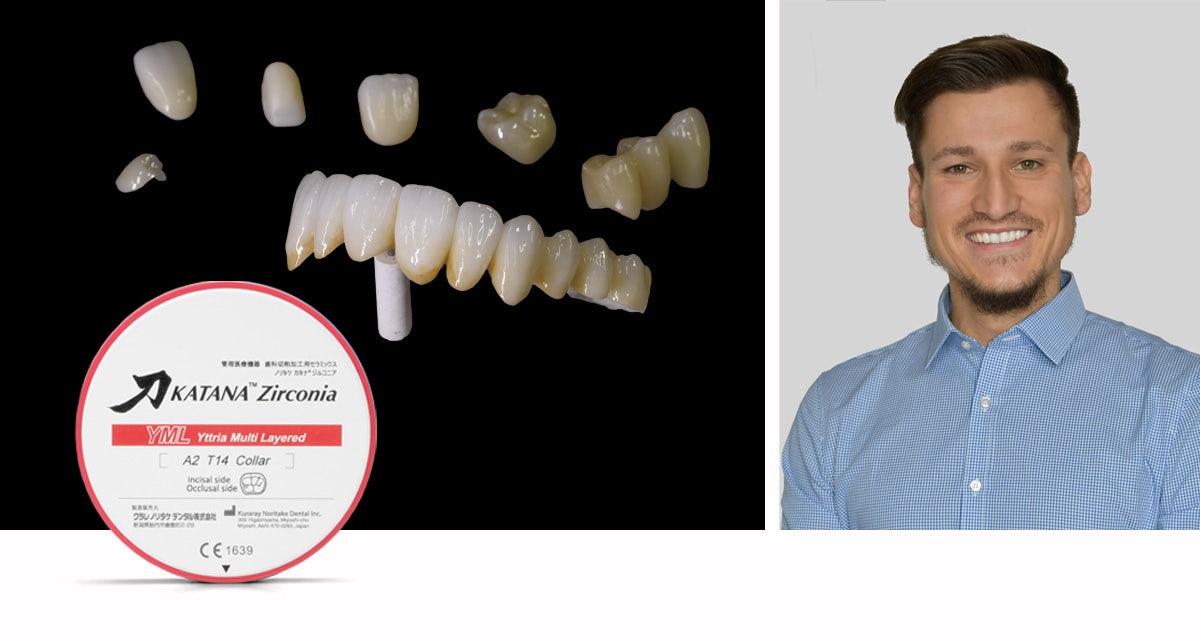
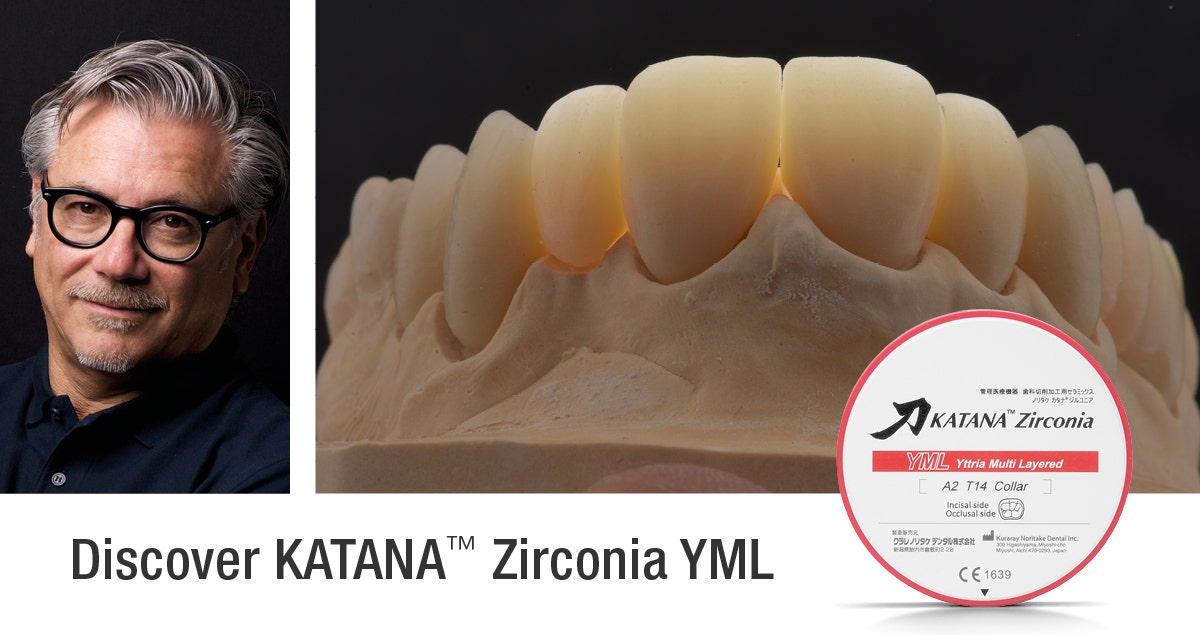
KATANA™ Zirconia ML, STML and UTML, as well as the latest KATANA™ Zirconia Block, are so-called multilayer zirconias. These products are built up of four layers with an ascending degree of translucency, ranging from the more opaque and coloured body layer (cervical), through two transitional layers, to the translucent incisal edge (occlusal/incisal). The invisible transition from one layer to another is achieved using a unique process. The secret is in the specific distribution of particles during the pre-sintered stage (continuous gap grading). In combination with the cold isostatic pressing method, this ensures material of an outstandingly high quality.


KATANA™ Zirconia Block

The use of KATANA™ Zirconia Block makes it possible to produce a complete monolithic zirconia prosthesis in a short time. This block was developed to be used within the CEREC workflow. After scanning, the prosthesis is ground for approximately 15 minutes and can then be sintered in the SpeedFire oven in just half an hour1). KATANA™ Zirconia Block shares the properties of KATANA™ STML and can be used for the production of single-unit prostheses such as full crowns for both anterior and posterior applications.


Wear of the antagonist

The question of whether zirconia prostheses are harmful to the antagonist would seem to be justified; after all, this is a very hard material. Hardness, however, does not relate directly to the abrasive properties of a material. Smoothly polished zirconia is minimally abrasive, something which has been corroborated by multiple studies2). Glaze, porcelain, lithium disilicate and even enamel are all more abrasive for the antagonist.


CAD/CAM

Thanks to emerging digital solutions (CAD/CAM) combined with the possibility of executing fixed partial dentures (FPDs) in monolithic zirconia, a fully digital workflow - from scan to prosthesis - is now feasible.


Sandblasting

Sandblasting using alumina is the standard method for the roughening of zirconia. In order to reduce the decline from the tetragonal crystal stage to the monoclinic stage, it is recommended that sandblasting be carried out at a maximum pressure of 2.5 bar using 50 micron aluminium oxide particles as a maximum3). In practice, zirconia is also frequently sandblasted tribochemically, for example, by means of CoJet (3M). The results achieved with this method are variable. In the case of limited pressure (2.5 bar as a maximum) there is a risk that the energy will be insufficient to achieve an effective and complete fusion between the silica and the zirconia surface. It is therefore recommended that CLEARFIL™ Ceramic Primer Plus be used for adhesive connection with the sandblasted surface. The silane in this ceramic primer bonds chemically with the silica, while the MDP bonds with the areas of zirconia not covered by silica. The use of silane alone does not provide an adequate basis for a reliable result4). Sandblasting with alumina, however, followed by priming with CLEARFIL™ Ceramic Primer Plus, is a well-proven and reliable method to ensure effective bonding to zirconia5).


Not etchable, but certainly bondable

Zirconia is not – or is barely – etchable with the etching technology available (HF). In addition, it cannot be recommended that zirconia be treated with phosphoric acid, because of the bonding of phosphates to the surface of the zirconia, which will inhibit a chemical activation of the surface for some adhesive cementation systems. The question of whether an etching product should be used is a valid one; after all, chemical etching is not necessary to achieve surface roughness. Achieving surface roughness is, however, a logical option, and roughening by means of sandblasting would seem to be the most appropriate method for zirconia. Thereafter, chemical bonding is ensured using a phosphoric functional monomer, preferably MDP.


Adhesion principles

Three basic factors are required to achieve the effective bonding of different materials. In keeping with the principles of adhesion, these are: surface enlargement (micromechanical retention), chemical activity (adsorption and electrostatic bonding) and a high-energetic surface to guarantee proper adaptation.


Adhesive bonding

The best method of adhesive bonding for zirconia is the use of a composite cement containing MDP. Professor Mathias Kern published an article about bonding to zirconia using MDP as early as 1998. This study showed that sustainable resin bonding to zirconia can only be achieved using a composite cement with a special adhesive monomer. The monomer used was in fact MDP. In the meantime, many studies have been published about bonding to zirconia.


On the one hand, these studies concern bonding with phosphate monomers (MDP); on the other hand, attention has been paid to the modification of the zirconia surface to render it etchable. The simplest and most reliable method is to sandblast the surface at a low pressure using aluminium oxide, followed by priming with an MDP-containing primer6).


PETER SCHOUTEN,
Technical Manager Kuraray Europe Benelux


1) Depending on the method of grinding/milling.
2) Mörmann W.H. et al. Wear characteristics of current aesthetic dental restorative CAD/CAM materials: Two body wear, gloss retention, roughness and Martens hardness. Journal of the mech. Behavior of Biomedical Materials 20 (2013) 113-125, Janyavula S. et al. The wear of polished and glazed zirconia against enamel. J Prosthet Dent 2013; 109;22-29 Stawarczyk B. et al. Comparison of four monolithic zirconia materials with conventional ones: Contrast ratio, grain size, four-point flexural strength and two-body wear. Journal of the mech. Behavior of Biomedical Materials 59 (2016) 128-138 D’Arcangelo C. et al. Wear Evaluation of Prosthetic Materials Opposing Themselves. Oper Dent 2017 antagonistic surface roughness on the wear of human enamel and nanofilled composite resin artificial teeth. J Prosthet dent 2009; 101: 342-349.
3) Attia A. / Kern M. Effect of cleaning methods after reduced-pressure Air Abrasion on Bonding to Zirconia Ceramic J Adhes Dent 2011; 13: 561-567.
4) Pilo R. Effect of tribochemical treatments and silane reactivity on resin bonding to zirconia. Dent Mater (2017).
5) Kern M. Bonding to oxide ceramics - Laboratory testing versus clinical outcomes. Dent Mater (2014).
6) M. Kern et al., Bonding to zirconia ceramic: adhesion methods and their durability. Dent Mater 14: 64-71, Jan.1998.


Effectiveness of temporary cement removal

Did you know that a complete removal of temporary cement from the abutment tooth with a rubber cup and pumice paste or an ultrasonic scaler is usually impossible? In most cases, some visibly undetectable residues remain on the surface. They will negatively affect the bonding performance of the permanent cementation system you selected. KATANA™ Cleaner is our answer to this problem! Applied after conventional temporary cement removal, it provides optimal conditions for permanent cementation.


All relevant details are revealed in this scientific report.


Clinical case - Direct composite overlay restoration with cusp coverage

By Aleksandra Łyżwińska, DMD


The MOD restoration on the maxillary left second premolar of this patient was in need of replacement. It was decided to create a direct composite overlay with CLEARFIL MAJESTY™ ES Flow - Super Low A3, CLEARFIL MAJESTY™ ES-2 Classic A2. CLEARFIL™ SE BOND 2 was used after selective etching of the enamel to establish a chemical bond to enamel and dentin. For the finishing and polishing procedure, abrasive discs were used first, followed by silicon carbide rubber instruments and the CLEARFIL™ Twist DIA system.


Fig. 1. Initial clinical situation revealing the composite restoration to be replaced on the second premolar.


Fig. 2. Occlusal view of the teeth after cavity preparation including cusp reduction.


Fig. 3. Lateral view of the teeth after cavity preparation.


Fig. 4. Matrix band held in place with wedges and two rings.


Fig. 5. Situation after etching, bonding, removal of one ring, and build-up of the interproximal walls with CLEARFIL MAJESTY™ ES-2 Classic in the shade A2.


Fig. 6. Cavity filled with CLEARFIL MAJESTY™ ES Flow - Super Low A3.


Fig. 7. Occlusal surface restored with CLEARFIL MAJESTY™ ES-2 Classic in the shade A2.


Fig. 8. Polishing with the pre-polisher of the CLEARFIL™ Twist DIA system.


Fig. 9. Polishing with the high-shine polisher of the CLEARFIL™ Twist DIA system.


Fig. 10. Appearance of the restoration immediately after rubber dam removal and checking of the occlusal contacts.


FINAL SITUATION


Fig. 11. Linguo-occlusal view of the treatment outcome.


Fig. 12. Lateral view of the treatment outcome.


Dentist:

ALEKSANDRA ŁYŻWIŃSKA
Warsaw, Poland


Aleksandra Łyżwińska, DMD, is a passionate aesthetic and adhesive dentist. Driven by Evidence Based Dentistry, her goal includes using modern composite materials and bonding agents in her clinical practise. In addition to her primary job, she worked as a lecturer and an assistant professor at the Department of Conservative Dentistry and Endodontics of Medical University of Warsaw, her alma mater.


Supporting dentists with universal products

Universal applicability of dental materials – this is a feature highly valued by the products’ users. It allows them to slim down the range of materials needed, which leads to reduced stock inventory and facilitates the establishment of universal workflows. With fewer variables and inconsistencies, all members of the practice team will know exactly what to do and how to do it, which mean less errors and consistent outcomes.


As one of the leading developers and providers of bonding agents, cements and composite filling as well as indirect restorative materials, Kuraray Noritake Dental strongly supports the universality trend in dentistry. Popular examples of universal products for direct restoration procedures are CLEARFIL™ Universal Bond Quick, a one-step dental bonding agent that works with or without a separate etching step, and the filling material CLEARFIL MAJESTY™ ES Flow.


Indirect restorative workflows are streamlined e.g. with PANAVIA™ SA Cement Universal, a self-adhesive resin cement indicated for all kinds of restorative materials, which is always used according to the same universal protocol.


Prior to the use of this product, the dental practitioner should consider cleaning the tooth and the restoration with KATANA™ Cleaner indicated for extra- and intra-oral use and providing optimal conditions for a strong and durable bond.


Both products recently received very positive ratings from the evaluators of Clinician’s Report. Click here to see the evaluations!


Restoration of a molar’s occlusal surface using the stamp techniquer with CLEARFIL MAJESTY™ ES Flow

By Dr. Michał Sucholdolski


This patient was concerned about the discoloration that had appeared on the occlusal surface of the mandibular left first molar. In an intraoral examination, caries was diagnosed in this area.


As the occlusal surface was almost intact initially, it was decided to restore the tooth with resin composite using the stamp technique. For this purpose, the occlusal anatomy was recorded using CLEARFIL MAJESTY™ ES Flow in the shade A3, which was stamped onto the occlusal surface and fixed to an applicator by light curing. Afterwards, the carious tissue was removed with the aid of caries-detector dye. Following cleaning of the prepared cavity and application of the bonding agent (CLEARFIL™ SE BOND 2), CLEARFIL MAJESTY™ ES Flow (A3) was applied to the cavity floor. The final occlusal layer was created with CLEARFIL MAJESTY™ ES-2 in the shade A3. The stamp was used to transfer the original occlusal anatomy to the new surface before light curing. A natural gloss was obtained by polishing of the surface with the CLEARFIL™ Twist DIA system.


Fig. 1. Initial clinical situation with an occlusal surface affected by caries.


Fig. 2. Appearance of the tooth after the application of caries detector dye during cavity preparation.


Fig. 3. Stamp created with flowable resin composite.


FINAL SITUATION


Fig. 4. Treatment outcome.


Dentist:


Dr. Michał Sucholdolski is a graduate of Silesia Medical University in Zabrze, Poland. He has attended various national and international conferences on microscopic dentistry, endodontic treatment and aesthetic restorative dentistry.


He makes use of innovative dental approaches such as Digital Smile Design, the MicroVision preparation concept, minimally invasive preparation techniques and modern direct restoration techniques.


He is a Member of the Polish Association of Endodontic Treatment and author of scientific work and publications in dental magazine.


Zirconia on zirconia

By Marco Stoppaccioli


In today´s society, due to higher life expectancy, greater and more responsible attention to one´s body, we have developed a culture more sensitive to personal well-being. Consequently, more patients with total removable prostheses request stabilization of their prostheses through implant treatment which offers the most effective and valid response to this need.


The demand for implant treatments has increased significantly during the last decade, specifically from patients with long-term full prostheses resulting in considerable bone resorption1, but are hesitant to undergo complex bone regeneration interventions (Photo 1).


These rehabilitations require great commitment and professional skills. In addition to restoring a complex series of aesthetic-functional parameters that have been lost. Innovative products were developed, not only the restoration of the dental, but also, the orthopedic aspects of the procedure.


Photo 1: Upper and lower Jaw situation models.


Initially, the dental-skeletal rehabilitations involved the exclusive use of metal posts combined with acrylic materials.


In recent decades, we have witnessed an evolution in the surgical techniques and materials used, among these, zirconia2 has a significant and highly innovative role. The main reason for its success is due to the possibility of being able to use it anatomically through a simple and effective protocol thanks to CAD CAM technology.


Zirconia, created to be covered with ceramic coatings, has undergone a profound evolution: from an exclusively structural material with high strength but low aesthetic appeal, it has become anatomical, constituting an alternative to layered restorations. Thanks to research and innovation, optimizing chemical and physical parameters3 in the dental industry, we now have a wide range of products, including multi-layer zirconia.


In more analytical terms, it offers a very valid response to the translucency, which is inversely proportional to the flexural strength. On the market this material class oscillates between 550Mpa and 1200Mpa of flexural strength. This characteristic identifies its indication range, specifically depending on the yttrium oxide content, which acts as a stabilizer of zirconia.


For dental-skeletal rehabilitations, the protocol involves the use of multi-layer monolithic zirconia with marked characteristics of flexural strength but lower translucency which determines a limit in the aesthetic sense. On the other hand, the use of multi-layered zirconia with high translucency cannot be considered suitable, due to its lack of flexural strength, despite fully meeting the requirement for naturalness.


To date it can be said that there is no zirconia that offers high mechanical properties combined with high translucency, two fundamental aspects for successful restorations.


Considering these factors, the idea was born to generate an innovative and experimental protocol capable of supporting, on the one hand, the ability of CAD/CAM systems to copy exactly a project or even better, a functionalized provisional implant, and on the other, to associate the use of two zirconia with different characteristics: one extremely tough, white colored zirconia with 1125 MPa (KATANA™ HT Kuraray Noritake) and the other super translucent multi-layered zirconia with 750 MPa (KATANA™ STML Kuraray Noritake).


OPERATIONAL PROTOCOL

In dental-skeletal rehabilitations, success depends on a precise diagnosis by the clinician, aimed at the functional and aesthetic restoration of the case. It is a fundamental task of the dental technician to translate this information through the creation of a wax-up, both analog and digital.


Photo 2: Digital wax-up.


Photo 3: Analog wax-up.


Thanks to digitization, with a 3D printer, it is possible to realize the wax-up quickly and economically in a prototype, capable of allowing the clinician to perform an initial test in the oral cavity.


Photo 4: From design to 3D prototype.


Once the adequacy of the prototype under study has been certified, the next phase involves the construction of the provisional implant which, placed in the oral cavity for a specified time, provides the fundamental information from an occlusal point of view, both in static and dynamic conditions.


The first strength of this protocol is to capture all information about the provisional implant and transfer them to the final work through digital systems. In other words, the provisional implant itself becomes the design of the final product.


Photo 5: Temporary result of analog project.


Photo 6: Acquisition of temporary arches refitted on the models.


FINAL PROCEDURE: OPERATING PHASES

Once the scans of the temporary implant have been acquired in the digital platform, the structural frame obtained by reduction of the temporary implant file is generated. The framework will be made by using KATANA™ HT white colored zirconia (Kuraray Noritake Dental Inc.) with a flexural strength of 1125 MPa. This choice is attributable to an adequate toughness of the material and an effective aesthetic chromatic response on the pink ceramic coating.


Photo 7: Structural framework.


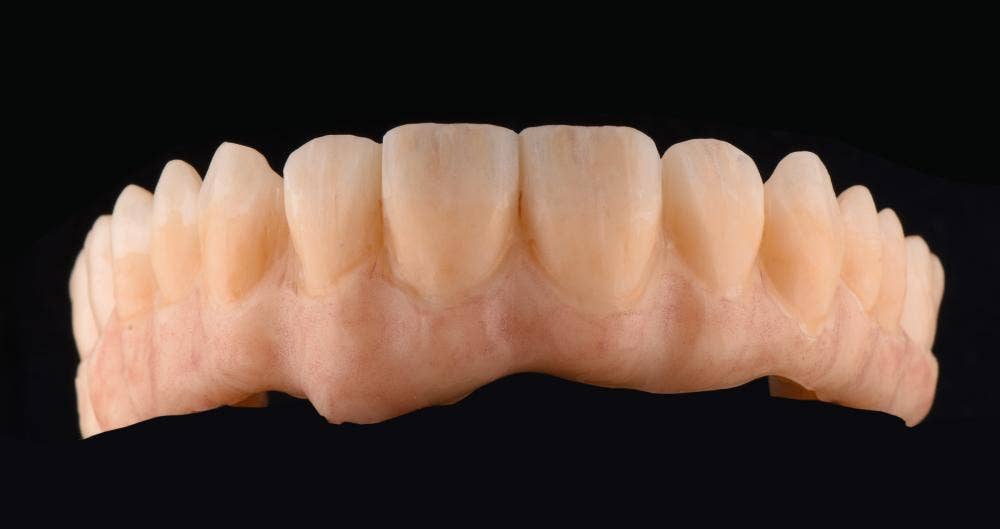
Photo 8: White zirconia framework, 1125 MPa (KATANA HT).


Once the structural file is generated, it is called up within the modeling software to create the anatomical components that will be divided into quadrants.


Photo 9: File divided into three seqments.


The selected material is multi-layered KATANA™ Zirconia STML by Kuraray Noritake Dental Inc. with a flexural strength of 750 MPa and high translucency. KATANA™ Zirconia STML shows an optimized balance between mechanical and optical characteristics.


The author's choice to divide the anatomical components into three segments has a dual purpose: the first is to have a better quality of the milling and the second is to reduce the material waste of the zirconia disc as much as possible.


Photo 10: The three segments after sintering.


Once the frameworks are obtained, before they are merged with each other, the anatomical parts are finished and polished; only the areas excluded from the functional part will be sandblasted. Special attention must be paid to the surface texturing of the anterior sectors5, with cutters, discs and rubbers dedicated for this purpose. The surfaces that remain shiny offer a lower abrasion coefficient than the natural tooth6; in fact, the abrasiveness depends on the surface smoothing. Polished zirconia has lower abrasion coefficients than lithium disilicate and layered ceramics7.


The adhesion between the anatomical and structural zirconia components is achieved by fusion with Noritake Cerabien ZR Low Fusion ceramic.


Photo 11: Anatomical components joined to the structural framework.


Once the adhesion between the zirconia components has been obtained, the first analog phase involves the creation of the gum parts, with dedicated pink gingival masses at a high temperature of 940 C° (CZR™ Tissue Kuraray Noritake Dental Inc.). The author selects three gingival masses with which the keratinized and vascularised parts are reproduced8, peculiar to the natural gingival tissue.


Photo 12: Used CZR™ Tissue porcelain.


Photo 13: Application of CZR™ Tissue porcelain.


Once the pink gingival parts are finalized, the coloring of the anatomical components will follow with the use of dedicated low temperature stains (CZR™ FC Paste Stain, Kuraray Noritake Dental Inc.) which, together with the high translucency of the anatomical zirconia, guarantees a high aesthetic result.


With gray, blue and black shades, it is possible to give a high degree of translucency to the incisal edges. With warm shades, like orange and yellow, the transitions of the anatomical crowns are emphasized, while with a few spots of strong color it is possible to give character and uniqueness to the teeth.


Photo 14: Used shades of CZR™ FC Paste Stain.


The low baking temperature of CZR™ FC Paste Stain guarantees the non-alteration of the gingival component. The final step involves glazing the sandblasted parts.


Photo 15: Final situation.


Photo 16: Occlusal view.


CONCLUSION

The strength of dento-skeletal rehabilitations made of monolithic zirconia, which is a stable, reliable and highly biocompatible material is, through the possibility of using CAD/CAM technology to make an exact copy of a case or, even better, a functionalized temporary implant.


Photo 17: Matching with wax-up.


The 1125 MPa zirconia is ideal for this type of prosthesis, however, does not offer an aesthetic quality. Therefore, the combination of two zirconia materials, one extremely strong and the other highly aesthetic, fully satisfies this requirement.


Photo 18, 19: Intra-oral situation.


BIBLIOGRAPHY:


1) Matteo Chiapasco, Eugenio Romeo La riabilitazione implantoprotesica nei casi compless, UTET S.p.A. 2003 Unione Tipografico-Editrice Torinese.

2) Piconi C. ,Rimondini L. ,Cerroni L. , La zirconia in odontoiatria, Masson, 2008.

3) Stawarczyk B., Ozcan M., Hallmann L., Ender A., Mehl A., Hammerle CH., Effect of zirconia sintering temperature on flexural strengh, grain size and contrast ratio. Clin oral investig, 2013.

5) Shigeo Kataoka, Yoshimi Nishimura , Morfologia naturale dei denti, Edizione internazionale Milano 2003
La riabilitazione implantoprotesica nei casi compless.

6) Oh W., Delong R., Anusavice K., Factors affecting enamel and ceramic wear: A literature review. J Prosthet Dent 2002.

7) Preis V., Bher M., Kolbeck C., Hahnel S., Handel G., Rosentritt M., Wear performance of substructure ceramics and veneering porcelains, Dent Mater, 2011.

8) Rutten L. & P., L’estetica su impianti, editrice MEA, 1999.


Thanks: Dr. Fortunato Alfonsi, Odt. Raoul Pietropaolo.


Uudiskirja tellimine