
Replacement of Class II restorations with hybrid-ceramic overlays

Case by CDT Daniele Rondoni


When planning to replace Class II restorations, many things need to be considered. In order to select the most appropriate restorative technique and preparation design, it is essential to evaluate the amount and state of the remaining tooth structure, first. After repeated restoration replacement or in teeth originally restored with amalgam, for example, the remaining walls and cusps are often weakened and prone to fractures and cracks. When the cavity walls appear to be too thin or the structure is weak at the time of restoration replacement, it may be better to remove walls and cusps and opt for indirect adhesive restorations (overlays) instead of direct composite restorations. Due to favourable material properties – in particular a high flexural and compressive strength while being gentle to the opposing dentition and not too rigid for the surrounding tooth structures – we often opt adhesive restorations made of KATANA™ AVENCIA™ Block in those situations.


The following clinical case is used to describe the replacement of two composite restorations with overlays made of the innovative hybrid ceramic material.


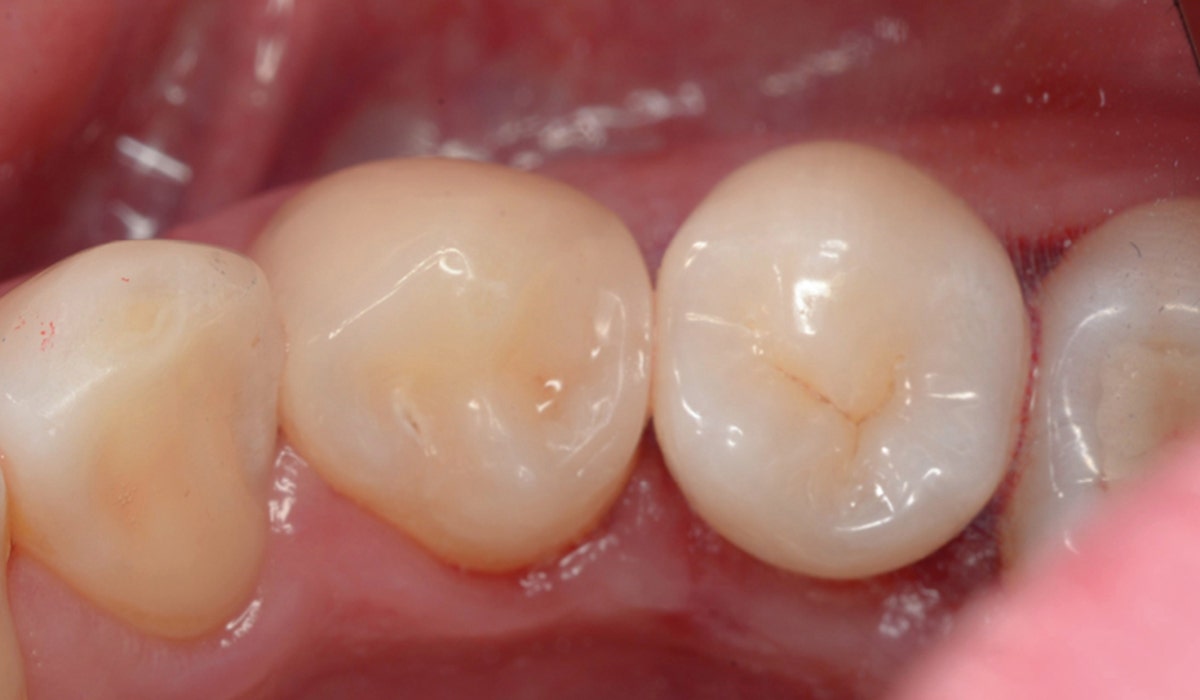
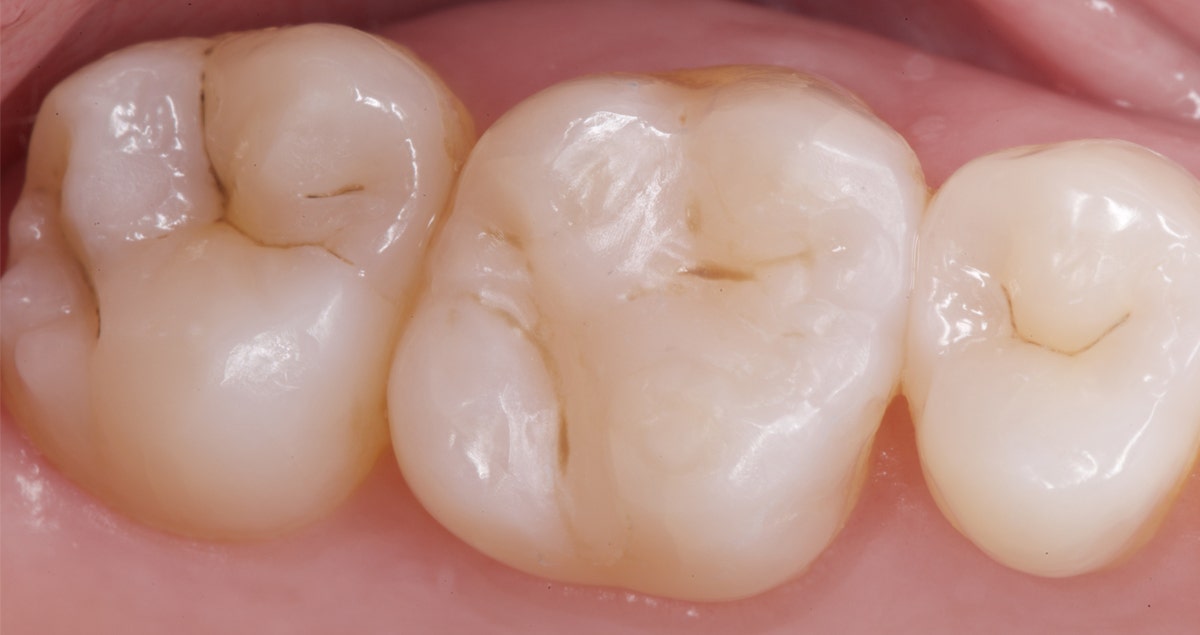
Fig. 1. Initial clinical situation with composite restorations on the second premolar and first molar in need of replacement. The tooth structure particularly of the first molar was weak, with the distobuccal cusp already fractured.


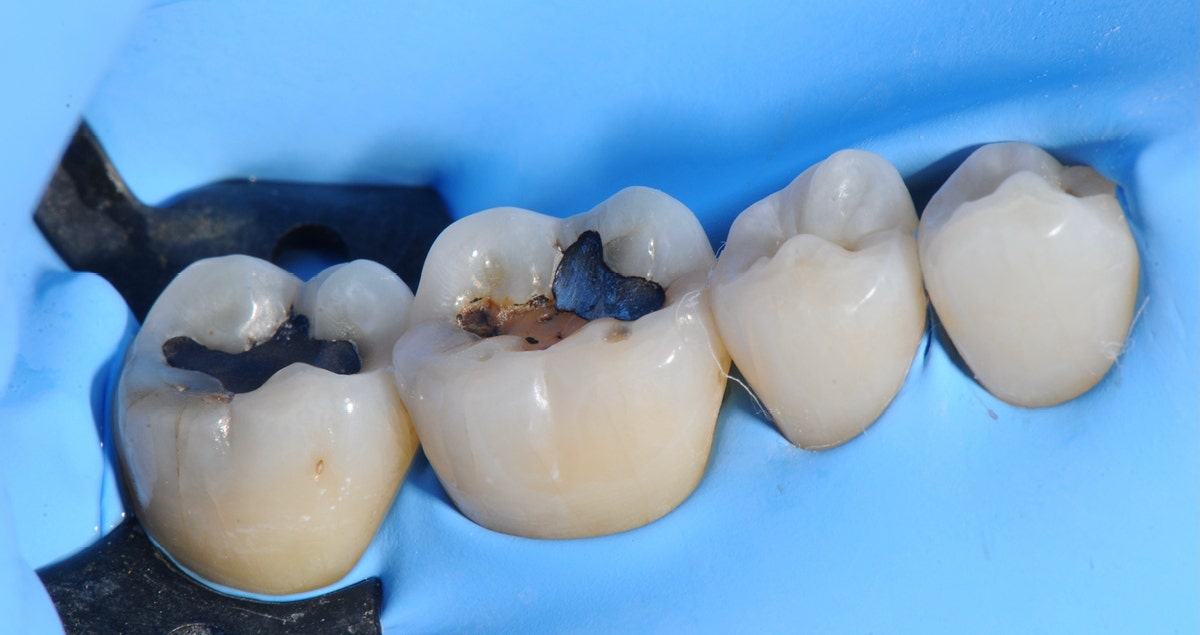
Fig. 2. Prepared tooth structure ...


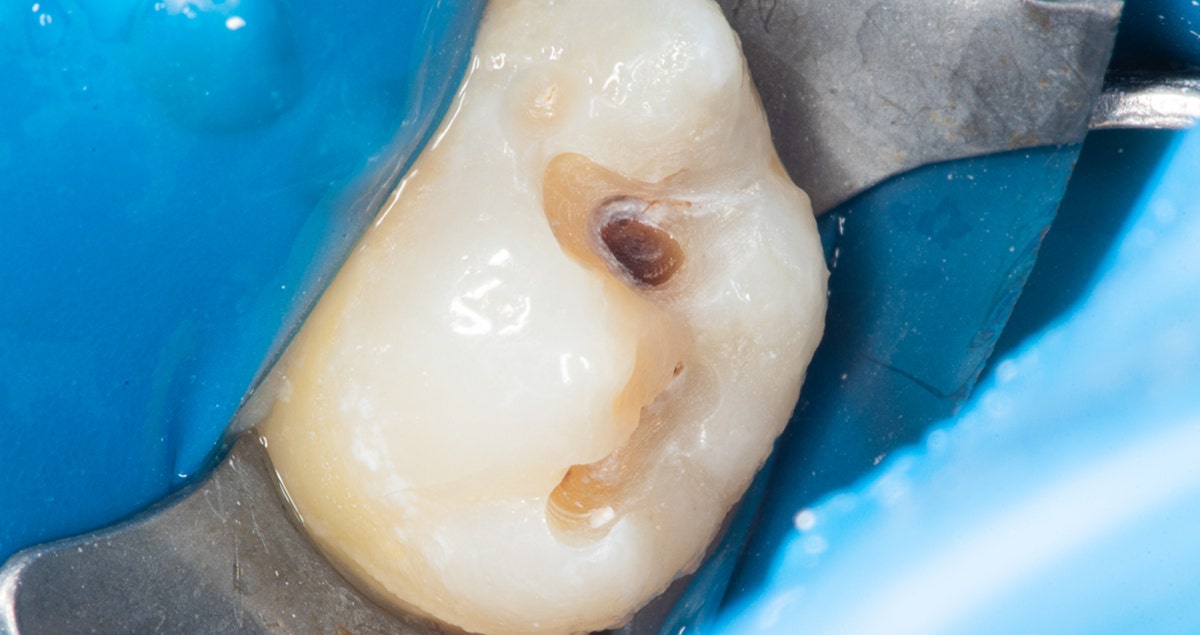
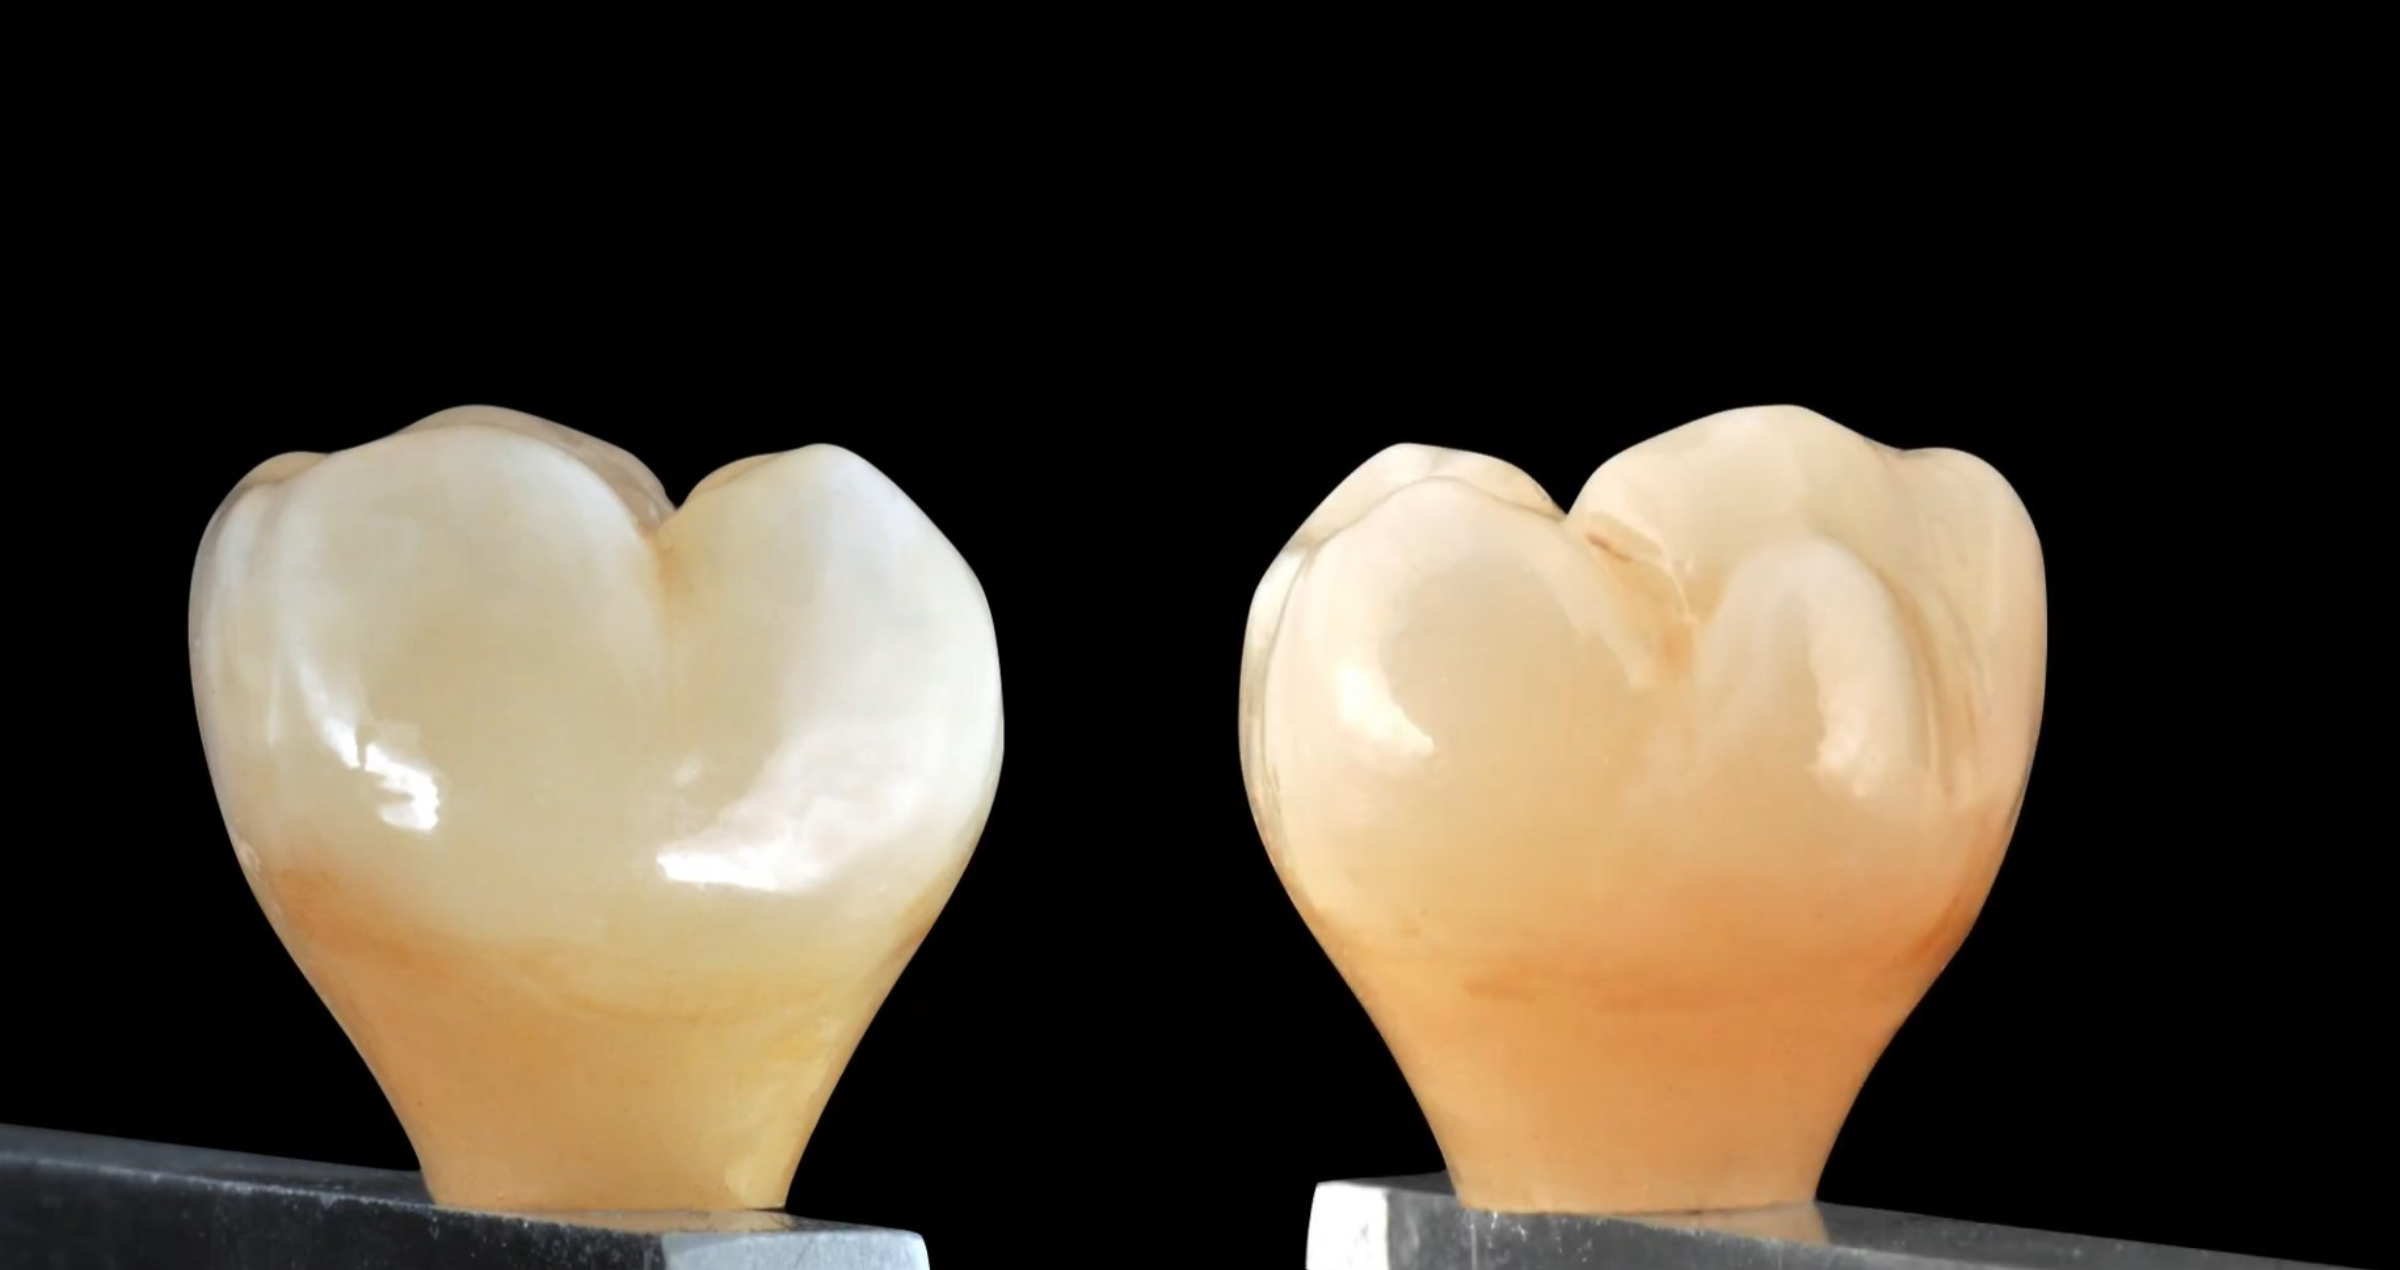
Fig. 3. Restorations milled from a KATANA™ AVENCIA™ Block after high-gloss polishing and characterization.


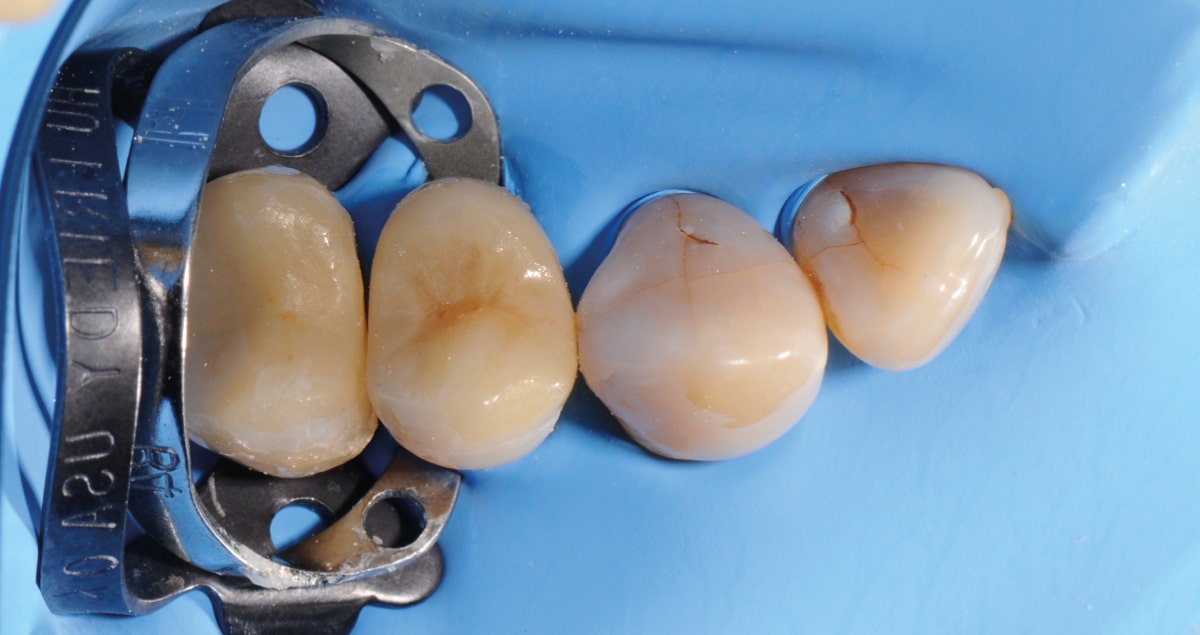
Fig. 4. Finalized restorations on a resin model.


Fig. 5. Adhesively cemented restorations in the patient’s mouth.


FINAL SITUATION


Fig. 6. Treatment outcome with a nice transition from the tooth structure to the restoration.


Posterior restoration procedure for predictable outcomes

Case by Dr. Jusuf Lukarcanin


Restoring posterior cavities is a standard task we perform virtually every day. Yet, it is a challenging procedure as access to the affected teeth is often limited. This fact complicates many steps from working field isolation to material application and sculpting. By streamlining procedures and establishing protocols that are followed every time, it is possible to achieve predictable outcomes even in difficult situations, as shown below.


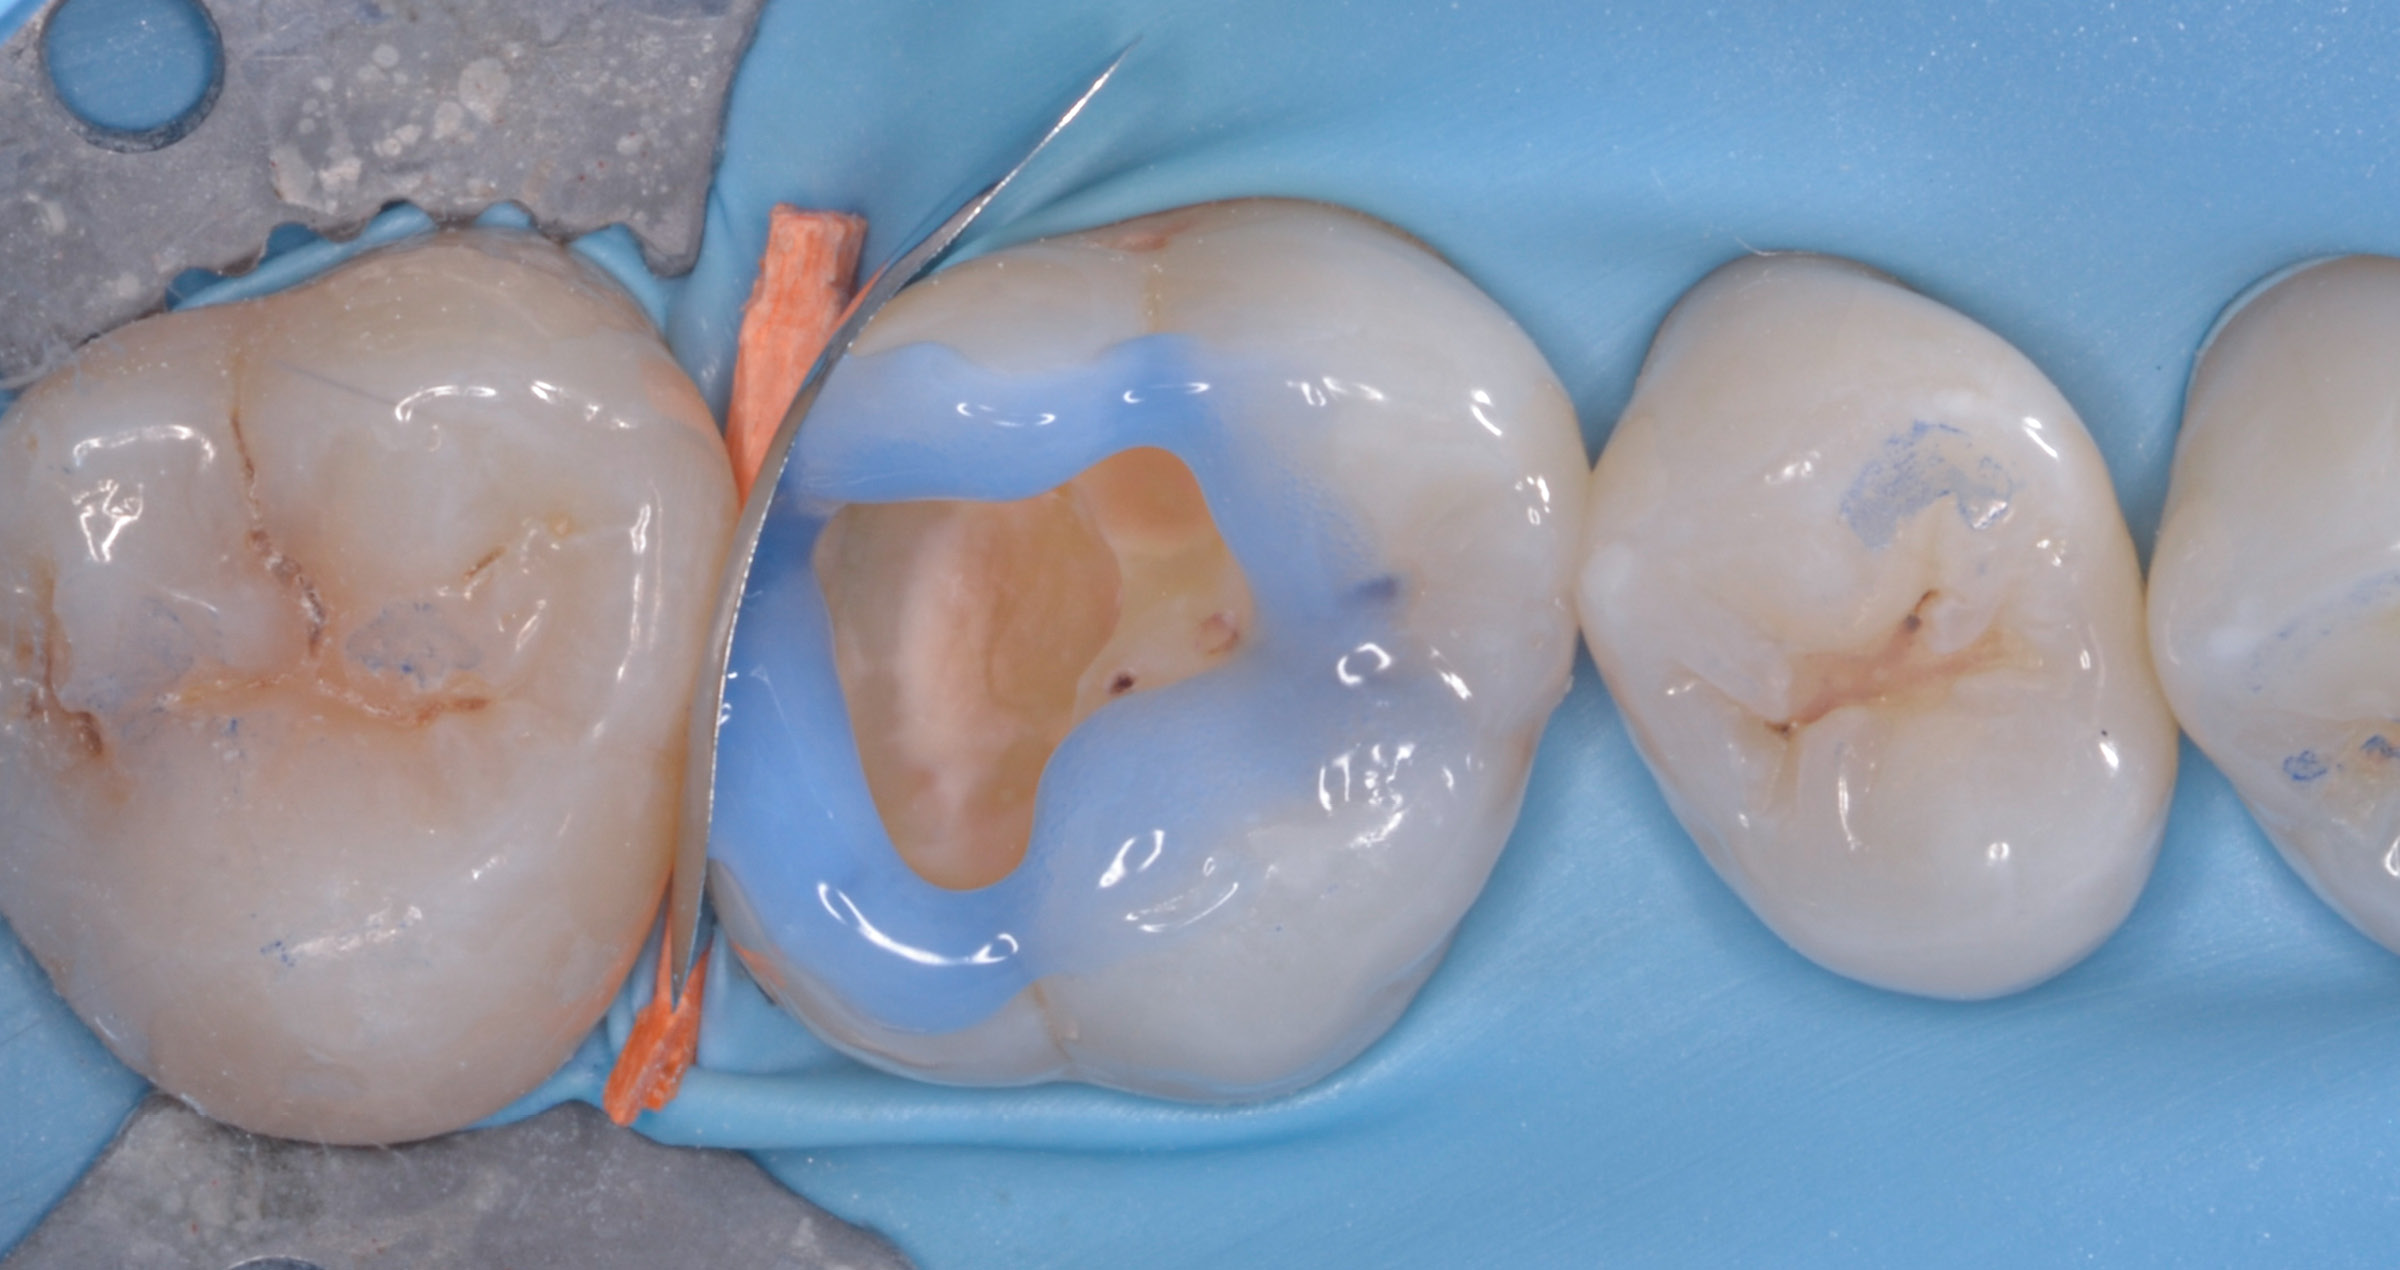
Fig. 1. Class II cavity in a second molar after caries removal and cavity preparation.


Fig. 2. Working field isolation.


Fig. 3. Application of adhesive (e.g. CLEARFIL S3 BOND PLUS) into the cavity.


Fig. 4. Build-up of the proximal wall with CLEARFIL MAJESTY™ ES-2 Classic (Kuraray Noritake Dental Inc.) in the shade A2.


Fig. 5. Build-up of the dentin core using the incremental technique with CLEARFIL MAJESTY™ ES-2 Premium in the shade A2D.


Fig. 6. Contouring of the occlusal enamel layer made of CLEARFIL MAJESTY™ ES-2 Premium in the shade A2E.


Fig. 7. Polishing of the restoration with Twist DIA for Composite.


FINAL SITUATION


Fig. 8. Treatment outcome.


Special MAJESTY ES-2 Universal - Clinical Cases Brochure

Compact, time-saving and aesthetic


How many different shades of composite do you need to create appealing restorations in virtually every clinical situation? If you opt for “CLEARFIL MAJESTY™ ES-2” Universal shade concept, a few shades will do the trick.


With wonderful support of our internationally recognized key opinion leaders, we have prepared a Clinical Case brochure of “CLEARFIL MAJESTY™ ES-2” Universal for you. The brochure highlights a variety of clinical cases in the anterior and posterior region to show the all about excellent properties of our latest composite. Let the pictures speak for themselves!


Click here to view. Enjoy!


Start Reading: Special MAJESTY ES-2 Universal - Clinical Cases Brochure


KARIOZA BOJĀJUMA ĀRSTĒŠANA AR VIENA TOŅA POSTERIOR KOMPOZĪTU

DR. NIKOLA SKOTI
KLĪNISKAIS GADĪJUMS


Atjaunojot sānu zobus ar kompozīta materiālu, tādi funkcionālie aspekti kā cieši un anatomiski pareizi proksimālie kontakti un dabiskas formas okluzālā virsma, kas ir nodilumizturīga un antagonistiem
draudzīga, ir pat svarīgāki par perfektu optisko integrāciju. Tāpēc zobārstiem šādos gadījumos nevajadzētu tērēt daudz laika toņu izvēlei, bet gan pievērsties faktoriem, kas ietekmē restaurācijas uzticamību un ilgmūžību. CLEARFIL MAJESTY™ ES-2 Universal kompozīta materiāls ar vienu universālu toni (U) sānu zobu rajonam ir izcili piemērots šādiem gadījumiem, jo vairs nav nepieciešams noteikt toni pēc krāsu skalas un izvēlēties no dažādiem materiāliem. Tajā pašā laikā, tas labi pielāgojas kavitātes robežām, tam ir zems saraušanās spriegums un augsta nodilumizturība, kas ir svarīgi nosacījumi lieliskiem ilgtermiņa rezultātiem.


1 att. Sākotnējā situācija ar plašu primāru kariozu bojājumu otrā premolāra distālajā virsmā.


2 att. Premolārs pēc darba lauka izolācijas ar koferdamu, kariesa izurbšanas un kavitātes sagatavošanas.


3 att. Sekcionālās matricas un ķīļa ievietošana. Tie tiek noturēti vietā ar atdalošo gredzenu, kas palielina interproksimālo attālumu, tādējādi nodrošinot ciešus, anatomiski pareizus proksimālos kontaktus.


4 att. Proksimālās sienas izveidošana ar CLEARFIL MAJESTY™ ES-2 Universal (U tonis) pēc selektīvas emaljas kodināšanas ar fosforskābi (K-ETCHANT šļirce) un adhezīva CLEARFIL™ SE Bond uzklāšanas un
gaismošanas.


5 att. Plāns plūstošā kompozīta materiāla slānītis (CLEARFIL MAJESTY™ ES FLOW High), uzklāts uz kavitātes pamatnes, lai darbotos kā sveķu pārklājums.


6 att. Restaurācija pabeigta ar CLEARFIL MAJESTY™ ES-2 Universal (U tonis). Lai gan universālais kompozīts ļoti labi saplūst ar apkārtējo zobu struktūru, dabiskais izskats tiek papildināts, pievienojot nedaudz brūnās nokrāsas fisūrā.


7 att. Ārstēšanas rezultāts uzreiz pēc koferdama noņemšanas. Proksimālais kontakts ir ciešs un okluzālā anatomija ir piemērota pacienta sakodienam. Restaurācijas robeža ir praktiski neredzama, savukārt bukālais paugurs šķiet gaišāks dabiskās zoba struktūras dehidratācijas dēļ.


GALA REZULTĀTS


8 att. Ārstēšanas rezultāts pēc diviem mēnešiem.


Secinājumi

Šis klīniskais gadījums parāda, ka izvēlētais kompozīts ir labi piemērots vienkāršām restaurācijām sānu zobu rajonā. Ar materiālu ir viegli strādāt, tam ir tādas pašas mehāniskās īpašības kā citiem CLEARFIL MAJESTY™ ES-2 sērijas materiāliem un tas harmoniski saplūst ar apkārtējām struktūrām, nebūdams pārāk caurspīdīgs. Šādā veidā ir iespējams atbrīvoties no krāsas noteikšanas soļa, nepasliktinot gala rezultātu. Šajā kontekstā ietaupīto laiku var tērēt funkcionālajiem restaurācijas aspektiem vai pat citam pacientam.


DR. NICOLA SCOTTI


Restoration of a class ii occluso-distal cavity with composite

Restoration of a class II occluso-distal cavity with composite

Case by Aleksandra Łyżwińska, DMD


This clinical case concerns a patient with a lesion on the occluso-distal aspect of the mandibular left first premolar. We opted for a direct treatment approach with a combination of flowable and high-viscosity composite resin (CLEARFIL MAJESTY™ ES Flow - Super Low A2, CLEARFIL MAJESTY™ ES-2 Classic A2). In order to establish a strong bond between the tooth structure and the restorative material, we decided to selectively etch the enamel and then apply a clinically proven self-etch adhesive (CLEARFIL™ SE BOND 2).


Fig. 1. Initial clinical situation.


Fig. 2. Appearance of the premolar after caries removal.


Fig. 3. Placement of a sectional matrix for anatomical shaping, the establishing of tight interproximal contacts and protection of the adjacent tooth.


Fig. 4. Appearance of the tooth structure after selective enamel etching.


Fig. 5. Interproximal wall built up with CLEARFIL MAJESTY™ ES-2 Classic (A2 shade) and cavity filled with CLEARFIL MAJESTY™ ES Flow - Super Low A2.


Fig. 6. After initial polishing.


FINAL SITUATION


Fig. 7. Occlusal view of the treatment outcome after finishing and polishing.


Fig. 8. Follow up after 1 week.


Replacement of an amalgam restoration in a maxillary first molar

Replacement of an amalgam restoration in a maxillary first molar

Case by Dr. Michał Pokojski


Universal resin composites with a simplified shade concept are popular as they streamline direct restoration procedures. Unfortunately, many of the available products that claim to blend in well with the surrounding tooth structure independent of its shade need a blocker or opaquer to mask dark areas. According to Kuraray Noritake Dental, CLEARFIL MAJESTY™ ES-2 Universal is different. This is why I decided to test its Universal shade (U) designed for all kinds of restorations in the posterior region in the context of replacing an amalgam restoration.


The restoration that needed to be replaced due to secondary caries was located in the maxillary molar region of a male patient. As usual under amalgam restorations, the remaining healthy tooth structure showed some discolouration. The cavity was prepared, the enamel etched and the whole bonding surface treated with CLEARFIL™ SE Bond. Subsequently, the restoration was built up using CLEARFIL MAJESTY™ ES-2 Universal in several layers. For a natural appearance, some brown tint was added to the fissures before finishing and polishing. The restoration shows a natural integration into the surrounding structure and is able to mask the discolouration on the cavity floor.


Fig. 1. Pre-operative image showing the amalgam restorations to be replaced.


Fig. 2. Appearance of the tooth after removal of the amalgam, caries excavation and cavity preparation.


Fig. 3. Tooth built up with CLEARFIL MAJESTY™ ES-2 Universal (U shade).


FINAL SITUATION


Fig. 4. Immediate treatment outcome.


Posterior composite restoration

Posterior composite restoration

Case by Dr Adrien Lavenant


Introduction


The patient consulted for a follow-up examination and presented with recurrent caries at the maxillary right first molar. A direct treatment with composite needed to be performed. We decided to use Kuraray Noritake Dental Inc.´s CLEARFIL MAJESTY™ ES-2 Universal composite for several reasons: the efficiency of the treatment, favourable handling properties and ease of use.


The clinical case illustrations below show the step-by-step approach carried out during a 30-minute treatment session.


Fig. 1. Initial situation showing an occlusal caries lesion on the maxillary right first molar.


Fig. 2. Pre-operative X-ray.


Fig. 3. Isolation of the working field with rubber dam.


Fig. 4. Situation after caries excavation and tissue preparation.


Fig. 5. Cavity ready for the application of the universal composite: CLEARFIL™ Universal Bond Quick is visible on dentin and enamel and the cavity floor is covered by a thin layer of CLEARFIL MAJESTY™ ES Flow Low.


Fig. 6. Appearance of the tooth after buildup of the restoration with several layers of CLEARFIL MAJESTY™ ES-2 Universal composite (in the shade U developed for the posterior area).


Fig. 7. Stains applied in the occlusal fissures ensure an even more natural appearance.


Fig. 8. Final result after polishing with CLEARFIL™ Twist DIA and checking of the occlusion.


Fig. 9. Final result immediately after rubber dam removal.


Fig. 10. Post-operative X-ray.


FINAL SITUATION


Fig. 11. Check-up after 15 days with rehydrated dental tissues.


Amalgam replacement using an innovative resin composite

Amalgam replacement using an innovative resin composite

Case by Dr. Max Andrup


This patient presented with a fractured amalgam restoration in the occlusal aspect of the mandibular right first molar. The cavity was shallow resulting in a very favourable C-factor. The C-factor describes the relationship between bonded and unbonded restorative material surfaces and is used as an indicator for polymerization shrinkage stress development in a cavity. Hence, it is essential to manage this factor when working with resin composites.


Fig. 1. Initial situation with the fractured amalgam restoration. In the distal aspect of the restoration, some recurrent decay is also visible.


Fig. 2. First molar ready for a new restoration after removal of the amalgam and bevelling of the enamel.


Fig. 3. Selective etching of the enamel prior to the application of CLEARFIL™ SE Protect into the cavity. Selective etching is performed in order to maximize the bond strength to enamel (by etching) and to dentin (without etching).


FINAL SITUATION


Fig. 4. Final situation after restoration of the cavity with CLEARFIL MAJESTY™ ES-2 Universal in the shade U developed for posterior restorations. The favourable C-factor and the fact that the polymerization shrinkage stress produced by the selected material is very low provide the conditions for a good long-term behaviour of the new restoration.


Dentist:


Dr. Max Andrup graduated from the University of Umeå in 2010 and today runs his private practice in the city of Hudiksvall, Sweden. He has a passion for restorative dentistry with a biomimetic approach.


Treatment of primary caries in a third molar

Treatment of primary caries in a third molar

Case by Dr. Michał Pokojski


When restoring primary carious lesions in the posterior area with composite, I wish to use a material that allows me to produce high-quality outcomes in an efficient procedure. The most important qualities of the restoration are its perfect marginal integrity and reliable long-term behaviour, which set the stage for a long and healthy life of the otherwise healthy tooth.


Reliability paired with ease of use is what I expected from the selected material combination: CLEARFIL™ SE Bond 2, a popular self-etch adhesive containing the original MDP monomer, and CLEARFIL MAJESTY™ ES-2 Universal. According to Kuraray Noritake Dental, the innovative resin composite comes with a universal shade concept and mechanical properties such as shrinkage, wear resistance and colour stability similar to those of proven CLEARFIL MAJESTY™ products. As a single shade is available for the posterior region, the need for shade determination is eliminated, which allows the dental practitioner to focus on the clinical work steps. In this case, a small primary defect in a third molar was restored. The outcome speaks for itself.


Fig. 1. Situation during cavity preparation revealing the carious lesion.


Fig. 2. Prepared cavity after the application of the bonding agent.


FINAL SITUATION


Fig. 3. Treatment outcome with the composite harmoniously integrated into the surrounding structure.


Deep margin elevation and placement of an onlay using warmed resin composite

Deep margin elevation and placement of an onlay using warmed resin composite

Case by Max Andrup


The maxillary right first premolar of this patient had a huge defect on the lingual aspect extending subgingivally. In order to facilitate proper working field isolation for the placement of an onlay, it was decided to elevate the margin using the deep margin elevation (DME) technique. Moisture control is more easily handled with a matrix and composite compared to trying to keep a deep box dry at the placement of an indirect restoration. The preferred method used to maximize the bond strength to dentin was immediate dentin sealing combined with resin coating, while the luting material of choice was warmed light-curing resin composite (CLEARFIL™ AP-X). It shows a superior performance compared to dual-cure luting materials e.g. in terms of conversion of monomers to polymers, time available for excess removal, bio-mechanical properties and polymerization shrinkage stress.


Fig. 1. Pre-operative situaton with clearly visible deep distal margin. In reality, it was even deeper than the picture reveals. The Brinker Rubber Dam Clamp B4 placed here is a life saver in cases with subgingival margins. The buccal wall was still intact. We planned to reduce it to allow the onlay to cover it completely, allowing it to work under compression and thus increasing the fracture resistance.


Fig. 2. Situation after placement of a sectional matrix on thedistal aspect of the tooth. In order to retract the rubber dam mesially, PTFE tape was placed in this area. This allowed me to seal the dentin in a perfectly dry environment. For immediate dentin sealing, the smear layer developed on the dentin immediately after tooth preparation was compacted with the aid of air abrasion (50 μm alumina particles) to provide for the best possible bonding conditions, followed by the application of the bonding agent (CLEARFIL™ SE Protect). Afterwards, the bonded dentin was covered with a thin layer of flowable resin composite (CLEARFIL MAJESTY™ ES Flow). This resin coating ensures that the hybrid layer is thick enough and that the dentin is perfectly sealed.


Fig. 3. After immediate dentin sealing and resin coating. The hybrid layer was left to mature for approximately five minutes. This measure leads to an increased bond strength to dentin, which prevents issues that might occur due to the polymerization shrinkage stress occurring after composite placement. Subsequently, CLEARFIL™ AP-X was applied in small increments, starting in the distal box. In this way, the biobase was built up to the desired height. The main arguments for using CLEARFIL™ AP-X as a replacement for deep dentin are that the modulus of elasticity is within the same range as that of dentin and it exhibits an extraordinarily low polymerization shrinkage.


Fig. 4. Lateral view of the tooth at the day of delivery. View of the tooth at the day of delivery after rubber dam placement and prior to air-abrasion treatment of the biobase, which was performed to remove any remaining temporary cement. Following try-in, the lithium disilicate onlay was cleaned with KATANA™ Cleaner and pretreated with CLEARFIL™ Ceramic Primer. The biobase was sandblasted again for cleaning.


Fig. 5. Onlay in place after selective etching of the enamel with 35 % phosphoric acid etchant, and application of CLEARFIL™ SE Bond to the biobase and the intaglio of the onlay as well as luting with heated CLEARFIL™ AP-X. Excess composite was removed and the composite light cured.


FINAL SITUATION


Fig. 6. Occlusial view of the luted restoration.


Clinical case with CLEARFIL™ MAJESTY ES-2 Universal

Clinical case with CLEARFIL™ MAJESTY ES-2 Universal

Case by Dr Paul Guicherit


A girl presented to the dental office after a bicycle accident. She had a traumatized maxillary left central incisor and an abrasion injury was visible on and above her upper lip.


The tooth was restored immediately using CLEARFIL™ MAJESTY ES-2 Universal in the shade UL (Universal Light).


The outcome was excellent due to a great optical integration and an invisible transition between the tooth and the resin composite.


Clinical photo credits: Dr Paul Guicherit